

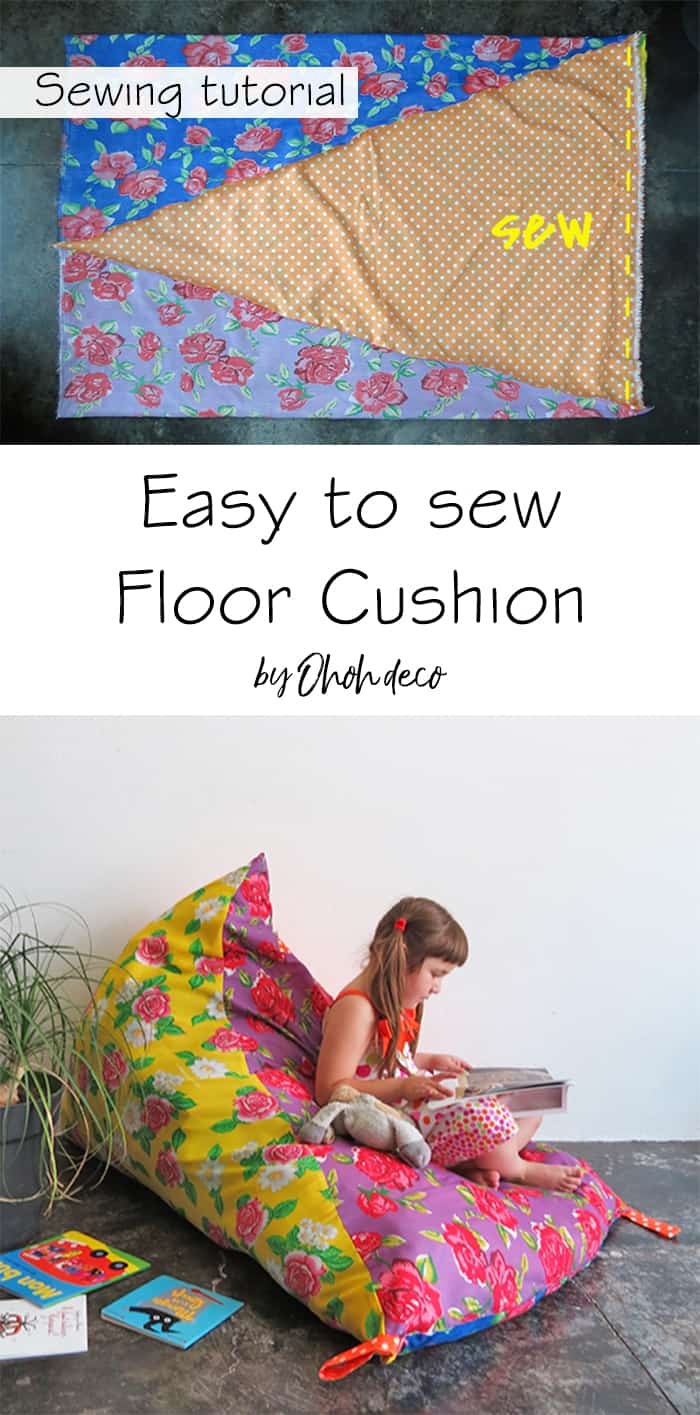
It’s not the first pouf or floor cushion I sew but it’s definitely the easiest project! You basically just need to sew 4 triangles together! I made it for my kids. They can use it wherever they want from the bedroom to the backyard! As you can imagine they love it…and the dog too!
I picked some colored and flourish fabrics, a little kitsch touch once in a while makes me happy! Choose a fabric thick enough to withstand rough use. Upholstery fabrics are the ones that will work best for this project. You can have fun mixing patterns as I did or make the whole seat with the same fabric.
No worries if you are not a professional seamstress, this floor cushion is a perfect project for a beginner.
[ This post probably contains affiliates links, our full disclosure policy is really boring, but you can read it HERE ]

One hour floor cushion
The materials you will need:
-
- 4 yards of fabric (one yard of every color)
- A LOT of filling
- Matching thread
- sewing machine
- scissors
- ruler tape
Cut a triangle out of each fabric yard, measure the middle of one side to place the triangle tip, and trace two lines to each opposite corner. Cut out the triangle and repeat it for each fabric.
The base of the triangle is 1 yard long and the high of the triangle is 1 1/2 yard. In the metric system are 1m for the base and 1,5 m for the triangle high. Preferably choose a fabric thick enough to withstand a floor use.

Once the 4 triangles are cut, sew them together. Place one triangle on top of the other, right side on the right side. The tip of one must be on top of the edge of the other. Sew the side and repeat with the other two.
Once the four triangles are sewn and form a rectangle shape, sew both edges together. You now have a tubular shape made of 4 triangles.

Your sewing is still wrong side out. The next step is to close both openings. Take one opening and place the triangle bases on top of each other, pin and sew.
Take the remaining opening, again place the triangle base on top of each other, pin and sew. This time leave an unsewn gap of 10 inches to turn the cushion right side out and to put the filling in.
The ends seams you just made must go in two different directions to create the floor pillow shape. You can see in the finished picture that one seam is vertical and the other horizontal.

Turn the cushion right side out and fill it with foam or polystyrene beans. Once you are done filling the pouf sew the opening. You can use your sewing machine (faster…it’s what I did) or hand stitch it for a nicer finish!

I wanted a way to store it or at least to have the floor cushion out of the way when cleaning. So I added fabric ribbons in two corners of the cushion.
You make a loop and you sew them with the edge. You will have to strengthen the seam a little to be sure the loops can withstand the cushion weight.

Tadaaaam!!! This huge floor cushion hangs out of the way to the DIY coat hook (I made those with perfume caps!)

Looking for more sewing ideas?
You will find all the tutorials featured in this video on my Best off-page.

A cozy place to read her favorite books! If you want to complete your reading nook with more floor cushion you will love this round pillow and the handle to carry them around!


Want to remember this? Save this One hour floor cushion to your favorite Pinterest board!


You may also like this sewing project:

Jeanna
Saturday 10th of December 2022
Love the fabric pattern! Could you perhaps share the name of it? So cute!!! Thanks for sharing this tutorial!
amaryllis
Monday 12th of December 2022
Hello Jeanna, It's been a few years since I made this cushion, and I no longer have the fabric references.
Kerry Williams
Tuesday 29th of December 2020
Hi Amaryllis,
Thank you so much for this wonderful tutorial. I have just finished one of these for my goddaughter. She is 5 and has juvenile arthritis. Her therapist recommended a bean bag big enough to support her knees without bending them too much but we couldn't find an affordable one. I have some very basic sewing skills so volunteered to try and make one for Christmas for her. Your instructions and photos made it look very simple and easy, which it turned out to be. You have helped make a little girl very happy, thank you! I have a feeling my 3 daughters will be wanting one each next 🙈🥰 Sending Christmas wishes if you celebrate and best wishes if not xx
amaryllis
Wednesday 30th of December 2020
Hello Kerry, I'm glad you used the floor cushion tutorial to make a nice Christmas present. My kids did enjoy the cushion a lot...before our dog chewed it! Haha! Thanks for your wishes, Merry (belated) Christmas to you too.
Destiny
Saturday 20th of June 2020
I am not getting it. HOw did you get a point at one end of this pillow. It's almost like some directions are missing. After sewing the triangles together and folding it over, it just makes another rectangle. How did you get it to a point??
amaryllis
Saturday 20th of June 2020
Hello Destiny, glad to hear you figure it out. In case someone have the same question I will update the tutorial and give more details. Thanks
Destiny
Saturday 20th of June 2020
Never mind. I made a mini version of it and figured it out. Thanks.
Sheilah Baxter
Monday 18th of November 2019
I made a oval floor No sew pillow And left a section open for the filling but I am using shredded foam. I have to get a total of 5 made for Christmas and I have just done the one. How is the best way to get that shredded foam into the pillow without getting it all over the outside because I am making mine with fleece and I don’t want to have to spend a lot of time trying to get it off the outside where it may get on it!?! I love the foam but it is in tiny squares that gets everywhere? The one I just made I tried filling those small Walmart bags and one at a time push them into the pillow and turn the bag upside down and shake it out before pulling the bag back out and it seemed to work pretty good but I didn’t get the whole thing inside on one before I realized I hadn’t gotten it in all the way and some had come out and I had a heck of a time trying to get it cleaned off!!! So I wandered what thoughts you might have?? It’s the type foam that I had ordered 30 lbs and it had to be opened up and allowed to expand for 72 hrs! I love it but it kind of difficult the way I was trying to use it?
amaryllis
Tuesday 19th of November 2019
Hello Sheilah, did you try to open the bag inside your floor pillow? So the foam will expand inside of your cushion. Leave a big opening to place the bag in it, open it a take the plastic bag out. Then sew the opening and just let a small section unsewn in case you need to remove or add some foam. This way you won't have to fill the all floor pillow with the foam. Let me know f it works.
James
Friday 4th of October 2019
Plastic shopping bags make a great filler
amaryllis
Saturday 5th of October 2019
Hello James, you are right plastic bags are a great option too!