
Lately I’ve been a little obsess about plants. Each Time I run to the hardware store I came out with an extra indoor plant . There is so many corners in the house to fill with greens. As I start to own a good number of plants, I’m always on the look for pretty and affordable planters. If I can’t find something I like, I recycle or divert daily objects. You will be surprise how many items you can use as cute planters.
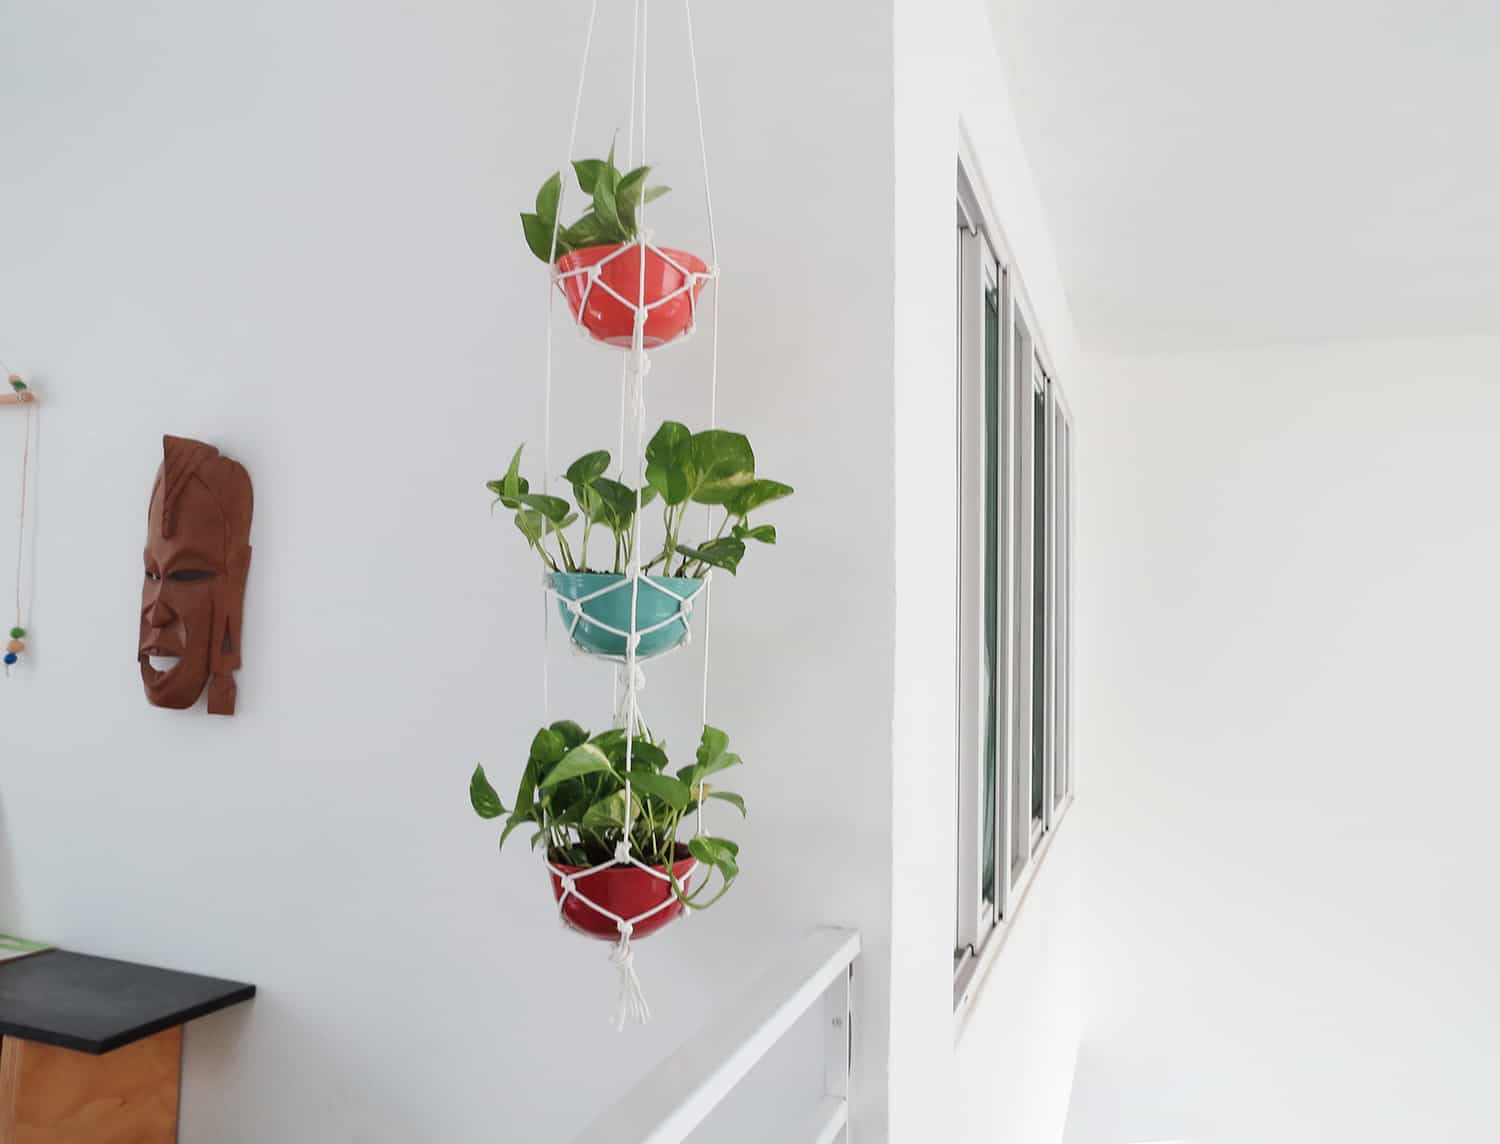
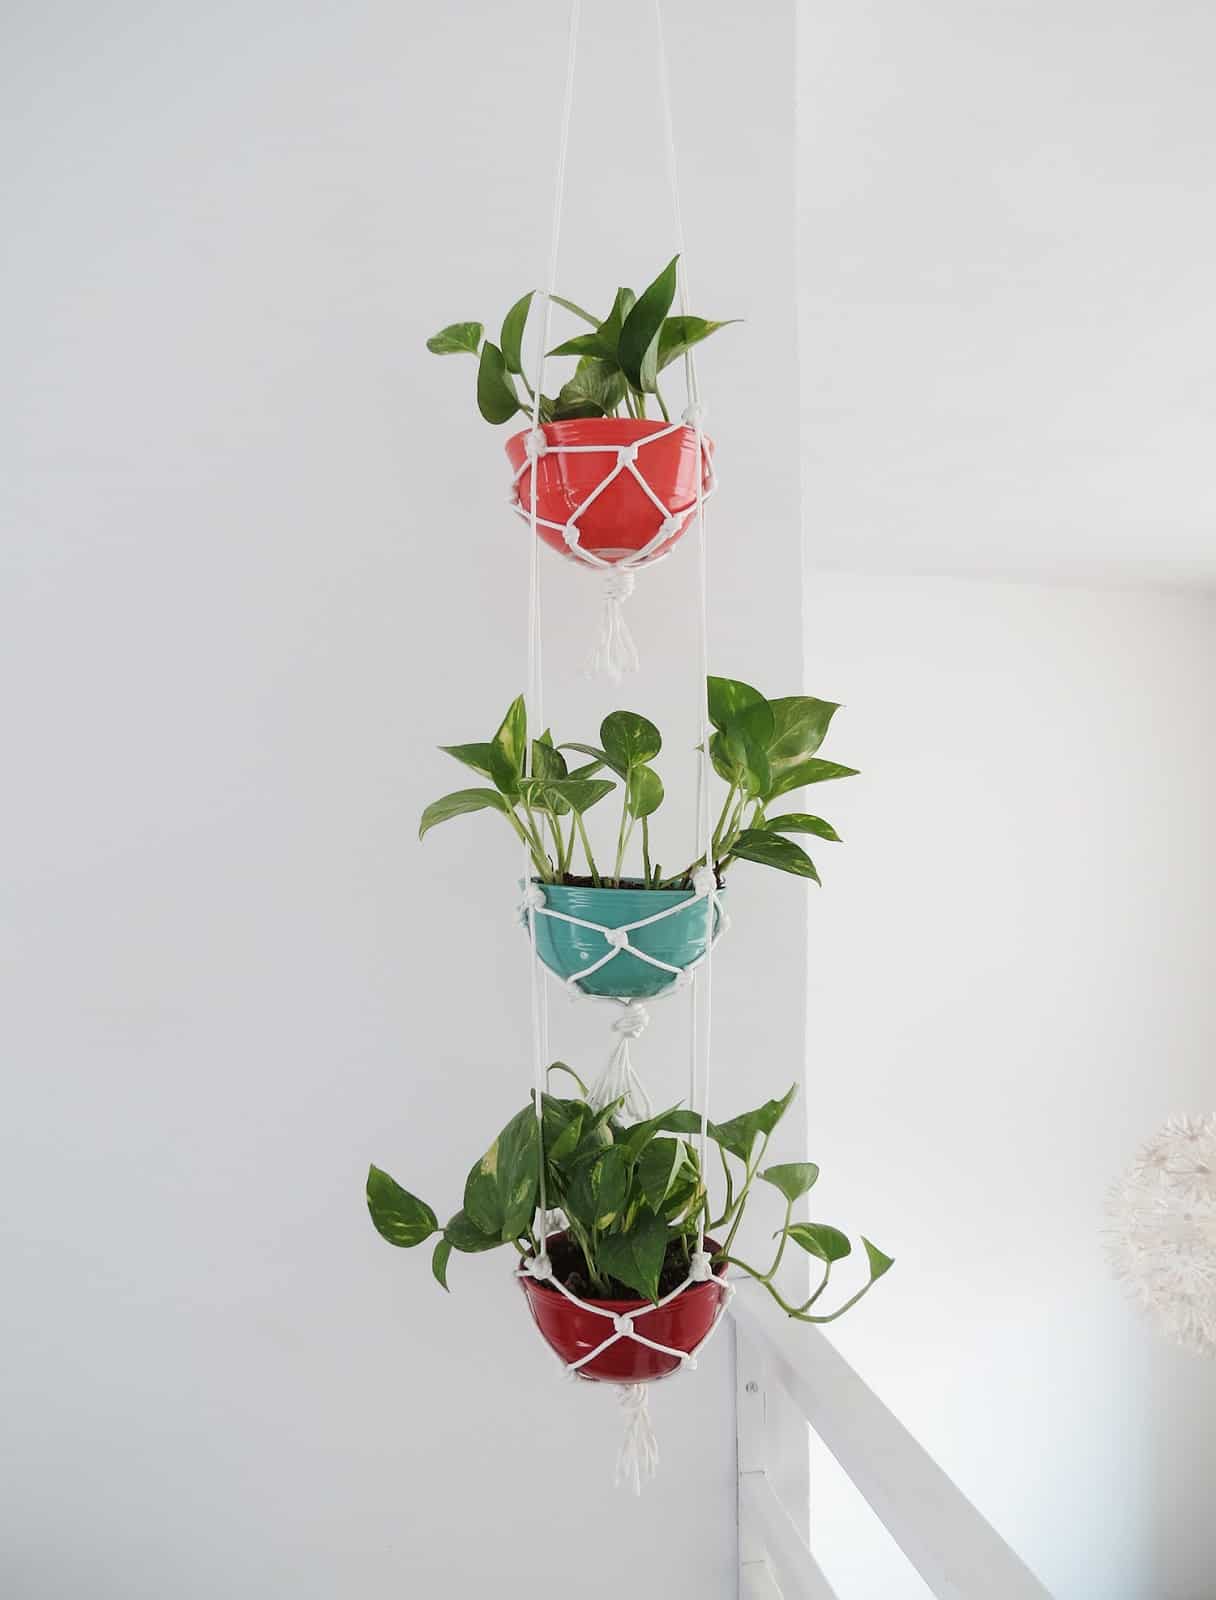
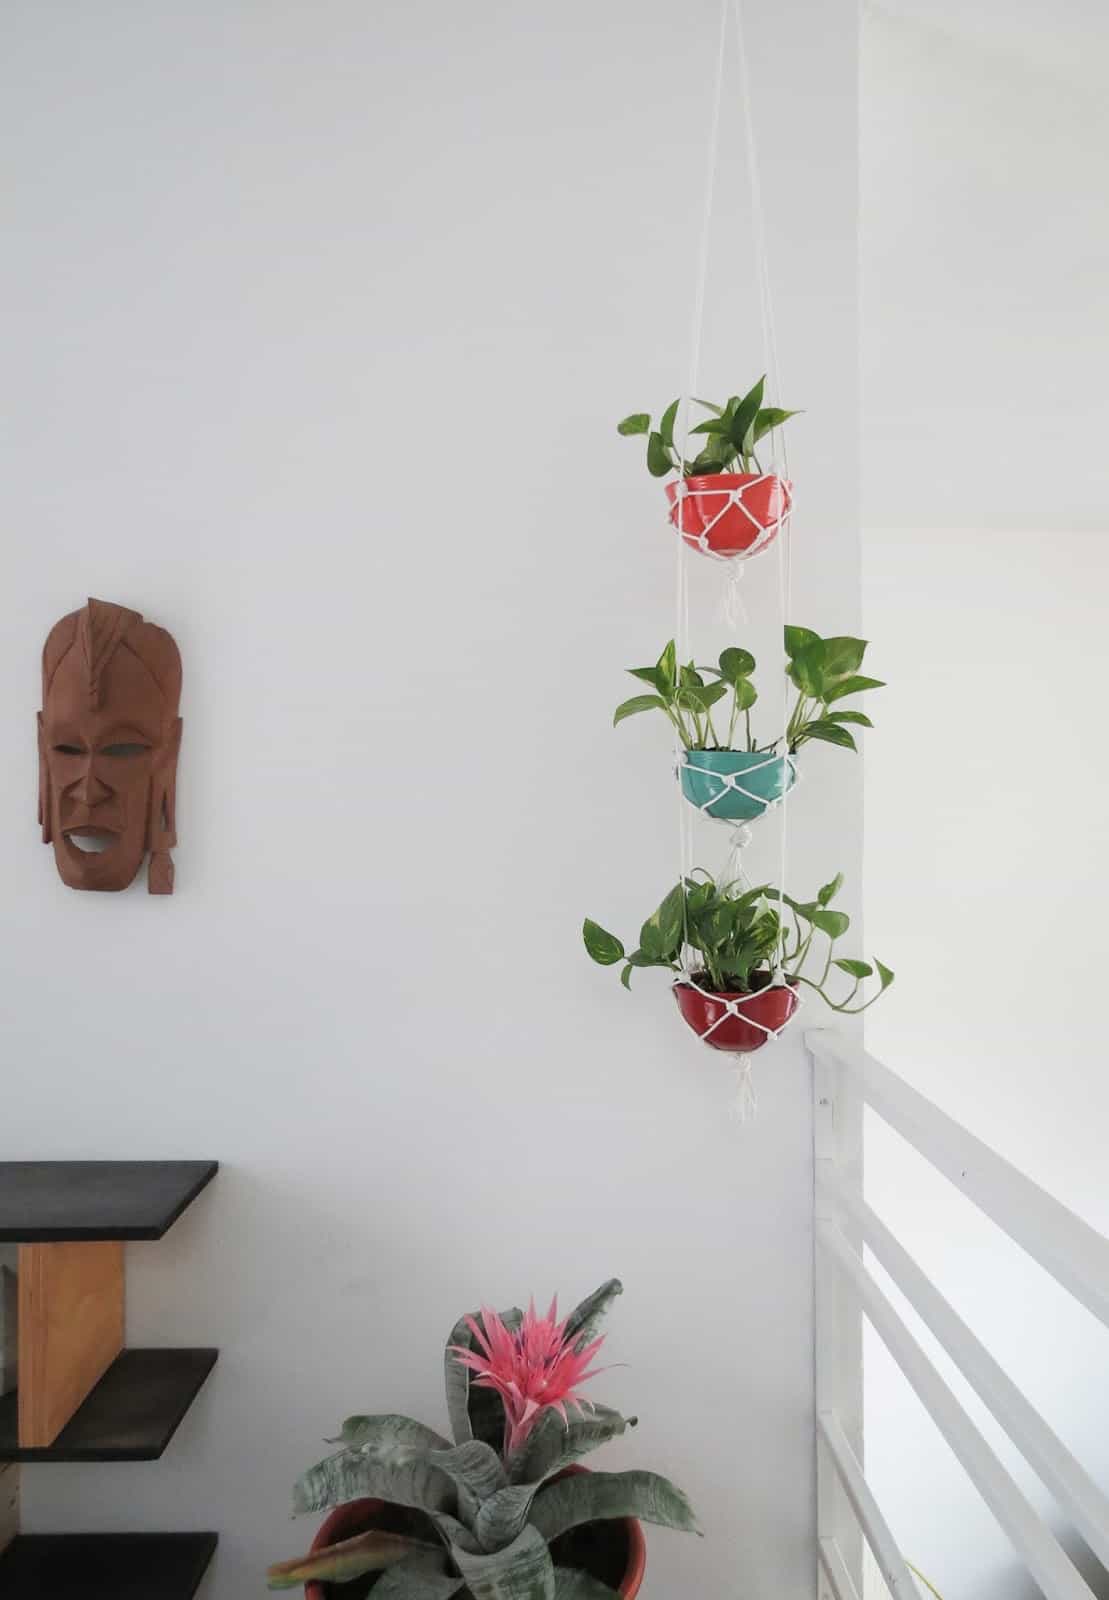
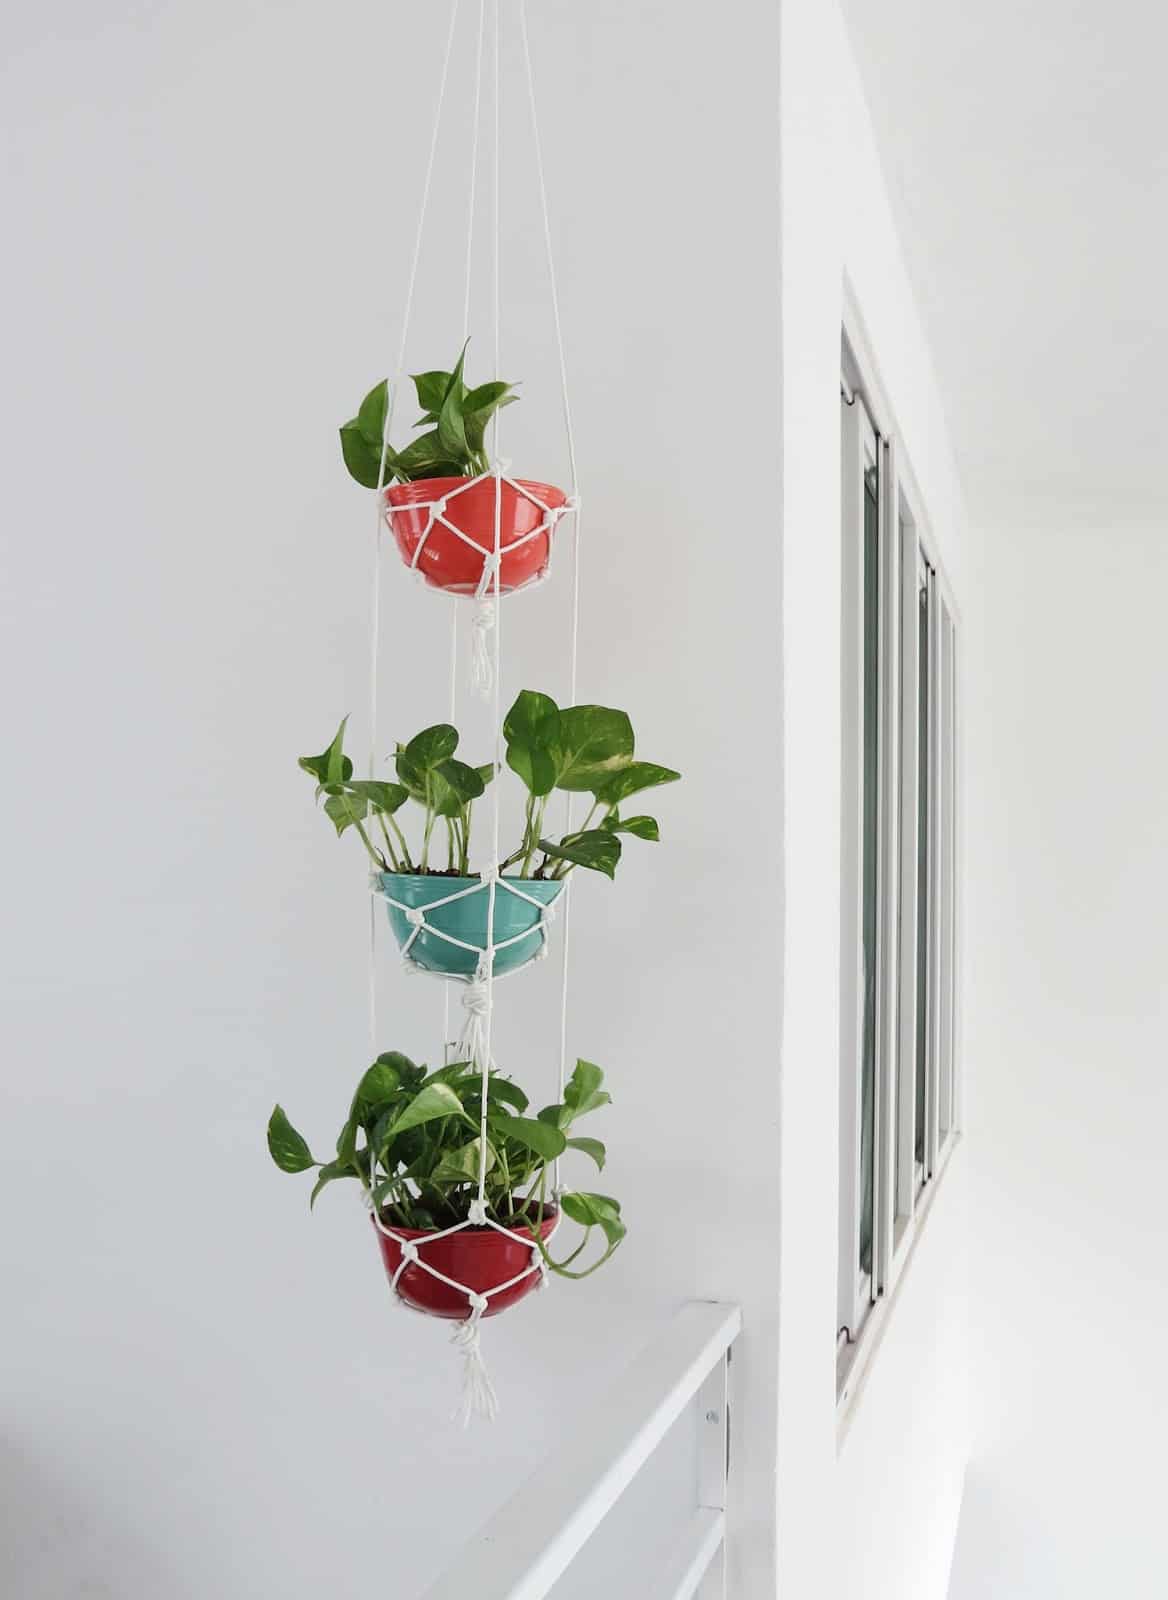
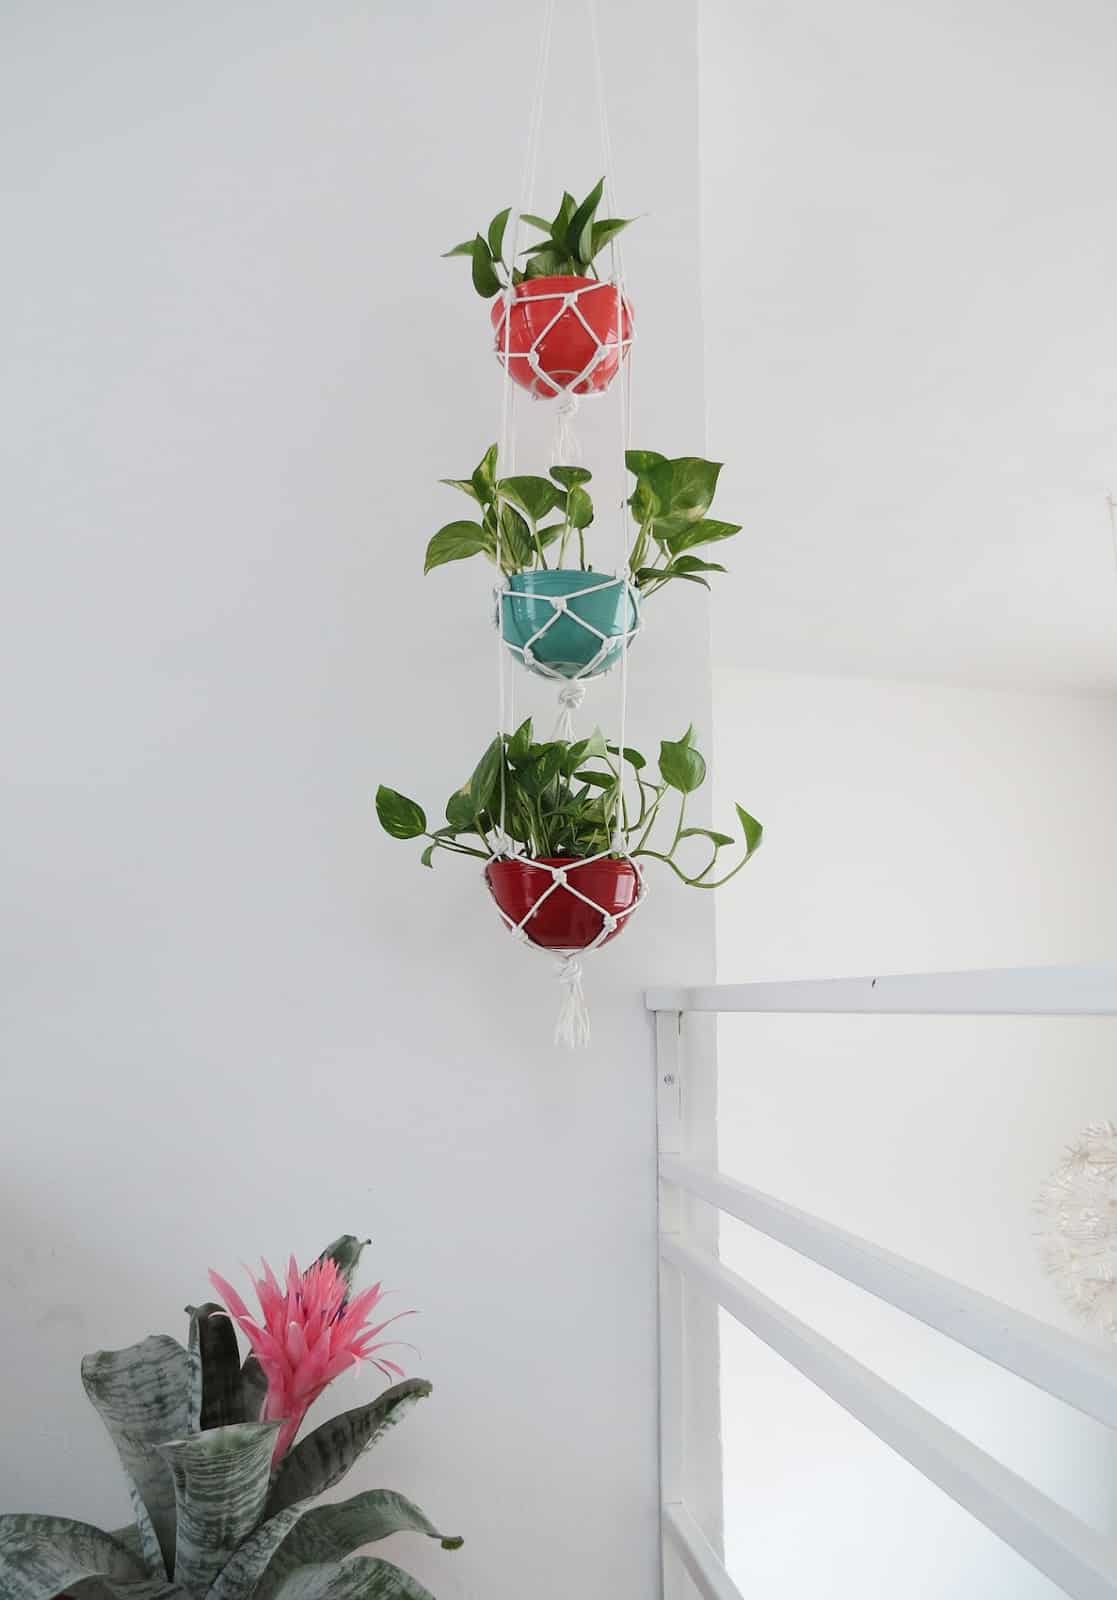
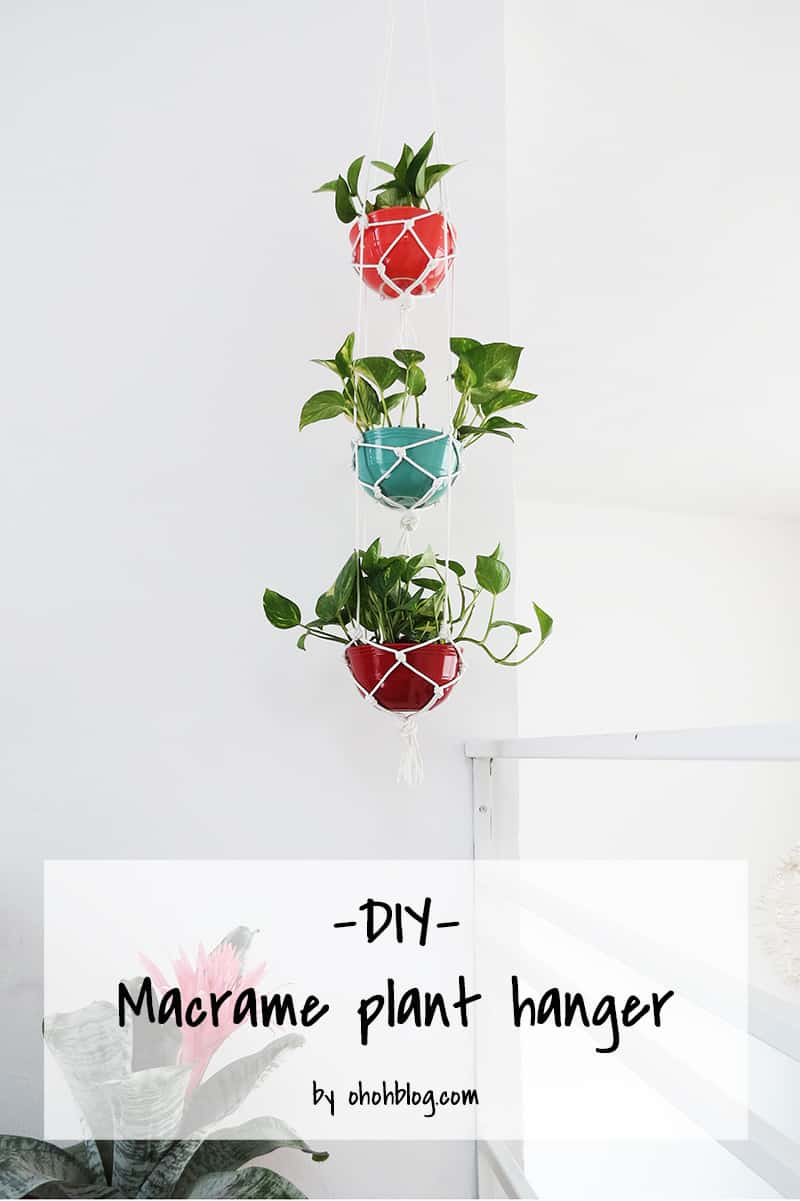
I wanted to add green in our night hall. So I turn 3 ceramic bowls and some rope into a modern macrame hanging planter. This project is quite simple to make, very affordable and will turn any corner into an eye catching decor.
Material you will need to make your plant hanger:
-
3 Ceramic bowls
-
30 yards of rope
-
A ruler
-
A curtain wooden ring
-
A pair of scissors
-
Super glue
- Some nice plants
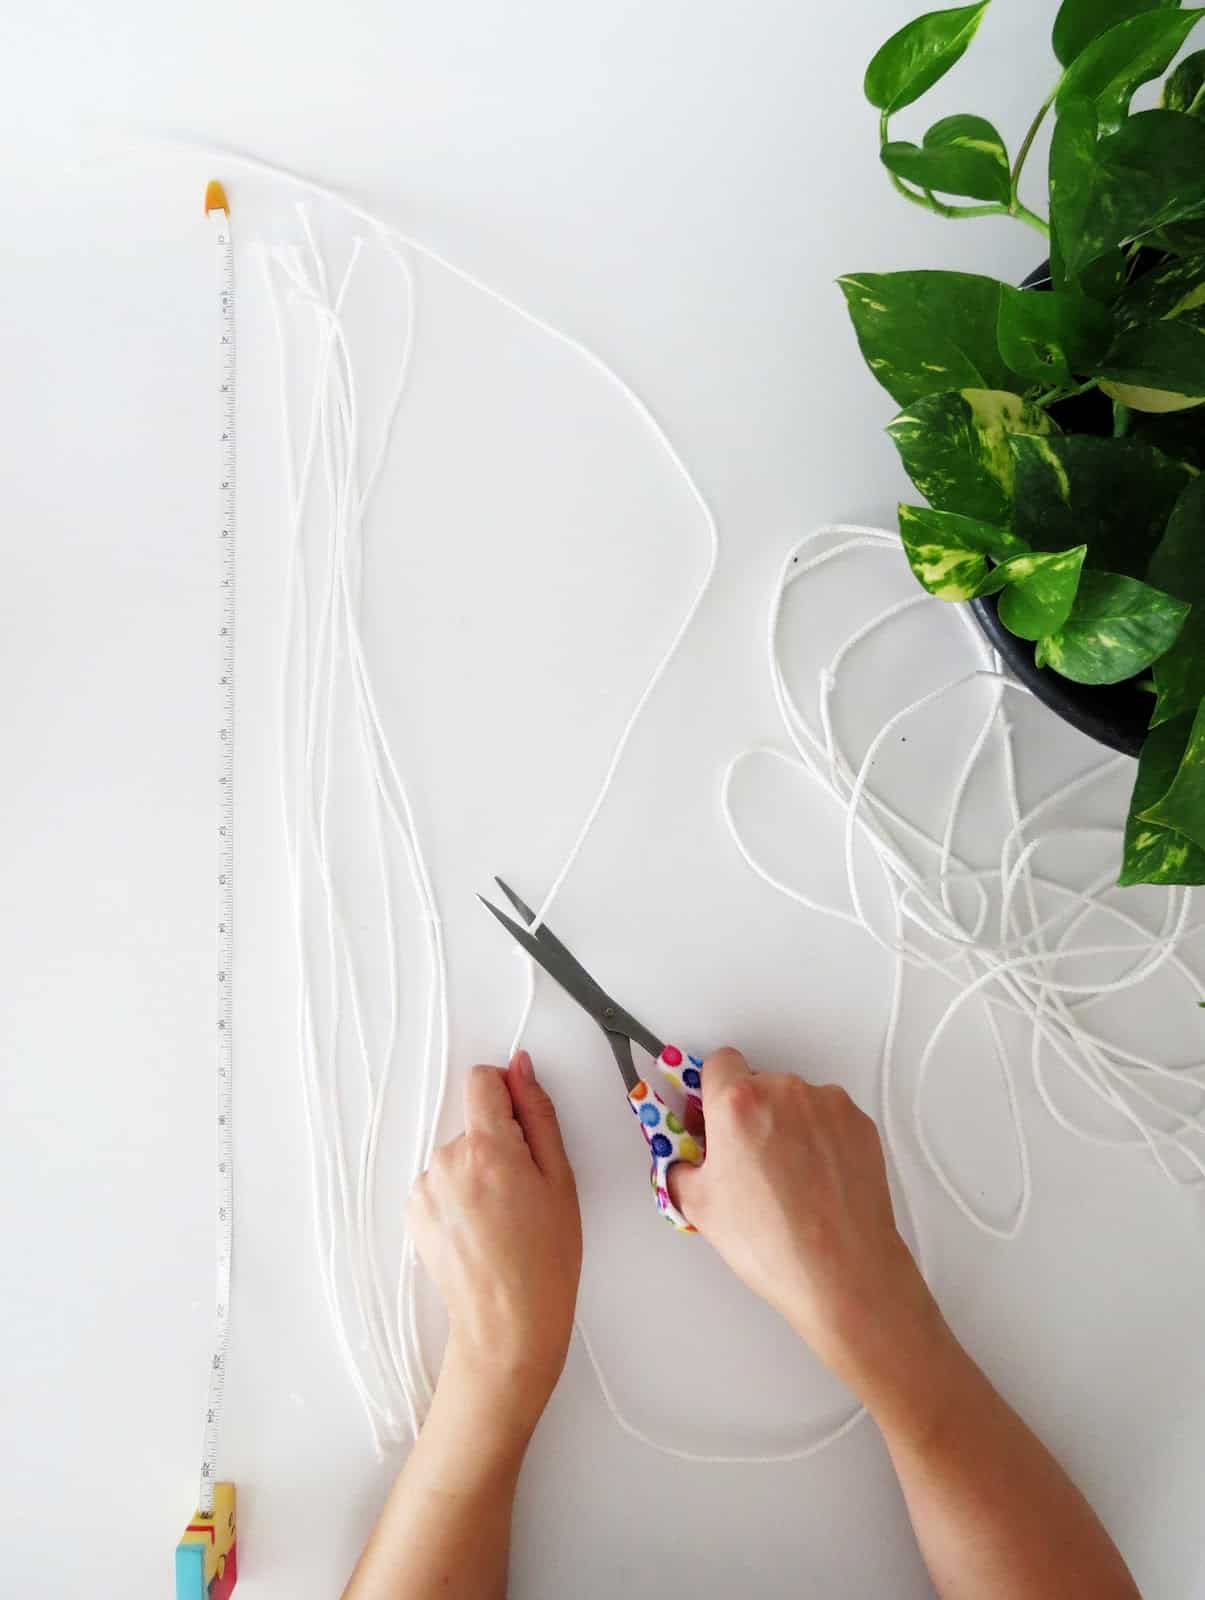
You will start by making a rope support to hold each bowl. Cut 8 pieces of rope of 30 inches each.
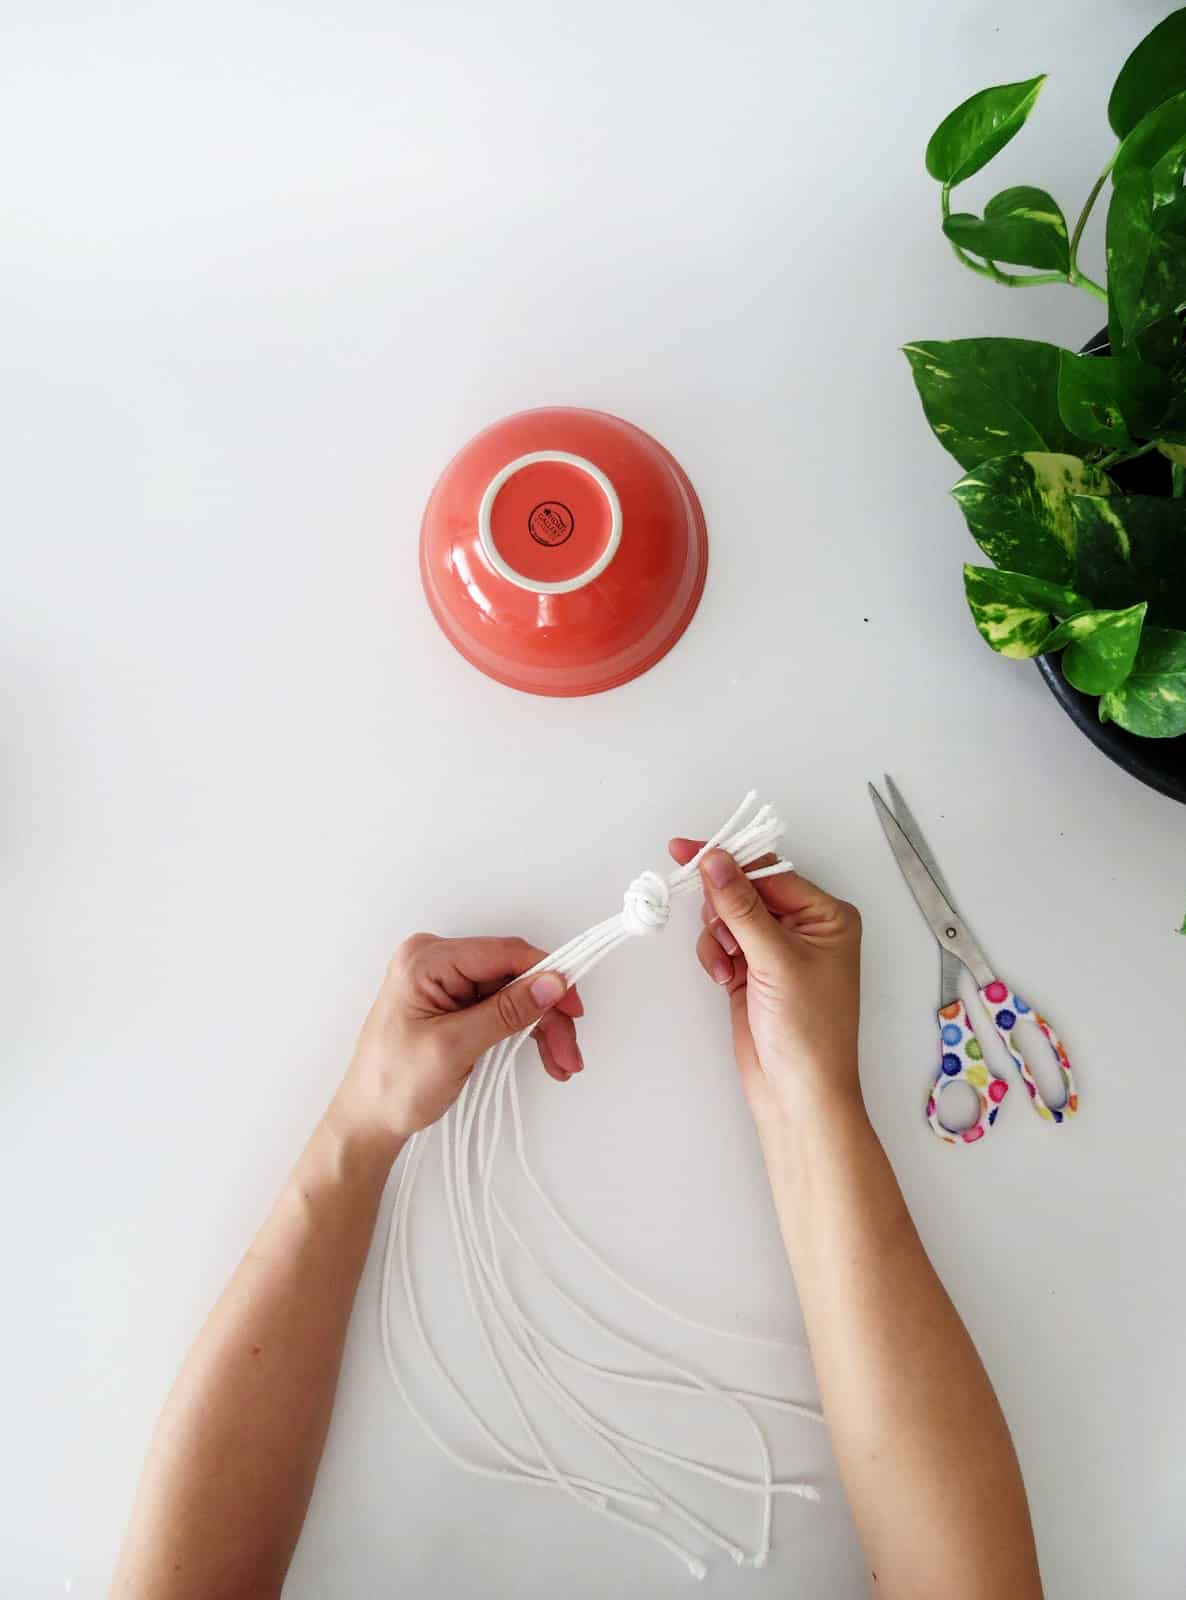
Make a knot at one end to hold the 8 pieces together. Don’t hesitate to tighten!
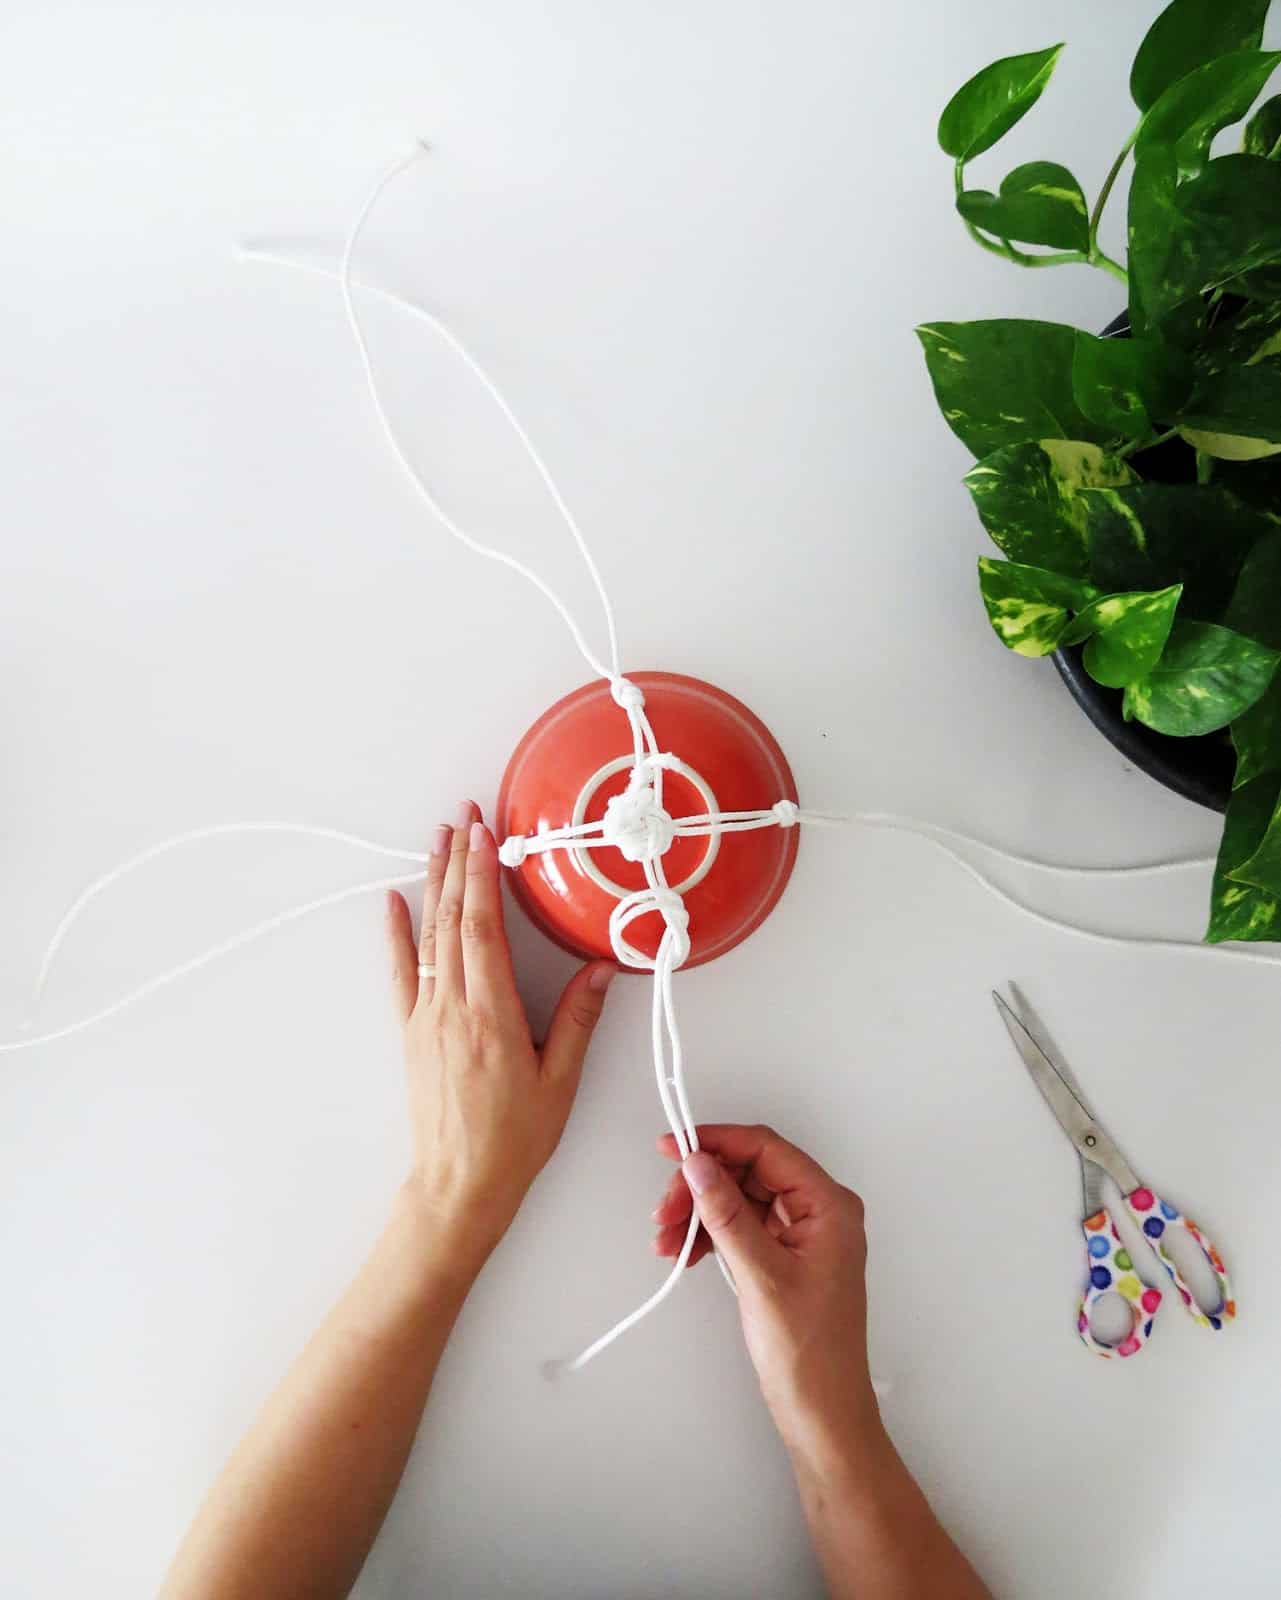
Take a bowl and place it upside down, put the knot on the center and separate the 8 strings 2 by 2 to make a cross shape. Make a knot, at 2 or 3 inches from the center, to hold every pair of string together.
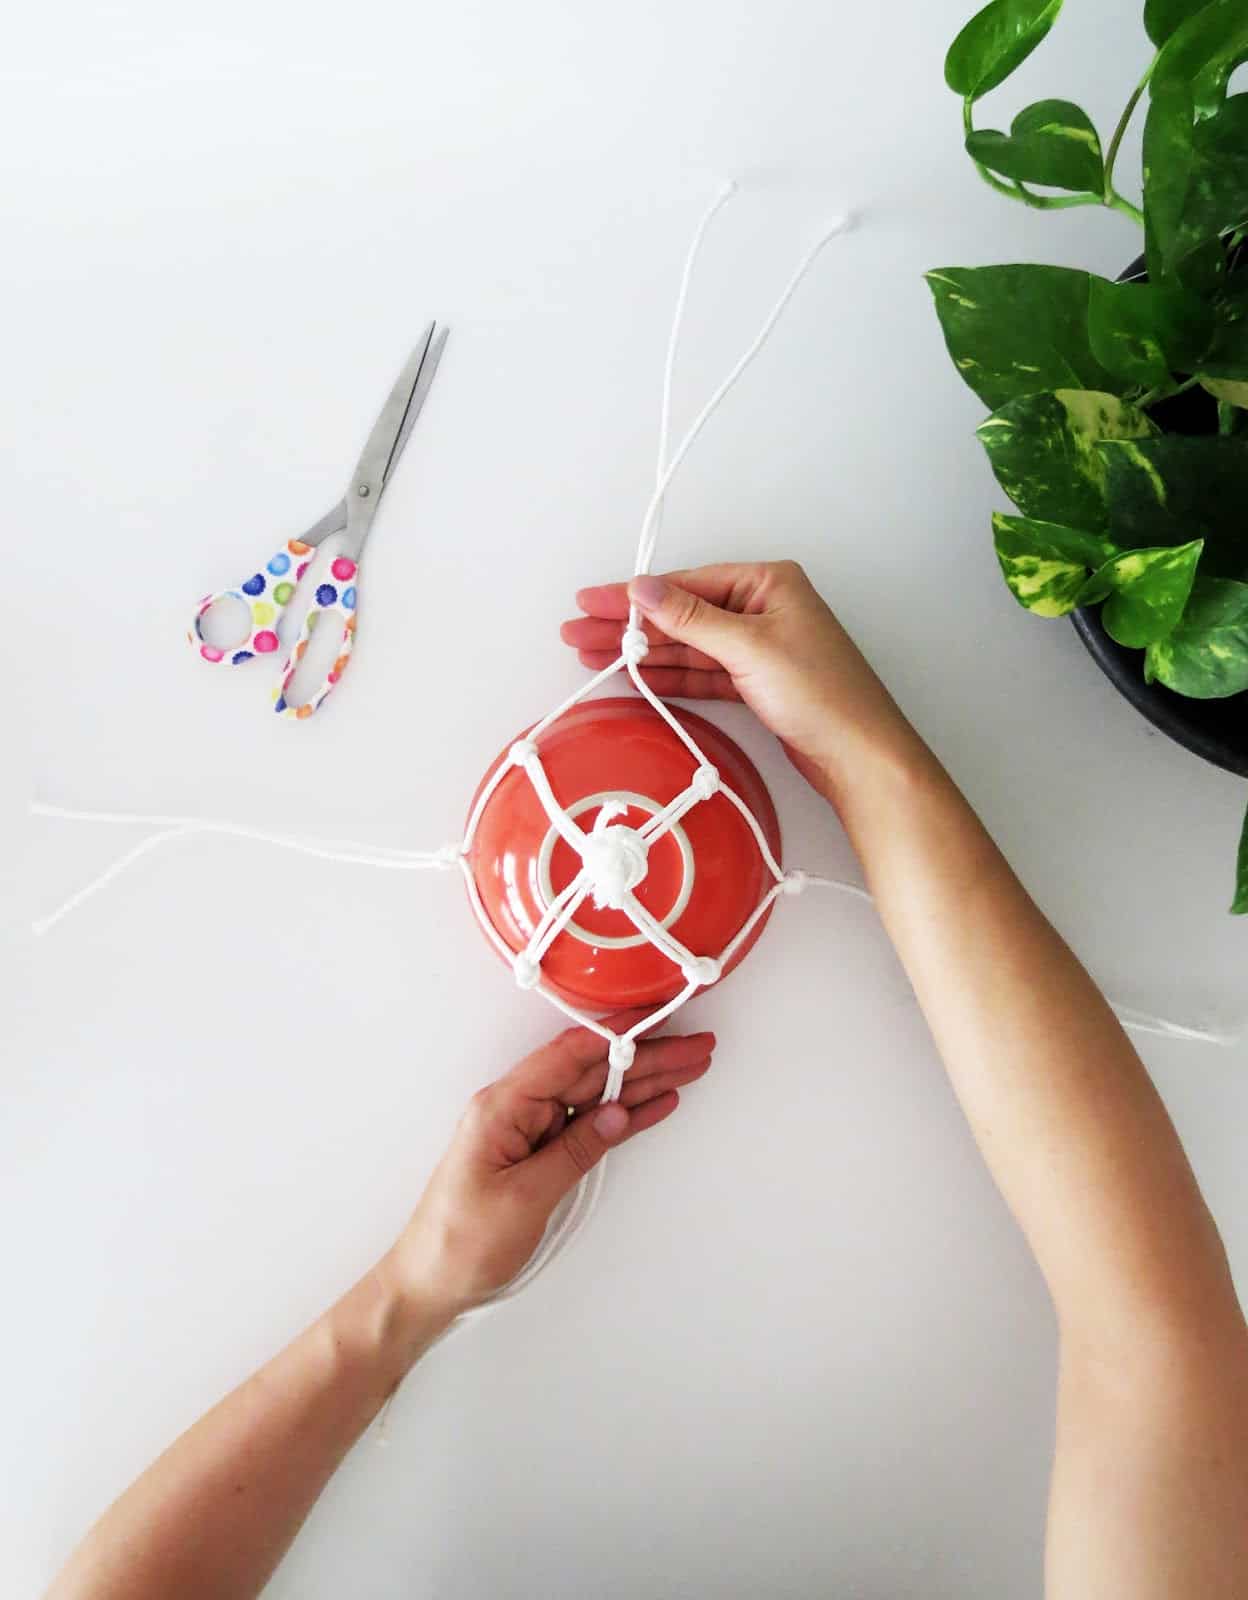
Take one string from each pair and join them with a knot, the rope between the first and the second row of knots will form a diamond shape.
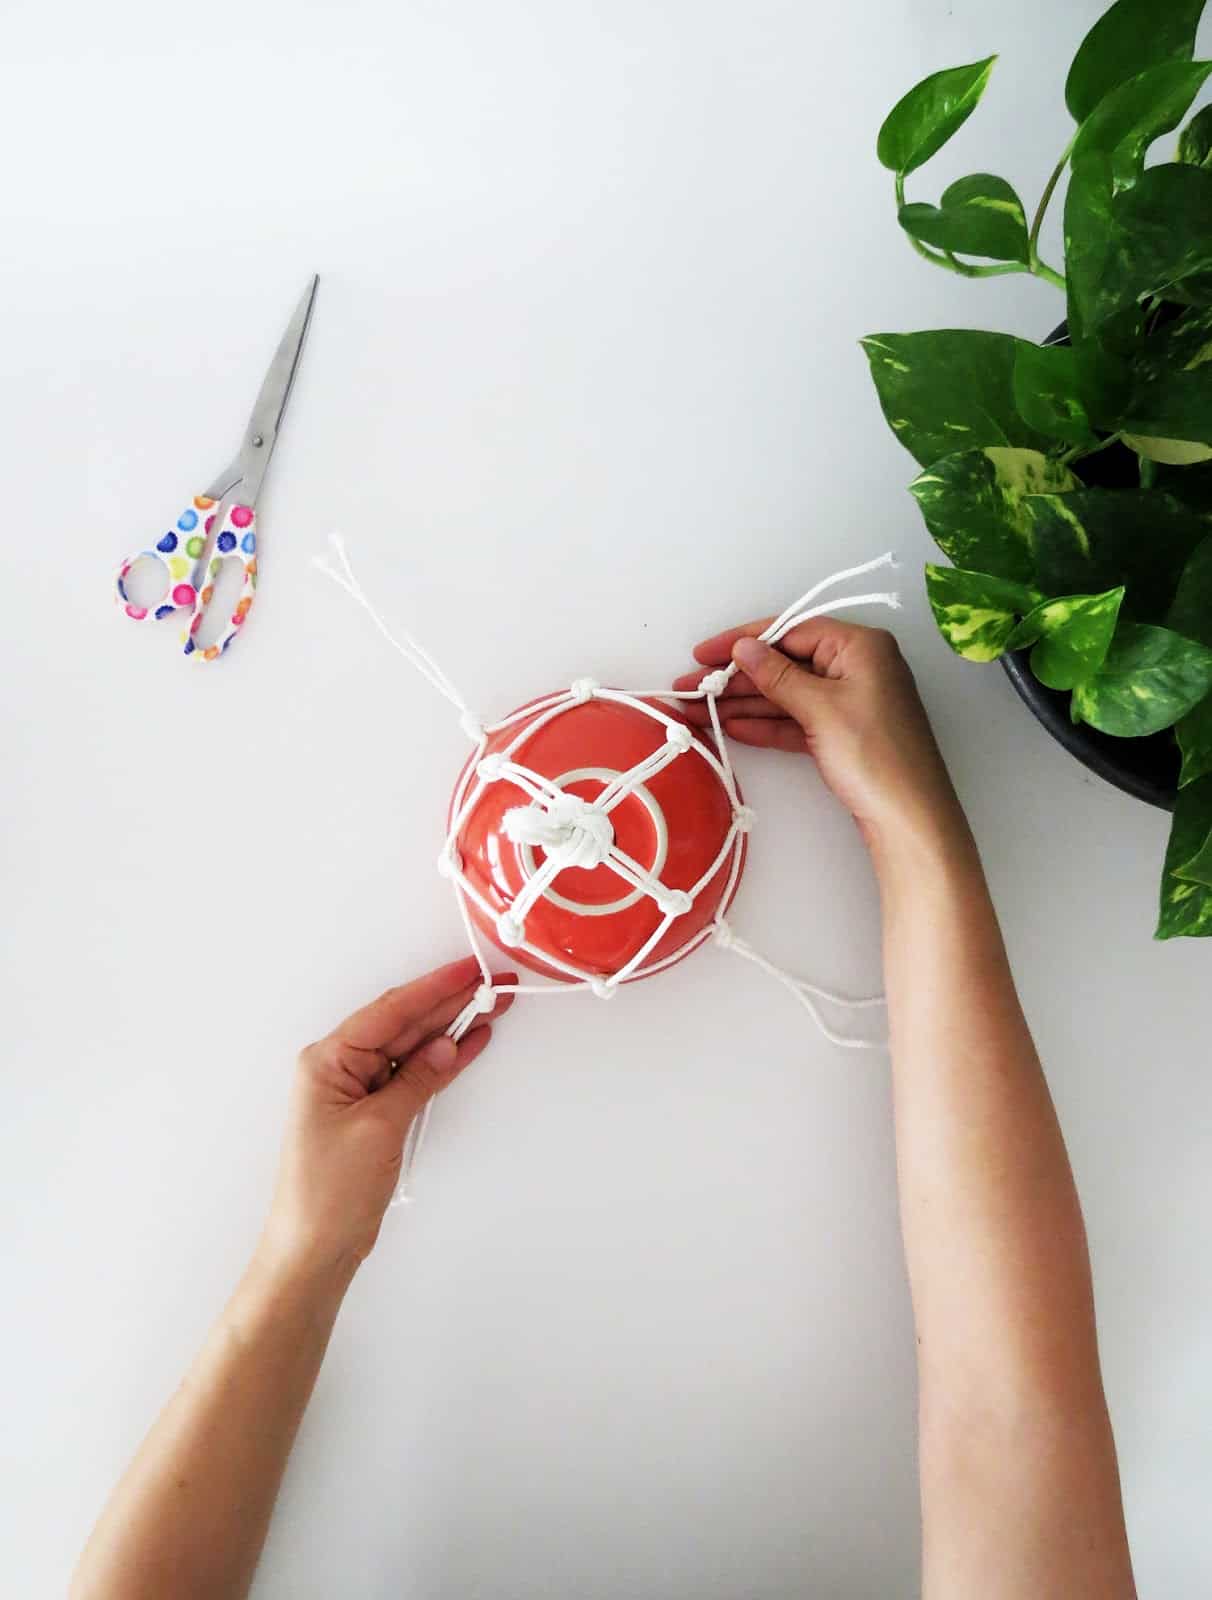
Once you finish making the 4 knots of the second row, repeat the same process to create a third row of 4 knots.
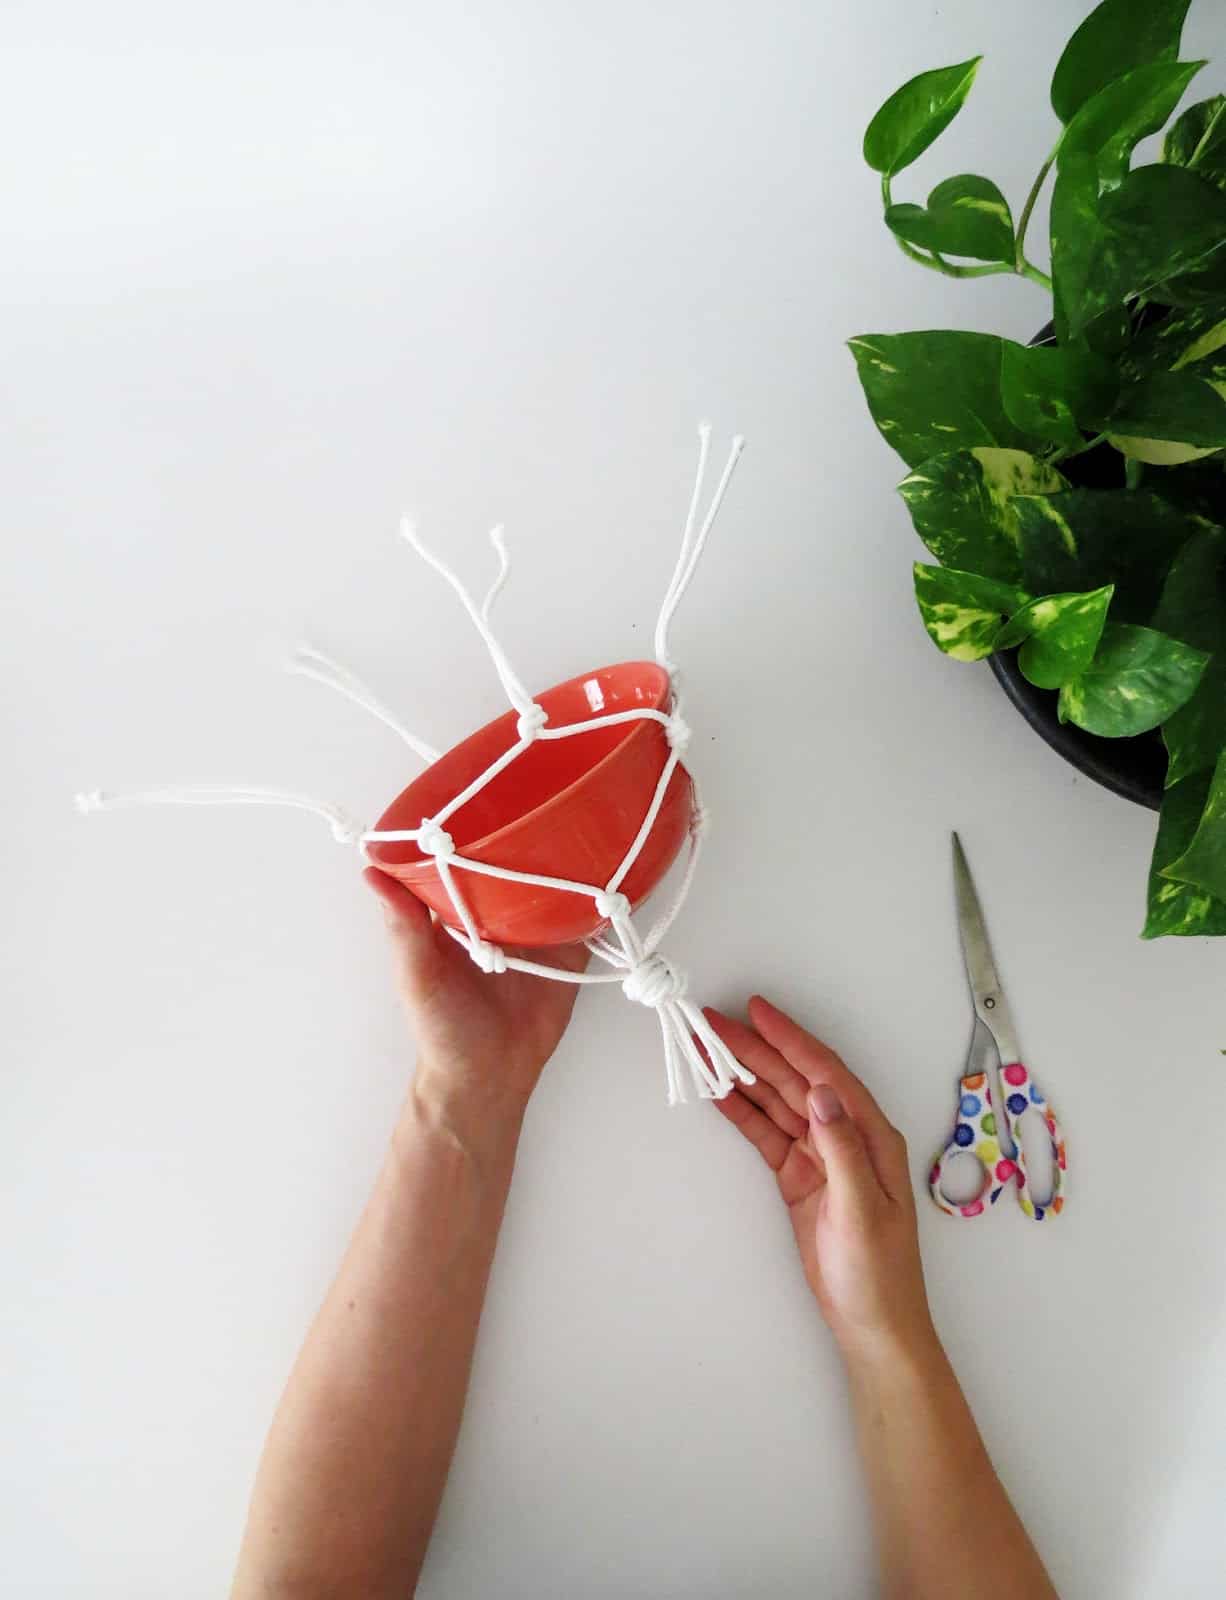
If you use regular cereal bowl size, three row of knots will be enough to hold them. The rope holder must be large enough to hold the bowl completely into it.
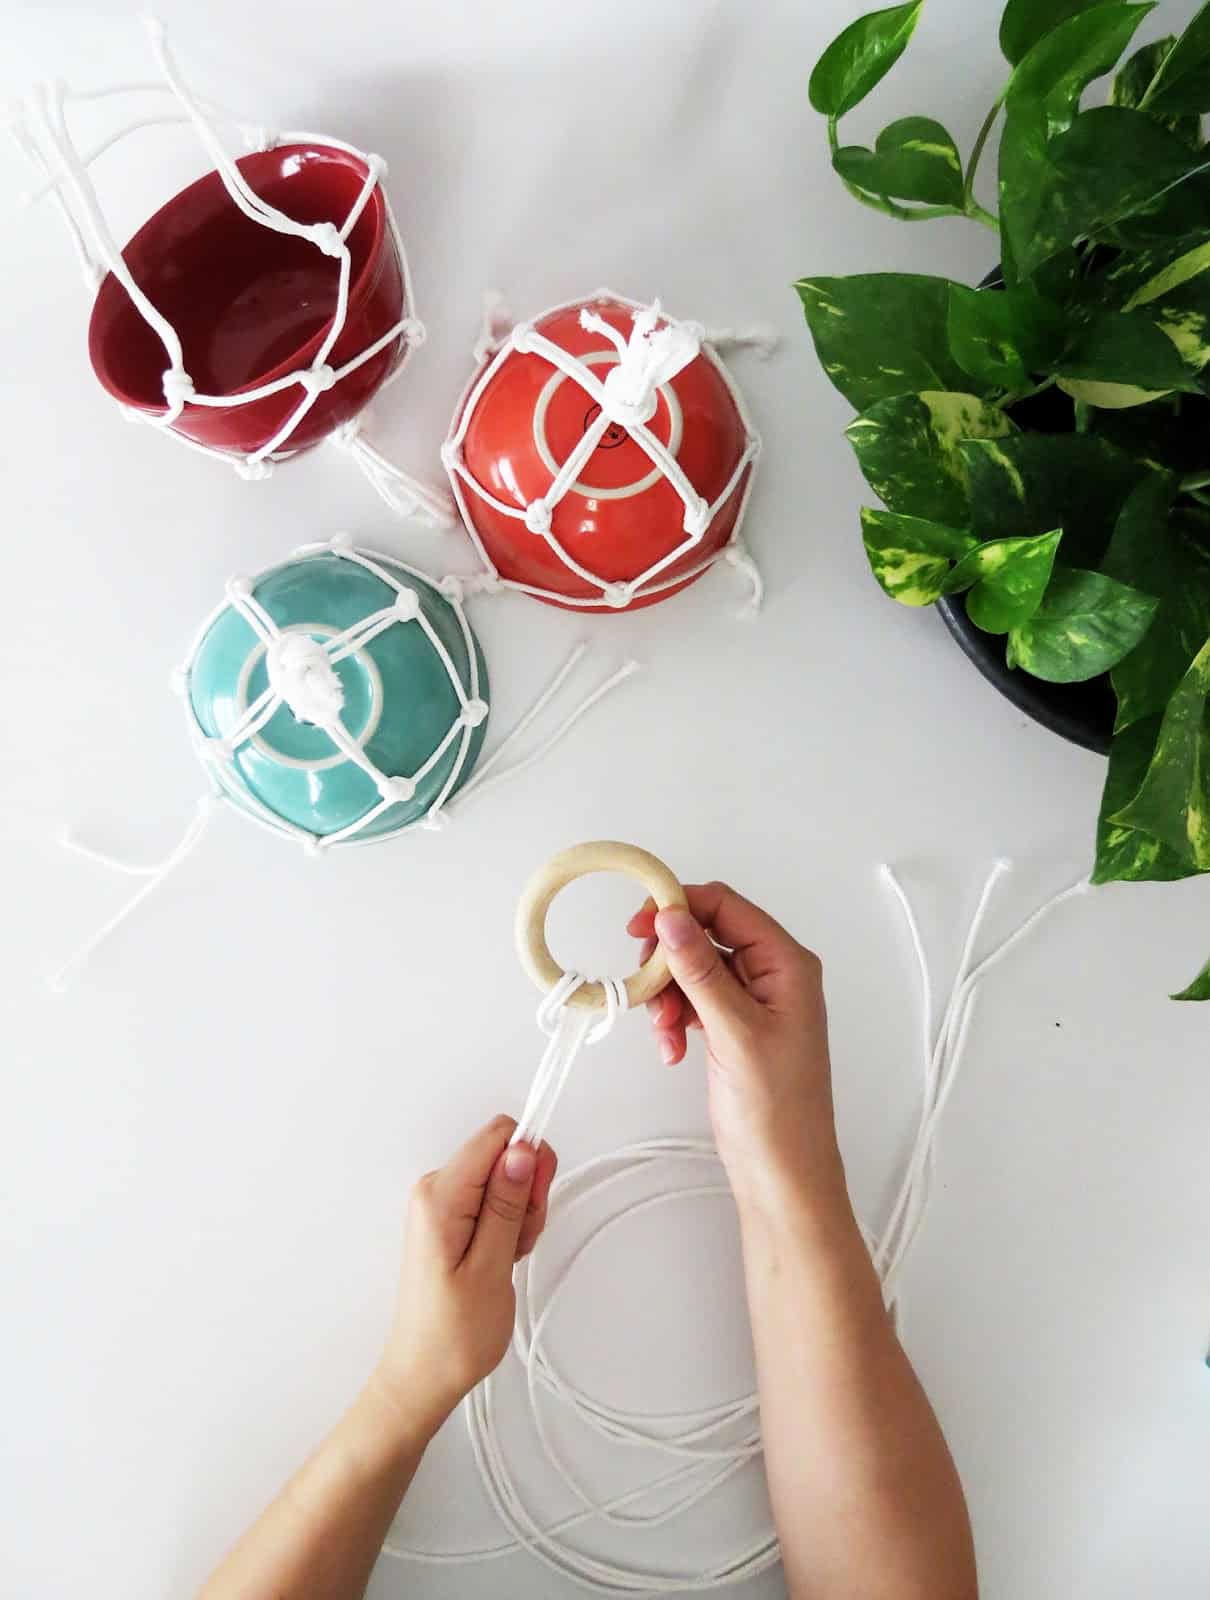
Repeat the previous steps to create a rope support for each bowl. I made a three level planter but it will works as find with more bowls if you have room for it!
Now you need to attach all your bowl supports together to create your hanging planter. Cut two pieces of rope of 3 yards. Fold them in the middle and make a loop with them, passing the rope through the wooden ring. You must have 4 strings of 1 ½ yard hanging from the ring.
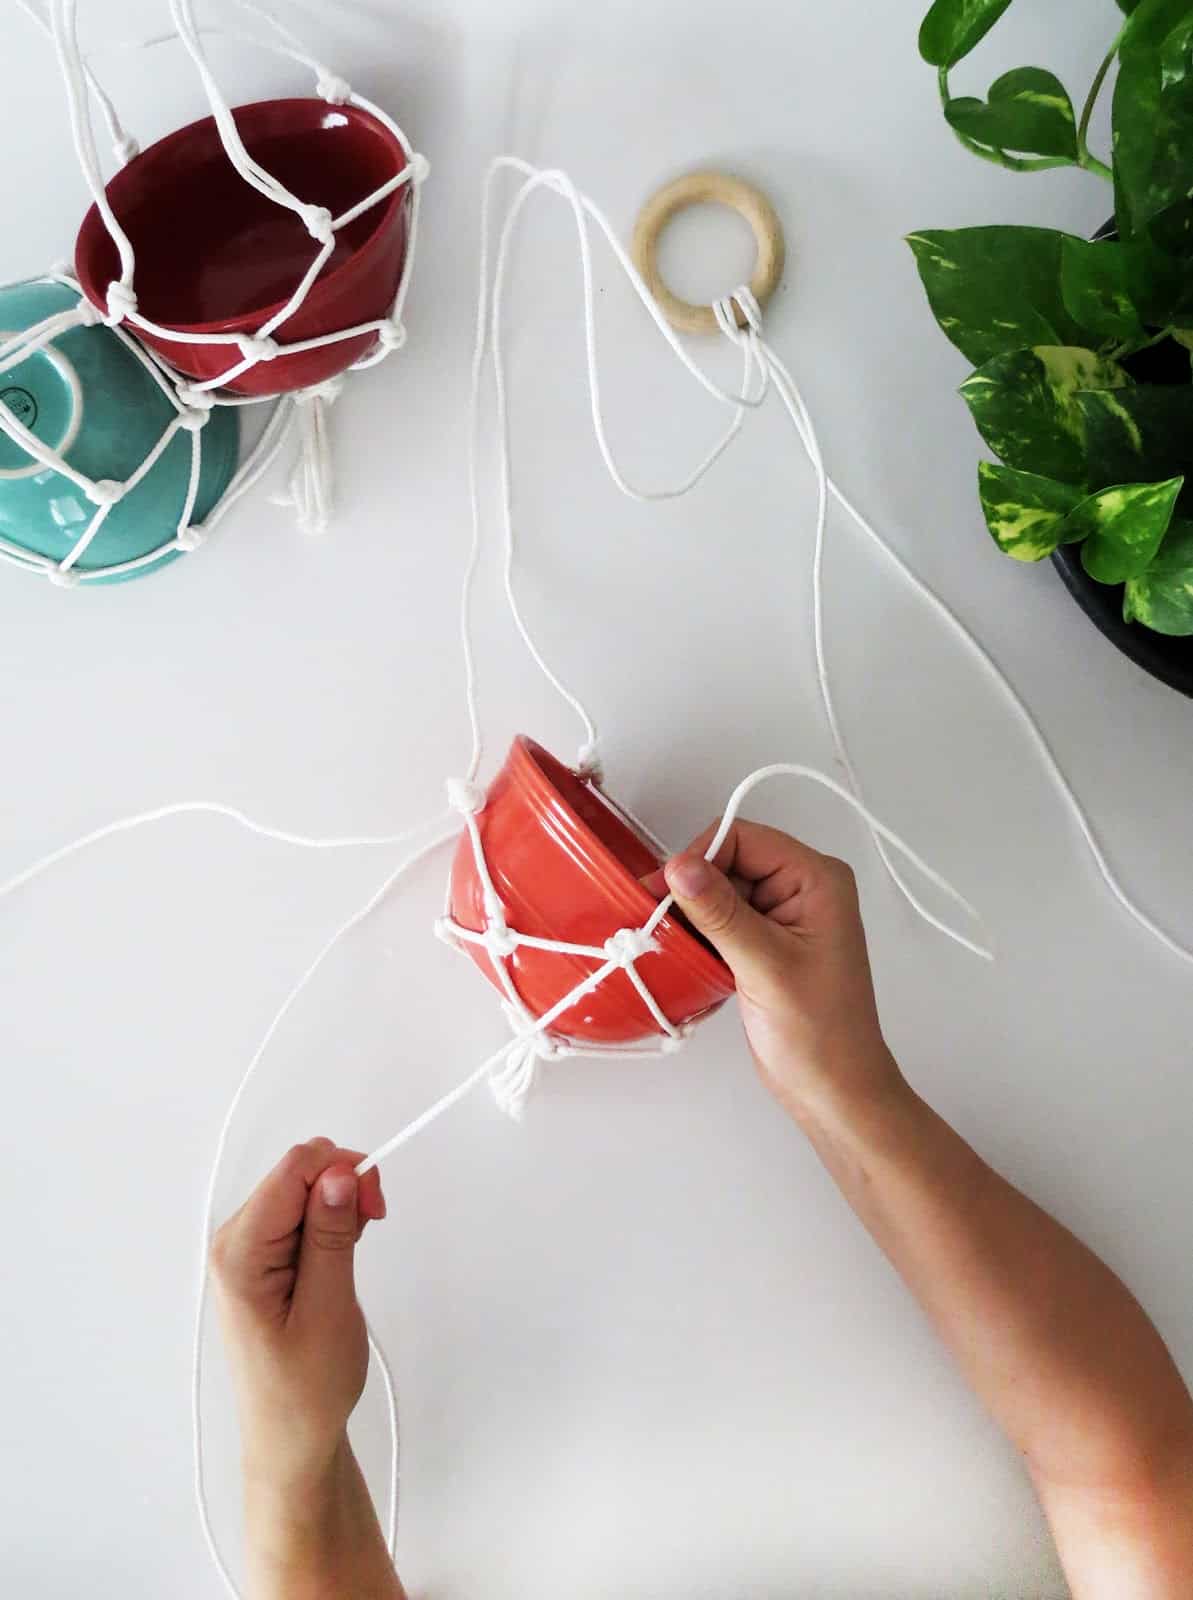
Attach each string with a knot to a first rope support. Try to have the same distance between the ring and each knot you make, help yourself using the ruler and make a small mark on each rope at a distance of 25 inches from the ring. It’s important if you want your bowl planters to hold horizontally!
Then attach the second and the third rope support below the first one, leaving a space of approximately 12 inches between each. Cut the extra rope length of each knot if necessary and add a dot of superglue. As the planter can become a little heavy when watering, this will avoid the knots from slipping.
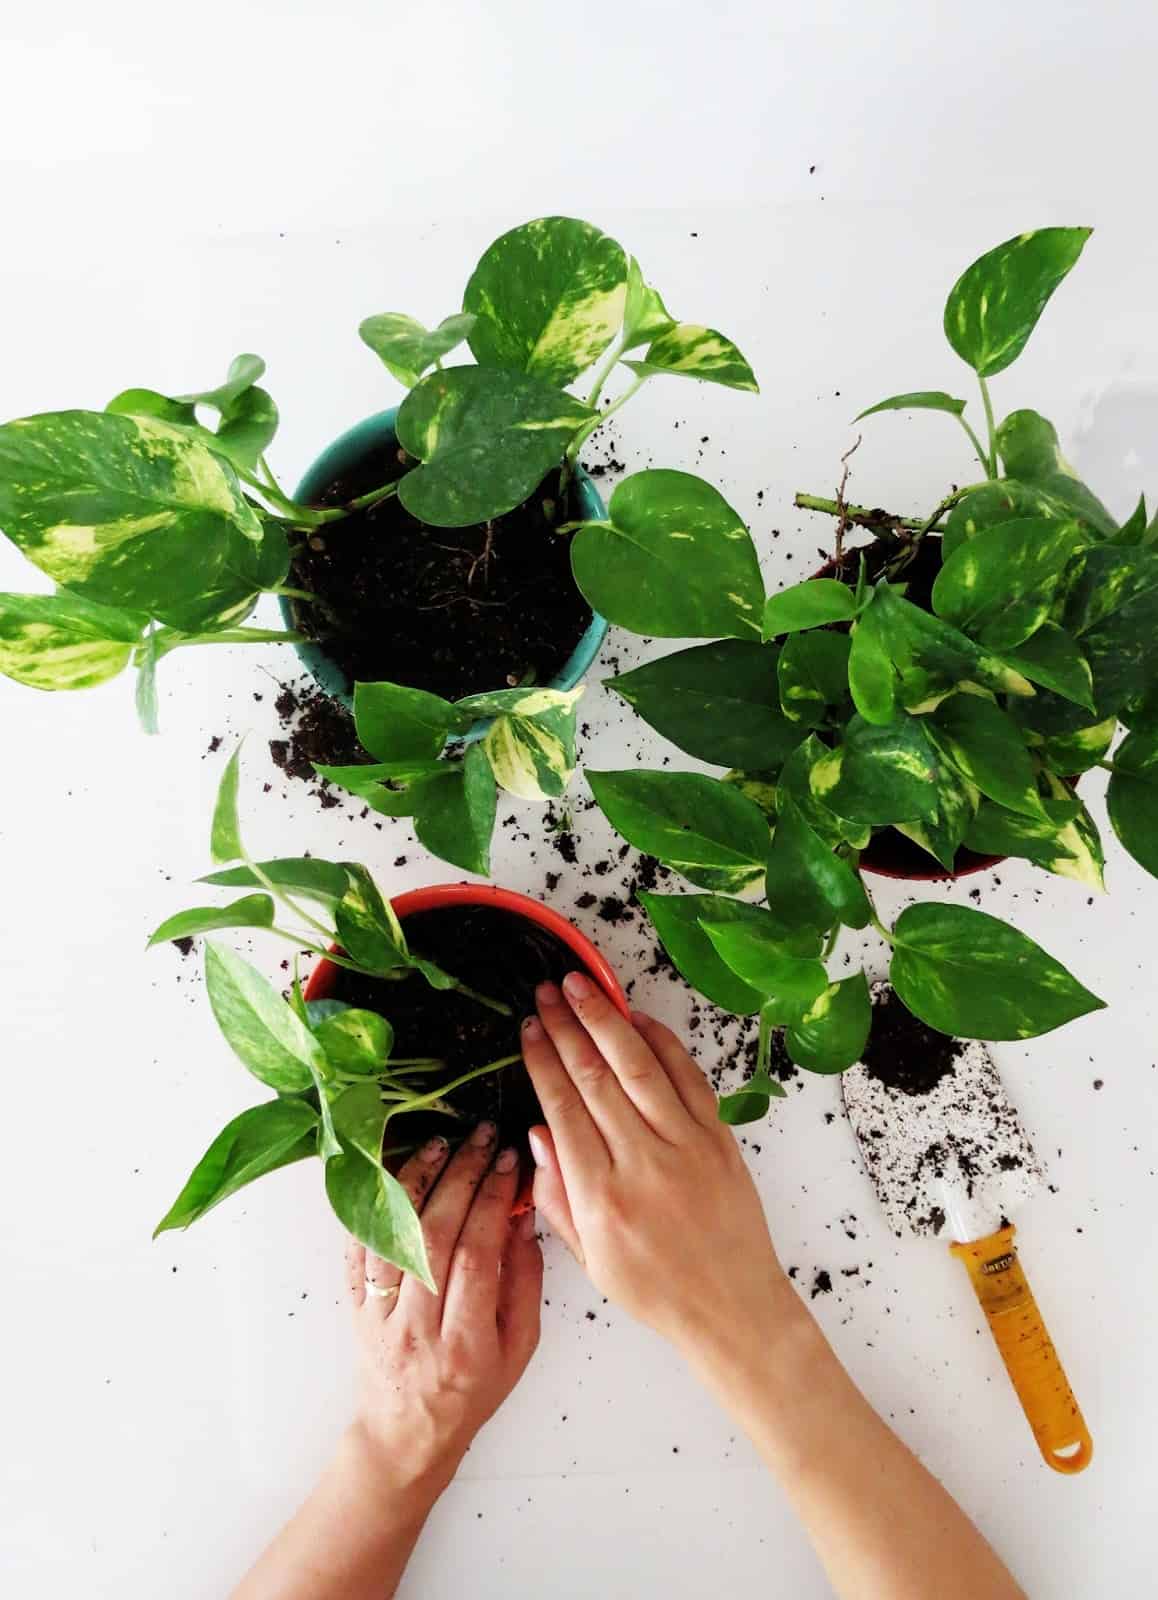
Put your plants into the bowls. As there is no drain hole, you can add some pebbles in the bottom before putting the soil and your plant.
The last thing you need to do, is drilling an hole in the ceiling and screw a hook. Use the wooden ring to hang your rope planter first, and then place your bowls planters into each rope support.
Enjoy you new green decor!
If your like it, please, share and make your friends enjoy this post!


Kelly Mahan
Wednesday 9th of August 2017
If there's one thing I'm crazy about are plant hangers! I just love them and the plants, nature is beautiful <3 Thanks for sharing this tutorial!
amaryllis
Wednesday 9th of August 2017
Hello Kelly, I love plants too...I usual get a new one when I go to the hardware store , it just makes me happy to have green in the house! ;)