
This summer when I visited my sister I saw the cool bar stools she made for her kitchen. I knew it would be awesome to share it on the blog. So she made a tutorial for us!!! I have the best sister ever!
I hope you will like it! Merci ma soeur 🙂

I had been looking for a cool bar stool for a while and after a couple of failed efforts at making one in concrete, I decided to use wood (I had found a bookshelf in my back alley, re purposed wood works perfectly if you paint you bar stool).
All you will need is:
- plywood (or any kind of wood), at least 18mm thick (0.7 inch) a board of 130 cm x 65 cm is sufficient
- saw (I saw is all by hand it’s not that hard)
- wood chisel-nails (4cm long finish wood nails # 15 x 1-1/2 in.)
- sanding machine
- paint (optional)
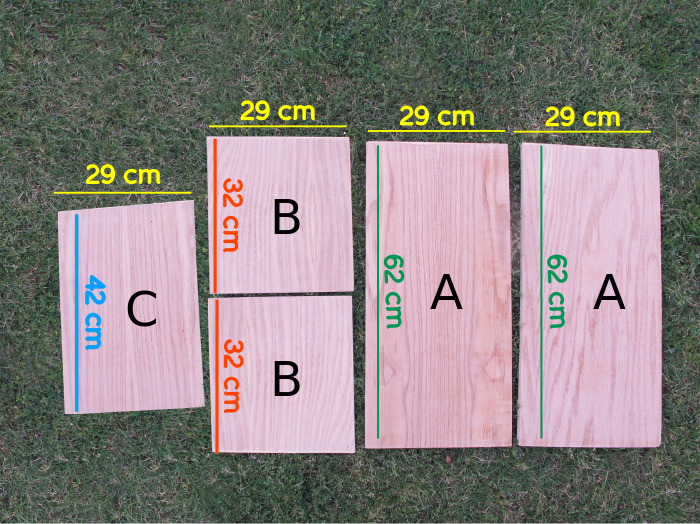
1. Cut the pieces you need:
A: 62 cm (24.5 in) x 29 cm (11.5 in) (x2)
B: 32 cm (12.5 in) x 29 cm (11.5 in) (x2)
C: 42 cm (16.5 in) x 29 cm (11.5 in) (x1)
and sand them.
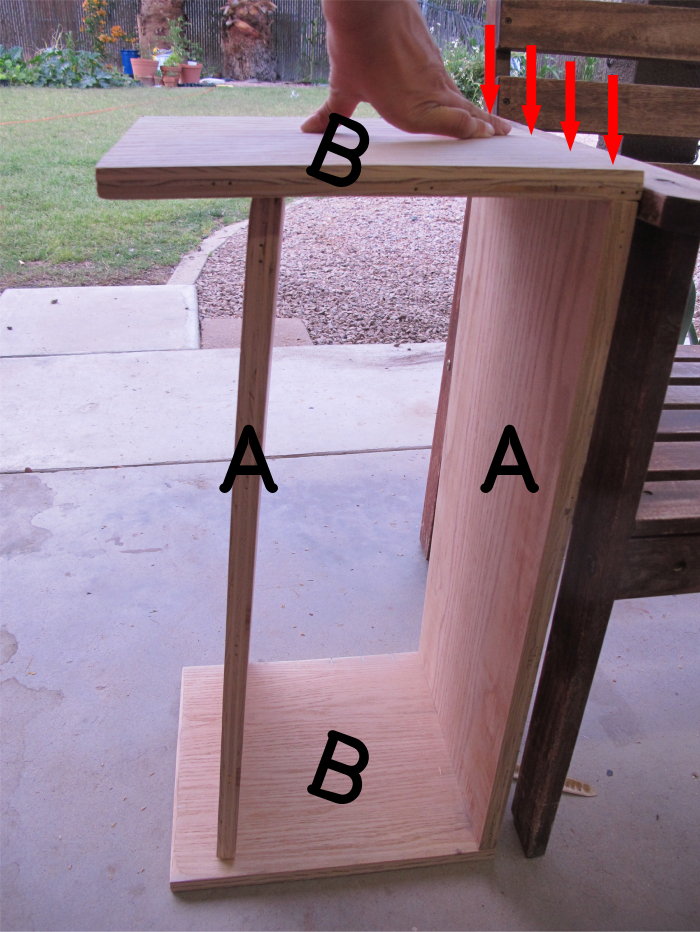
2. Assemble the first pieces
It can be a little tricky to nail the first pieces. I first assembled the stool and nailed the top piece (see picture). I used 8 nails. Turn it upside down and nail the 2nd base the same way. Now you have the base and the seat nailed. Time to nail the center piece (A). Be sure it’s in the middle, straight and at right angle everywhere. Then nail it to the base and the seat. I also nailed the two A pieces together.
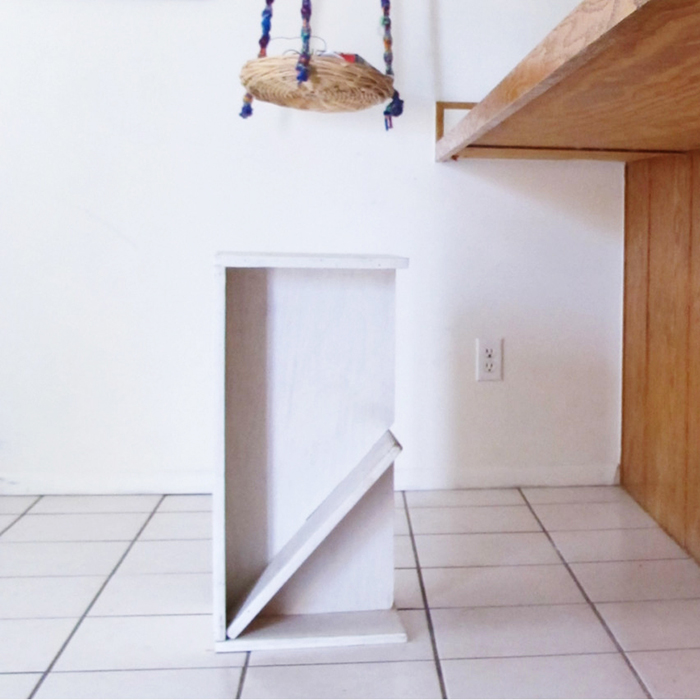
At this point you already have a pretty cool low table, step stool or kid’s bench.
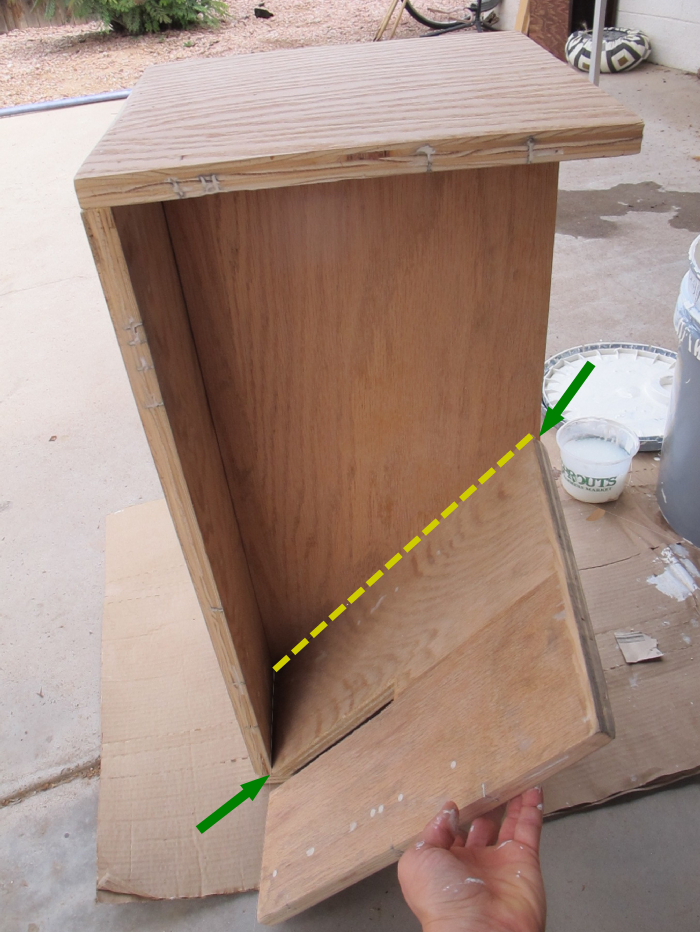
Now the piece C is left to add. It’ll be the foot rest.
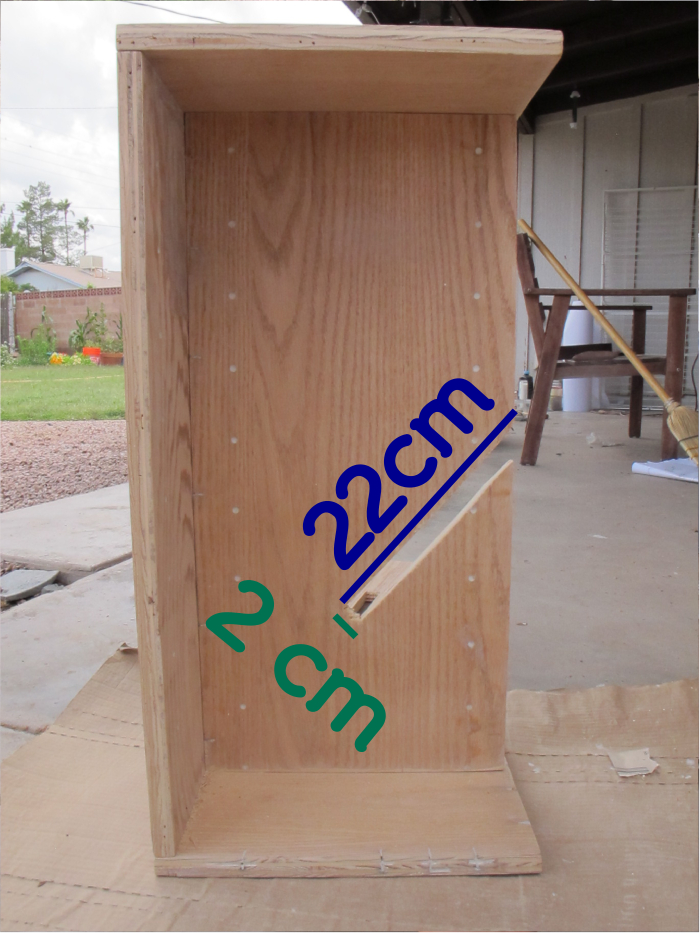
3. You will have to cut a center slit in piece C and the center piece A. The width of the slit should be a little thicker than the thickness of the wood you chose (in my case, 2cm). The length of each slit should be 22 cm.

The angle of the slit in piece A should be drawn first by positioning piece C as in picture.
4. Place the foot rest into the slit.

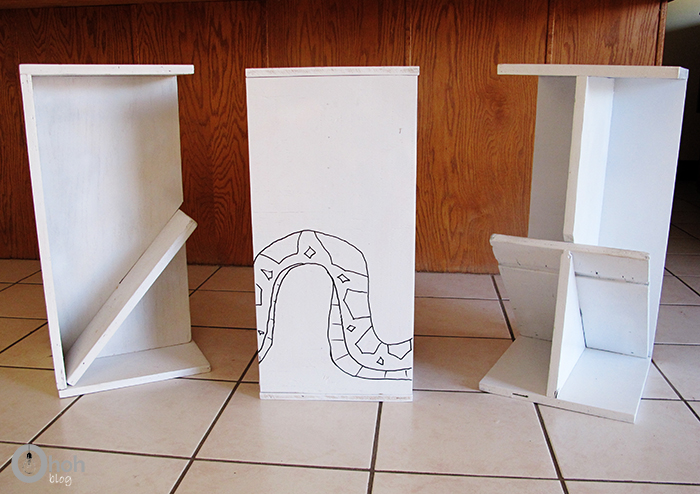
and tadaaaaaa! You only need to paint it (or leave it natural if you used nice wood). You could also paint the pieces before assembling them.

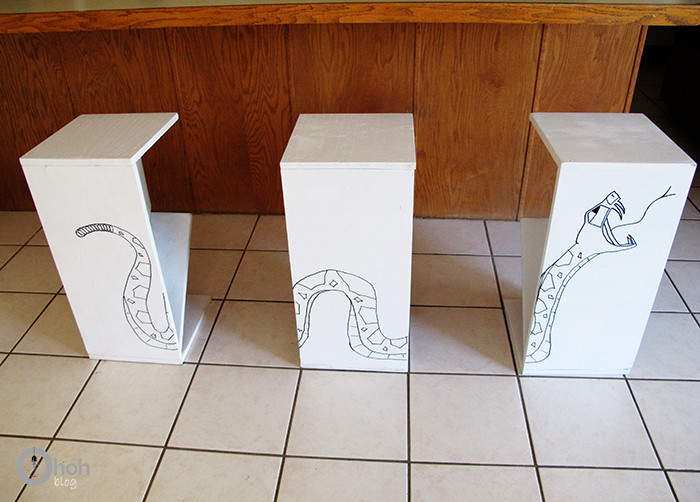
UPDATE: You can make a nice drawing or painting on the back of the stool to personalize it!


Elise
Friday 13th of November 2015
Trop bien Auré :)Je suis fan des shoes aussi !