Are you looking to bring a little bit of the outdoors into your home? Look no further than creating your own DIY dried flowers decor!
In this step-by-step guide, you will learn how to design and assemble a stunning wall decoration using toilet paper rolls.
From selecting the right flowers to adding the finishing touches, this article will walk you through the process of creating a personalized piece of decor for your space.
Get ready to unleash your creativity and add a touch of elegance to your home with this fun and rewarding project.
Create a DIY Flower Wall
Now, let’s dive into the exciting process of creating a DIY flower wall. This larger-scale project will allow you to showcase your creativity and add a stunning focal point to any room in your home.
By following these steps, you can design a beautiful and personalized flower wall that will leave a lasting impression on all who see it.
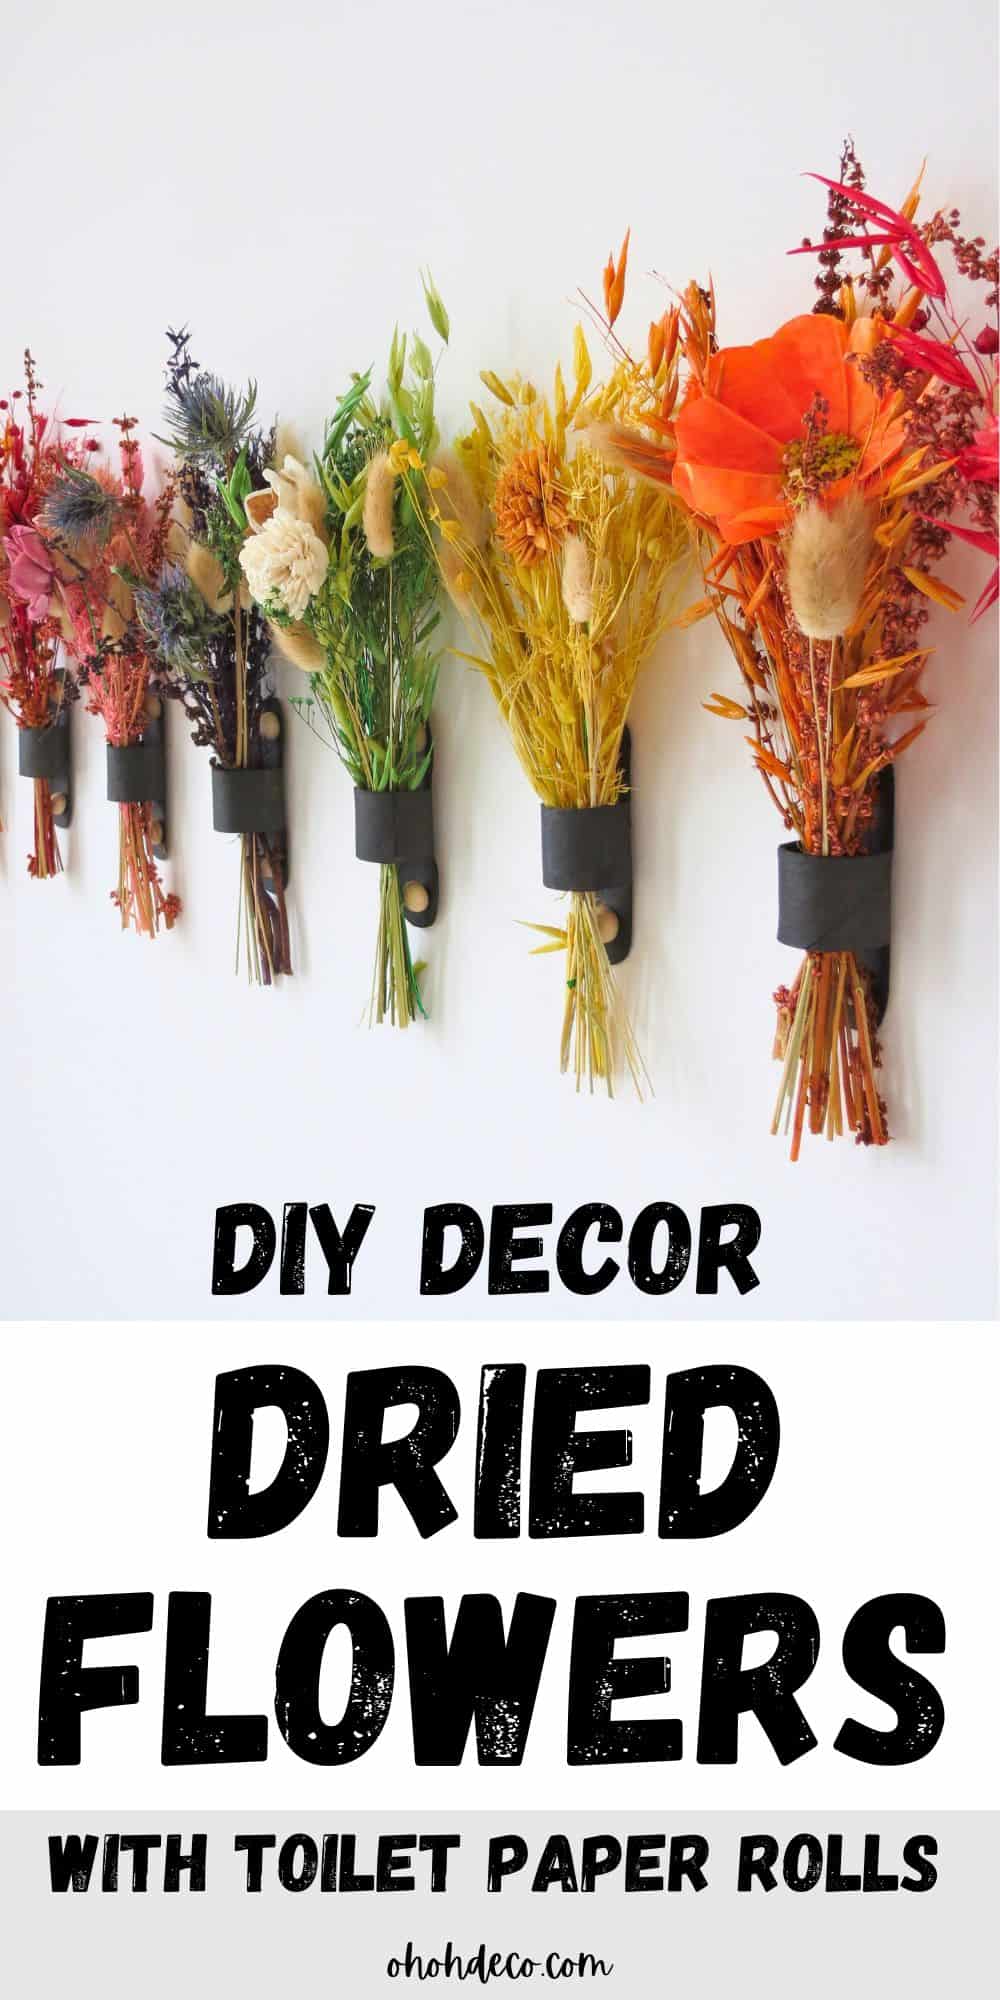
DIY Dried Flowers Decor
Get ready to start this toilet paper roll crafts, and create a pretty wall decor on a dime.
Supplies you will need to make your dried flowers decor:
- Toilet paper rolls
- Paint
- Thumb tacks
- Half wooden beads
- Dried flowers
- Glue (or this)
- Pencil
- Ruler
- Scissors
To make the dried flower bouquet support, take a cardboard roll and cut it to open it.
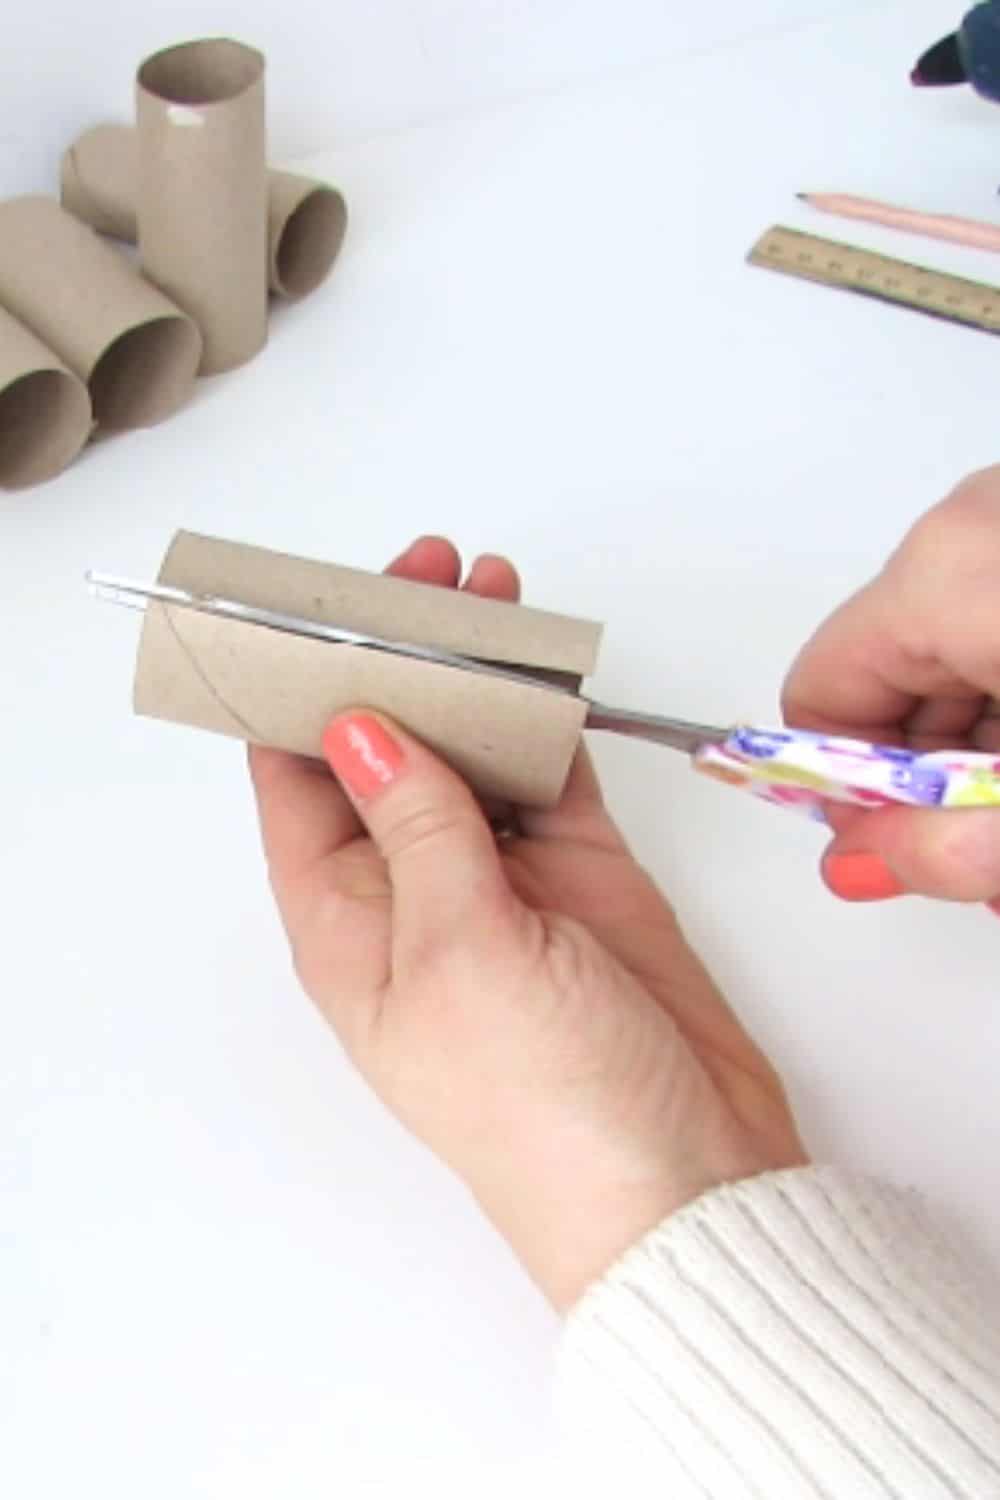
With a pencil draw a cross on the inside of the roll.
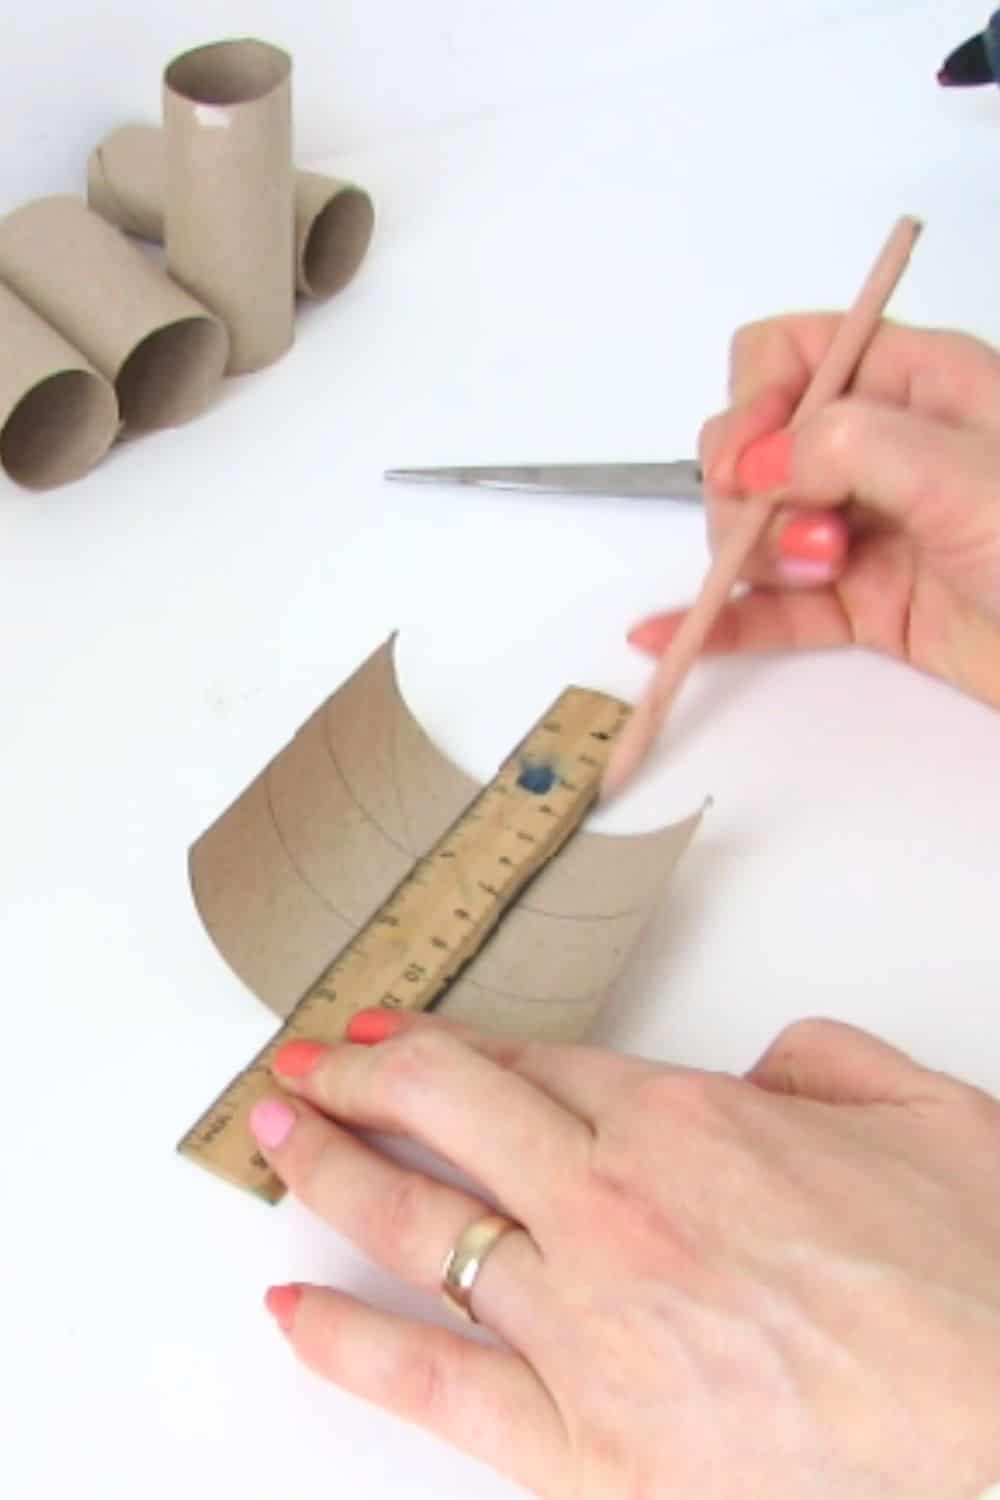
Cut the cross shape and rounded the two short ends.
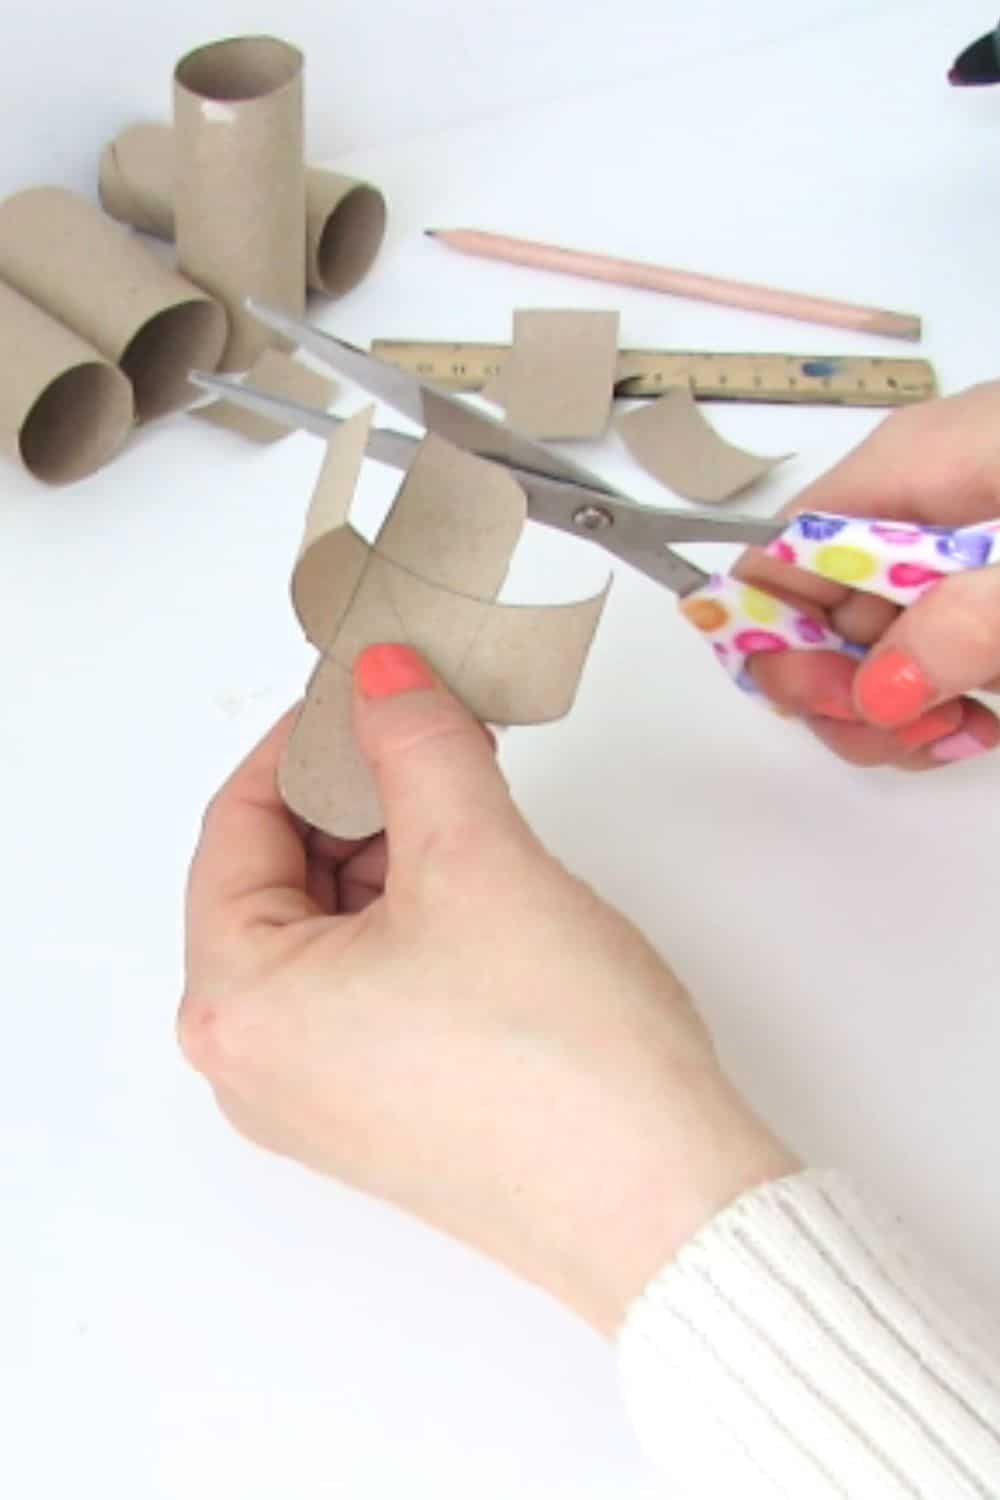
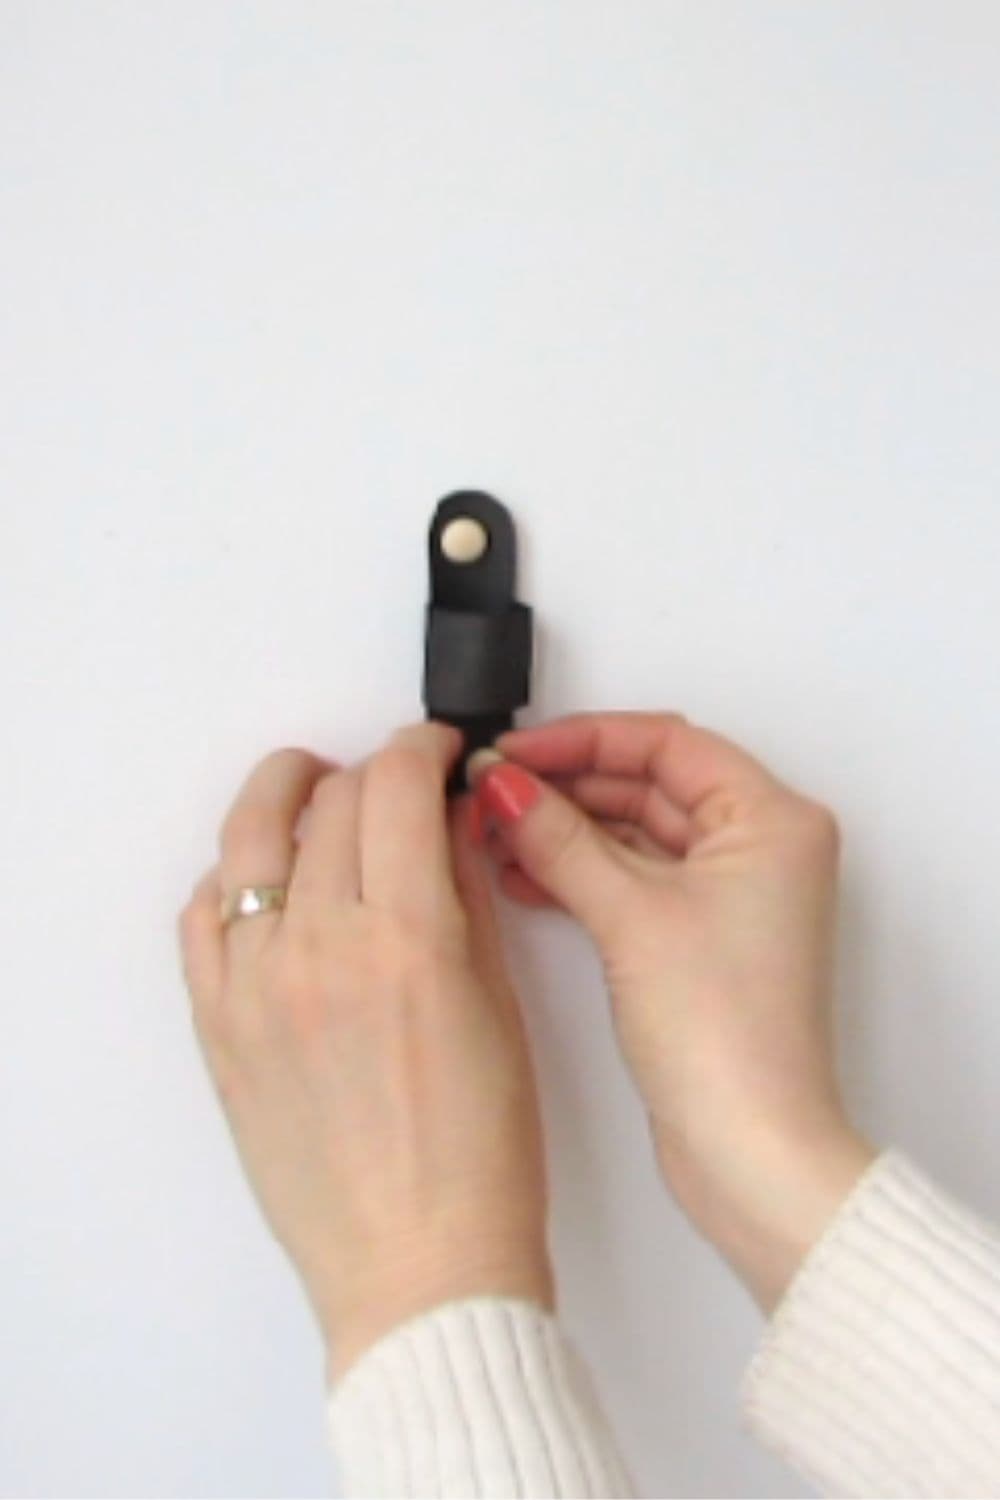
Roll the cardboard piece and glue both ends together to create a ring.
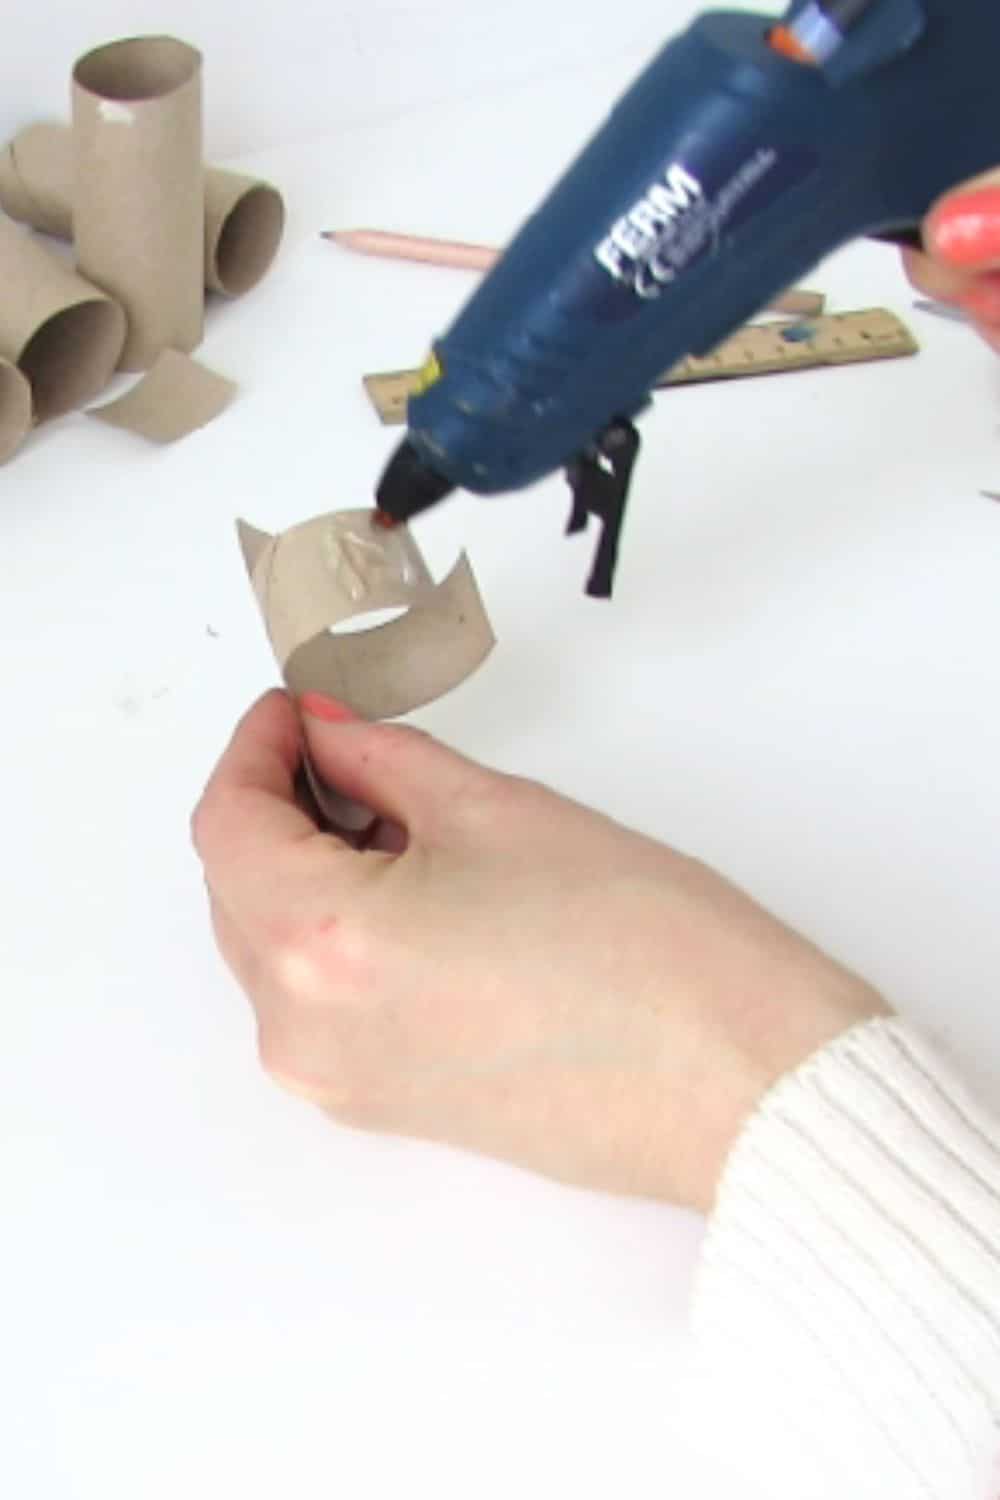
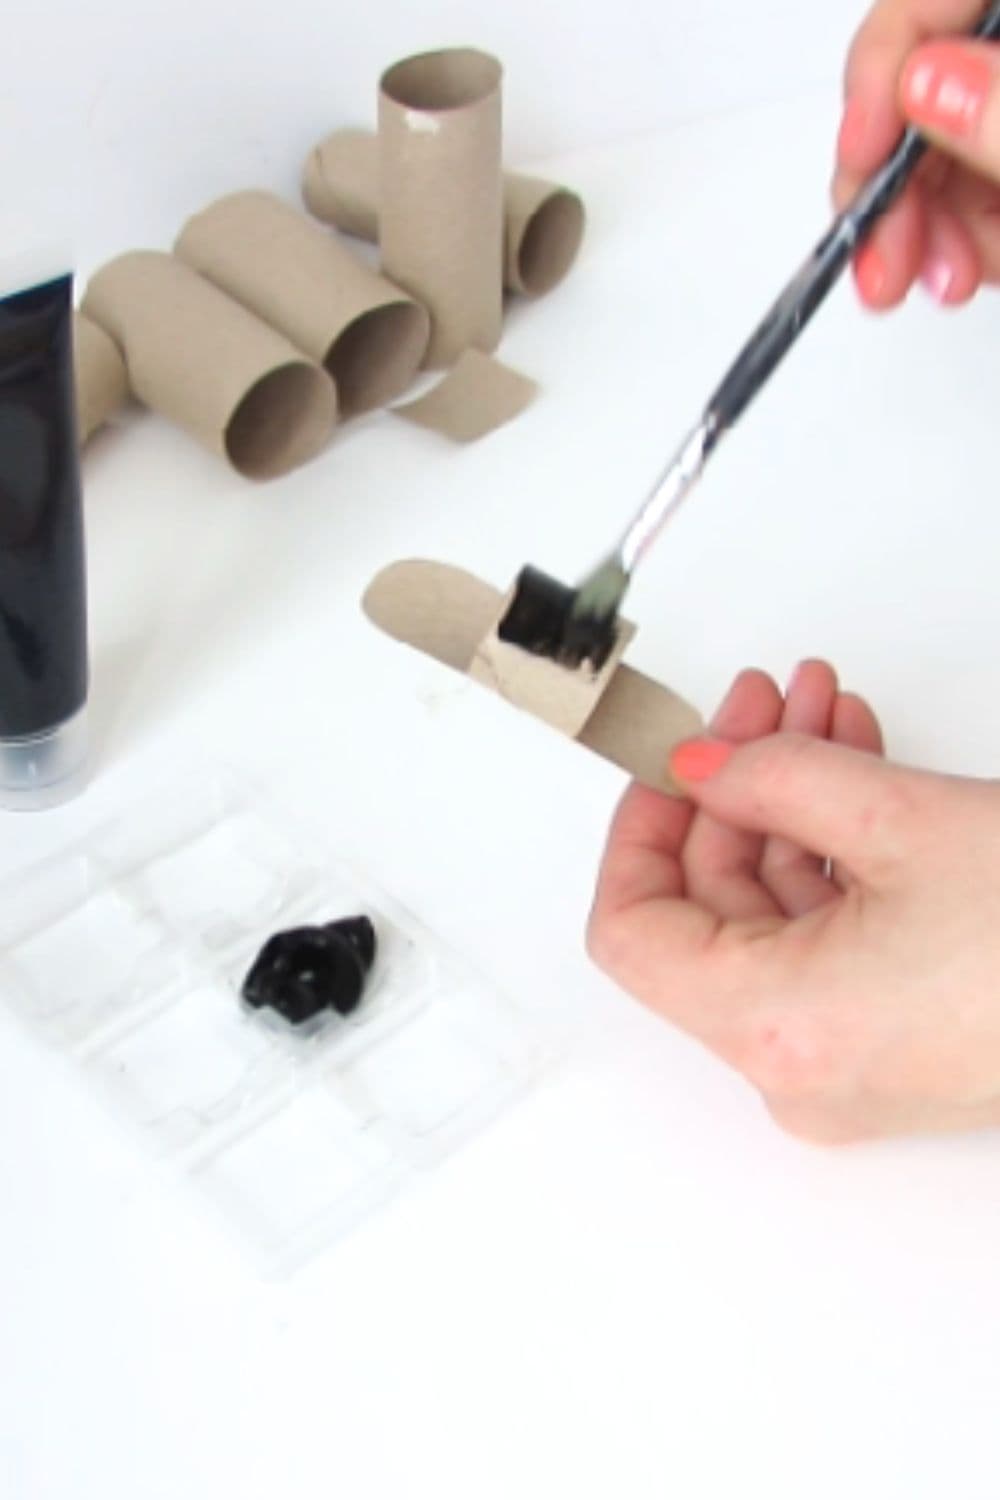
Now that the support for the dried flowers is made you can customise it. I choose to paint it black. You can use any acyclic color you like or have.
Make as many flower support as you like, or need to create your dried flower wall decor.
I couldn’t find any thumb tacks that I like so I customized the one I had by gluing a half wooden bead on top of each push pin.
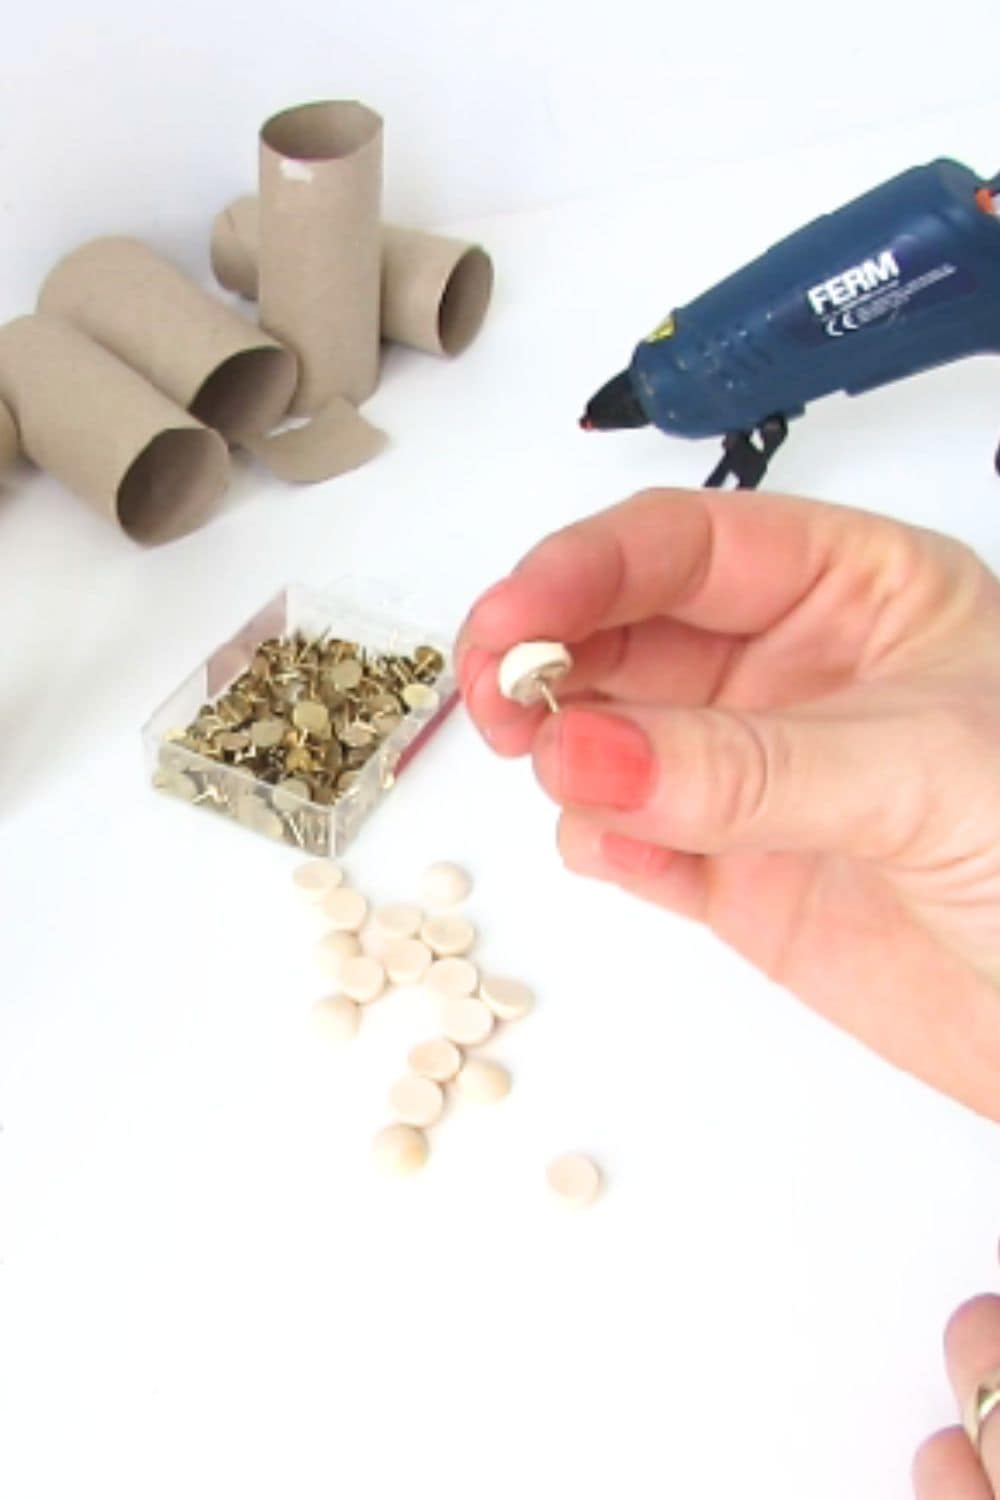
I found several cute options online, like these wooden ones, or these other cut ones. So you can skip this step if you already have nice thumb tacks on hand.
Assembling Your Dried Flower Wall Decor
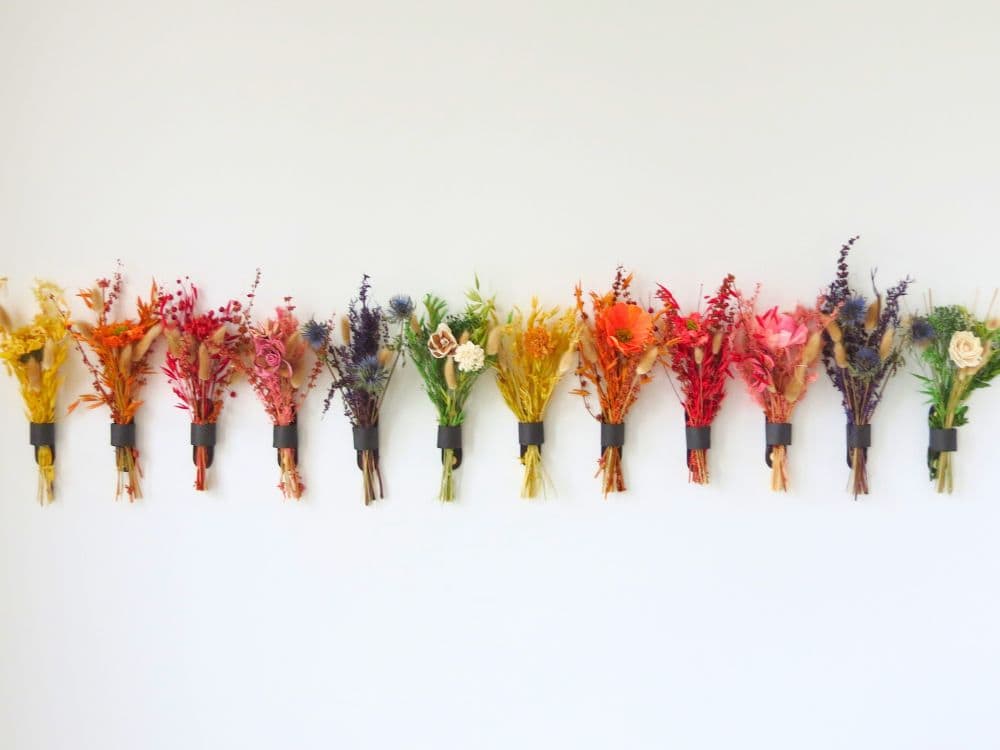
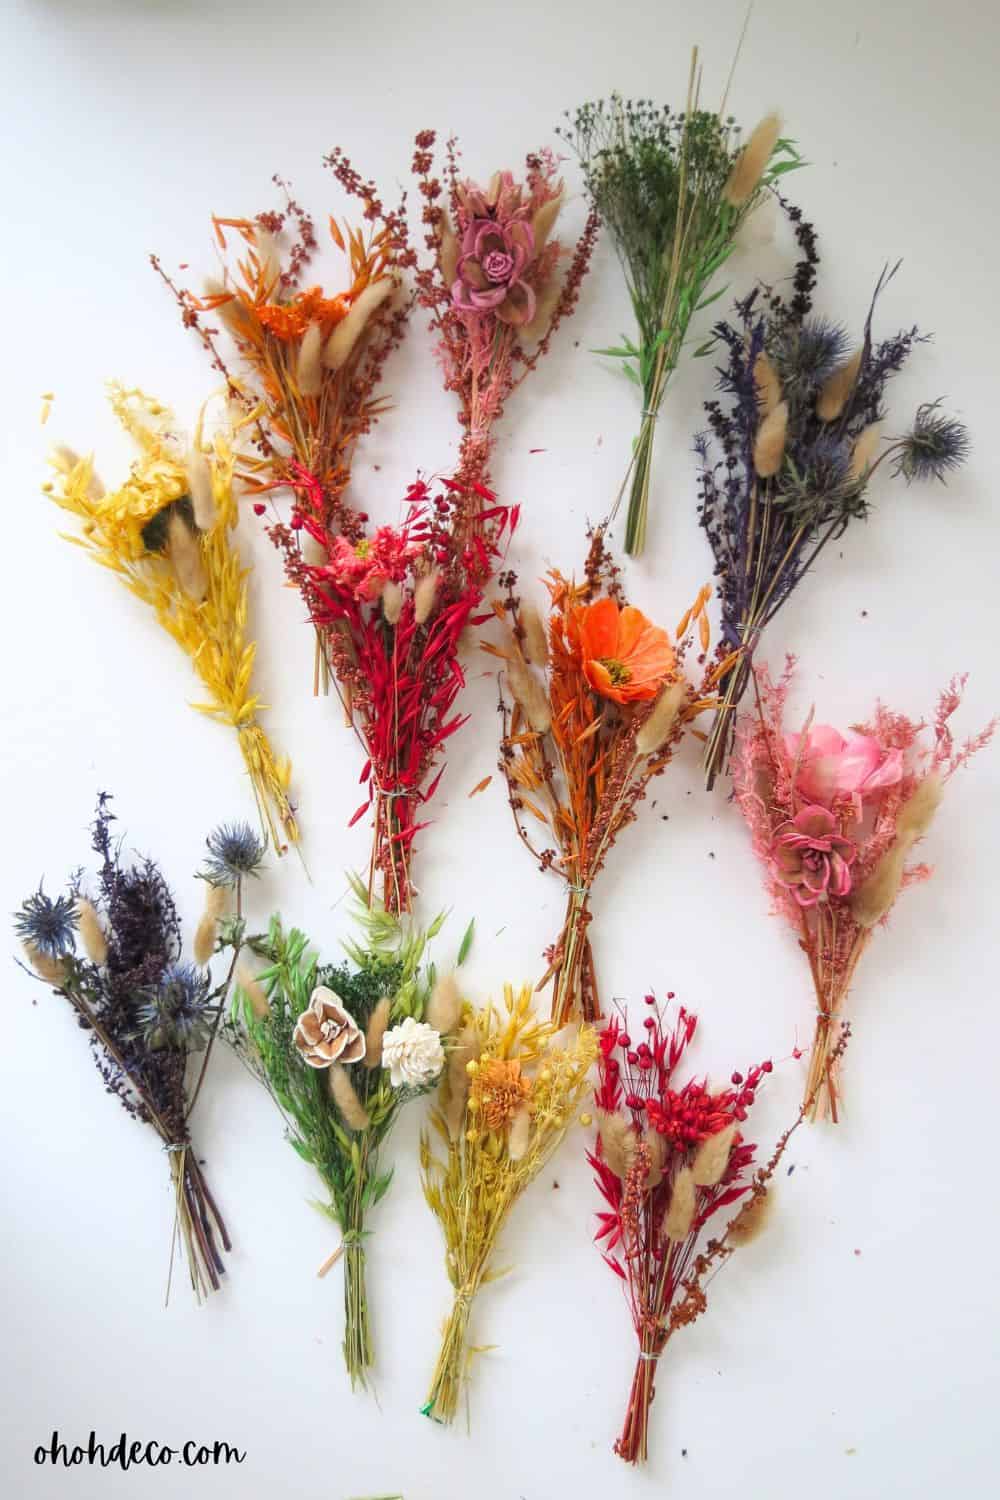
To assemble your dried flower wall decor, start by arranging your dried flowers in a pattern or design that you find visually appealing.
Experiment with different placements and combinations until you achieve a look that you love. Consider mixing different flower shapes, sizes, and textures to add depth and interest to your arrangement.
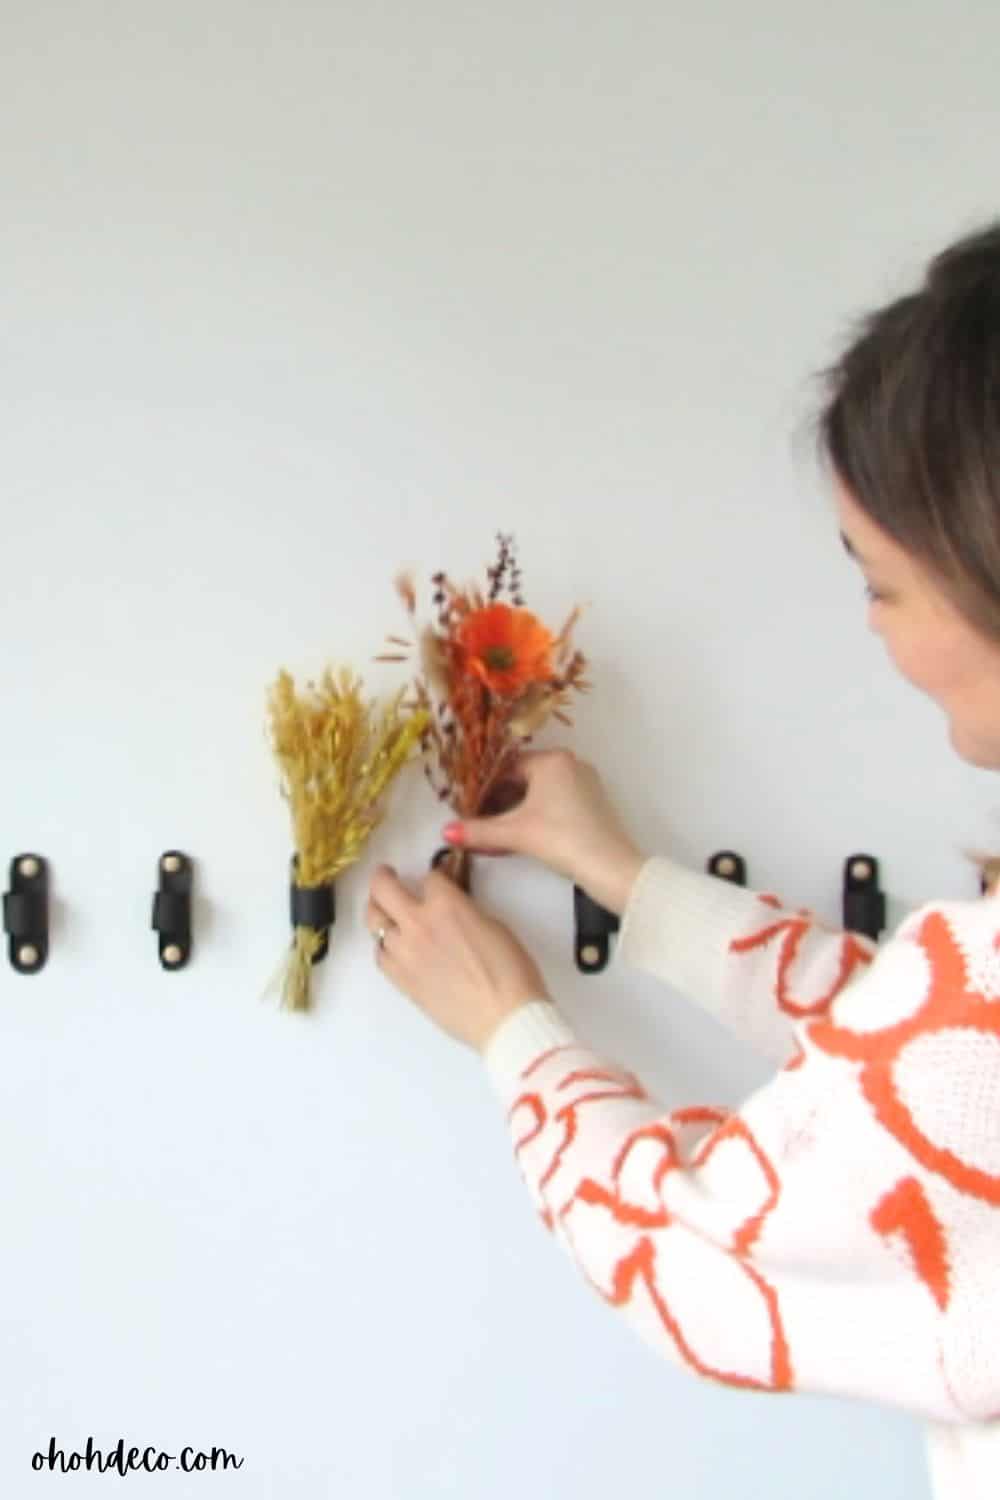
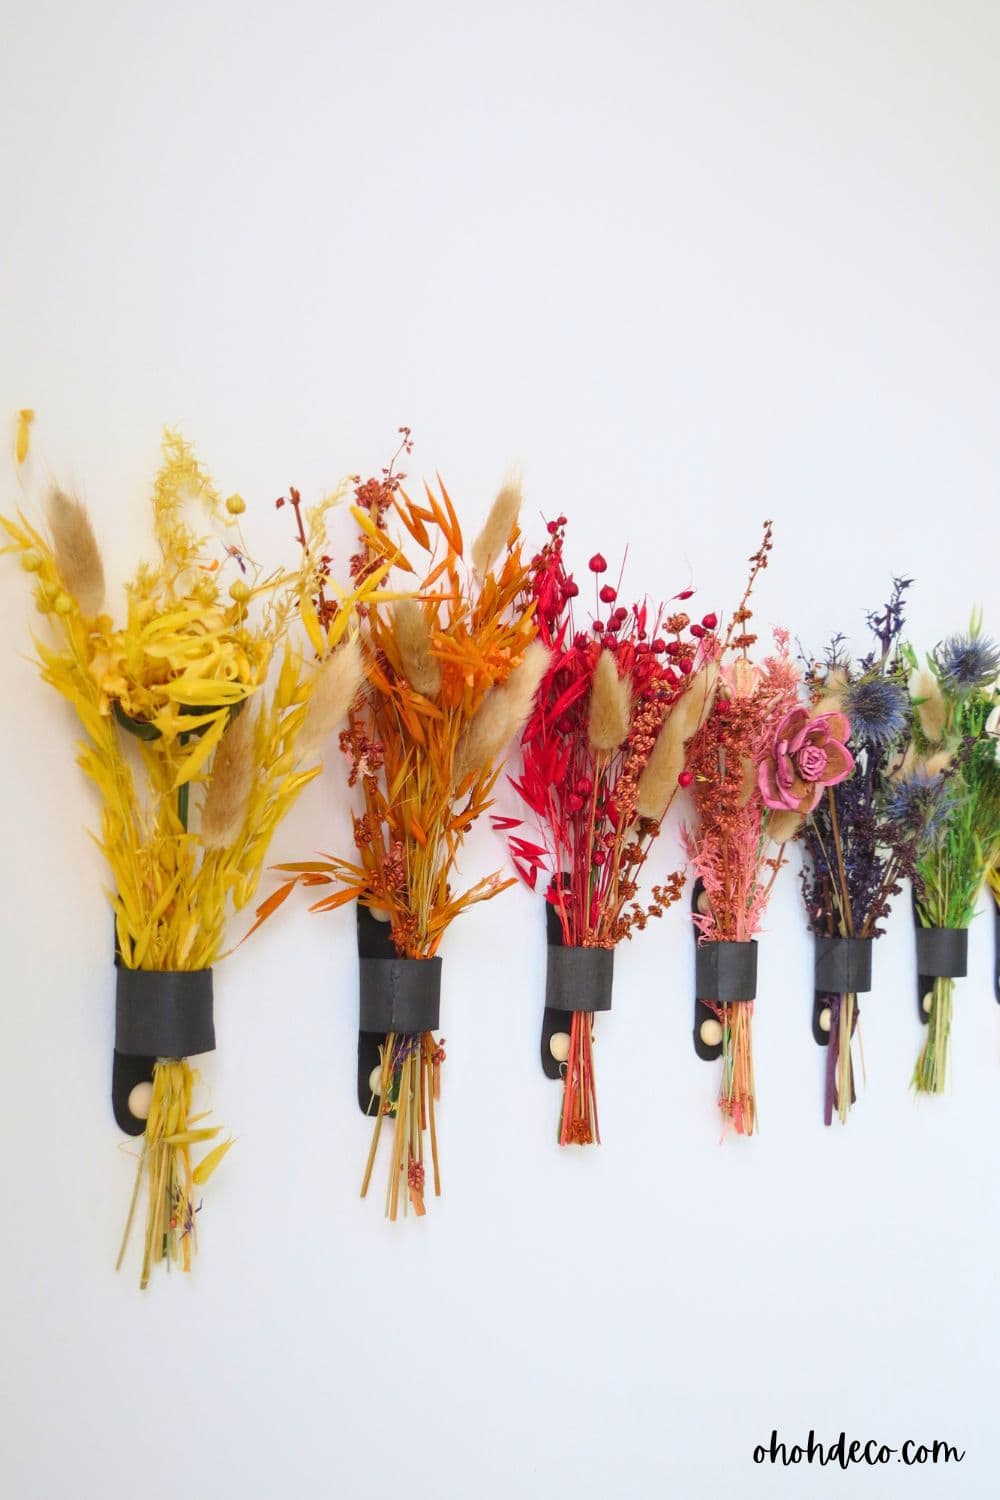
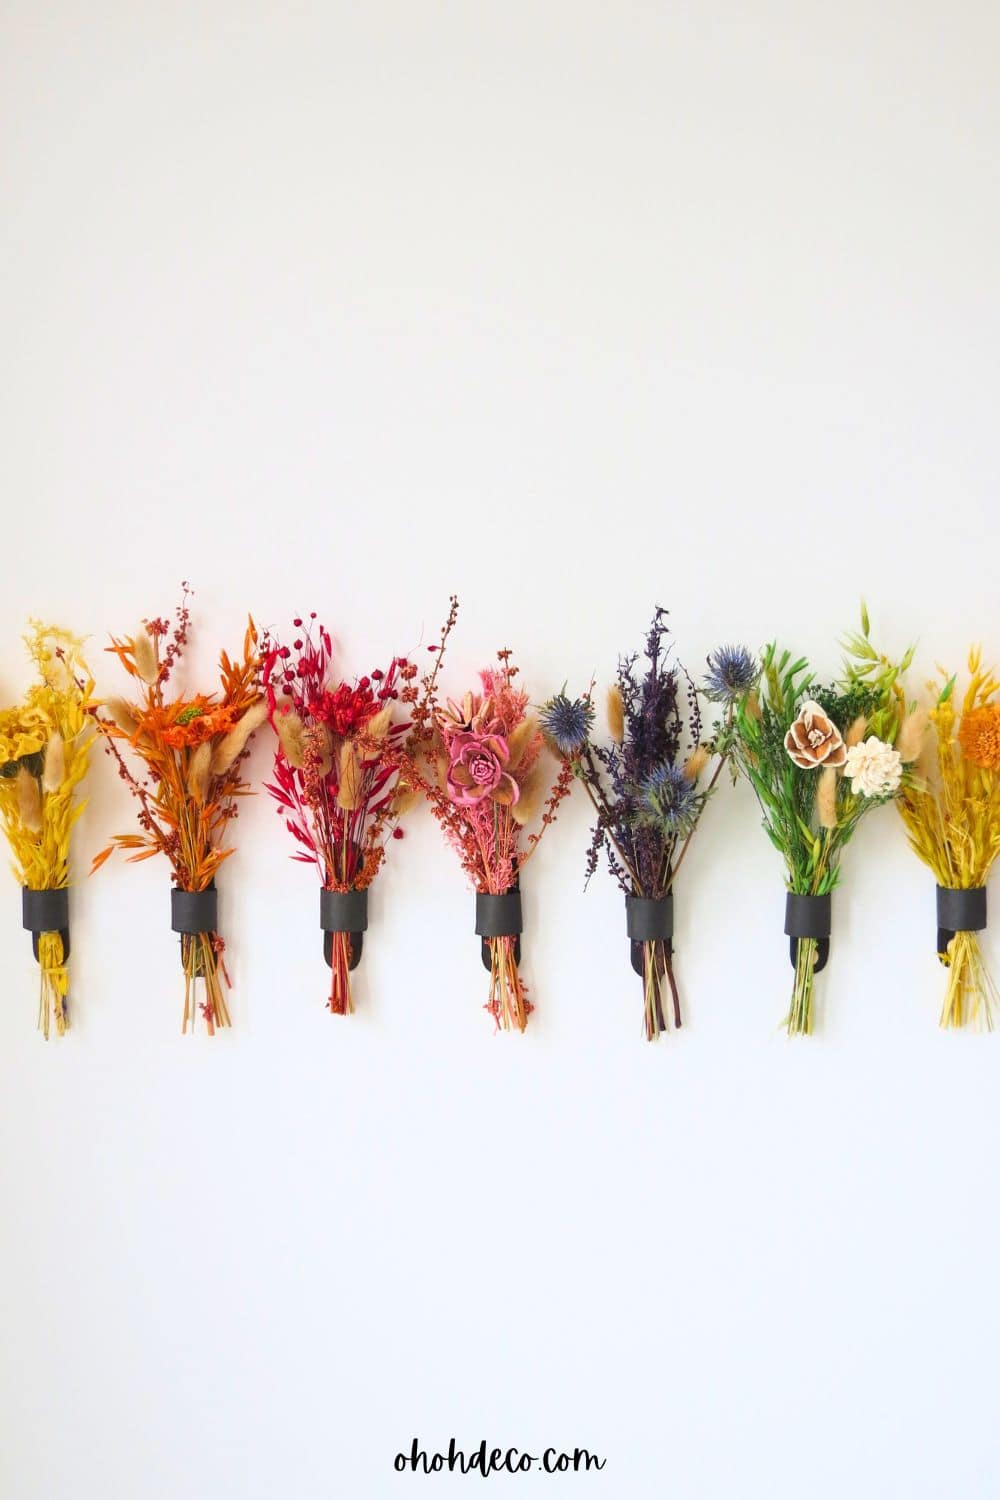
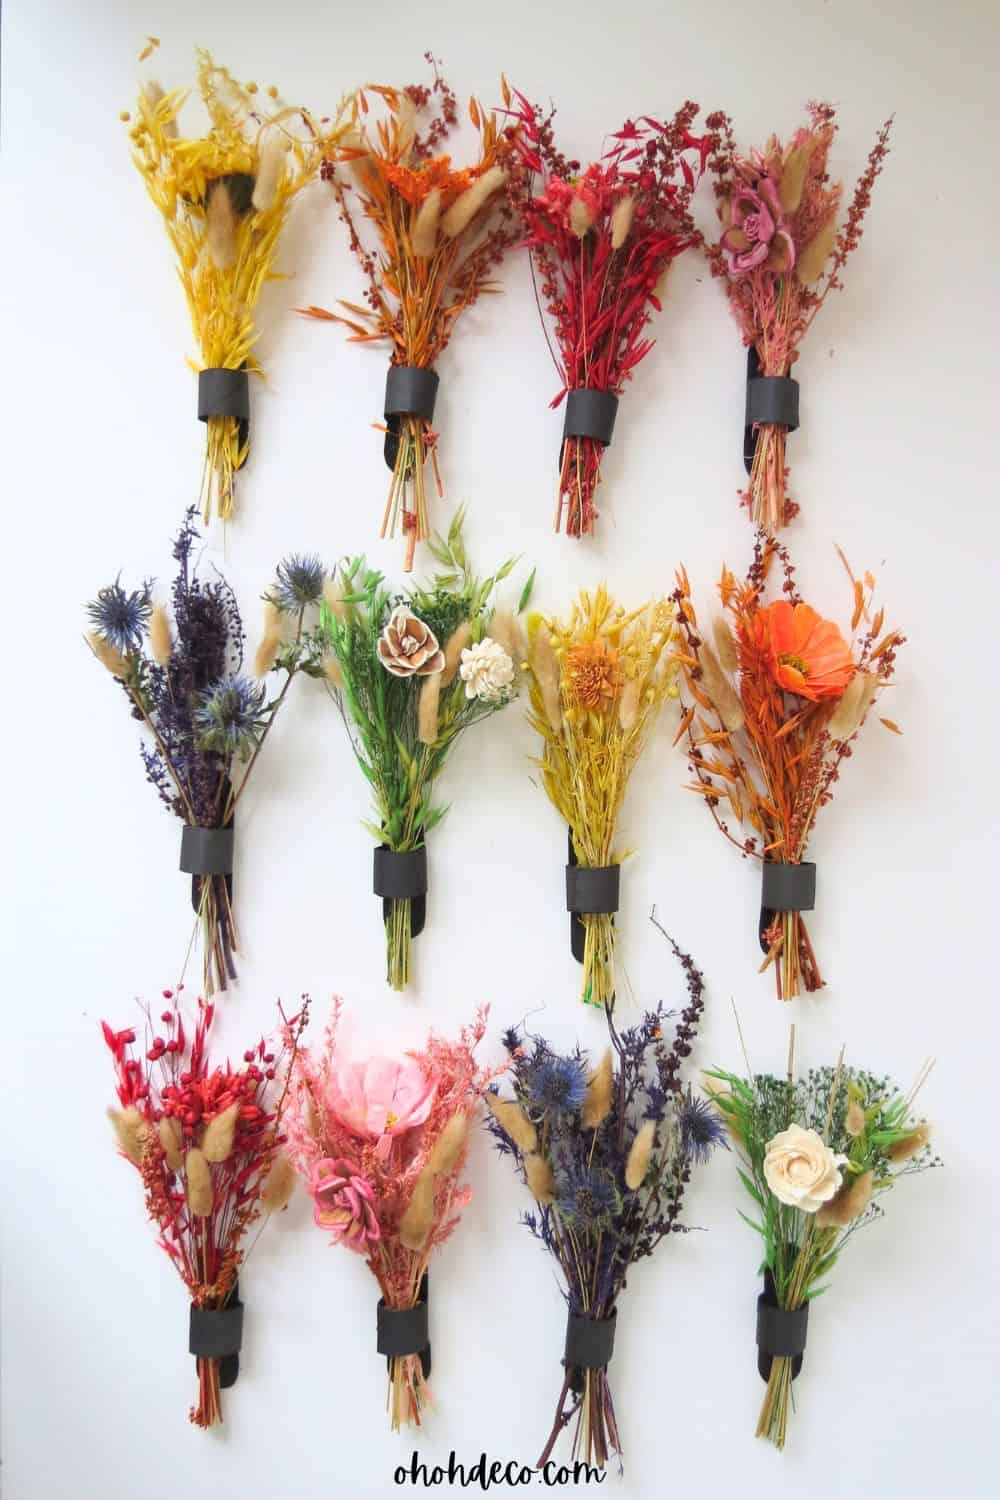
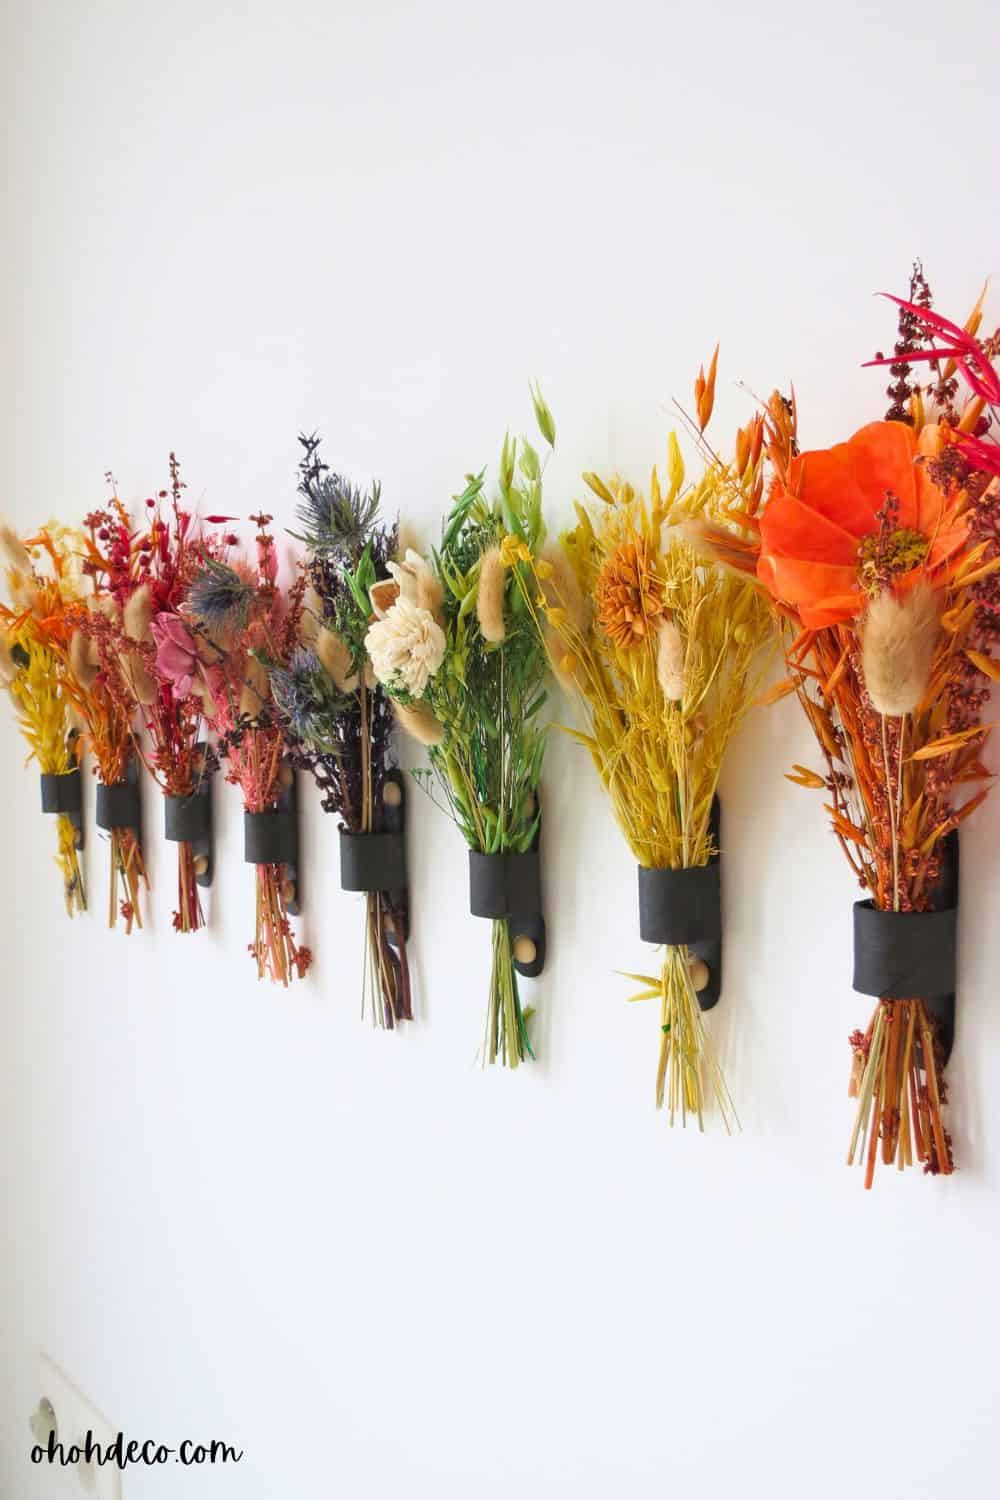
Time to place the flower holders on the wall. Take a minute to think how you like to display the dried flowers. You can align them, create a grid, mixing the color of prefer an ombre effect.
Measure and mark on the wall the placement of each flower support. Then just fix the support with two push pins, one above and one below.
TIP: If you don’t want or can’t make holes on the wall you can use double sided tape or this removable adhesive instead.
Once all the flower supports are in place you just have to slide the bouquets in to display the flowers the way you like.
To give you an idea, the bouquets I made are on average 10 inches (25 cm) high and I leave a space of 4 inches (10 cm) between each support.
You can also watch the video tutorial of the Dried Flower Wall Decor
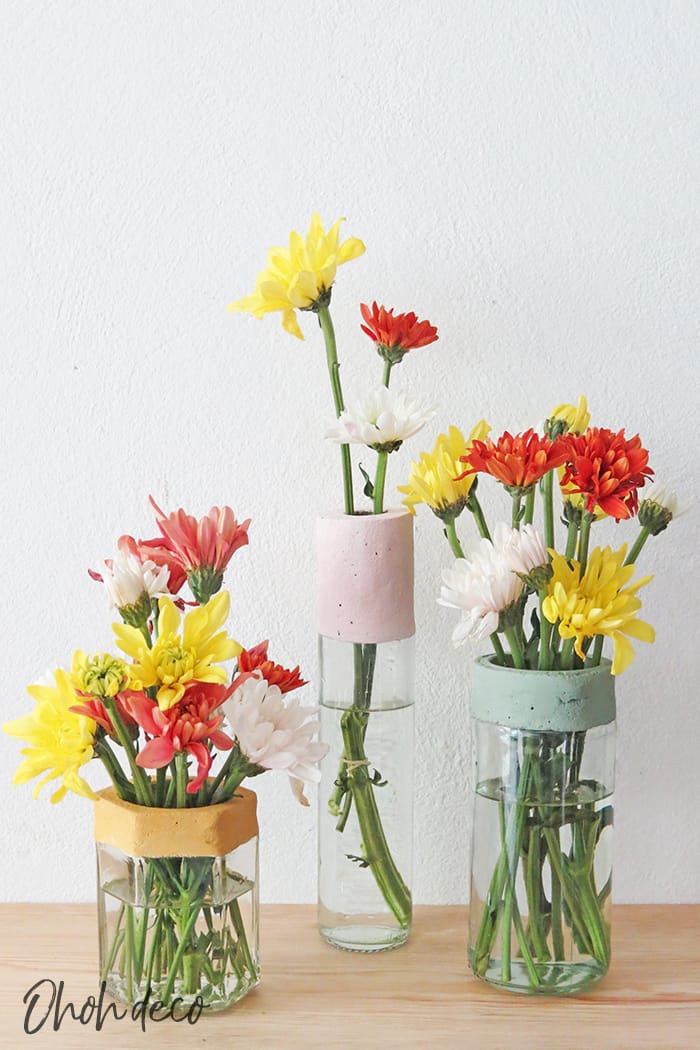
Selecting the Right Flowers
When selecting flowers for your DIY dried flower decor, it’s important to consider not only the colors and textures you desire. Popular choices include roses, lavender, baby’s breath, and eucalyptus. Before starting your project, take some time to research different types of flowers to ensure they will suit your design and last for as long as you want them to.
To create a cohesive and visually appealing arrangement, choose a color palette that complement the space where your dried flower decor will be displayed. Whether you prefer soft pastels, vibrant hues, or earthy tones, selecting flowers in a specific color scheme will help tie the design together and create a harmonious look. Be sure to consider the overall aesthetic of the room and any existing decor elements that you want to highlight or match.
By thoughtfully selecting the right flowers for your DIY dried flower decor, you can set the foundation for a stunning and personalized creation that will bring beauty and charm to your home.
Adding the Finishing Touches
Once your dried flowers are on the wall, it’s time to add the finishing touches that will truly elevate your decor.
Consider incorporating small details like ribbons, bows, twine, or even metallic accents for a touch of glamour. These additional elements can help tie your arrangement together and make it look polished and complete.
Don’t be afraid to get creative and experiment with different embellishments until you find the perfect combination that suits your style and the overall aesthetic of the room.
By adding these final touches, you’ll ensure that your DIY dried flower wall decor truly shines and becomes a beautiful focal point in your space.
In conclusion, transforming dried flowers into a stunning wall decoration is a creative and rewarding DIY project. By carefully selecting the right flowers, and creating a beautiful design you can personalize your space with elegance and nature.
Embrace the process, have fun, and let your creativity shine through as you craft a unique decor piece that will enhance your home. Remember, a touch of nature can truly breathe life into any space. So, why not give it a try and bring a piece of the outdoors inside? Your beautifully decorated walls will thank you for it.
RELATED: 40 Creative Ideas to Use Dried Flowers in Your Home Decor
RELATED: Toilet paper roll flowers
Want to remember it? Save this DIY Dried Flower Decor on your favorite Pinterest Board.