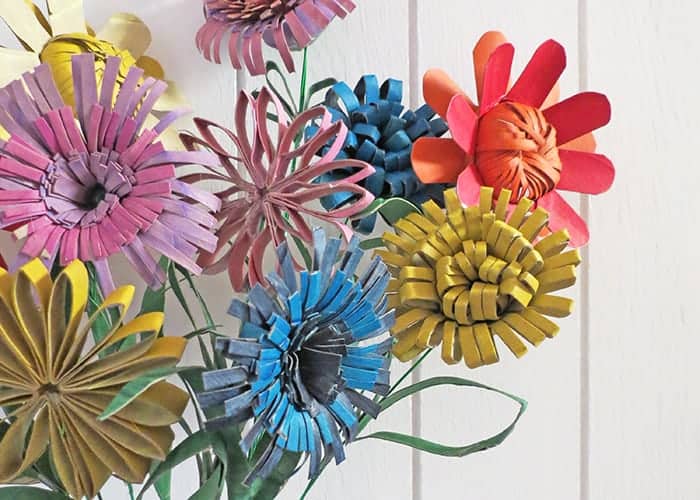
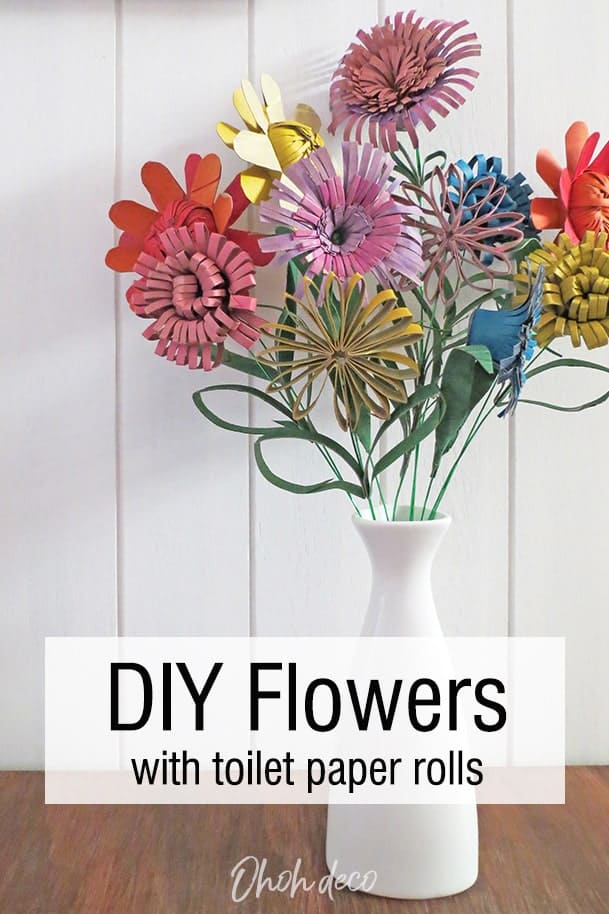
Creating flowers from toilet paper rolls is a simple yet beautiful craft idea that can add a touch of creativity to your home decor.
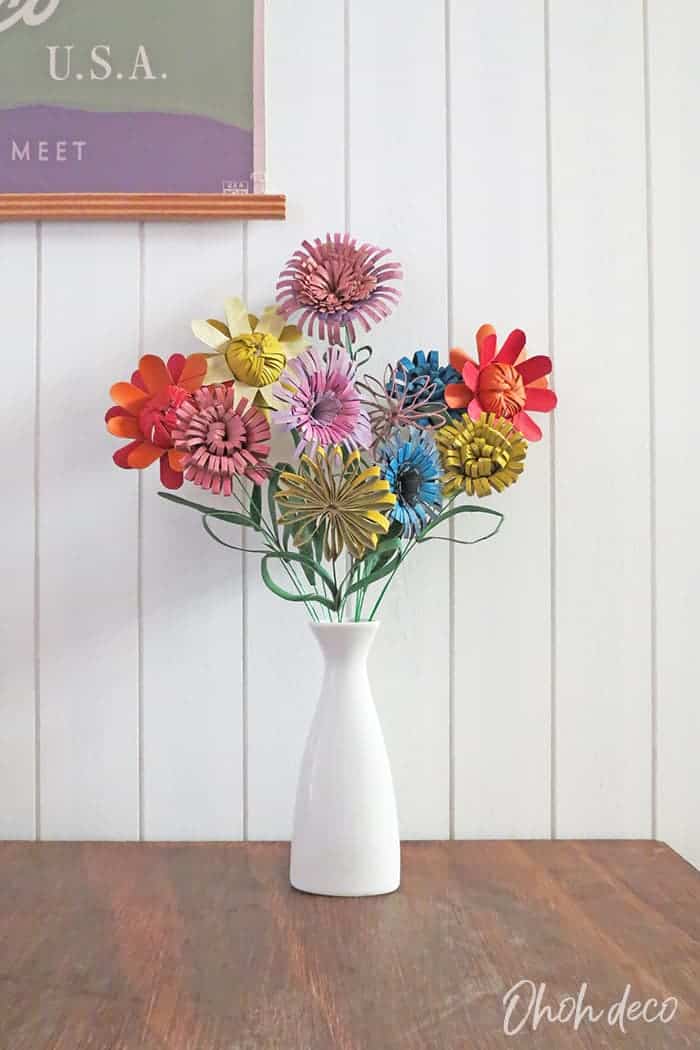
With only a few supplies, you can craft an enchanting bouquet of colorful blooms that will brighten up any room.
Once you learn the basics of the technique, you can use toilet paper rolls to make all kinds of decorative flowers, from dainty daisies to bougainvilleas. Let’s get started!
[ This post probably contains affiliate links, our full disclosure policy is boring, but you can read it HERE ]
How do you make a flower out of toilet paper rolls?
Making something beautiful with something as mundane as a toilet paper roll can be surprisingly easy!
Follow the tutorial to create gorgeous flowers that are perfect for decorations, gifts, or even home decor.
In this guide, you will learn how to turn a simple toilet paper roll into 4 different stunning flowers that are sure to bring a smile to anyone that sees it.
Supplies to make DIY cardboard rolls flowers:
- Toilet paper rolls (I can’t believe it’s possible to buy some)
- Acrylic paint
- Brush
- Scissors
- Floral wire
- Glue gun
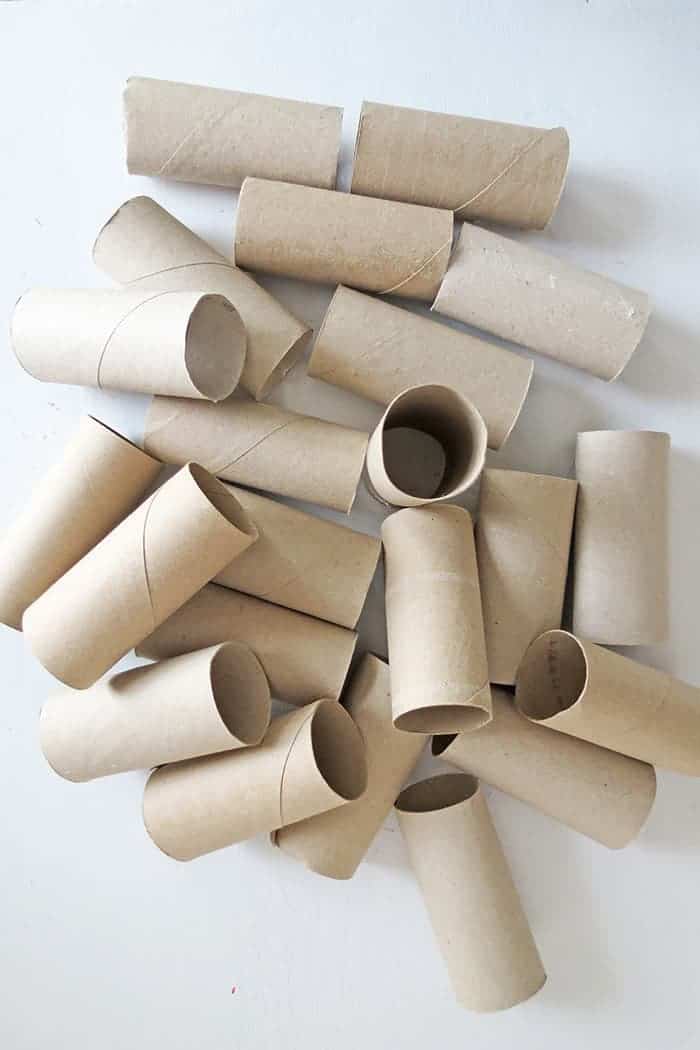
Grab as many toilet rolls as flowers you want to make.
Paint the rolls with acrylic paint. Apply the paint in and out of each roll.
The little trick that will make your flowers awesome is to use two different tones for each roll, and combine matching colors like pink and purple, red and orange, dark and light blue…apply one color inside and use the other to paint the outside of the roll.
This paint set is perfect for the DIY.
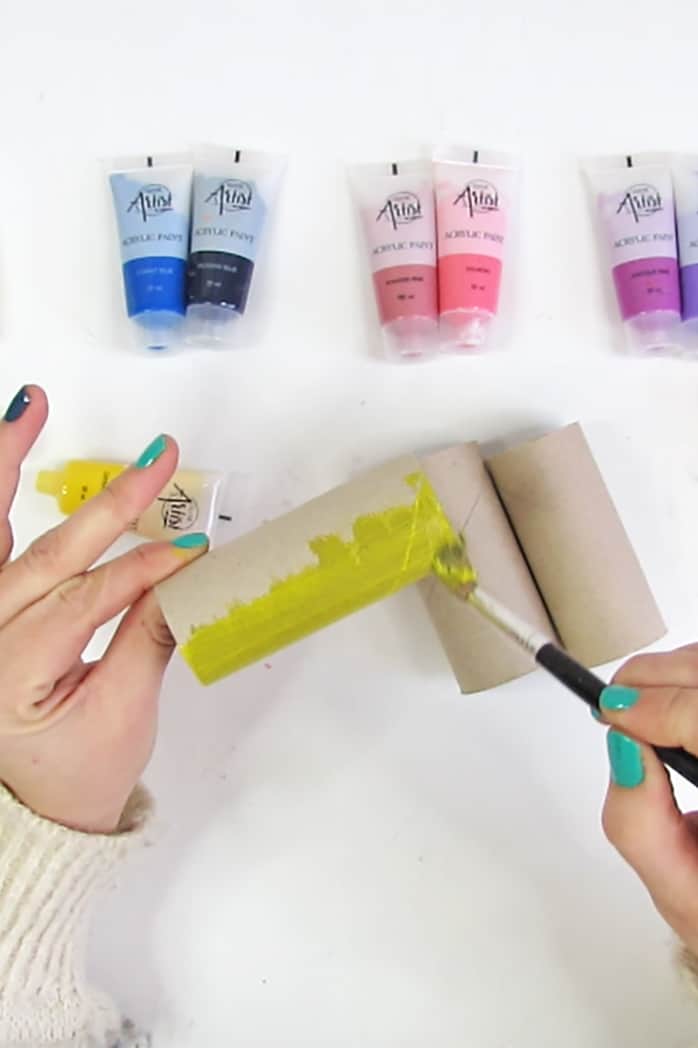
Paint all the rolls and let them dry.
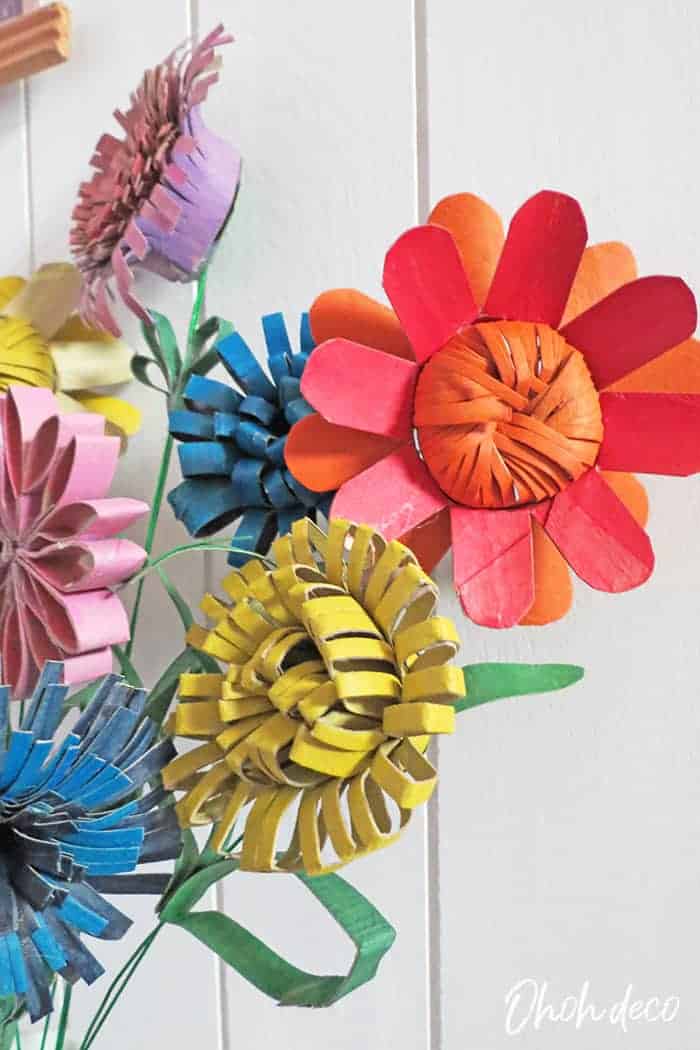
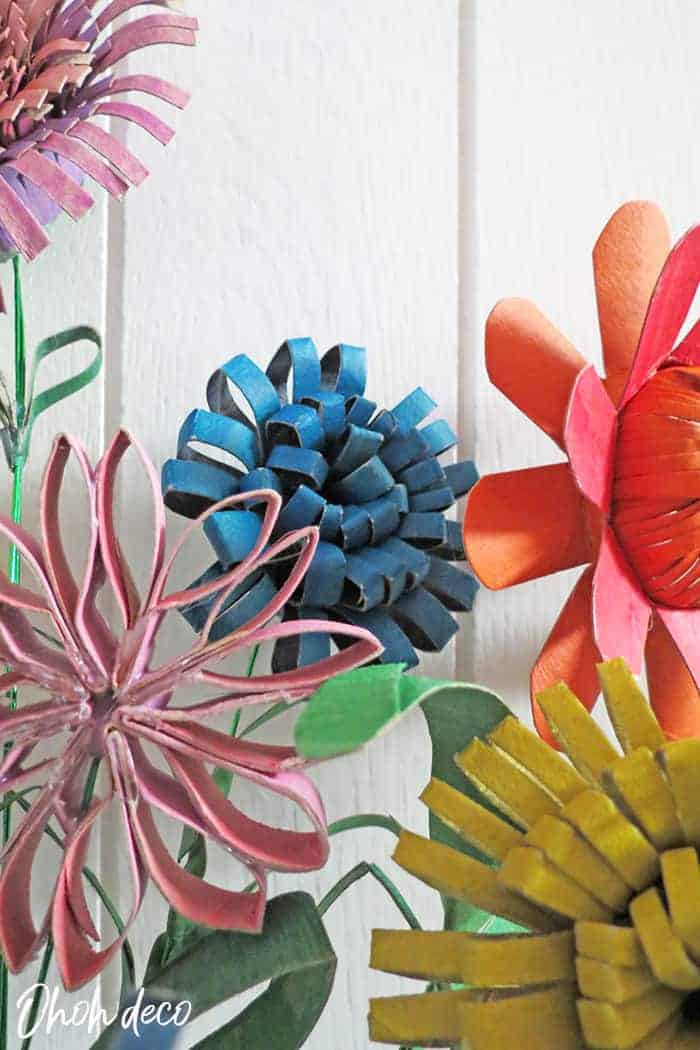
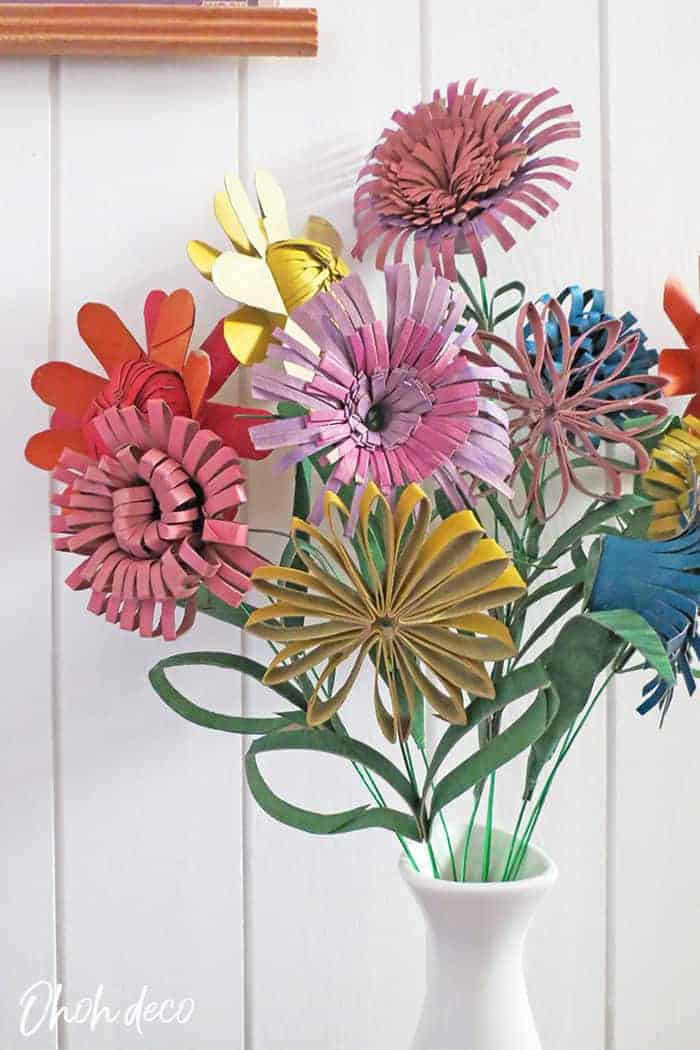
You will learn four creative ways to make flowers with cardboard rolls! Don´t hesitate to mix shapes and colors to create a beautiful DIY flower bouquet.
You can also watch the video tutorial to make the toilet paper roll flowers.
RELATED: Heart Garland DIY
RELATED: Paper Christmas Ornaments, 12 easy DIY ideas
Flower 1
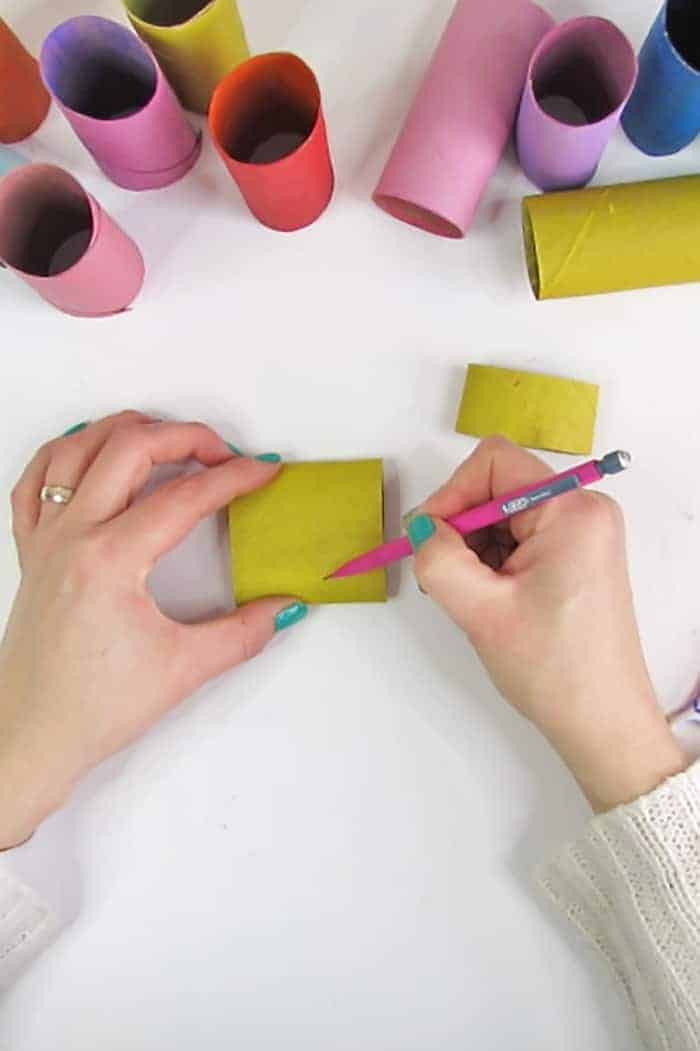
Take a toilet paper roll, and press it flat. Cut it in half with a proportion of 1/3 – 2/3.
Take the larger piece and draw two parallel lines close to the center, leave a space of 1/4 in, (5 mm) between each line. Both lines go around the roll.
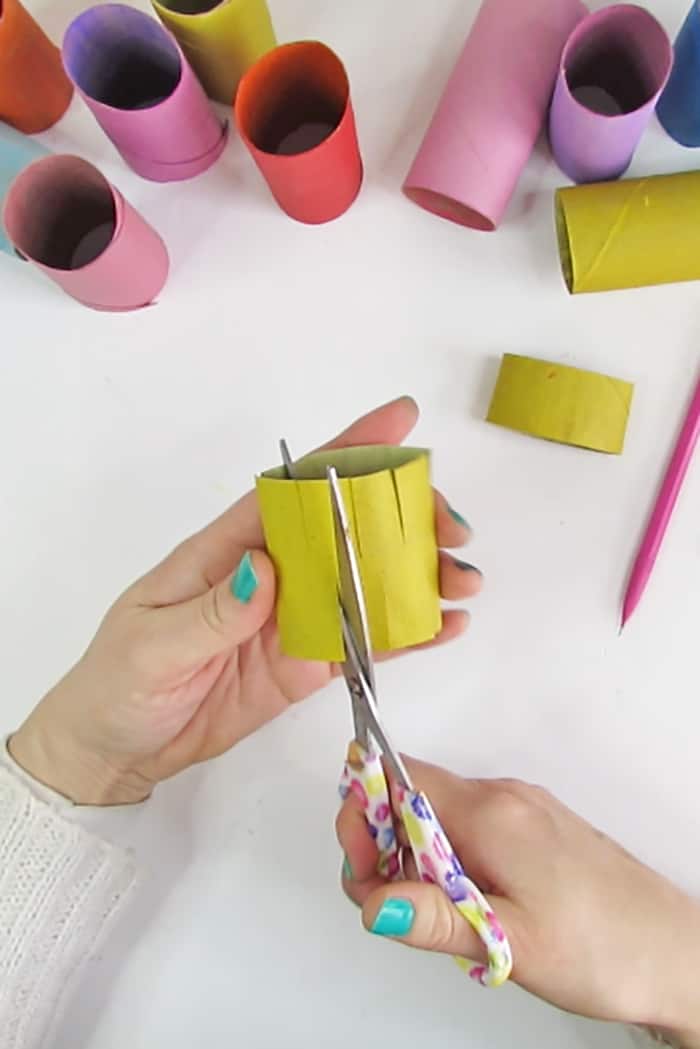
Make 8 noches on each side of the roll to create petals. Try to cut the notches at the same distance of each other and stop cutting at the lines.
Start cutting the notches on one side. When finished make the other side, do not align the notches.
Unrelated: I like pretty scissors like these 😉
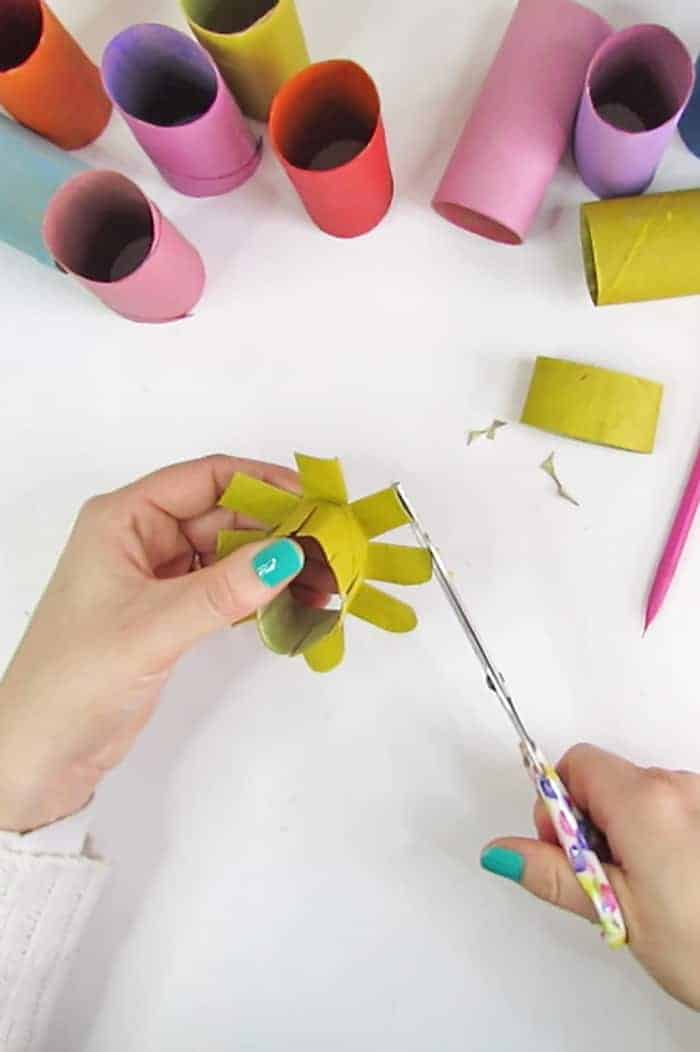
Open the petals on one side and rounded the corners. Repeat for the petals on the other side.

The first part of the flower is made and you can see how nice it looks using who shades of yellow.
Take the smaller part of the roll and cut it to open it flat.
Make small cuts all along the edge, use a pencil to bend the cardboard fringes.
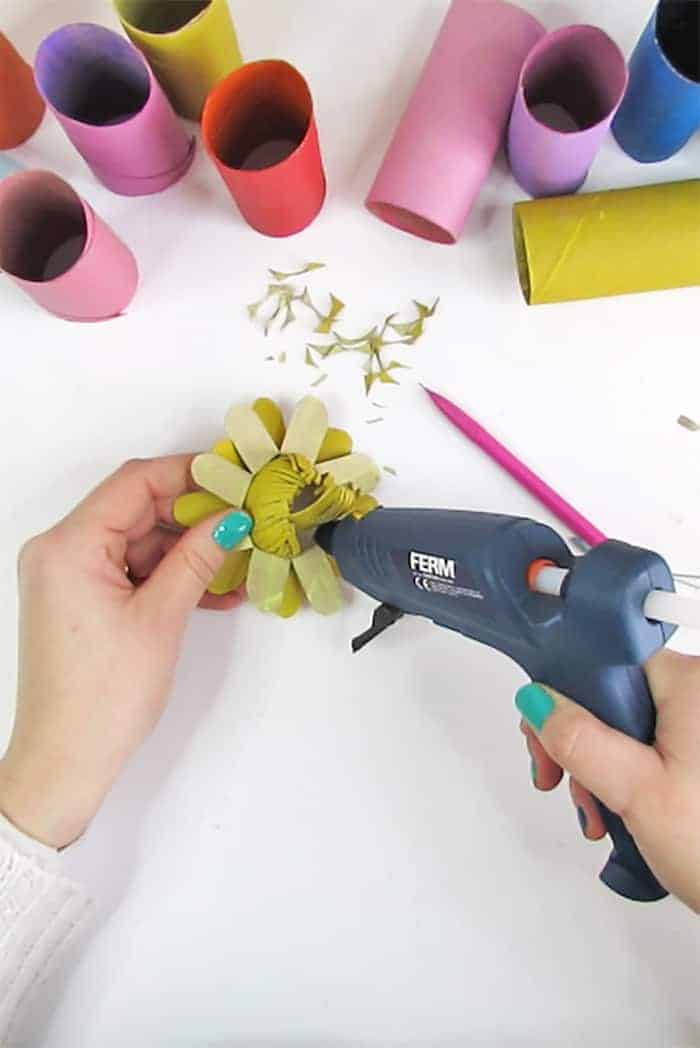
Glue the fringed cardboard piece inside the flower to create the center.
Once glue, press all the fringes to give the flower center a nice shape.
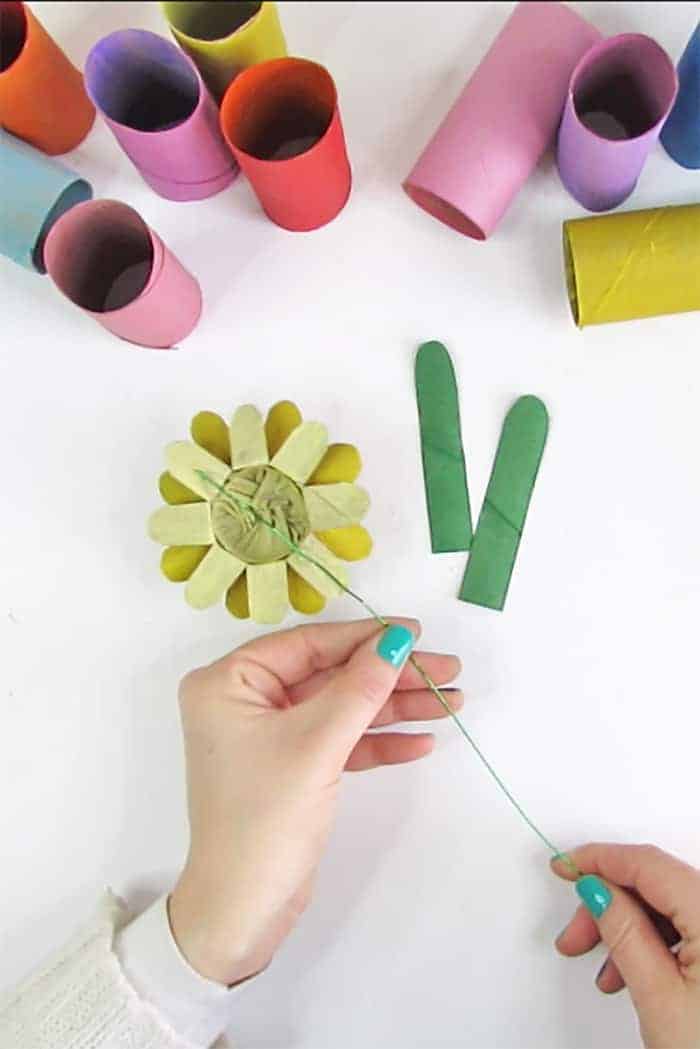
Take a floral wire and glue it on the back of the flower to make the steam.
You can also add leaves. Take a cardboard roll painted in green, cut to long rectangles and rounded the corners.
Fold the base of the leaf and glue them on the steam.
If you have any doubt about one of the step, you can find more details watching the step-by-step video.

And the first flower from toilet paper roll is done!
RELATED: DIY picture frames with paper
RELATED: Paper Lampshade DIY
Flower 2
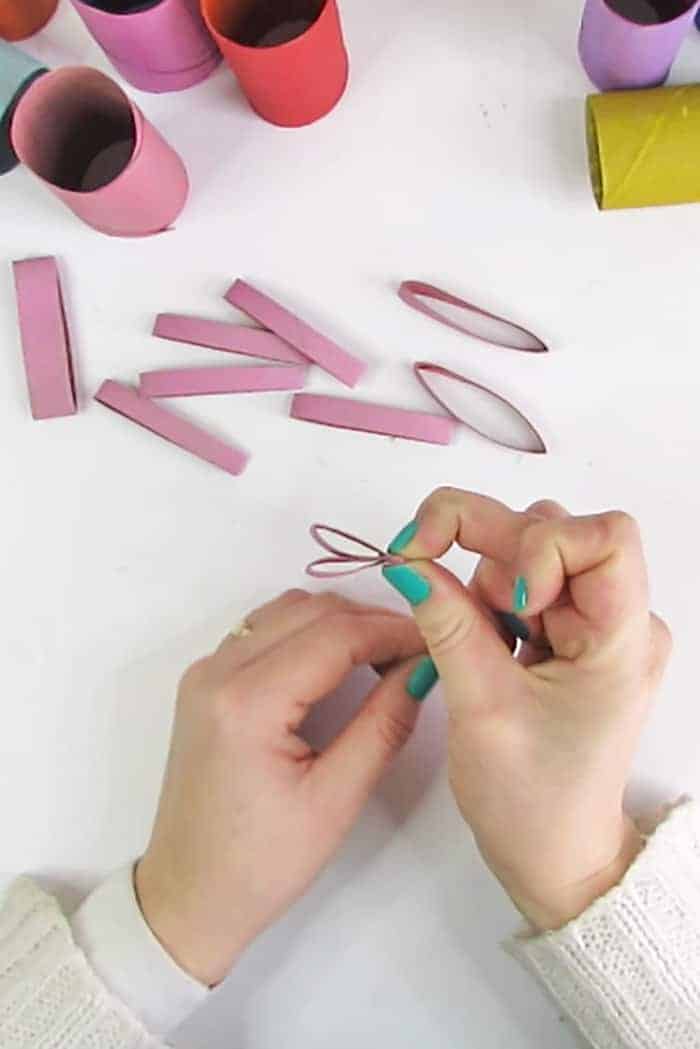
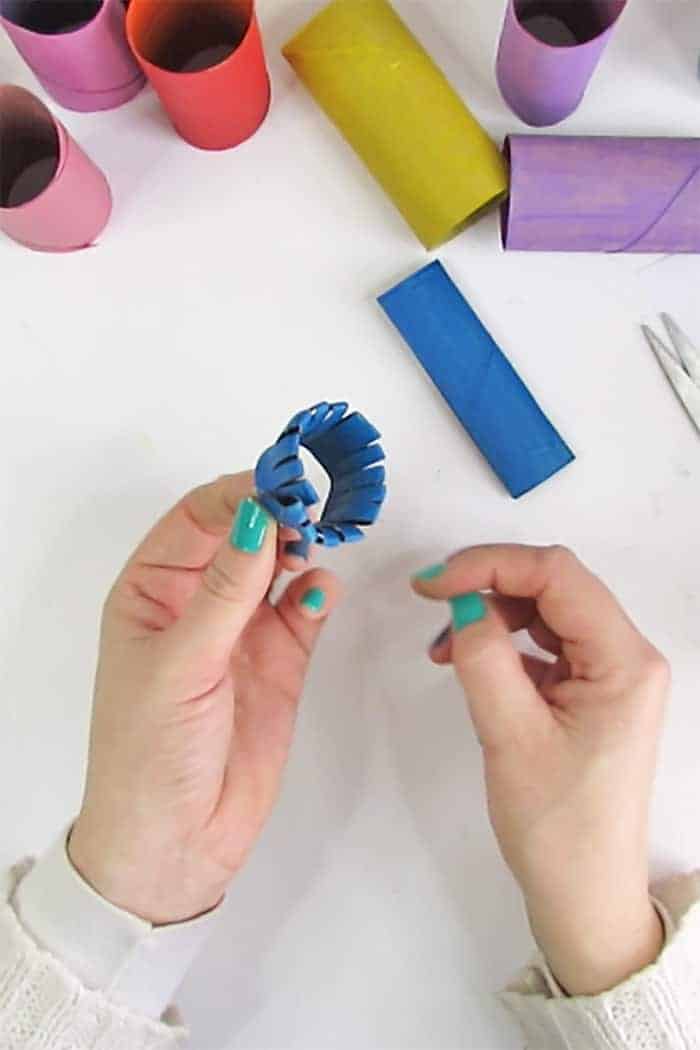
Take a toilet paper roll and cut it in slices. You will need 8 slices to make this flower.
Take one “slice” and fold it in the center to create two petals. Add a dot of glue to hold the petal in shape.
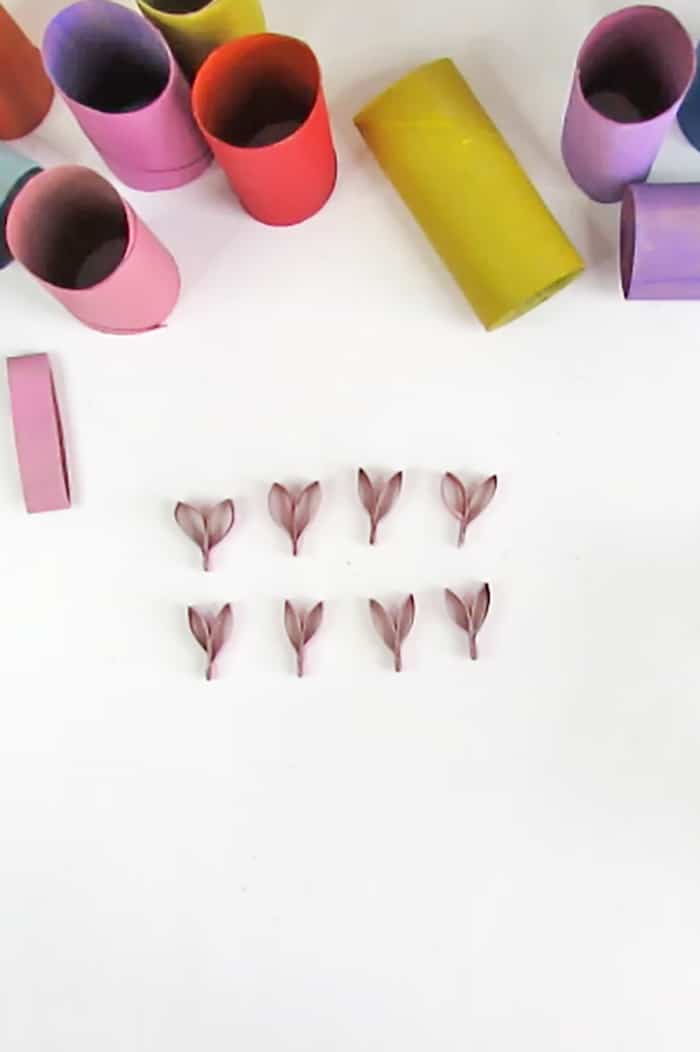
Repeat to create 8 identical pieces.

Place the petals next to each other to form the flower and glue them together. Add glue on the center and between each petal.
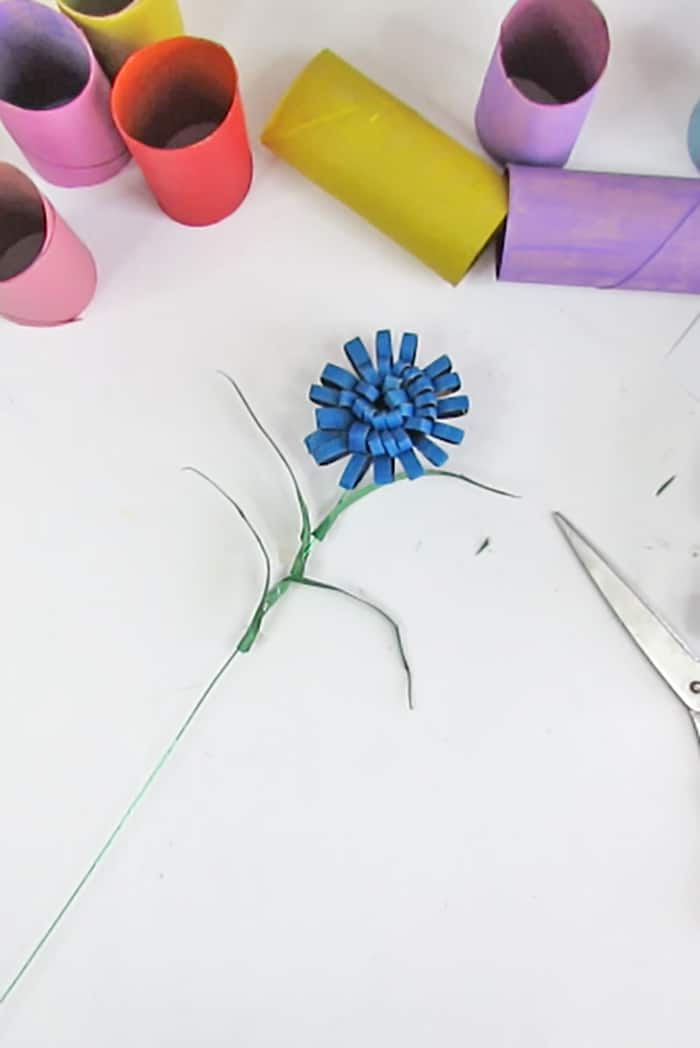
When finishing the flower, slide the floral wire between the last two petals and glue.
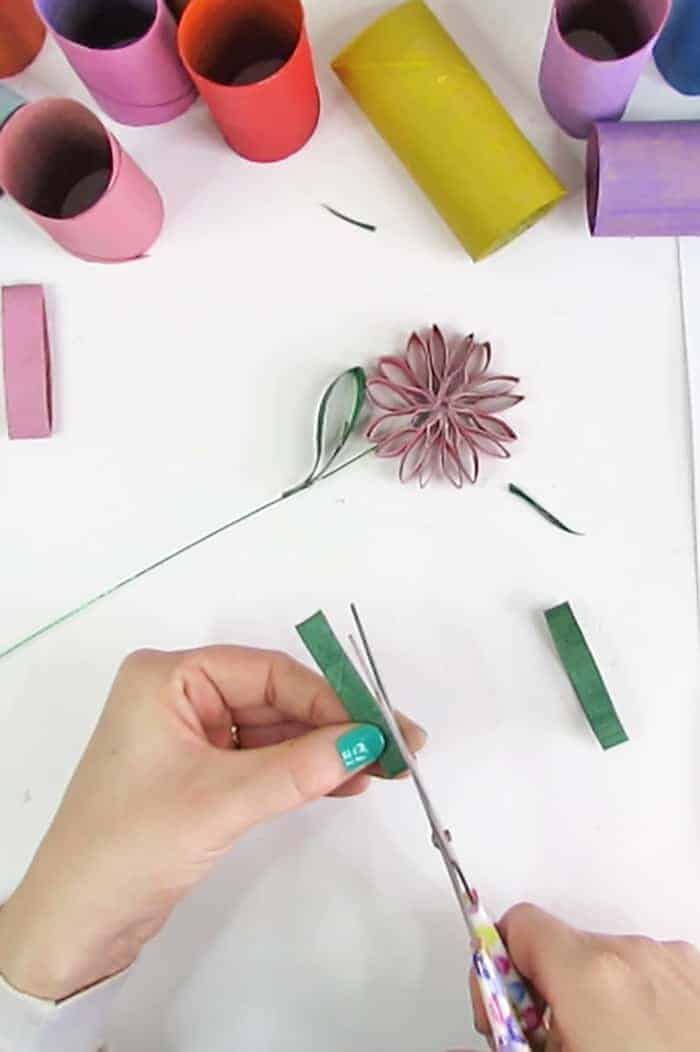
Take a cardboard roll painted green and cut 2-3 slices in it to make the leaves.
Glue the leaves on the steam.
Enjoy the second DIY toilet paper roll flower!

Flower 3
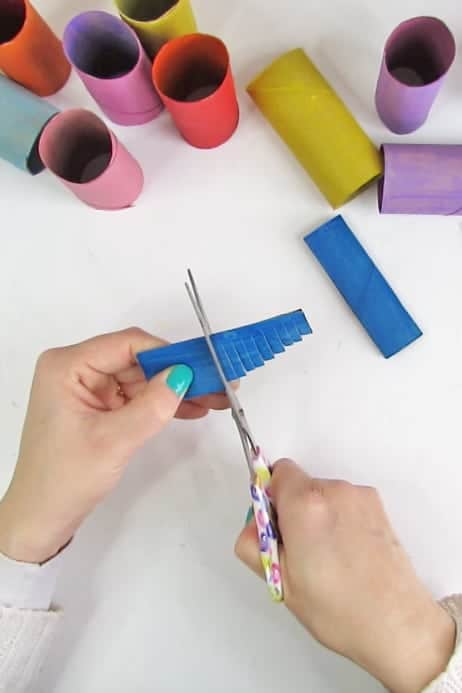
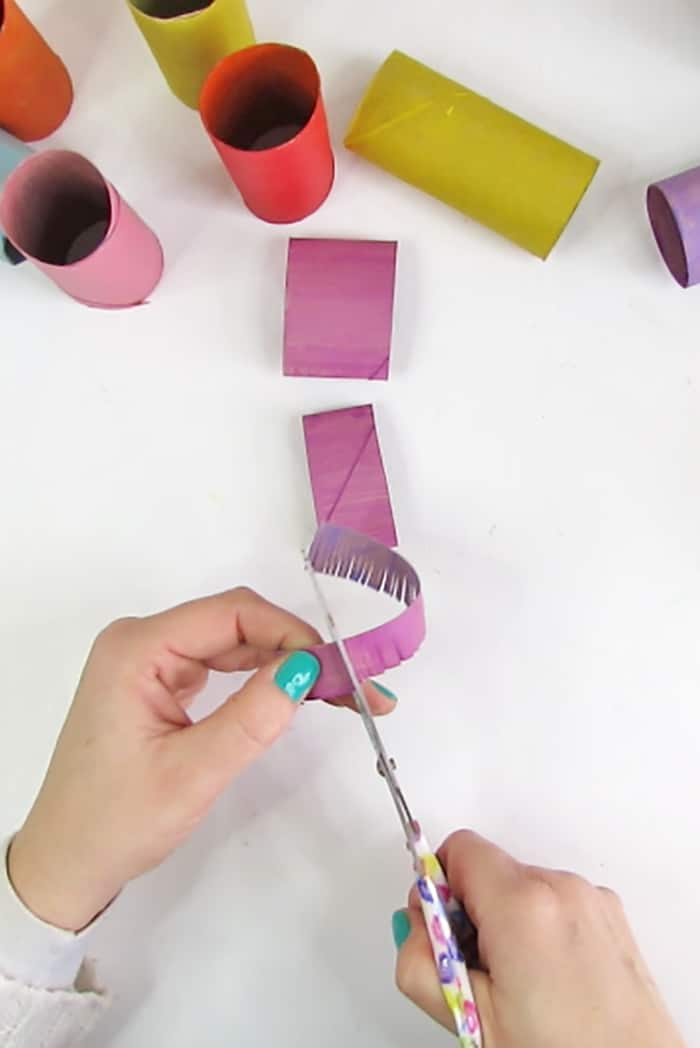
Take a toilet paper roll, press it flat, and cut it lengthwise.
Cut notches all along the fold, on both pieces.
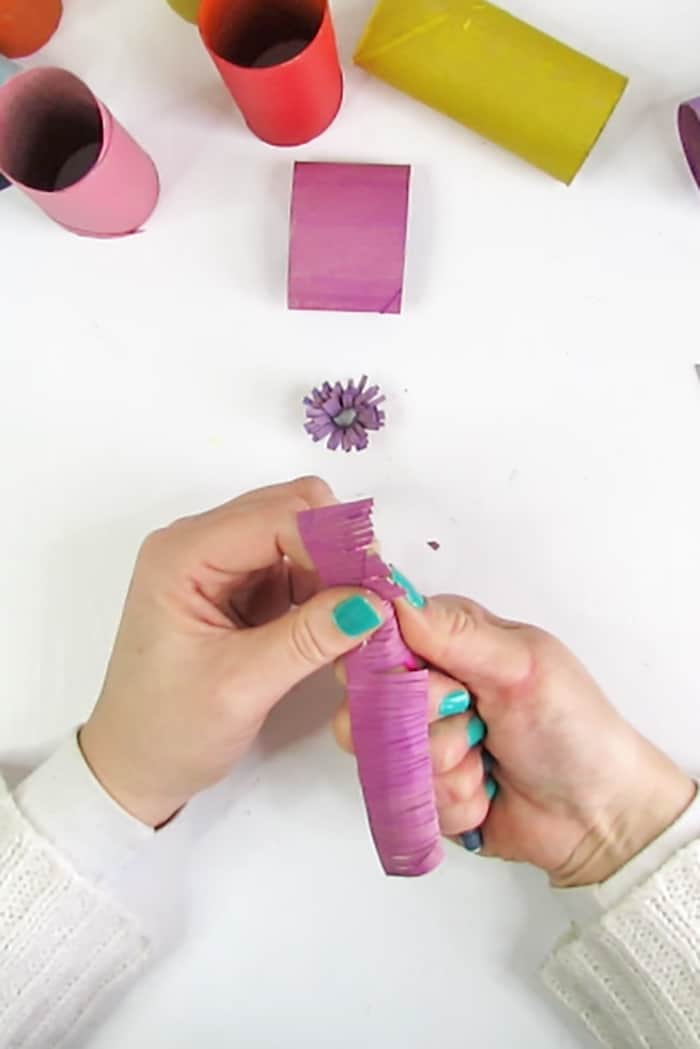
To make the outer petals of the flower, take one of the piece, bend it and glue ends together.
Once the glue dries, put the cardboard in shape to give the flower more volume.

Take the second piece and glue it inside the first one.

Take a green painted cardboard, cut a circle and glue it on the back of the flower.
Then cut 4 slim triangles to make the leaves.
Glue the floral wire on the back of the flower.
Make a fold on the the base of the leaves and glue them on the steam.
And done!
Flower 4

Take a toilet paper roll and cut it in 3 pieces of different sizes: one large, a second medium and a third small.
Cut to open the cardboard pieces and make noches all along the edge.
Do the same for all 3 pieces.
With a pencil bend the fringes.
To make the center of the flower, take the smaller piece add a dot of glue on one end and roll it on it self. add a more glue while rolling to hold it together.
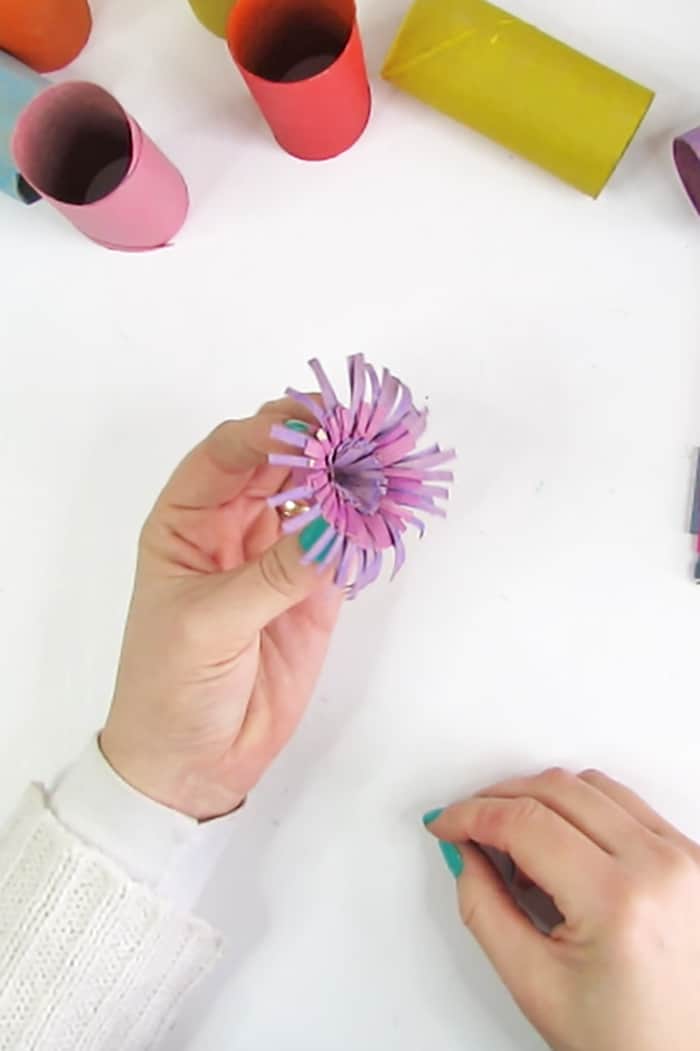
Take the flower center and glue the medium piece around and then the large piece.
If you painted the roll with two different colors, you can alternate colors.
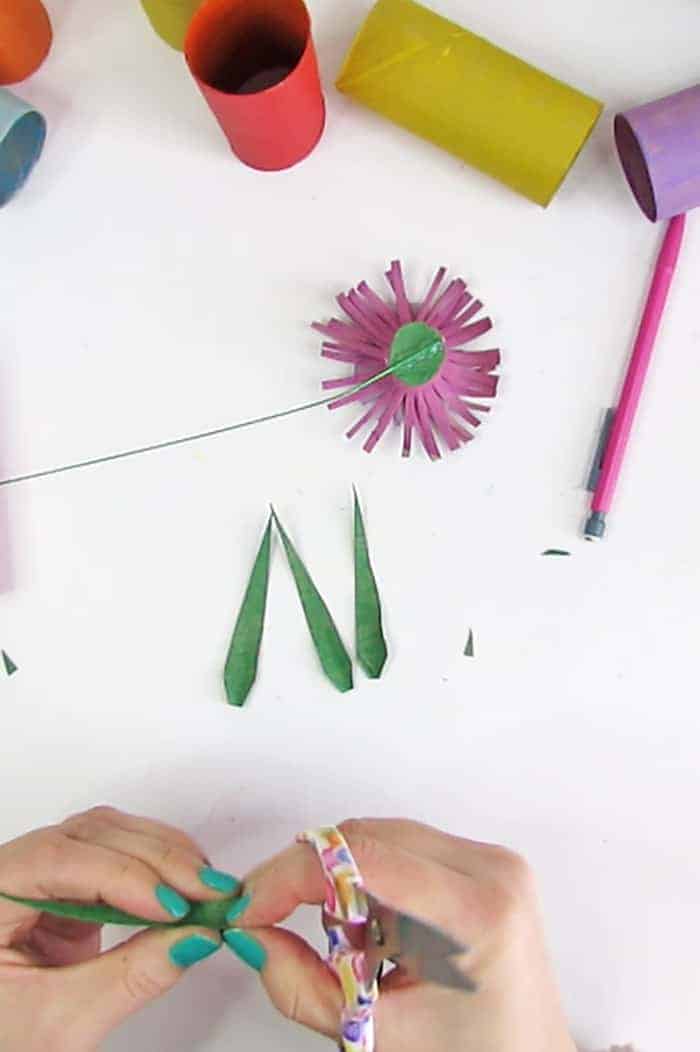
Cut and glue a circle of green cardboard on the back of the flower.
Take a floral wire and glue is on the flower back.
Cut 4 triangles in the green cardboard. Trim the base angles and fold in the center.
Glue them on each side of the steam to make the leaves.
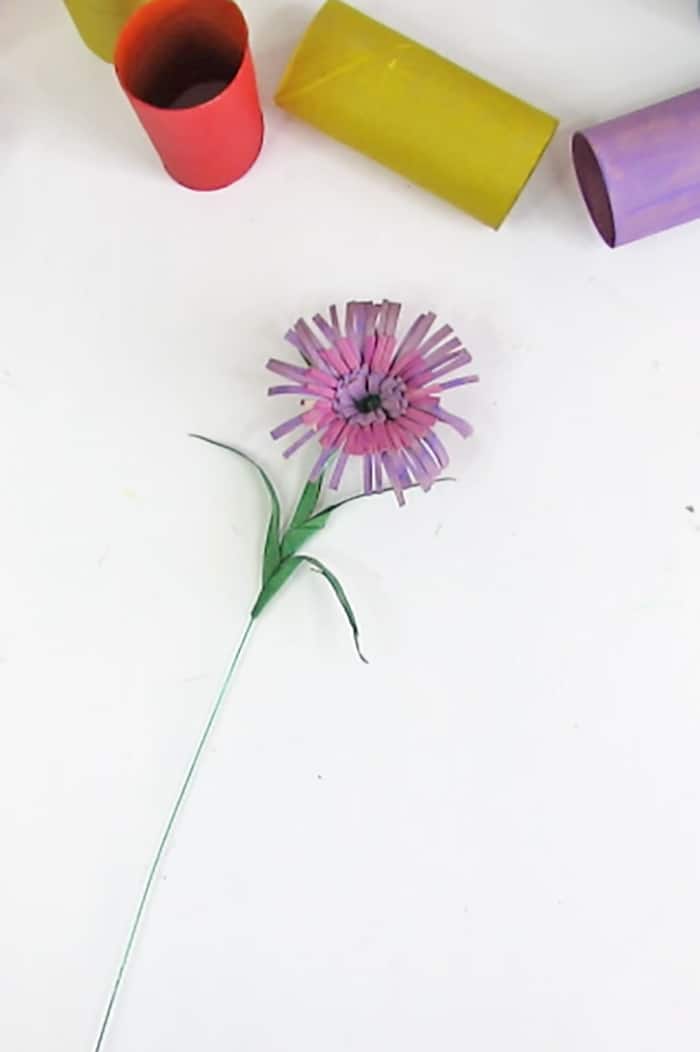
And this is how the fourth paper roll flower looks!
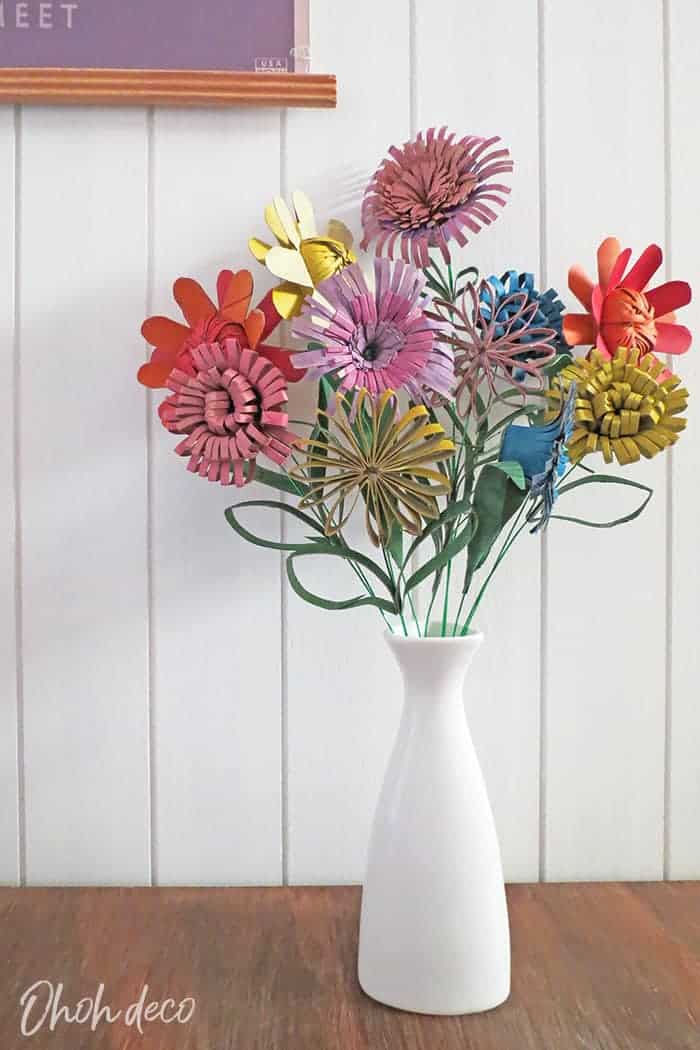
Don’t hesitate to combine shapes and colors to make as many flowers as you want and create a stunning DIY flower bouquet!
Toilet paper rolls crafts are fun to make! I hope you enjoyed this idea and will have fun making a DIY flower bouquet!
In conclusion, the art of creating beautiful flowers using toilet paper rolls is not just about recycling and being eco-friendly, but it is also a creative outlet that allows us to see beauty in everyday objects.
These flowers are a testament to the power of imagination and resourcefulness. So, the next time you have a spare toilet paper roll, don’t just throw it away – turn it into a beautiful flower that will brighten up any space.
Keep crafting and exploring new ways to create with everyday objects.
RELATED: Easy to make 3D Paper house
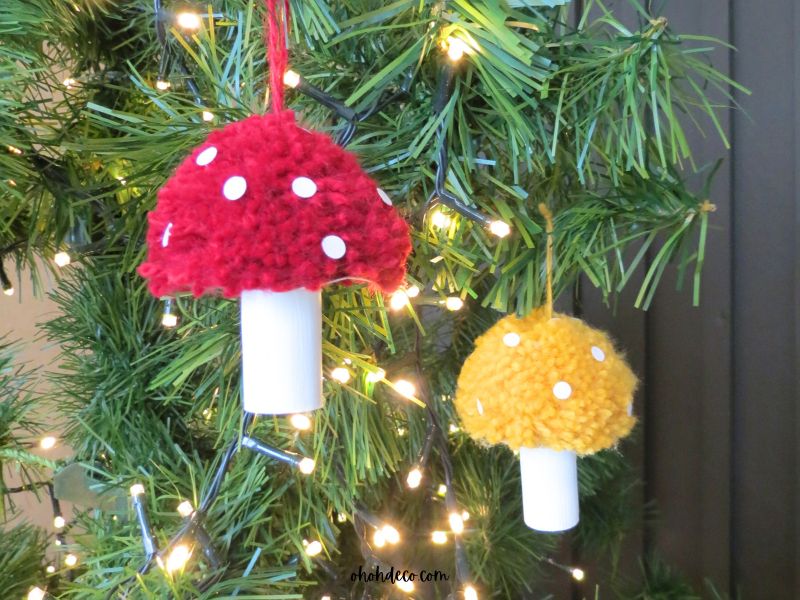
RELATED: How to make Christmas ornaments with toilet paper roll
Want to remember it? Save these Toilet paper roll flowers on your favorite Pinterest board.
Like to see more ideas? Visit my Best DIY page!
Amaryllis

Amazing! Thanks for sharing
I’ve just finished making a bouquet as a gift for my mother and they look so lovely i’m going to make some more for myself. Great video, very easy to follow instructions. Thank you x
Thanks for your message, Stephanie. I´m glad you enjoyed making TPR flowers 💐