

I’m glad to finally share this simple craft with you: how to recycle a plastic container into a cute planter. I made this DIY with my kids a few months ago. By that time I had to buy some tools and planters for the garden and my kids came with me to the nursery garden. Of course, they wanted their own little plant … and as you can imagine, I couldn’t say no!
So we went back home with a few extra indoor plants and needed some planters for them. Planters are a fun craft to make with kids and when possible I like to use recycled materials. This DIY is no exception as we turn yogurt containers into practical planters. The kids made one each, and they turn out very pretty so I still have them on my kitchen counter.
* * *
Finalmente, puedo compartir contigo este simple DIY: cómo reciclar un recipiente de plástico en una maceta bonita. Hice este bricolaje con mis hijos hace unos meses. Para entonces, tuve que comprar algunas herramientas y jardineras para el jardín y los niños me acompañaron al vivero. Por supuesto ellos quisieron comprar unas pequeñas plantas … y como puedes imaginar, ¡no pude decir que no!
Así que volvimos a casa con algunas plantitas de interior adicionales y necesitábamos algunas macetas para ellas. Las macetas son manualidades divertidas de hacer y, cuando es posible, me gusta usar materiales reciclados. Este bricolaje no es una excepción, ya que convertimos envases de yogurt en macetas. Los niños hicieron una cada uno, y resultaron muy bonitas, así que todavía las tengo en el mostrador de mi cocina.
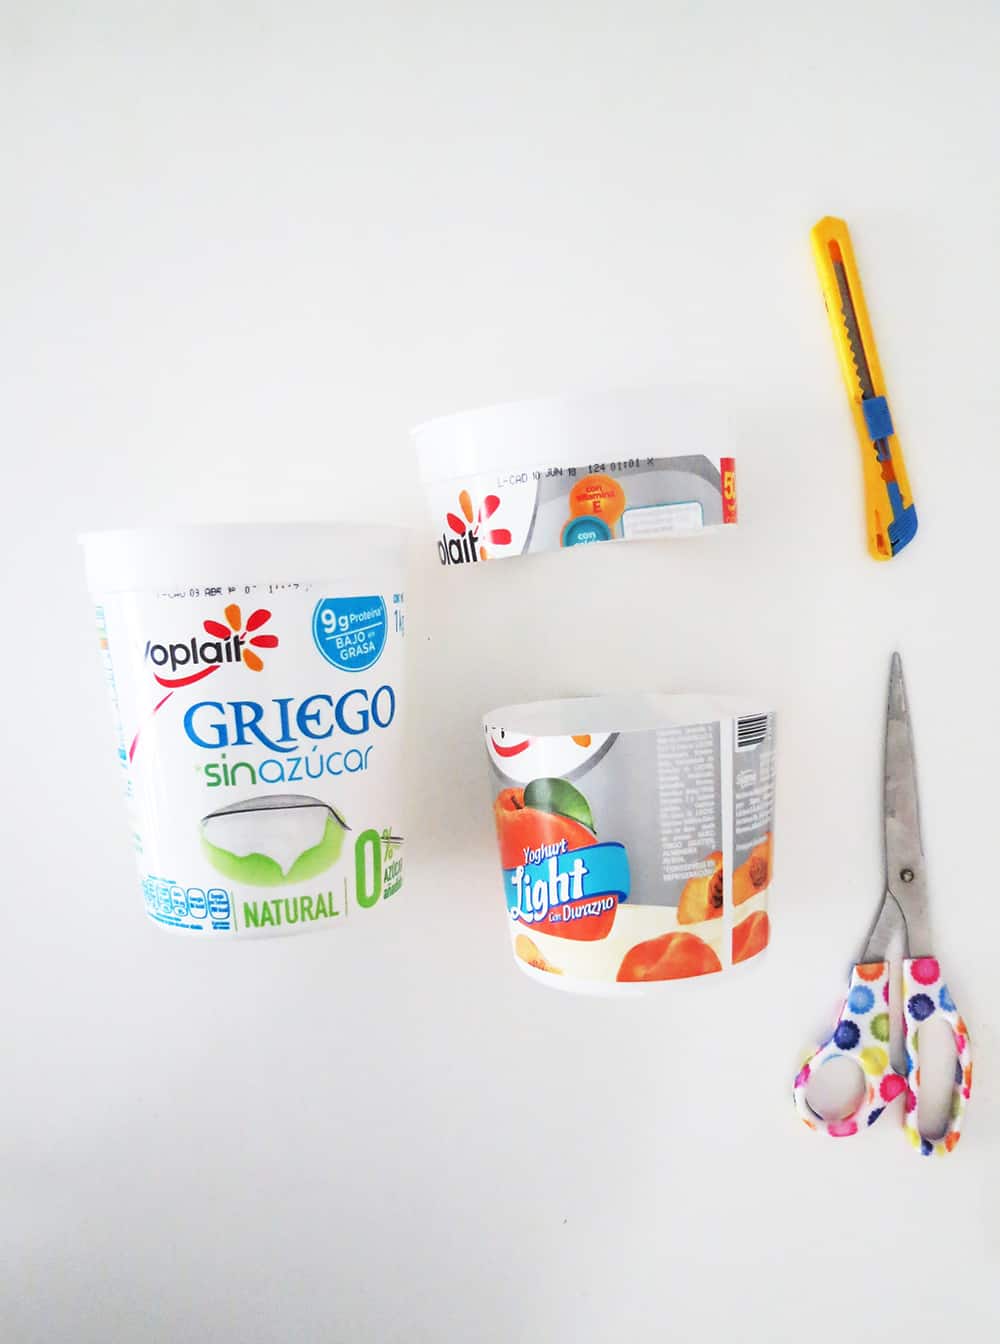
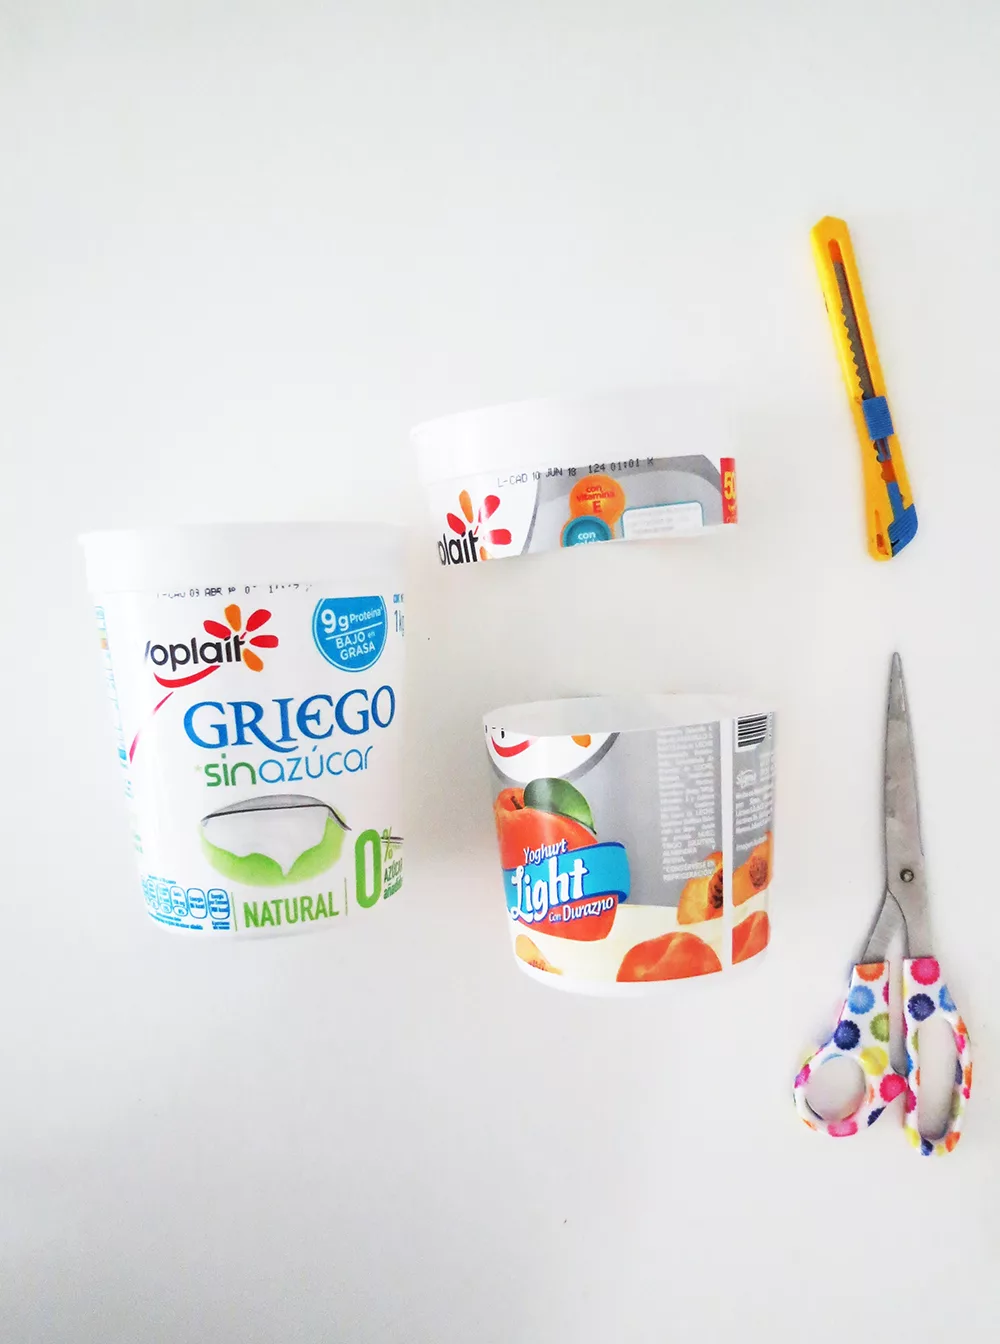
Material and tools you will need to make your recycled planter:
- Clean plastic container
- Scissors and cutter
- Air clay
I choose to work with yogurt containers because we had a bunch home and there were the perfect size for the little plants we bought. As the container was a little high I cut it at a third of the height. You can use any clean plastic container you have around, as you may want to make bigger or smaller planters depending of the size of your plants.
* * *
El material y las herramientas que necesitas para hacer tu maceta reciclada:
- Recipiente de plastico limpio
- Tijeras y cortador
- Arcilla blanca
Elegí trabajar con envases de yogurt porque tenías un montón en casa y tenían el tamaño perfecto para las pequeñas plantas que compramos. Como el recipiente estaba un poco alto, lo corté a un tercio de su altura. Puedes usar cualquier recipiente de plástico limpio que tenga alrededor, ya que puedes querer hacer macetas más grandes o más pequeñas dependiendo del tamano de tus plantas.
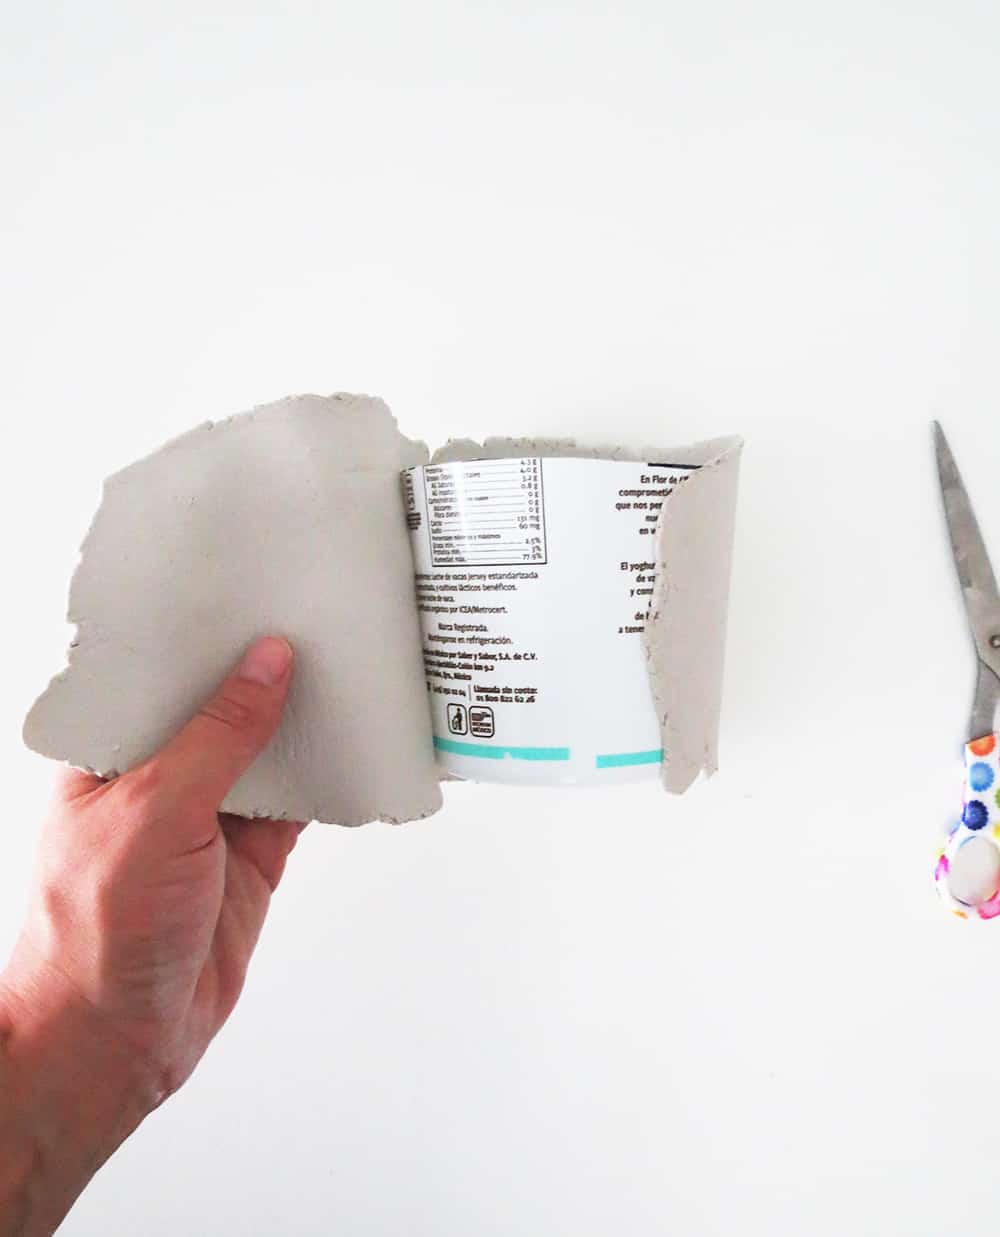
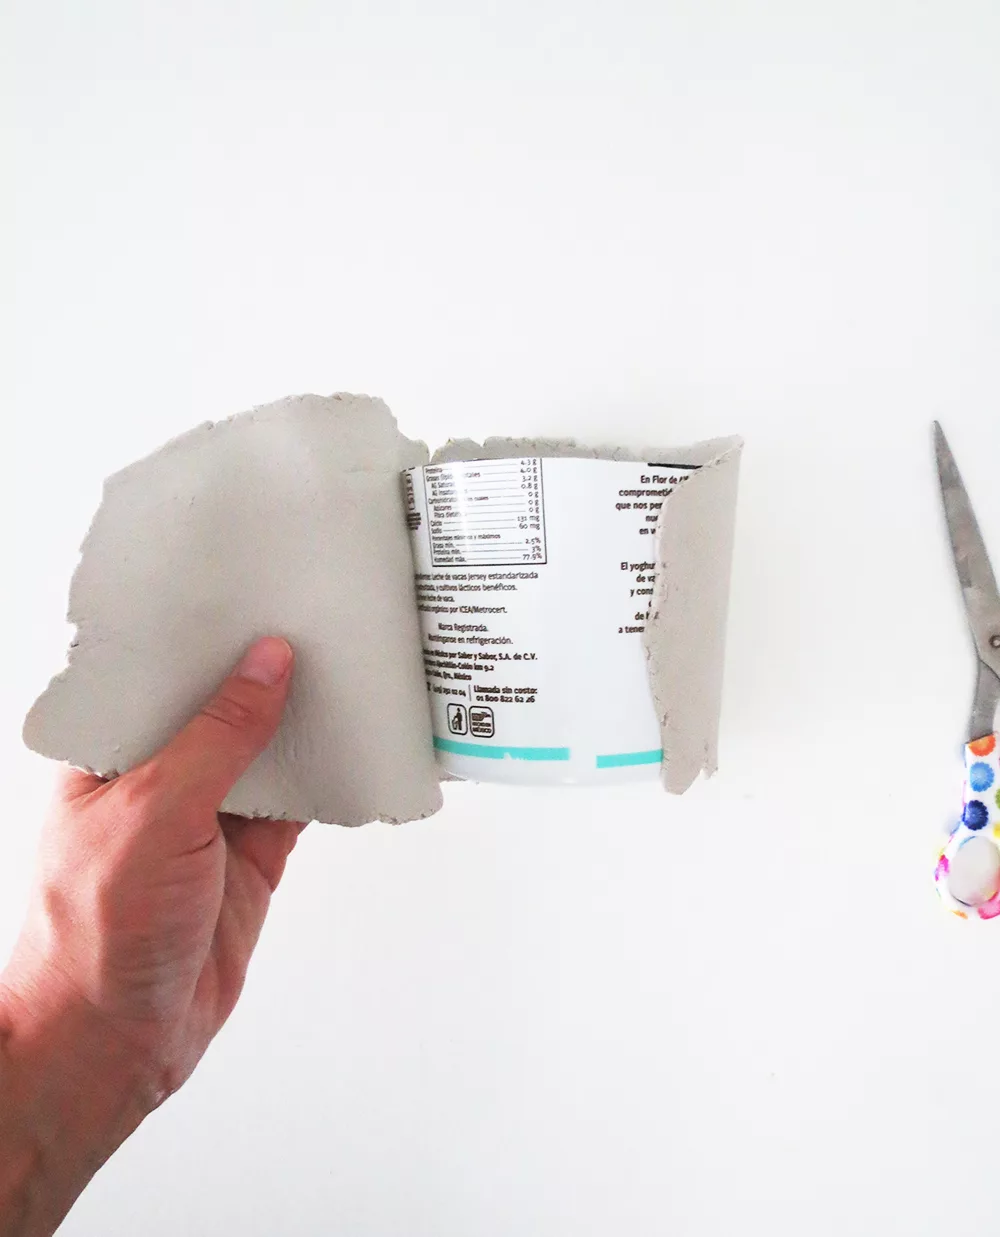
Take a piece of air clay and flatten it with a rolling pin (or a glass if you do not have one). The air clay surface should be large enough to cover the side of your plastic container. Wrap it around your container, use your fingers and a little water to smooth the junction between the two ends of the air clay. Fold the air clay under the container bottom. The bottom doesn’t have to be fully covered with clay, just be sure that the clay is flat enough so the planter standstill. Use the cutter to cut the extra clay following the top edge of the container, you can also smooth the edges passing your finger along with a little water.
* * *
Toma un trozo de arcilla blanca y aplana con un rodillo (o un vaso si no tiene uno). La superficie de la arcilla debe ser lo suficientemente grande como para cubrir los lados de tu recipiente. Envuélve la arcilla alrededor de tu recipiente, usa tus dedos y un poco de agua para suavizar la unión entre los dos extremos de la arcilla. Dobla la arcilla debajo del fondo del recipiente. El fondo no tiene que estar completamente cubierto con arcilla, solo asegúrate de que la arcilla sea lo suficientemente plana para que la maceta sea derecha. Utiliza el cutter para cortar la arcilla adicional a lo largo del borde superior del recipiente, también puedes alisar los bordes pasando un dedo con un poco de agua.
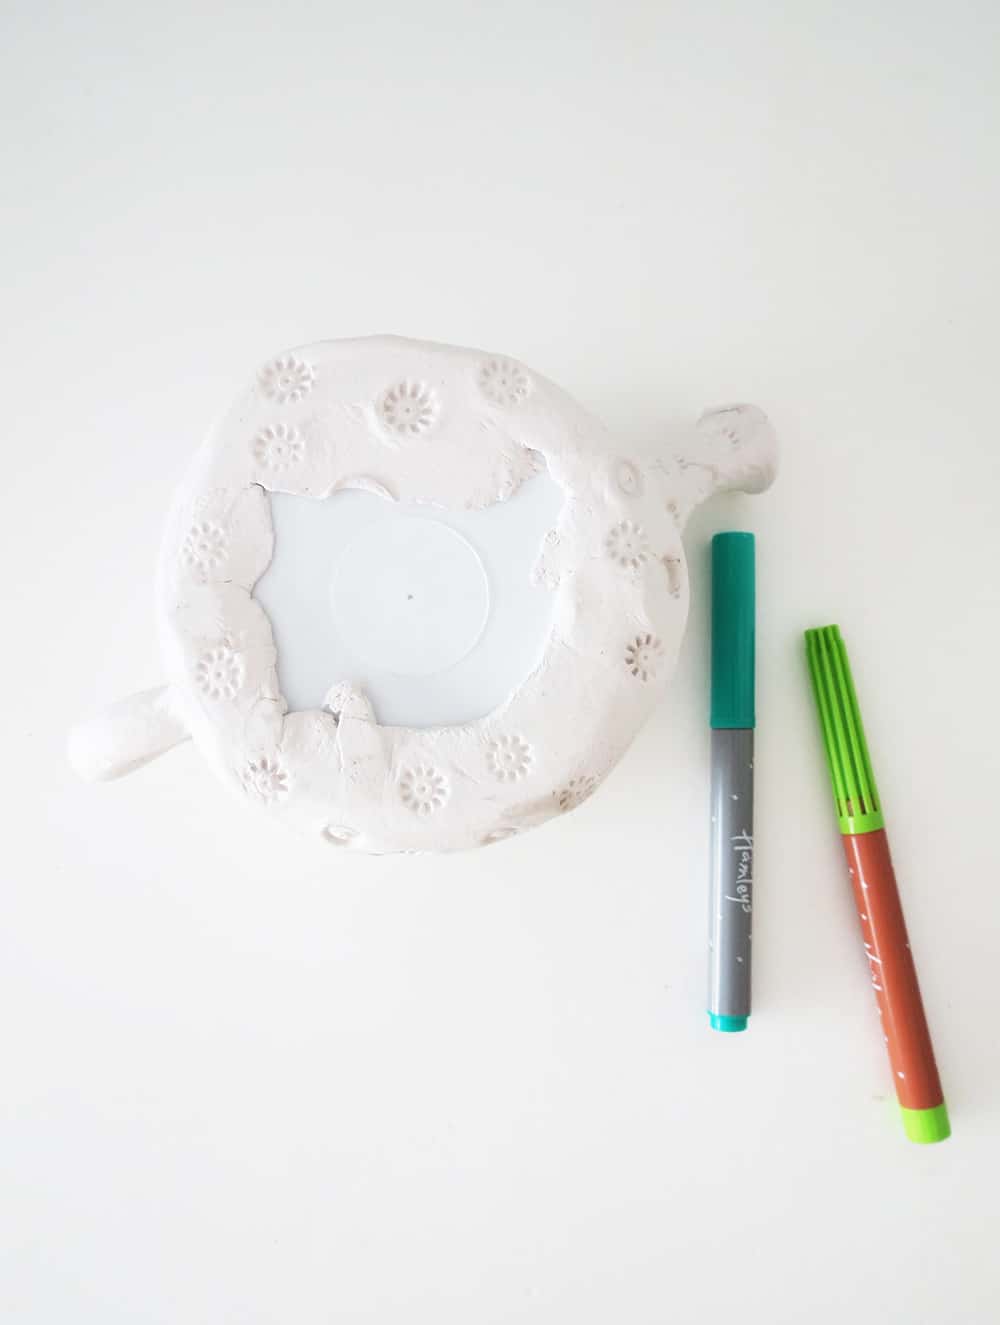
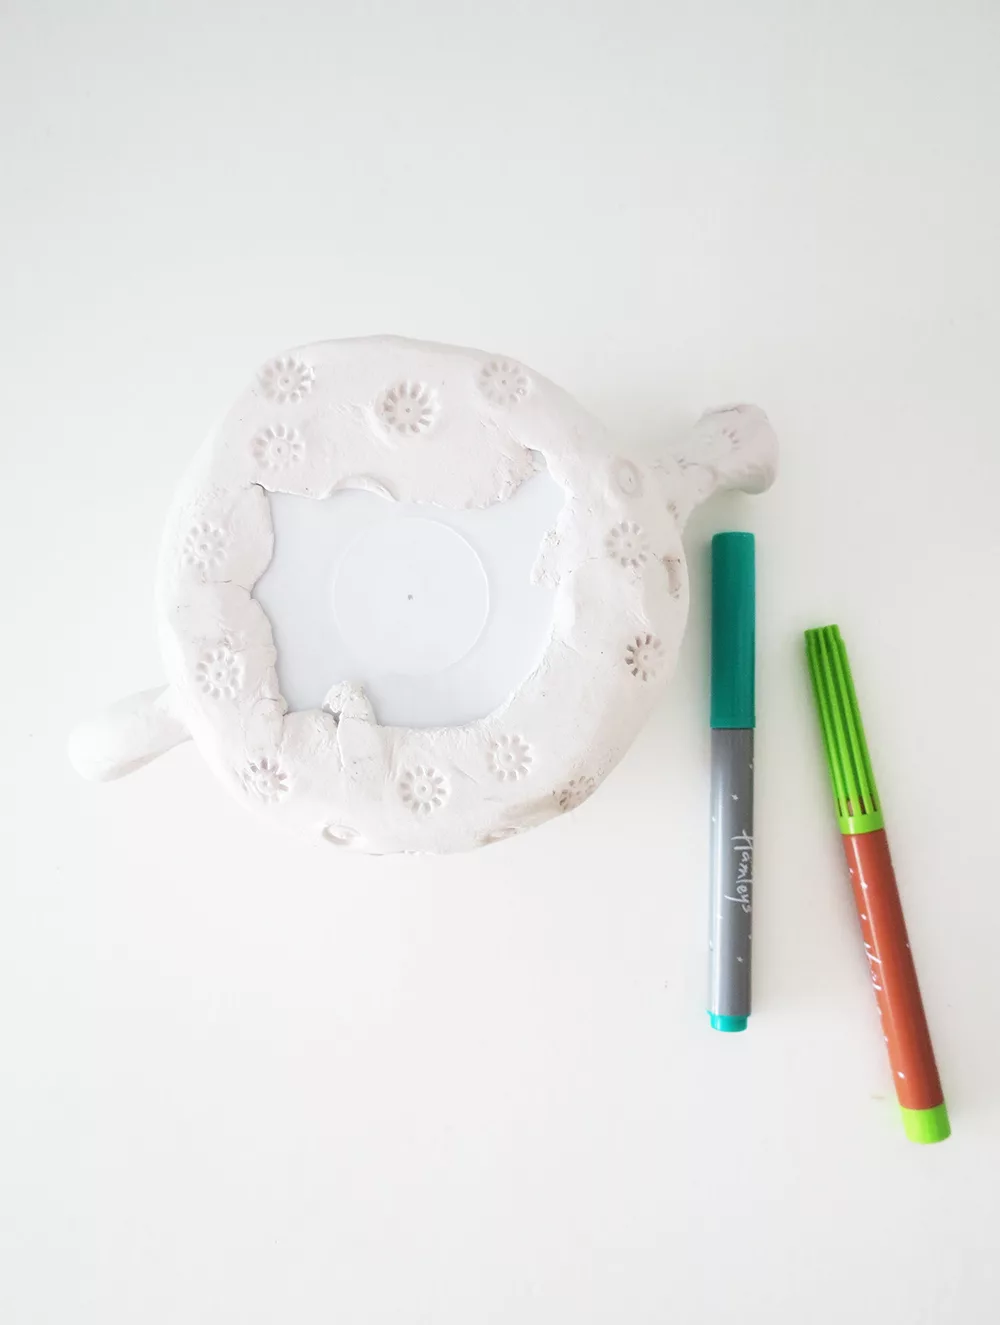
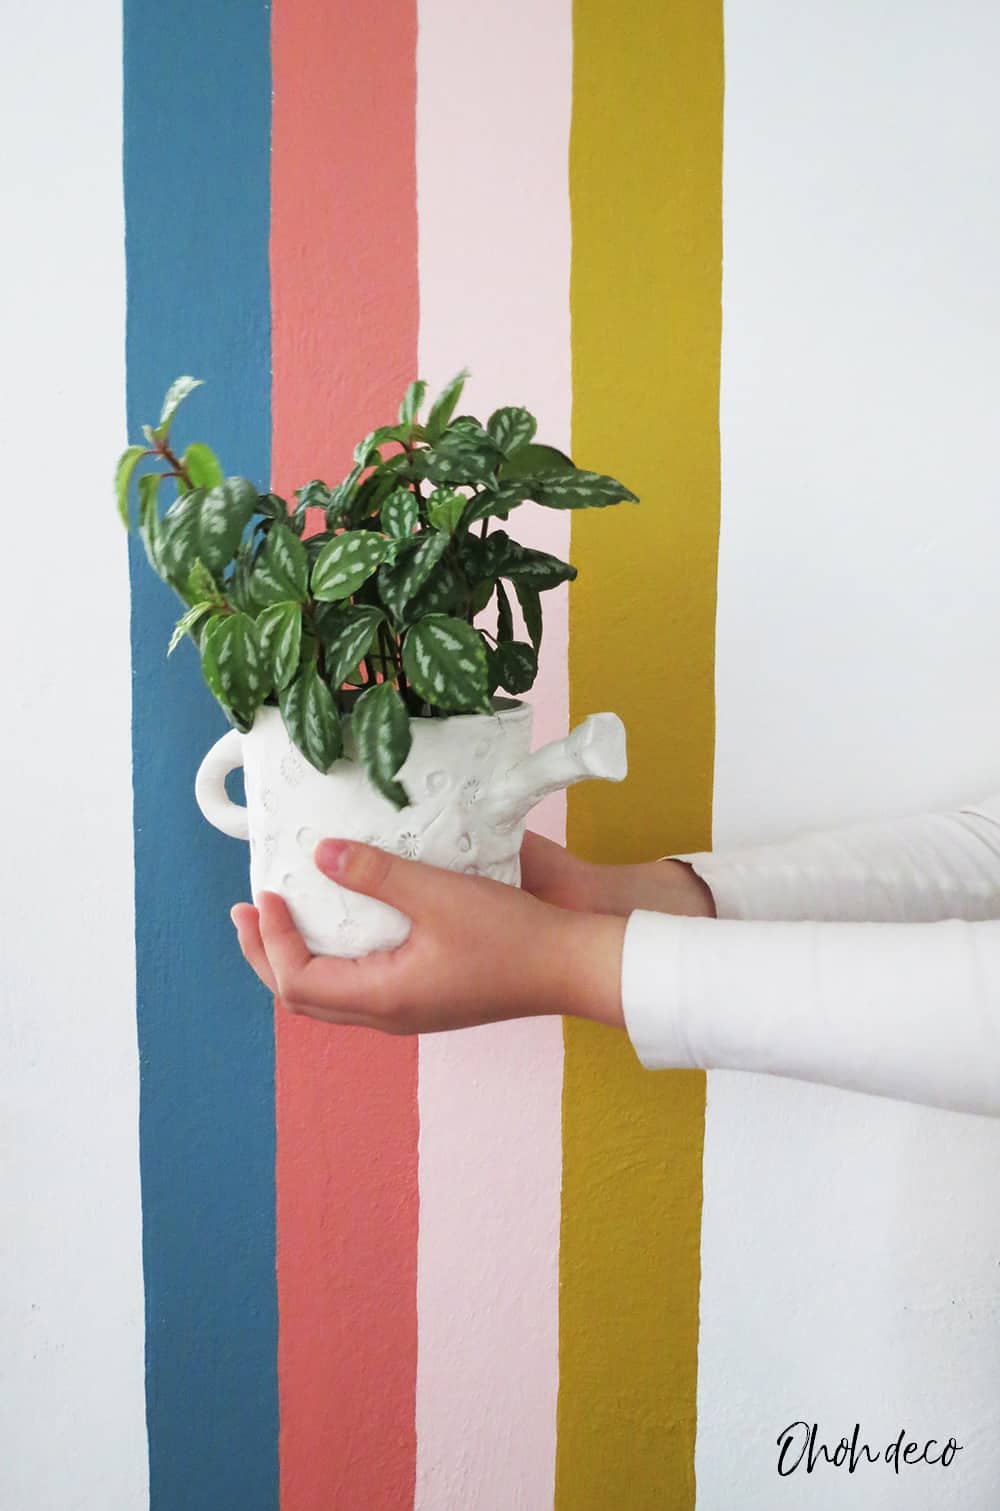
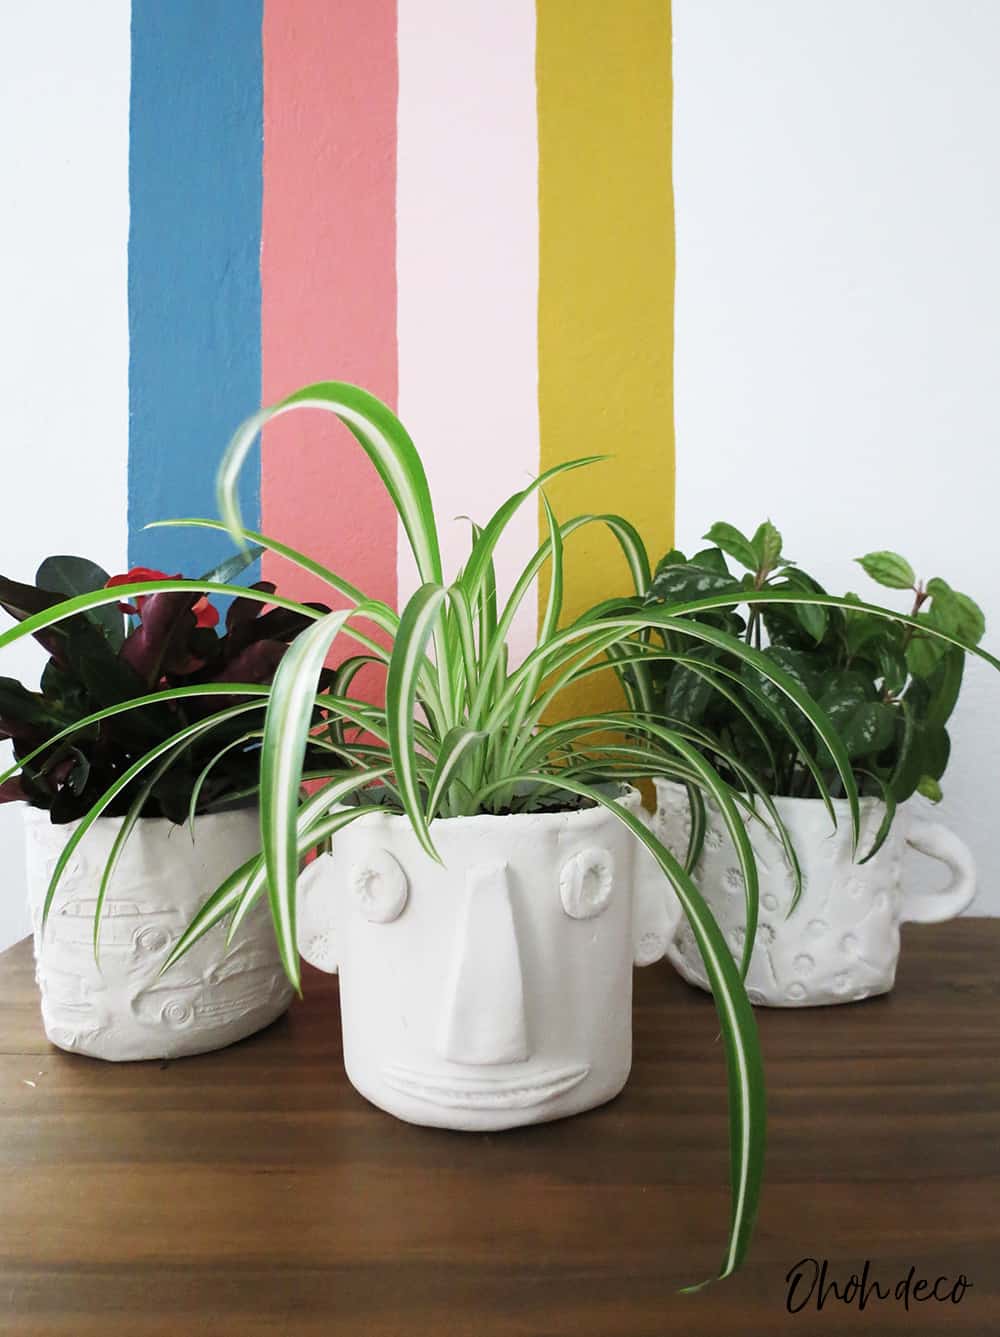
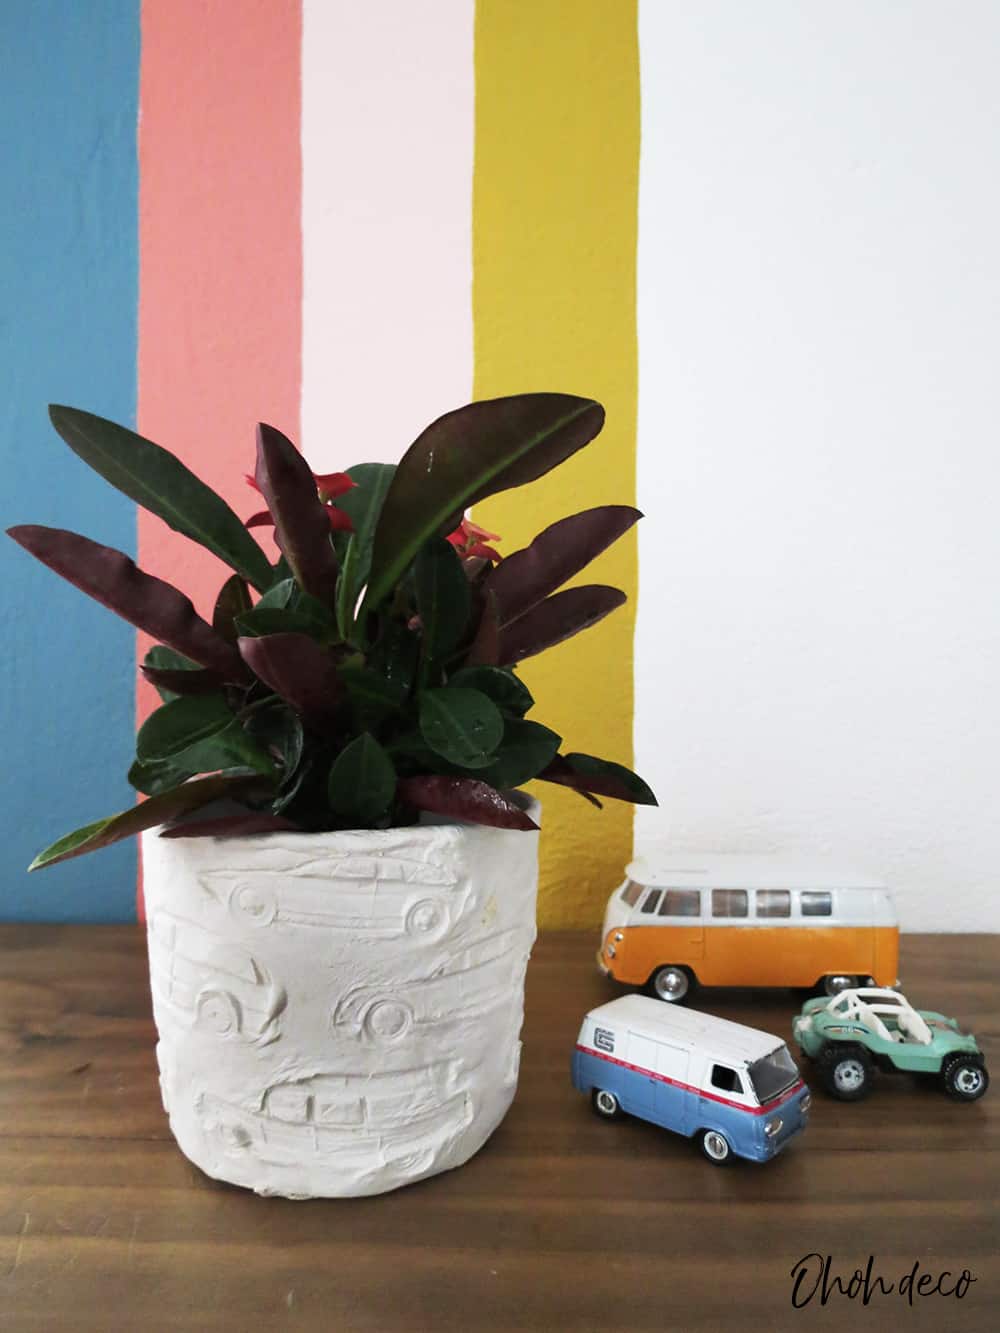
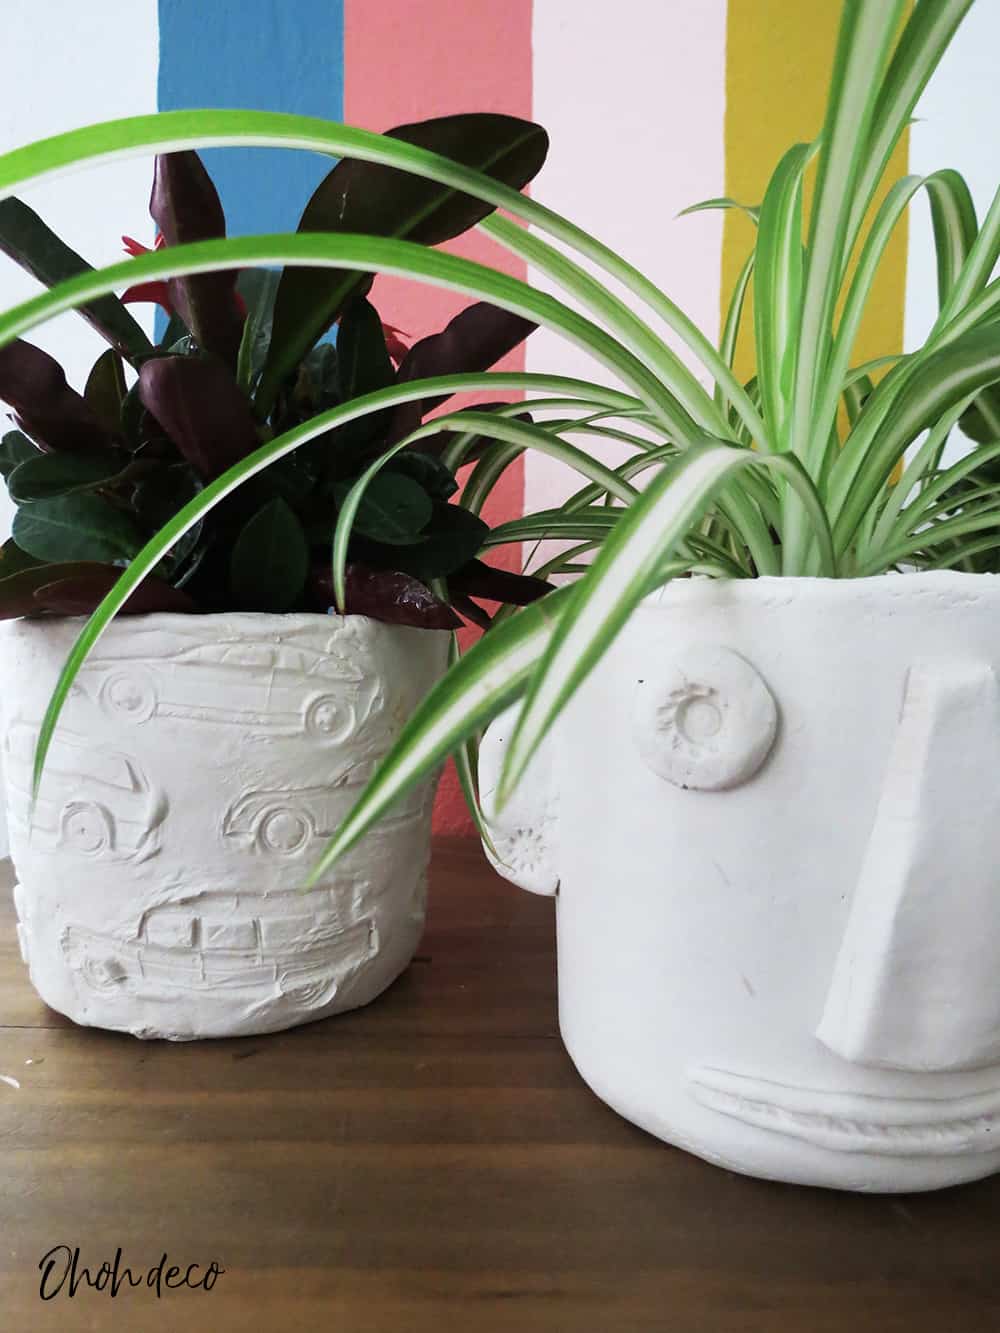
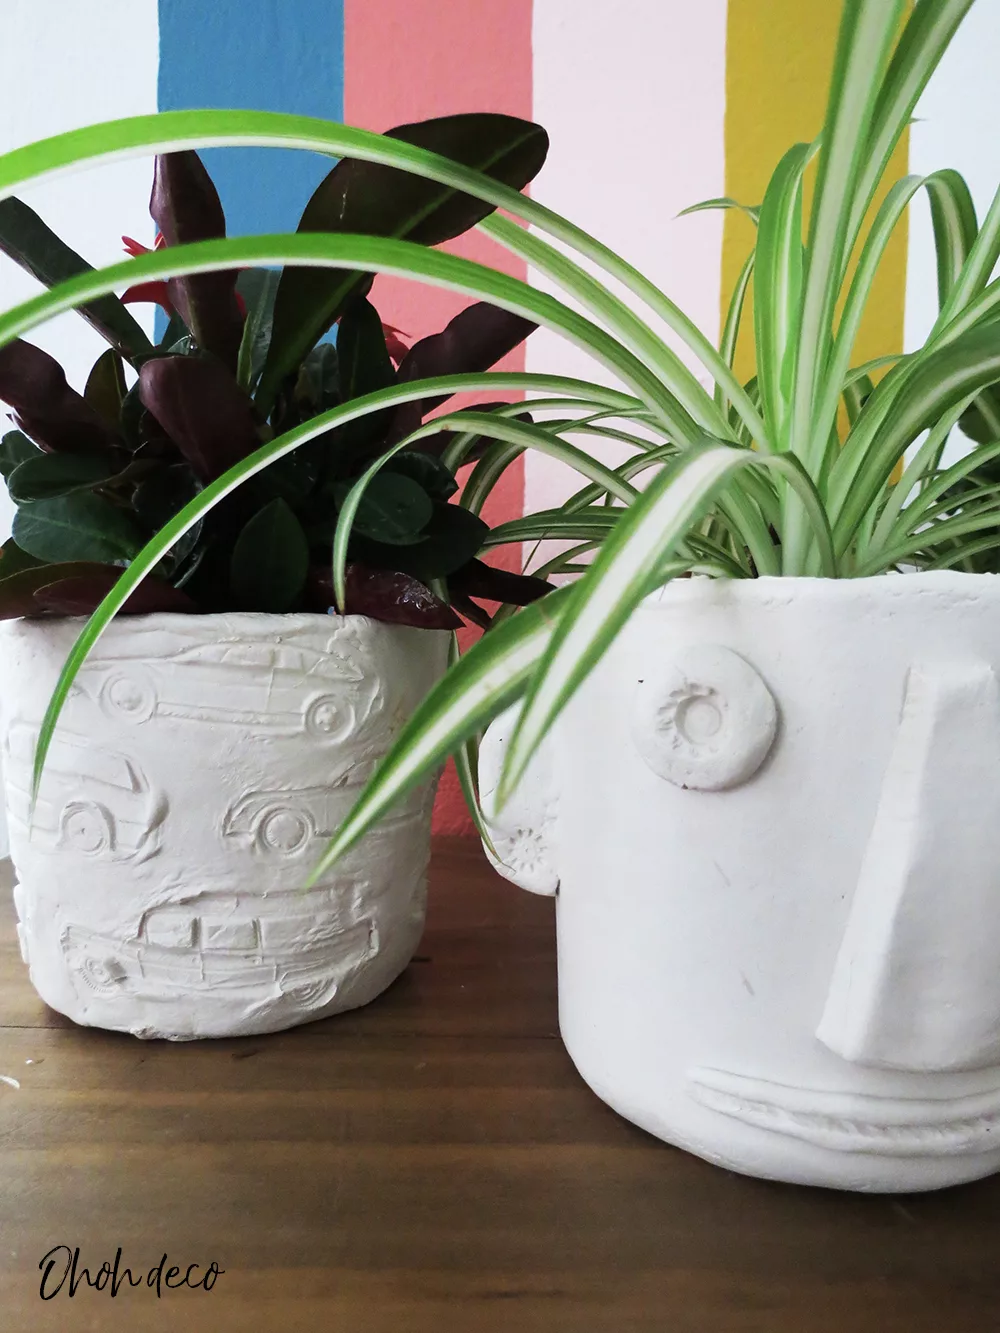
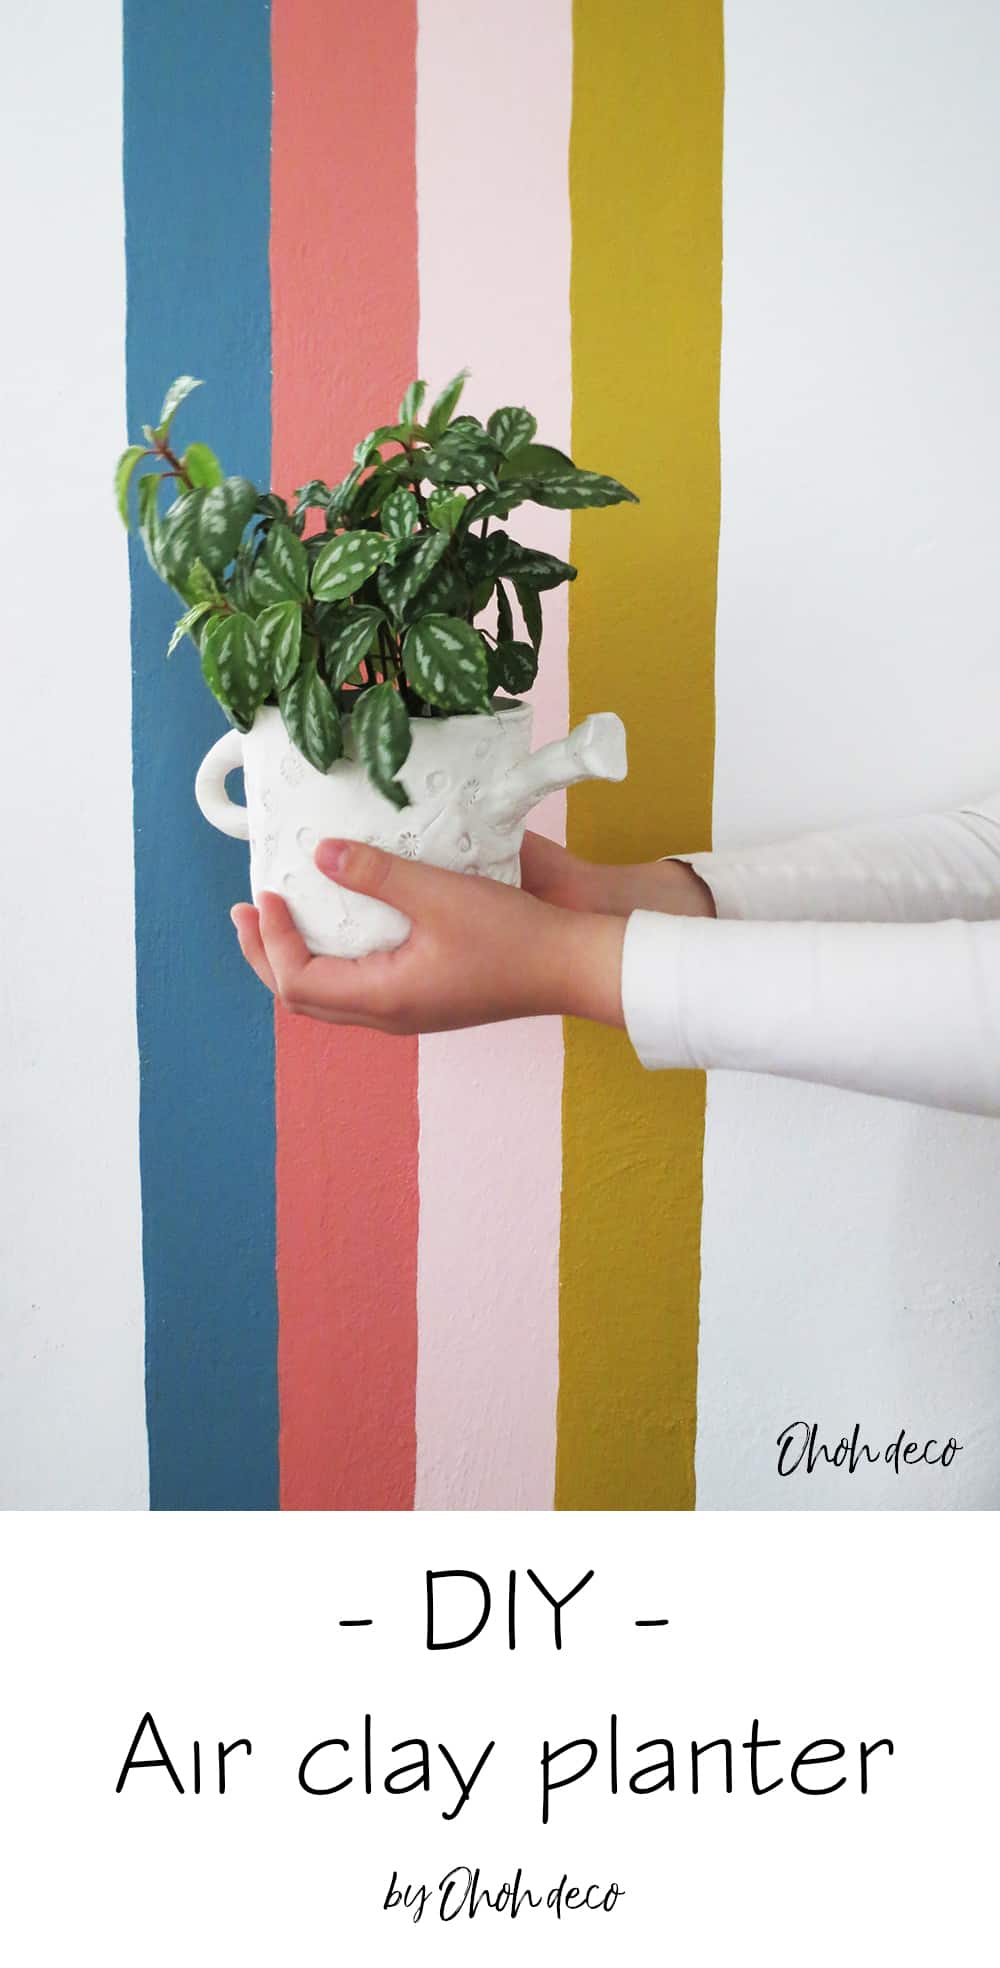
When your container is covered with clay you can decorate it the way you like. My daughter decided to make a watering can and use markers caps to make the flowers. My son wanted a pot with cars, then we used his matchbox cars and pushed them lightly into the clay to reproduce the shapes. I cut out geometric pieces of clay to make a masked face.
You can experiment with various objects and create a multitude of different patterns. Once you are satisfied with your design let the clay dry for 48 hours before putting the plant. I leave the clay white but adding a touch of color is definitely a good option.
* * *
Ya que tu recipiente este cubierto de arcilla lo puedes decorar a tu gusto. Mi hija decidió hacer una regadera para plantas y uso las tapas de plumones para hacer las florecitas. Mi hijo quiso una maceta con coches, entonces usamos sus carritos y los empujamos ligeramente en la arcilla para reproducir sus huellas. Yo recorte trozos geométricos de arcilla para hacer una mascara.
Puedes ir experimentado con varios objetos y crear una multitud de patrones diferentes. Una vez que este satisfecho con tu diseno deja secar la arcilla por 48 horas antes de poner la planta. Deje la arcilla en blanco pero agregar un toque de color es definitivamente una buena opción.
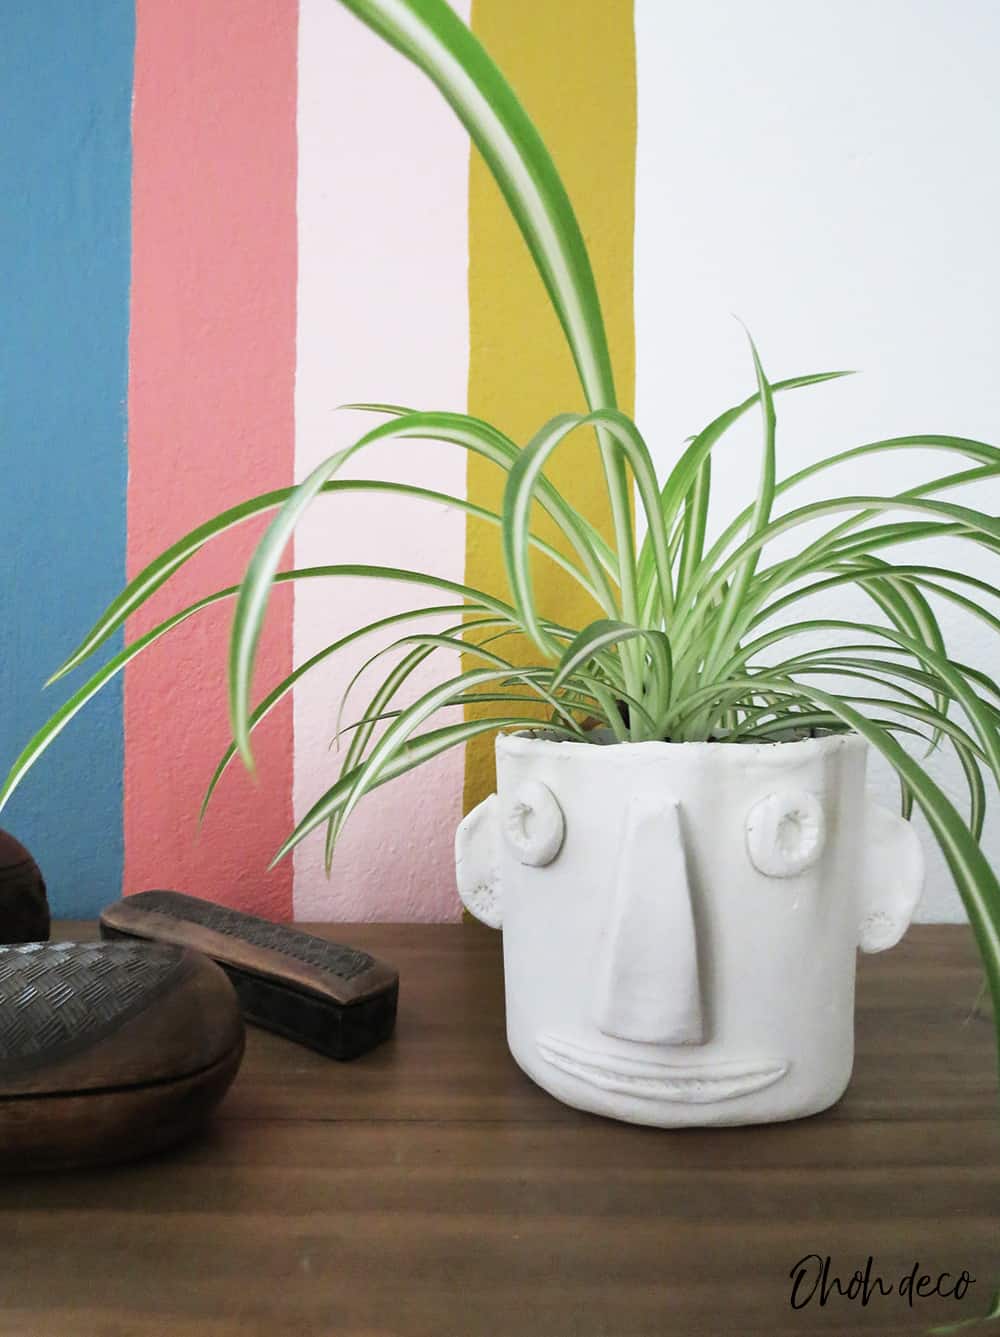

Here goes our recycled planters! It was very fun to make this easy craft with the kids. They turn out better than I expected and my kids are so happy to see that I still have them in my kitchen counter top. As you guess I’m the one taking care of the plants. So, what do you think of this DIY? Is it something you would like to make? On your own of with your kiddos?
* * *
¡Aquí van nuestros maceteros reciclados! Fue muy divertido hacer este bricolaje con los niños. Resultaron mejores de lo que esperaba y mis hijos están felices de ver que todavía los tengo en mi cocina. Como te imaginas soy yo quien cuida las plantas. Entonces, ¿qué te parece este bricolaje? ¿Es algo que te gustaría hacer? ¿Por tu cuenta o con tus hijos?


Pin it for later!

You will find all the tutorials featured in the video on my “Best DIY” page.
Amaryllis
skraft
Friday 12th of May 2023
Cute, but a nightmare to read! You should have a page/section that is english and a separate on for Spanish.
amaryllis
Wednesday 14th of June 2023
I do understand the difficulty to follow an article in two languages. I am working to upgrade all articles in English only. Hope you liked the DIY anyway.
Teening
Monday 18th of November 2019
We truly enjoyed reading this article, it's really nice. I might have a suggestion, but don't want to cause a quarrel :P:.. Keep up the awesome work, and see you!