Pillows are a great way to change or upgrade the house decor. You can find a nice cushion cover in all decoration stores, but I like to make them myself. It’s cheaper and I can make what fits perfectly my space as well as for the shape, the color, and the materials. With three kids regular cleaning is absolutely essential, as they use the pillows to build forts, read on the floor or as slalom obstacles for rollers…. and I don’t want to sit in a couch full of dirty grey cushions. As you know it’s way easier and faster to wash covers that the full cushion. The easy way is to sew a pillow cover envelope, it just takes a few minutes and it’s easy even if you are a seamstress beginner.
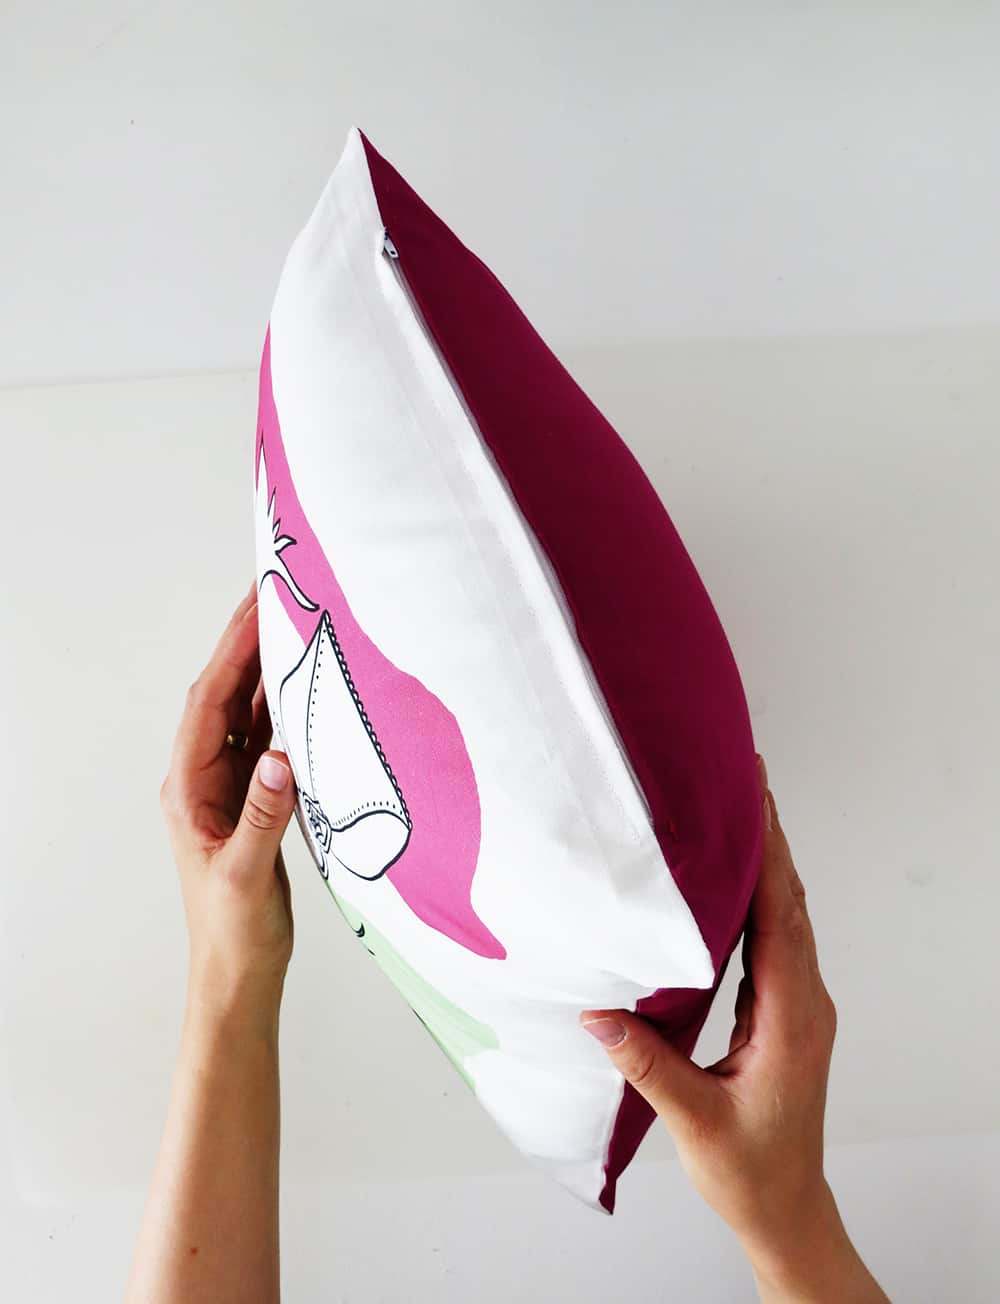
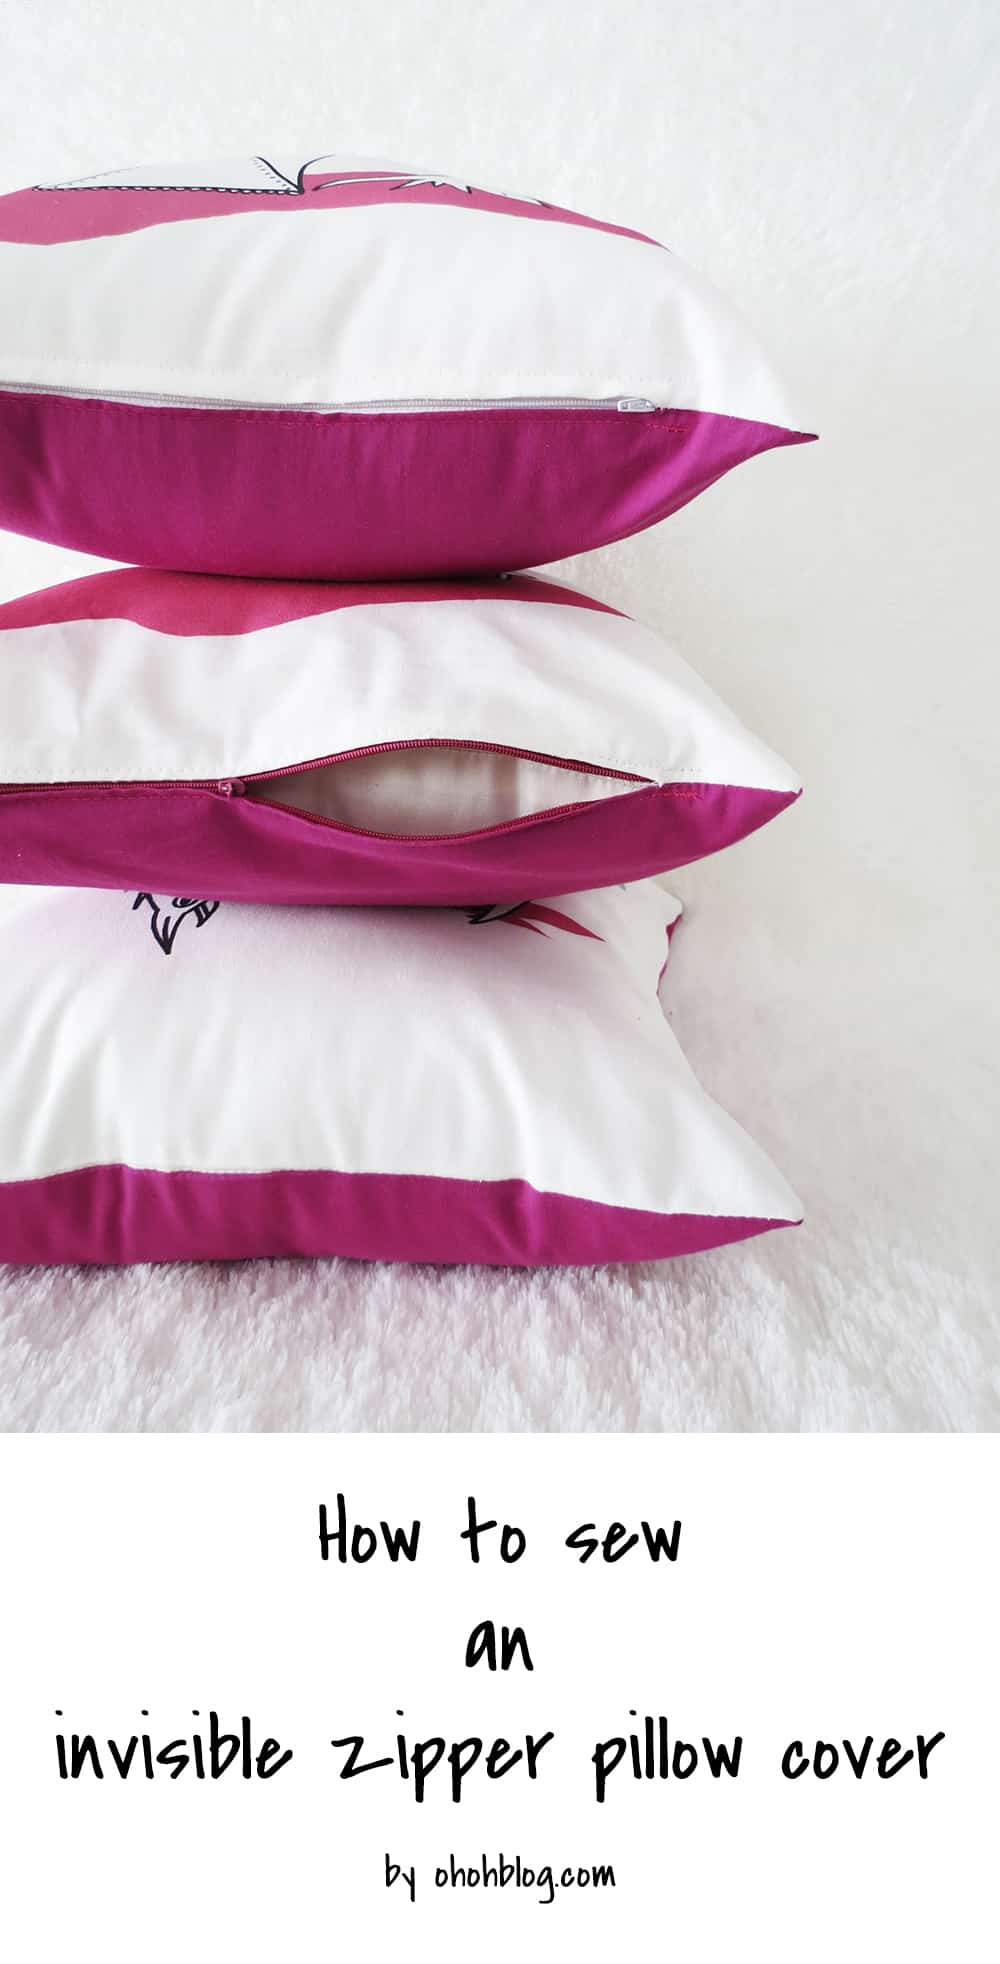
I prefer a zippered pillow cover, I think it looks nicer and better finished! Once you know how to sew it, it’s also quite fast to make. I will show you an easy way to sew the zipper and keep it hidden under fabric flaps.
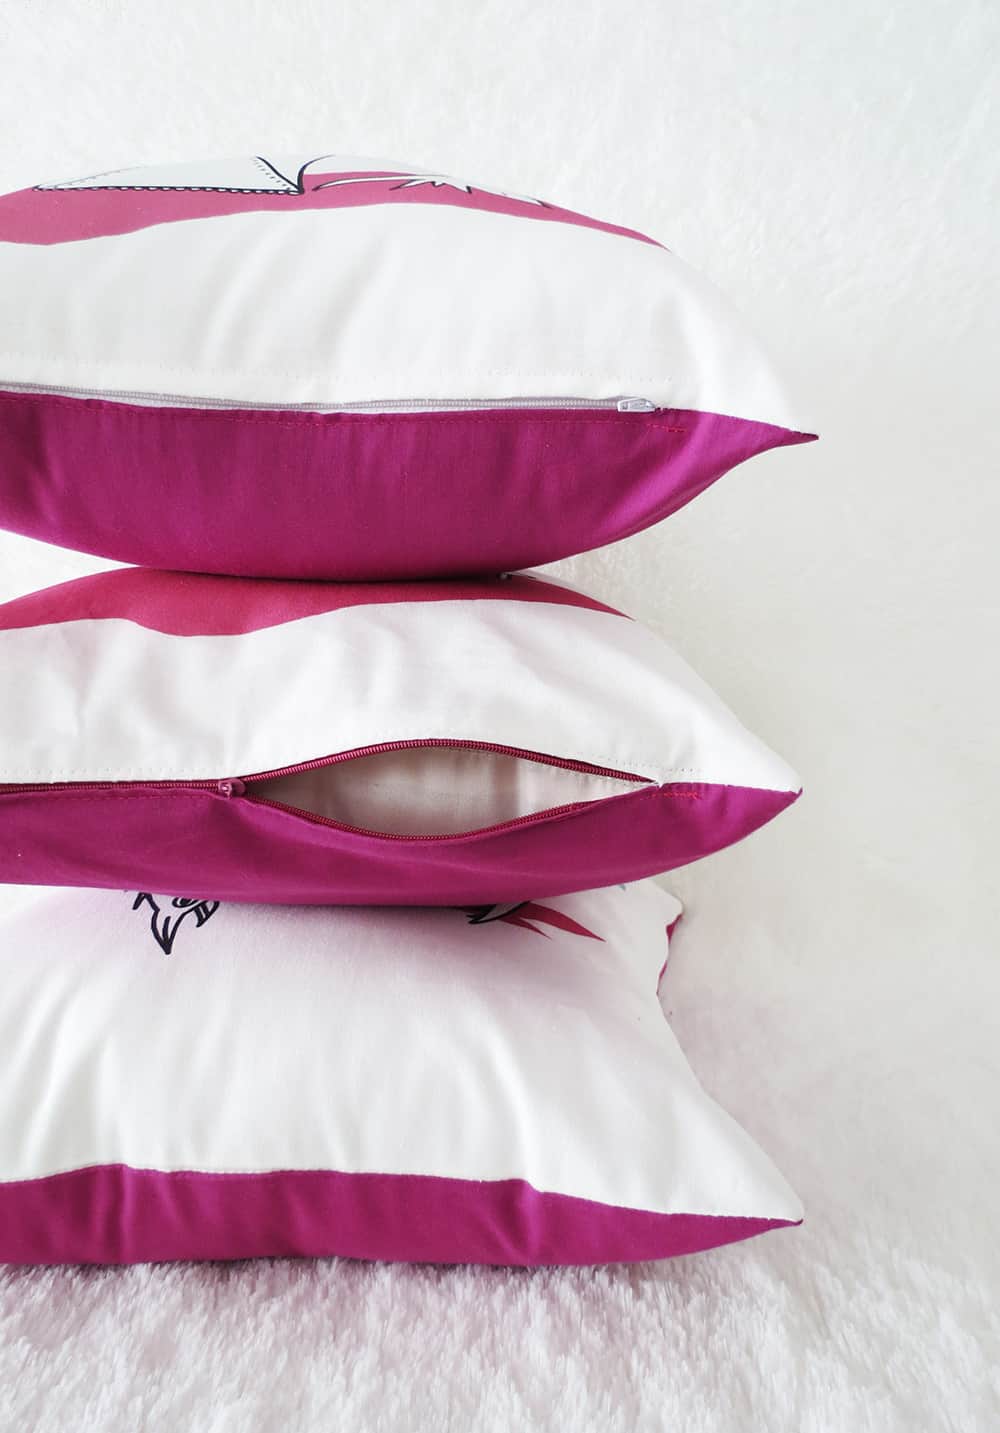
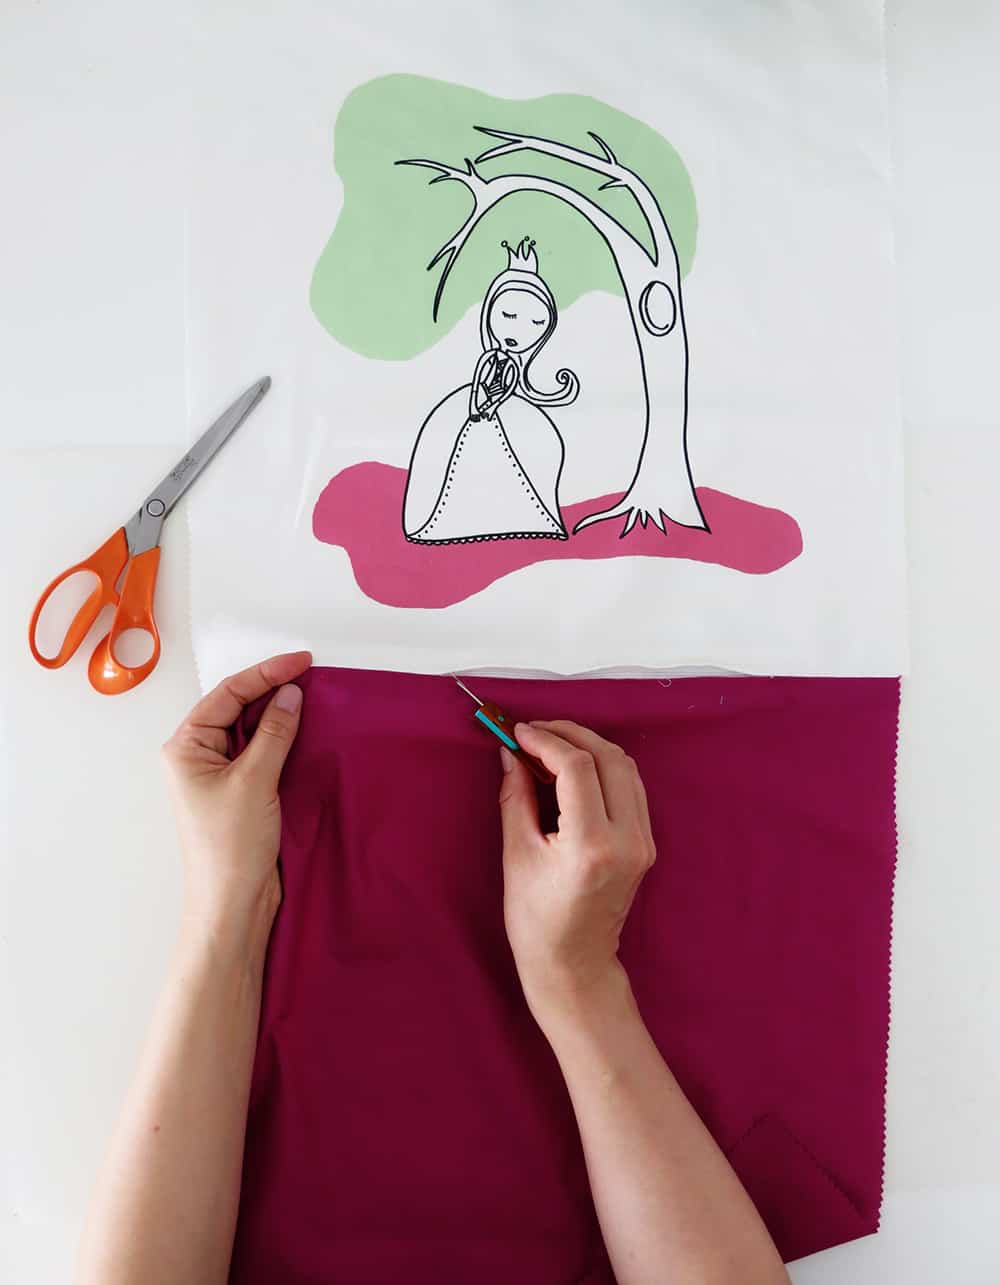
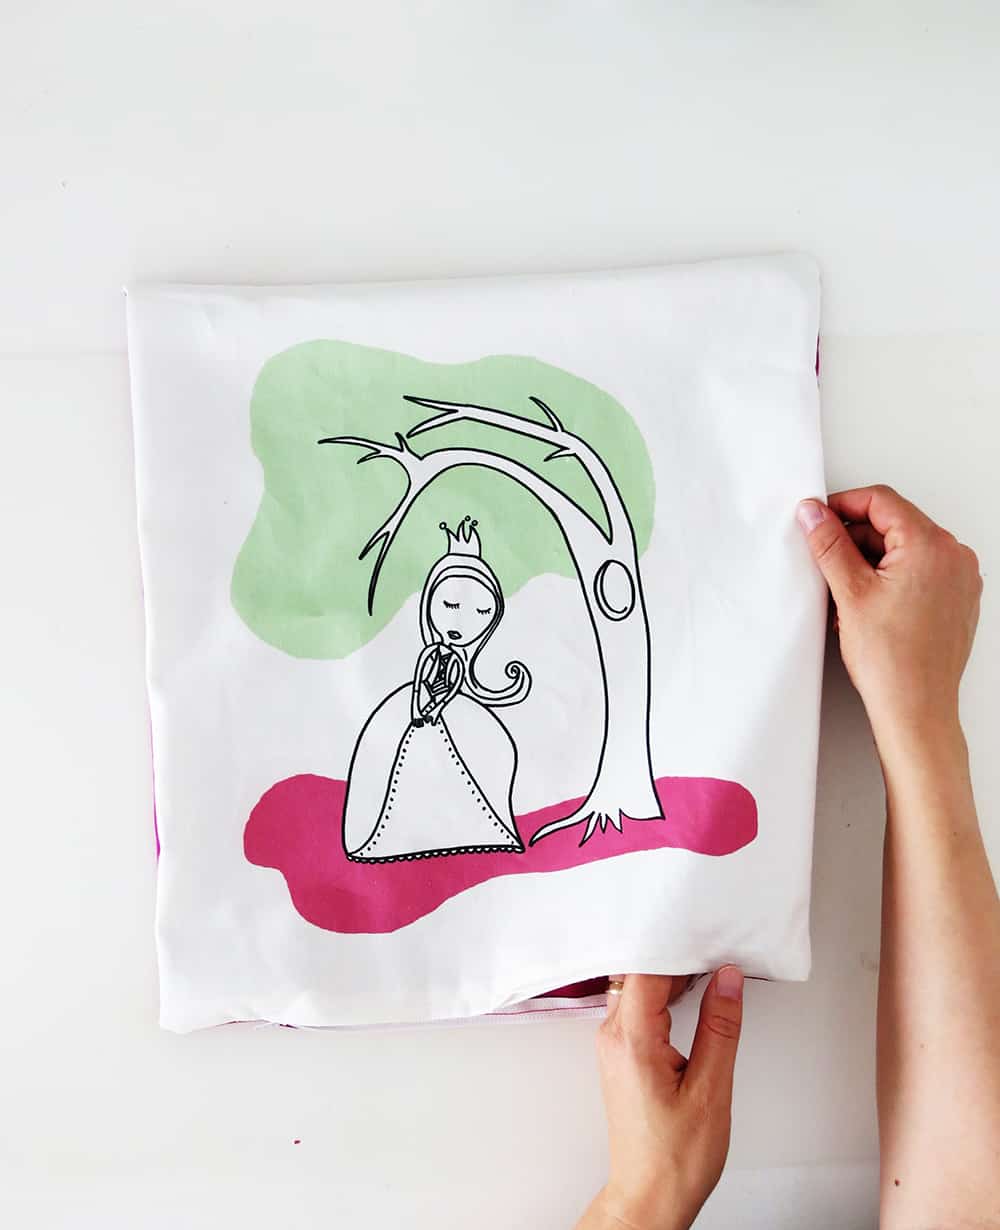
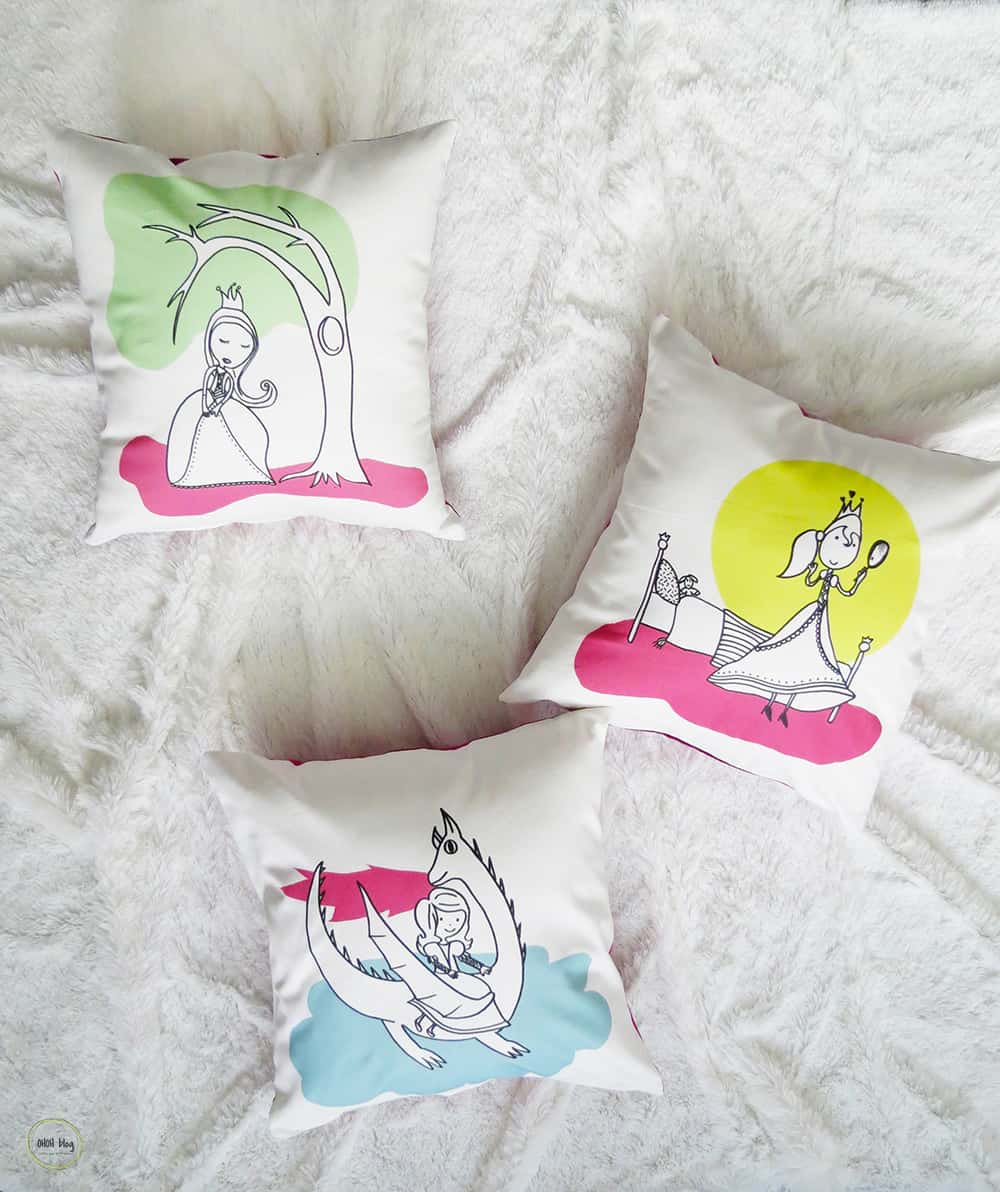
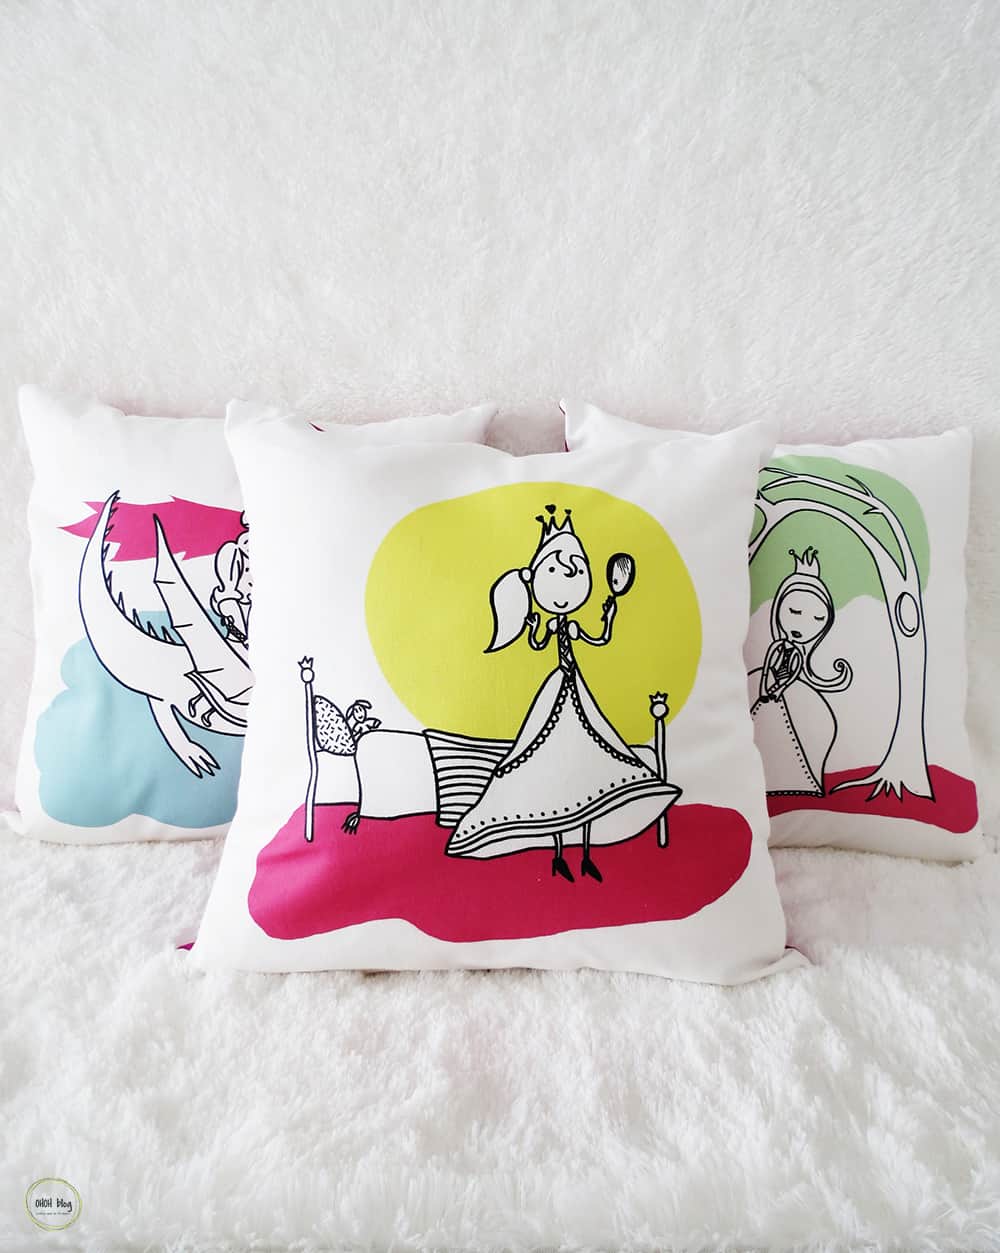
I made those pillows for my daughter’s bedroom. We choose three of her drawings and made them print on cotton by Contrado. The print turns out absolutely lovely. For the pillow back I used fuchsia cotton to add some contrast with the front.
Here goes the material you will need to sew an invisible zipper pillow cover:
- Fabric
- matching thread
- Pins
- A 12″ (30cm) zipper
- A sewing machine
- Iron and iron board
- A pair of scissors.
This pillowcase was made for a standard 18″x18″ (45×45 cm) cushion insert.
RELATED: DIY succulent shaped pillow
RELATED: How to sew a round pillow with handle
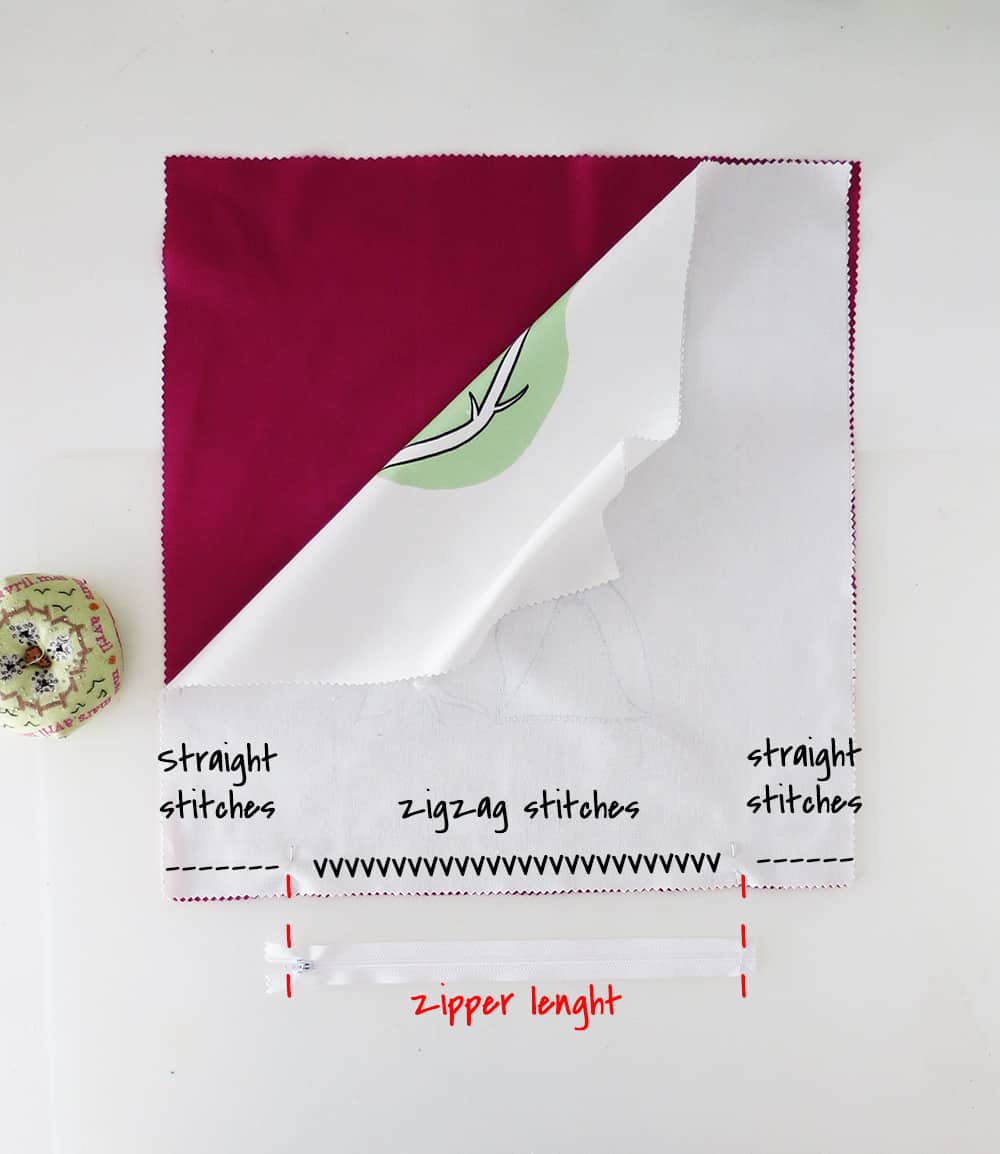
Start by cutting two fabric squares of 19 x 19″ (48×48 cm), serger or zigzag the edges to avoid the fabric to fray. Place both fabric squares one over the other, right side facing each other. Place the zipper along one side and report the zipper length on the fabric with two pins. Sew the two outer parts (from the pin to the fabric edge) with regular straight stitches and the inner section (between the two pins) with zigzag points. Once you are done sewing, remove the pins, open and iron the fold.
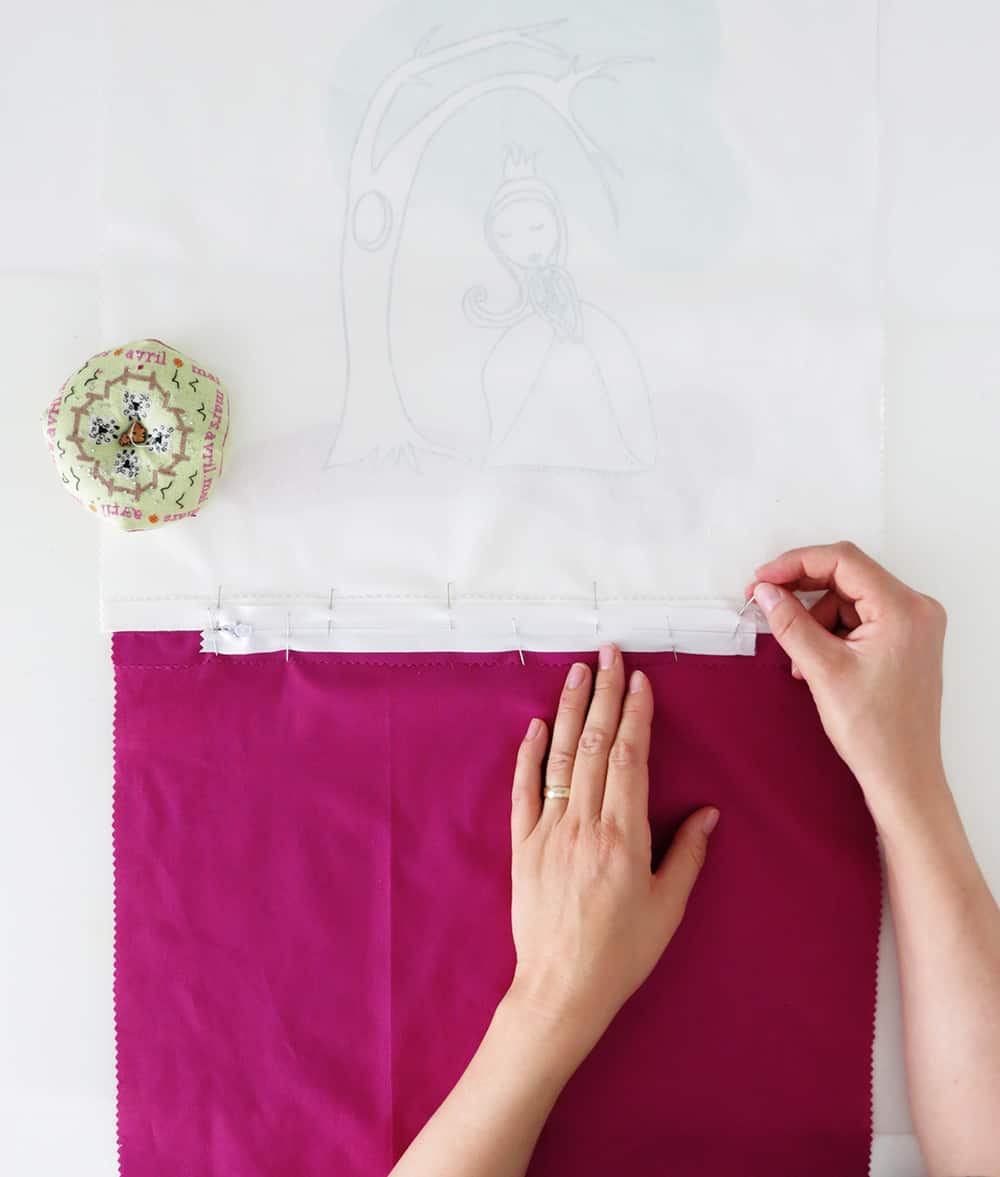
Place the zipper on the ironed fold, where the zigzag points are. The fabric and the zipper must be facing down. Pin the zipper with the fabric.
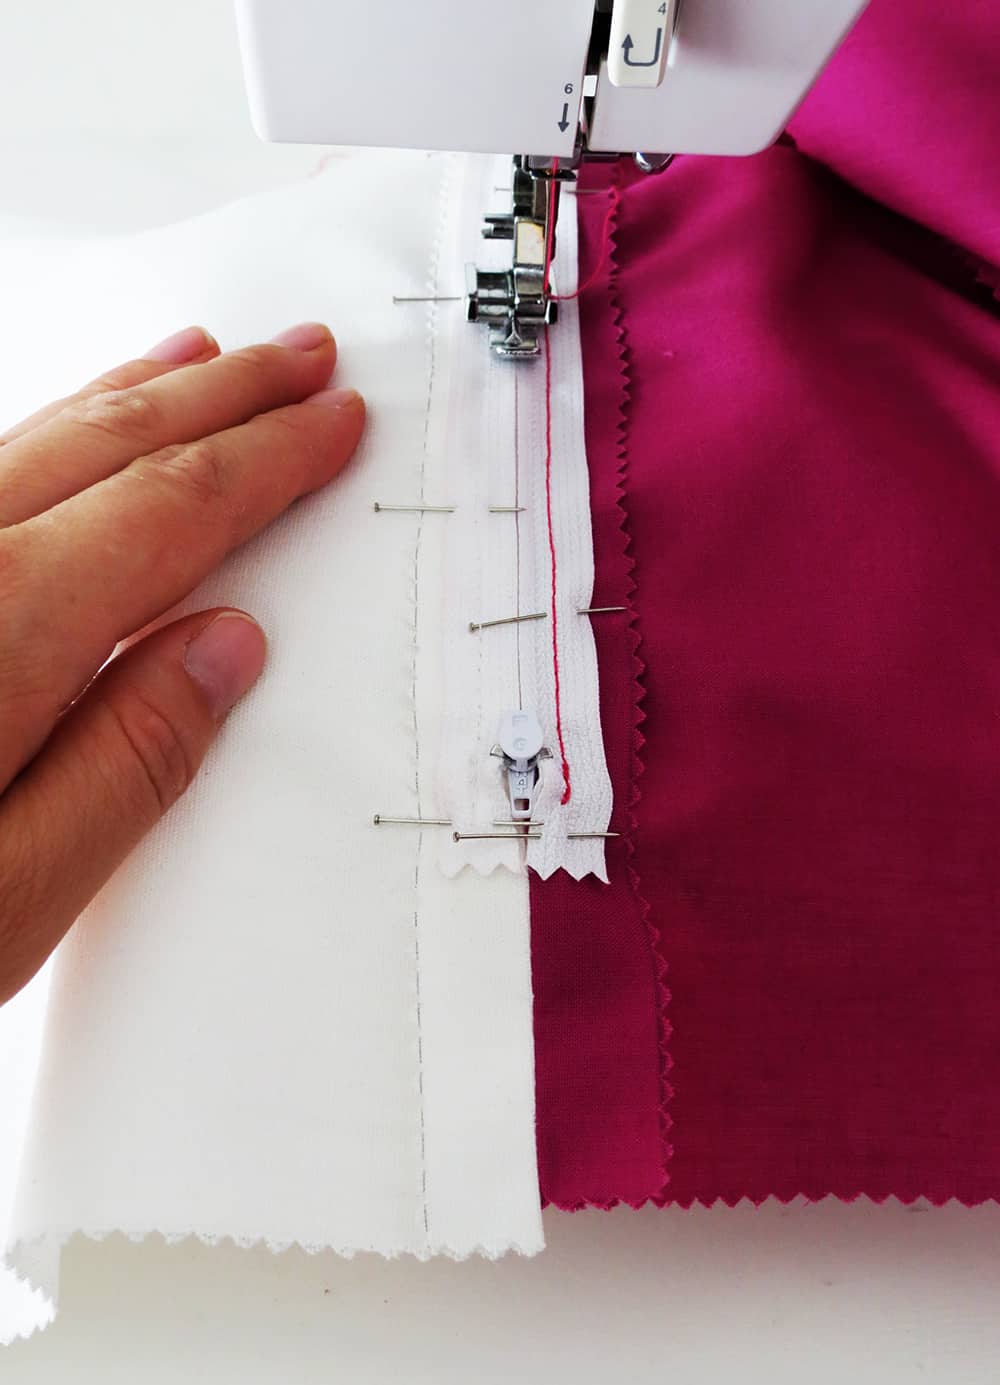
Use the zipper foot and make a seam on both sides of the zipper.
Remove the pins and flip the fabric to have the right side up. Unstitch the zigzag stitches, remove the small thread pieces and done! The zipper is perfectly stitched, you can open and close it easily.
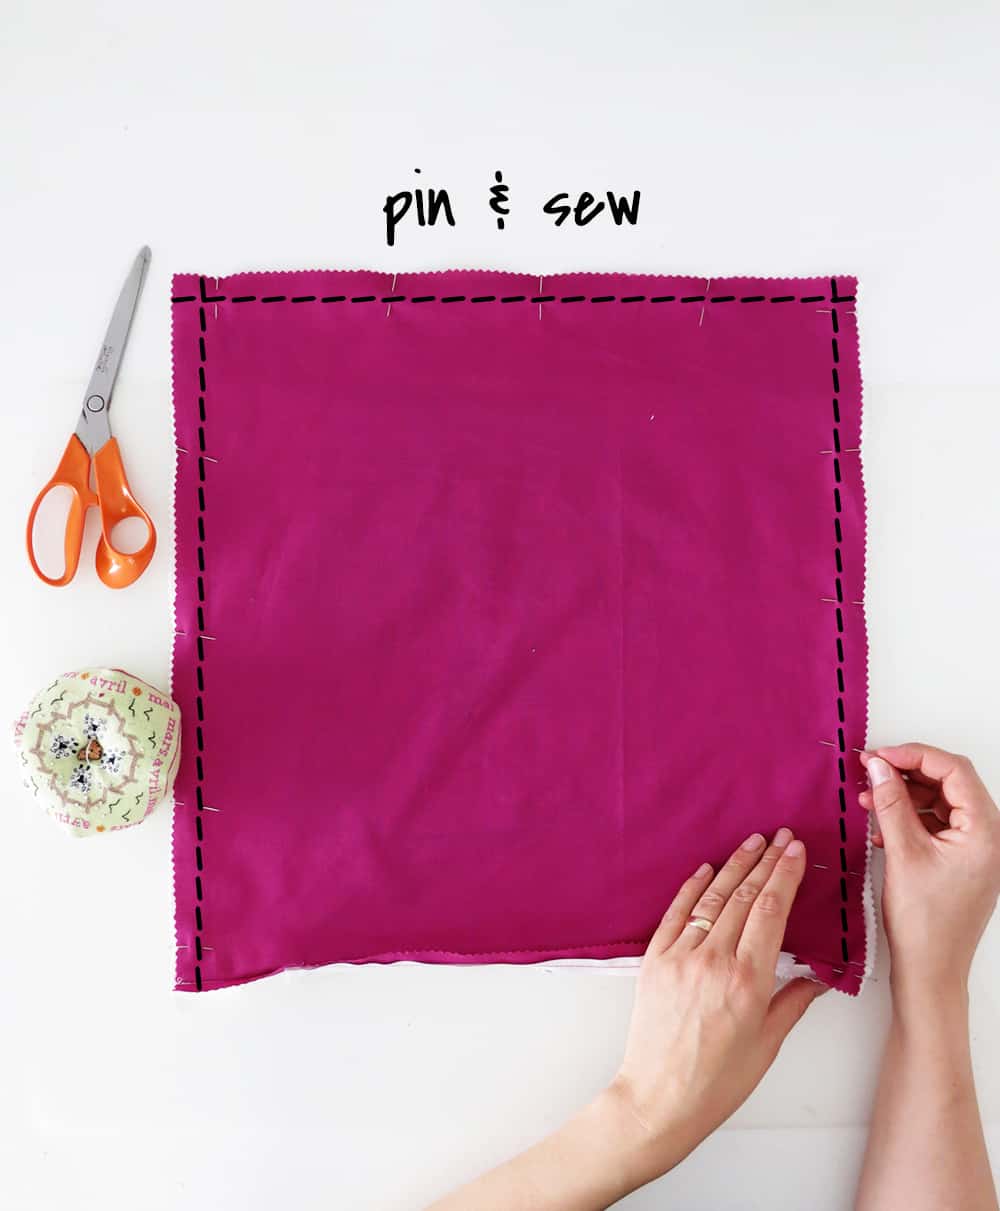
Place both squares on top of each other again, right side in. Pin the edges together and sew the 3 sides. Leave the zipper 3 inches open, so you will be able to turn the pillow cover right side out easily.
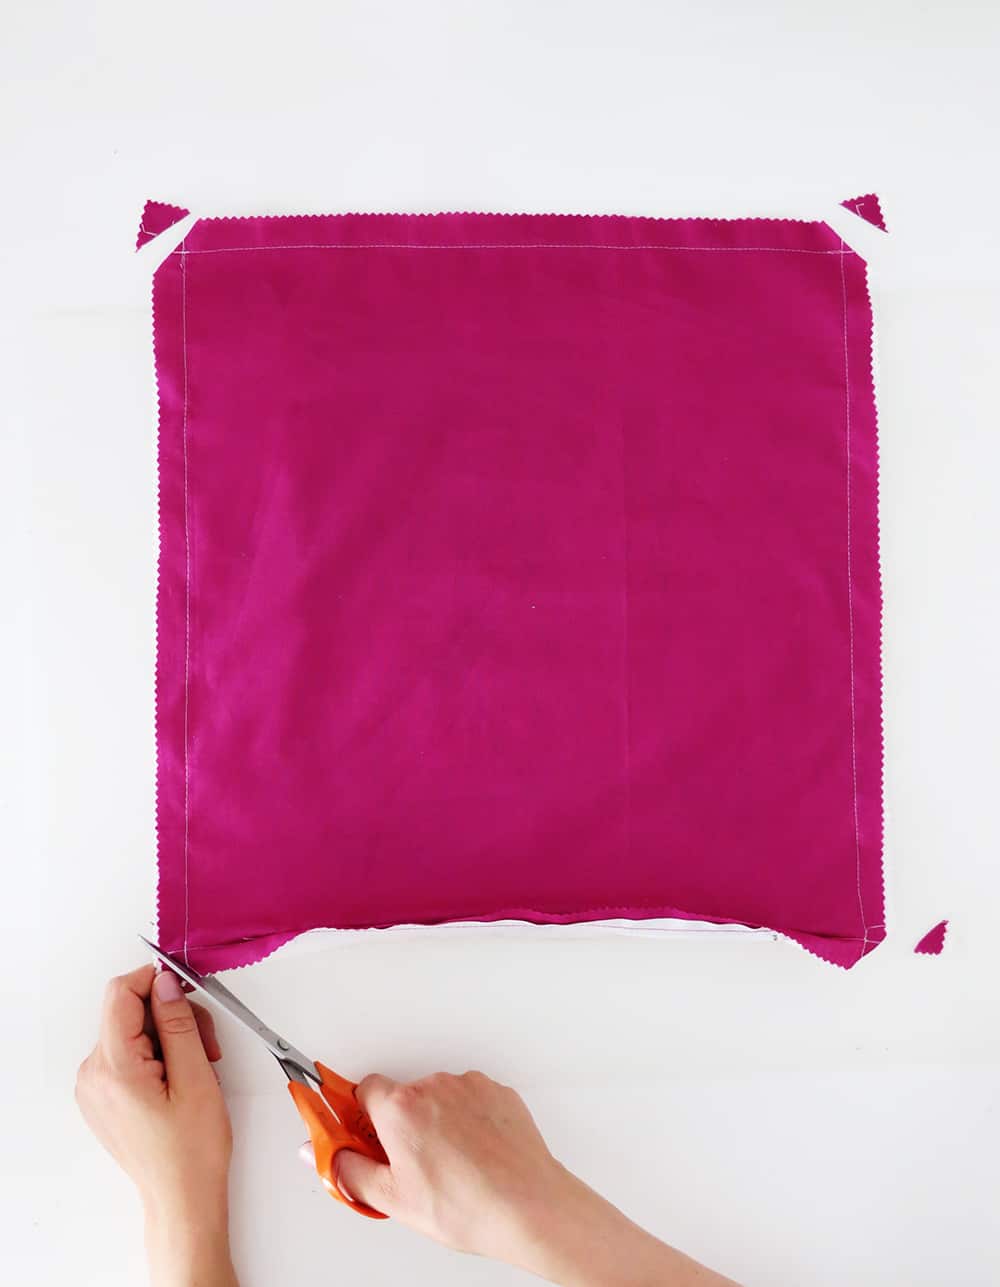
Trim the corner to have a cover with nice clean tips.
Open the zipper and turn the cover right side out, Iron the seams for a nice finish.
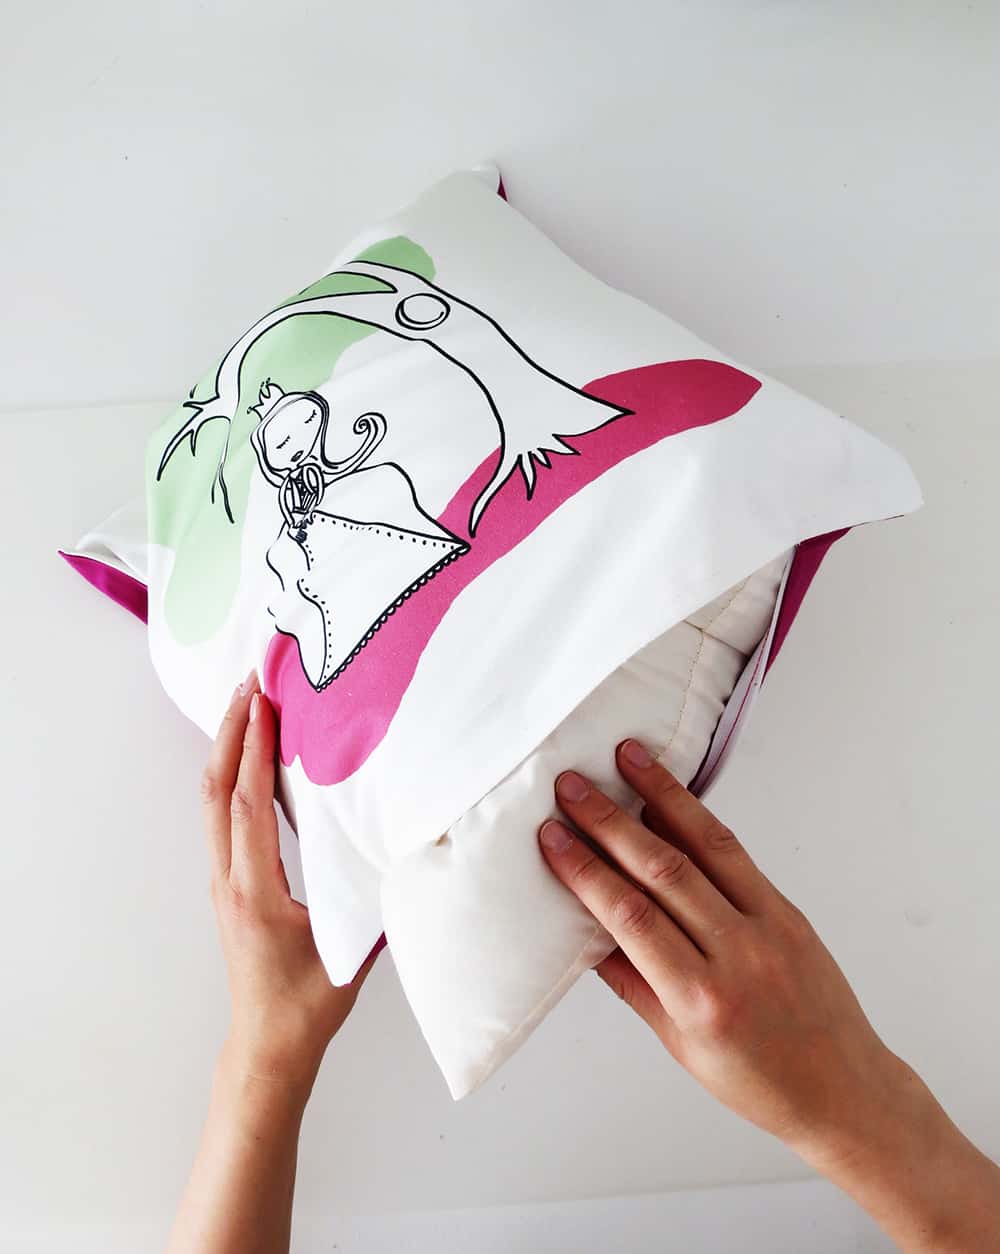
Put the insert in and close the zipper!
And done! You have a practical pillow cover with an invisible zipper!
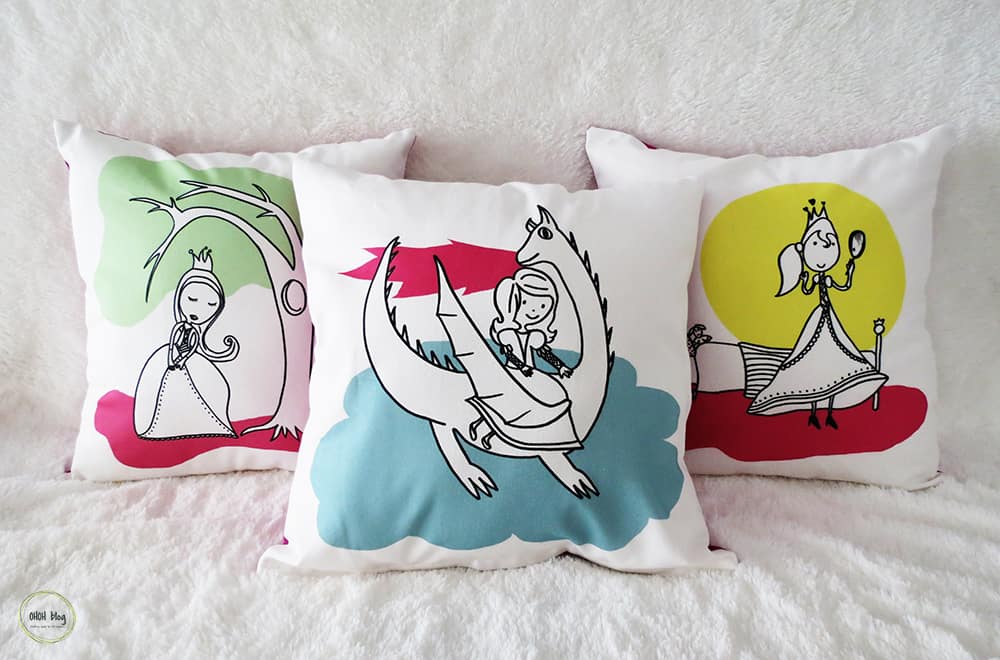
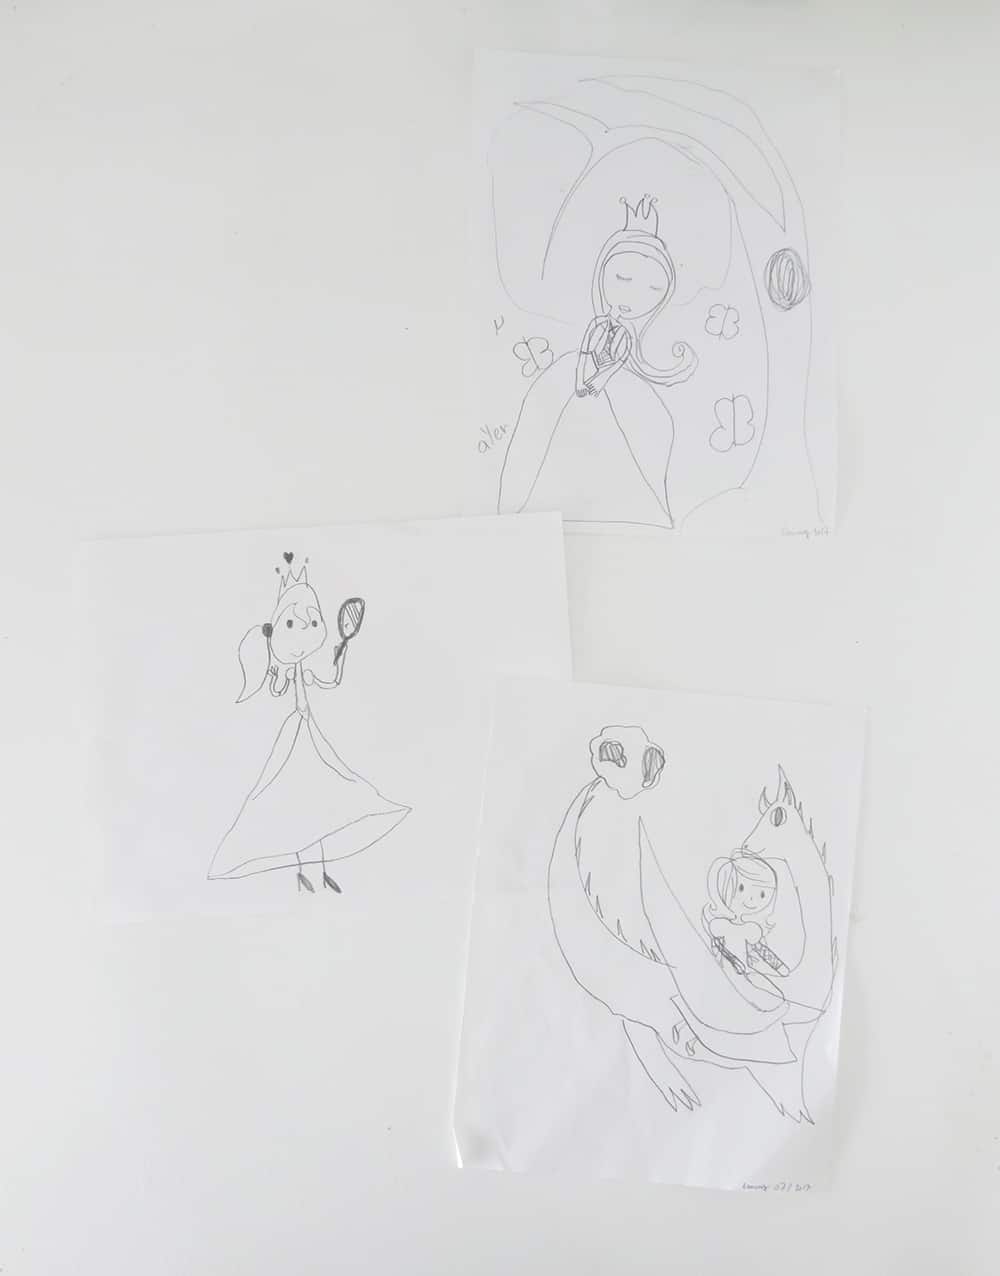
I just wanted to share my daughter original drawings, she is 8 but draws them last year. As you can see the only thing I did was to add some color to the drawings. No need to say that she is absolutely thrilled to see her drawings on pillows. And I’m still amazed how good she is for drawing…but I guess it’s normal I’m her mum 🙂
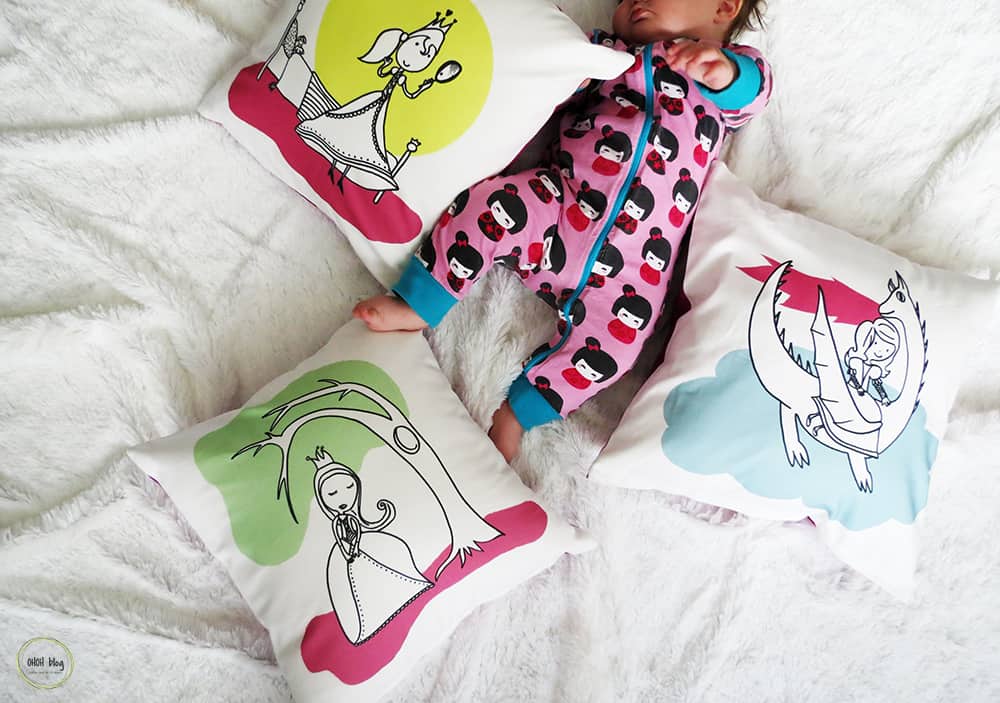
And some more pics because I also love how the cushions turn out!
Pin it for later!
Talking about throw pillows, you may also like

[AdSense-C]
Amaryllis

Wonderful!
Thanks Maria laura!
That’s really cute! One should try this and after reading this post and watching the amazing pictures I would love to do that. I will try some letters on the pillows. I hope it will work. I really love this post, it gave me some quite good ideas. Thanks.
Reverse channel letters
Thanks, have fun sewing!
I love your pillows-your daughter is a talented artist! I think Im going to try and make a pillow
Thanks Claire, she draws all day long.
This is gorgeous work 🙂