Something I want to change this year is being more daring. In life in general but also in my decoration choices. Trying new things, innovate, eventually fail and try again! I just feel a need to get out of the routine and takes some risk.
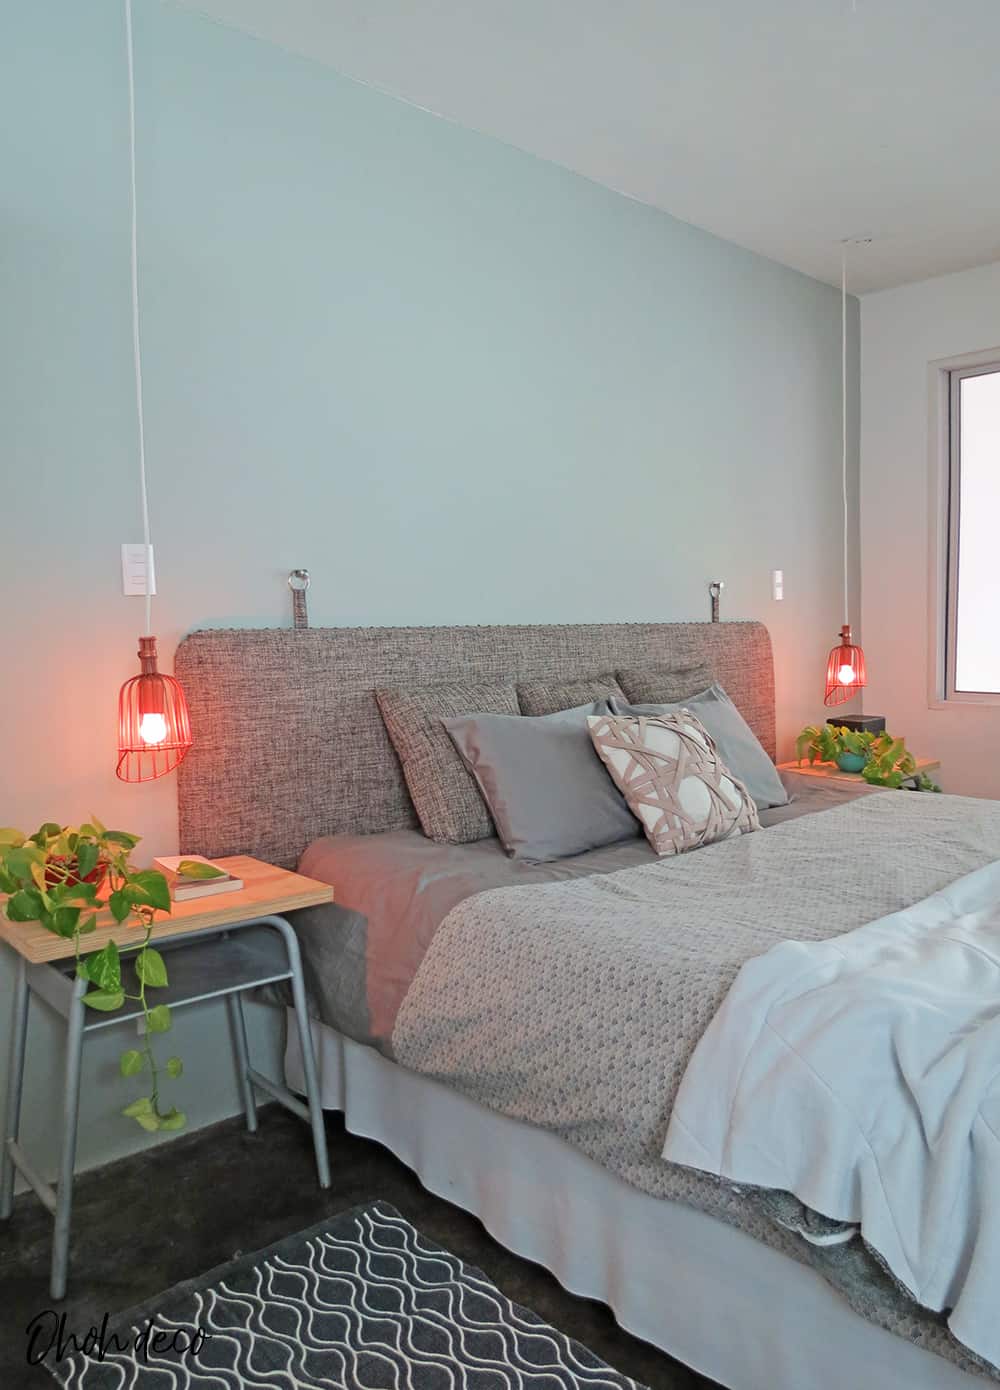
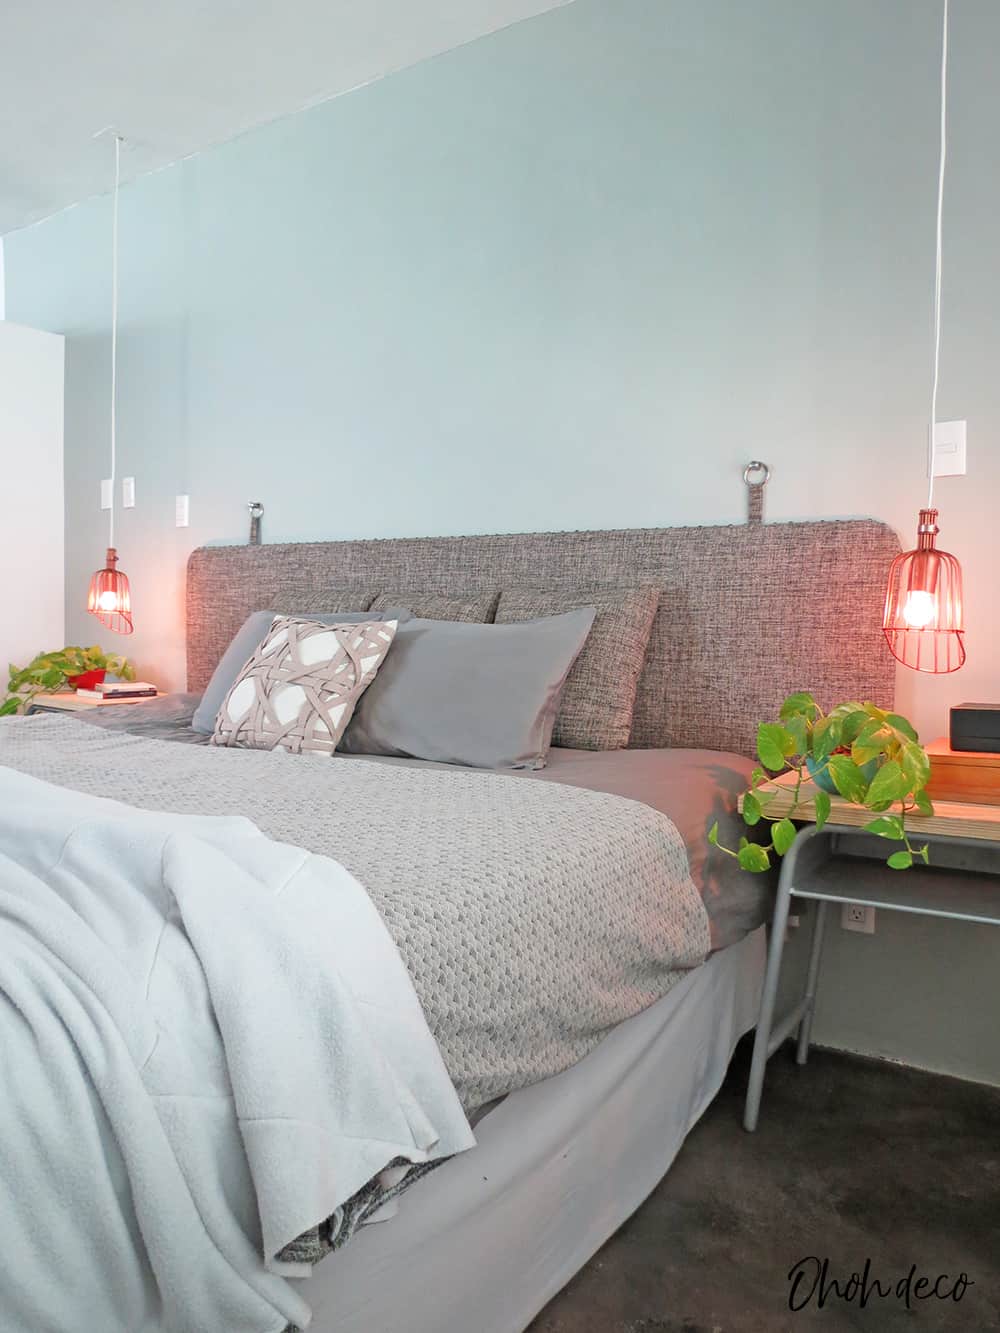
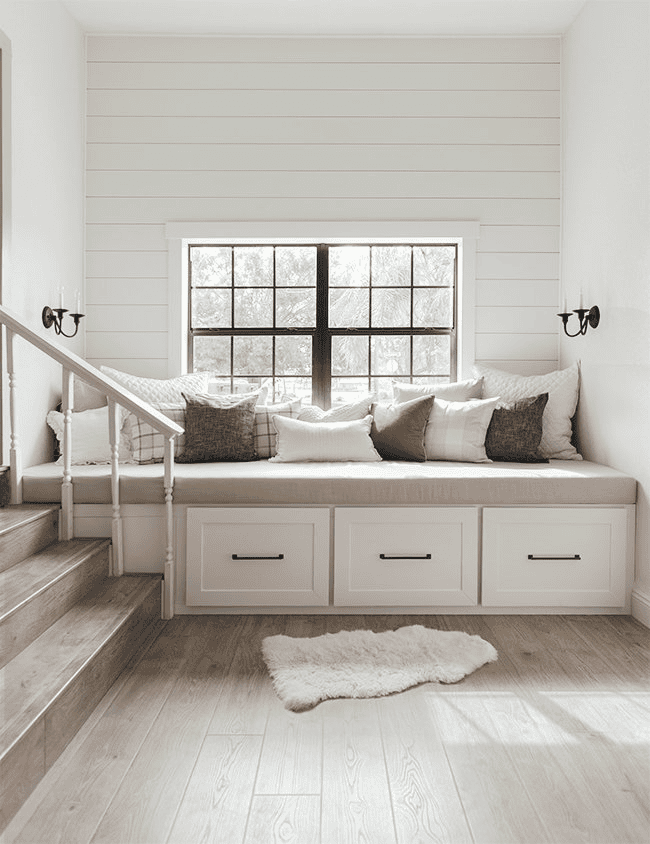
We agree that big changes always begin with a small step, so I decided to change our bedroom decor. I added a colored wall and changed the side lamps.
I you like to read the DIY cage lamp tutorial, scroll down. I will start by explaining my color choice.
A few years ago, after a bad experience with a horrible red wall in our living room, I took the decision that every wall will be white. I like white, but I just feel it’s playing safe.
[ This post probably contains affiliate links, our full disclosure policy is really boring, but you can read it HERE ]
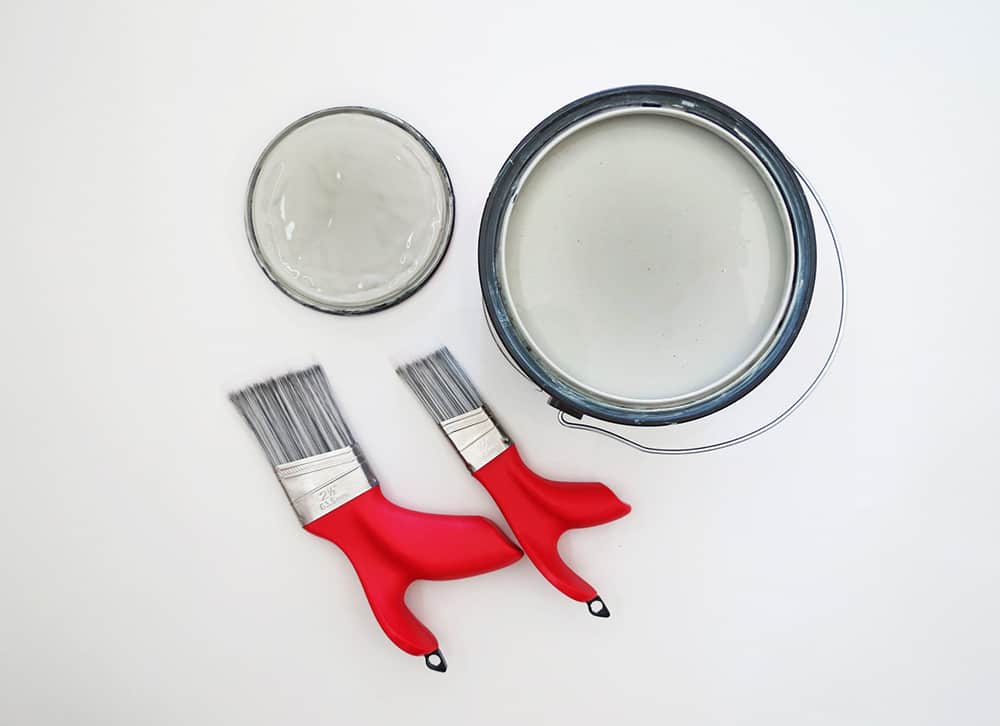
The first painting project I had in mind was the wall behind our bed, I have been thinking about it for a while. So when Pure Form Brands reach me out to know if I wanted to try them ergonomic brushes, I just feel it was the push I was waiting for! So, I start pinning bedroom colors and getting some paint samples.
RELATED: DIY paper lampshade
RELATED: How to wallpaper
Painting one wall a different color
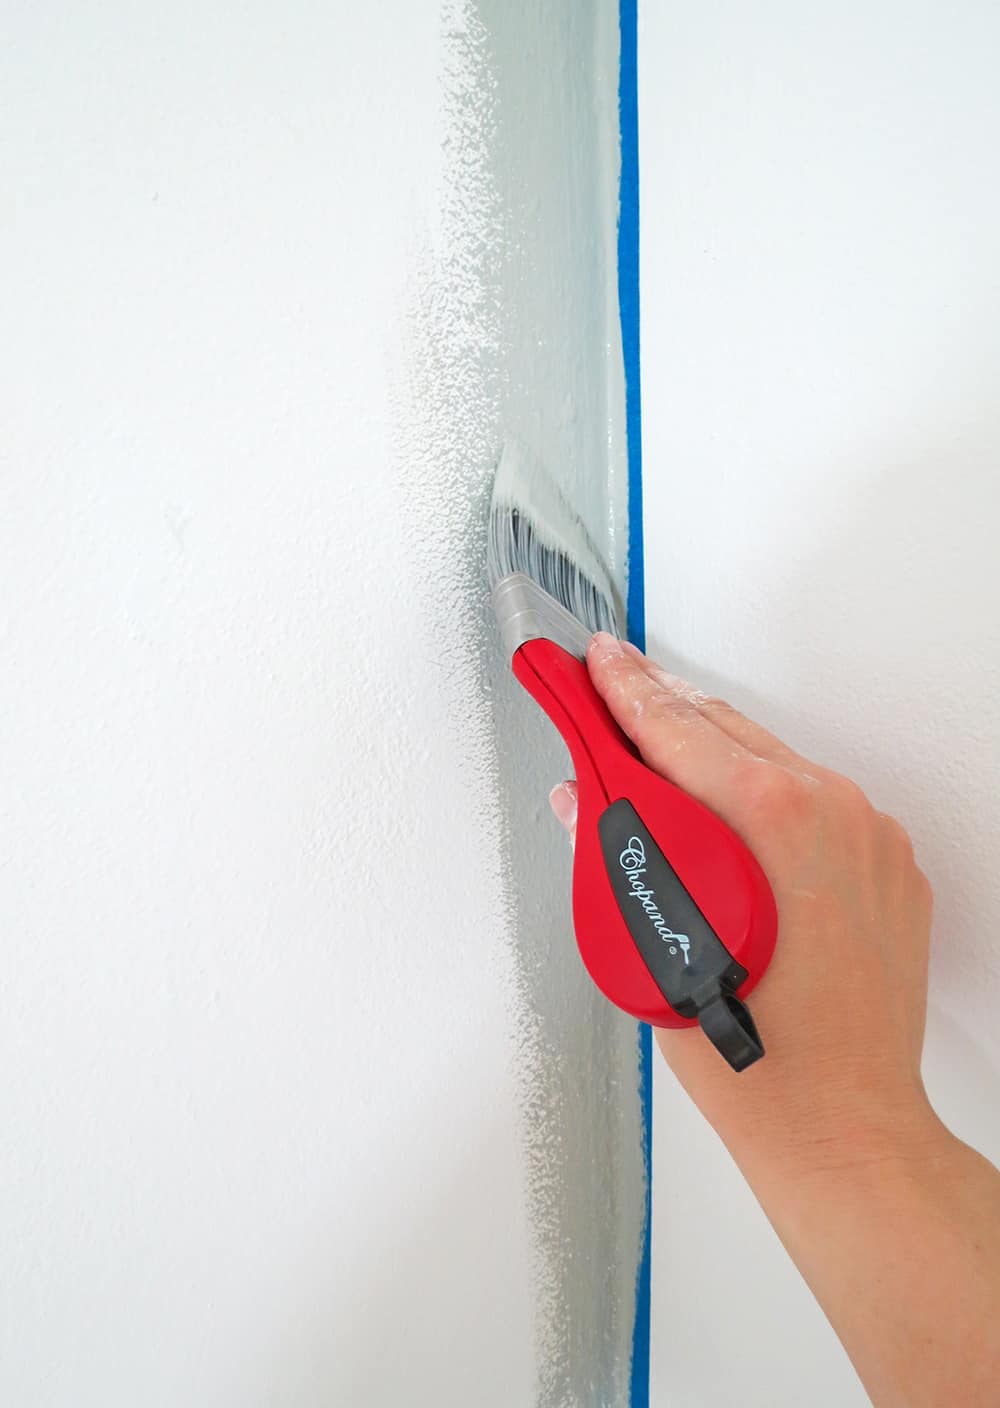
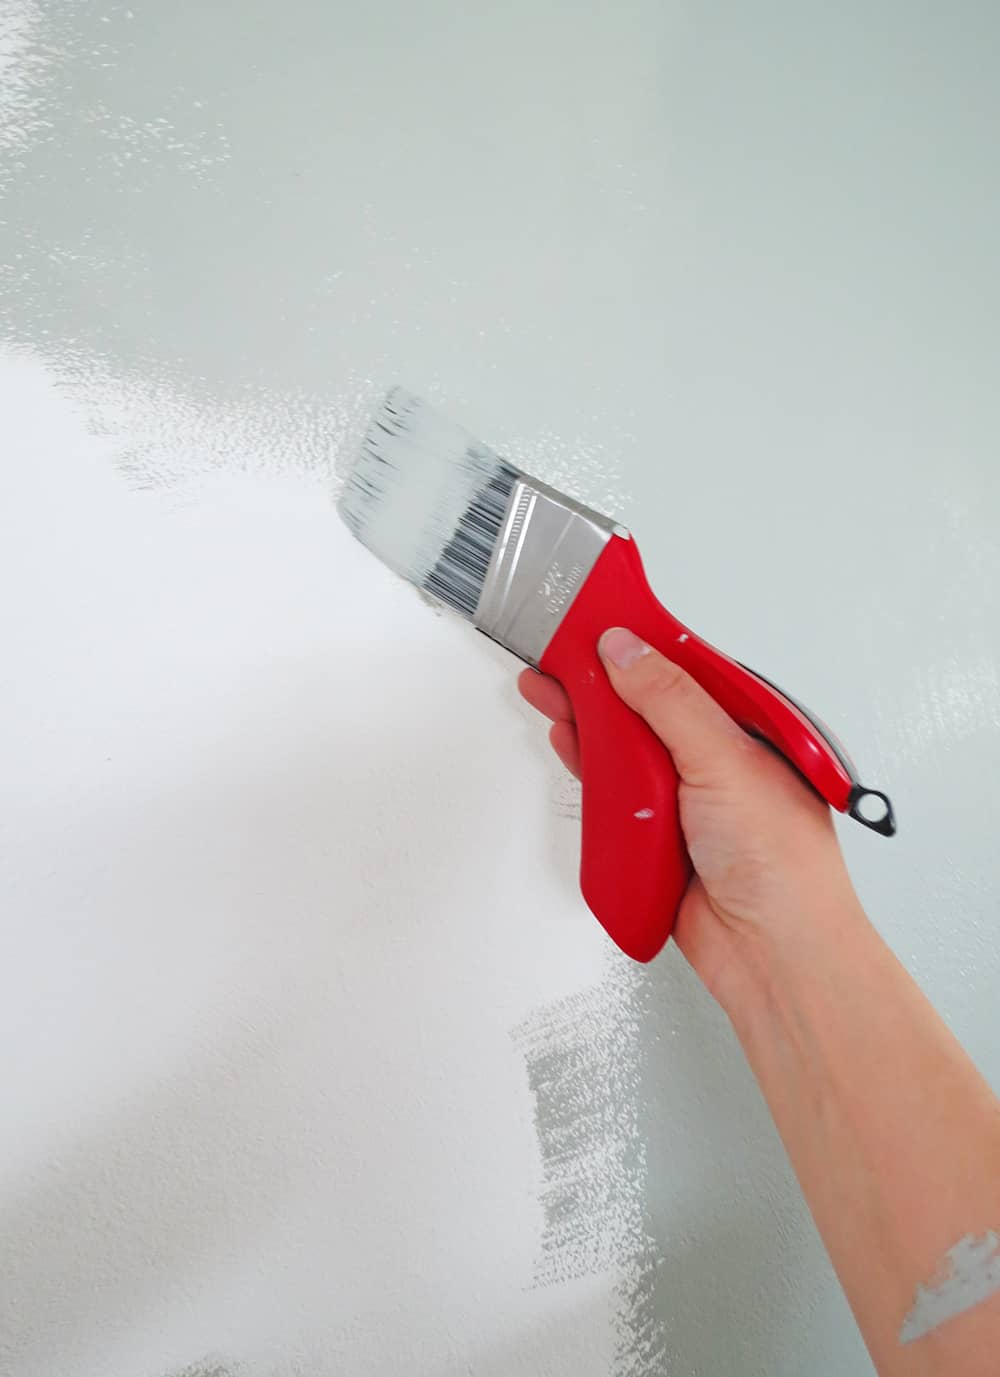
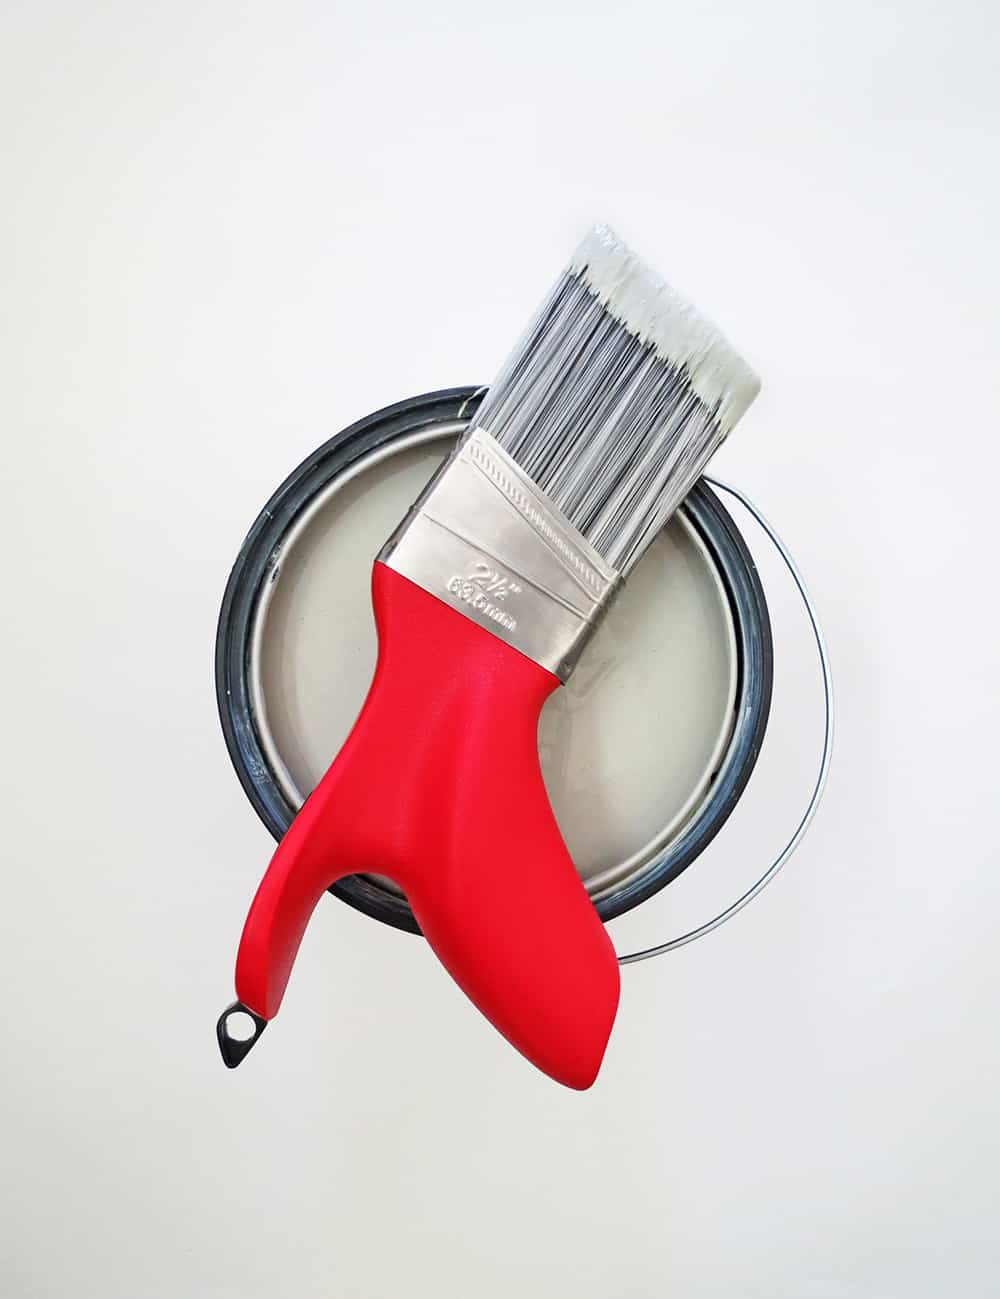
I moved the furniture away, placed some masking tape to delimitate the painting area and I was ready to try these fun brushes.
When you first see the shape it’s a little surprising, but once you take it in hand, the shape is made in such a way that the handle fits perfectly to your hand. You have a better grip than with a regular brush.
Other things that I liked is the soft bristles that bend nicely to paint the corners. Another good point, essential for me, it’s that the brushes are well crafted and not a single bristle came out. If you had ever paint something with a brush that lost hair…you know what I mean and the nightmare it can be!
I didn’t paint all wall with the brushes, I also used a painting roller, but I did try them on a few square meters and they are really comfortable to use.
When working (painting, drilling or using any other tool) I always have blisters that appear on the side of my thumb. This time, since the position of my hand was ergonomic, I had no injuries. Which is pretty cool!
Conclusion, these brushes are a very good tool and I will definitely continue to use them for my upcoming painting projects!
Our bedroom doesn’t have much natural light, so I didn’t want a dark color. First, I thought about putting a mint green, but when I tried the samples on the wall it just didn’t work with the headboard and the bedside tables.
My husband chooses a light gray with a subtle touch of green … I was not convinced at first, but I decided to follow his choice (after having a discussion in Home Depot because we didn’t agree on the color, obviously) and I’m very glad I did it!
I love the color and it fits perfectly in the room. What do you think?
I still have to find something to hang above the headboard, but meanwhile, I’m happy with our bedroom colored wall! I can’t believe that a simple layer of paint can change the room’s mood so much.
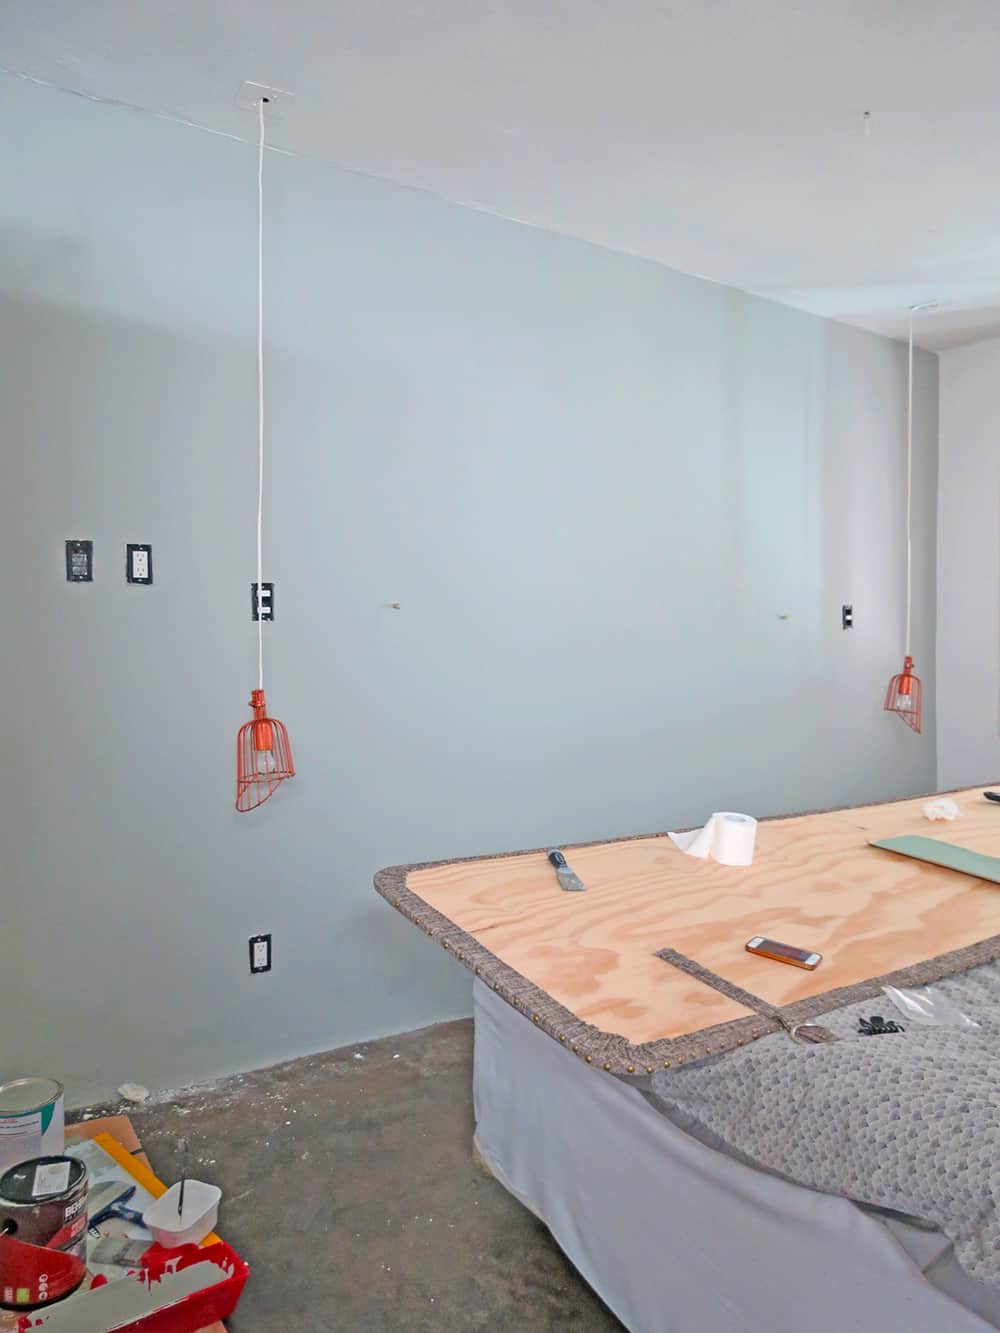
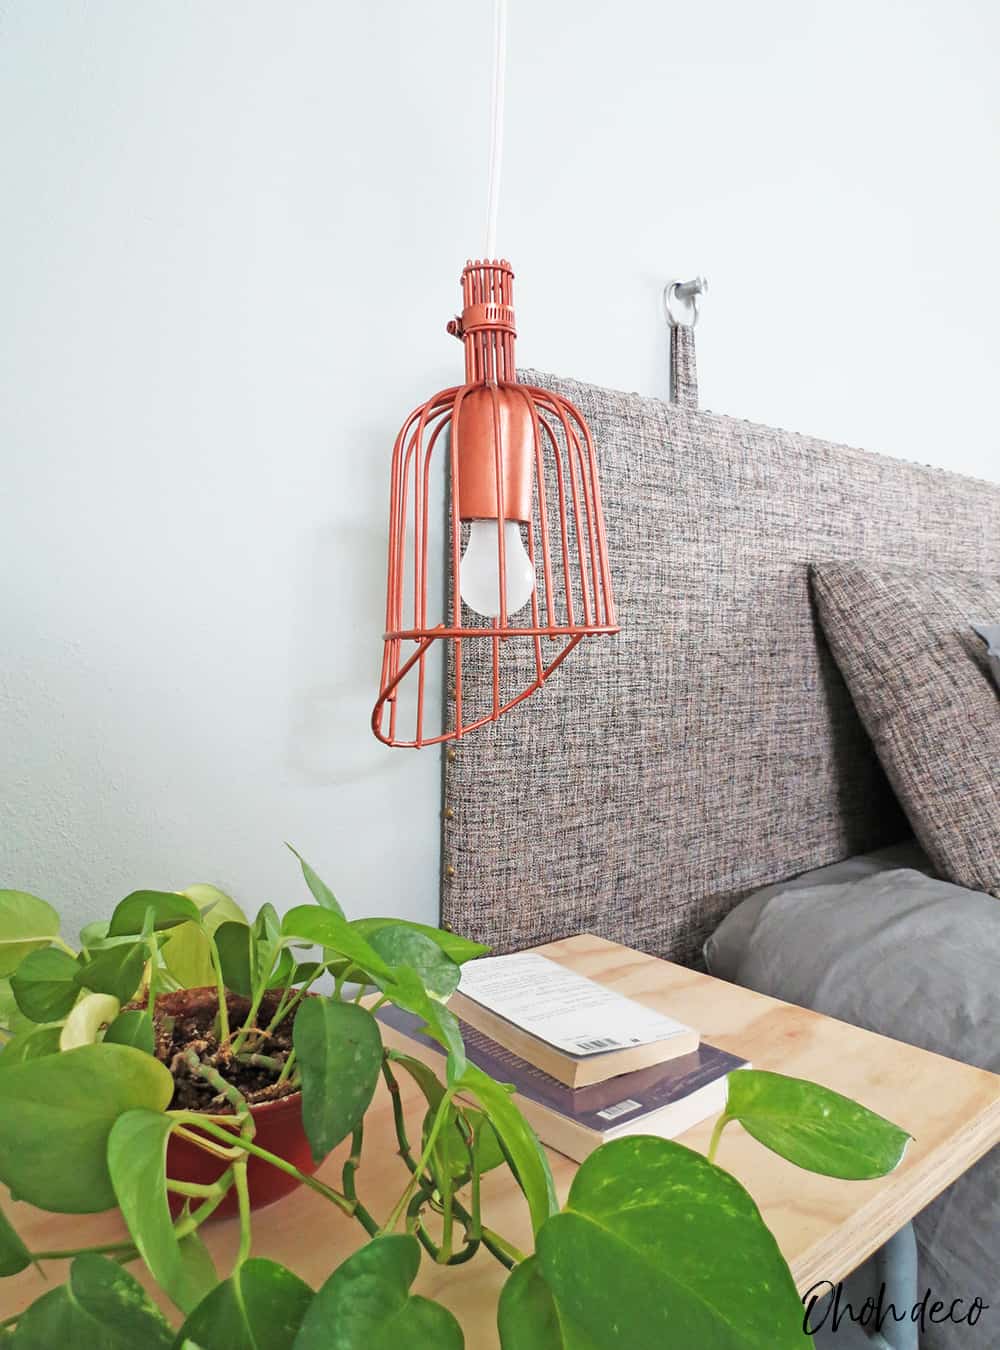
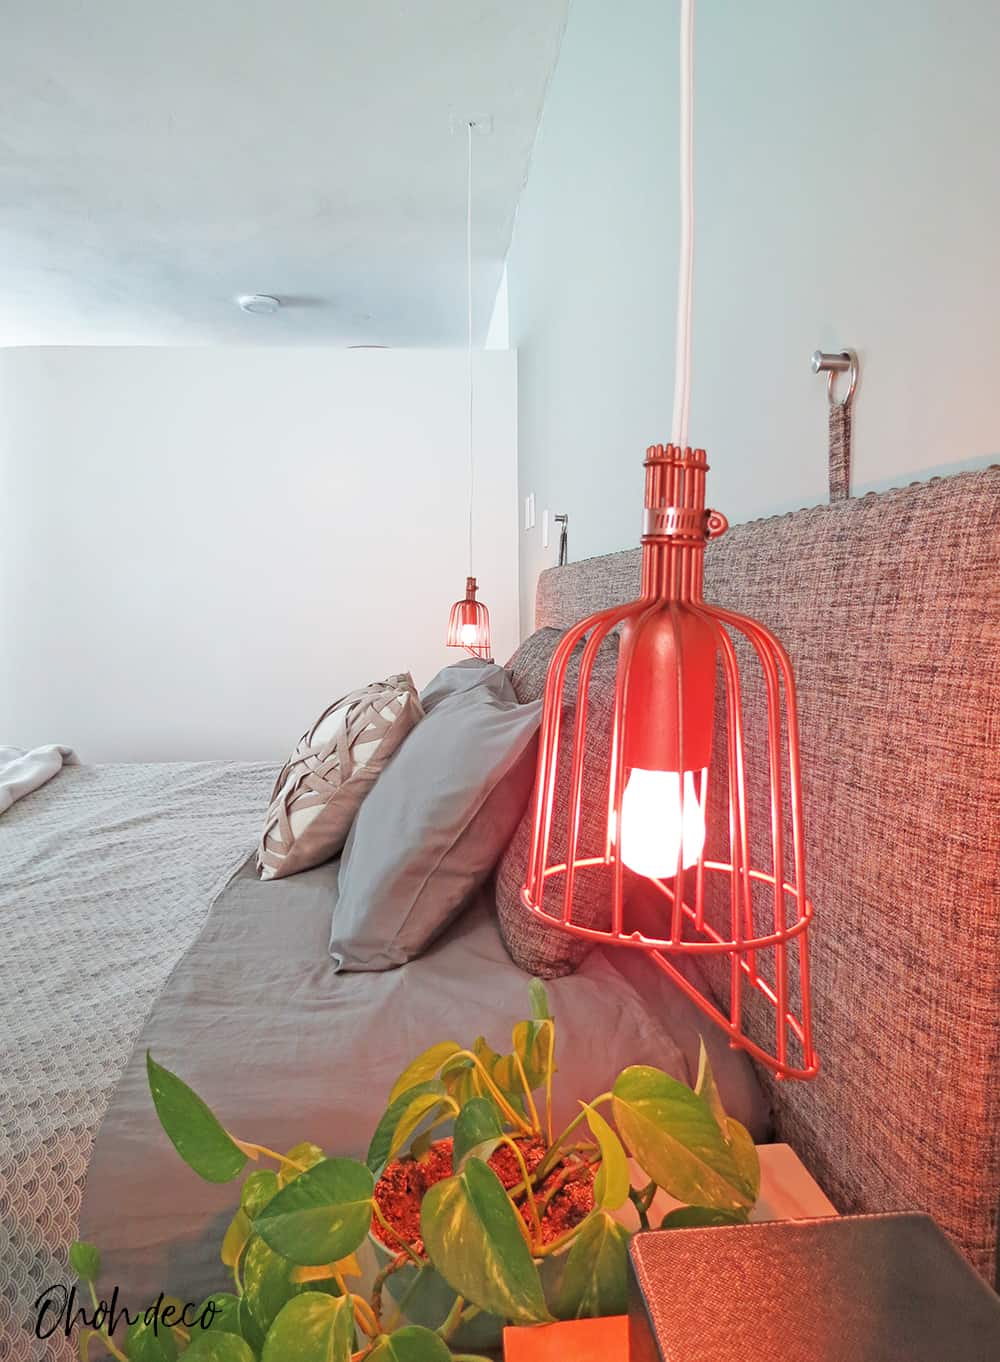
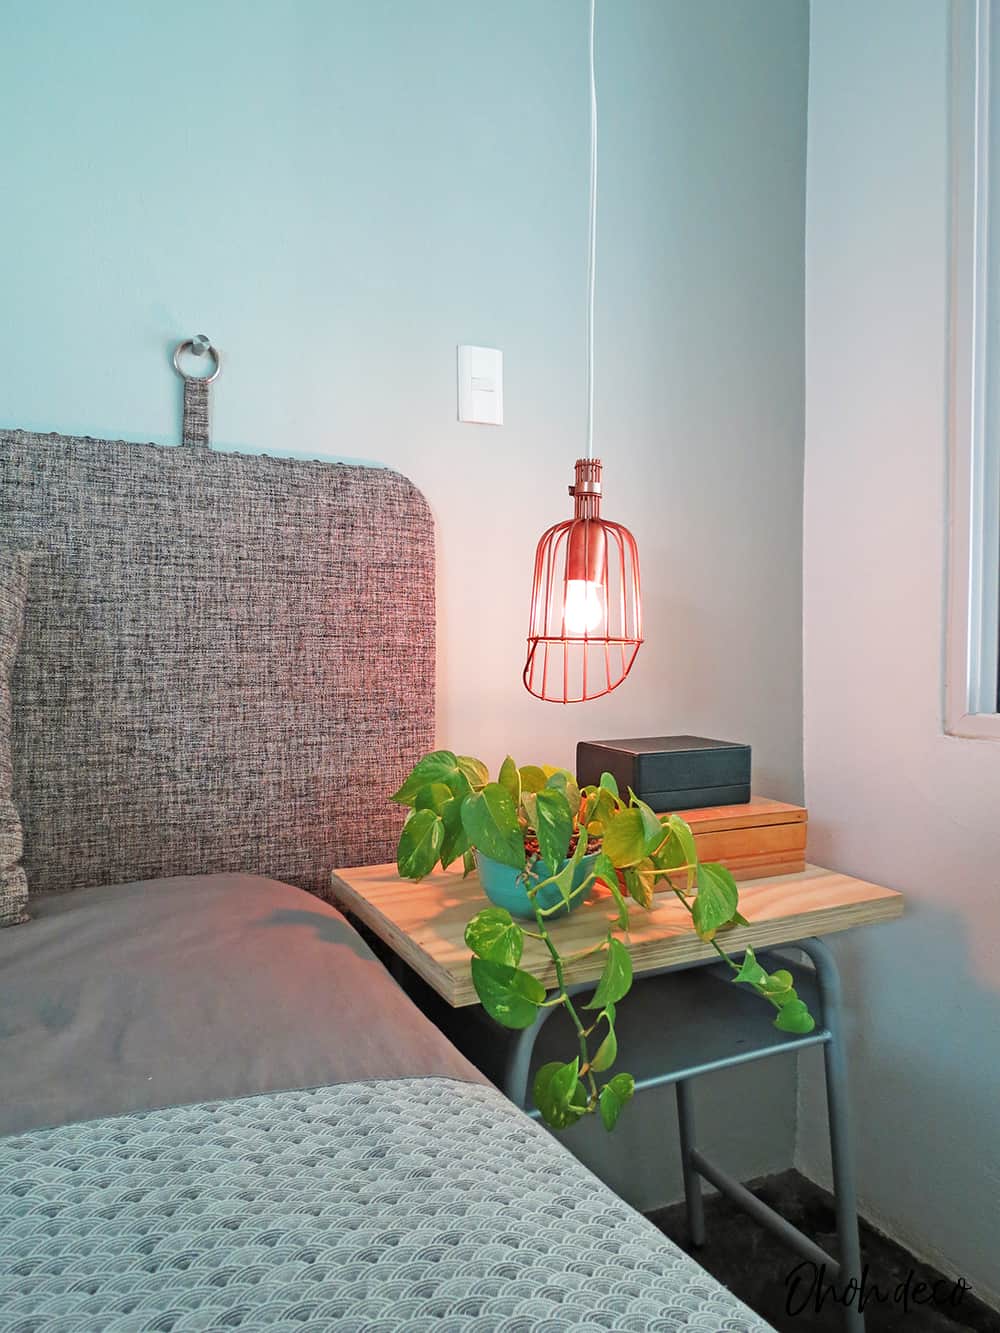
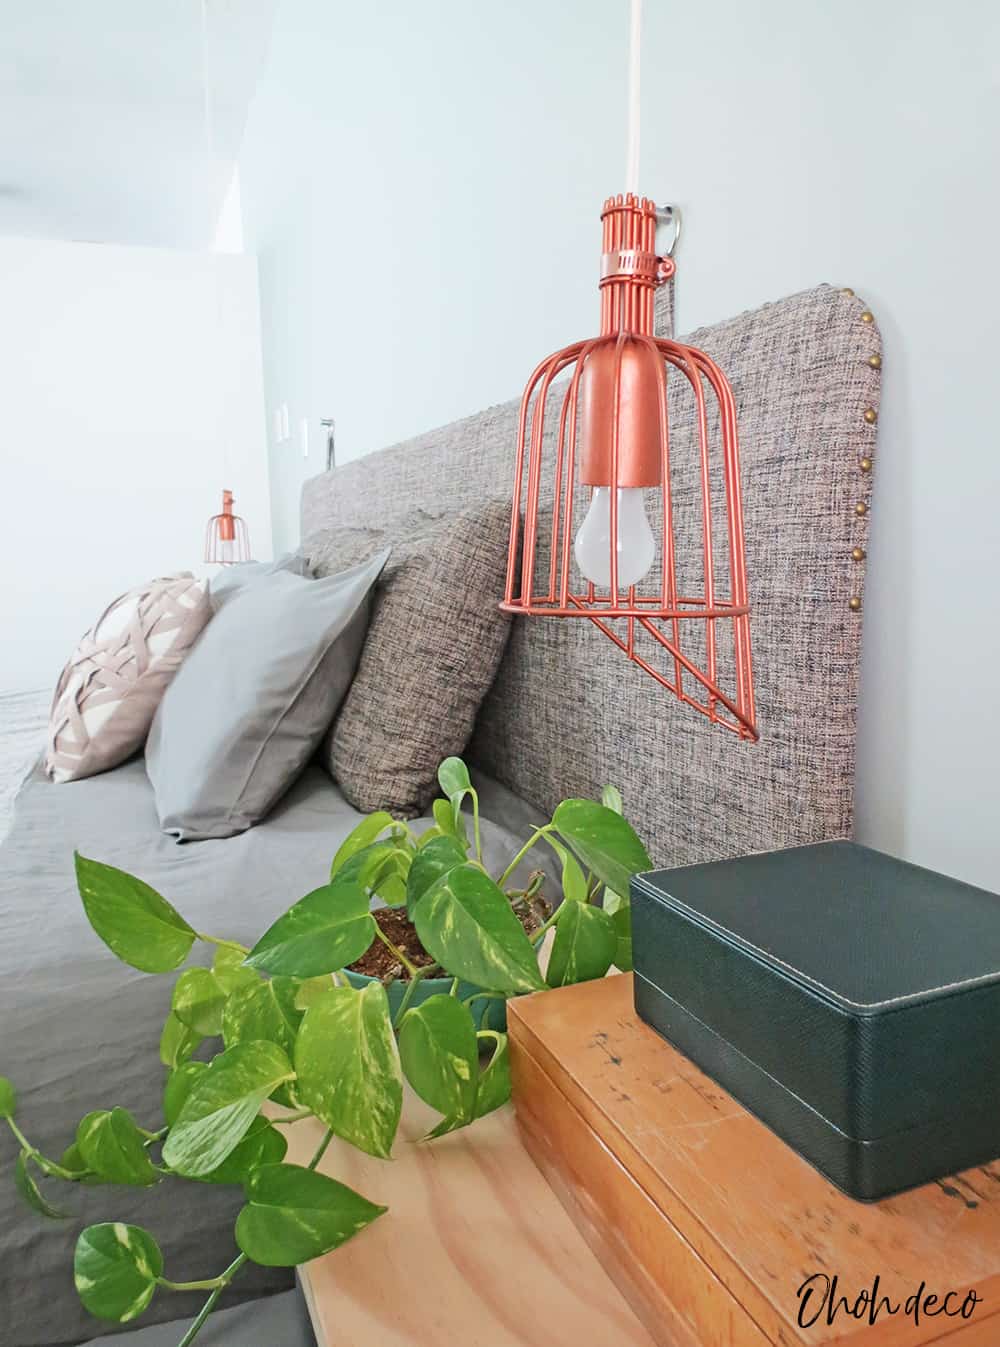
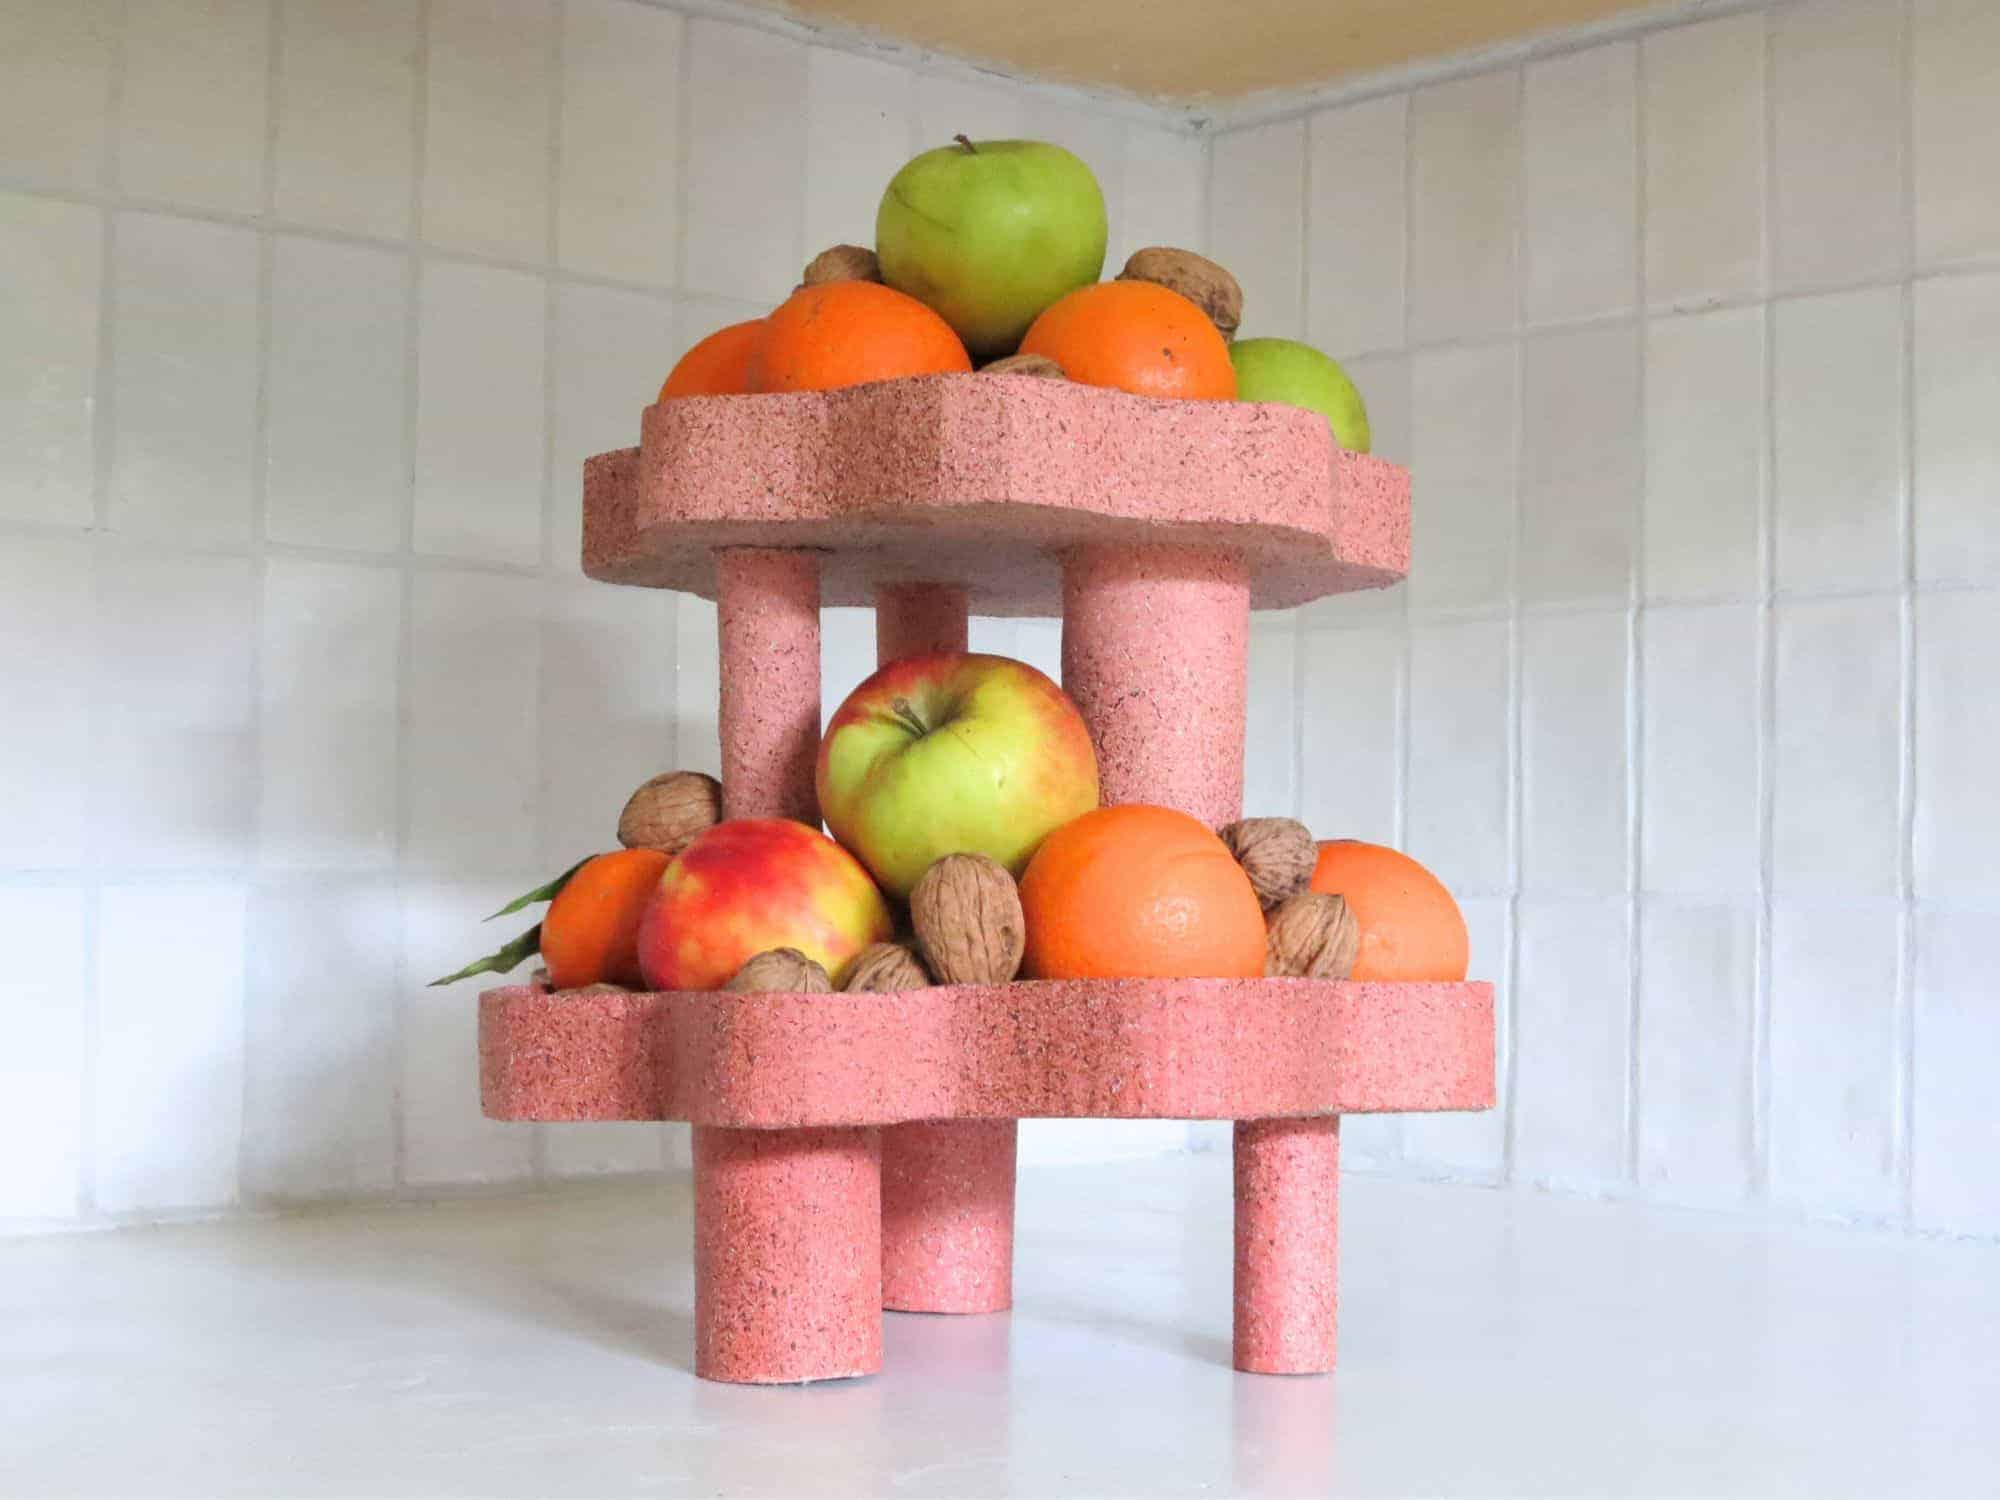
I also changed the bedside lighting. You already have seen the cage lamp in the bed sheets customization post, but I didn’t shared the tutorial yet!
I made them with fruit picker baskets. So easy, I’m sure you will like this 30 minutes DIY! Scroll down to have a look at the step by step.
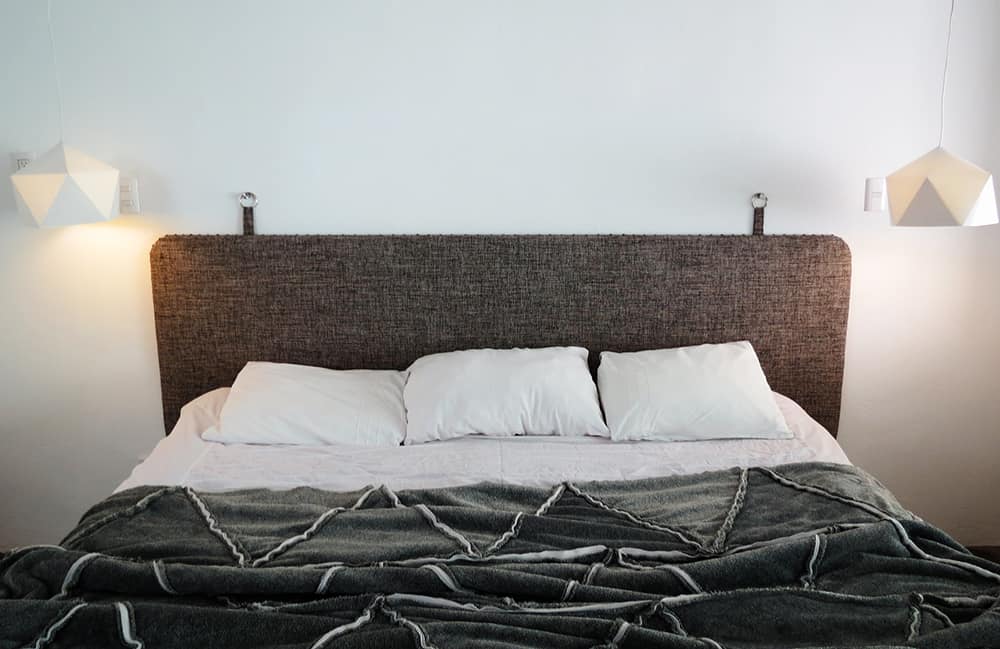
It´s always interesting to see how a room decoration can change over time, so in case you don’t remember, the bedroom looks like this before.

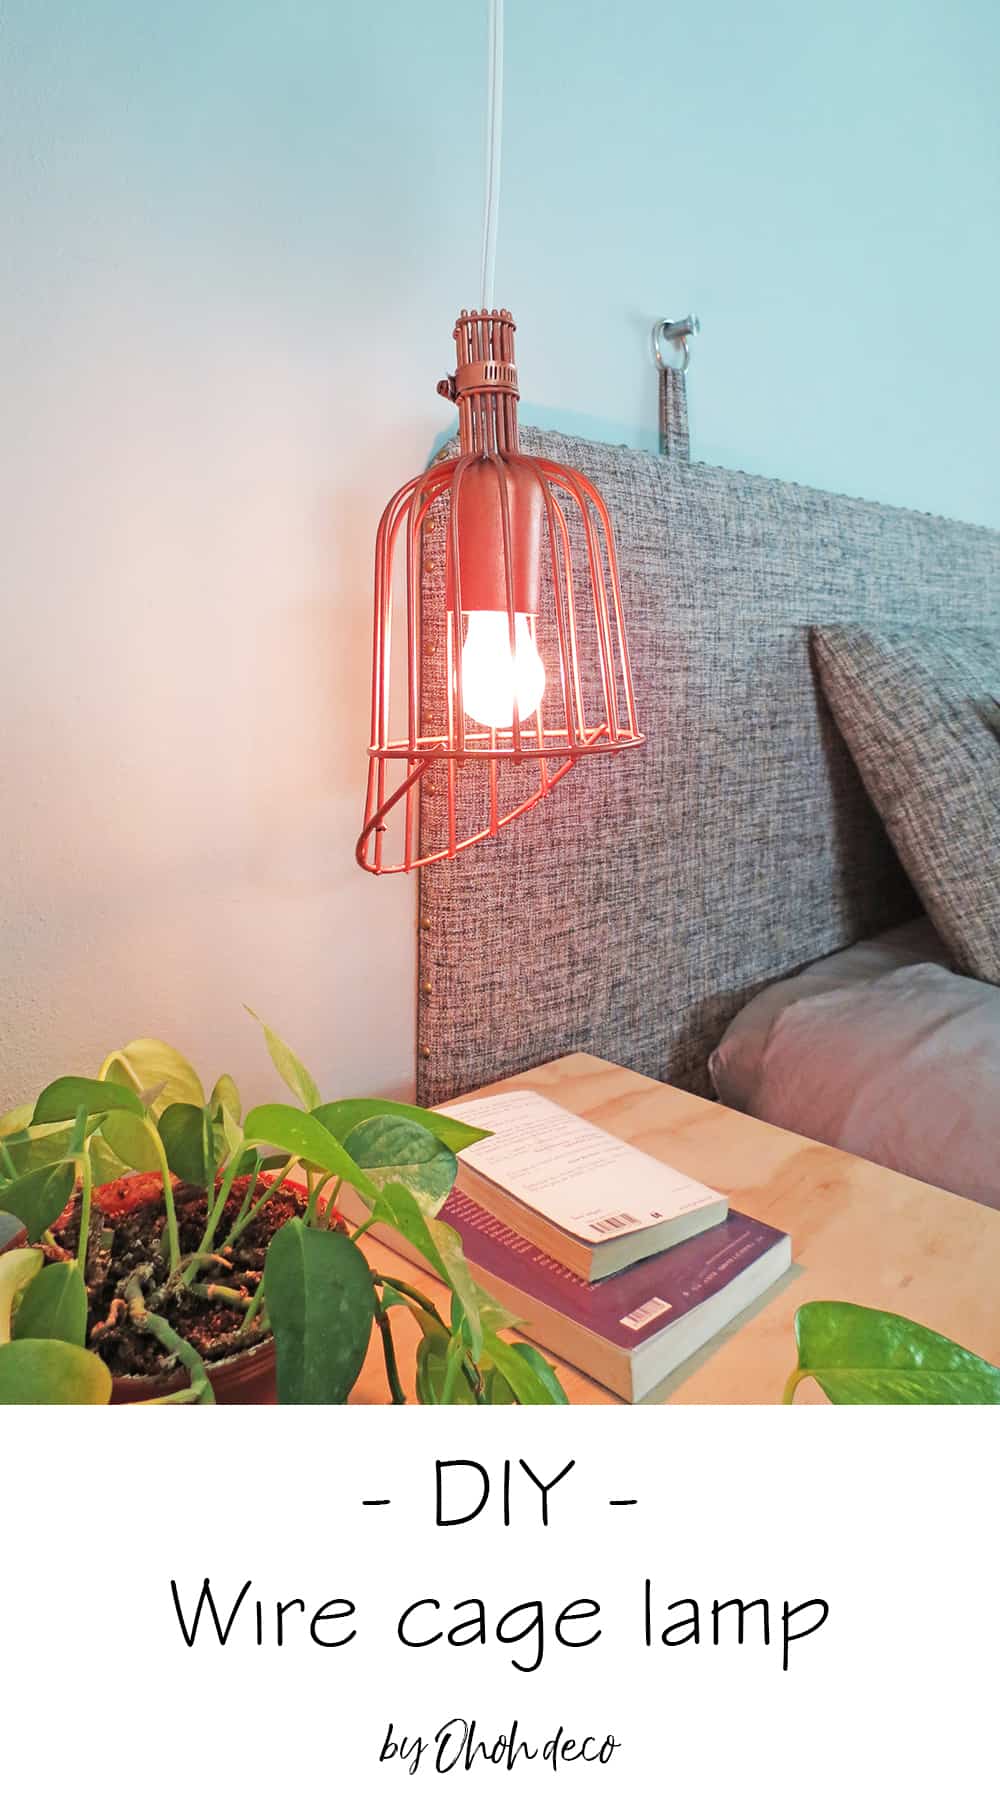
How to make a DIY lamp Cage
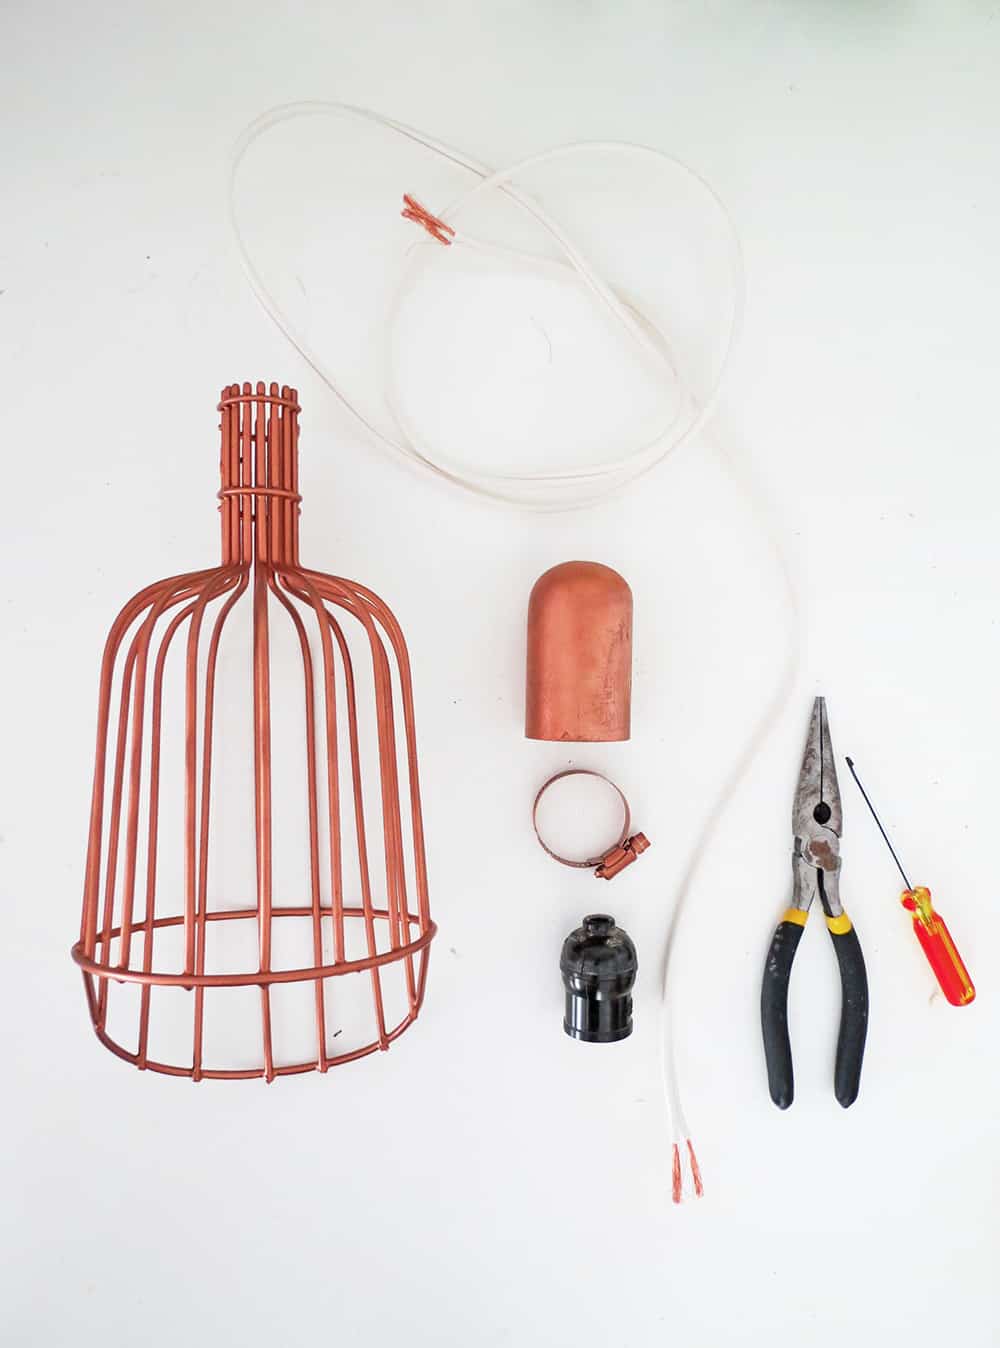
And now the light tutorial! Here goes the supplies you will need to make a DIY cage lamp:
- A metal fruit picker basket
- Cutting pliers
- Screwdriver
- A lamp kit (socket and wire)
- A hose clamp (it normally came with the basket)
- A spray paint (the color you like, I choose this)
- A light bulb
You can find great lamp kit online, from basic ones to high finished one with nice-looking cord
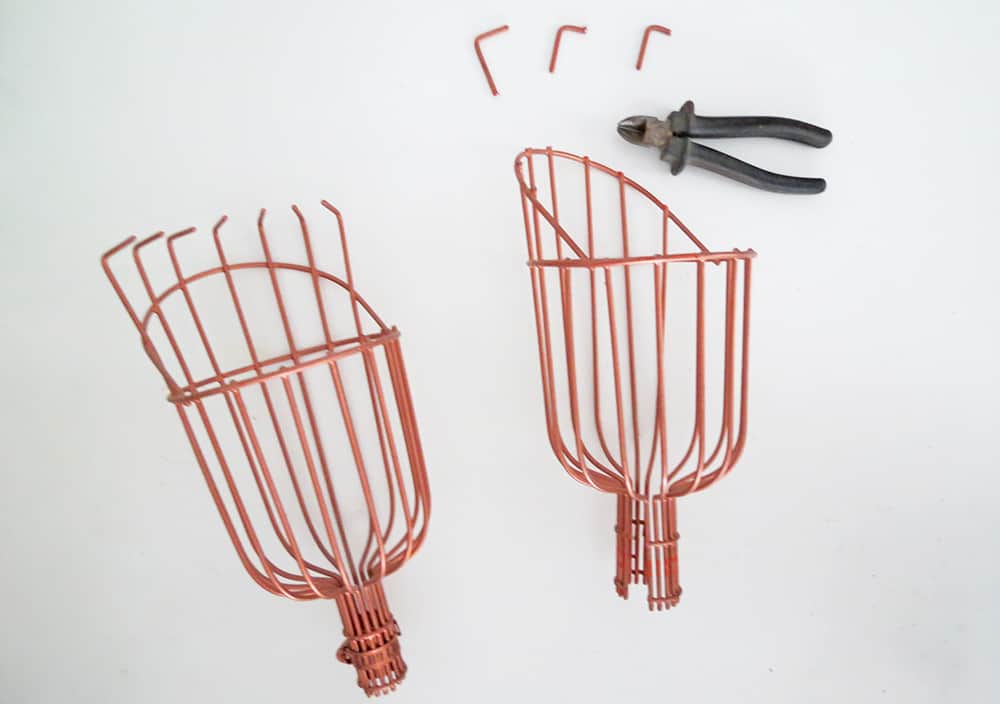
Using pliers, cut out the bent wires that serve to pick fruits.
Then spray paint the basket, the hose clamp and the socket the same color. I choose copper and apply 3 coats, turning the objects to make sure the paint covers everything.
I connected the socket with the wire. If you don’t have any electricity knowledge, ask for help! And don’t forget to turn power off, I don’t want anything to happen to you my friend.
I used a wooden socket cap (painted copper) to cover the socket but you can choose to spray paint the socket if you like!
RELATED: 18 ways to make DIY lighting
RELATED: How to customize bed sheets
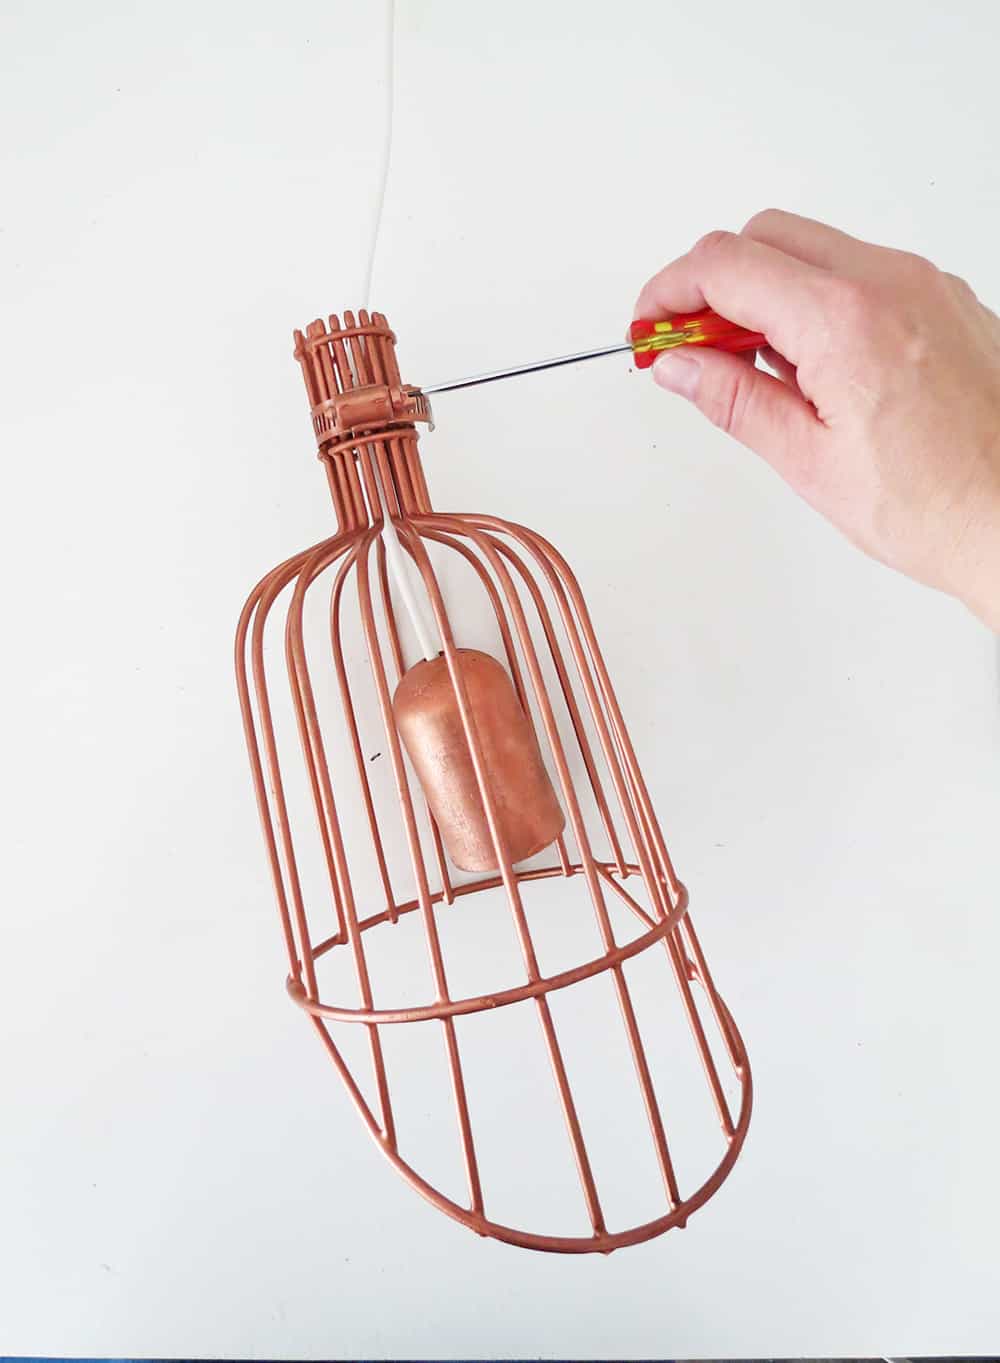
Slide the socket into the basket, close with the hose clamp, place the bulb and done! At first, I put a transparent bulb of 100 watts into the cages. It was cool because it makes nice shadows on the wall, but the light was too dazzling. We almost went blind every time we turned on the lights (which made us wake up quickly in the morning, seeing the positive side).
So, I changed them for some frosted 40 watts bulb, it’s a soft and pleasant light, and it still shines enough to read my book at night!
What do you think? I hope you like it as much as I do!
I love to see your creations, so don’t hesitate to let me a comment or share them on social media (FB: @ohohdeco IG: ohoh.deco)
RELATED: Tips for a great lighting decor
RELATED: How to paint a polka dot wall
Want to remember this? Save this DIY lamp cage in your favorite Pinterest Board.
* * * Thanks to Pure Form Brands for making this sponsored post possible by supplying me with brushes. * * *
Amaryllis

looks great!
Thanks Patti, I still need to paint the wall in the dressing room…
It’s beautiful! Love the lamps!
Thanks Michelle! The lamps where so easy to make 😉
Wowww te quedo requetebien!!!! Me gusta mucho el color de la pintura y eso que normalmente en las fotos nunca hacen justicia a la realidad, jeje.
Que brocha tan rara, jajaja, pero habría que probarla, por que no? jejeje
Ohhhh la lámpara es de lo mas moderno, pero seguro que hace buena luz, no como algunas pantallas muy bonitas pero que tapan un montón la luz que despide la bombilla 😛
Besote!!!!!
Gracias! Si me encanto como quedo la pared! y la lamparas son super fáciles y económicas de hacer 😉
“Nice info!”