Step into a world of enchantment as you immerse yourself in the breathtaking beauty of spring. With this step-by-step guide, you will learn how to create your DIY cherry blossom tree, allowing you to savor the serenity and joy that spring brings.
From gathering the materials to assembling your masterpiece, this article will take you on a journey that will awaken your creativity and transform your surroundings. So, let’s embark on this crafting adventure and learn how to capture the essence of spring with your own handcrafted Sakura tree.
[ This post probably contains affiliate links, our full disclosure policy is boring, but you can read it HERE ]
Step 1: Gathering the Materials
To begin your journey of creating a stunning DIY cherry blossom tree, the first step is to gather all the necessary materials. Let’s dive into the list of supplies that will bring your vision of a blooming Sakura tree to life.
- Egg cartons
- Pink paint
- Small beads (or this)
- Branches
- Scissors
- Glue
- Hot glue gun
- A large cute vase (love this one)
Choose a vase or container that will serve as the base for your finished creation. Consider choosing a vessel that complements the overall aesthetic and allows for stability, ensuring your cherry blossom branches stands tall and proud.
With all your materials in hand, you are now ready to embark on the next step, where you’ll learn the art of creating the blossoms themselves.
RELATED: 10 Creative Flower Bouquet Wrapping Ideas for Any Occasion
RELATED: From Trash to Treasure: How to Make a Flower Vase Using Recyclable Materials
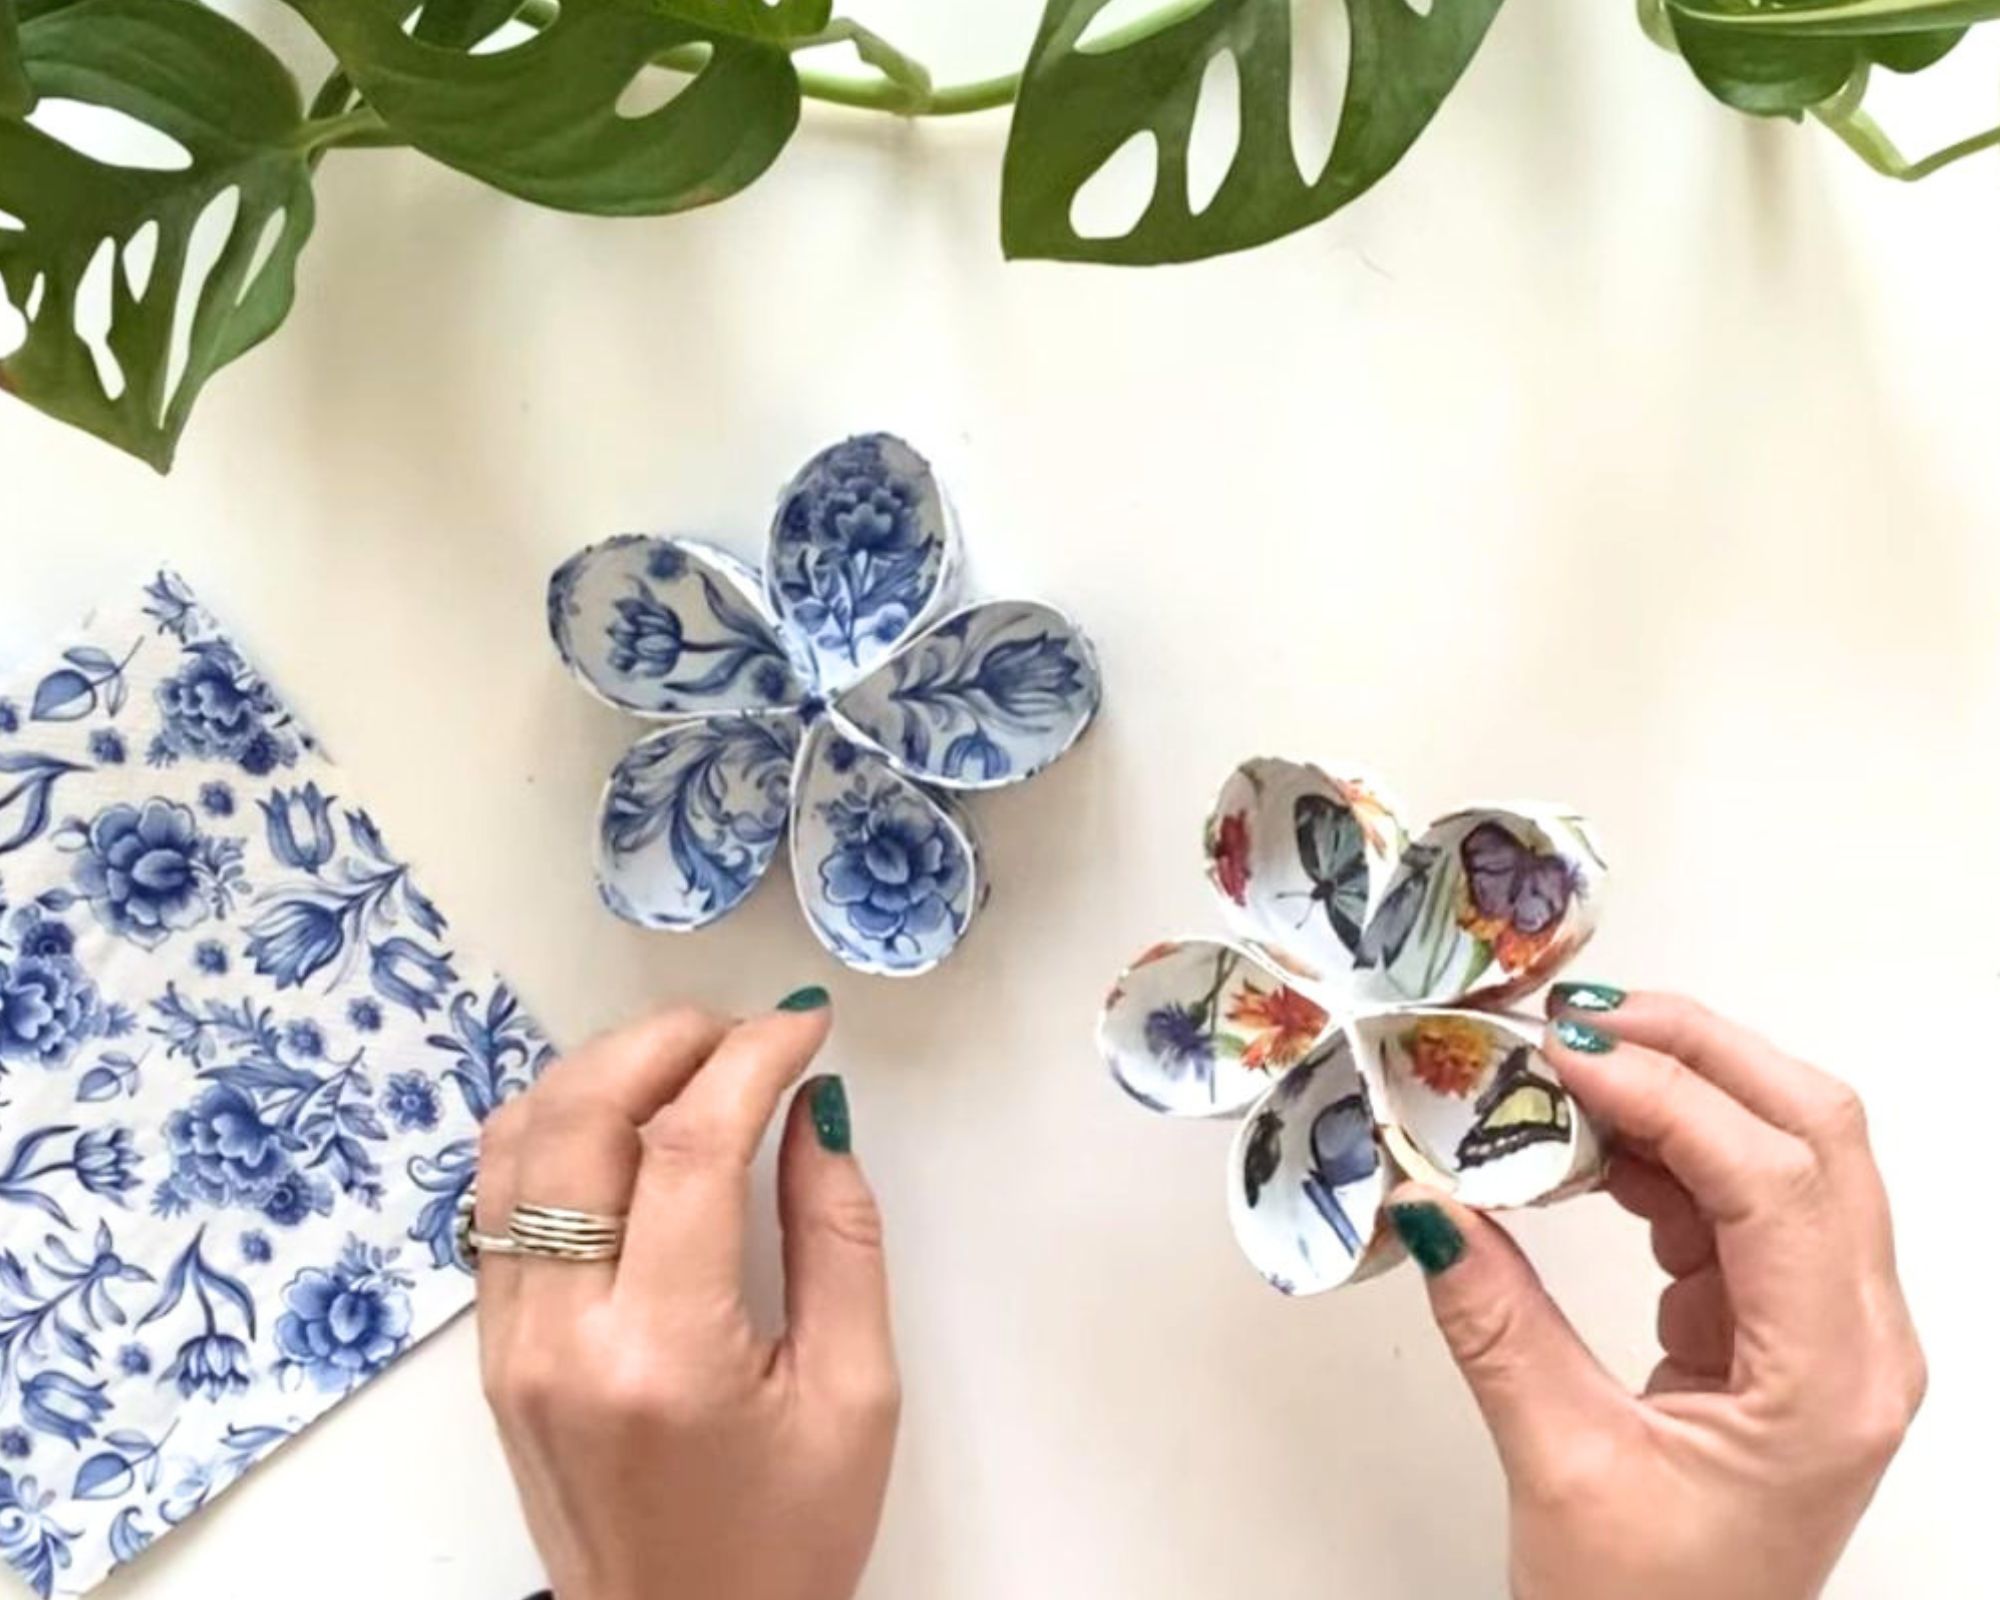
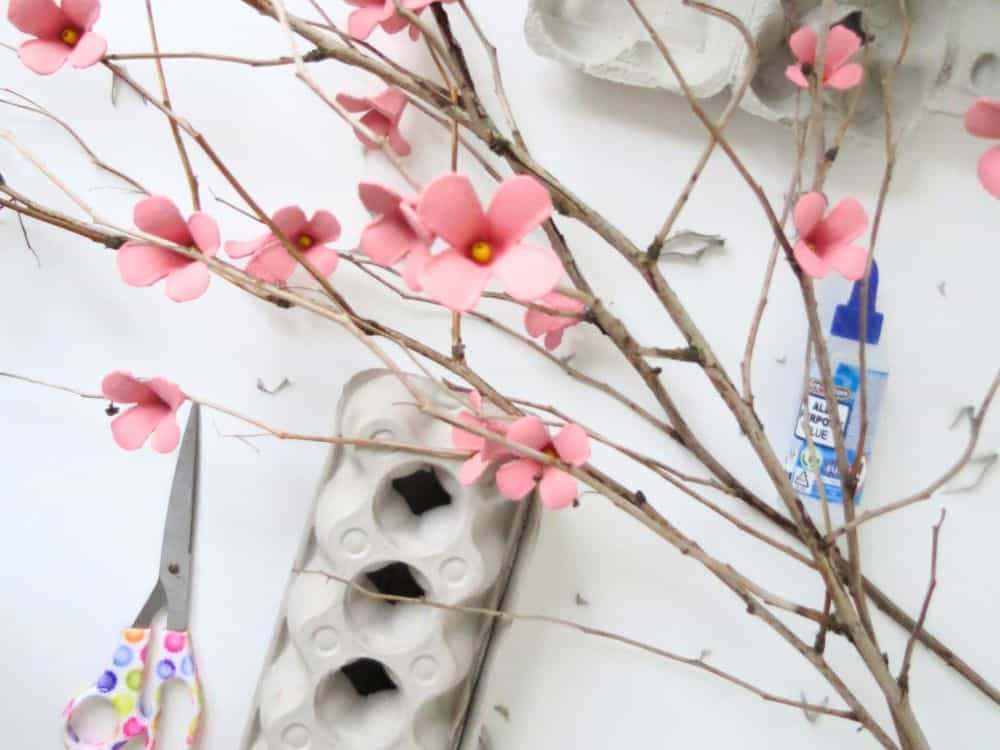
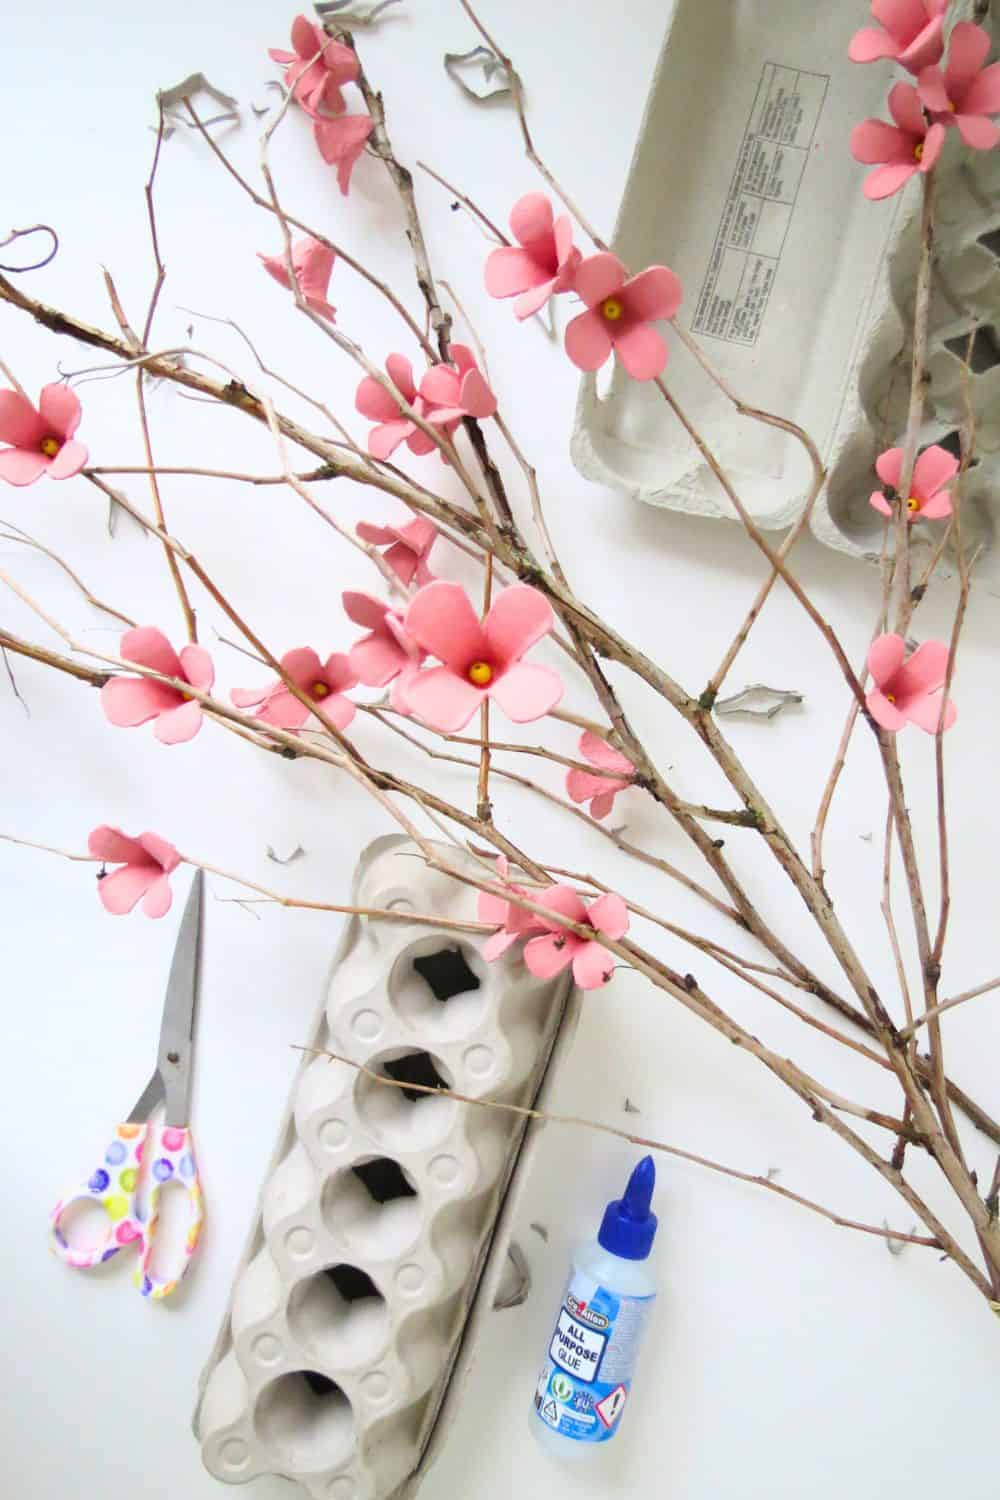
Step 2: Creating the Cherry Blossoms
Discover how to create Cherry blossoms recycling egg cartons.
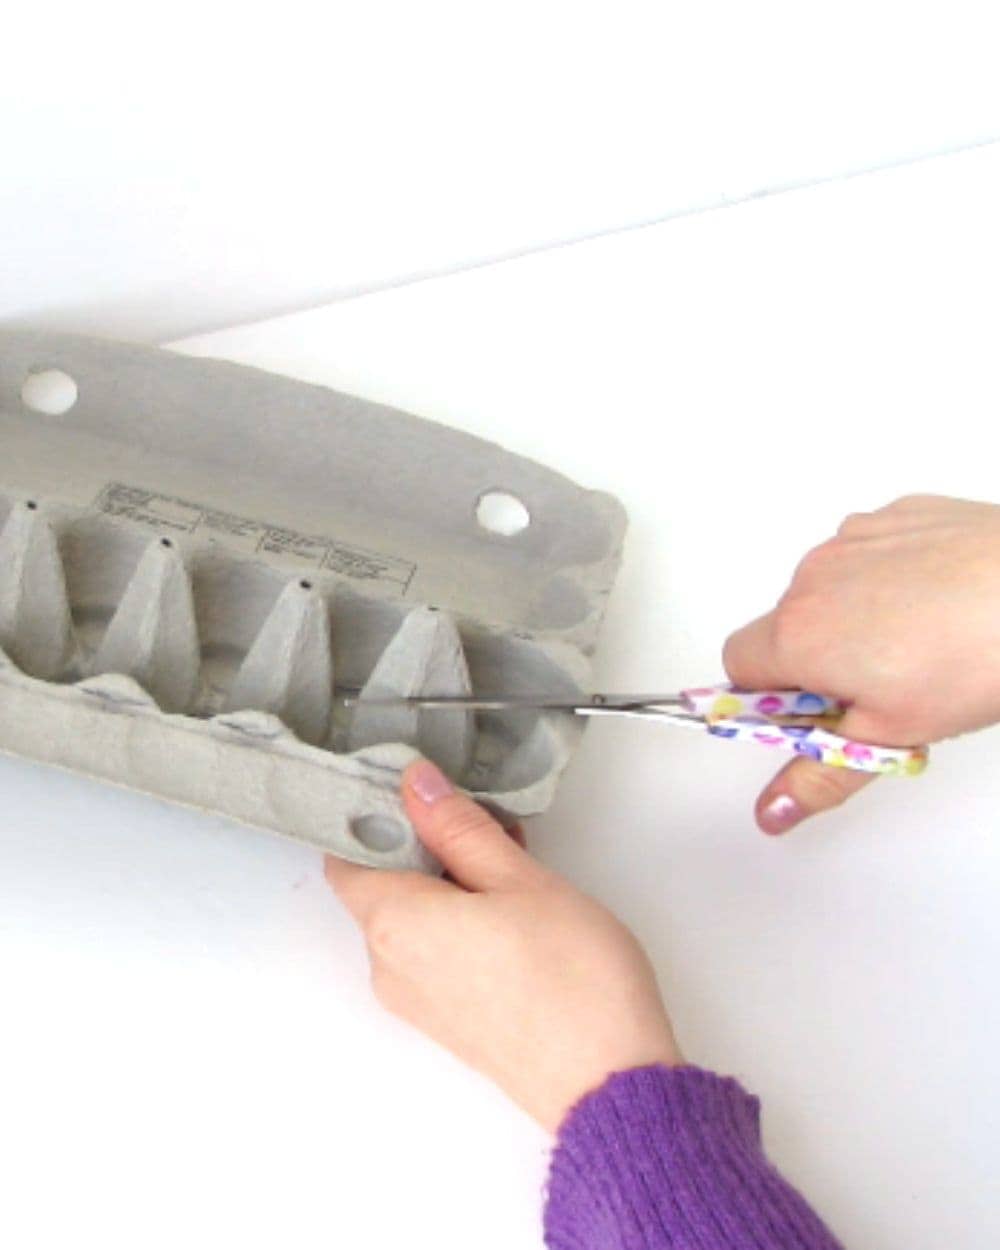
Take an egg carton an cut one of the central tip.
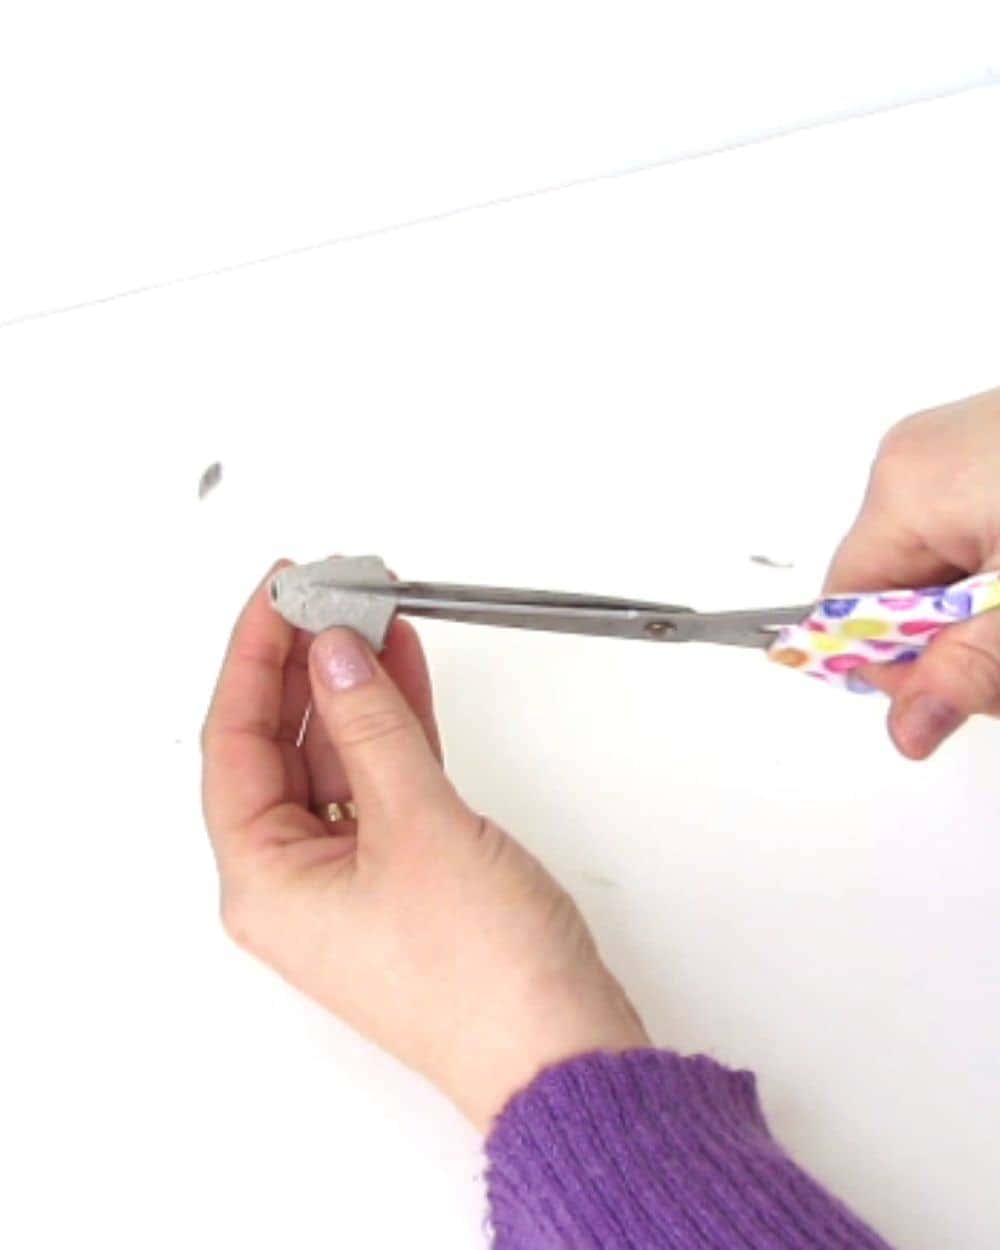
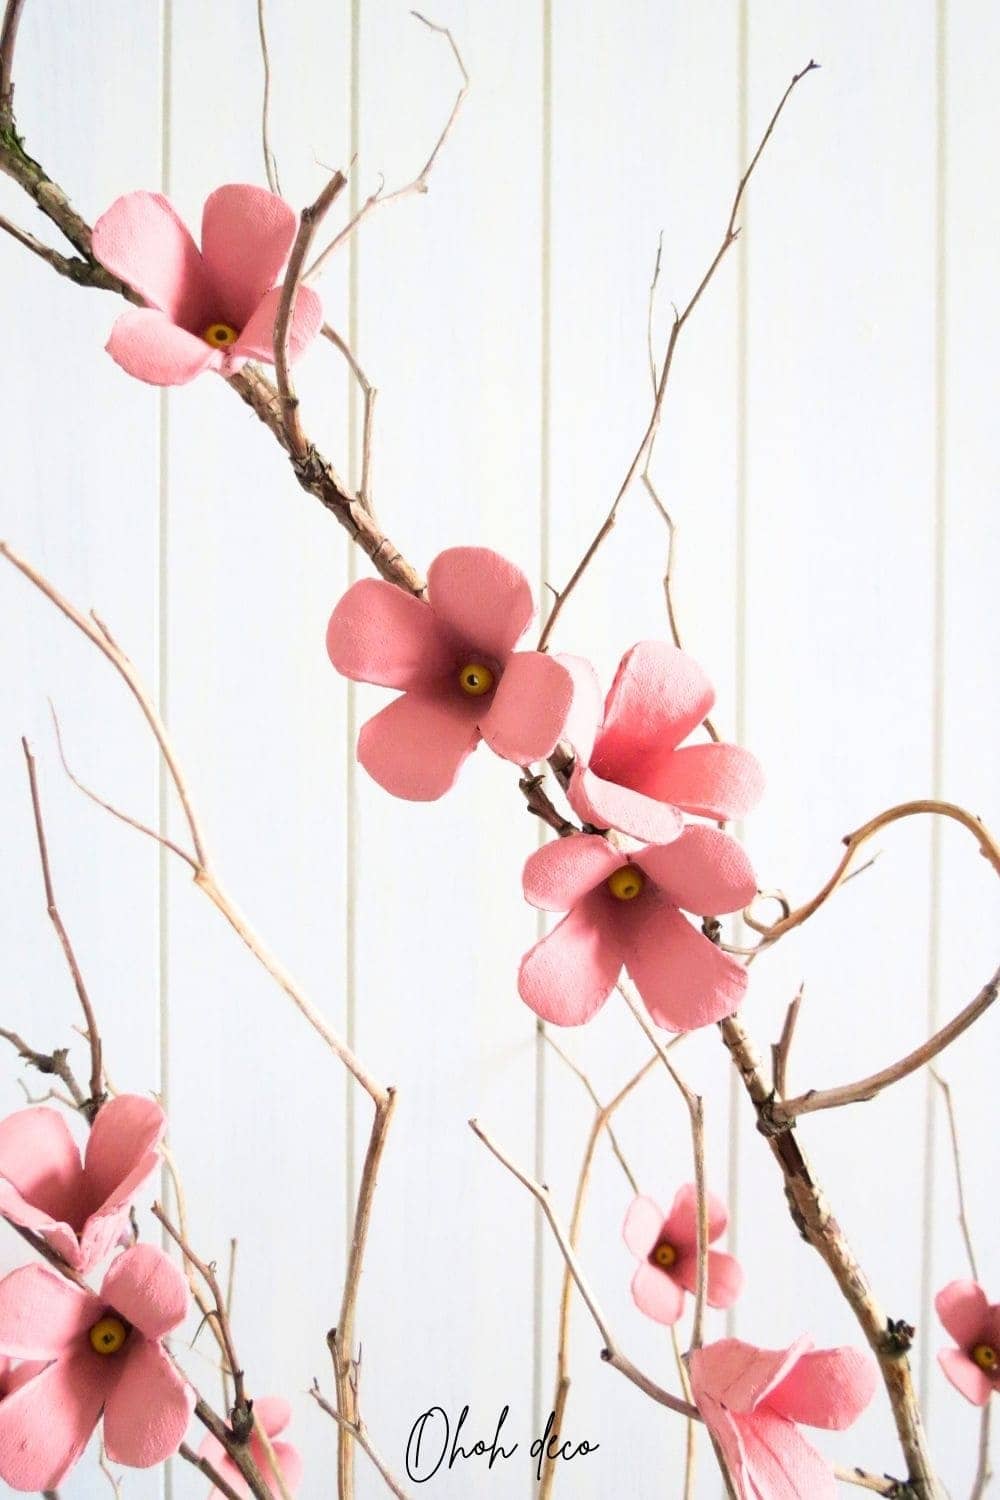
Make 4 cuts into the carton piece to create 4 petals. Open the petals to form the flower and rounded each petal to give the flower a nice cherry blossom shape.
To give the flower a nice shape you can use a pencil and wrap each petal around it.
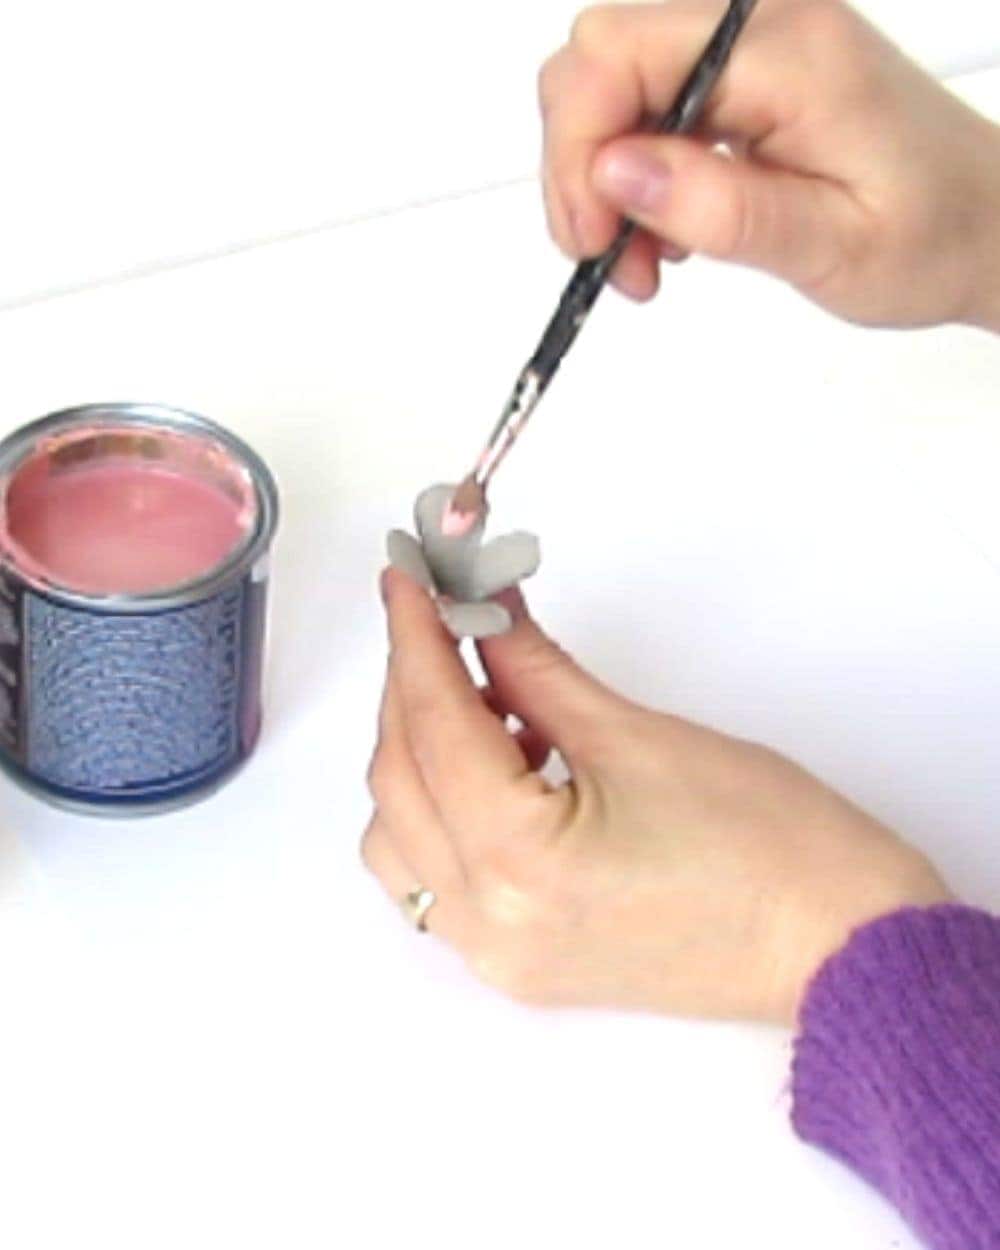
Paint the flower in and out with pink acrylic. Let it dry.
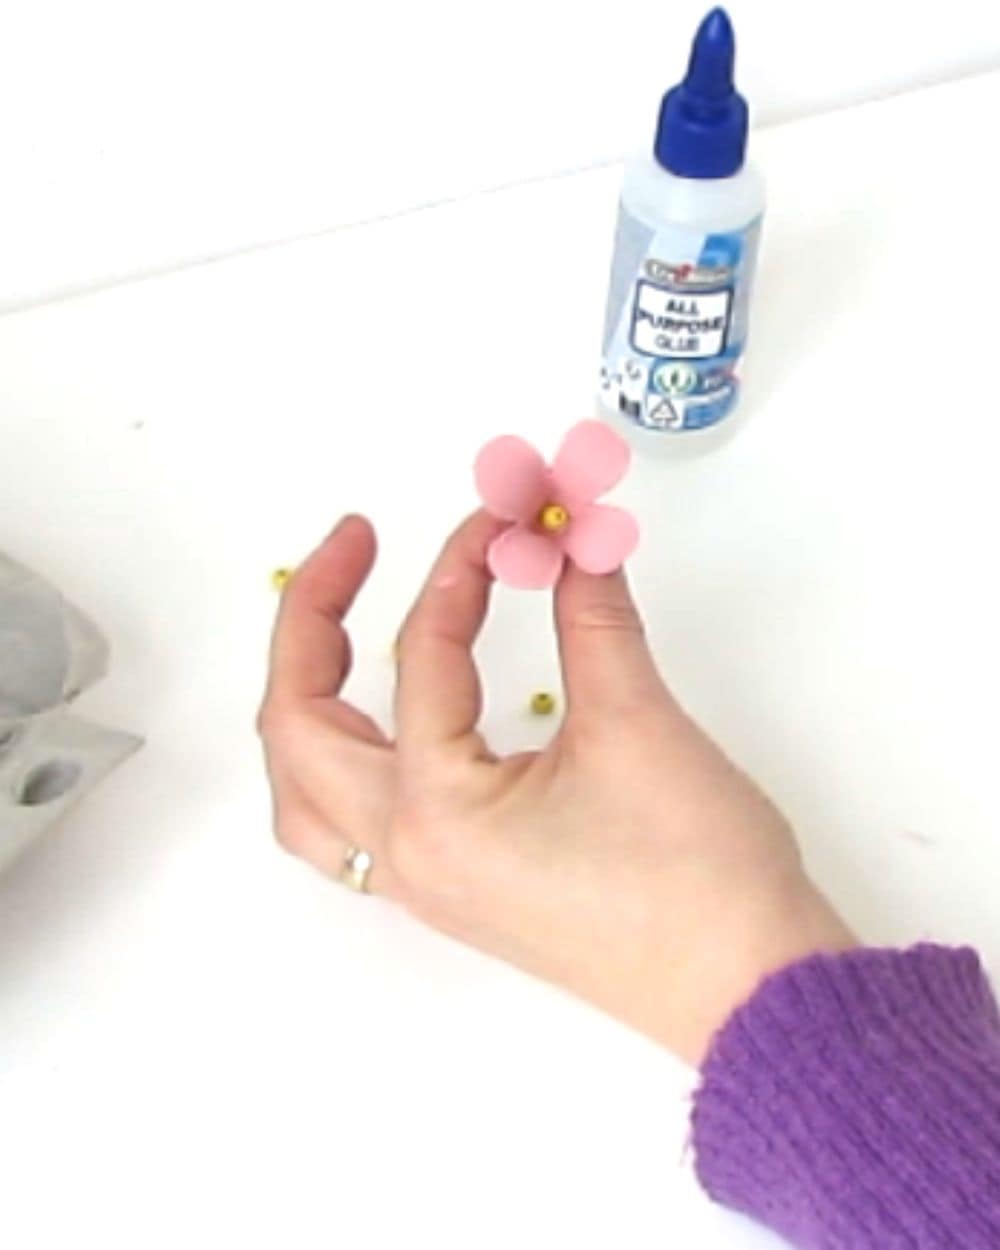
Once the paint is dry, glue a yellow bead in the flower center. You can also use small pom poms, like these ones, or a piece of pipe cleaner.
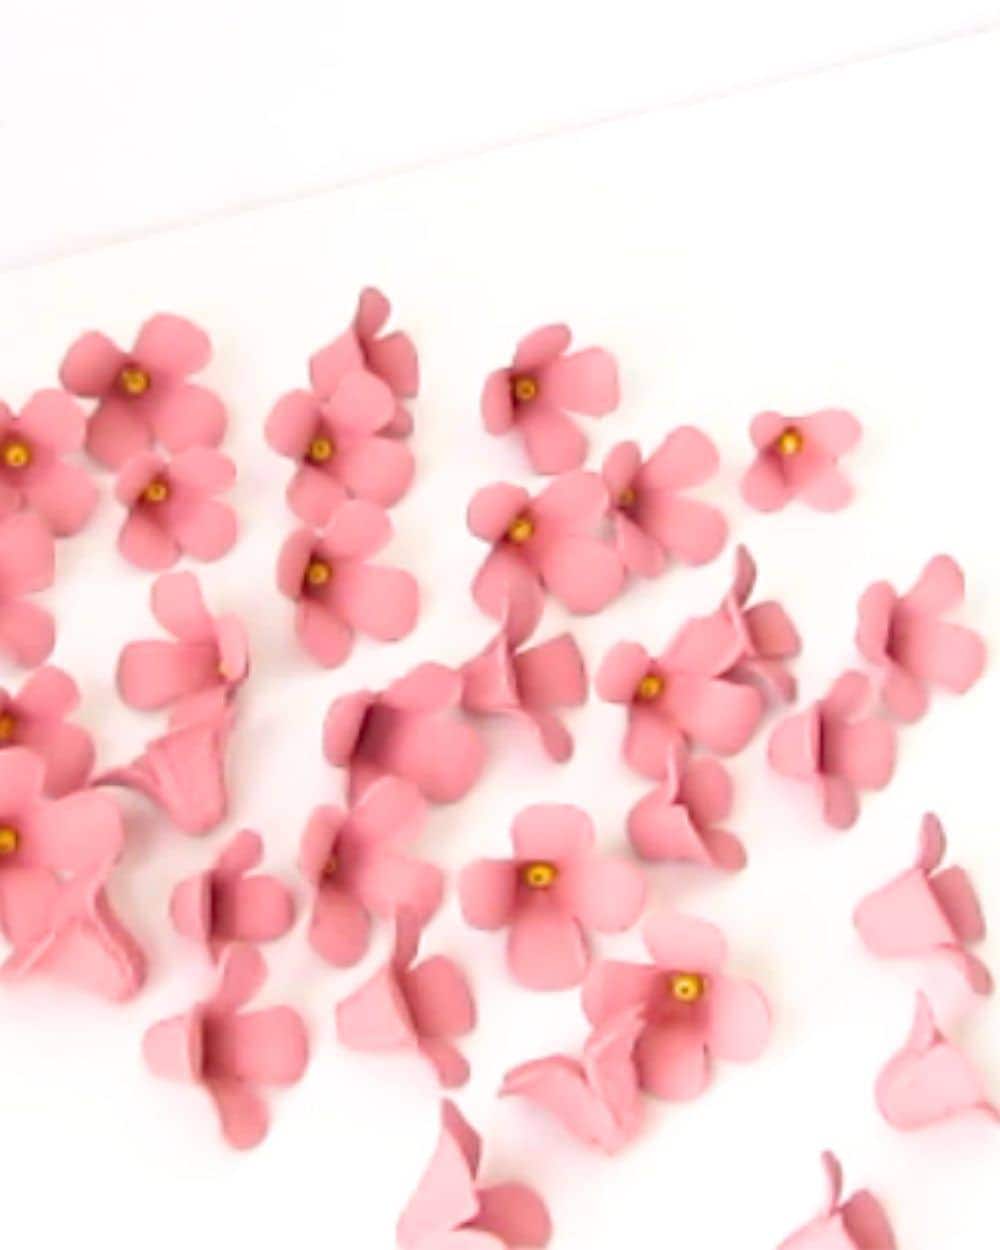
Repeat the previous steps to make as many flowers as needed to complete your Cherry blossom tree.
As you marvel at the delicate flowers you’ve created, get ready to take the next step in the process – selecting the perfect tree branches that will complete your masterpiece.,
Step 3: Selecting the Tree Branches
As you prepare to bring your vision of a cherry blossom tree to life, it’s time to focus on selecting the perfect branches that will serve as the foundation for your masterpiece. Just like the delicate petals you meticulously crafted, the branches you choose will contribute to the overall beauty and authenticity of your creation.
When it comes to selecting tree branches for your cherry blossom tree, there are a couple of key factors to consider. Firstly, you’ll want to ensure that the branches you choose are sturdy and able to support the weight of the blossoms you’ve created.
It’s important to select branches that have a natural, graceful curve or shape. This will help create a more organic and realistic appearance for your cherry blossom tree. As you browse through potential branches, imagine how they will look once adorned with your handmade blossoms.
Don’t be afraid to get creative with your branch selection. Depending on the look you’re going for, you may choose to use a single branch as the main trunk, or you could opt for multiple branches to create a fuller, more vibrant tree. Consider the size and scale of your chosen container or vase, ensuring that the branches you select are proportional to the overall design.
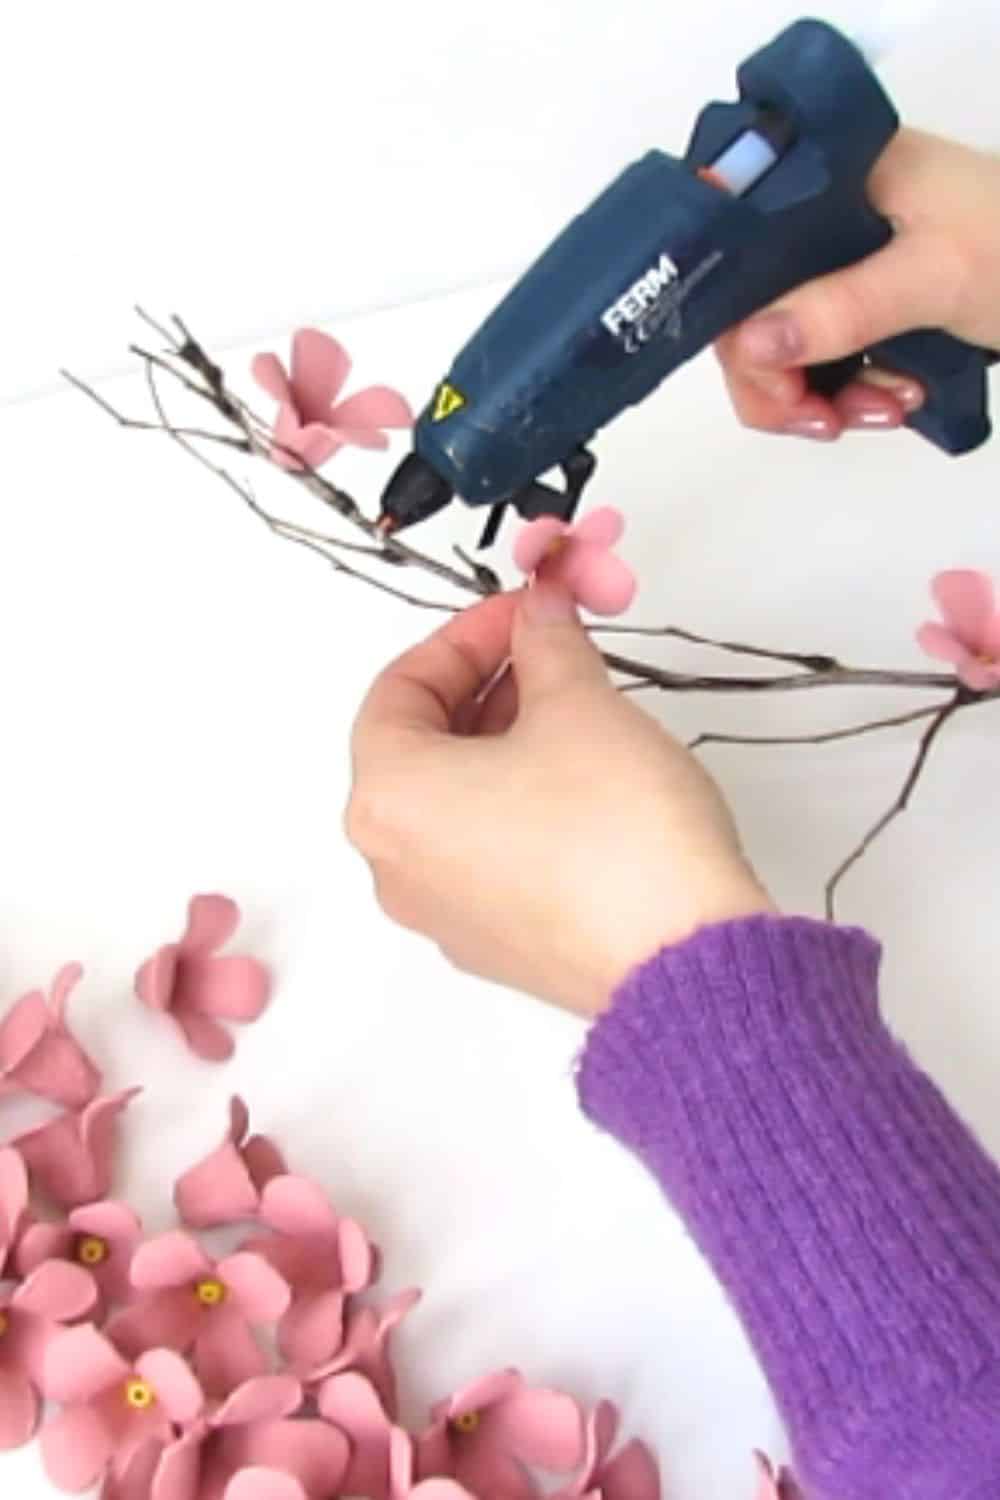
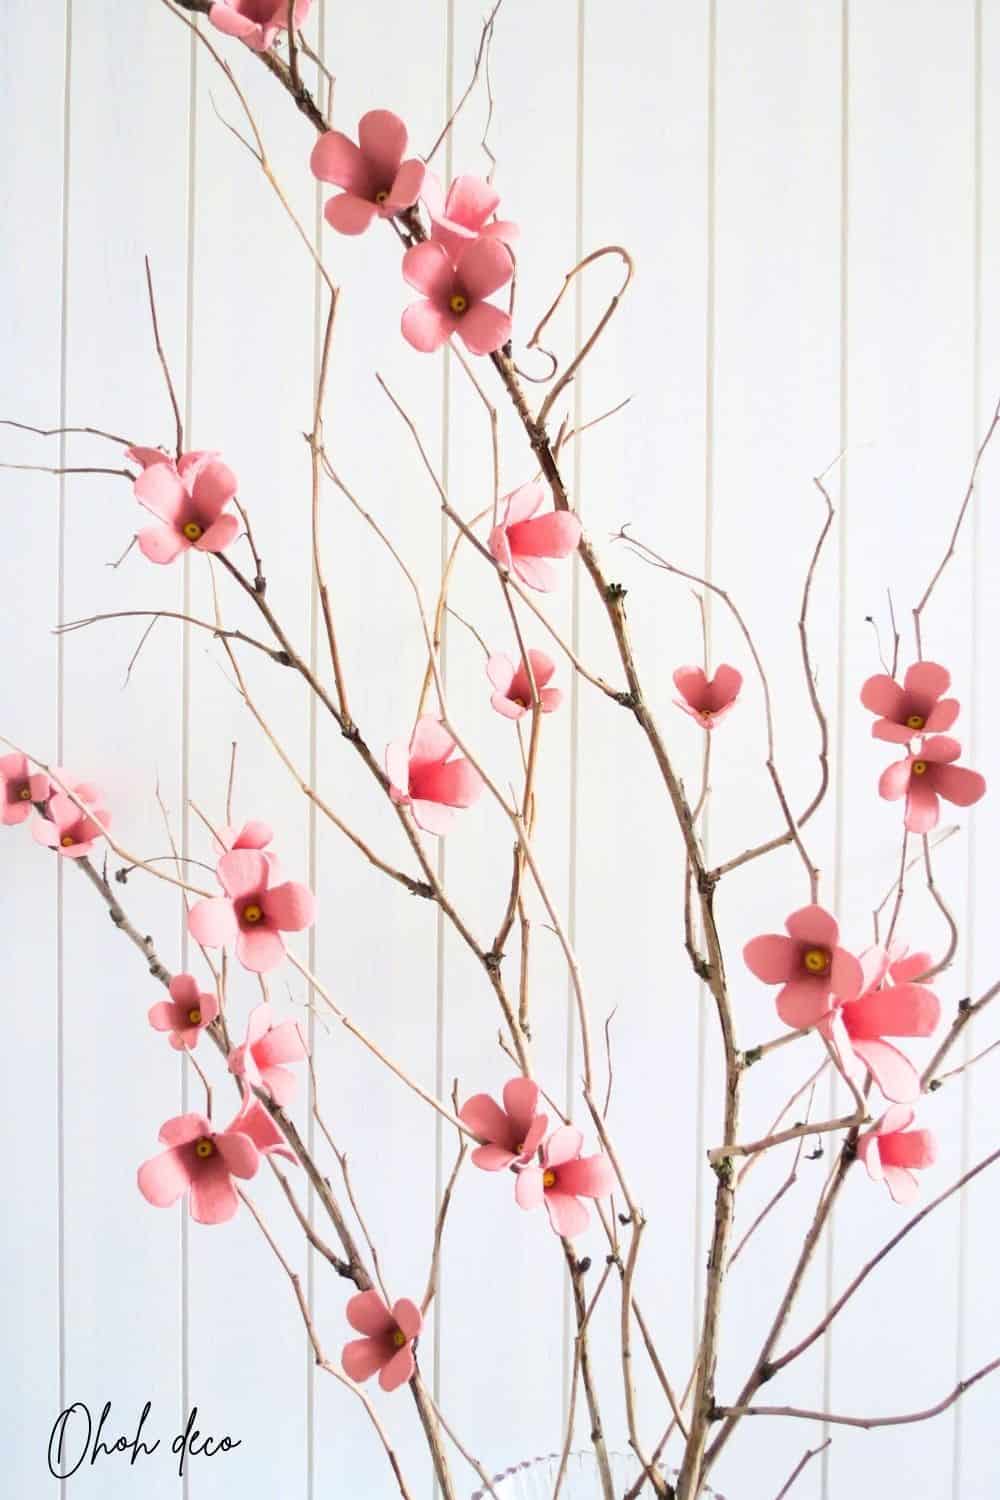
Attach each flower to the branches by using a small drop of craft adhesive or a glue gun. Start at the tips of the branches and work your way downwards, gradually filling the tree with an abundance of blossoms. Vary the placement of the flowers to create a natural-looking abundance of blooms, as if a gentle breeze has scattered them across the tree.
Feel free to mix in some additional accents if desired, such as small faux buds or even tiny LED lights to add a magical glow to your cherry blossom tree. Allow your creativity to flow freely as you bring your vision to life, indulging in the soothing and rewarding art of blossom creation.
Watch the step-by-step video
Watch the step-by-step video on YouTube and bring a touch of spring into your home with this beautiful handmade project.
Follow along as each step is clearly explained, from shaping the branches to adding the soft pink blooms that make this piece so charming. It’s a relaxing and rewarding craft that adds elegance to any space—so grab your supplies and let’s make something beautiful together!
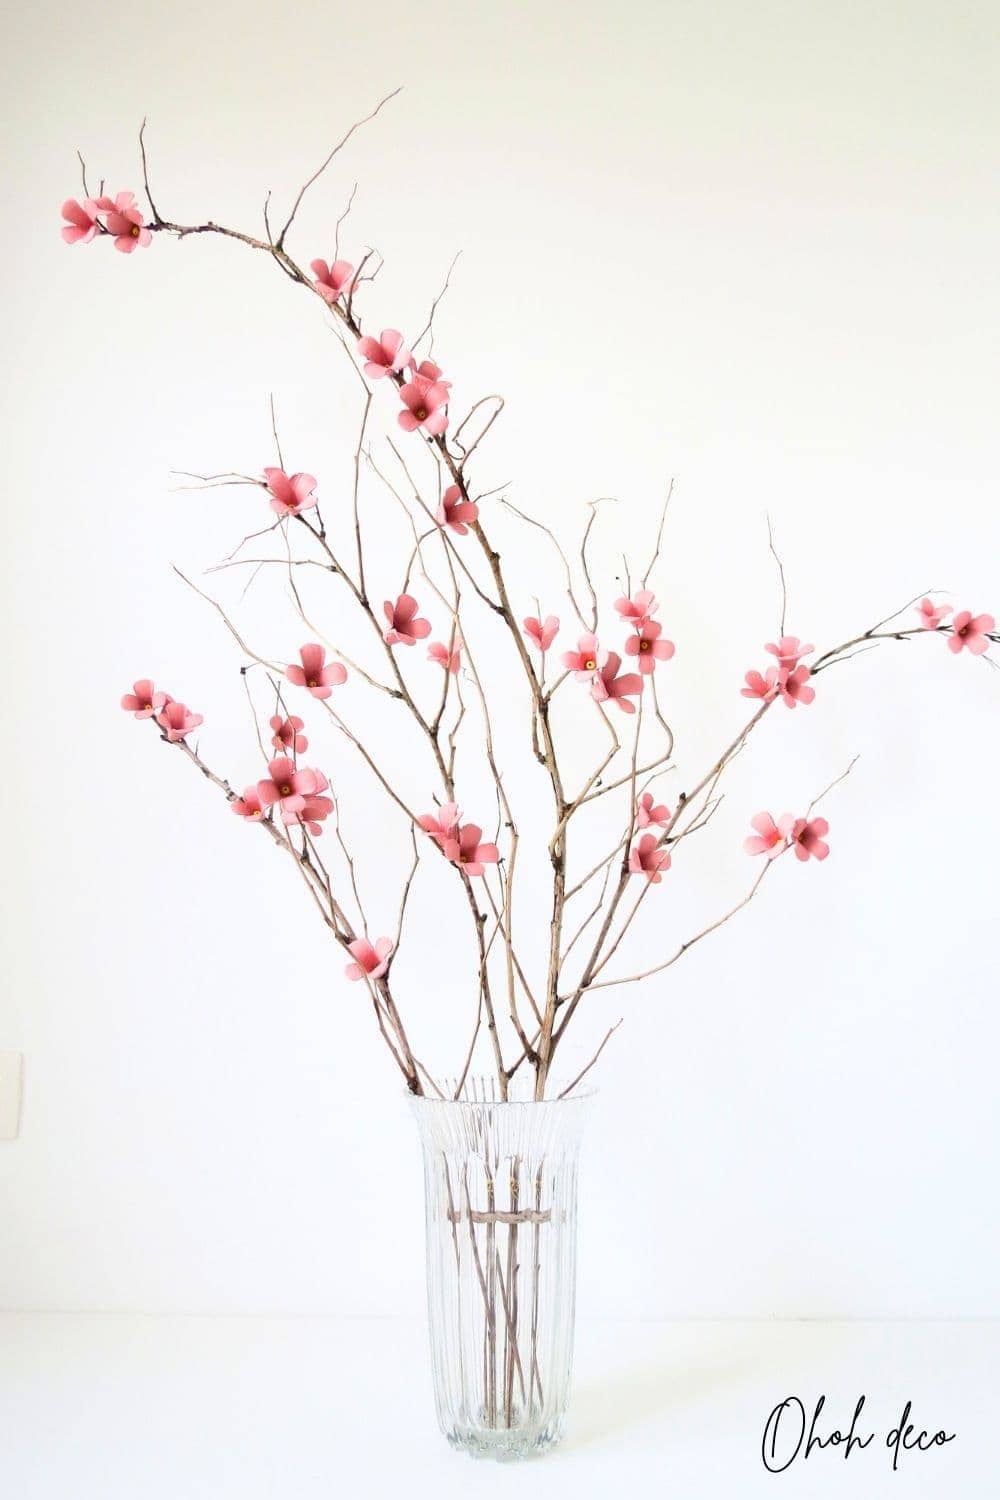
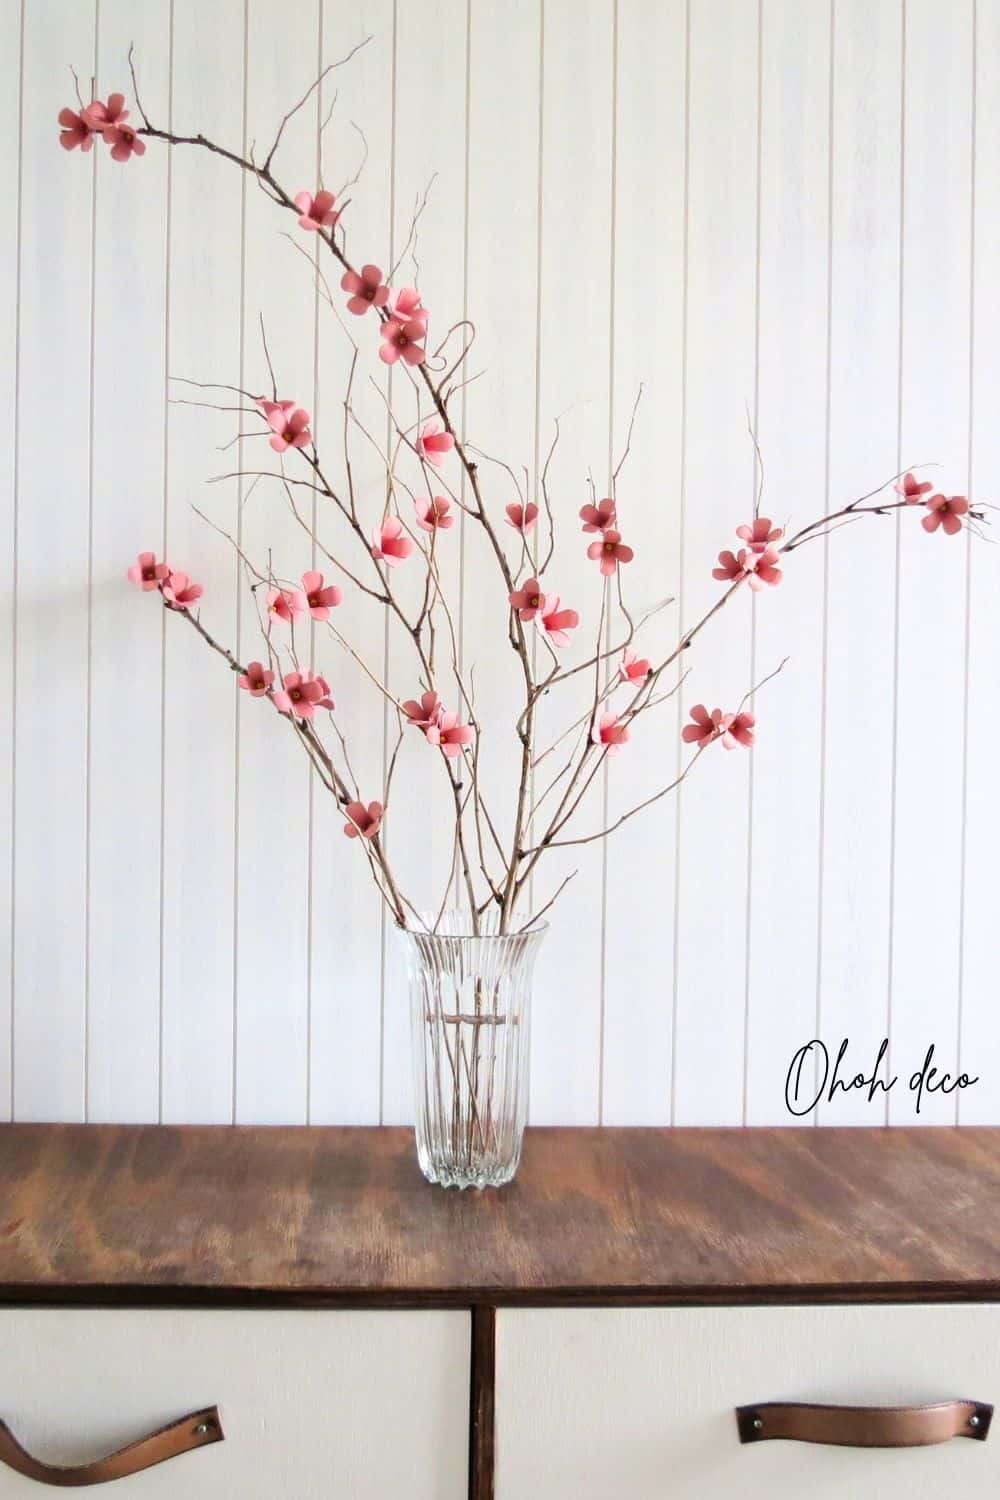
Step 4: Assembling Your Cherry Blossom Tree
The moment of assembly your DIY Cherry blossom tree is the best. As you gather your selected branches and arrange them in the desired shape, your creative vision come to life. Every step you’ve taken so far, from crafting the blossoms to selecting the branches, has led you to this point.
As you delicately intertwine the branches and secure them together, the tree begins to take shape, reflecting the care and dedication you’ve poured into each element.
Now, stand back and admire your assembled cherry blossom arrangement.
.
.
.
In conclusion, creating your own DIY cherry blossom tree is a rewarding experience that allows you to immerse yourself in the beauty of spring. By carefully selecting materials, crafting delicate blossoms, and assembling tree branches, you can bring tranquility and joy into your surroundings. As you witness the transformation of your space, take a moment to appreciate the calming effect these blossoms provide. Now is the time to start your Sakura tree project and embark on a journey of natural beauty and serenity. Remember, the beauty of spring lies in the hands of those who seek it. So, go ahead, unleash your creativity, and let the cherry blossoms bloom.
RELATED: Toilet paper roll flowers
RELATED: Make a DIY Spring Wreath in 10 minutes
Want to remember it? Save this DIY Cherry Blossom Tree on your favorite Pinterest Board.