
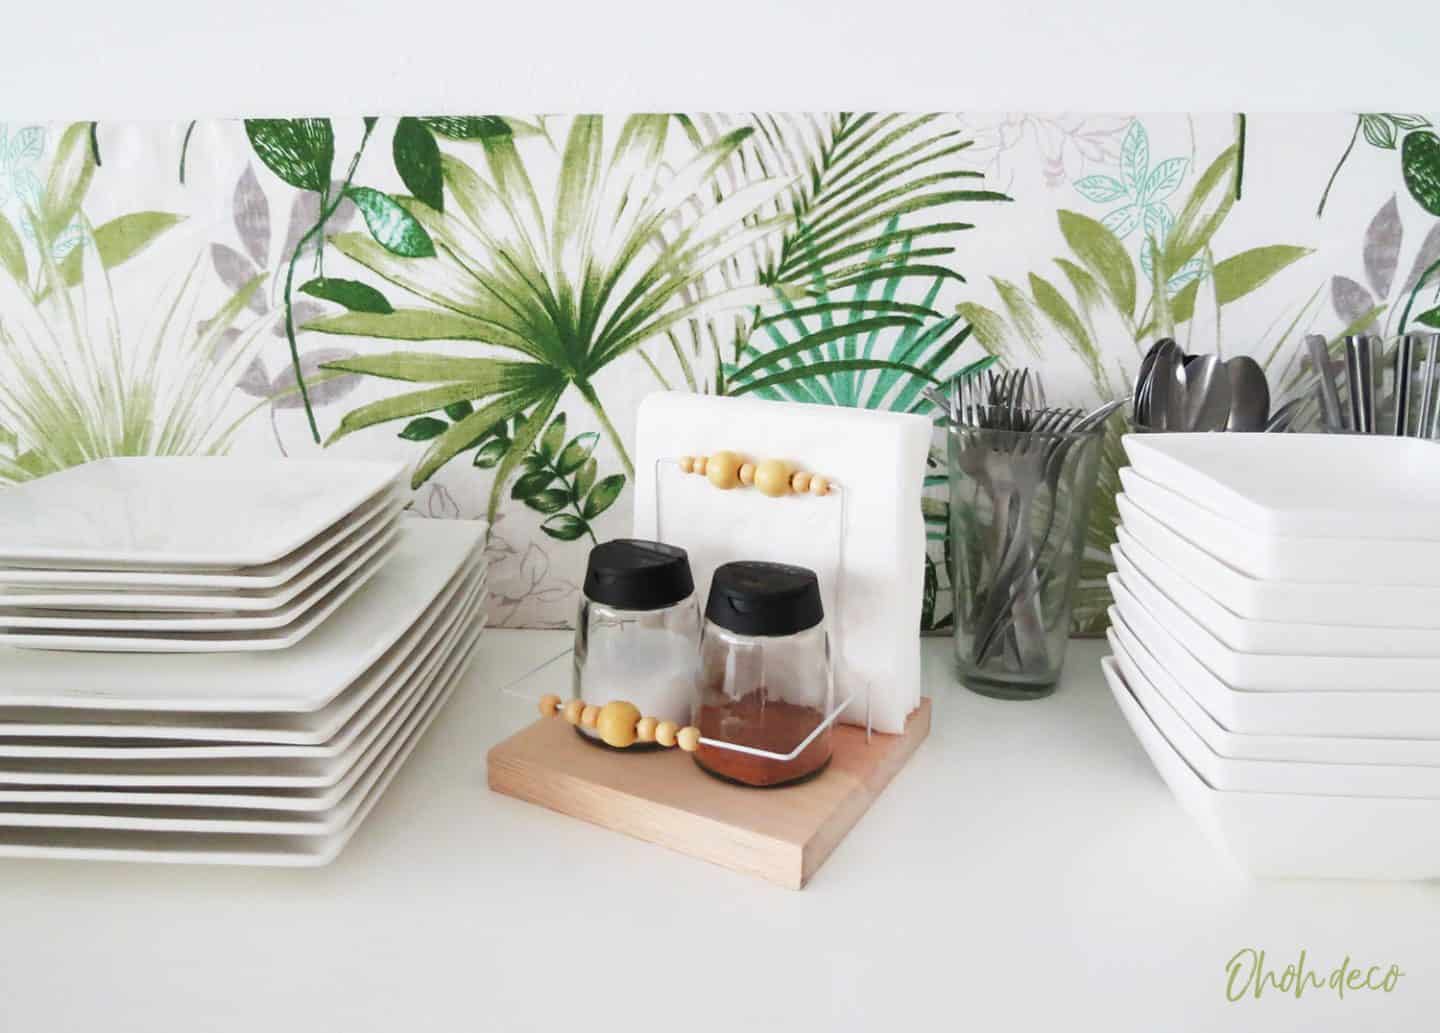
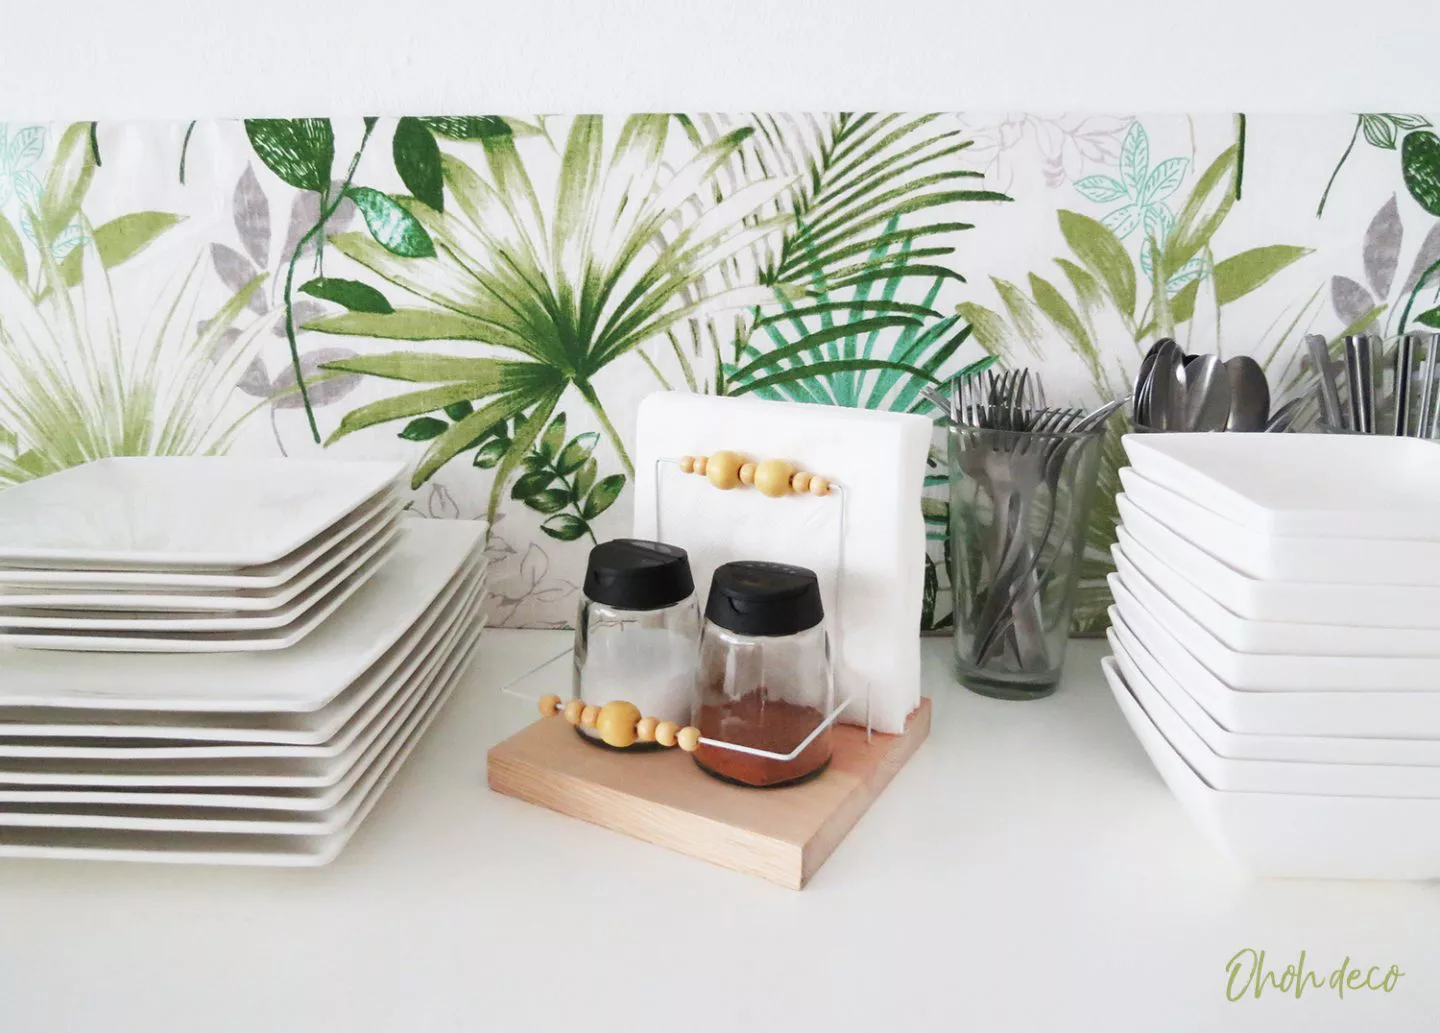
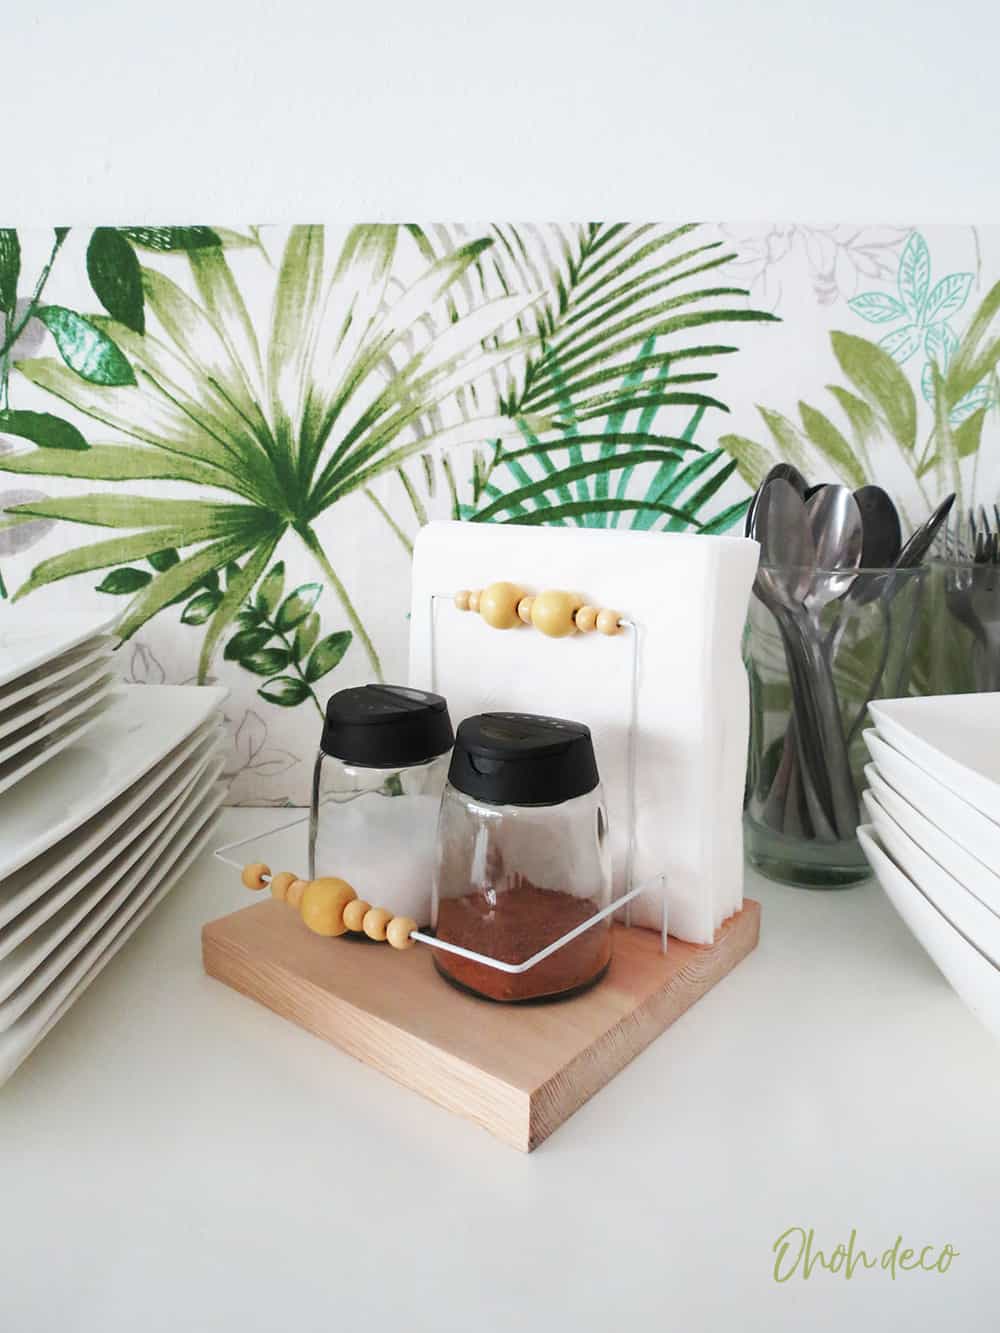
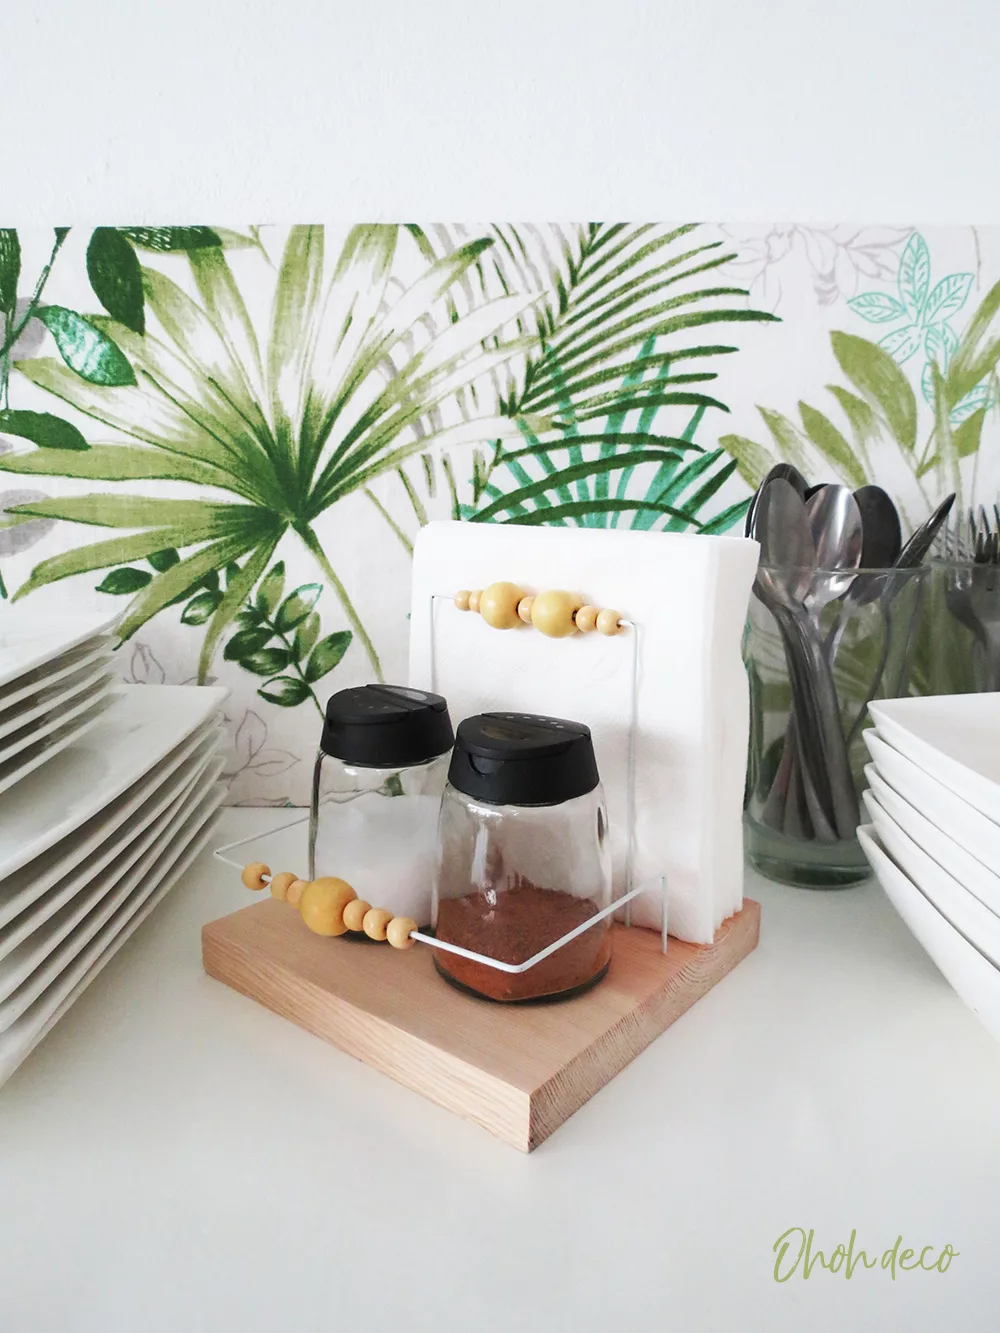
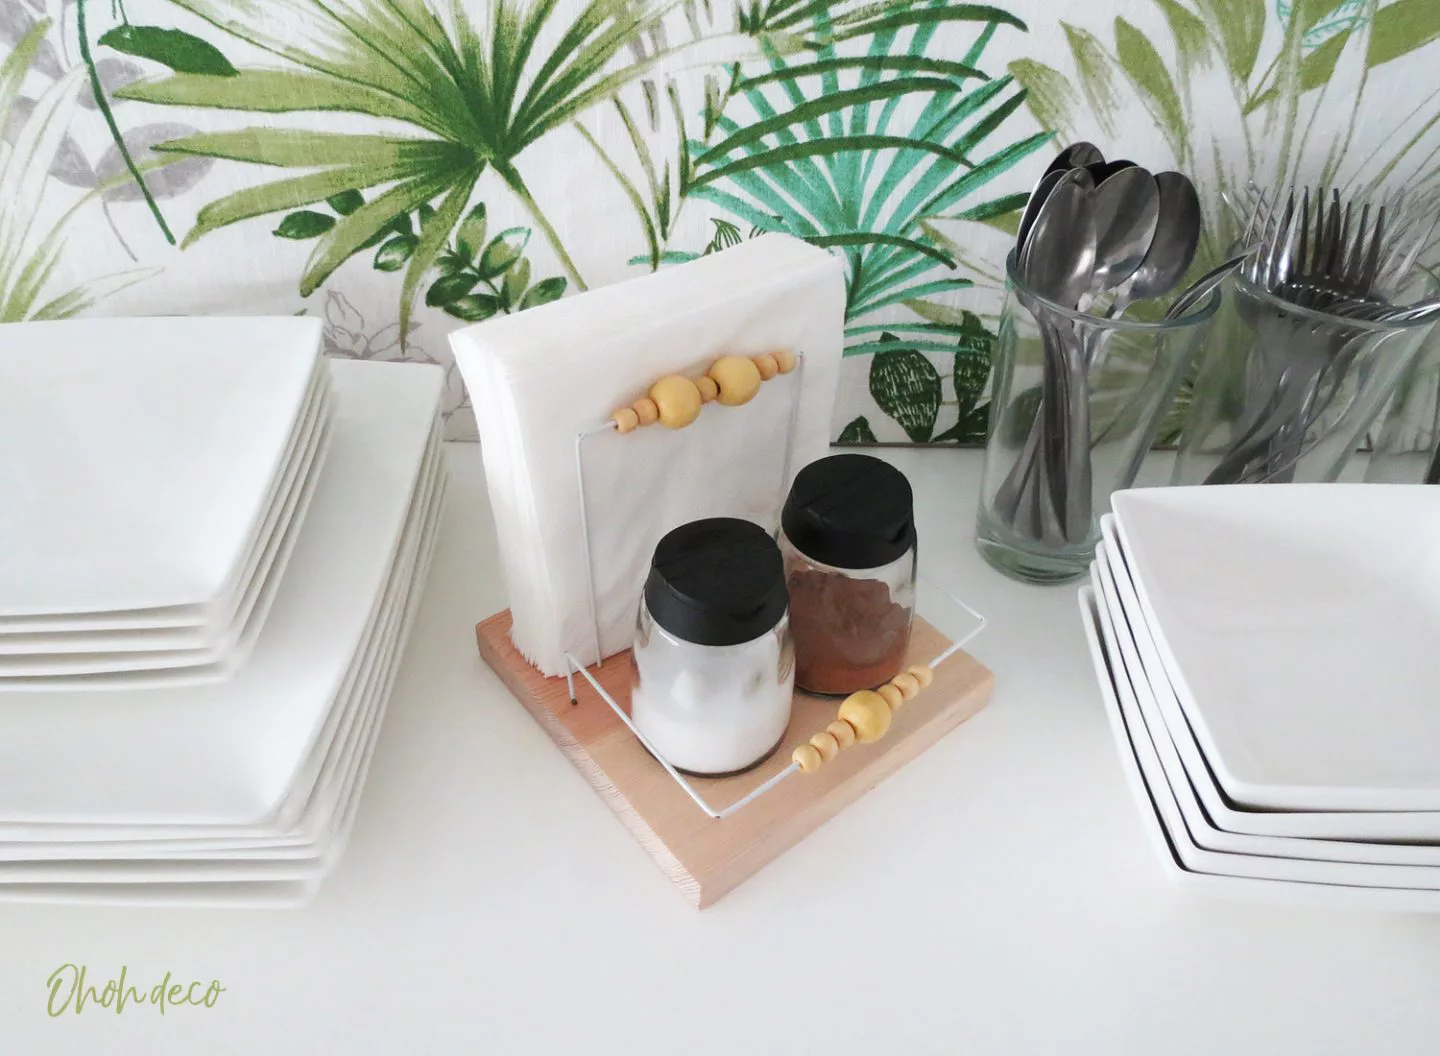
I wanted to make a napkins tray for awhile. One part to hold the napkins and an other space to keep salt and peper. It makes things much easier when it’s time to clean the table. And as it look quite nice I can just let the tray on the dinner table. I finally took the time to think about a nice design and to build it. Even if my first attempt of using a concrete base turns out to be a fail, the second try using a hard wood support works just fine.
Here is the material you need:
- 3 wire coat hangers
- a piece of hard wood of 2cm – 3/4 inch thickness
- wooden beads
- silicon glue
- a drill
- a saw
- a ruler and a pencil
* * *
Hace tiempo que quiero hacer una bandeja para servilletas. Una parte para sostener las servilletas y otro espacio para guardar la sal y la pimienta. Tener todo junto es mas practico cuando llega el momento de limpiar la mesa. Y como se ve bonito (en mi opinión ;), puedo dejar la bandeja sobre la mesa del comedor. Me tomé el tiempo para pensar en un buen diseño y construirlo. Incluso si mi primer intento de usar una base de concreto resulta ser un fracaso, la segunda prueba con un soporte de madera si funcionó.
Aquí está el material que necesitas:
- 3 ganchos metálicos
- una pieza de madera de 2cm de espesor
- cuentas de madera
- pegamento de silicon
- un taladro
- una serrucho
- una regla y un lápiz

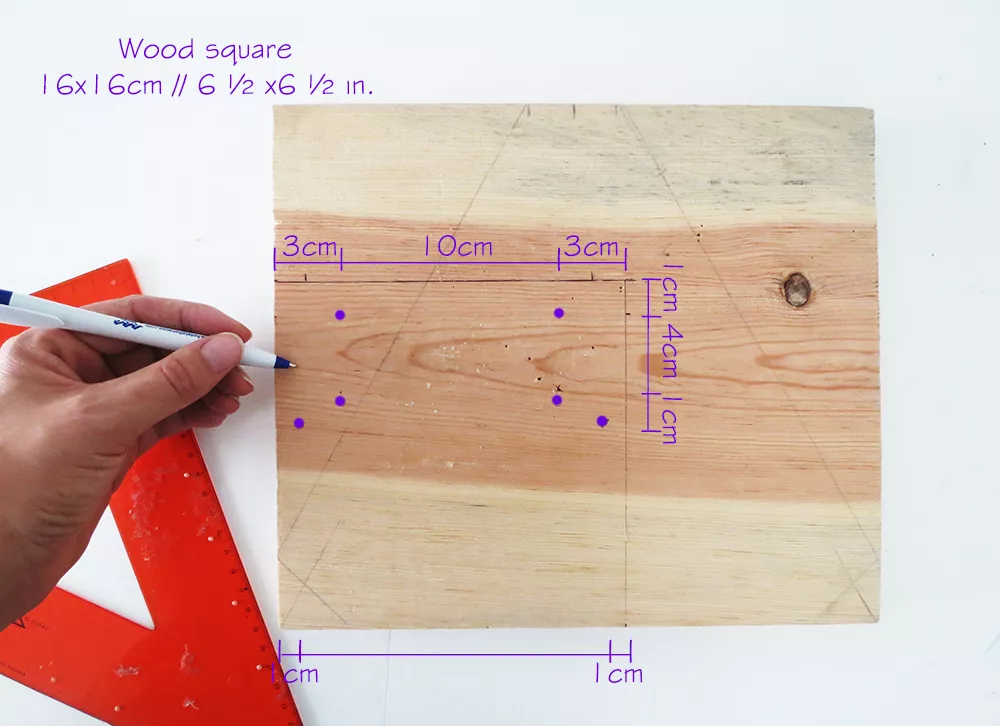
Start by making the wooden base cutting a square of 16×16 cm (6 1/2 x 6 1/2 inches). With the ruler and the pencil make 6 marks on the wood where you will have to drill small holes to stick the wire in. Follow the measurements on the picture.
* * *
Comience cortando que la base de madera en un cuadrado de 16×16 cm (6 1/2 x 6 1/2 pulgadas). Con la regla y el lápiz, haga 6 marcas en la madera donde tendrá que perforar pequeños orificios para insertar el cable. Siga las medidas de la imágen.
[AdSense-A]

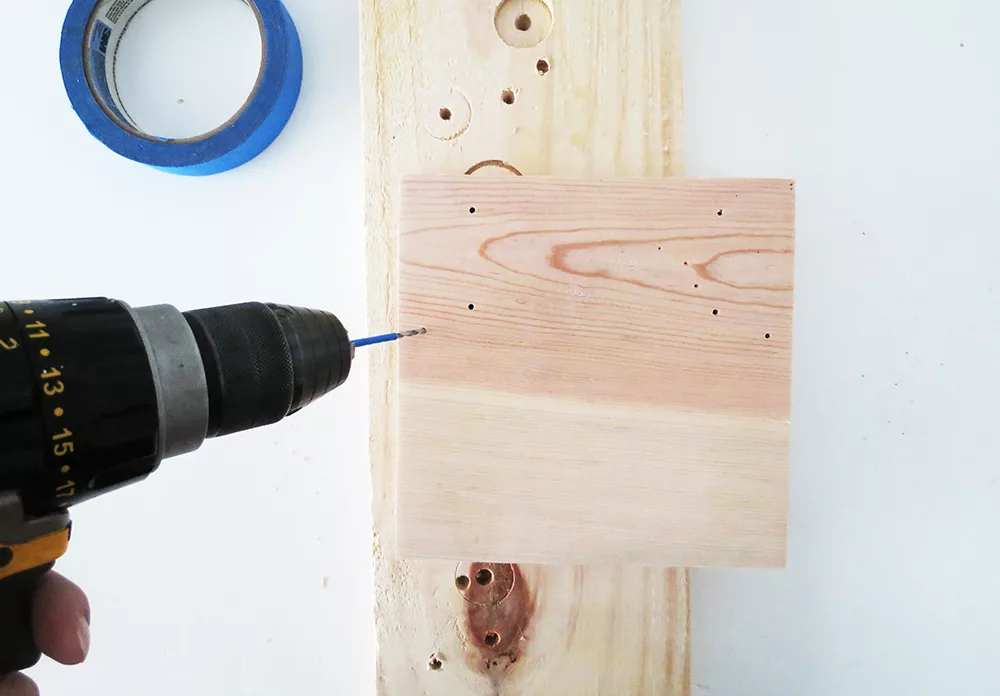
Use a drill bit the same tickness as the coathanger wire thinkness. Hold the drill vertical and drill the holes. Don’t drill on throught all wood tickness. To help you stop drilling on time wrap a piece of masking tape on the bit, at 1,5 cm (3/4in.) from the tip, so you will know when the tape reach the wood surface that you can stop drilling. Sand and varnish the wood base.
* * *
Usa una broca del misma tamaño que el alambre del gancho. Mantengas el taladro en posición vertical y taladre los agujeros. No taladres a través de todo el espesor de madera. Para ayudarte a detener la perforación a tiempo, envuelva un pedazo de cinta adhesiva al rededor de la broca, a 1,5 cm (3/4 in) de la punta, cuándo la cinta llega a la superficie de la madera puedes dejar de perforar. Lija y barniza la base de madera.
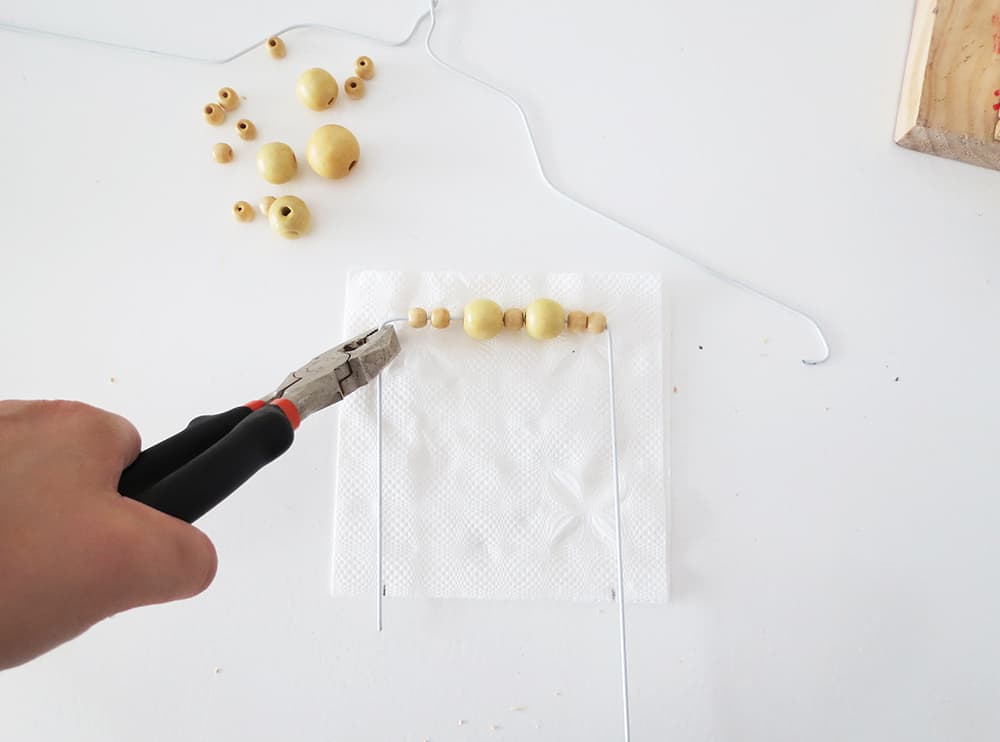
To hold the napkins you need to make two U shape with the wire. Cut the long part of the coat hanger and use pliers to make a first 90 degree angle. pass some beads through the wire and fold and other 90 degree angle. The U shape have the following dimensions: 13cm x 10 cm x 13 cm – 5 x 4 x 5 inches.
* * *
Para sostener las servilletas, necesitas hacer dos formas de U con el alambre. Corta la parte larga del gancho y usa alicates para hacer un primer ángulo de 90 grados. Pasas algunas cuentas en el alambre y doblas otro ángulo de 90 grados. La forma de U tiene las siguientes dimensiones: 13 cm x 10 cm x 13 cm.


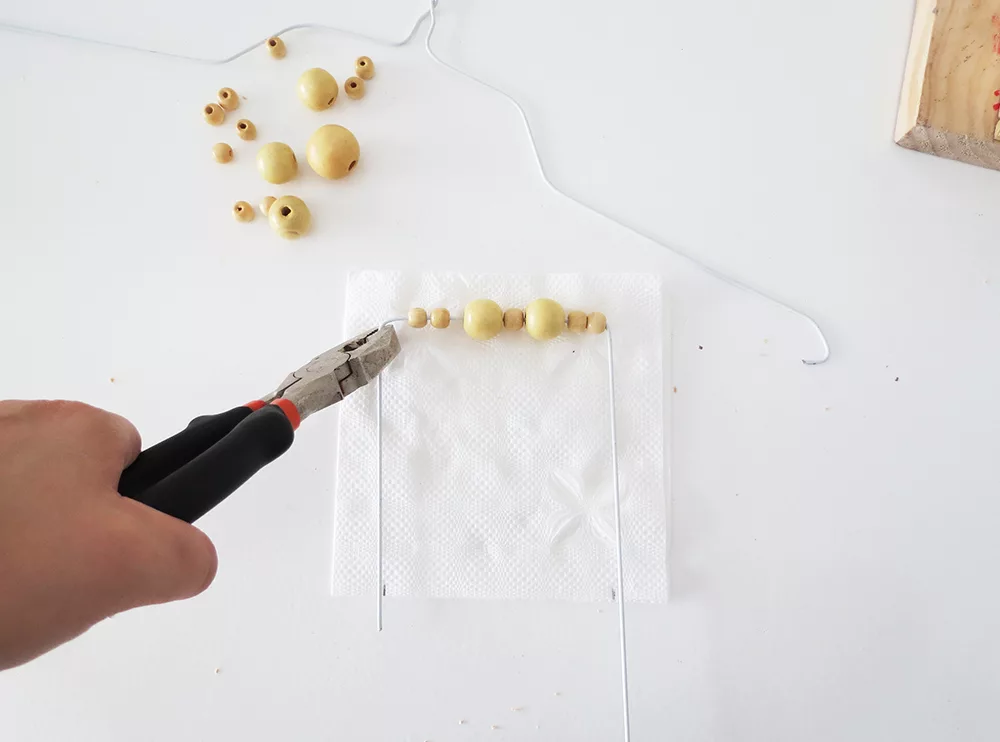
Make a second identical U shape…don’t forget to pass the beads before folding the wire.
* * *
Haz una segunda forma de U idéntica a la primera … no olvides pasar las cuentas antes de doblar el alambre.
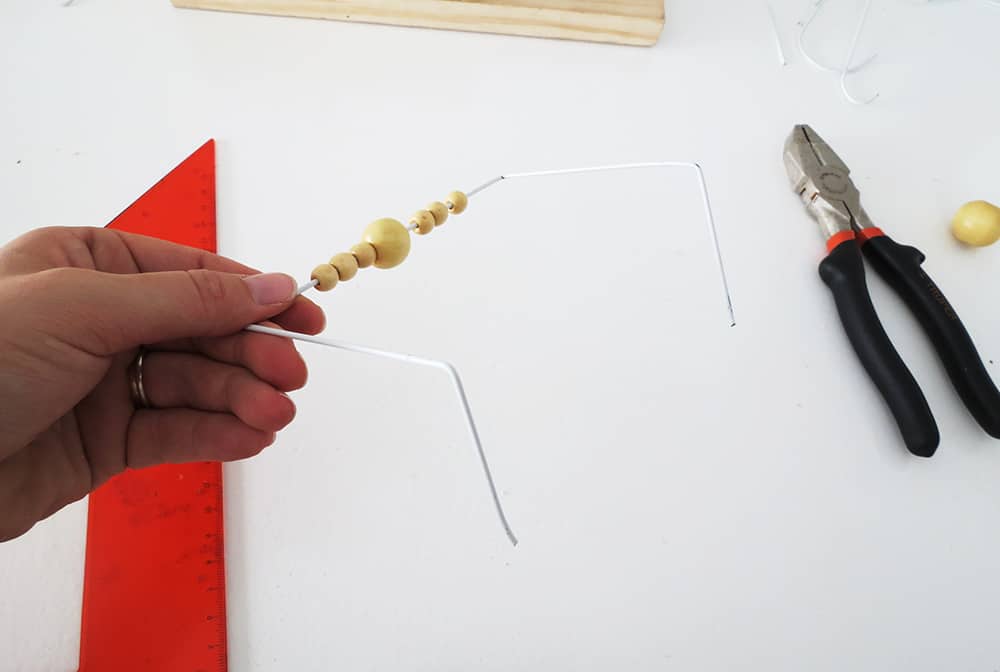
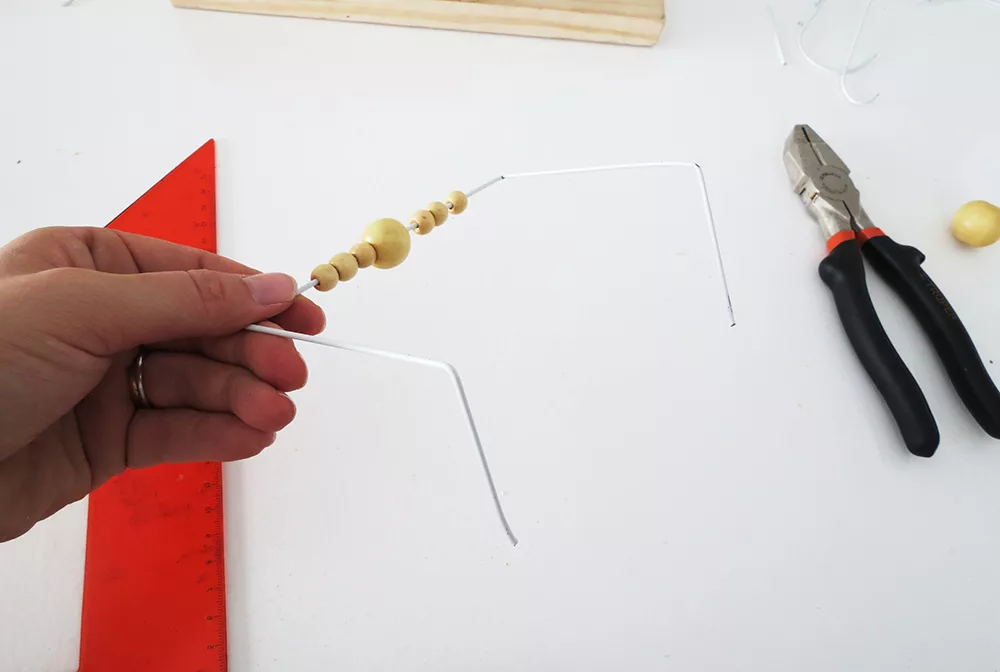
Fold a third wire piece to surrounded the tray area. Start by passing some beads and hold them in the wire center. Fold both sides at 90 degree to make a U shape. The U shape measure 14 x 14 x14 cm (5 1/2 x 5 1/2 x 5 1/2 inches). Then you need to fold again each leg at a 90 degree angle but in the opposite direction of the first ones. leave a distance of 9cm (3 1/2 in.) between each angle.
* * *
Doblas una tercera pieza de alambre para rodear el área de la bandeja. Comienzas pasando algunas cuentas y mantenlas en el centro del alambre. Doblas ambos lados a 90 grados para hacer una forma de U. Esta forma de U mide 14 x 14 x 14 cm (5 1/2 x 5 1/2 x 5 1/2 pulgadas). Luego, debe doblar nuevamente cada extremo en un ángulo de 90 grados, pero en la dirección opuesta a los primeros angulos. Dejas una distancia de 9 cm (3 1/2 in) entre cada ángulo.

[AdSense-B]
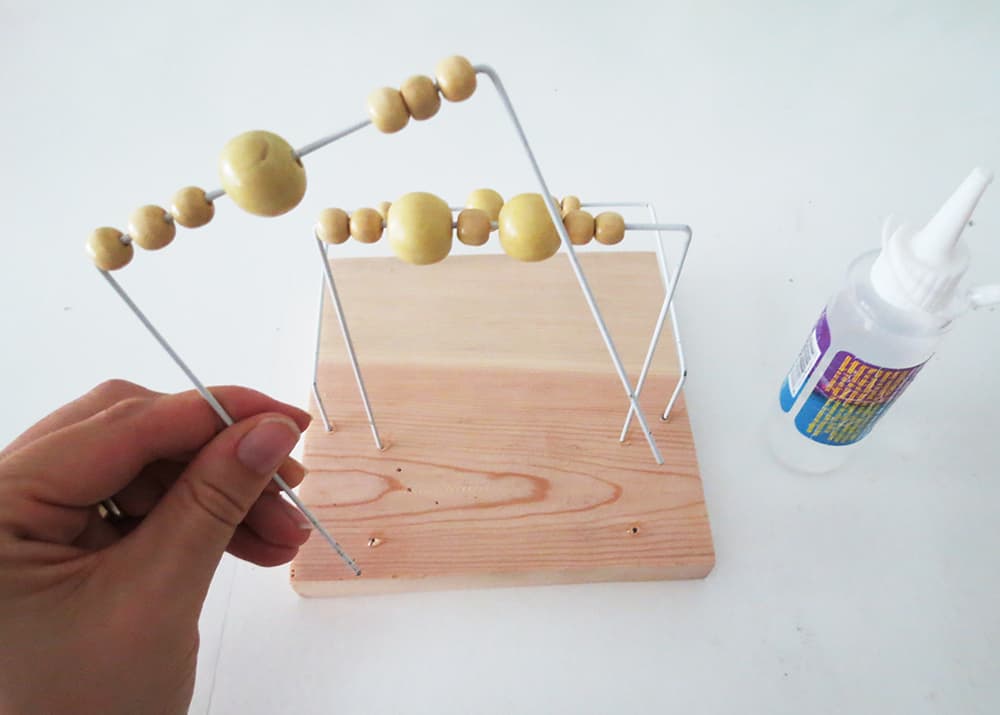
Take the wood base and add a dot of glue on each hole. Push the wire shapes into the holes and wait for the glue to dry.
* * *
Tomes la base de madera y agregues un punto de pegamento en cada hoyo. Empujas las los alambres en los agujeros y esperas a que se seque el pegamento.
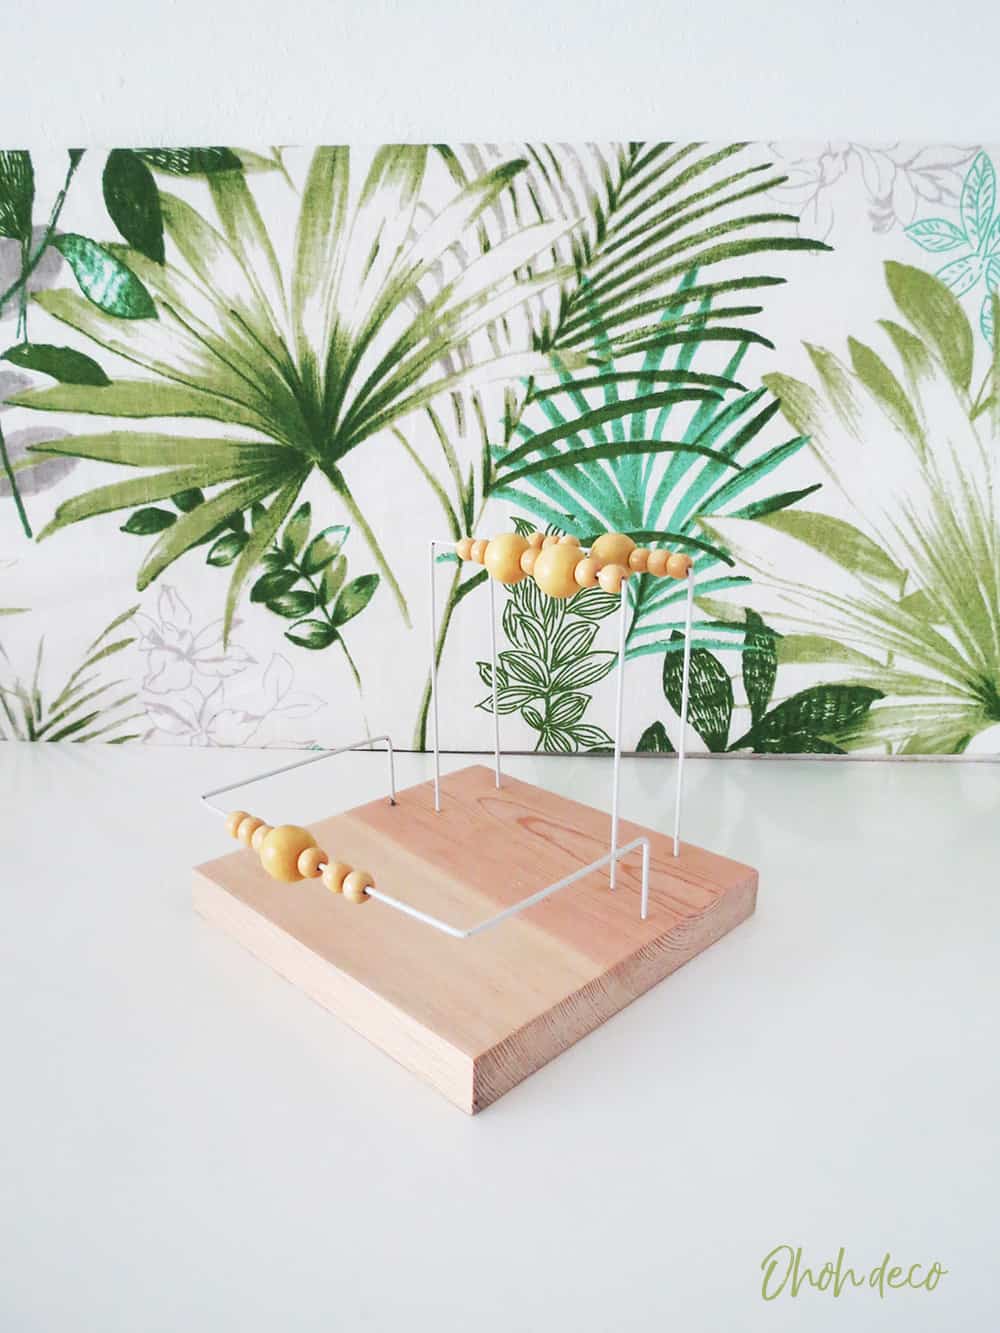

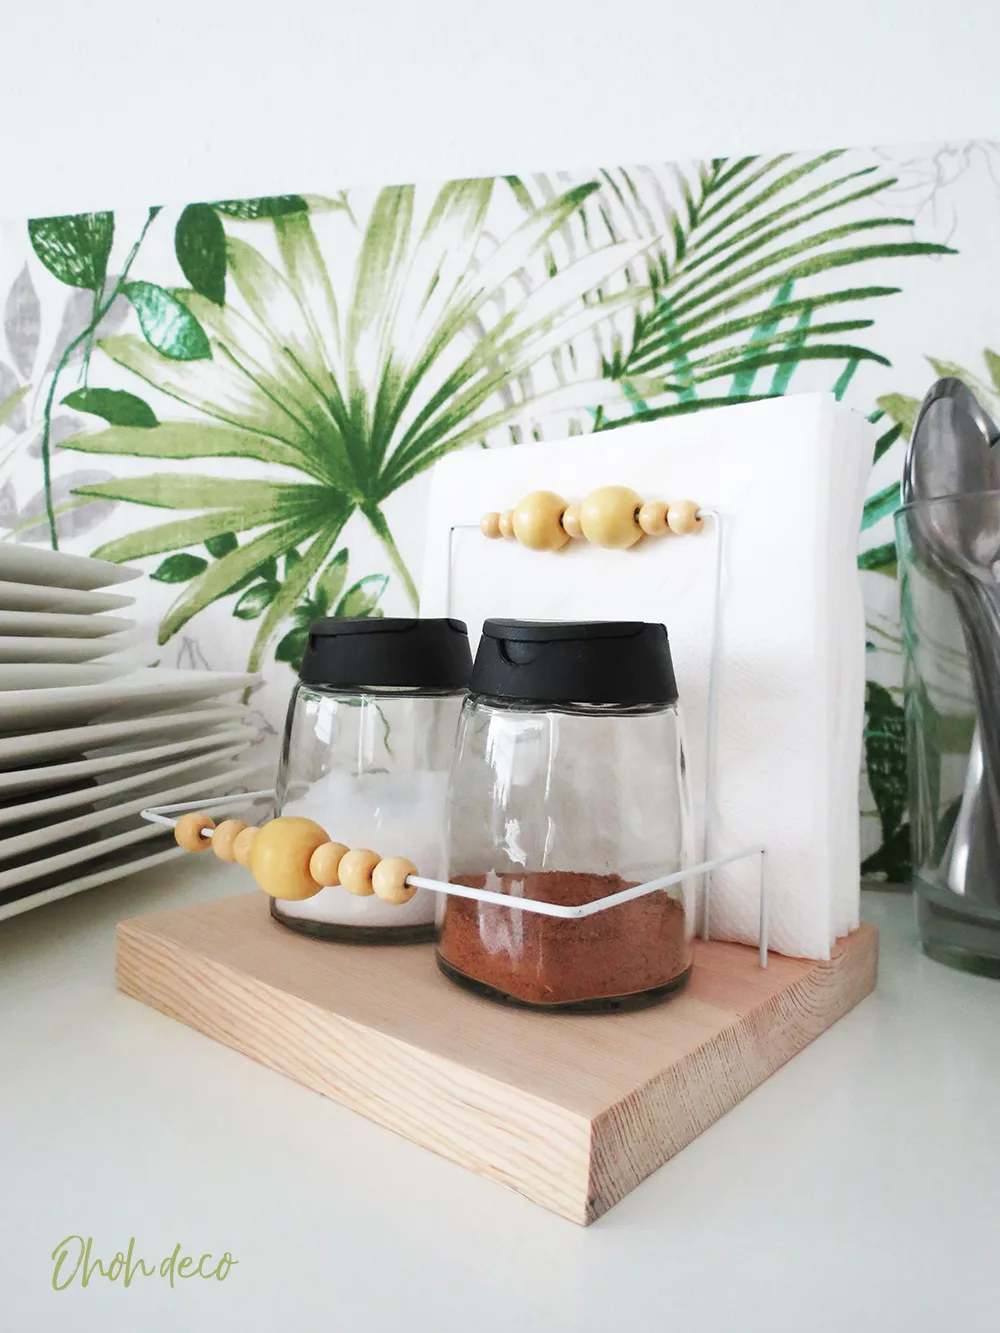
Done! Place napkins and spices into the tray and enjoy a nice meal.
* * *
Terminado! Coloques las servilletas y las especias en la bandeja y puedes disfrutar de una buena comida.
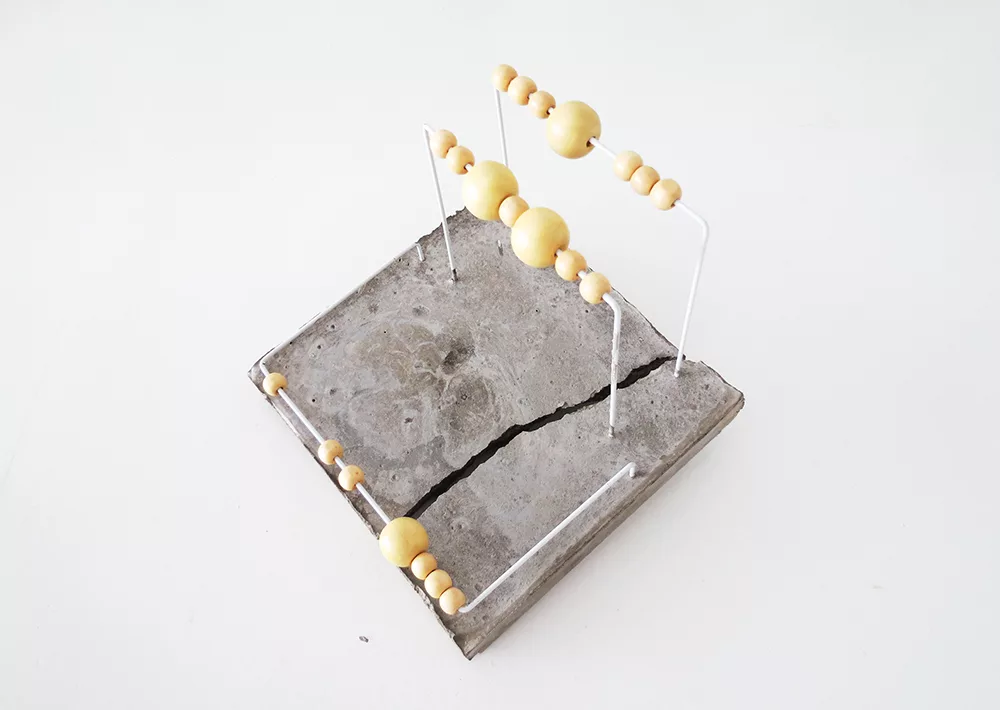
And one pic of the first fail attempt with the concrete base!
Y una foto del primer intento fallado con la base de concreto!

https://youtu.be/oxjyh-uMZEo
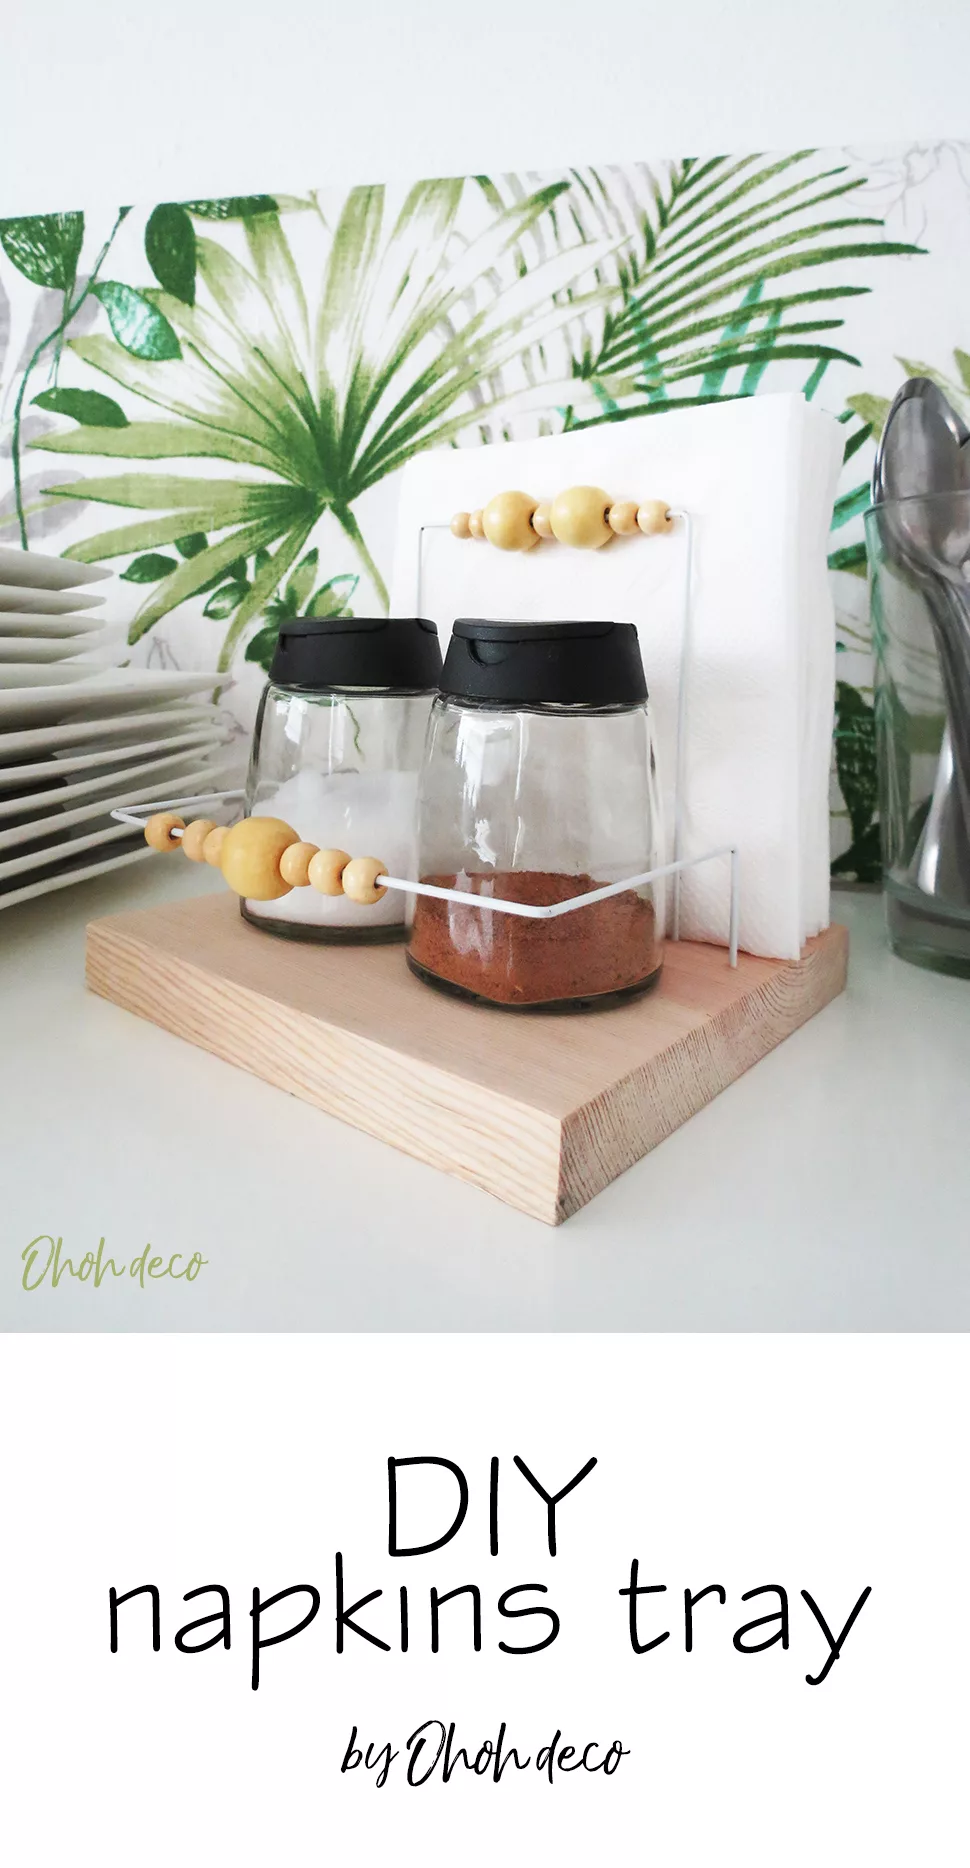
Pin it for later!

[AdSense-C]
Amaryllis
clique aqui
Wednesday 5th of September 2018
I loved this tray of napkins will look great in my cottage.
Mamyca
Monday 27th of August 2018
Super, joli et bien pratique pour des serviettes NORMALES ?
amaryllis
Monday 27th of August 2018
Hahaha oui! La prochaine fois je ferai des ronds de serviette pour des en tissus, histoire de voir leurs têtes ;)
Kelly Mahan
Monday 16th of July 2018
These look like so much fun to make. A very summery DIY, love it!