Tired of the same old decor? Looking to add a touch of elegance and creativity to your home without breaking the bank? Well, we’ve got the ultimate DIY hack for you: creating a stunning DIY tiered tray using the most unexpected material – cardboard!
Yes, you read that right. In this article, we’ll show you step-by-step how to craft a tiered tray that will elevate your style and impress your guests. Get ready to unleash your creativity and discover just how easy it is to transform humble cardboard into a gorgeous centerpiece for your home. So, gather your supplies, follow along, and prepare to be amazed by the possibilities that await you. Are you ready to embark on your DIY journey? Let’s dive in!
[ This post probably contains affiliate links, our full disclosure policy is boring, but you can read it HERE ]
What can I use to make a tiered tray?
When it comes to making your own tiered tray, you might be wondering what materials you can use that will give you the best result.
One popular option for creating a tiered tray is using wooden materials. This gives a natural and timeless look to your tray, perfect for adding a touch of warmth to any space.
if you’re feeling adventurous and want to add an eclectic touch to your home, consider using unconventional materials such as vintage plates, tin cans, or even repurposed furniture. These unique choices can add a whimsical and personal touch to your tiered tray, making it a true conversation starter.
If you’re looking for a more budget-friendly and versatile option, cardboard is an excellent choice. It may seem unconventional, but with the right technique and design, you can achieve stunning results. Cardboard is lightweight, easy to mold, and readily available, making it a convenient choice for those who want to experiment and get creative. Plus, you can easily customize the shape and size of your tray to fit your specific needs.
So, gather your supplies and let’s get started on this exciting DIY project!
RELATED: How to make DIY Cardboard table
RELATED: DIY Cardboard Wall Shelf
Gather Your Supplies

Gather your supplies to embark on this exciting DIY project and create a stunning tiered tray that reflects your personality and adds a touch of wow-factor to your home. Here are some essential items you’ll need to bring your vision to life.
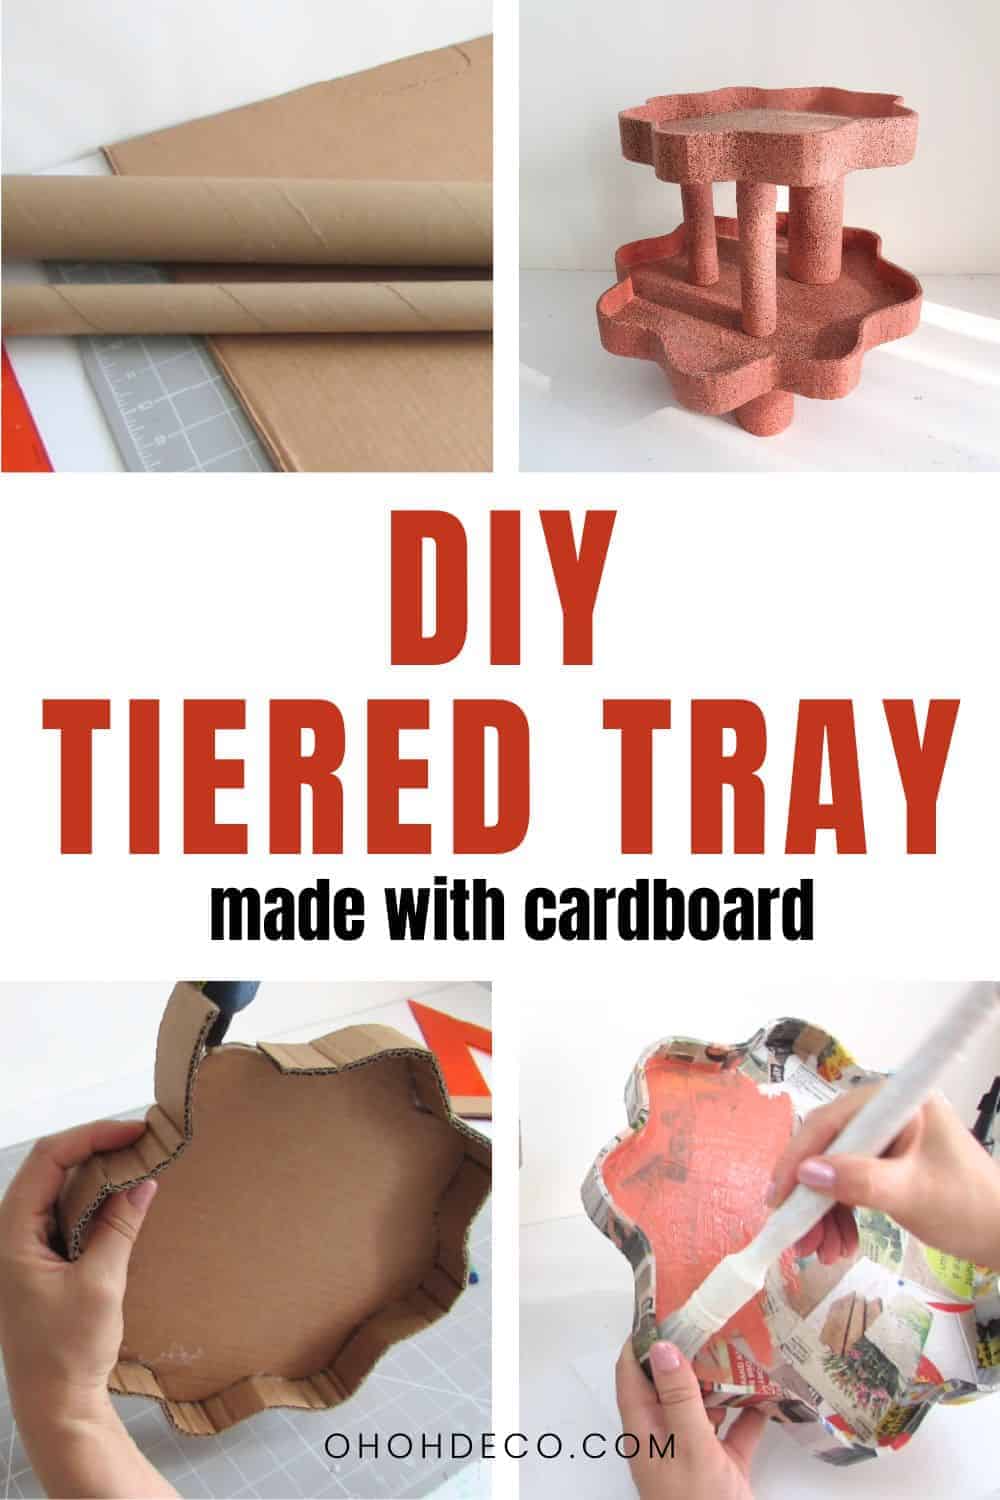
- Cardboard
- Cardboard tubes
- Old newspapers or magazines
- Acrylic paint
- Stone effect spray paint
- Varnish
- Glue gun
- Utility knife
- Ruler
- White glue
- Foam brush
- Pencil
Firstly, cardboard will serve as the main building material for your tiered tray. Look for sturdy pieces that are large enough to accommodate your desired size and shape. Consider repurposing old packaging boxes.
Next, you’ll need a strong hot glue gun. This will ensure that your tiered tray maintains its structure and durability over time. Make sure to have enough glue sticks on hand.
Step-by-Step Guide to Make a tray
With your supplies gathered, you’re ready to move on to the step-by-step guide and bring your DIY tiered tray to life. Let’s dive in and discover how to create a stunning piece that will elevate your home decor.
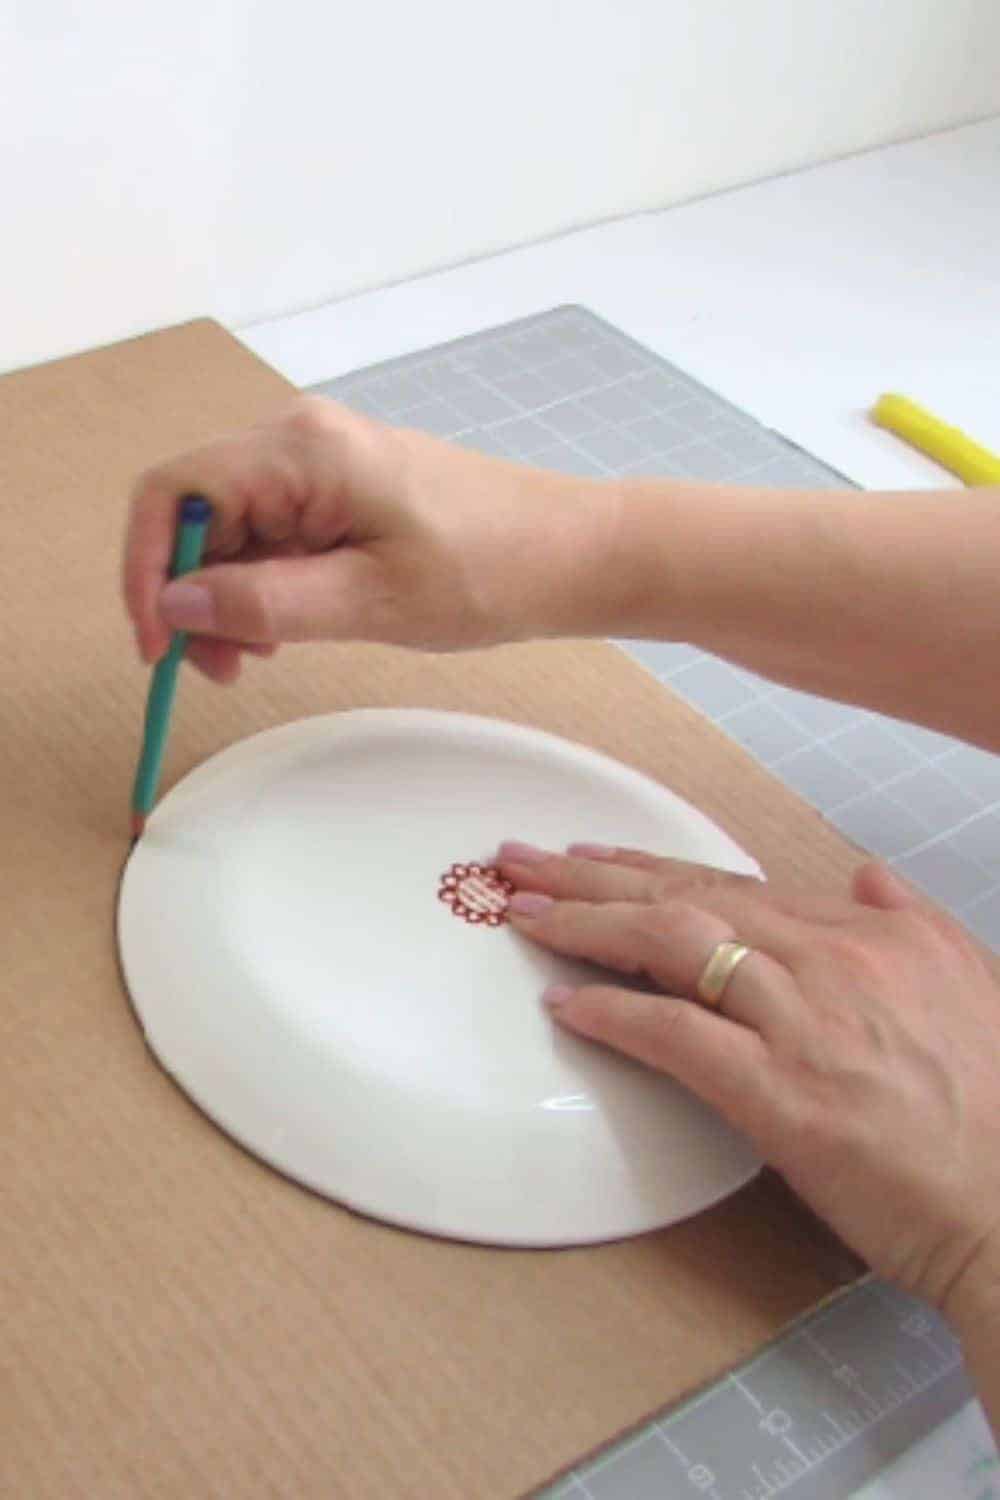
First, start by cutting out the cardboard pieces that will form the base of your tiered tray. Take a plate and report the circle shape on the cardboard.
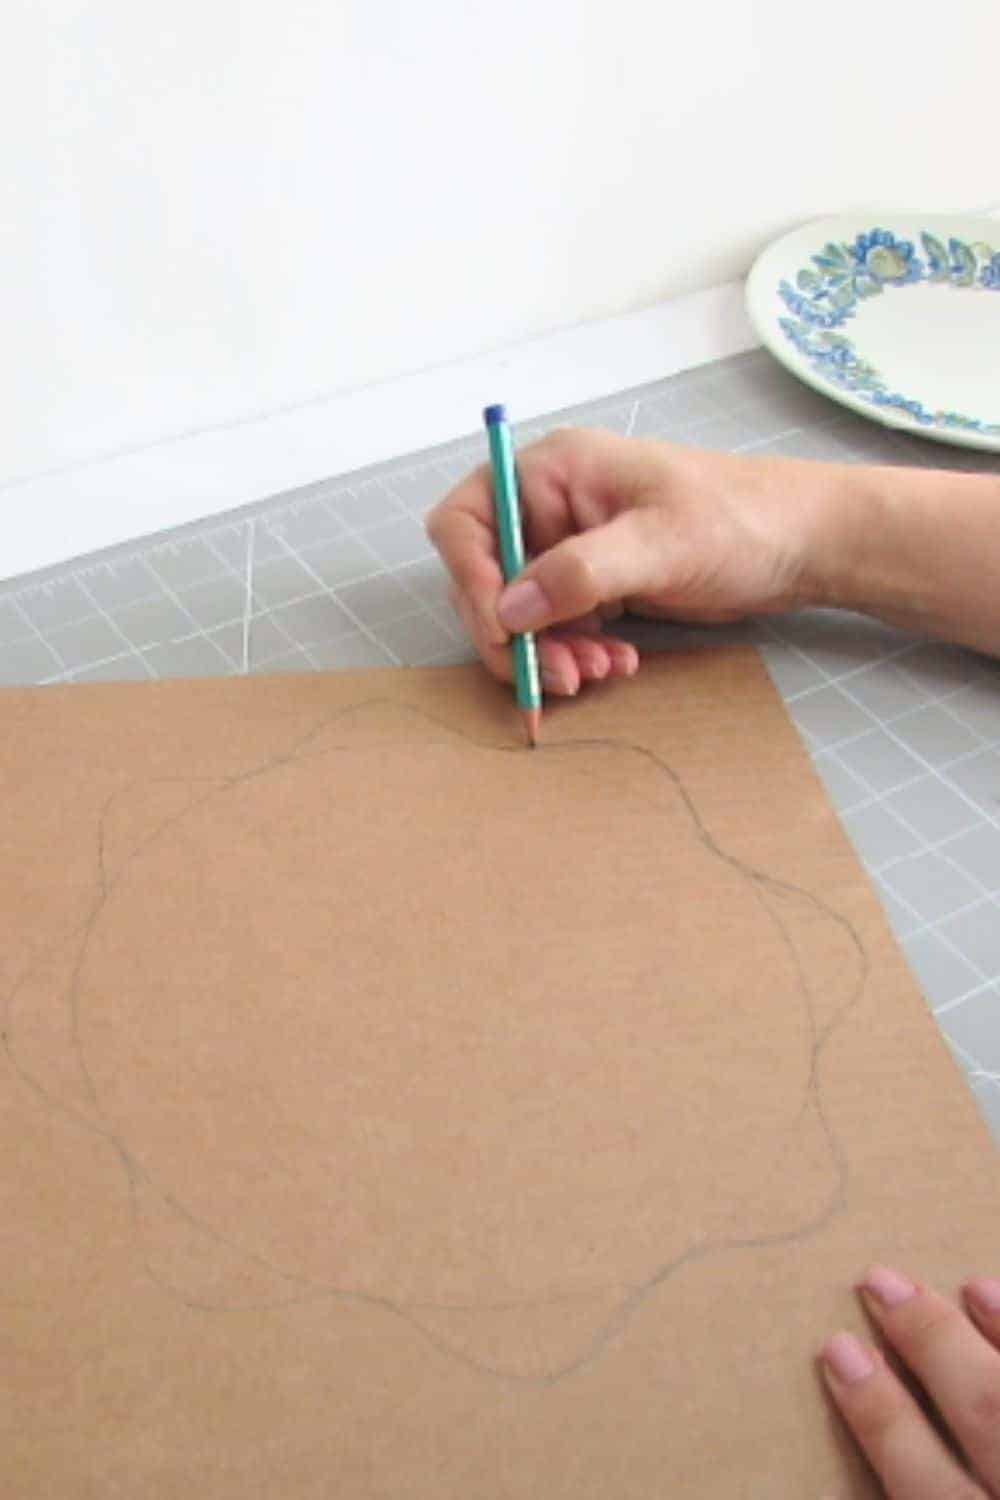
Create waves around the circle to give the tired tray an interesting shape.
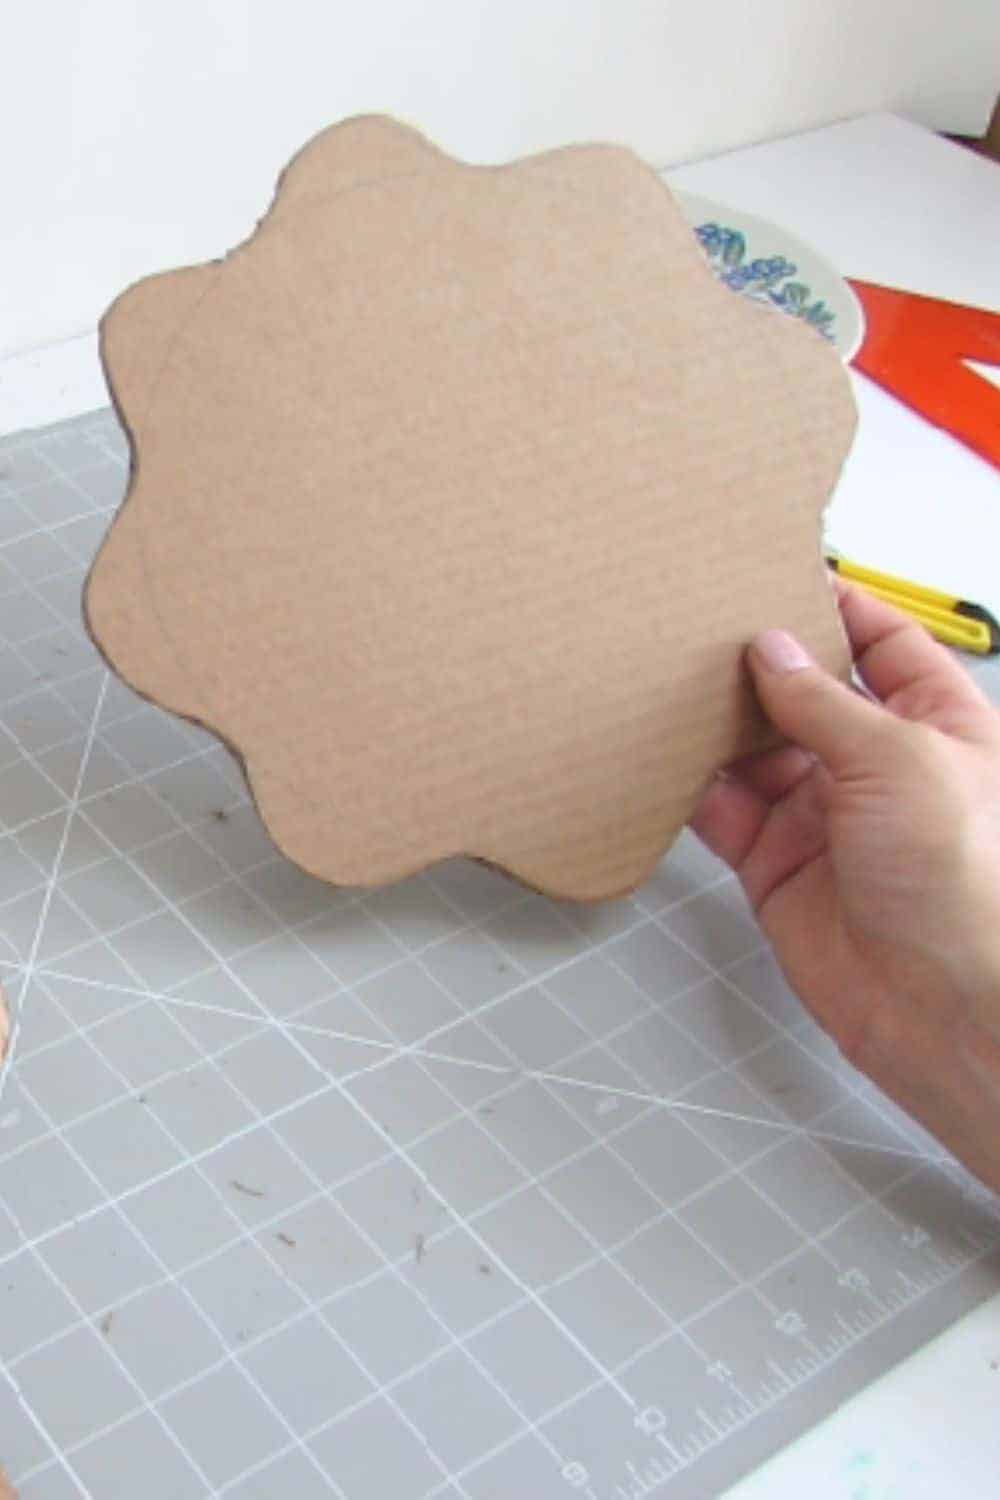
Cut out the shape. Use a craft knife to make precise cuts, keeping safety in mind as you work. As you want the bottom of the tray to be sturdy, report and cut a second identical shape.
Try to cross the cardboard structure to build a stronger bottom tray.
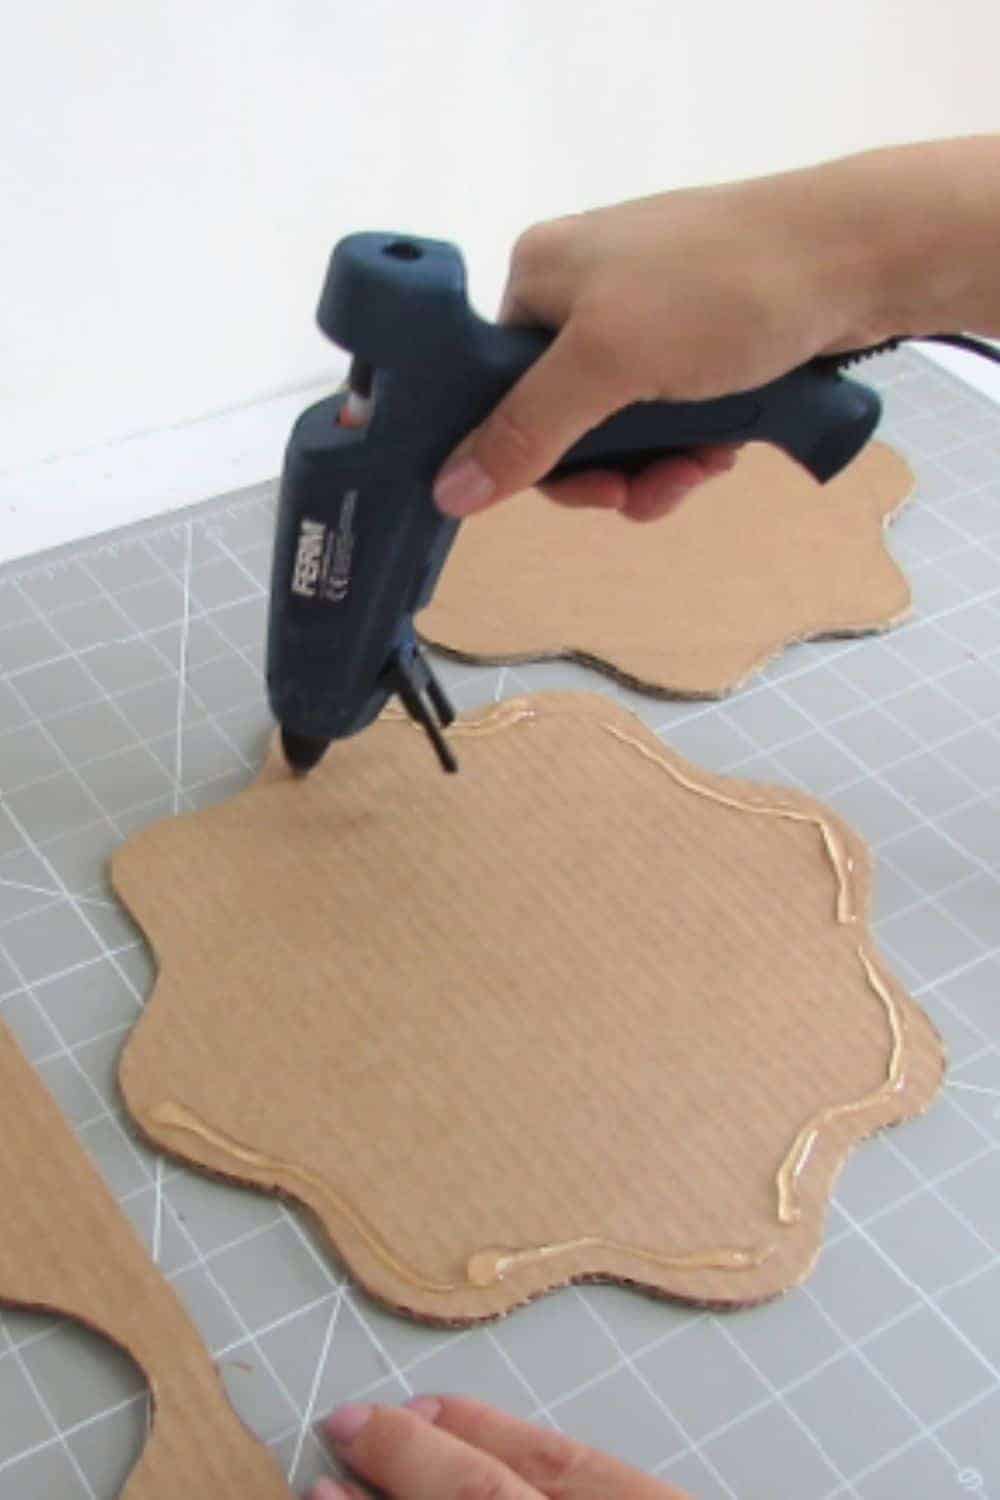
Next, it’s time to assemble the bottom. Apply a generous amount of glue along the edges of the cardboard pieces and the center, making sure they are securely joined together. Press while the adhesive dries, ensuring a sturdy construction.
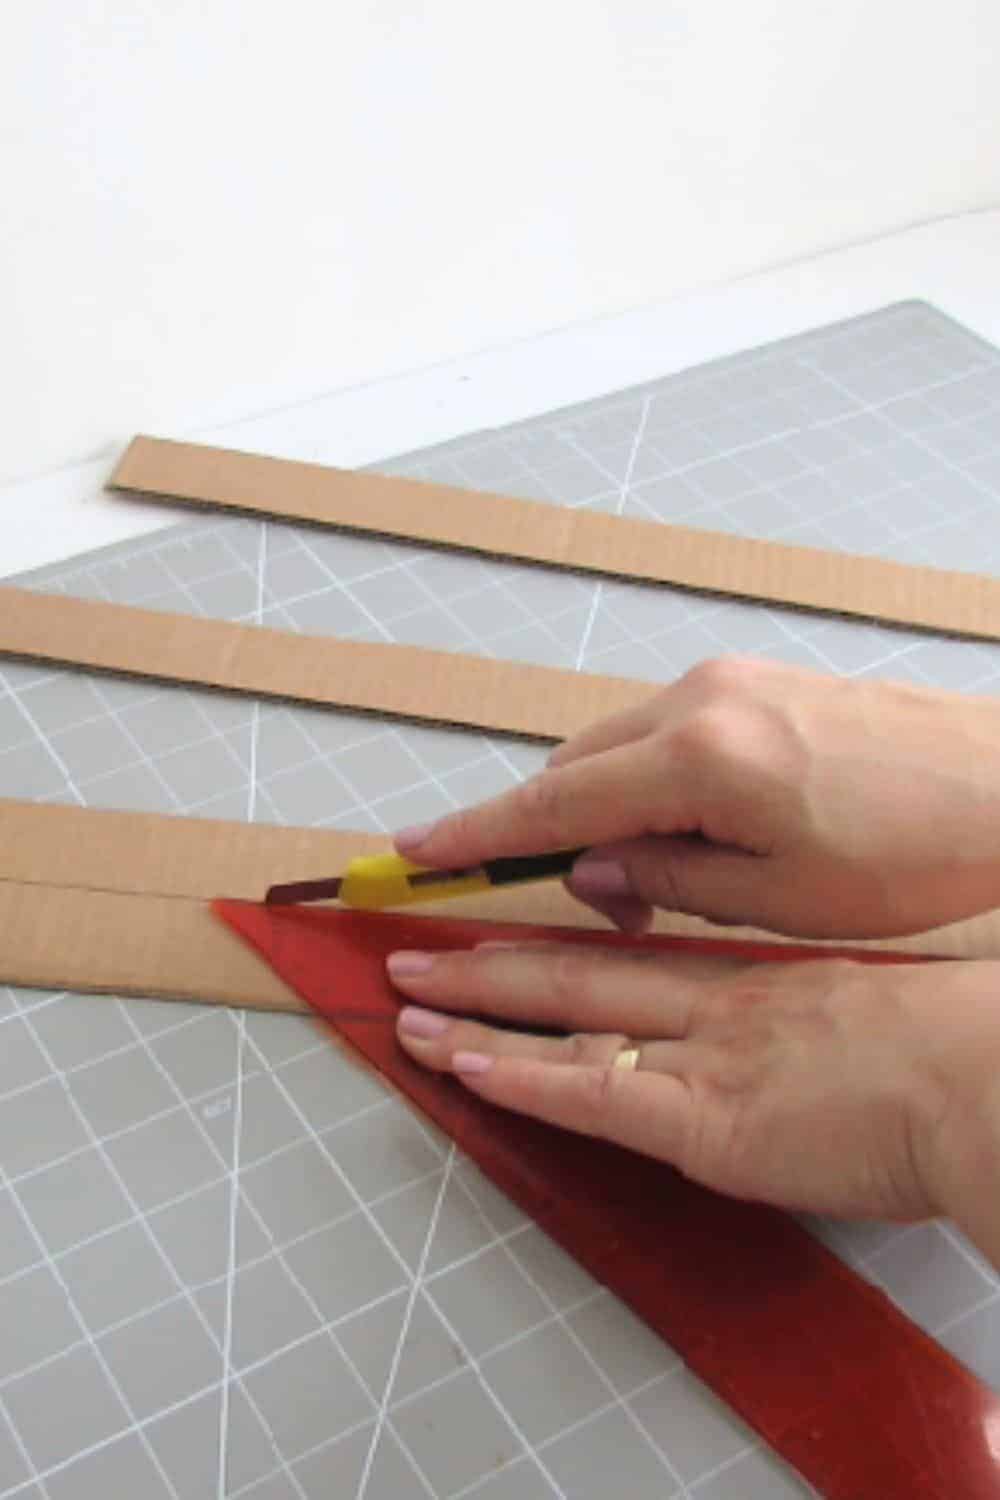
Time to make the tray edges. Cut stripes of 1 1/3 inches high (3.5 cm) in the cardboard. You will need to bend the stripes to follow the tray rounded bottom so ensure you cut the cardboard the right way, cardboard structure lines must be on the small side.
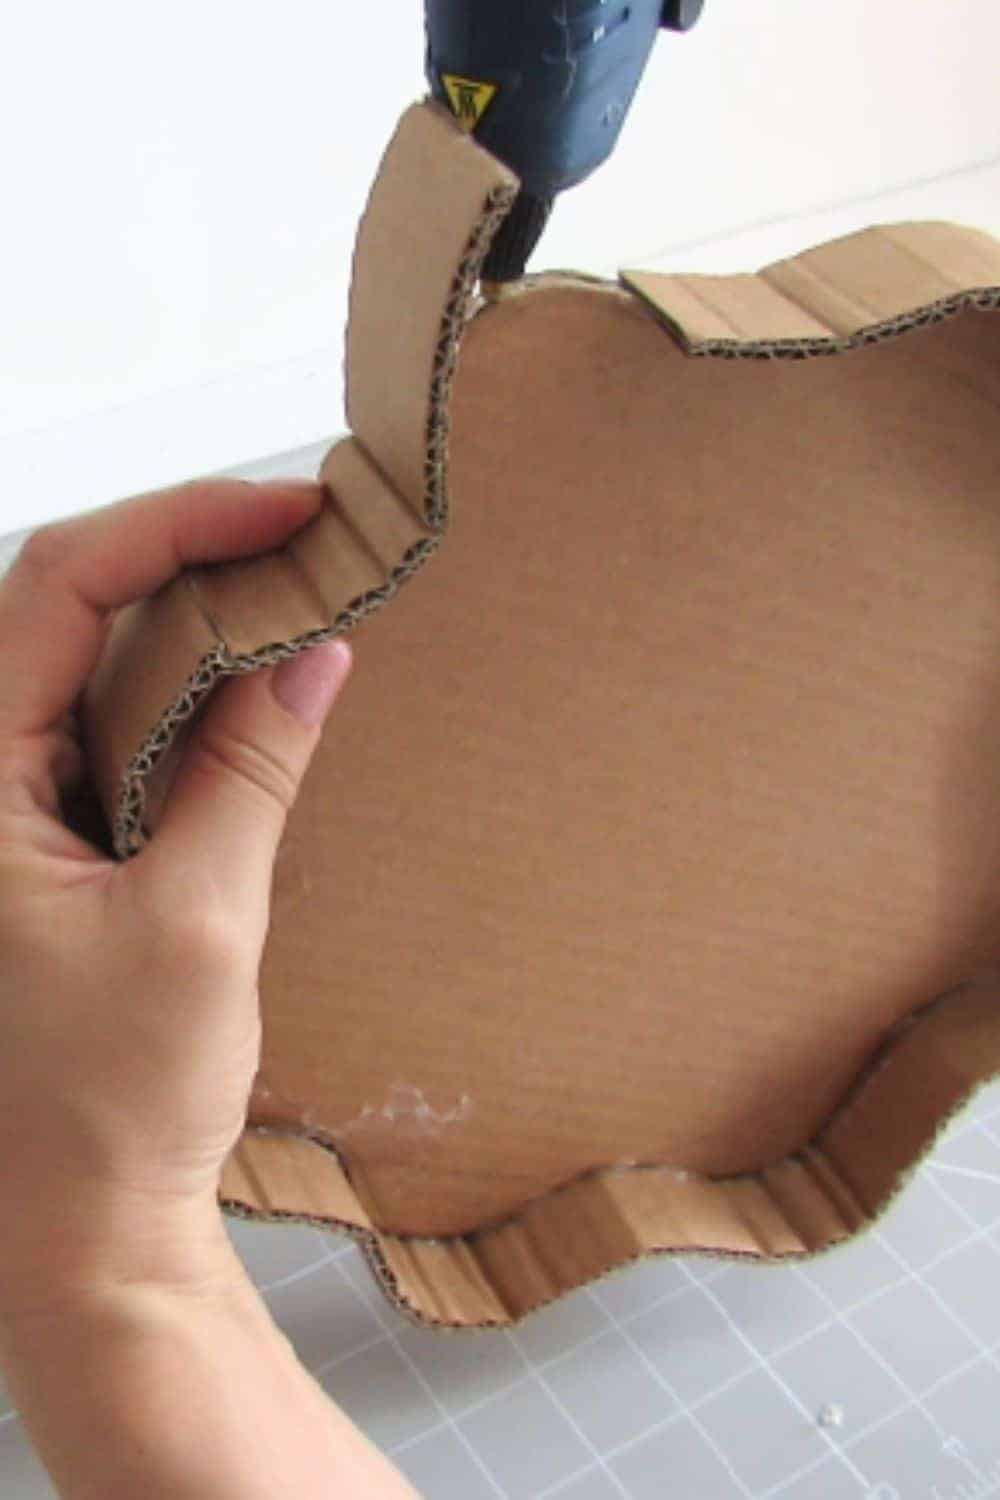
Glue the tray side with the bottom following the curved shape. You will probably have to use several stripes to finish the edge. Just glue the strips one next to the other.
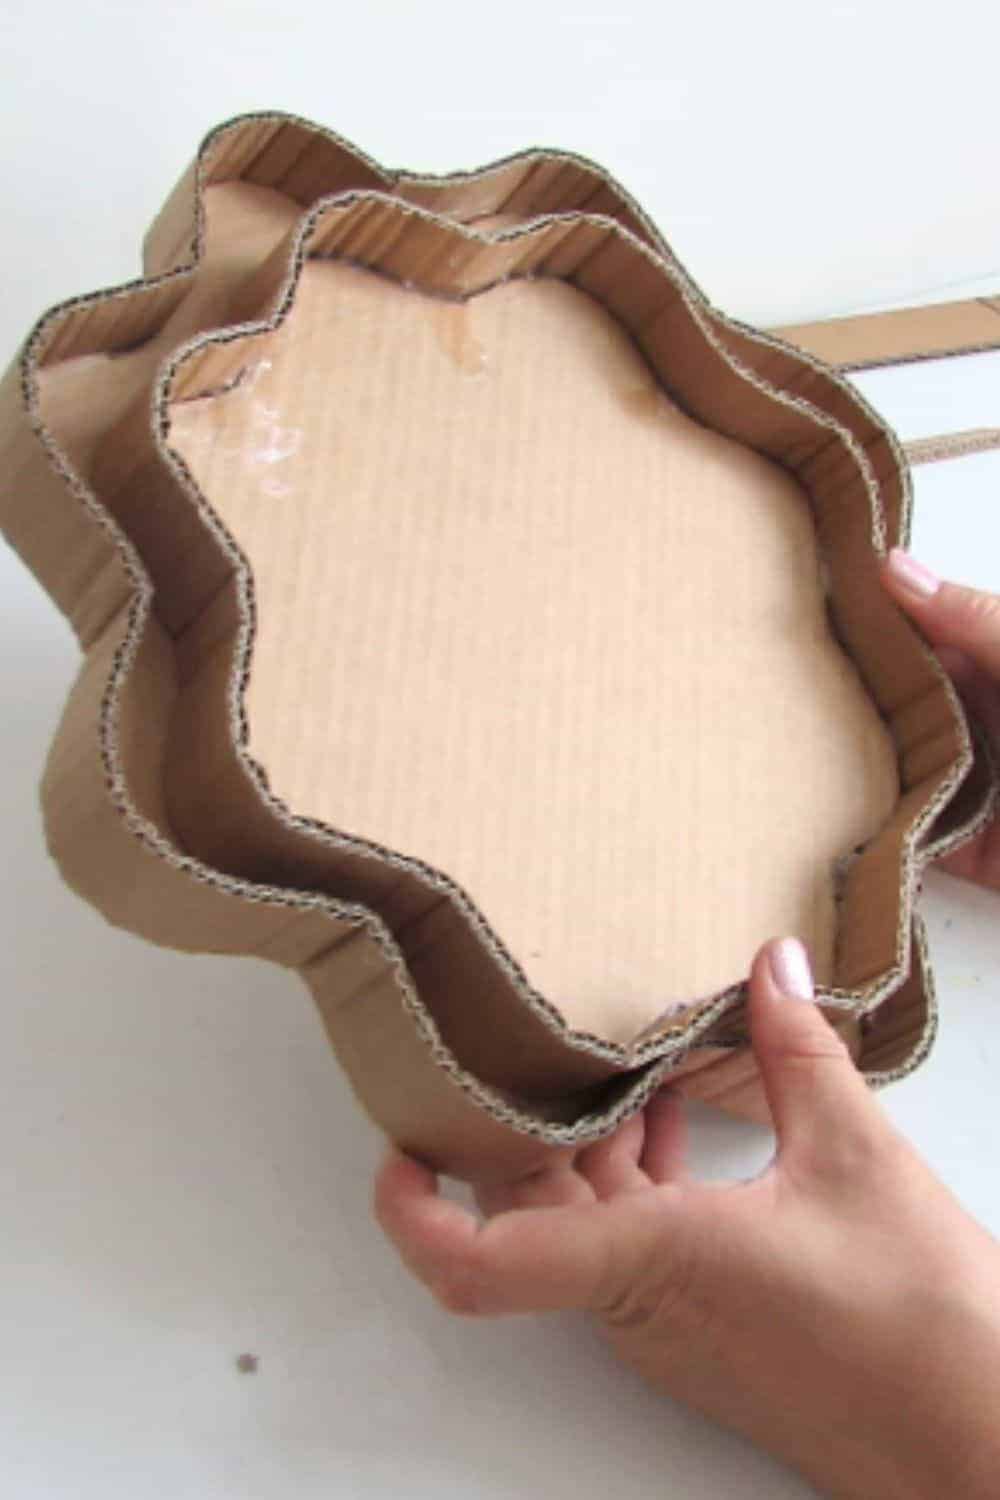
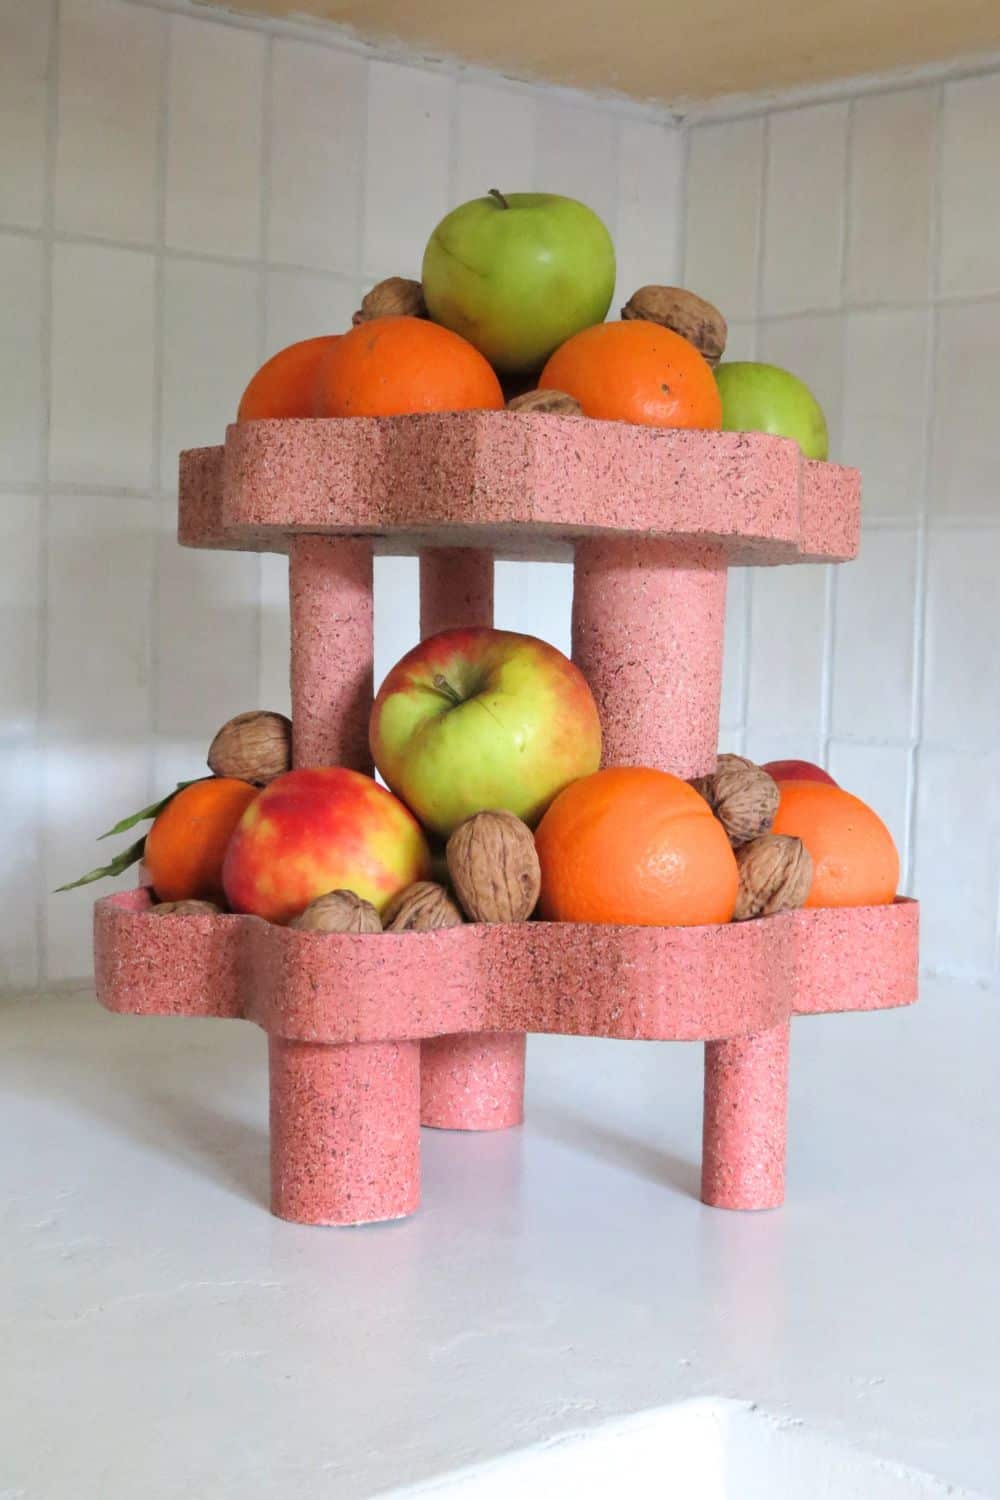
Now that the first tray is finished, repeat the previous steps to create a second one. The trays must have different sizes. I used as a starting point a dessert plate for the small tray and a dinner plate for the large one.
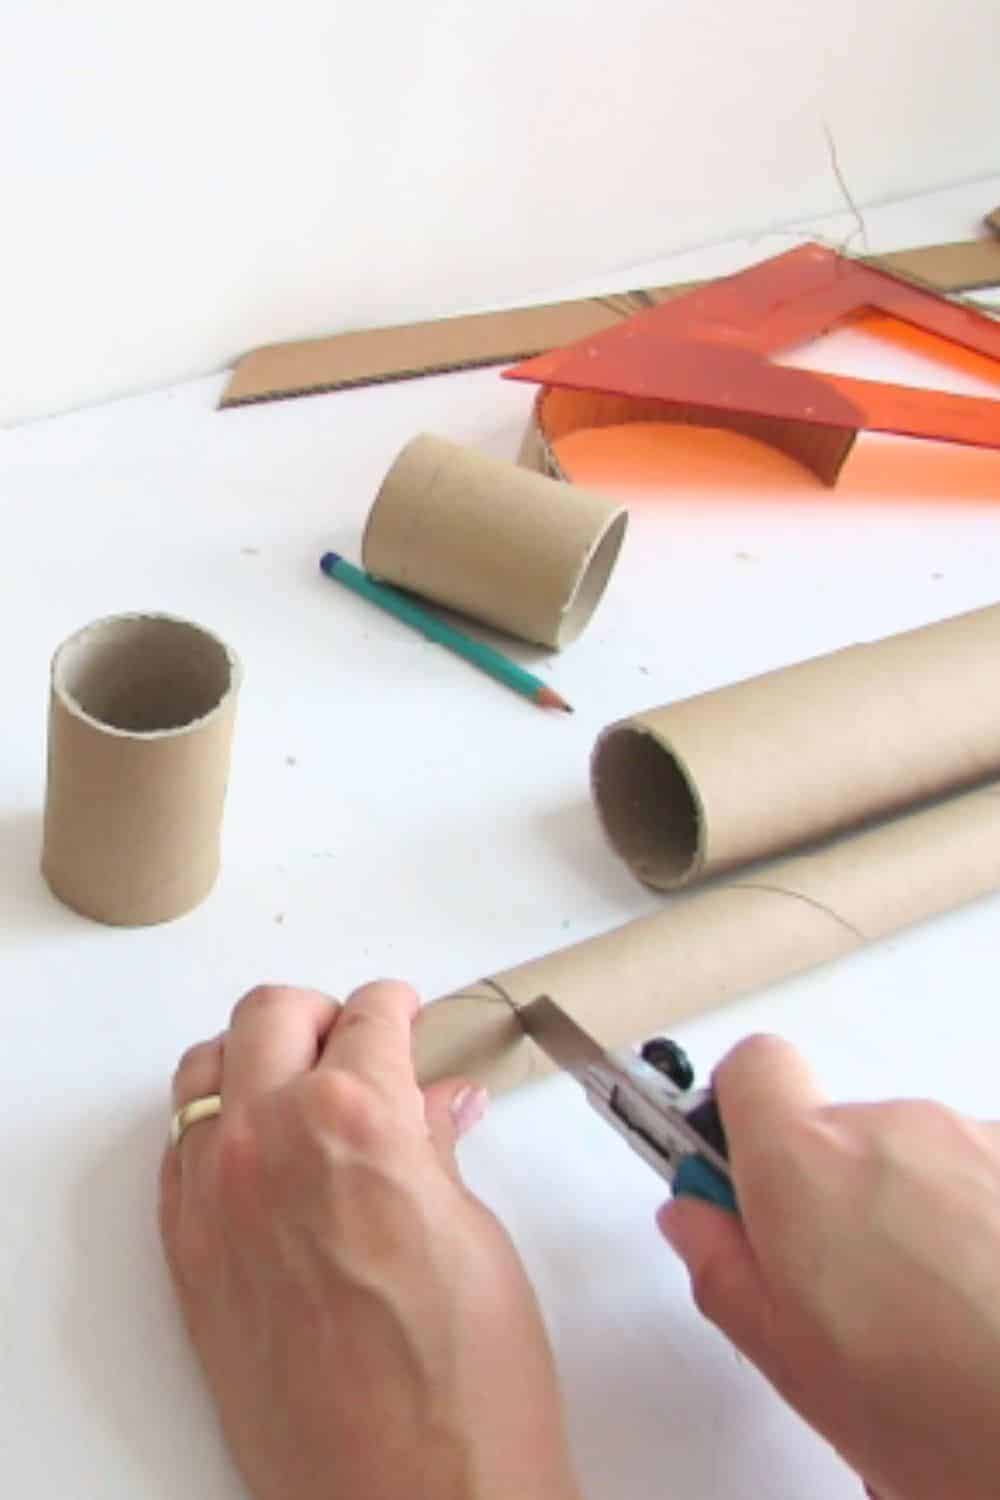
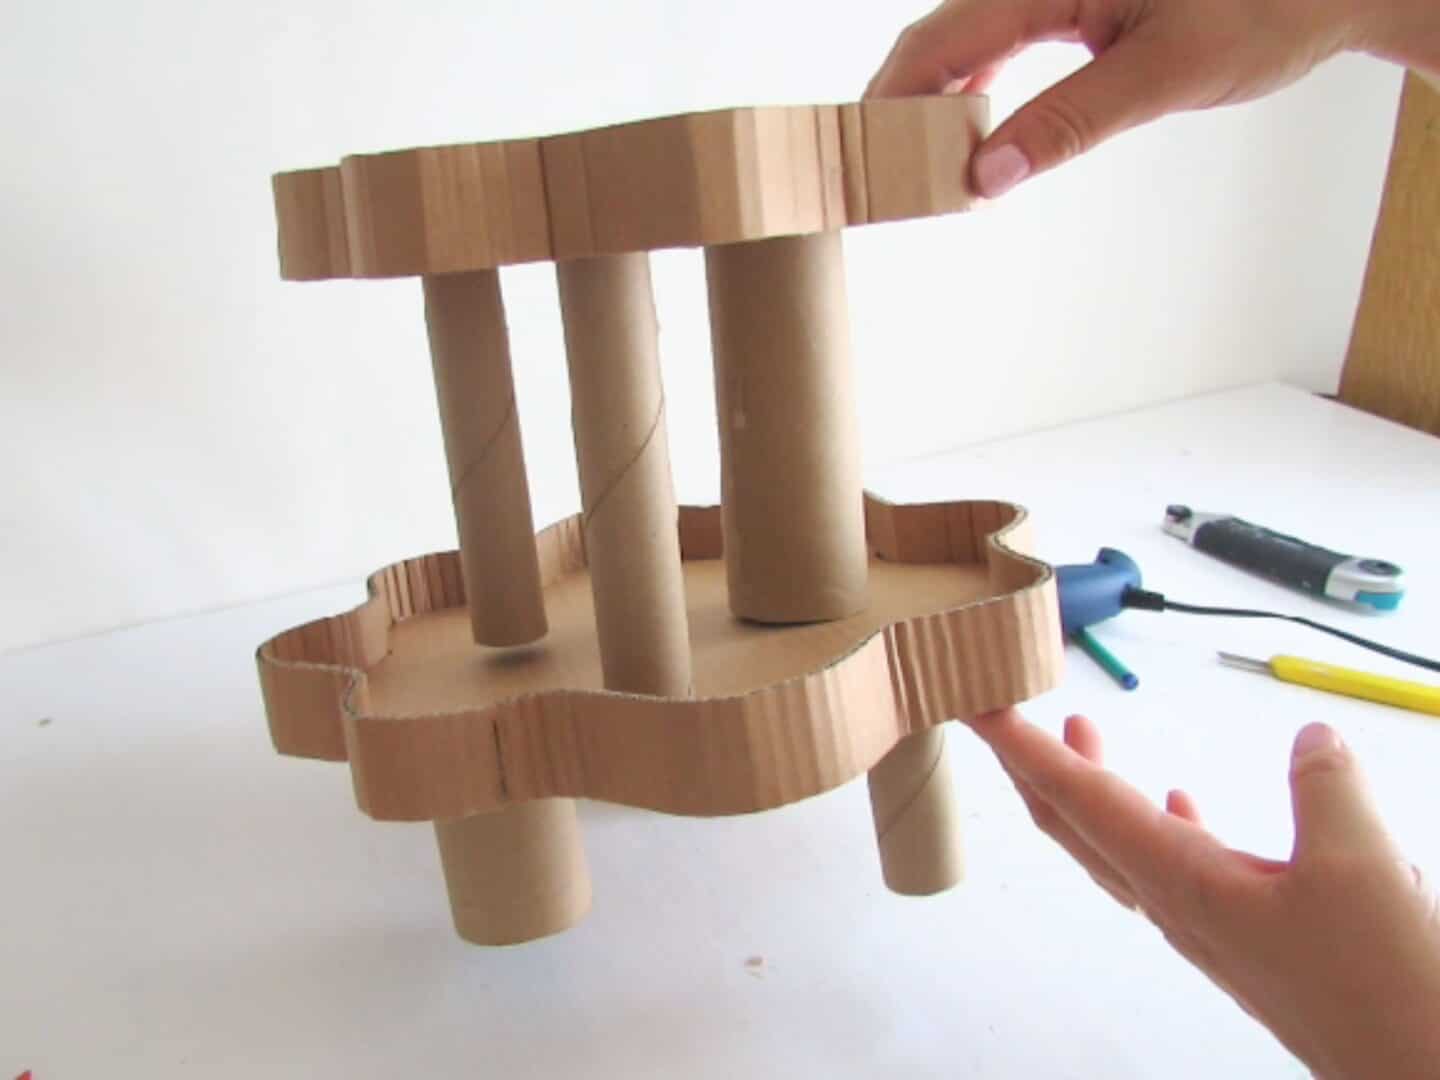
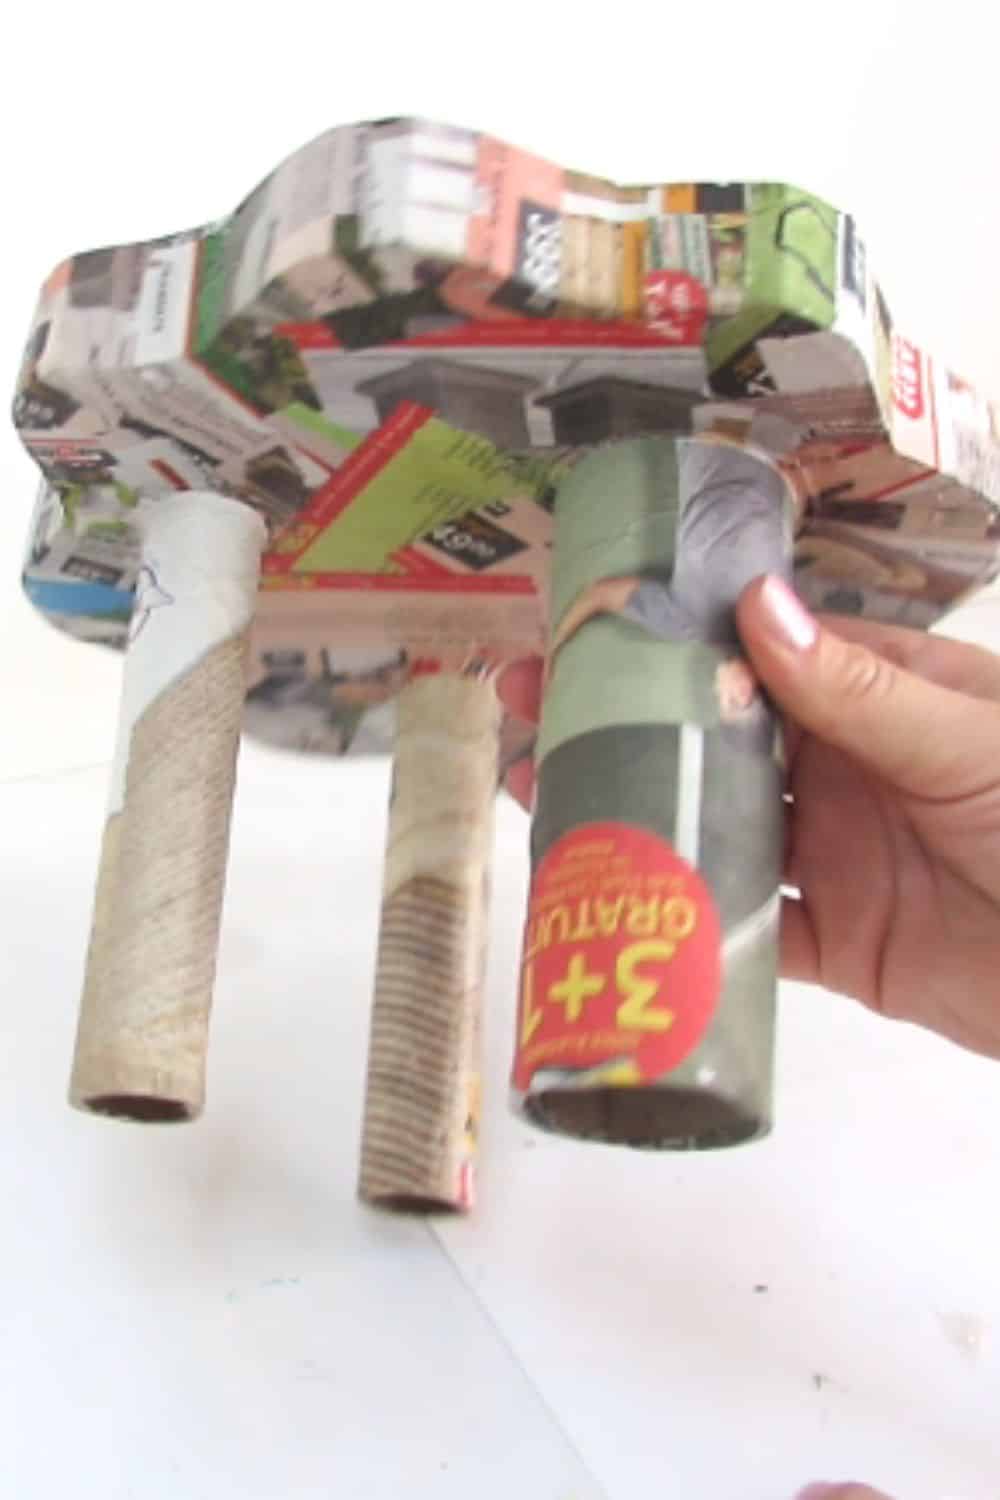
Time to elevate the trays. Cut cardboard tubes pieces to make the tray feet.
For the bottom tray, cut 3 pieces of 3 inches (7,5 cm) and for the top tray cut 3 pieces of 5 3/4 in. (14,5cm).
I recycled mail and aluminum foil cardboard tubes to make the feet as they are thick and sturdy. I like that they are different diameters, it makes the tiered tray more interesting. Please note that toilet paper rolls may not be strong enough for this project.
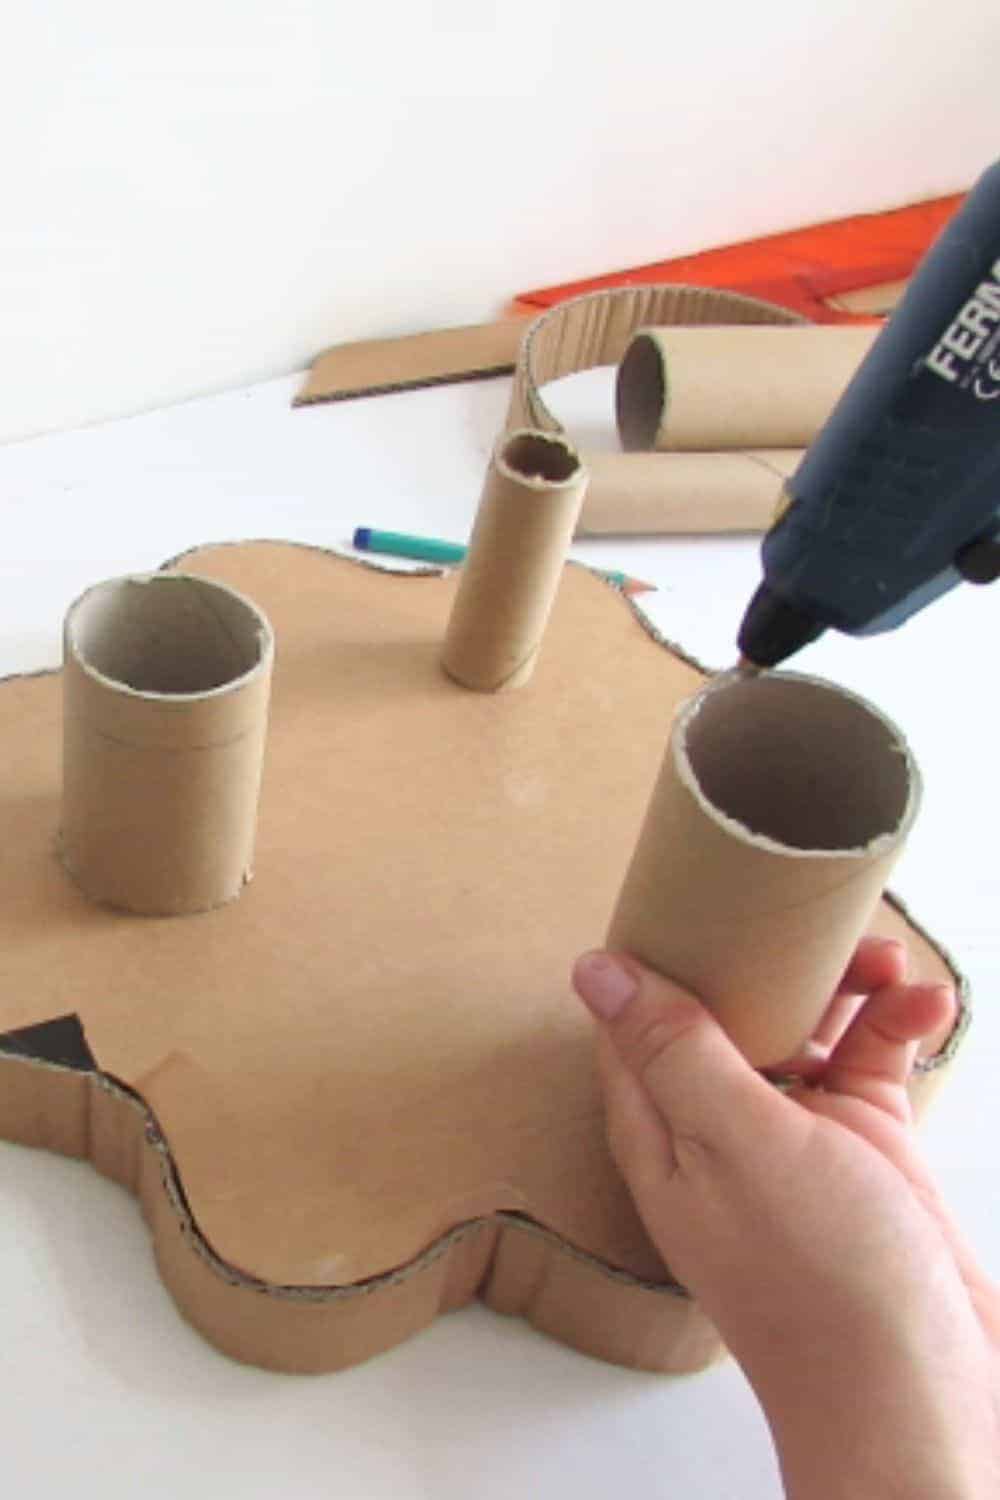
Flip the tray bottom, and place the feet on the back. Place them in a balanced way so that the tray holds well and does not tip over when you place things in it.
Glue them on the bottom, press while the glue diy to ensure good adherence.
Time to give your DIY tiered tray a nice finish.
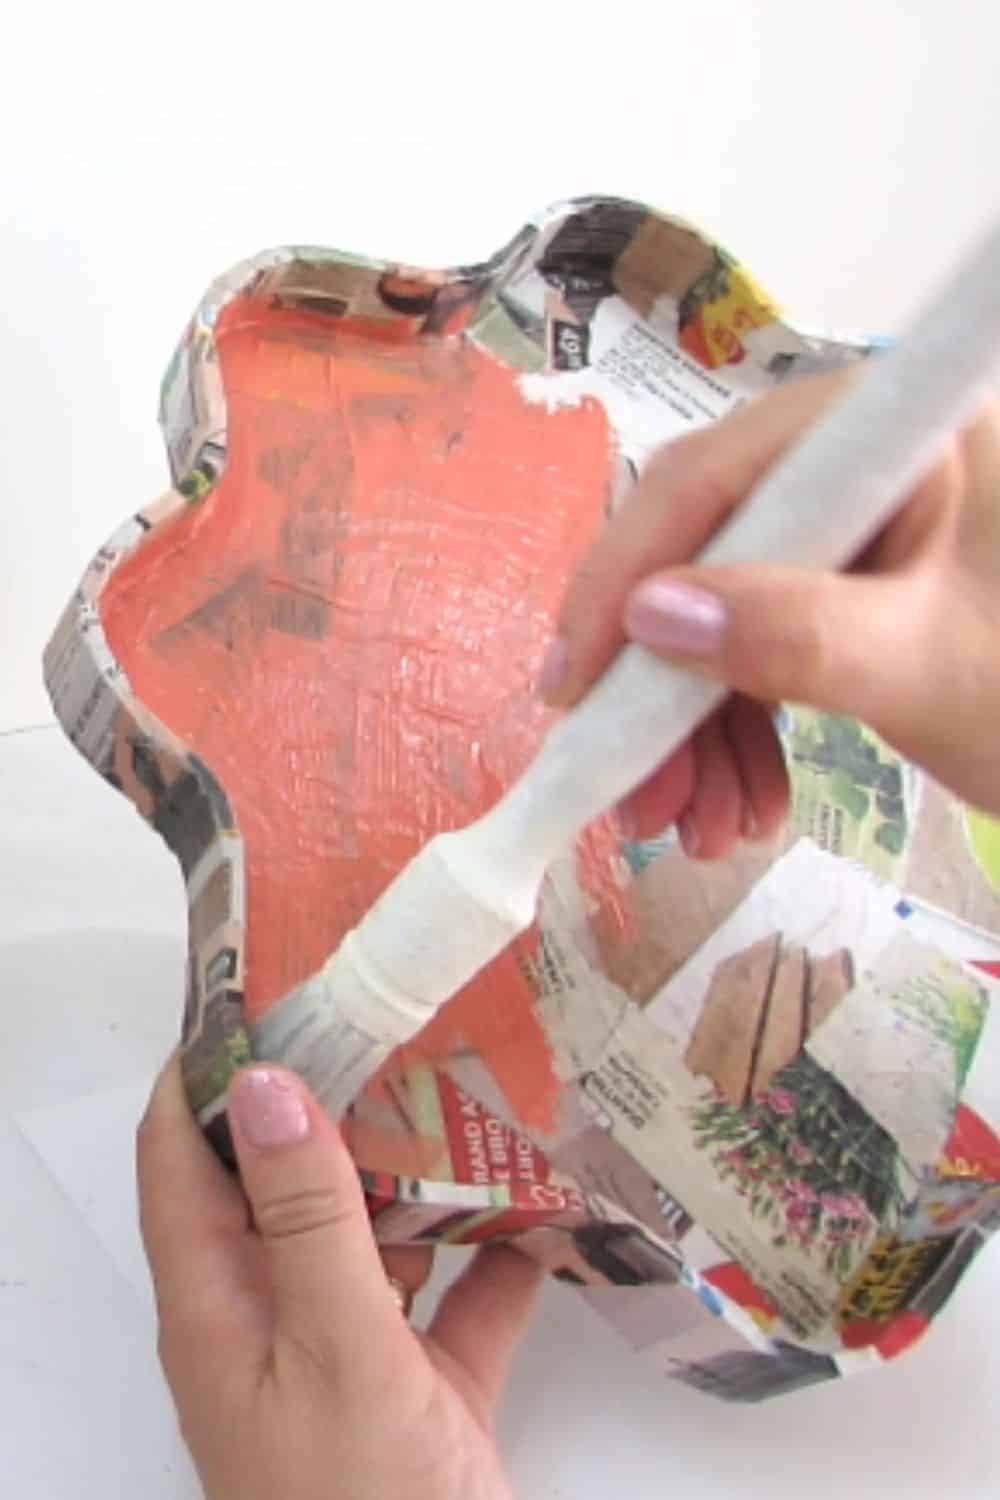
Cover the trays with strips of newspapers or magazines to hide the cardboard structure and have a smoother finish. Mix white glue )or wooden glue) with some water, apply on the cardboard and glue the paper strips one by one.
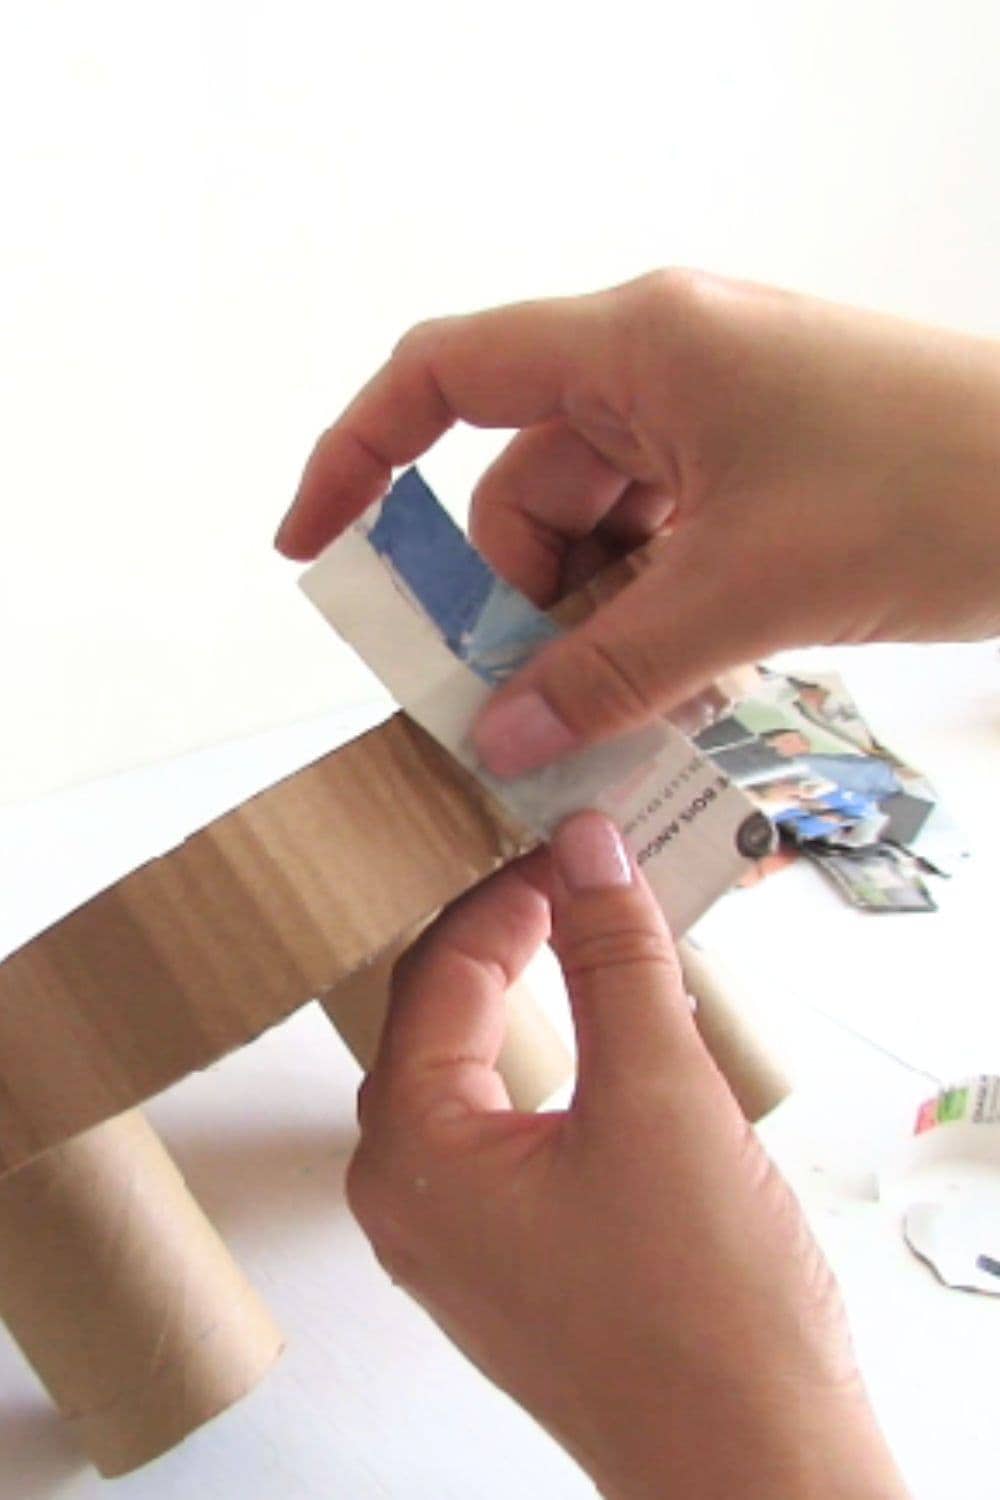
Cover top and bottom of both trays, do as many coat as you want to have a nice and smooth surface.
Let it dry entirely before moving on to the next step of this DIY.
Apply a coat of paint to the entire tray, choosing a color that complements your home decor. Then, layer on additional coats until you achieve the desired level of vibrancy and coverage.
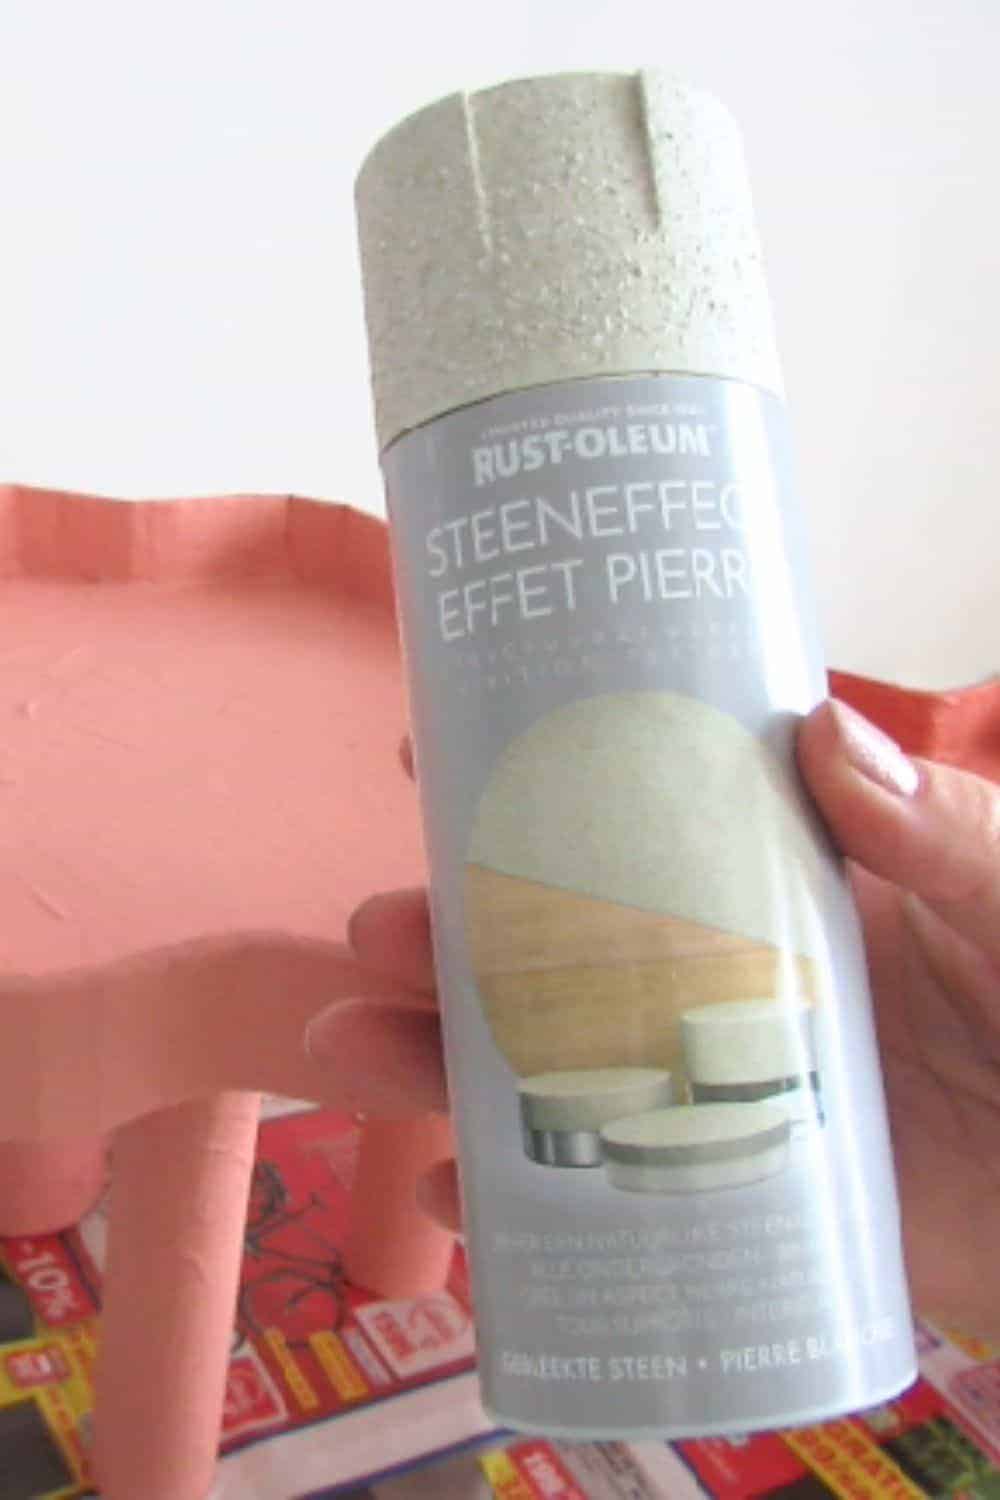
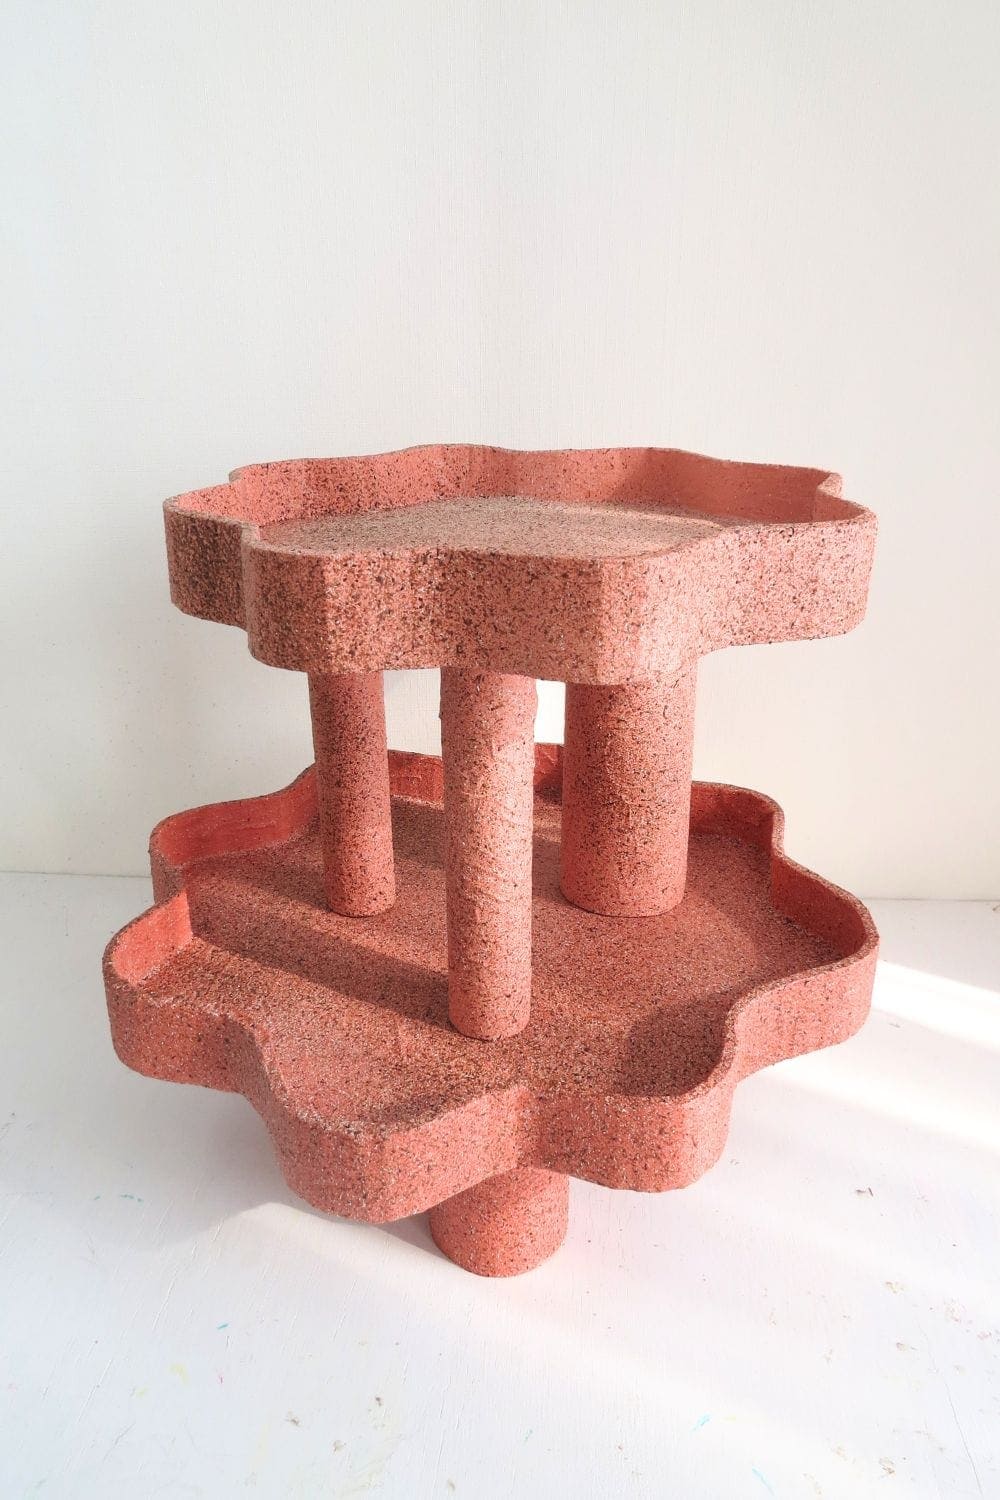
This last step is optional, but it gives the tiered tray a modern vibe. When the paint has dried, add a coat of stone effect spray paint for an interesting finish.
Once the spray paint is dry, apply a coat of varnish for better protection. If you plan on using the DIY tiered tray with food, check that the varnish is safe with aliments.
You can also watch the video tutorial on my Youtube channel to make The DIY Tiered tray.
With your step-by-step guide complete, you’re now ready to move on to the next section and learn how to decorate your tiered tray in a way that truly showcases your style and creativity.
How do you decorate a tiered tray?
With your tiered tray assembled and looking fabulous, it’s time to shift your focus to the fun part: decorating! This is your chance to unleash your creativity and make your tray truly stand out as a unique piece.
First things first, consider the overall theme or style you want to achieve and select decorations that complement your vision and create a cohesive design.
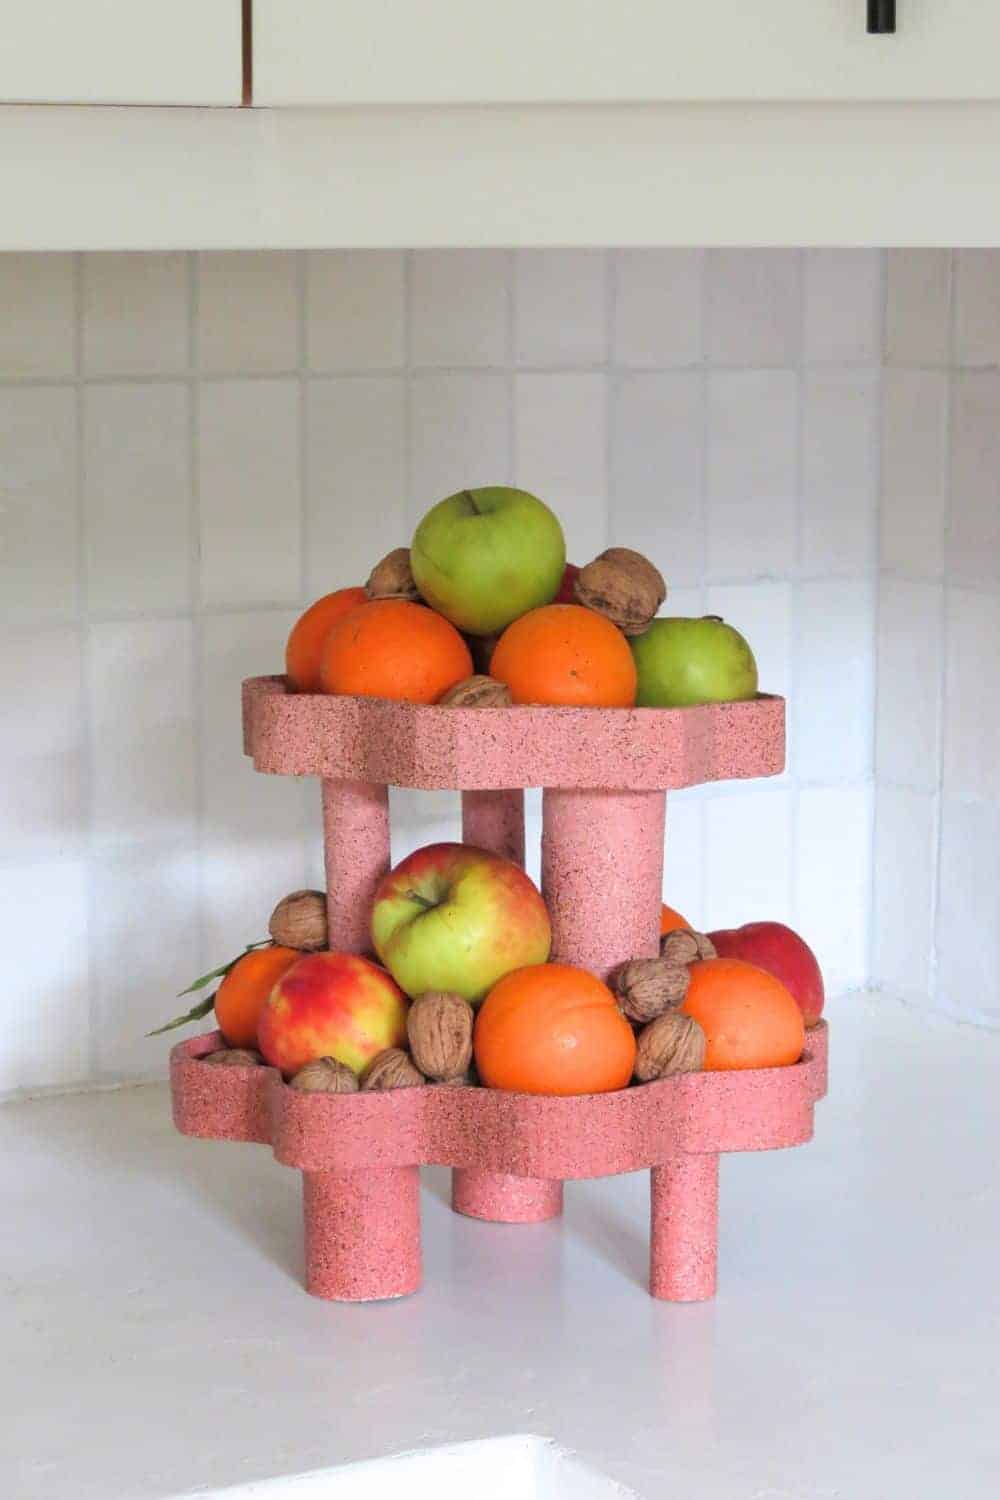
You can display decorative items, or some collectibles. Don’t forget to consider the size and scale of your decorations. While it’s tempting to fill every nook and cranny of your tray, remember that less is often more. Opt for a few statement pieces that accentuate the tray’s shape and allow it to shine.
You can use the tray to display faux flowers or greenery. These can instantly brighten up your tiered tray and add a pop of color. Choose flowers that match your existing decor or go for something bold and eye-catching. Whether you arrange them in a small vase or scatter them loosely on each tier, the addition of faux flowers will infuse life and vibrancy into your display.
Lastly, remember that you can easily switch out decorations to match the changing seasons or rotate them to breathe new life into your display. Play around with different arrangements and experiment with various combinations until you find the perfect balance that reflects your style and taste.
.

.
.
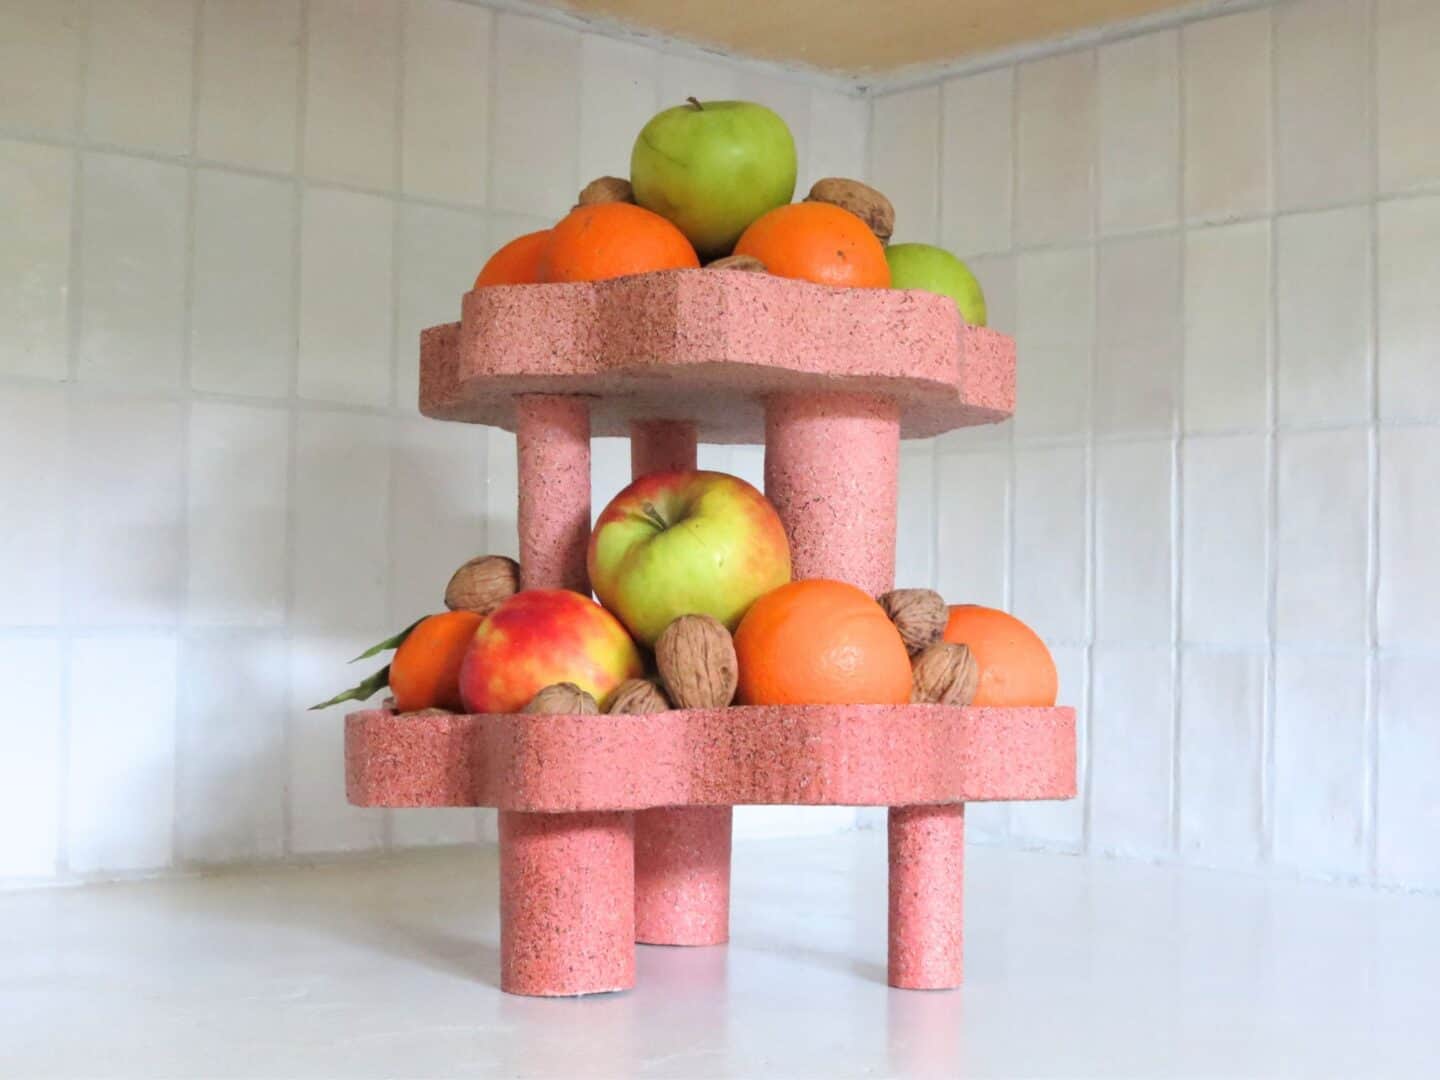
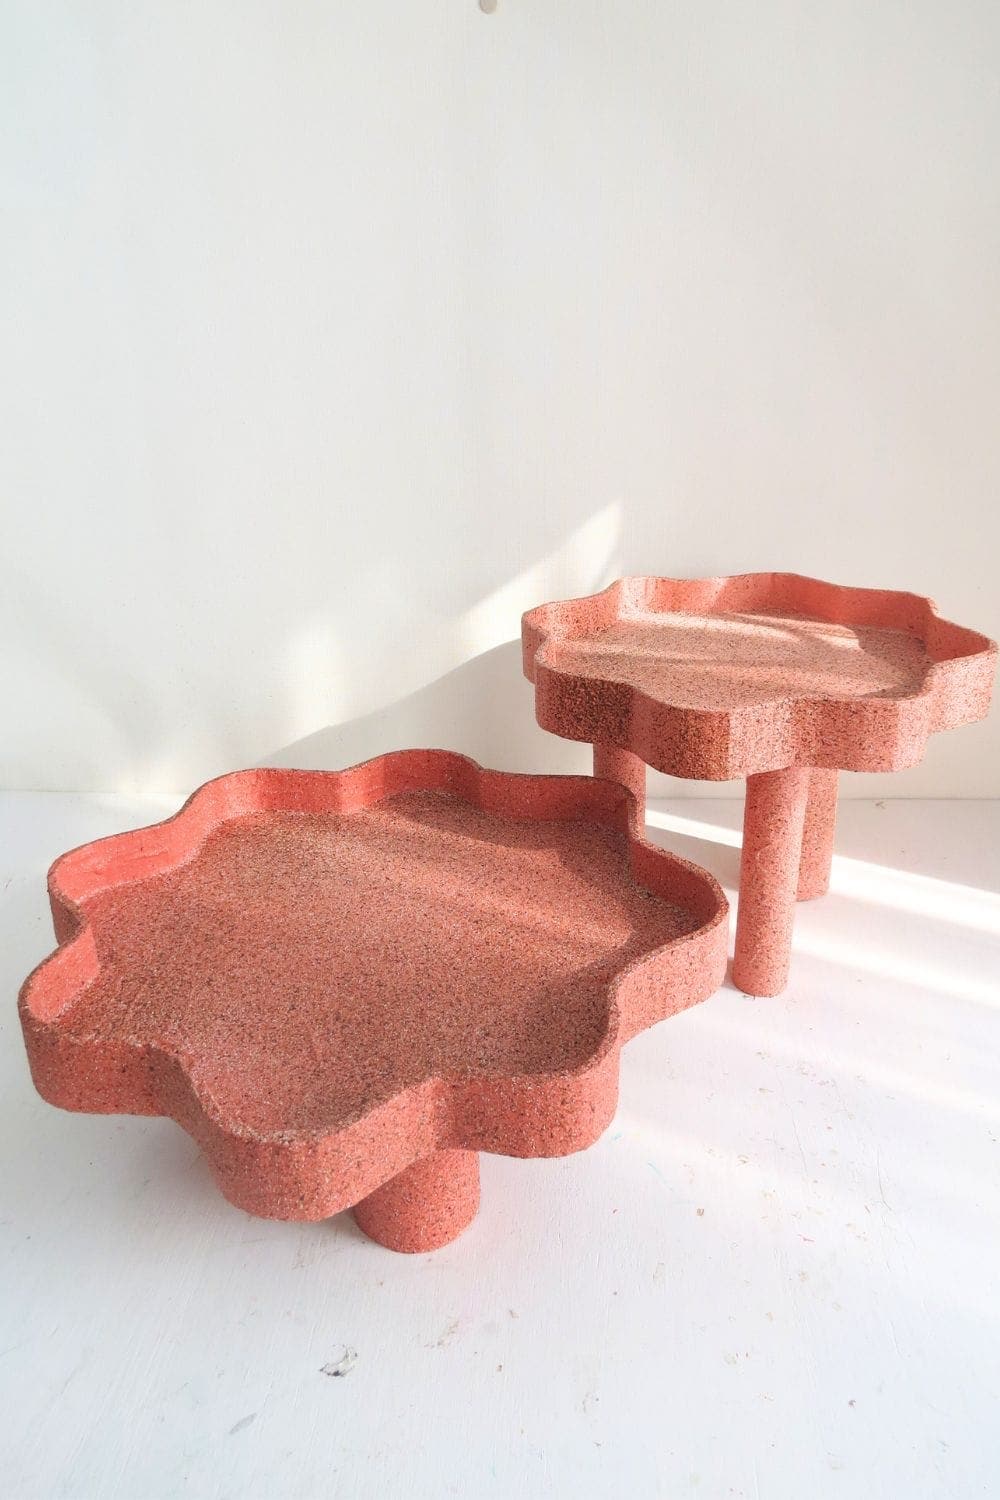
In conclusion, creating a stunning DIY tiered tray using cardboard is the ultimate hack to elevate your home decor without breaking the bank.
With the step-by-step guide and a little bit of creativity, you can achieve a magazine-worthy look that will impress your guests. So let your creativity shine, and enjoy the satisfaction of creating something beautiful with your own two hands. Now, go ahead and turn that “junk” into a work of art.
RELATED: How to recycle a cardboard box
RELATED: DIY hexagonal tray
Want to remember it? Save this DIY tiered tray on your favorite Pinterest board.