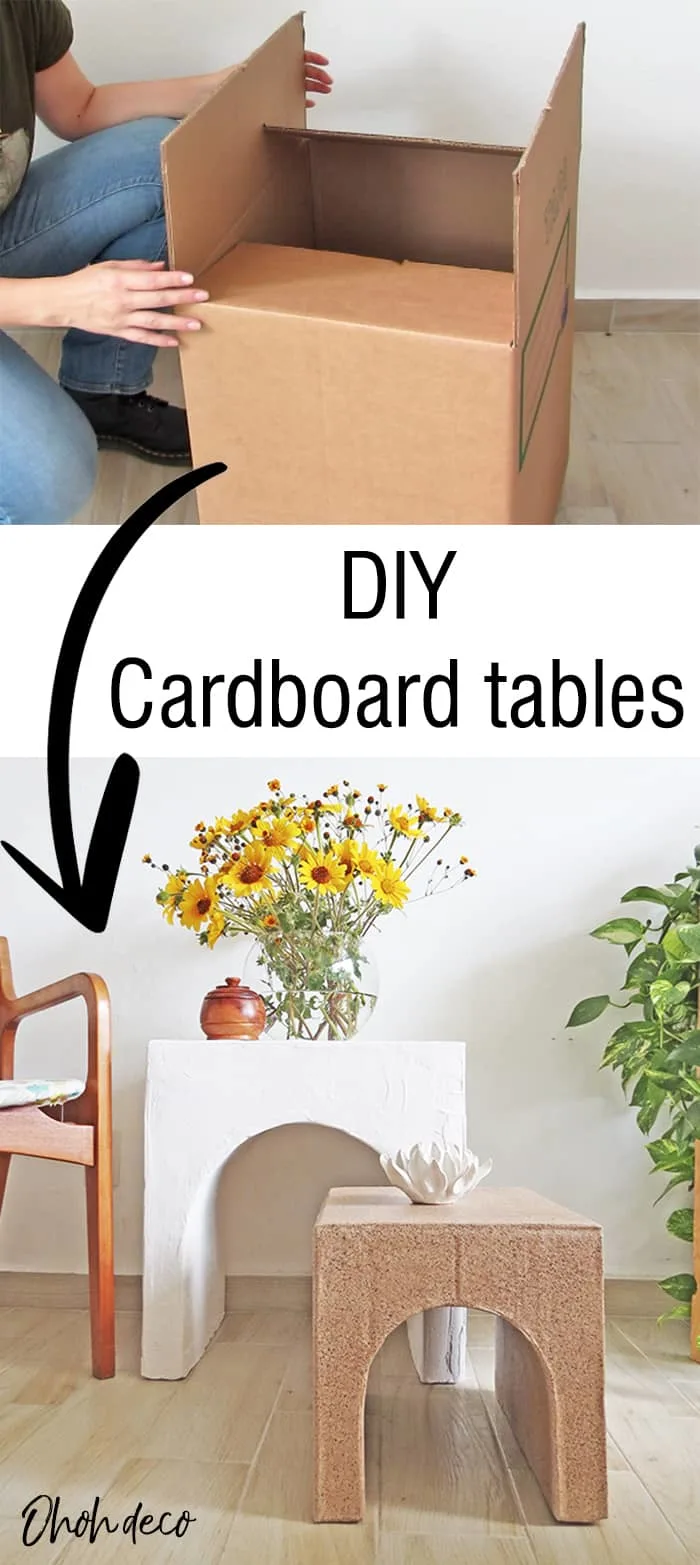
Cardboard is a great material to make a side table or coffee table for several reasons.
First is cheap to buy. The best is obviously to recycle cardboard boxes, which means that the raw material is free.
Second, cardboard is easy to work with. Unlike wood or other construction materials, you don’t need power tools to work with cardboard, a simple cuter or a pair of scissors is enough.
[ This post probably contains affiliate links, our full disclosure policy is really boring, but you can read it HERE ]
Third, is lightweight and strong at the same time. If you are worried about whether your cardboard table will be strong enough, no worries I will explain to you how to position the cardboard sheets in the most resistant direction and how to build a table structure that stands in time.
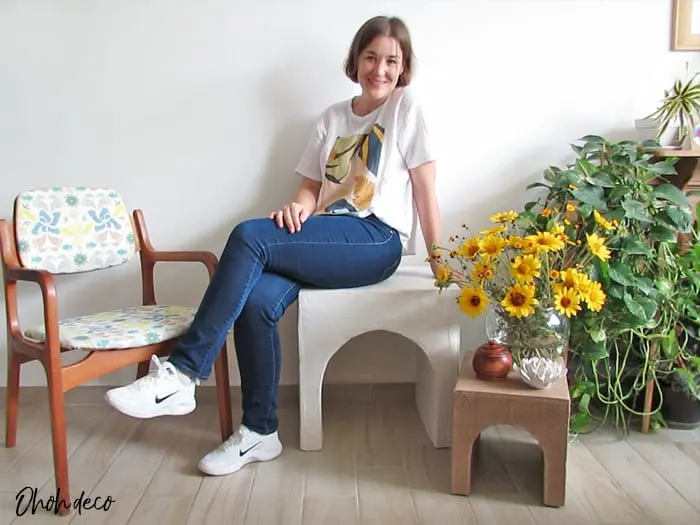
If you have any doubts, watch the video, you will see that I sit down on the table without any problem 😉
RELATED: Paper Lampshade DIY
RELATED: DIY round Coffee Table
How do you make a cardboard table?
Start by gathering the materials:
- Cardboad boxes and cardboard sheets
- Cutter
- Scissors
- Ruler
- White glue
- Glue gun
- Wallpaper glue (or this glue)
- Old newspapers
- Tile adhesive
- Paint
- Varnish
- Brush
Building a cardboard table is a weekend project. You have to cut and glue the cardboard pieces to build the table but what takes more time is to wait for the drying between the different steps.
So, you can plan to mix the table building with watching nice series or listen to a cool podcast.
RELATED: DIY Cardboard Wall Shelf
RELATED: DIY picture frames with paper
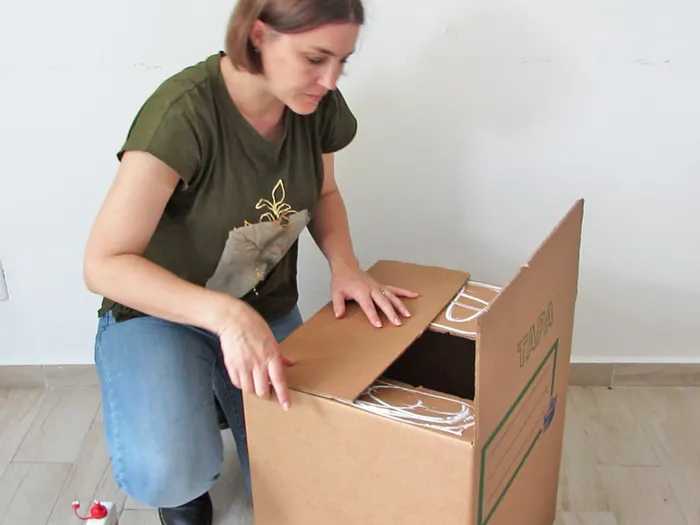
You can use any box you have to make your coffee or side table. Choose a size that fits in your space and remember that a coffee table is usually between 16 and 18 inches high (40-45 cm) and a side table can have a height up to 24 inches (60 cm).
For the large table, I used a cardboard box of 20x20x15 inches (50x50x40 cm).
Decide what side of the box will be the top of the table and close it gluing the flaps together. Once the glue is applied you can put the box upside down with books in it to make some weight while the glue dries.
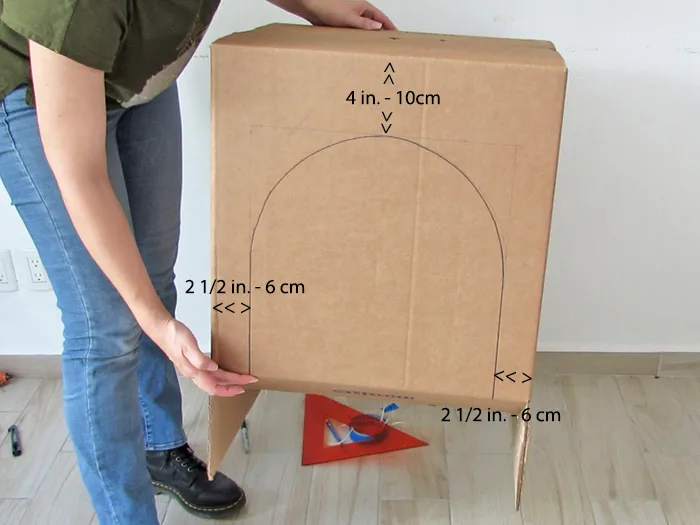
Once the top of the box is glued, draw an arch on one side of the box. Leave at least 4 inches (10 cm) between the top of the arch and the top of the box and leave 2 1/2 inches (6 cm) between the sides of the arch and the sides of the box.
These measurements are important to have a strong and durable table.
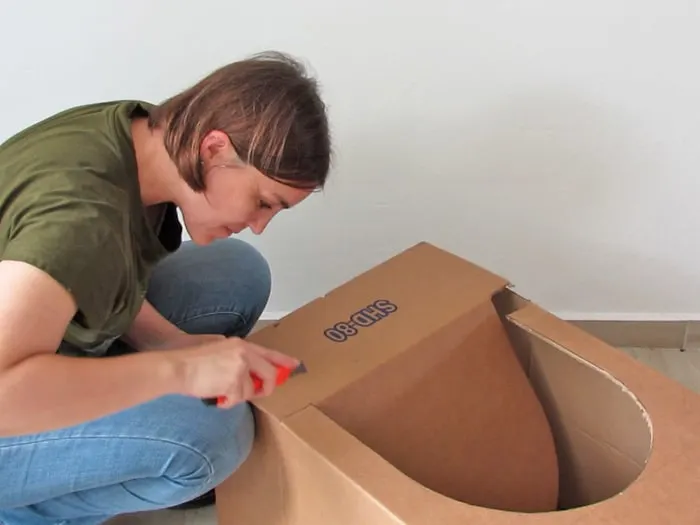
Cut out the arch shape with a cutter.
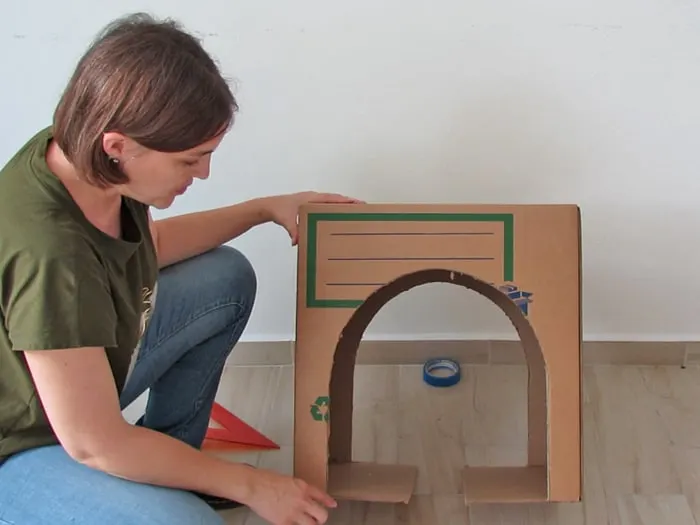
Draw and cut an identical arch shape on the opposite side. You can use the inner piece of the cut arch to report the shape on the other side of the box. Cut the second arch out.
Keep the flaps of the solid sides attached to the box.
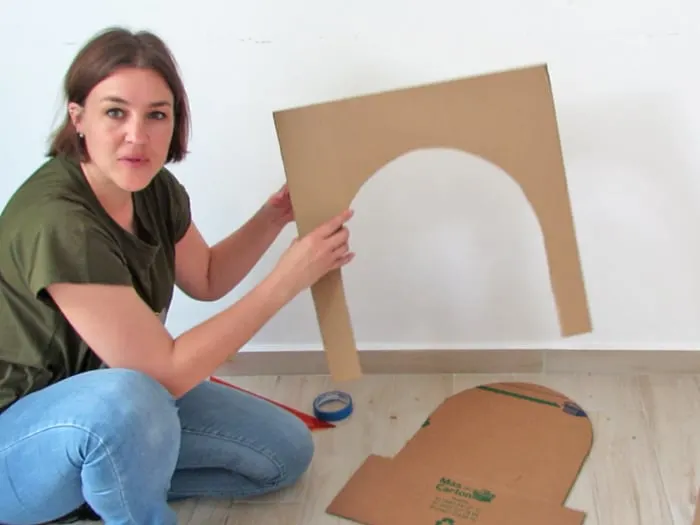
Take another piece of cardboard. It can be a cardboard sheet or a box that you flattened. Draw an arch piece that fits inside the box.
The arch shape is exactly like the ones you have on the box and the arch frame is slightly smaller so it can fit inside the box.
Measure the inside of the box, width and high, draw the rectangle on the cardboard. Mark the center of the rectangle and draw an arch with the same dimensions as previously.
Check carefully that you use the cardboard vertically. You can see lines on any cardboard, these lines must be placed vertically when drawing the arch as is in this direction that cardboard is resistant.
Cut out the arch piece and slide it in the box to check the measurement. Place it next to the side, adjust and cut again if necessary.
It’s important that this piece is at the right dimension because you will use it as a template to create the reinforcements inside the box so the table is strong.
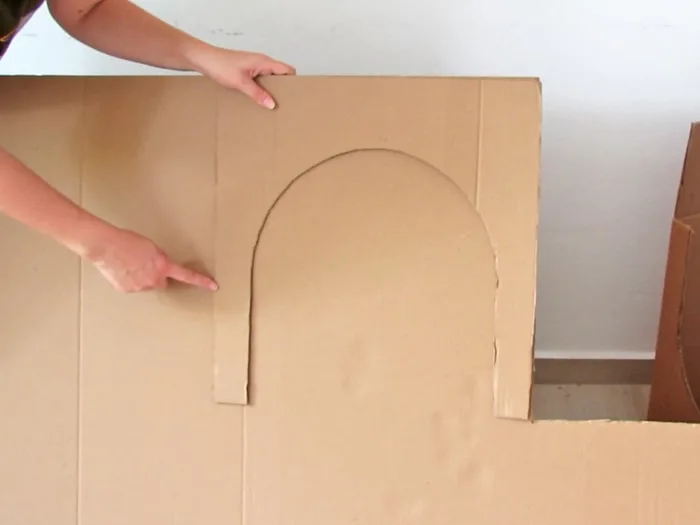
Once the first inner arch shape fits perfectly into de box, report the shape on the cardboard to create 5 to 7 other arches. The number of inner arches you will need depends on your table size.
Calculate that for a strong table you want to have an inner arch approximately every 2 1/2 inches (6cm).
All the arches must be drawn and cut following the vertical cardboard lines. That means if you have any doubt, that you can see the little waves inside the cardboard on top of the arch piece.
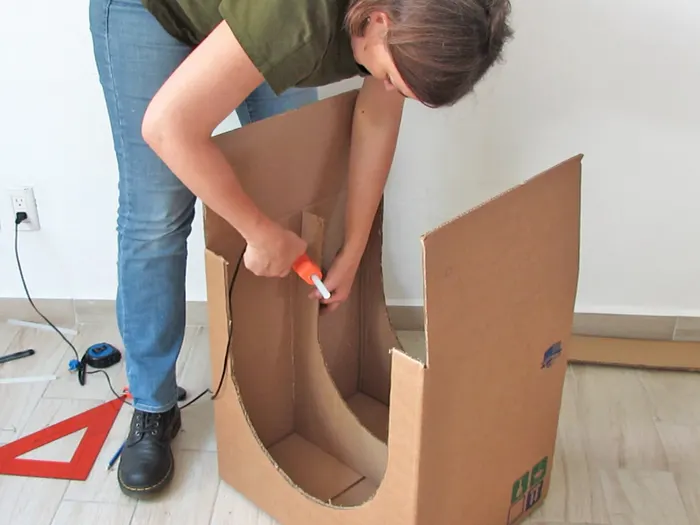
Use a glue gun to fix the arches inside the table. Center the first one, glue it with the three sides with the box.
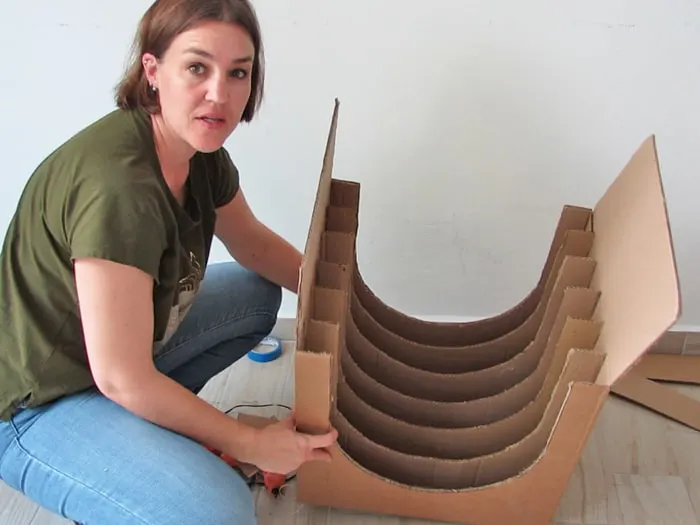
Repeat the fix the other arches. Try to place them at a distance of 2 1/2 in. (6cm) from each other.
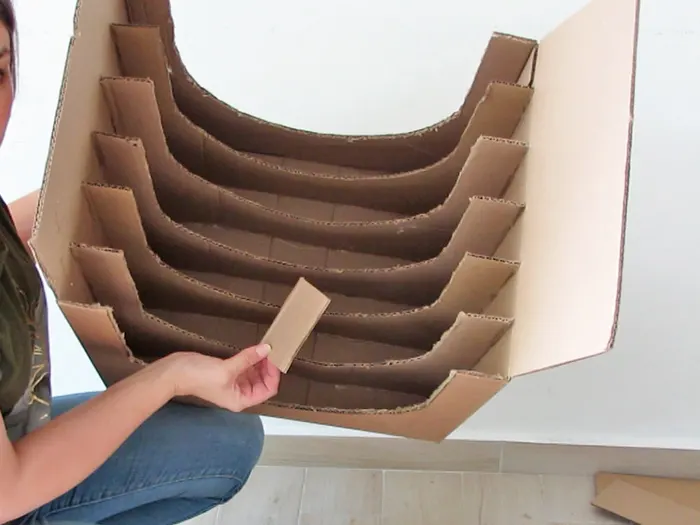
You can already feel that the table is much stronger.
Finished consolidating the table by cutting rectangles of cardboard that you glue between the inner arches.
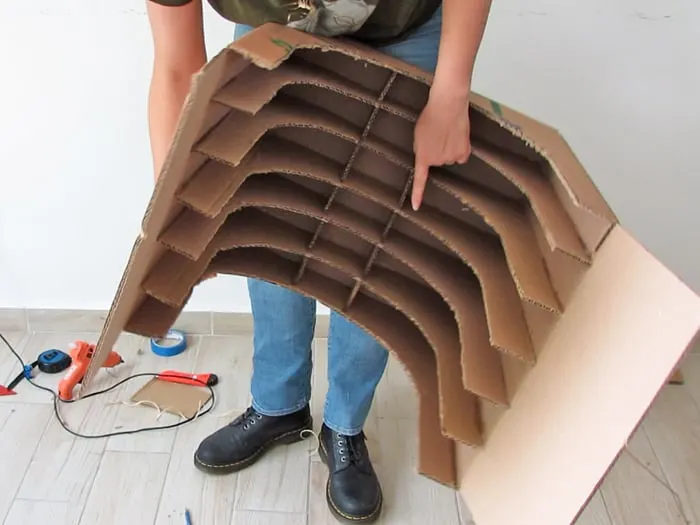
You can see I added two rows of rectangles between the arches, you can add more if you feel the table needs it.
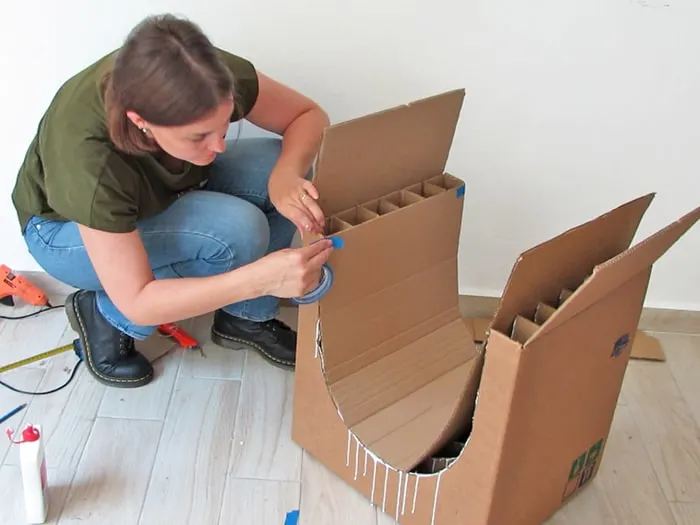
Time to finish the arch. Cut a rectangle of cardboard the same width as the table and long enough to cover the arch.
This time the cardboard lines must be placed to help you fold the cardboard to follow the arch curve.
Add white glue on the edges of the inner arches and on the sides, place the cardboard and hold with masking tape while the glue dries.
The reason why I used white glue is that it doesn’t dry as fast as the glue gun. There is a large surface where to apply glue and I find it more practical to use white glue as I needed to adjust niecely the cardboard around the arch.
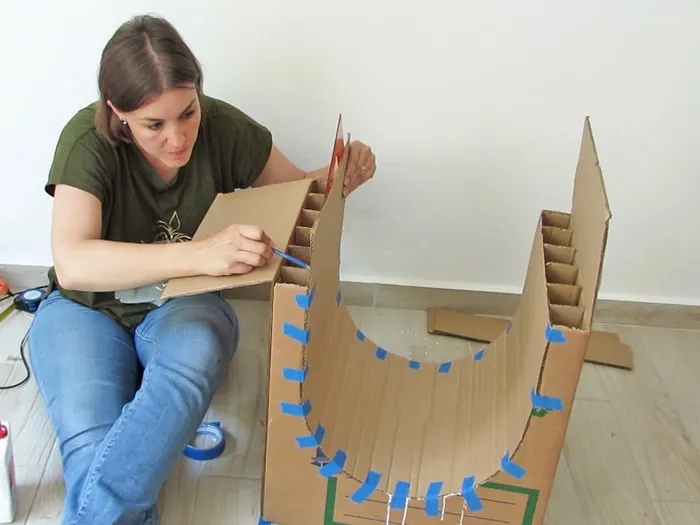
While the glue dries, you can finish the table legs. Cut the extra arch cardboard if needed.
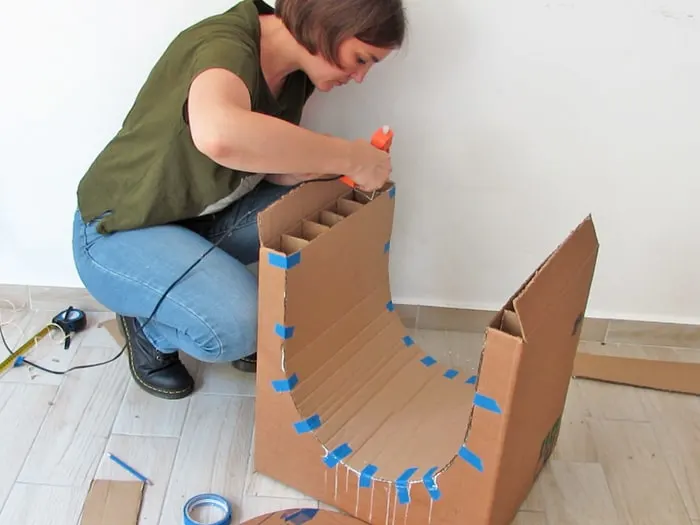
Cut the bottom flaps at the table legs width, fold and glue in place. Do it on both sides.
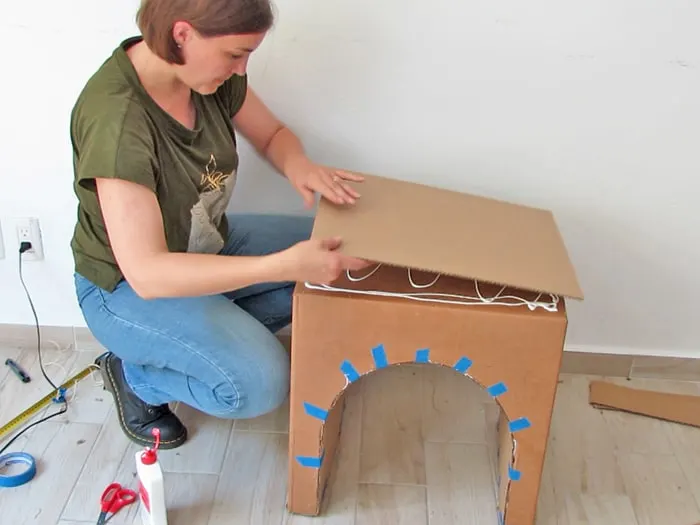
This step is optional, but I wanted to ensure to have a nice and flat tabletop without any gap, so I glue an extra cardboard layer on top of the table.
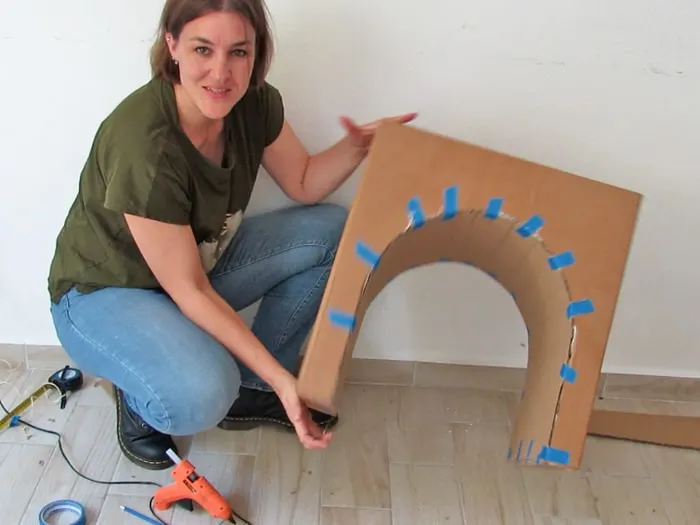
And almost done! The cardboard table shape is made!
How do you make cardboard waterproof?
It’s nice to make cardboard furniture, but you have to make sure that cal holds up over time. Now that you have built a strong cardboard structure it is time to look at the finishes.
It is obvious that the cardboard table must be resistant to food and drink stains and that it must be clean easily.
I try to different finish that I explain in detail below.
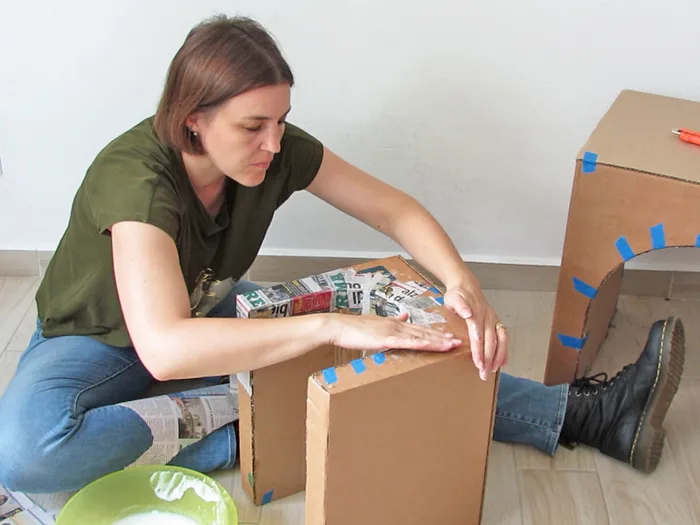
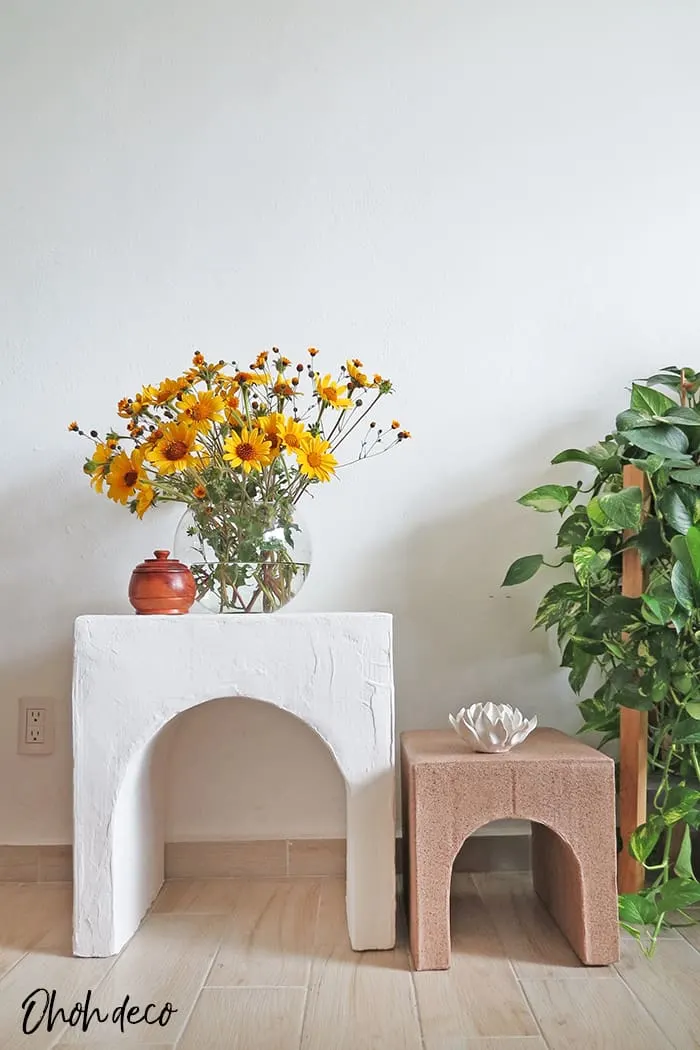
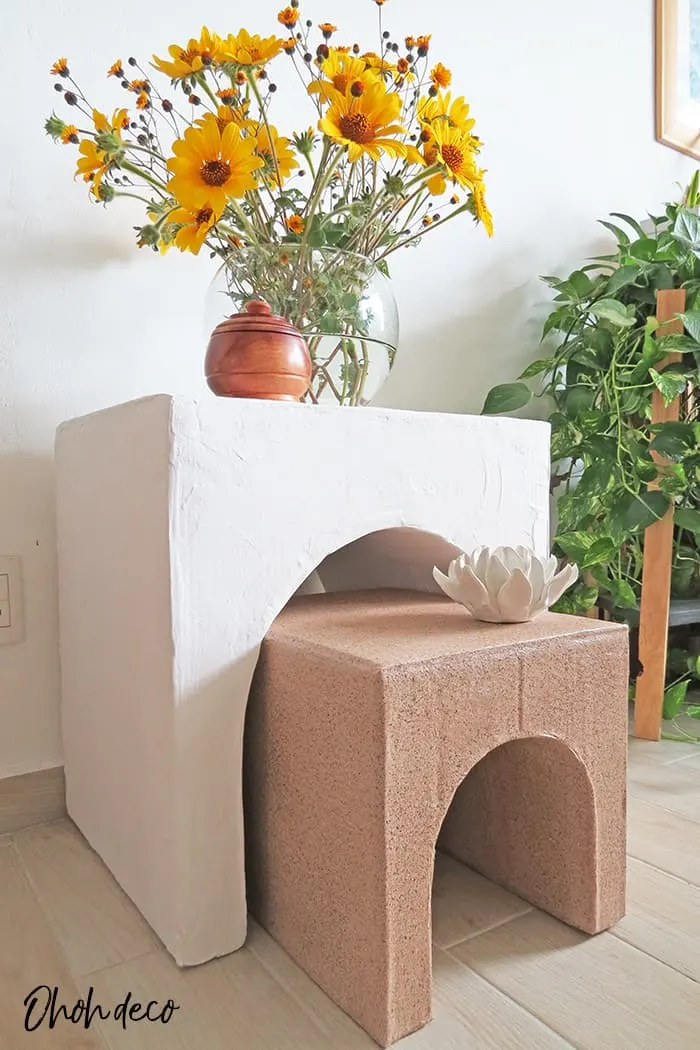
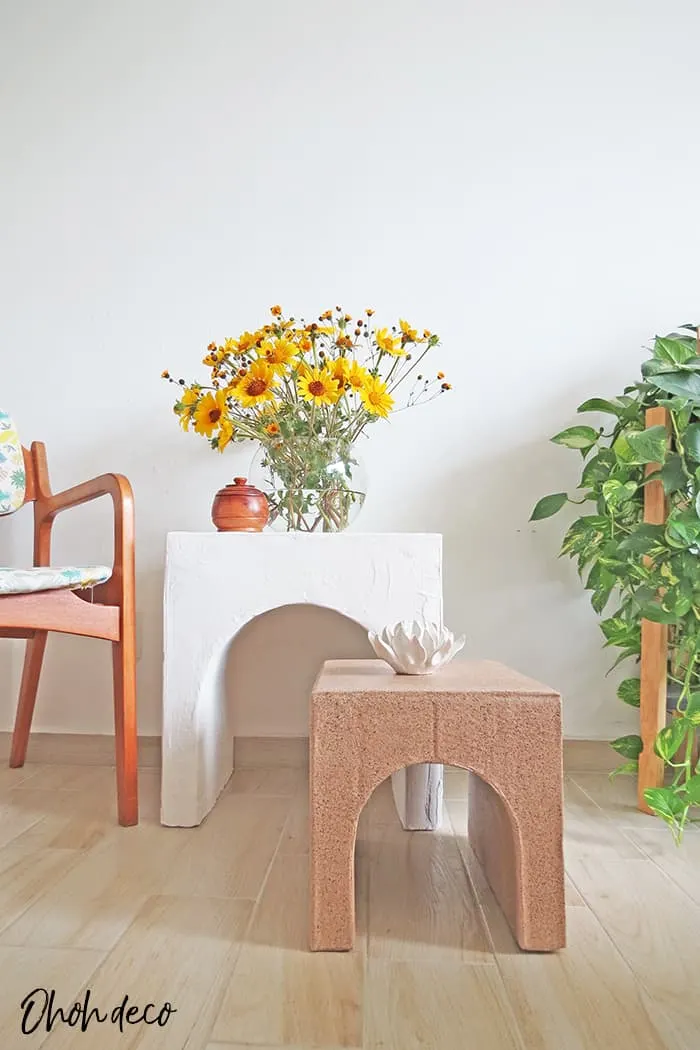
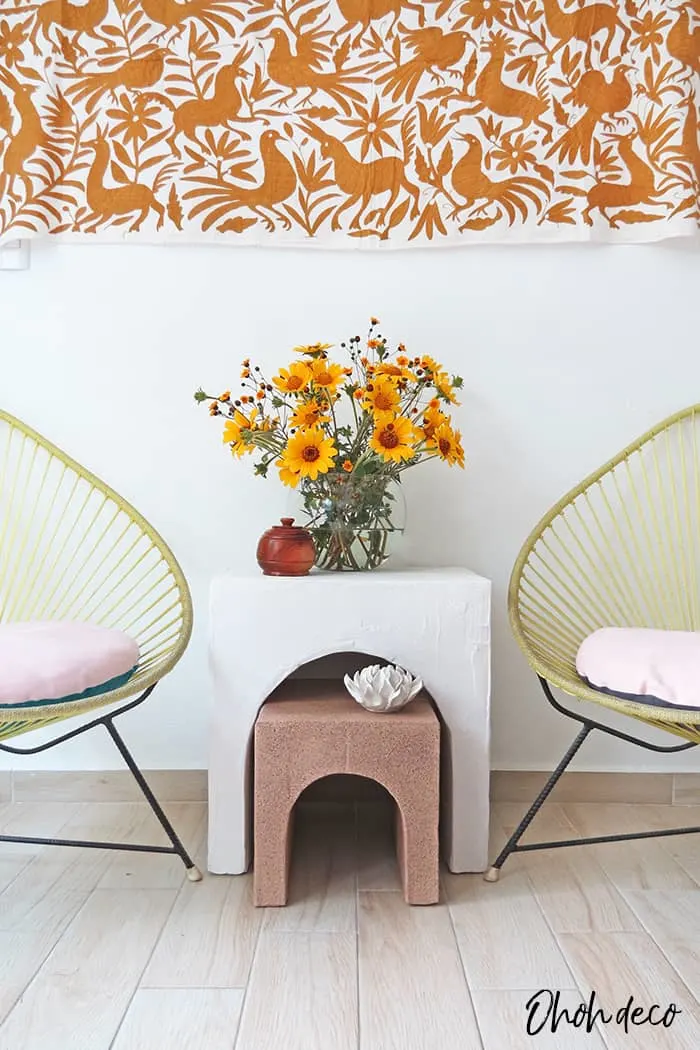
For the first finishing method, I used paper mache. It is simple to implement and economical.
To make the papier mache, cut out pieces of newspaper, dip them in wallpaper glue and cover the table with them.
Gradually place the paper and smooth it out so as not to have any wrinkles or bubbles. Apply several layers of paper for a nice smooth finish that doesn’t show the cardboard structure.
Let dry overnight, then you can start applying the paint.
I put 3 coats, then I used a stone effect spray paint. and finally, I apply the last coat of acrylic varnish.
Don’t forget to respect the drying time before each new coat.
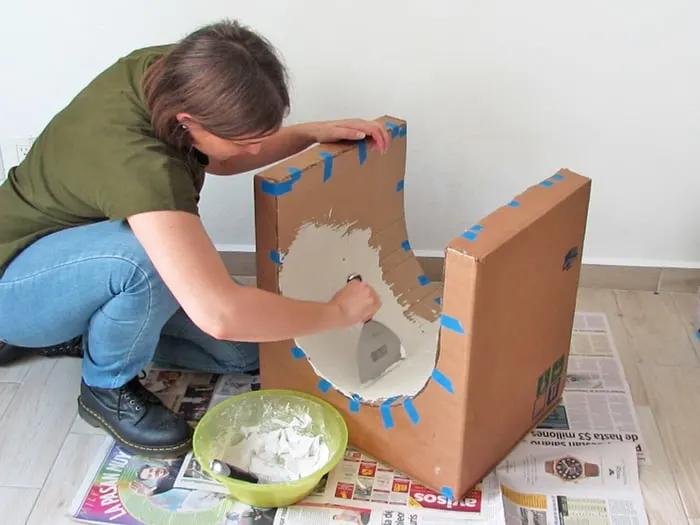
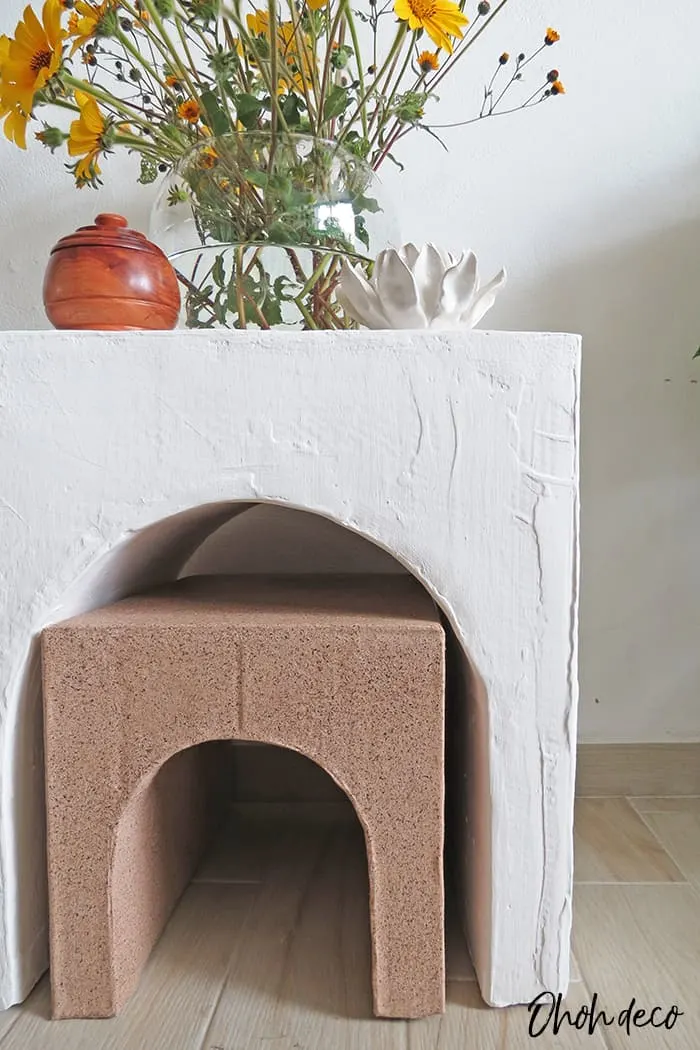
The second finish method for cardboard furniture is to apply a coat of tile adhesive.
You can use powder mix or ready-to-use tile grout, you apply the texture directly on the cardboard with a spatula. It’s quite fun to make, it’s like cake glassing.
It’s better if you remove the masking tape before applying the tile grout. Apply one coat and let dry.
Once it’s completely dry you can sand it if you want cleaner edges or a smoother finish.
remove the dust and apply two coats of paint. I didn’t apply varnish on this table but you can if you want to.
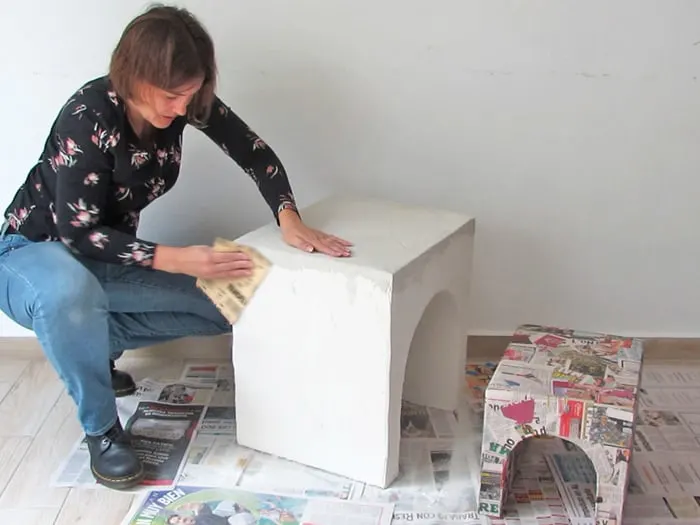
What is the better finish for cardboard table?
The papier-mache is easy to apply but it’s quite a long process. You have to apply several coats of paper, and paint for a nice finish. I like that it’s cheap and that the table remains very lightweight.
The tile adhesive technique is faster but you need a little more material. The weight of the table is a little heavier, and that makes it impossible to guess what was made with cardboard.
If you ask I like the tile grout finish better 😉
RELATED: How to make a Christmas gingerbread village with cardboard
RELATED: How to recycle a cardboard box
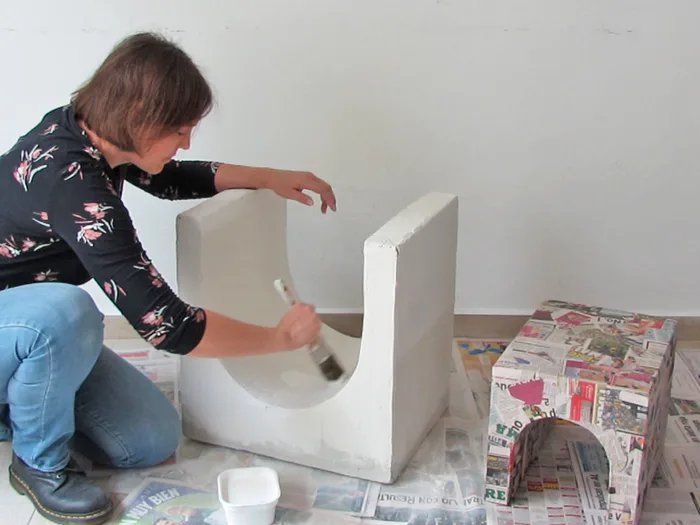
It’s a little too early to tell you how both finishes will hold in time and after a several cleaning. I will keep you updated.
I hope you will have fun building a cardboard table. I can’t wait to see what shapes you will create.
As you can see below cardboard is quite strong!
Enjoy building your cardboard table and don’t hesitate to share your creation in the comments or on social media (FB @ohohdeco, IG @ohoh.deco)
RELATED: The Ultimate Hack: Create a Stunning DIY Tiered Tray Using Cardboard
Watch the video to Build a DIY cardboard Table
1
What to remember it? Save this DIY Cardboard table on your favorite Pinterest board.
