Hanging a wall shelf is a nice way to add a decorative element to a wall. You can display decorative items, collectibles, or a few books.
[ This post probably contains affiliate links, our full disclosure policy is really boring, but you can read it HERE ]
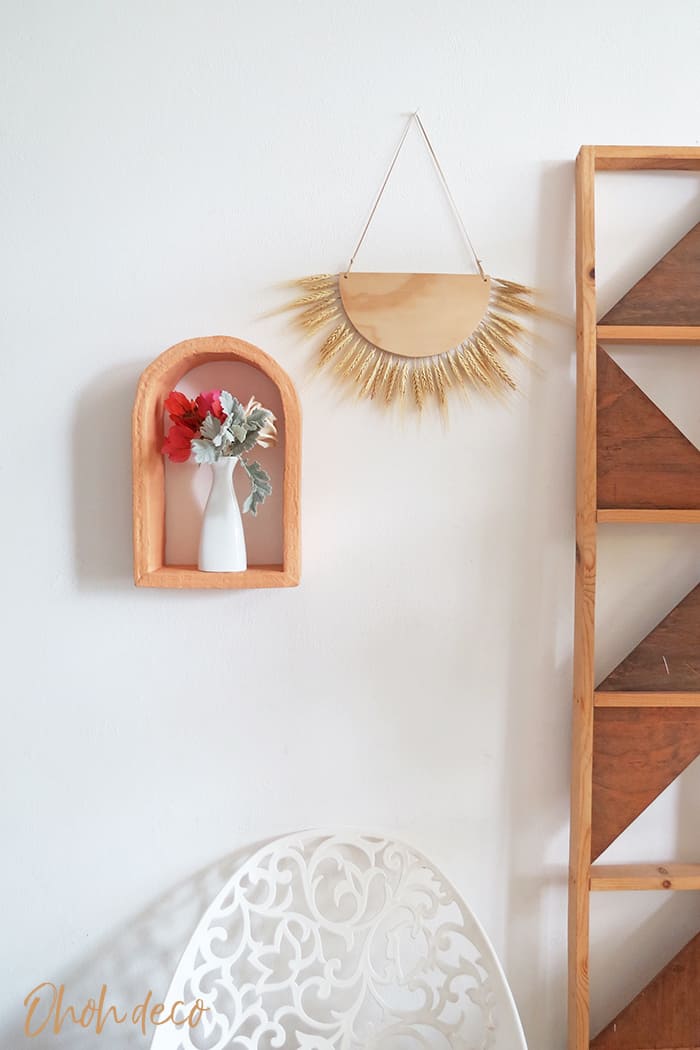
You can hang a wall shelf alone, or combine it with frames and prints to create a interesting wall gallery.
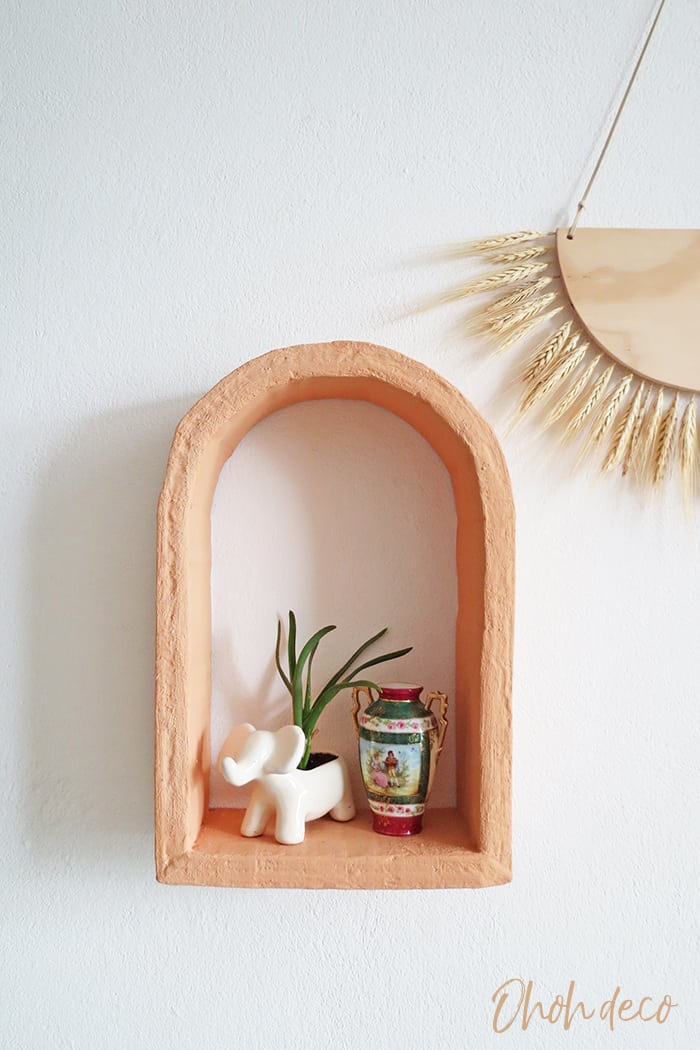
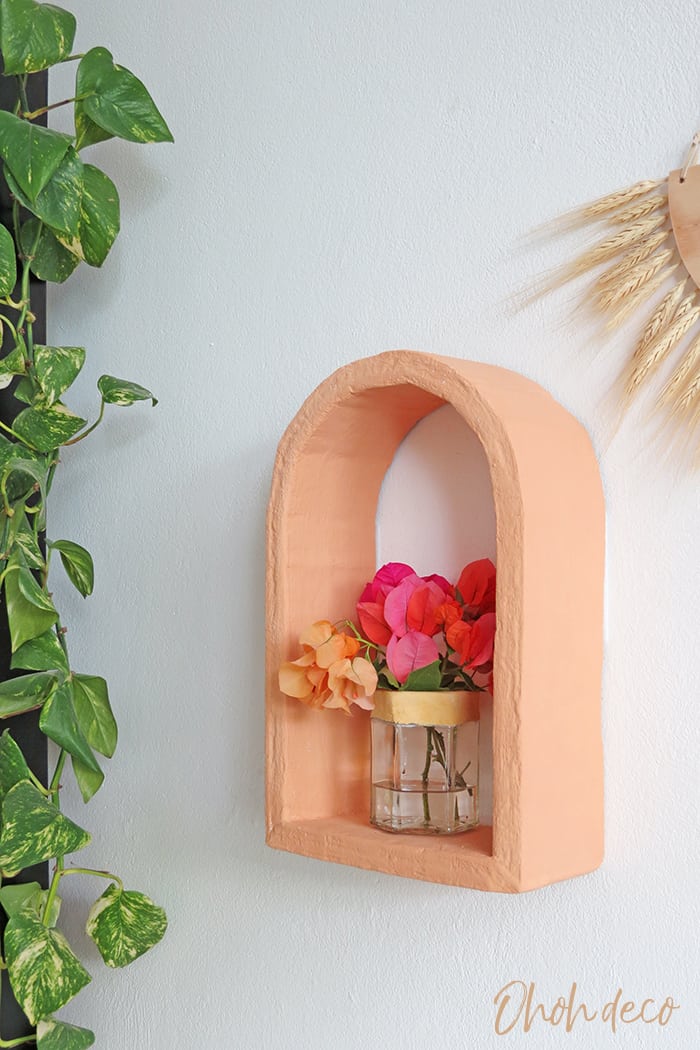
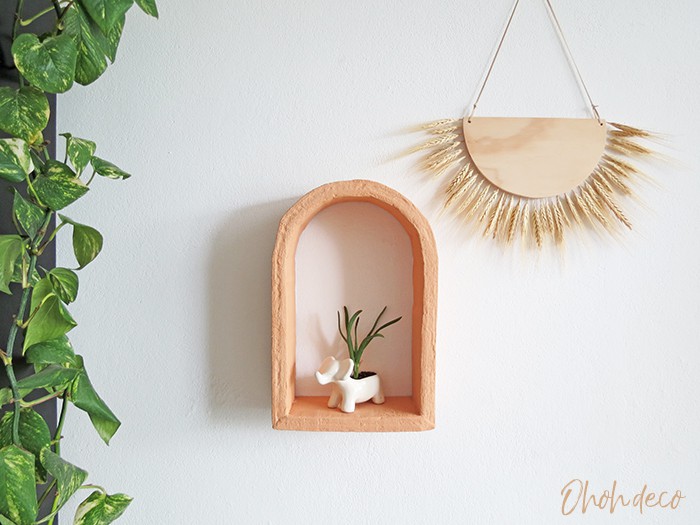
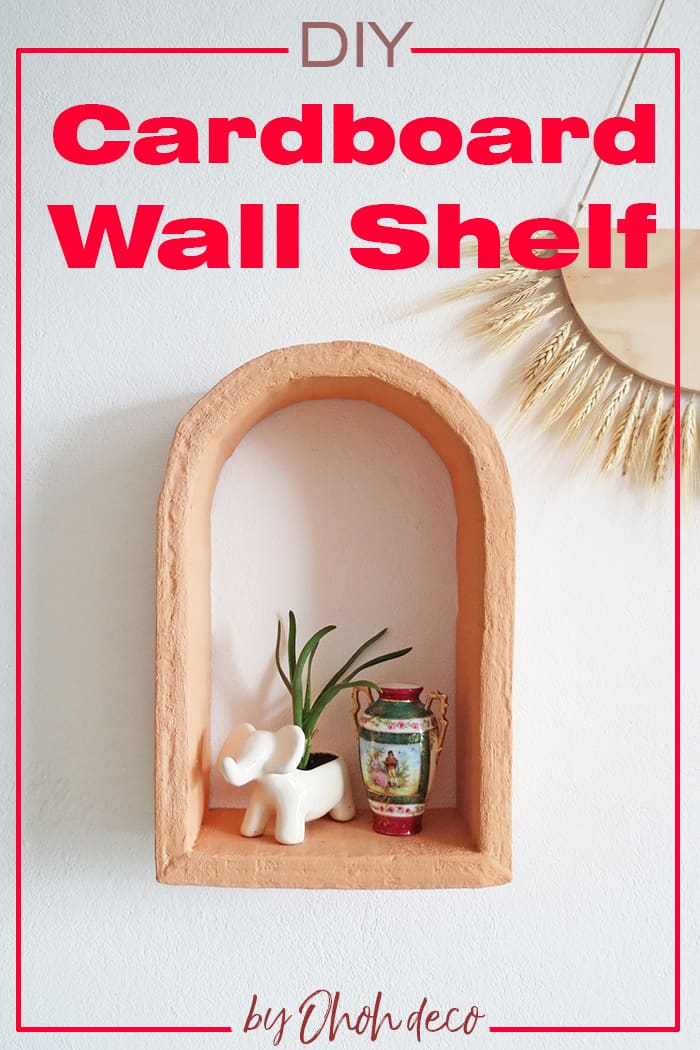
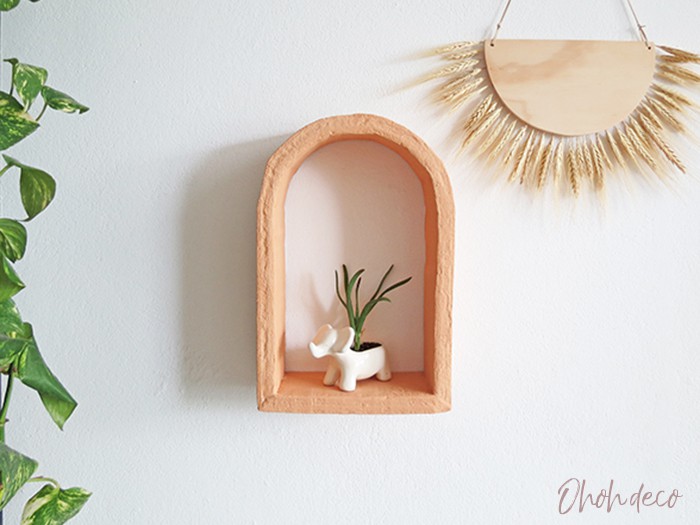
This arch shelf has a cute shape and is perfect to display your favorites items.

DIY cardboard Wall Shelf
This DIY cardboard wall shelf is quite simple to make. You will glue several layers of cardboard to build a strong structure.
I guide you step by step to build this pretty storage.
It’s easy and you only need a few supplies. The advantage of working with cardboard is that it’s simple to use and you don’t need any power tools. And it’s free!
The only supplies I had to buy to make the project were the paint and the velcro tape. I already had the other materials. So, making this DIY wall shelf cost me 8 US$.
RELATED: DIY easy box shelves
RELATED: DIY Geometric display shelf
How to make a cardboard shelf
Supplies you will need to make the DIY arch-shaped wall shelf
- Cardboard boxes
- Glue all
- Masking tape
- Round cookie tin box (empty)
- Scissors
- Cutter
- Paint
- Baking powder
You only need a little paint for this project. I used acrylic wall paint and bought a paint sample, which is more than enough for this project.
Before starting the DIY, you have to empty the cookie box…This is, without a doubt, the better part of this craft!
Cardboard shelf instructions
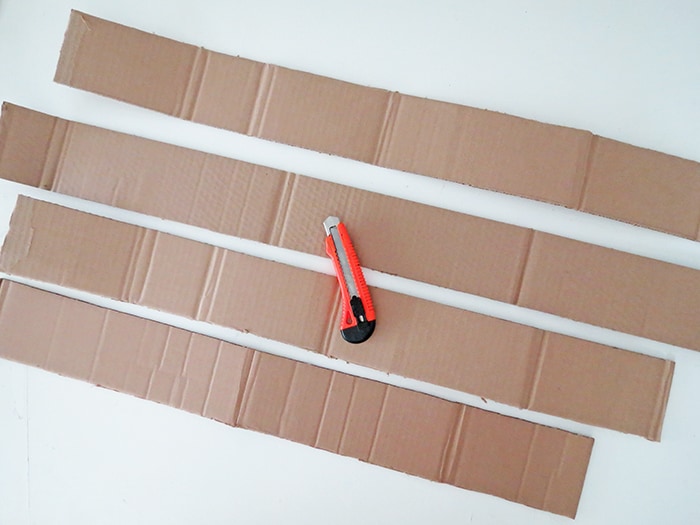
Open the cardboard box flat and cut strips of 4 inches (10cm) width. The strips must be more or less 32 in. lenght.
One important thing is that the strips must be cut perpendicular to the cardboard structure, which means you can see the little waves inside the cardboard when cutting it.
The reason you have to cut it that way is to easily fold the cardboard strips around the cookie tin to make the arch.
Cut 5 long strips for the arch part and 5 smaller to make the shelf base. The base strips are a little longer than your cookie box diameter.

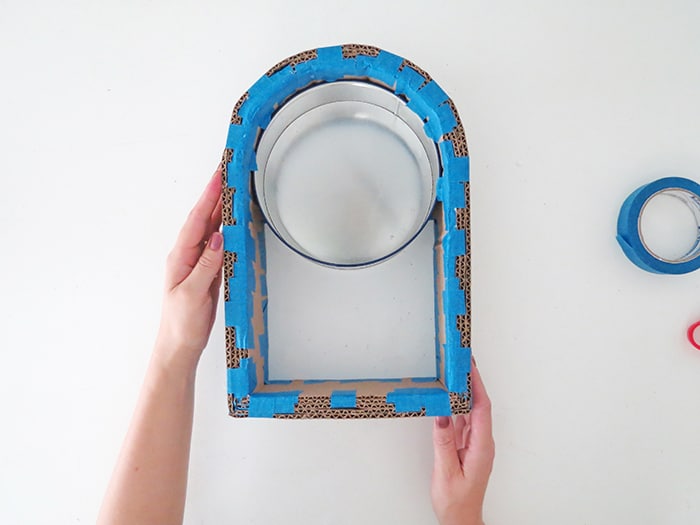
Wrap the first cardboard piece around the empty cookie tin and tape it around the upper part of the box.

Tape the cardboard with the box on the back too.
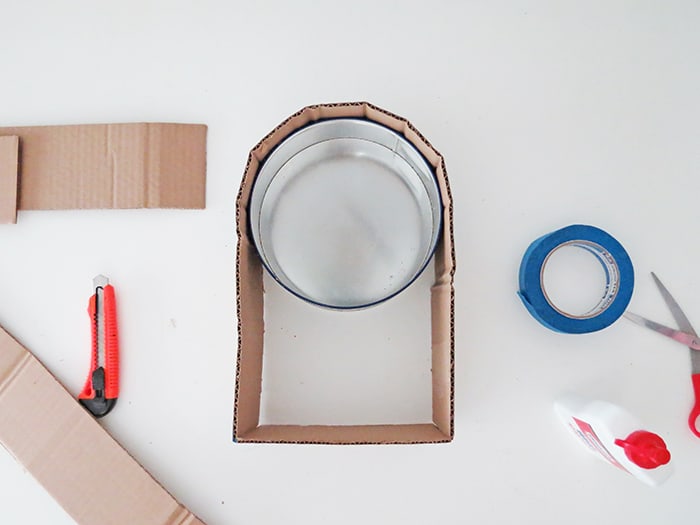
Take a cardboard strip that is the same lenght as the cookie tin diameter and tape it with the arch bottom. As reference, my shelf if about 14 inches high.
Measure the high, cut both arch ends and tape the base.
At this point, you made the first layer and the shelf is wonky. No worries it will strengthen when adding more cardboard layers.
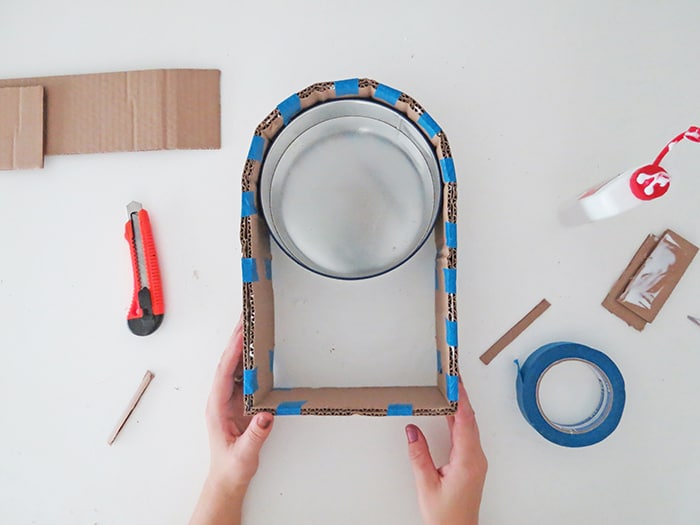
Add glue on another cardboard strip and wrap it around the structure. Hold the cardboard with masking tape.
Glue a second cardboard piece on the base and tape. All the pieces are glued and taped together.
I found it easier to first glue the piece and once in place trim the extra lenght, so the cardboard fits nicely.
Don’t hesitate to watch the video tutorial for more details.
Keep gluing and taping cardboard layers. I found that 5 layers make a sturdy shelf.
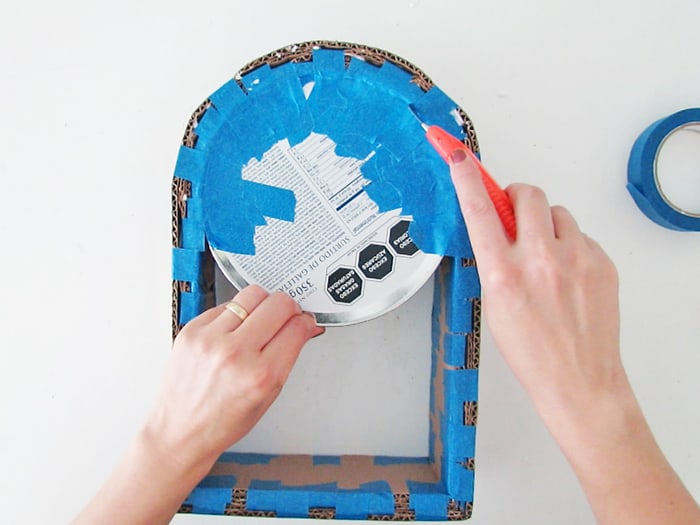
Using a cutter cut the tape following the tin edge and remove the cookie box.
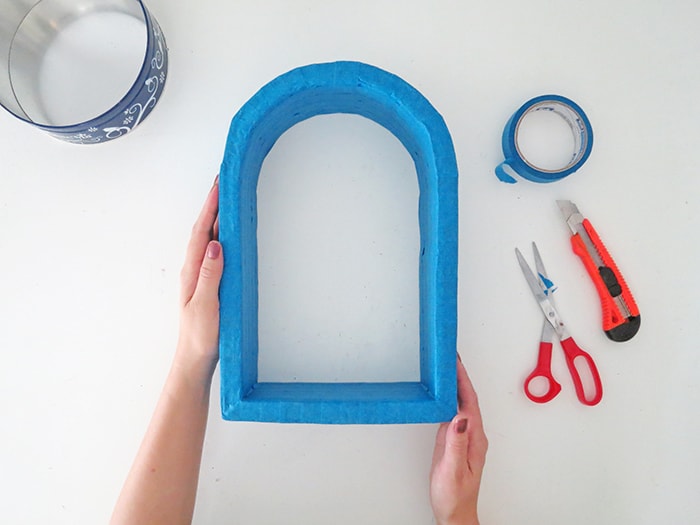
Tape all the edges of the shelf to have neat surfaces.

Mix the acrylic paint with baking powder.
This will give the shelf a nice textured terracotta look. Plus it’s thicken the paint which is great to smooth the cardboard structure.
I made the mix in a container and I added 2 table spoons of baking soda with 2 1/2 oz. of paint.
The measures are not precise and are just to give you an indication. the mix must be a little thick but still spreadable with a brush.
If you want more detail about how to make terracotta paint and how to apply it, I suggest you read what Geneva did.
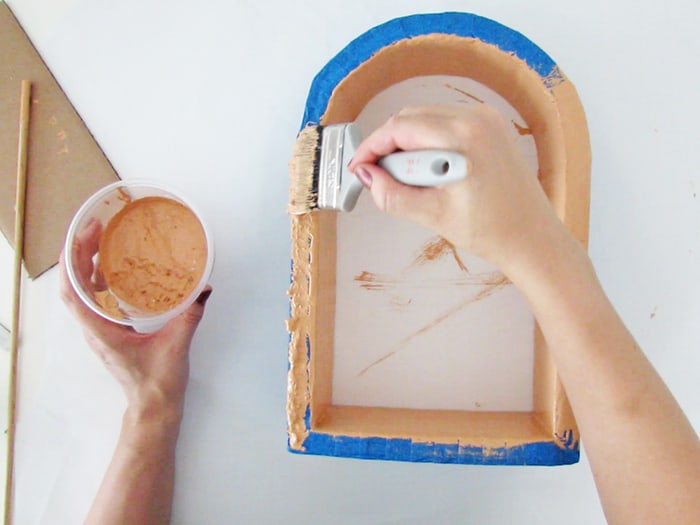
Apply several coats of your terracotta mix on the shelf. Let dry completely between each coats.
As you can see I didn’t paint the back 😉
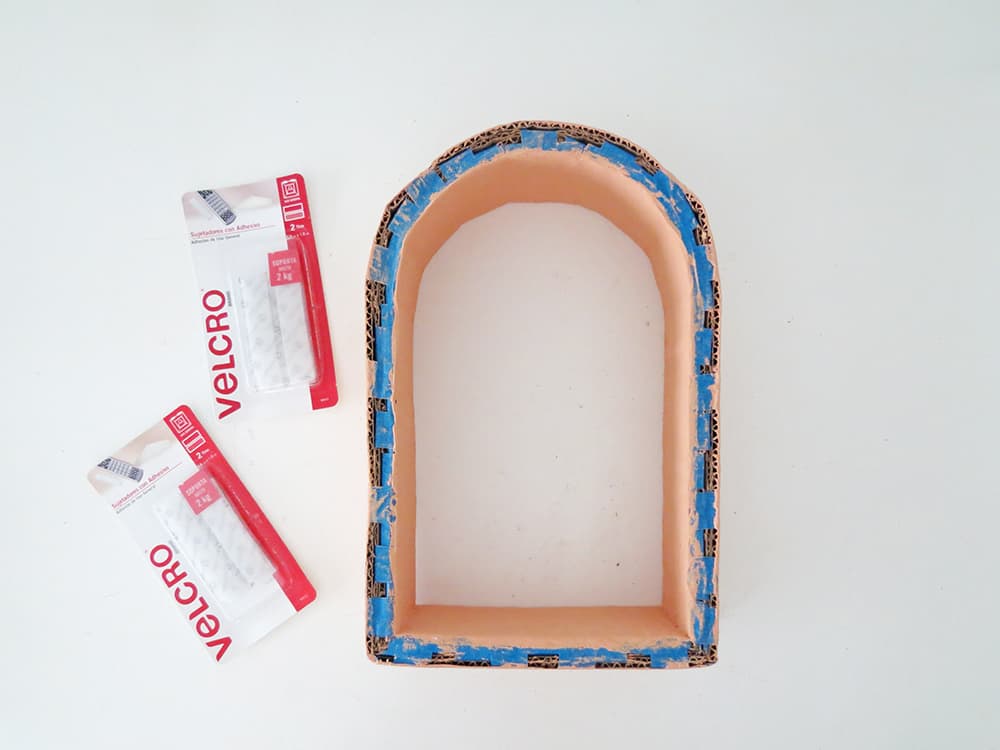
To hang the shelf on the wall just stick adhesive velco on the back.
The shelf is light weight so it works perfectly.

Stick the other part of the velco adhesive on the wall and fix the shelf. The nice part is that you don’t have to make holes and it’s easy to move the shelf if it’s not perfectly level.
RELATED: DIY crates storage
RELATED: DIY Drop shaped Shelf
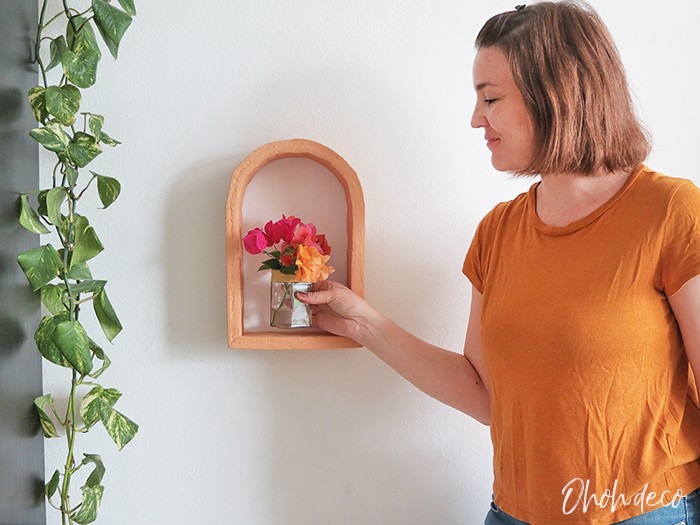
And done! It’s that easy to create a cardboard wall shelf.
I had fun trying different to display different items in it.
Which is you favorite? What would you like to put in your arch-shaped shelf?
Watch the video tutorial to make your DIY cardboard wall shelf
Don’t miss the fun. Follow Ohoh deco on Youtube and be the first to find out about the new DIY and crafts ideas.