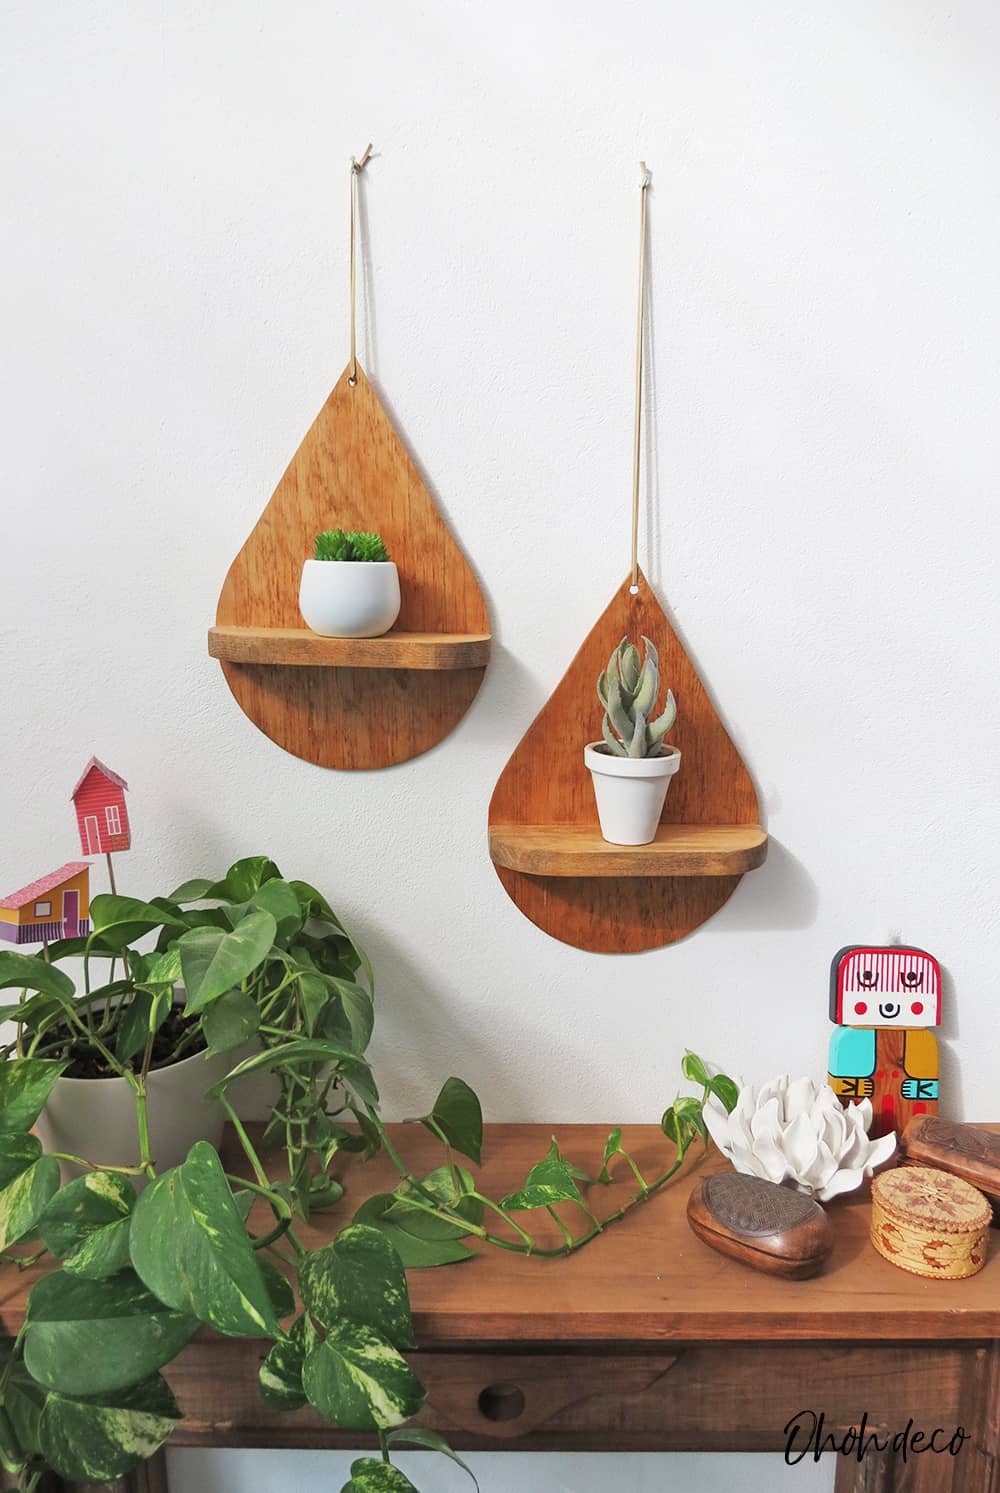
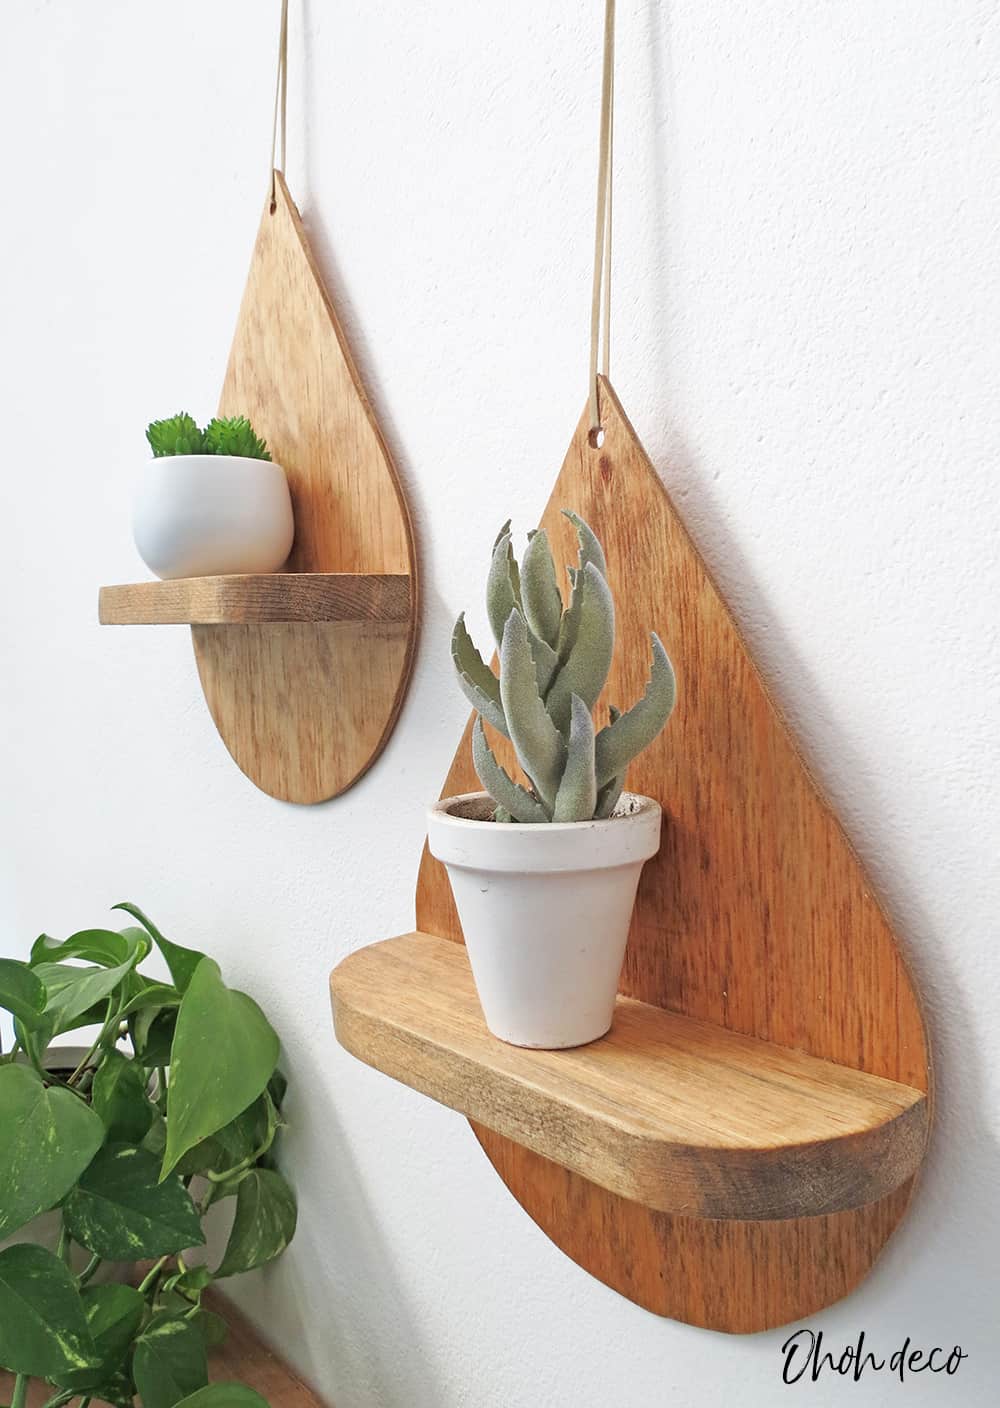
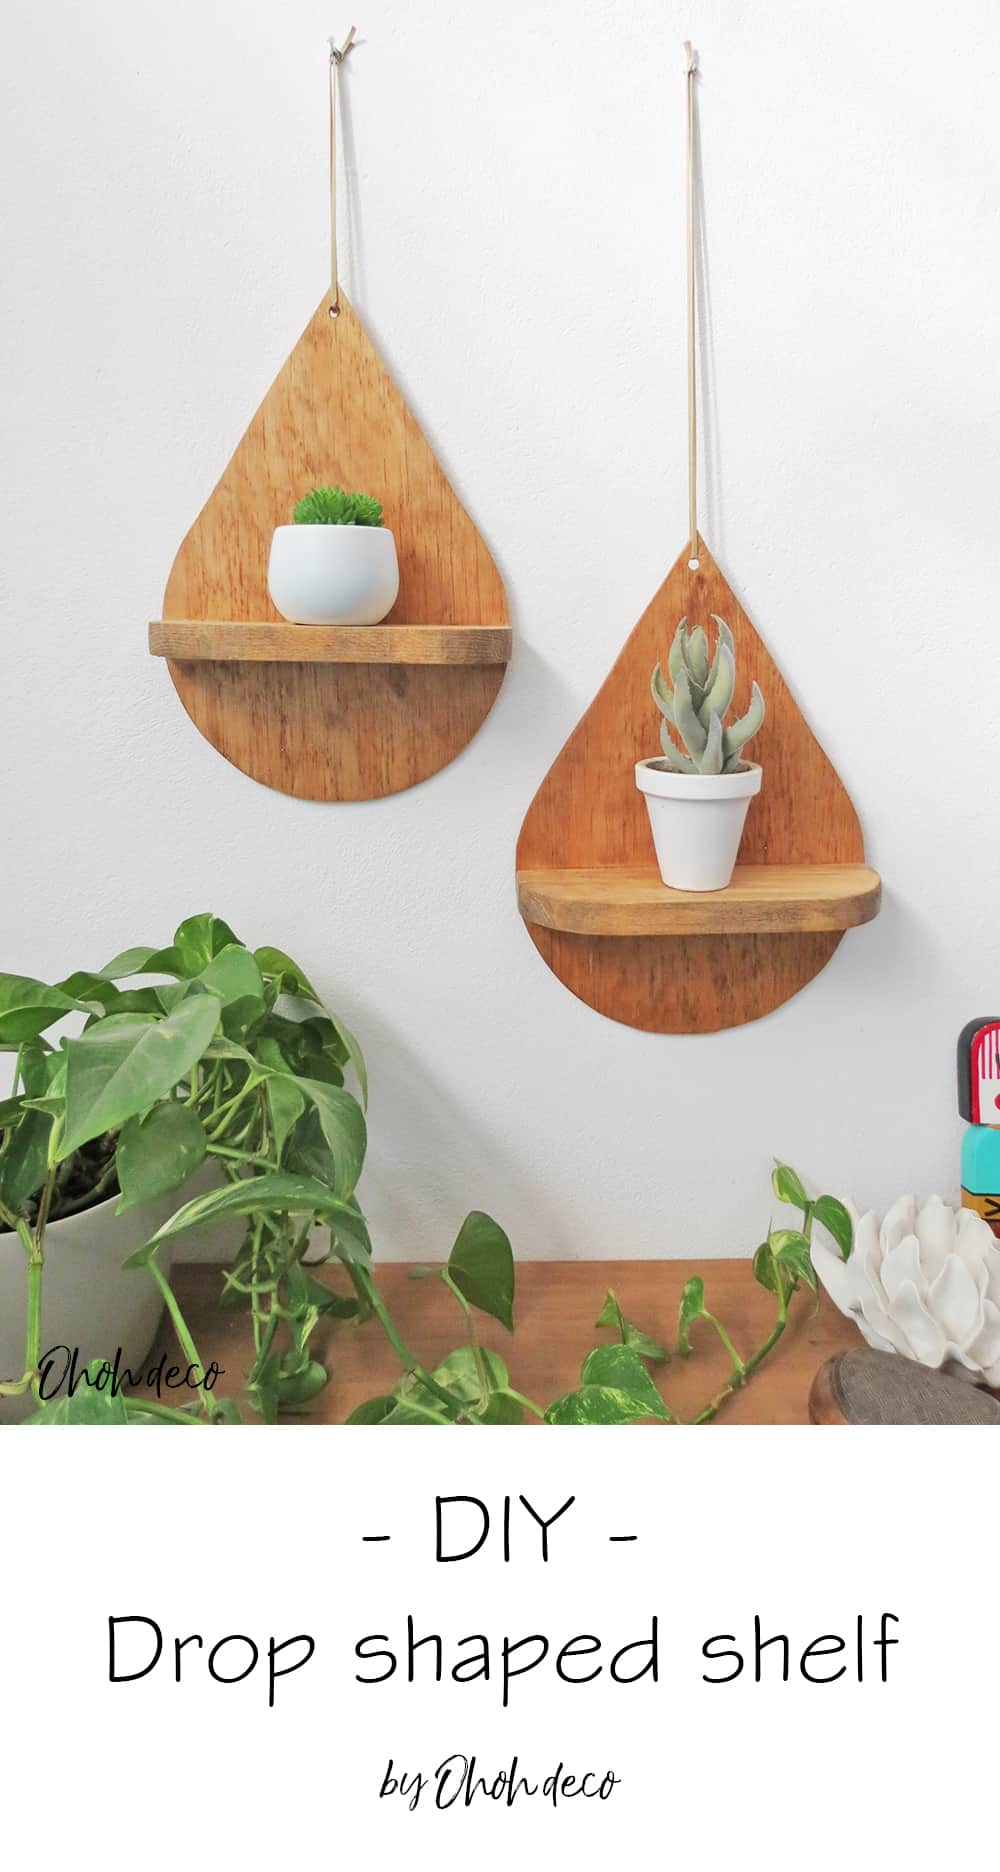
I continue working on the playroom upgrade, and I wanted to add some decorative shelves above the drawing table. I painted a cloud shape on the wall, some drop-shaped shelves seem like a good addition.
[ This post probably contains affiliate links, our full disclosure policy is really boring, but you can read it HERE ]
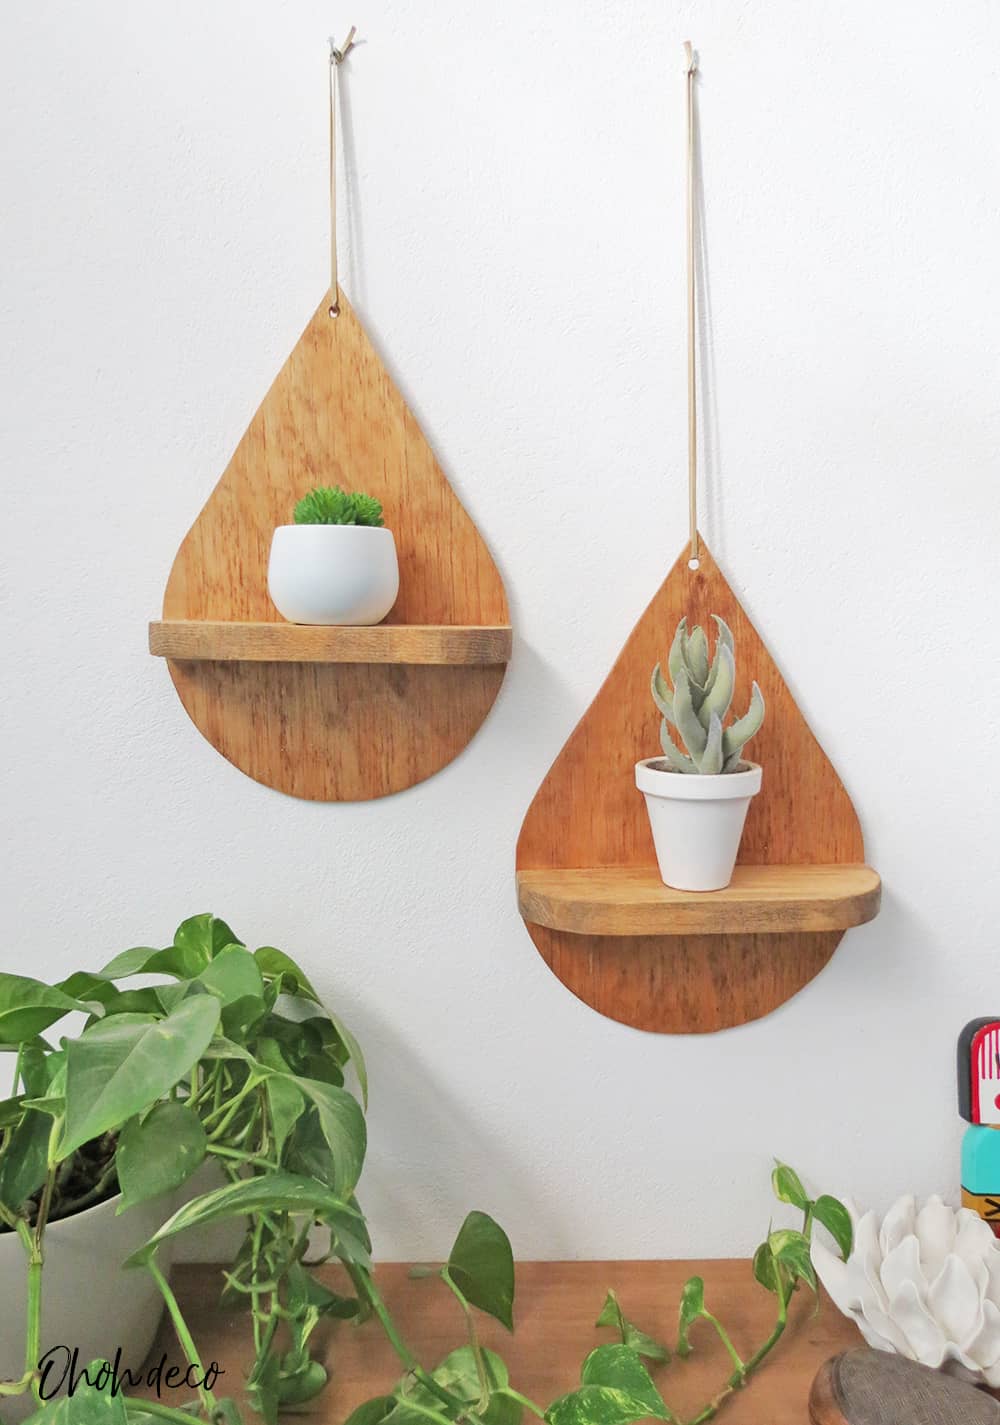
I like how they turn out, it makes a very cute wall decor. I may have to complete the wall decor with this cute mirror, I feel like it will match perfectly with the shelves.
I first cut the shelf edges straight, but I didn’t like the way it looks with the drop shape on the back. I obviously realized that after gluing the two parts together. As you can imagine, it wasn’t easy to rounded the corners afterward.
It was a good decision anyway and the shelf looks much better with two rounded corners. You know if you decide to make this drop-shaped shelf, just rounded the plank corner before gluing!
RELATED: DIY Easy Box shelves
RELATED: DIY cardboard wall shelf
How to make a water drop shelf
Supplies you will need to build this simple decorative shelf:
- A piece of 6mm plywood
- A small piece of lumber of 3 in. width
- A jigsaw
- Sanding paper
- Wood glue
- A drill
- A piece of rope or suede ribbon
- Stain, varnish or paint
Like for the shelf unit makeover, I used reclaimed wood, so it’s a cost-free project!
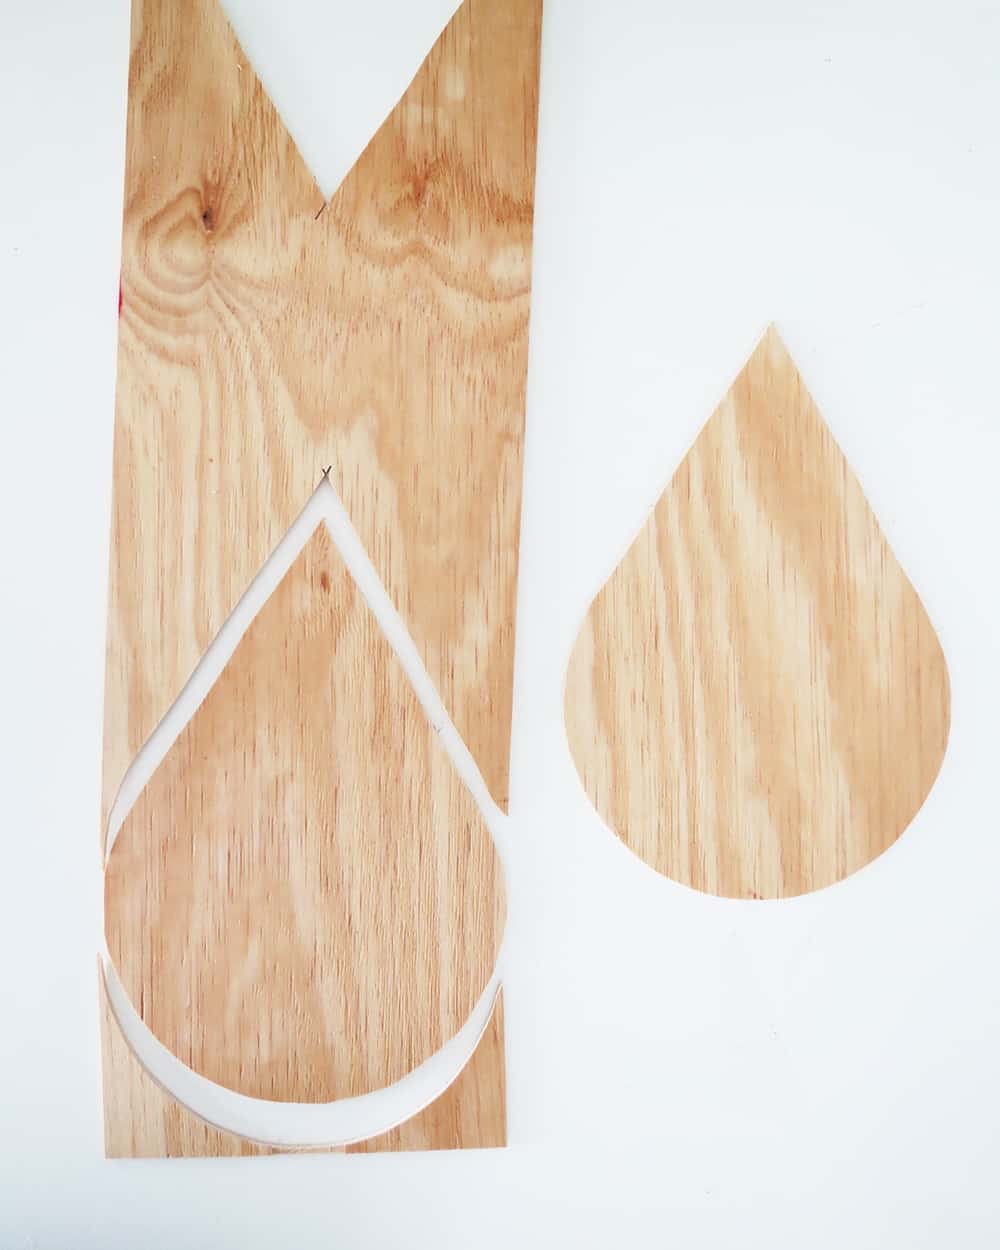
Start by drawing a water drop shape on a piece of 6mm plywood.
To make a drop shape similar to mine, start by drawing a circle of 4 1/2 in. radius. Mark a point above the circle at 4 inches from the circle edge. The point must be aligned with the circle center. Starting from the point, trace two lines that will joint each side of the circle edge to form the drop shape.
Cut the shape using a jigsaw.
Cut a piece of wood of 3 in. width to fit in the center of the drop shape.
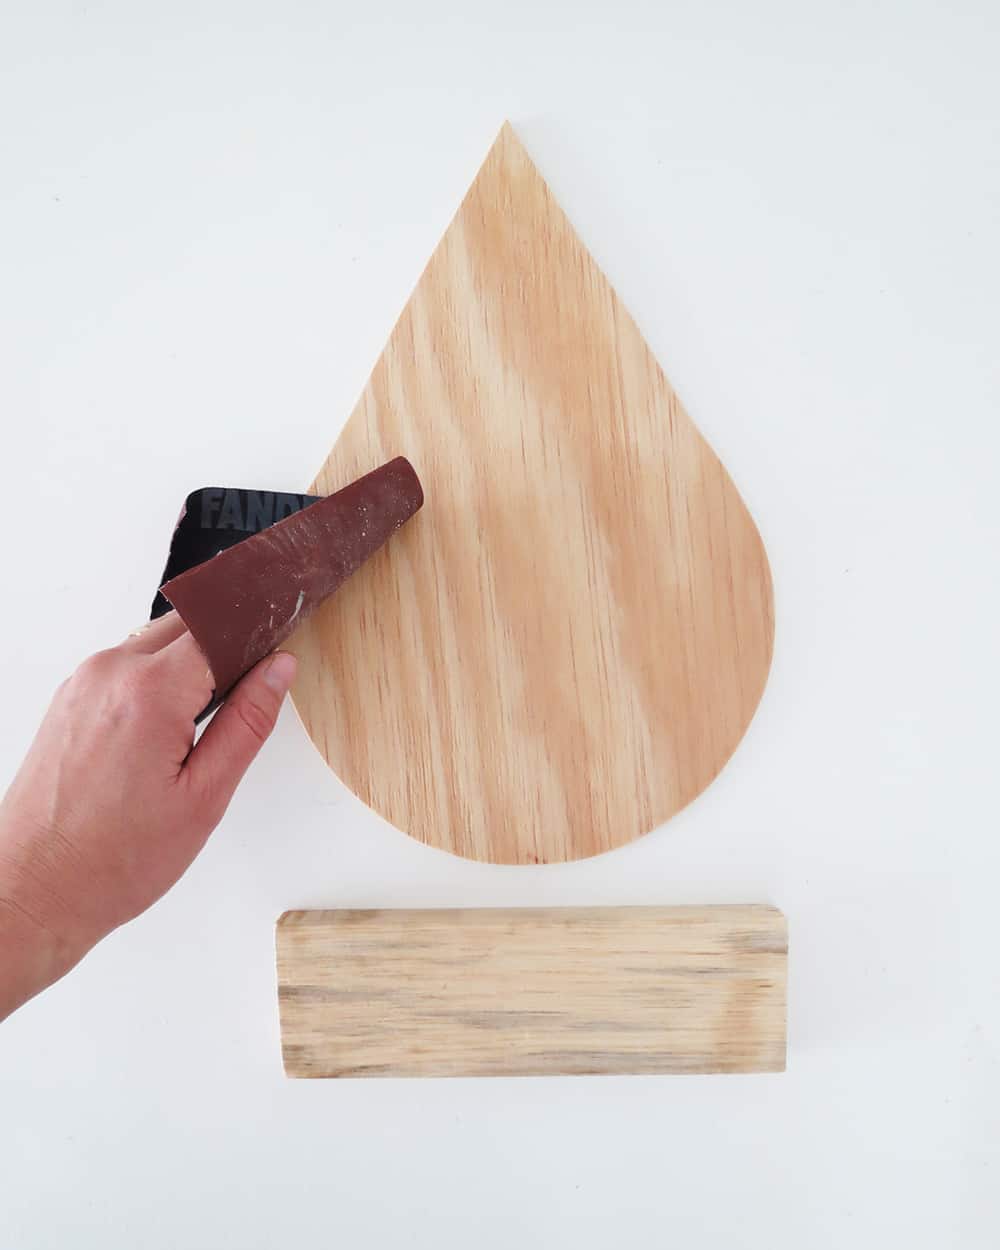
As I said at the beginning the shelf looks better with rounded corners…so you can trim two of the shelf corner before gluing.
I did it afterward and it was a pain! Sand both pieces to remove splinters.
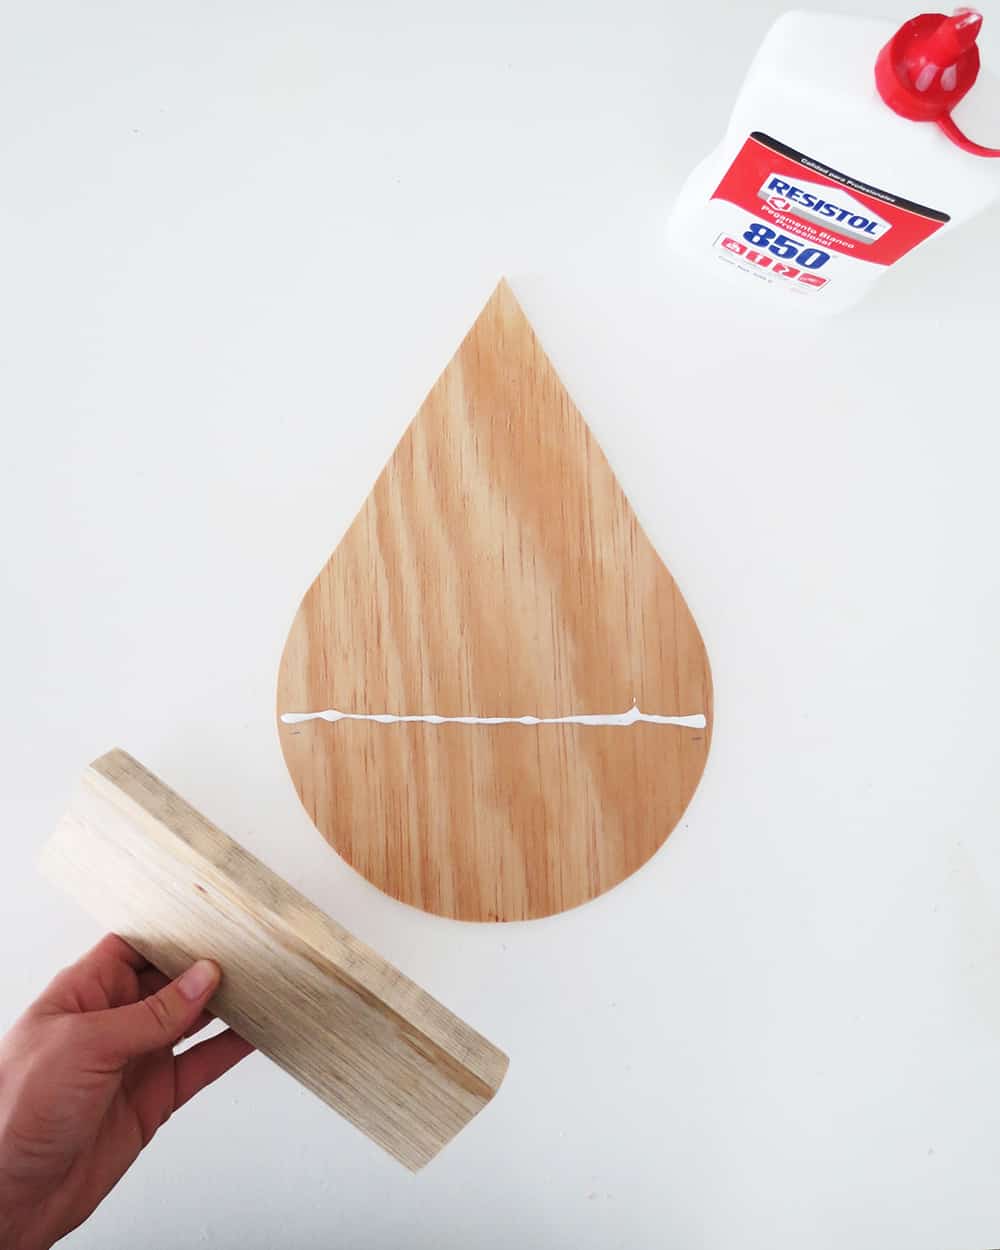
Trace an horizontal line that goes through the center of the drop and apply glue on it. Place the shelf and hold with trigger clamps while the glue dries.
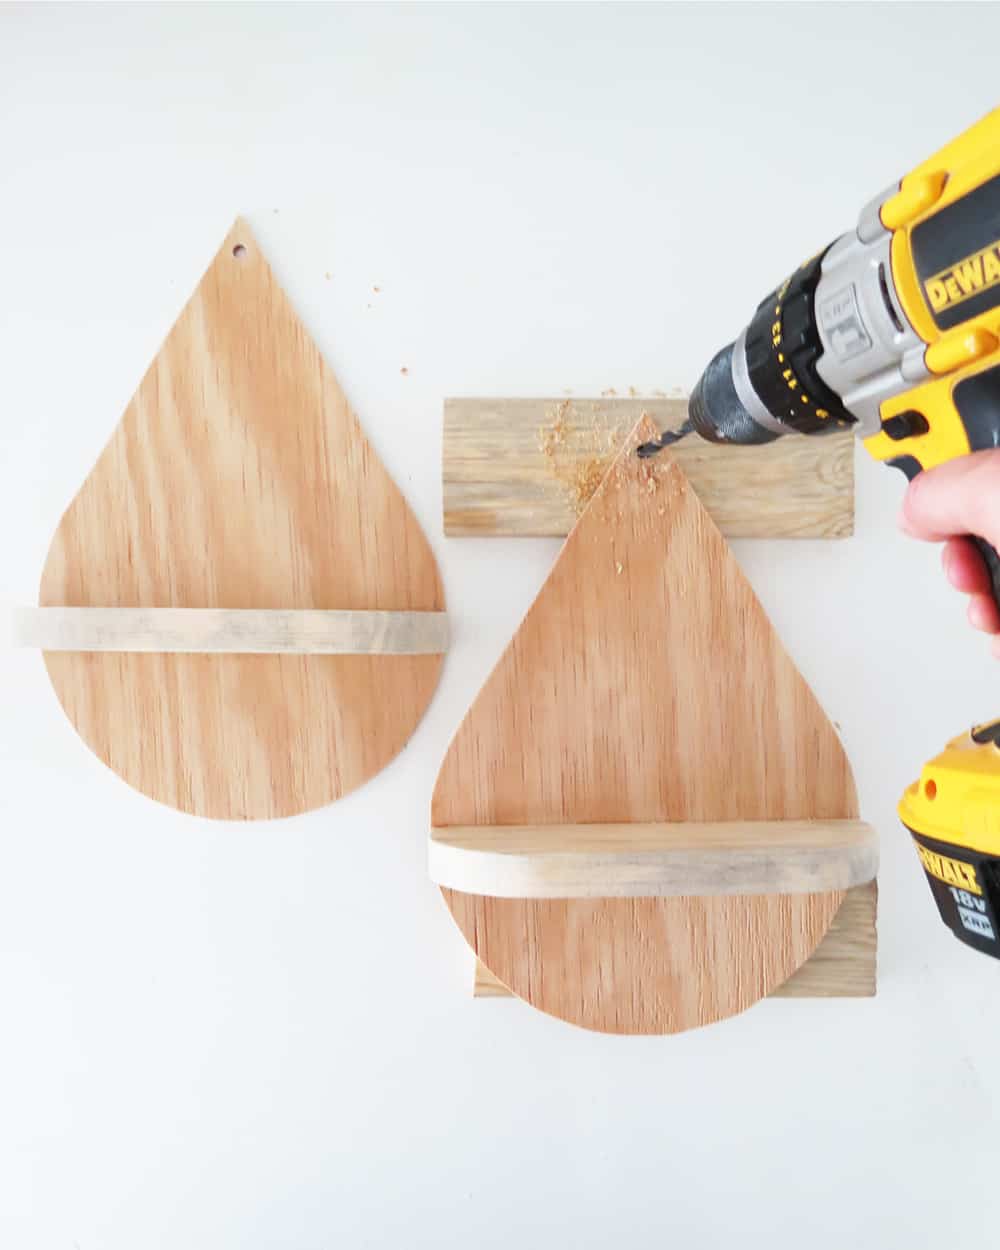
Drill a hole on the top part of the drop, so you can pass a rope of a ribbon and hang the shelf on the wall.
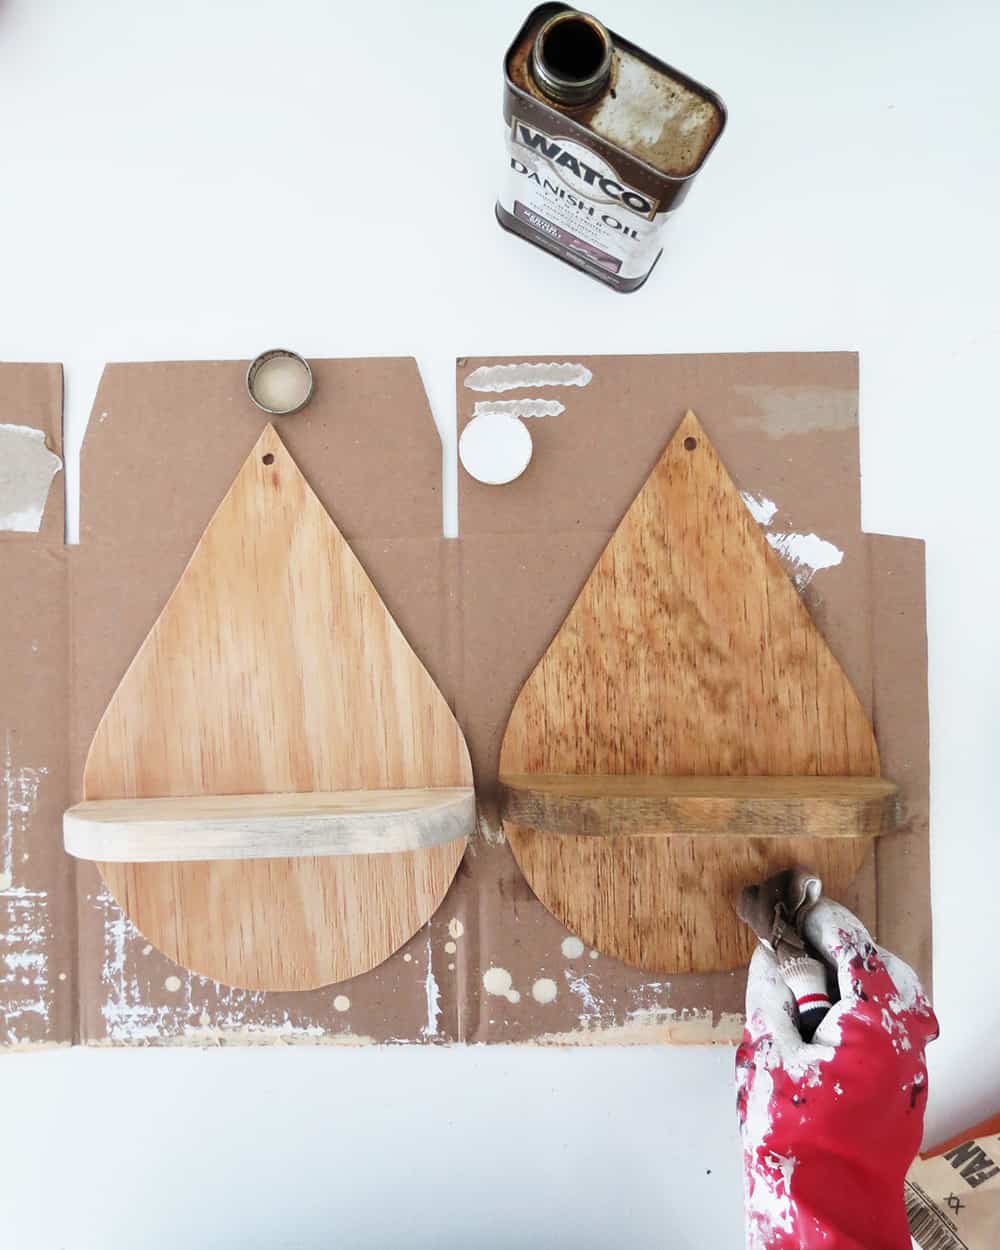
Stain, varnish or paint your shelf. I choose to apply danish oil. I like how it turn out and it looks great in my living room.
But the drop shelves are supposed to be hanged next to the kids drawing table and I’m not entirely convinced that the wood texture matches the peach wall color. So I will probably paint the shelves in white.
Once the stain or paint is dry, pass a ribbon or a piece of rope through the hole and hang the shelf on the wall.
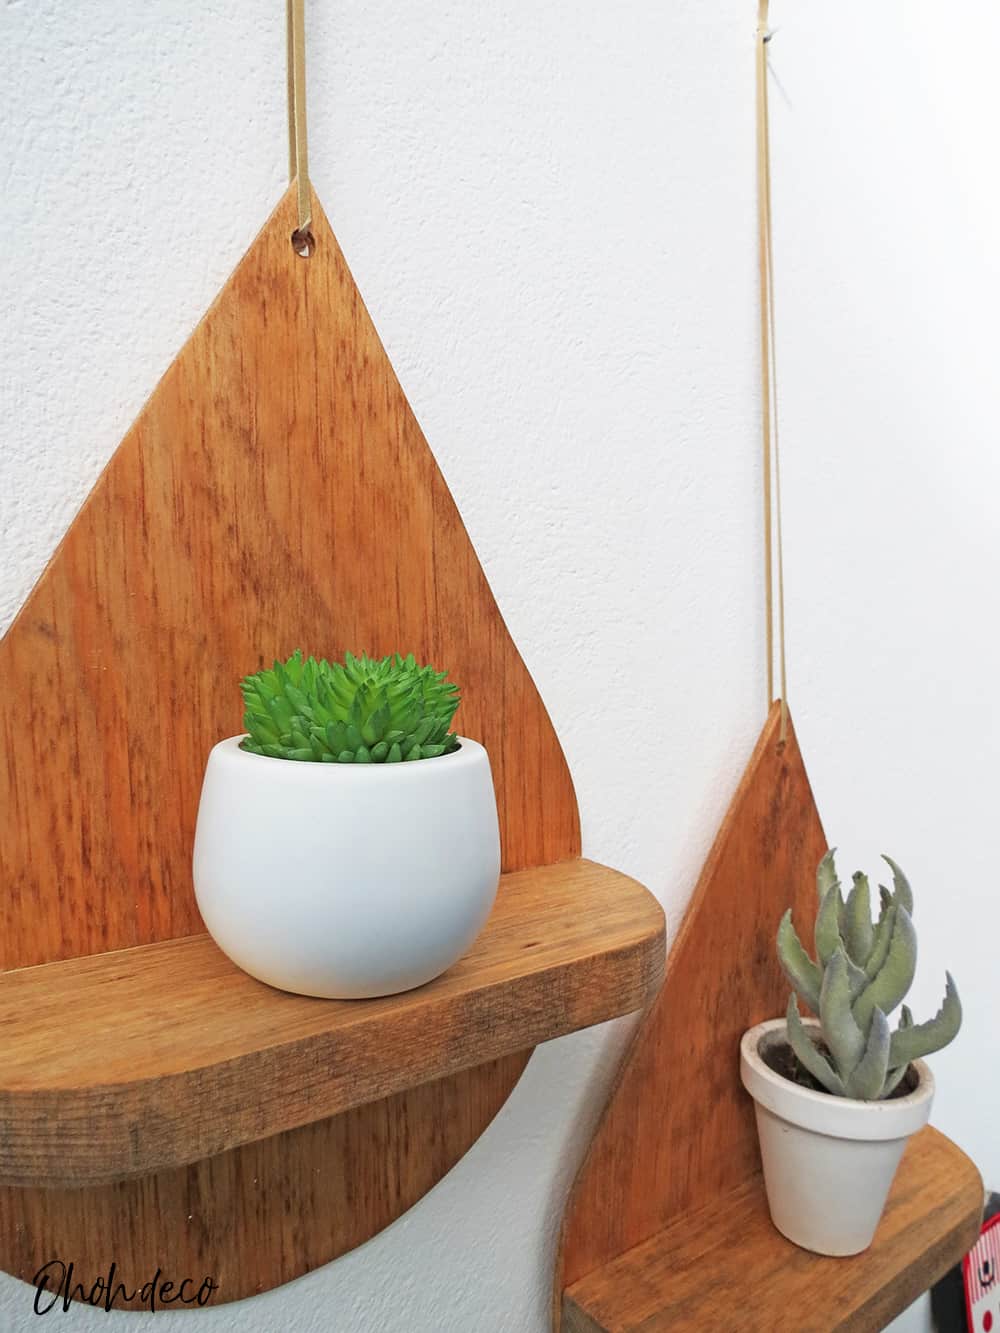
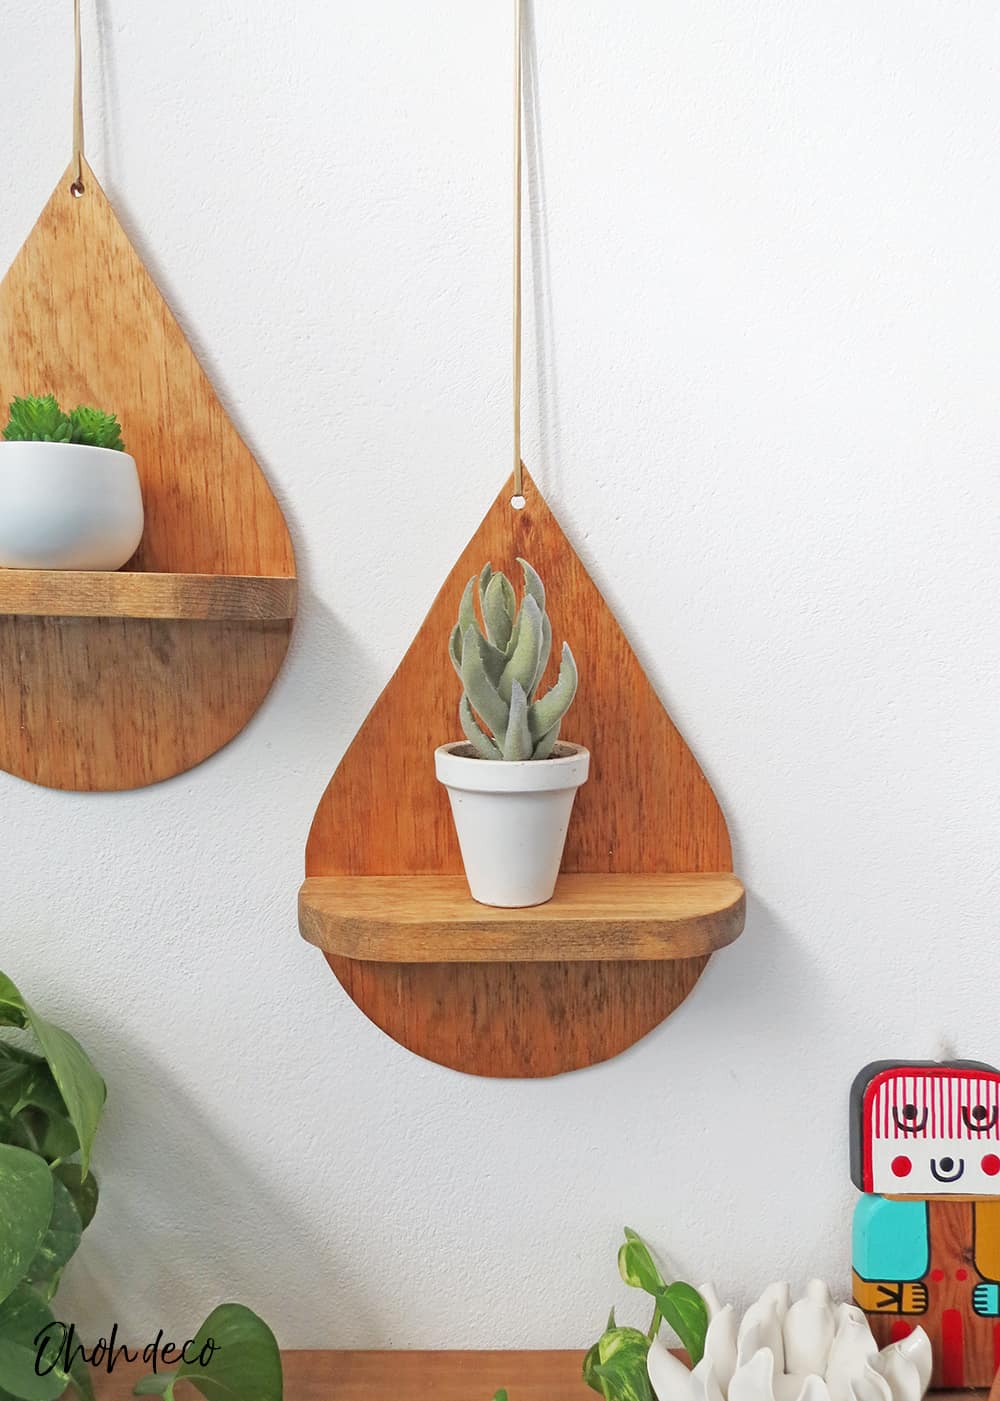
And done! The drop shaped shelf is perfect to display small items, collectibles or little plants!
I love how these unique DIY shelves turns out! It’s such an easy way to decorate a wall.
Tell me, What would you display on your water drop shelf?
I love to see your creations, so don’t hesitate to let me a comment or share them on social media (FB: @ohohdeco IG: ohoh.deco)
RELATED: DIY display shelf
RELATED: How to make a wall display shelf
Amaryllis