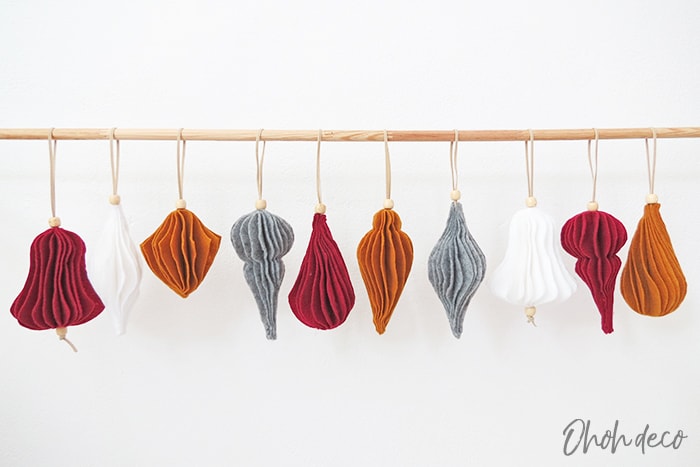
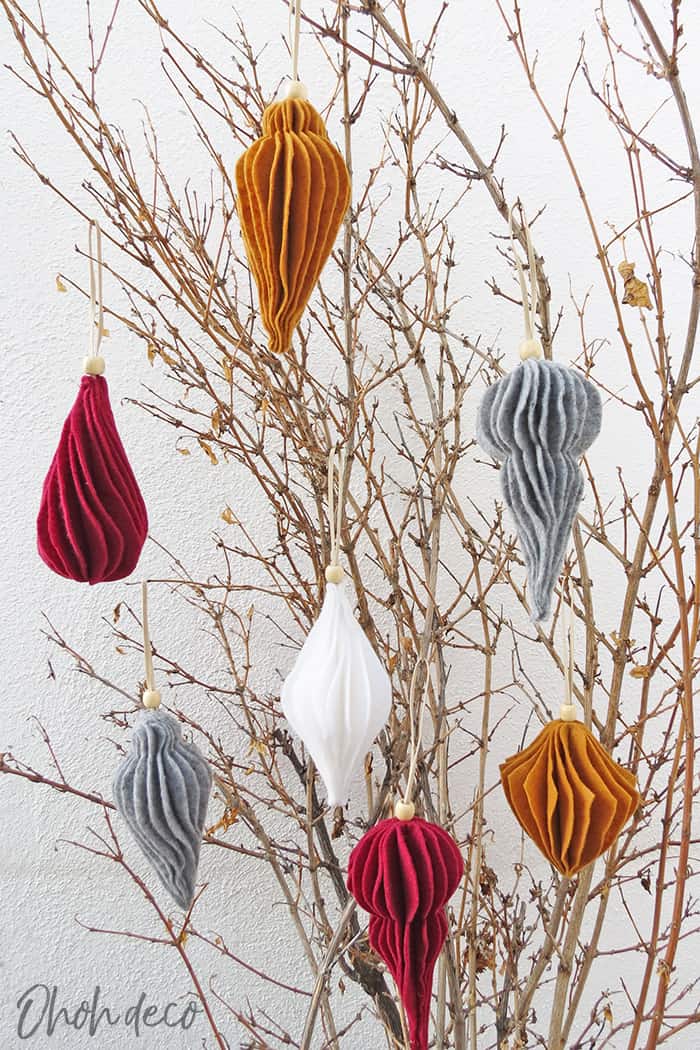
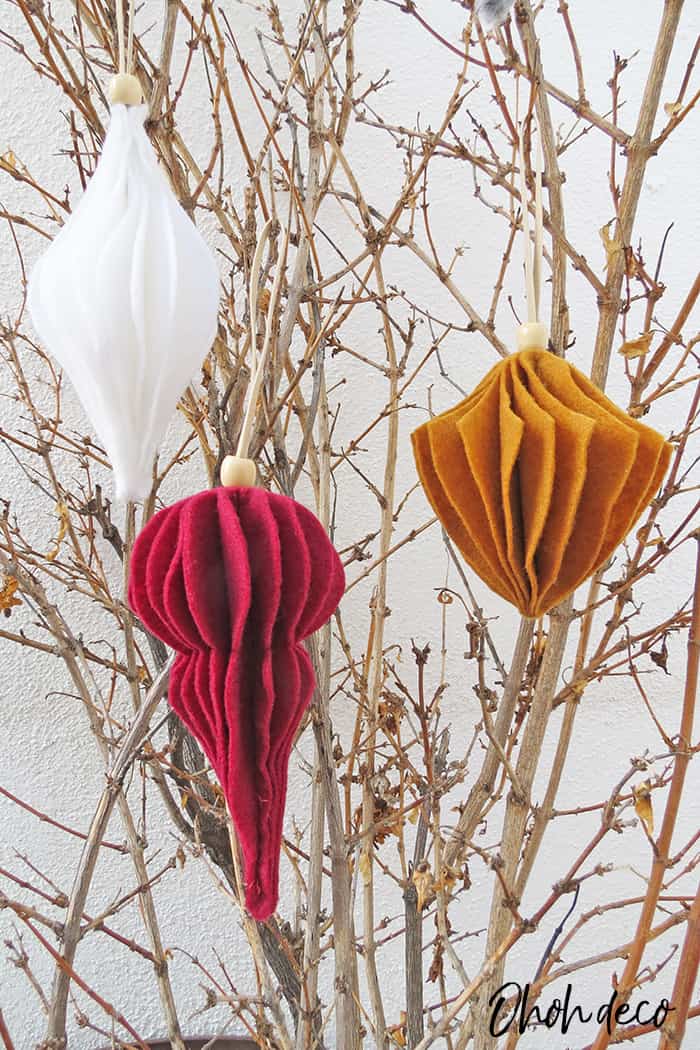
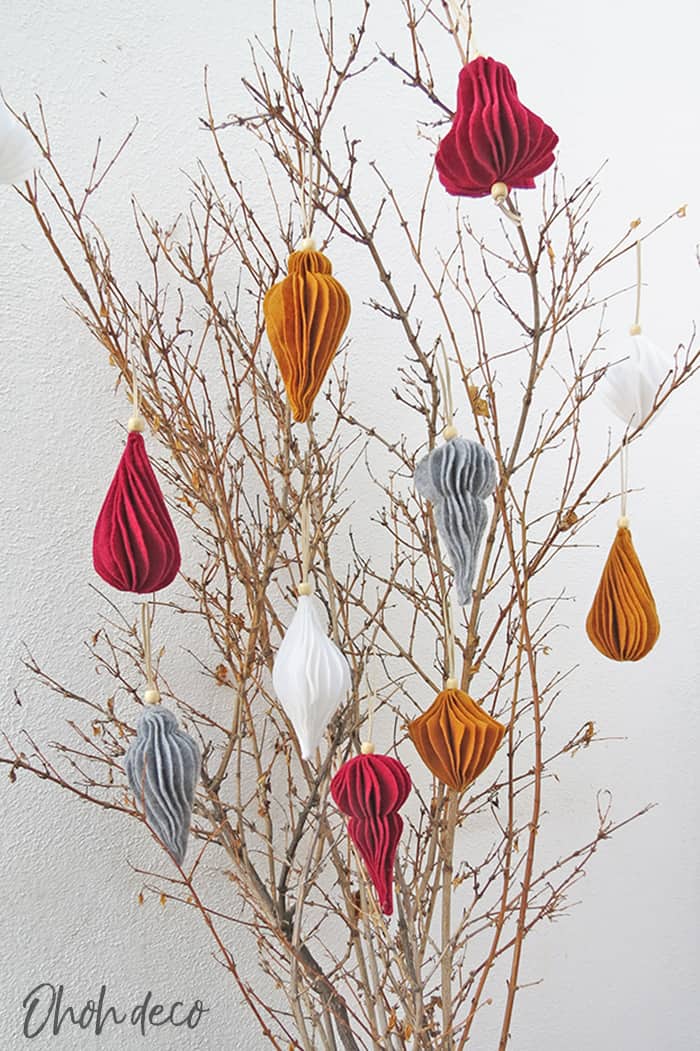
Creating modern and easy felt Christmas ornaments is a delightful and beginner-friendly project. Felt is versatile and easy to work with, making it perfect for crafting beautiful decorations. Here are some simple Felt Christmas ornaments patterns and instructions to get you started
Let’s give a new vibe to traditional felt decorations.
You can handmade these felt ornaments in any color you like. They are kids friendly, easy to store, and you will certainly enjoy them for years.
[ This post probably contains affiliates links, our full disclosure policy is really boring, but you can read it HERE ]
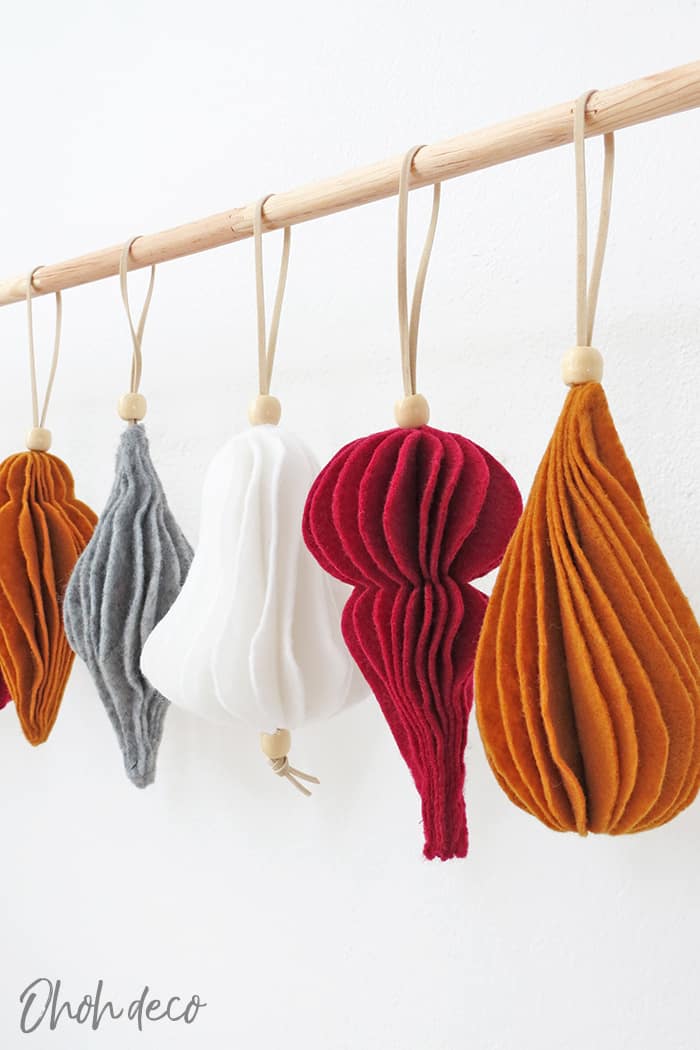
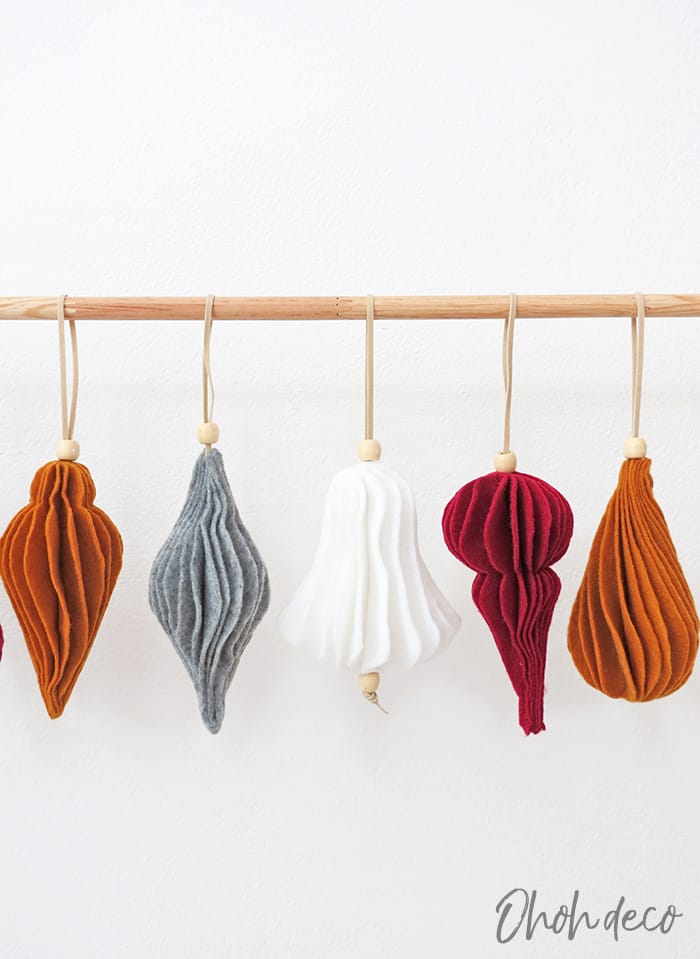
These Christmas ornaments are easy to make and propose a modern twist to the traditional embroidered felt decoration. They are made of several layers of felt sewn together.
No worries, you don’t need a sewing machine or seamstress skills to craft these decorations. All is hand stitched and very easy to make.
It’s also quite fast. It takes me around 15 minutes to make one ornament.
And if you plan to make several, you can cut the shape in bulk to make the process quicker.
To make your felt Christmas decoration you will need the patterns, available in my shop.
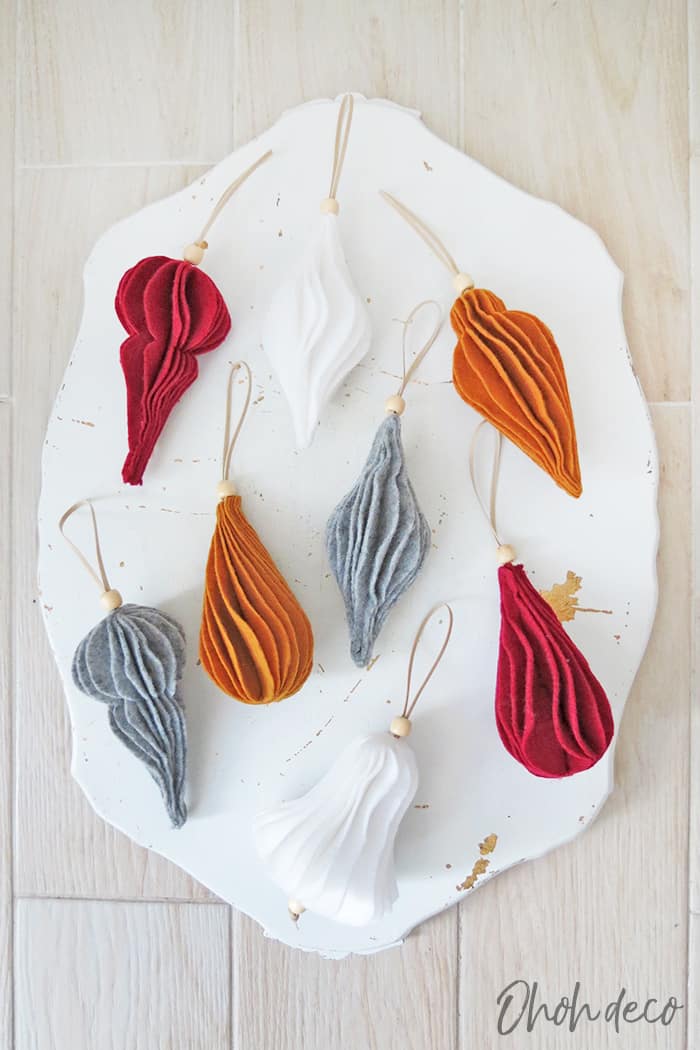
The felt Christmas ornament pattern is available as an instant download. This digital PDF file includes the 6 differents ornaments patterns.
>>> Get the ornaments patterns <<<
How to make felt Christmas ornaments?
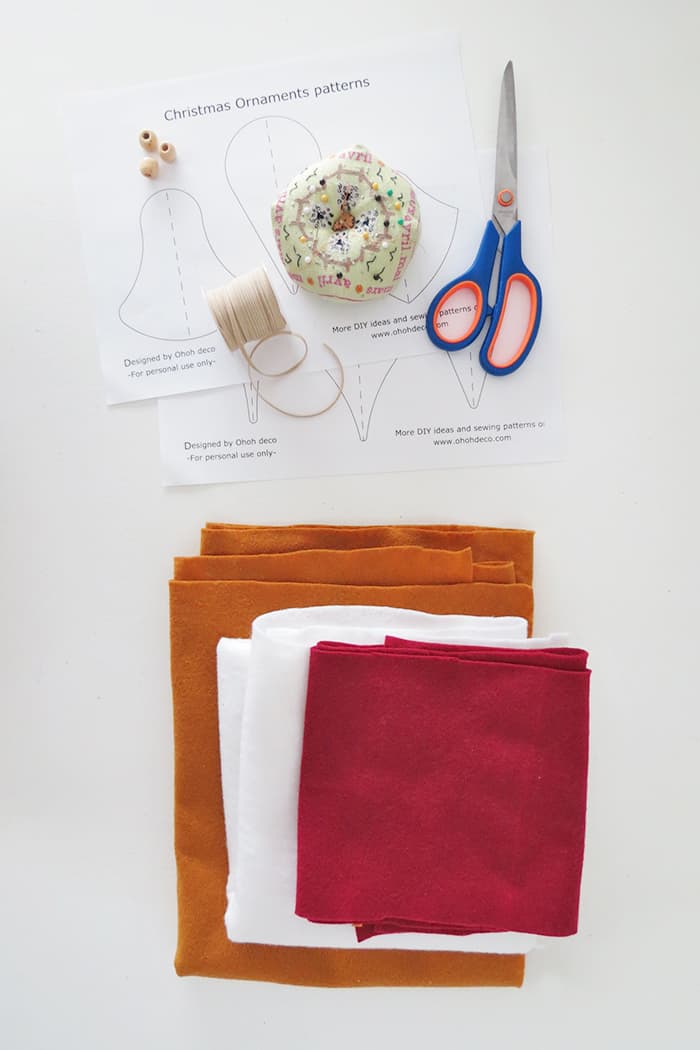
Materials you will need to make felt ornaments:
- The PDF ornament patterns
- Felt, any color you like
- Scissors (a sharp pair for clean cuts)
- Thread
- Needle
- Some ribbon, twine, or suede lace
- Large sewing clips
The ornament patterns are available as an instant download.
This digital PDF file includes the 6 differents ornaments patterns.
Just place your order and complete the payment. You will receive an email with the link to download your sewing pattern.
Click and print at home on A4 or US Letter size paper. Then, you are ready to start sewing!
>>> Get the ornaments patterns <<<
How to DIY the felt ornaments
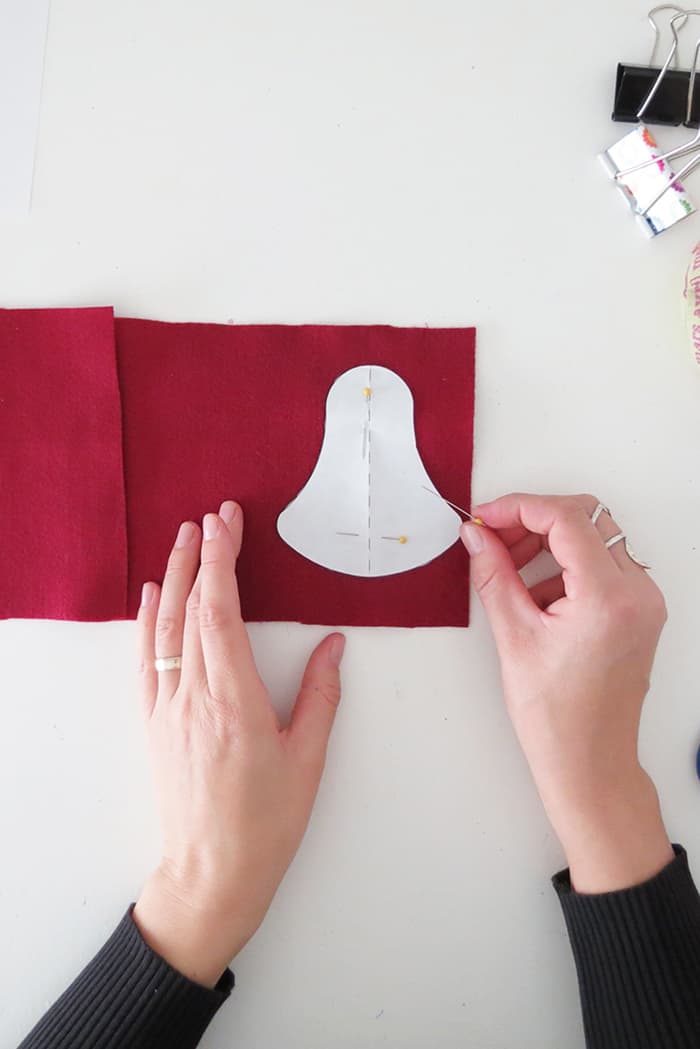
Download and print the ornament patterns. Cut out the 6 shapes. Choose one shape, here I used the bell, and pin it on the felt fabric.
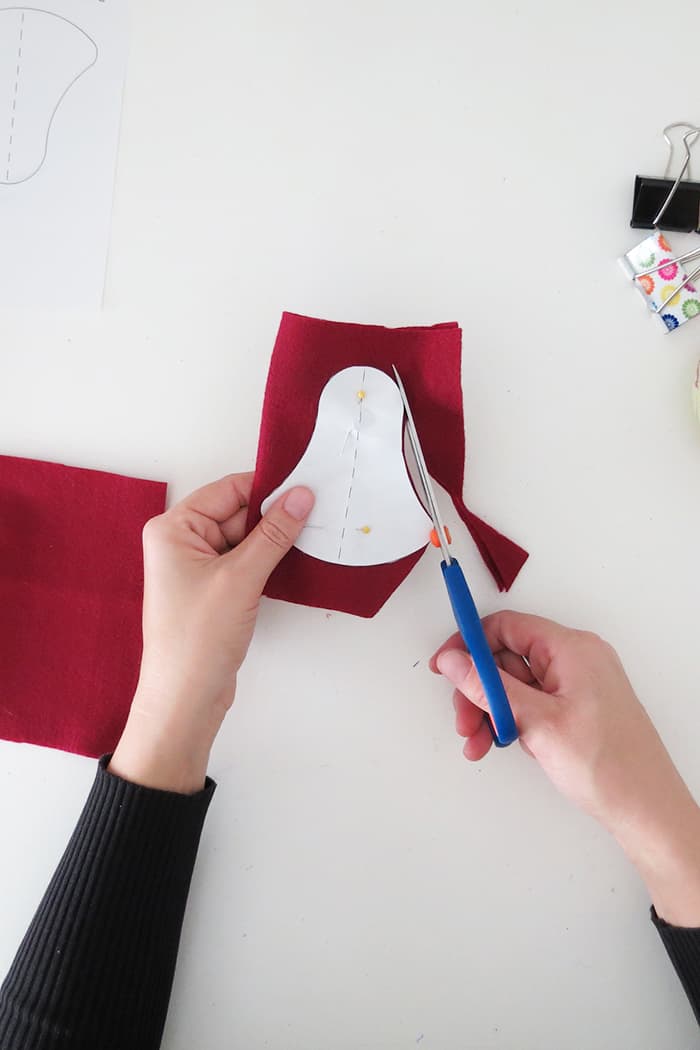
Report the shape on the felt and cut it.
It’s a little tricky to draw on felt fabric, I found that what works best is tailor chalk.
I found it easier to cut the ornament shape following the pattern pinned on the fabric. Do what works best for you and if you found a magic trick, please share it in the comments.
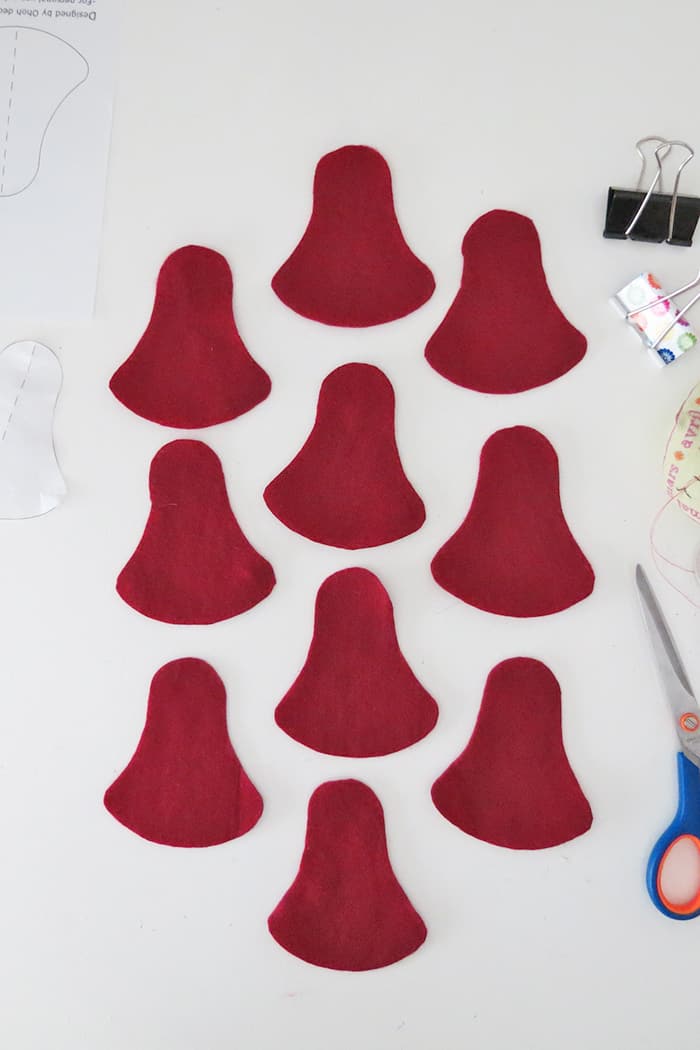
Repeat to cut 10 identical shapes.
The number of layers to make an ornament will depend on the thickness of the felt you are working with.
The felt I use was quite thin so 10 layers work great.
You can try with fewer or more layers, to achieve a nice finish.
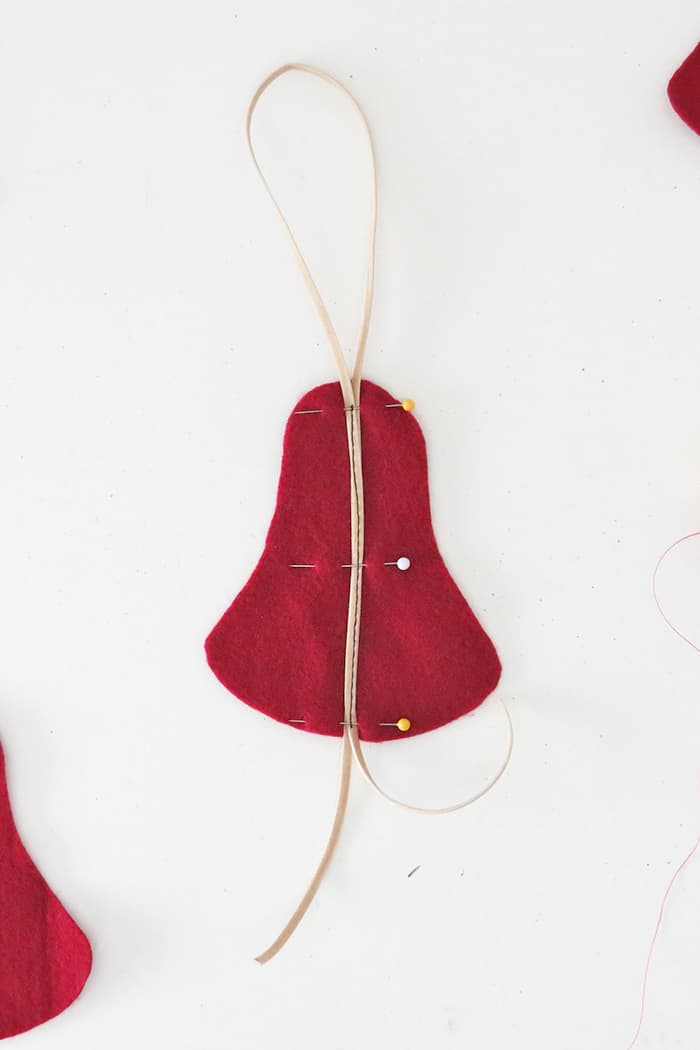
Cut a piece of ribbon or leather cord.
Fold it in two and pin it in the center of one piece of felt. Hand stitch the ribbon in place. Make a loop big enough to easily hang the ornament on the tree.
The bell ornament is slightly different from the other as the ribbon is longer and the ends come out from several inches at the bottom of the bell. The extra length will allow you to slide a bead to complete the bell.
For the other ornaments shapes, you can cut a smaller piece of ribbon.
Fold it in two and pin it on the upper part of the ornament. If you have any doubt, you can watch the video tutorial, I show you in details.
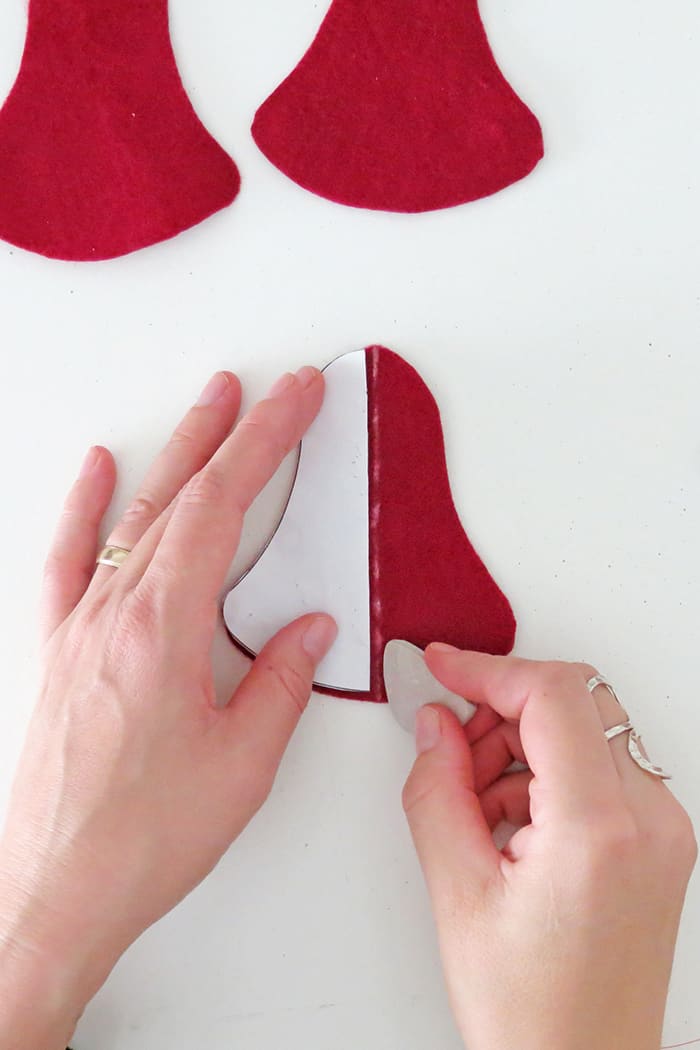
Once the ribbon is stitched on the first felt piece, take a second piece of felt.
Fold the paper ornament pattern in it center following the dotted line. Place it folded on the felt shape and trace a vertical line in the center.
I choose to fold the pattern, instead of cutting it in the middle, so I can use it again to make several other ornaments with the same shape.
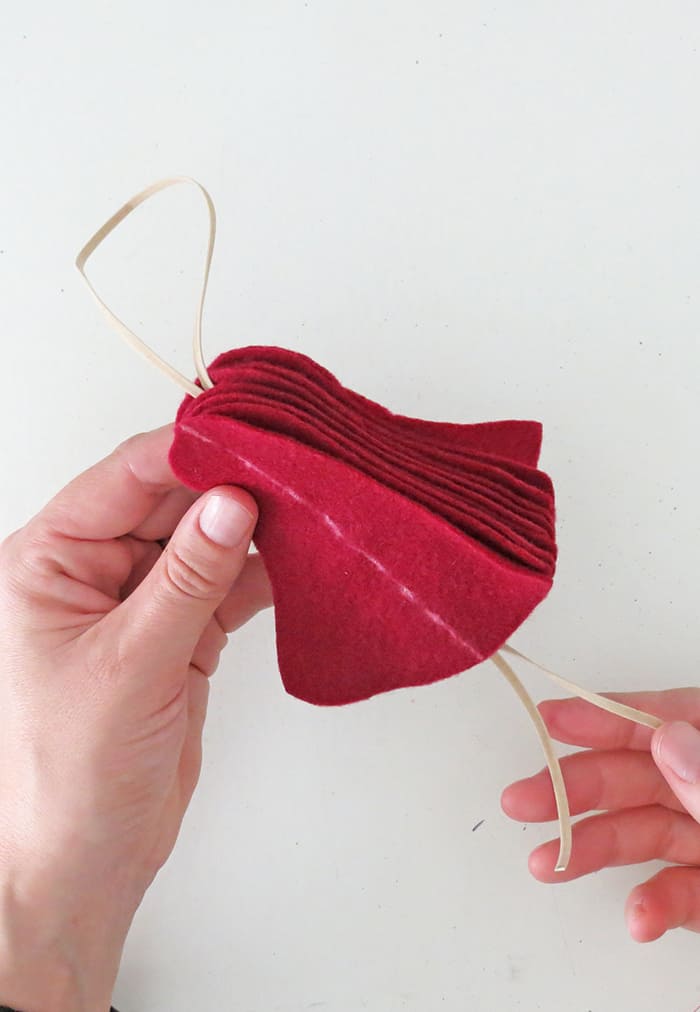
Now you can layer all your felt shapes to make the ornament.
Take first the felt piece with the ribbon, this felt shape is the center of the ornament.
So place 4 shapes under, and 5 above. The felt piece with the line must be on top, so you can follow it to make a straight stitch line.
If your felt is thicker than mine and you made less shapes, distribute them in a balanced way on each side of the central piece with the ribbon.
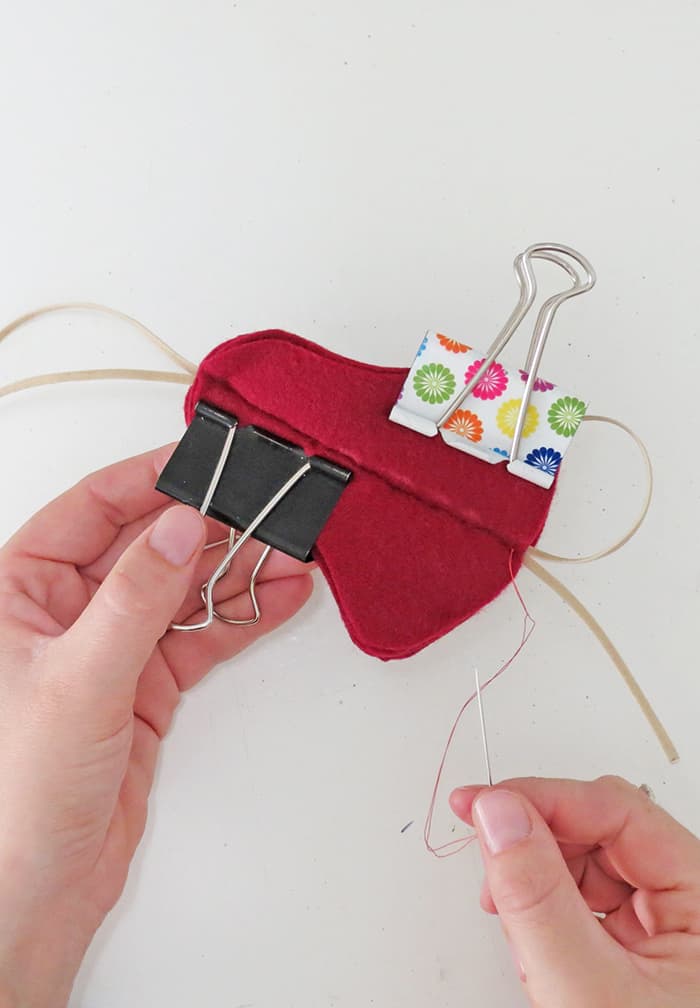
Watch that all the pieces are well aligned and clip them together, I didn’t have sewing clips large enough to hold all the felt layers so I used paper clips.
It works ok, even if the thread remains tangled in the clip sometimes…nothing bad, just a little annoying.
Take a matching color thread and a needle and hand stitch all the layers together. Follow the line, so you are sure to sew straight.
As the seam needs to be strong, I suggest you make a backstitch seam. No worries, it’s more simple than it sounds and the ornament will last longer.
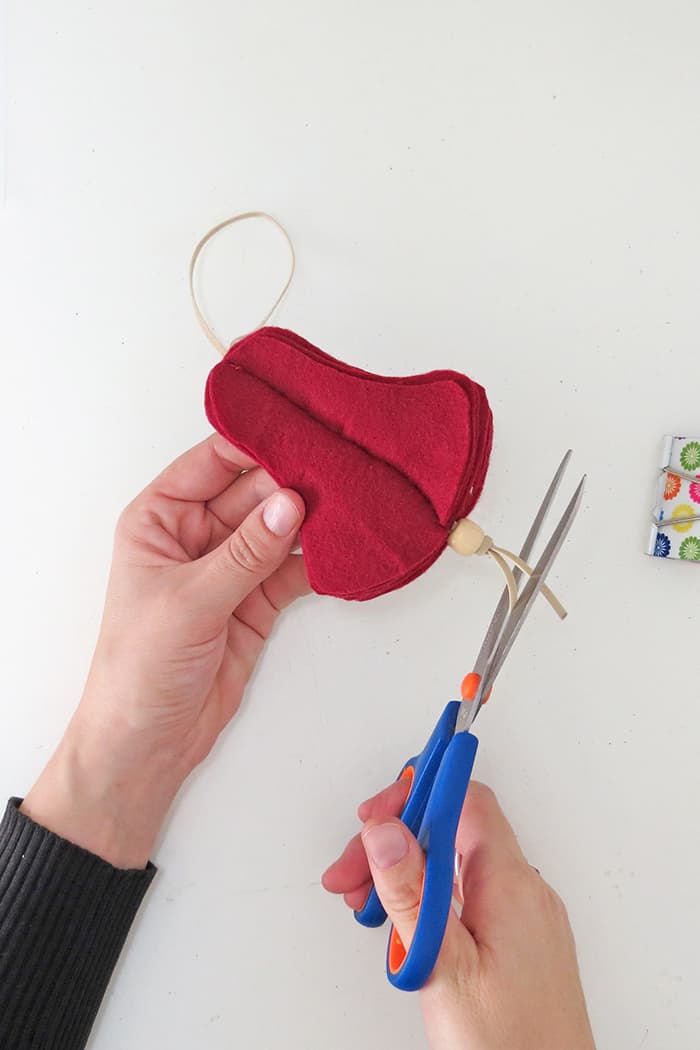
This step is only for the bell-shaped ornament: Pass a bead through the ribbon, hold it with a knot, and cut the extra ribbon length.
I used a wooden beads, but a little bell can be cute too.
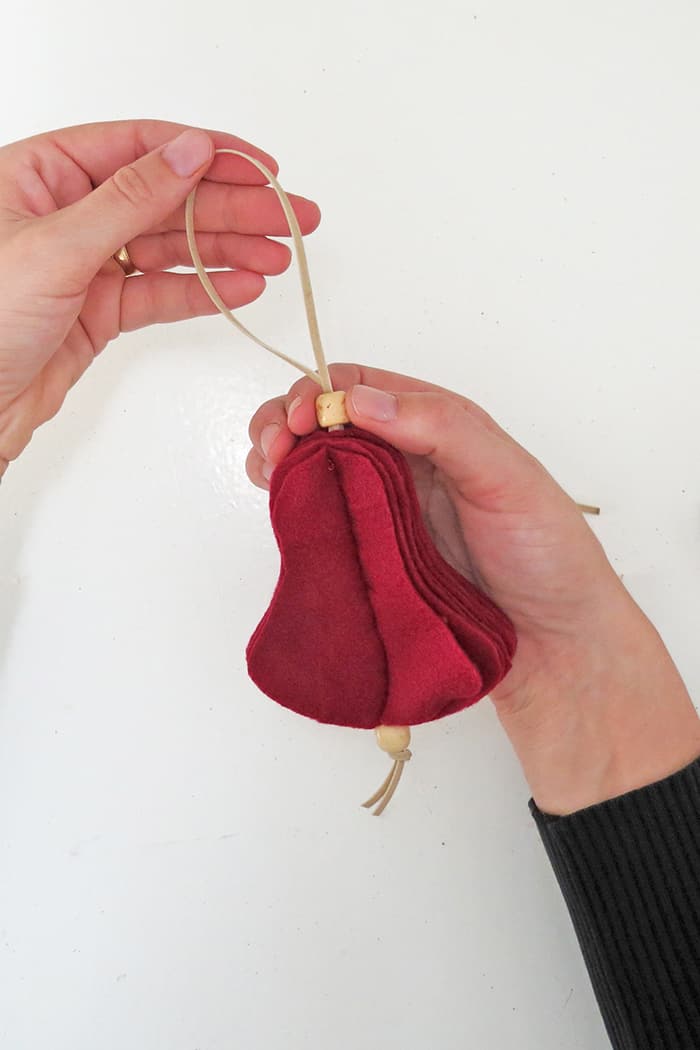
I also pass a wooden bead through the ribbon loop. It’s optional but I think it gives the ornament a well-finished touch.
Puts the ornament in shape, just pass your finger between each layer to separate them from each other and give the felt ornament all its volume.

And done. What do you think?
I like how this Christmas felt craft turns out. These felt ornaments are easy to make budget friendly and unbreakable, which is a good think if you have kids or pets around.
Another good point is that they are easy to store. Just lay the ornaments flat and keep them in a closed box (shoe box for example) and they will be ready to be reused next year.
Felt deco is the best!
>>> Get the ornaments patterns <<<
Watch the video tutorial to easily DIY felt Christmas Ornaments
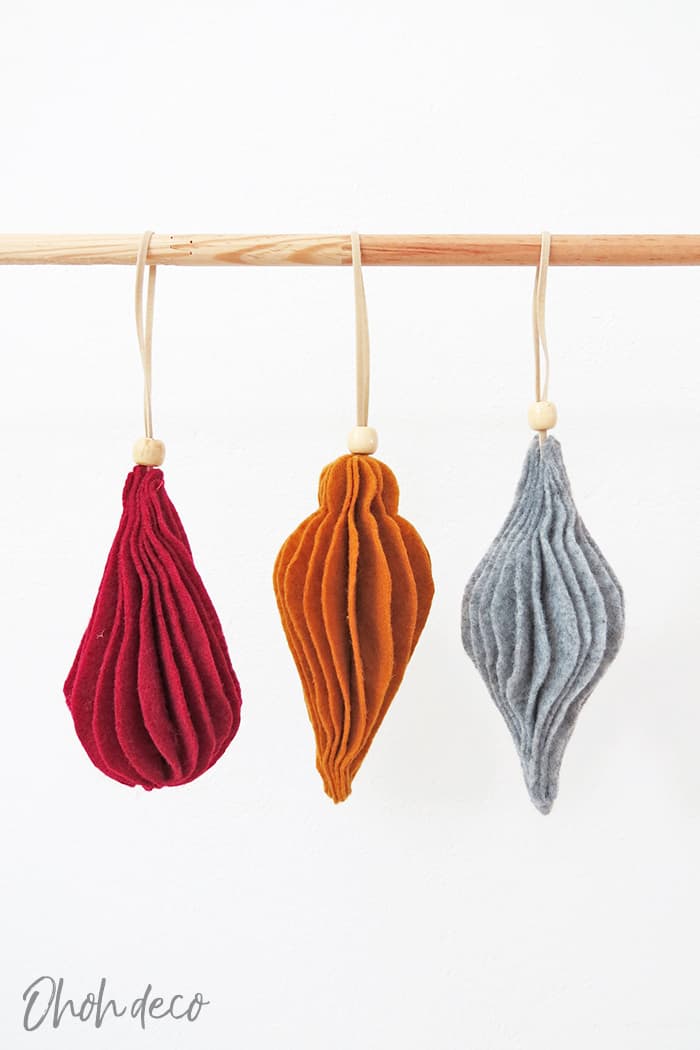
Which one of the 6 Felt Christmas ornaments patterns would you like to try first? Which felt color would you like to use to make your tree ornaments?
Let me know in the comments.

These simple felt ornaments are not only easy to make but also provide a modern and festive touch to your Christmas tree. Grab the Felt Christmas ornaments patterns and enjoy your crafting!
RELATED: 25 easy DIY Scandinavian Christmas Ornaments
RELATED: How to make Christmas ornament with concrete
Want to remember it? Save these easy to DIY felt Christmas ornament in your favorite Pinterest board.
Amaryllis

I will pick it on my Pinterest Board. Thank for sharing!
Thank you 🙂 I’m glad you like it! Have fun crafting for Christmas
Cool DIY! Really you are so talented. I am totally impressed with your work. I am going to try this. Thanks and keep sharing.
Hello Diana, Thank you so much! I’m glad you enjoyed this easy to make felt ornaments.