

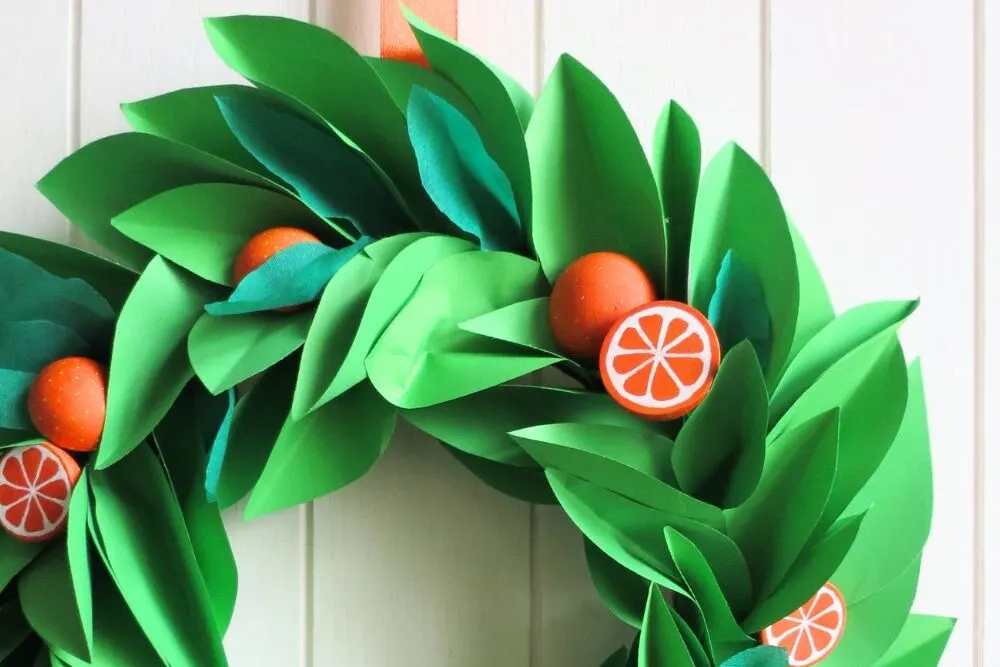
Are you looking for a creative way to spruce up your home decor this summer? Look no further than this step-by-step guide to create a stunning paper wreath that will add a touch of elegance to any room.
From gathering materials to assembling the final product, you’ll learn everything you need to know to craft your own beautiful summer wreath.
[ This post probably contains affiliate links, our full disclosure policy is boring, but you can read it HERE ]
Gathering Materials
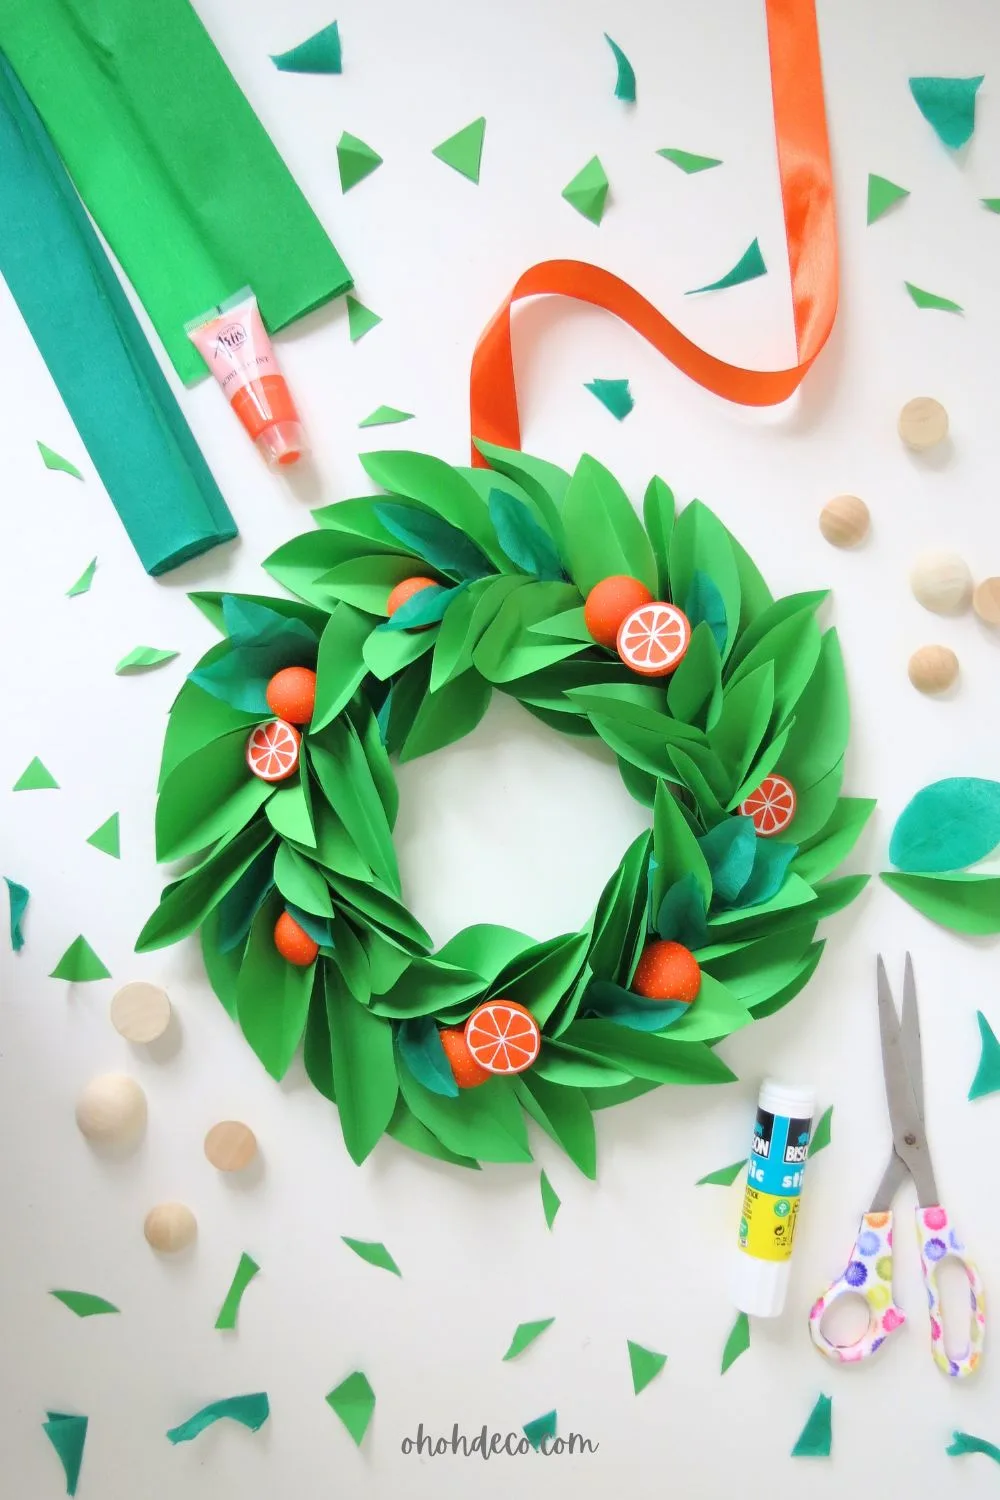
To begin creating your paper wreath, it’s essential to gather all the necessary materials. You will need:
- Cardboard
- Green paper sheets
- Green crepe paper
- Half wooden beads
- Acrylic paint
- Paint markers
- Ribbon
- Hot glue (or this adhesive)
- Scissors
- Cutter
These items are readily available at your local craft store or online. Once you have all your materials, you can move on to creating the wreath base by following the simple steps outlined below.
Creating the Paper Wreath Base
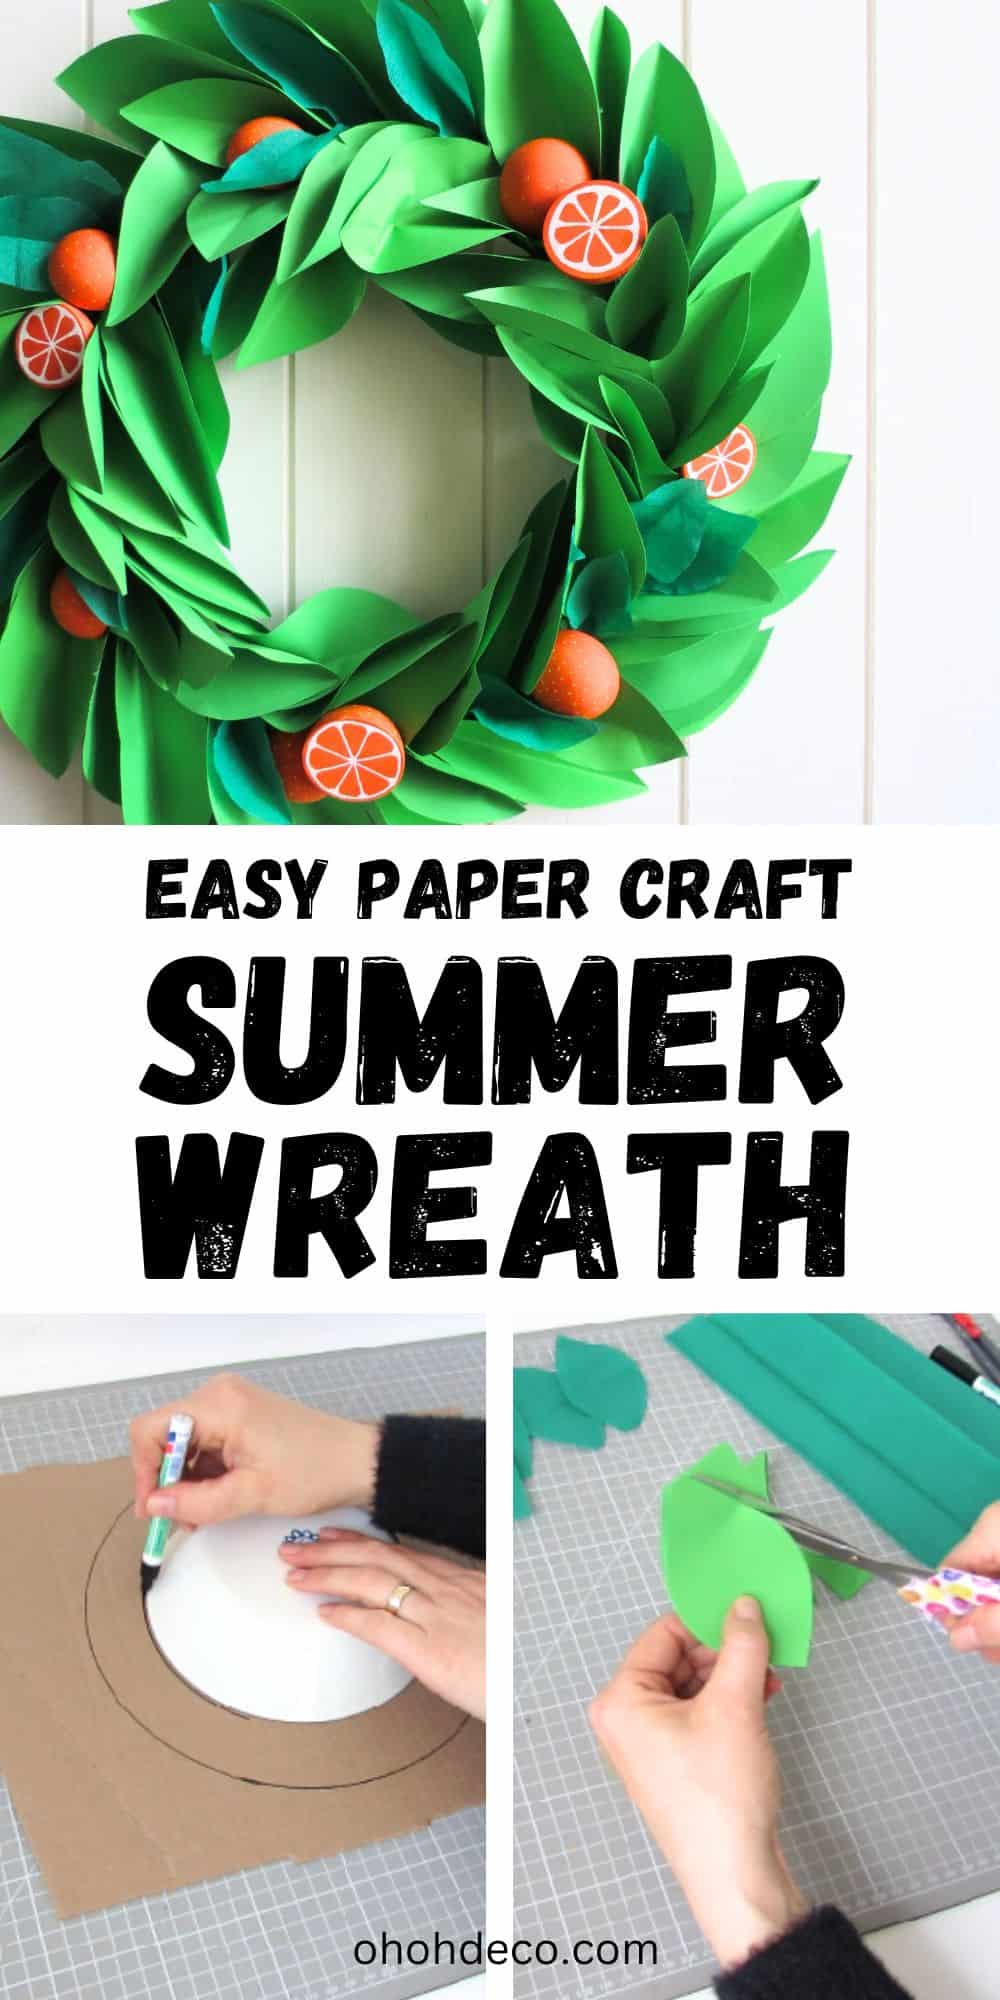
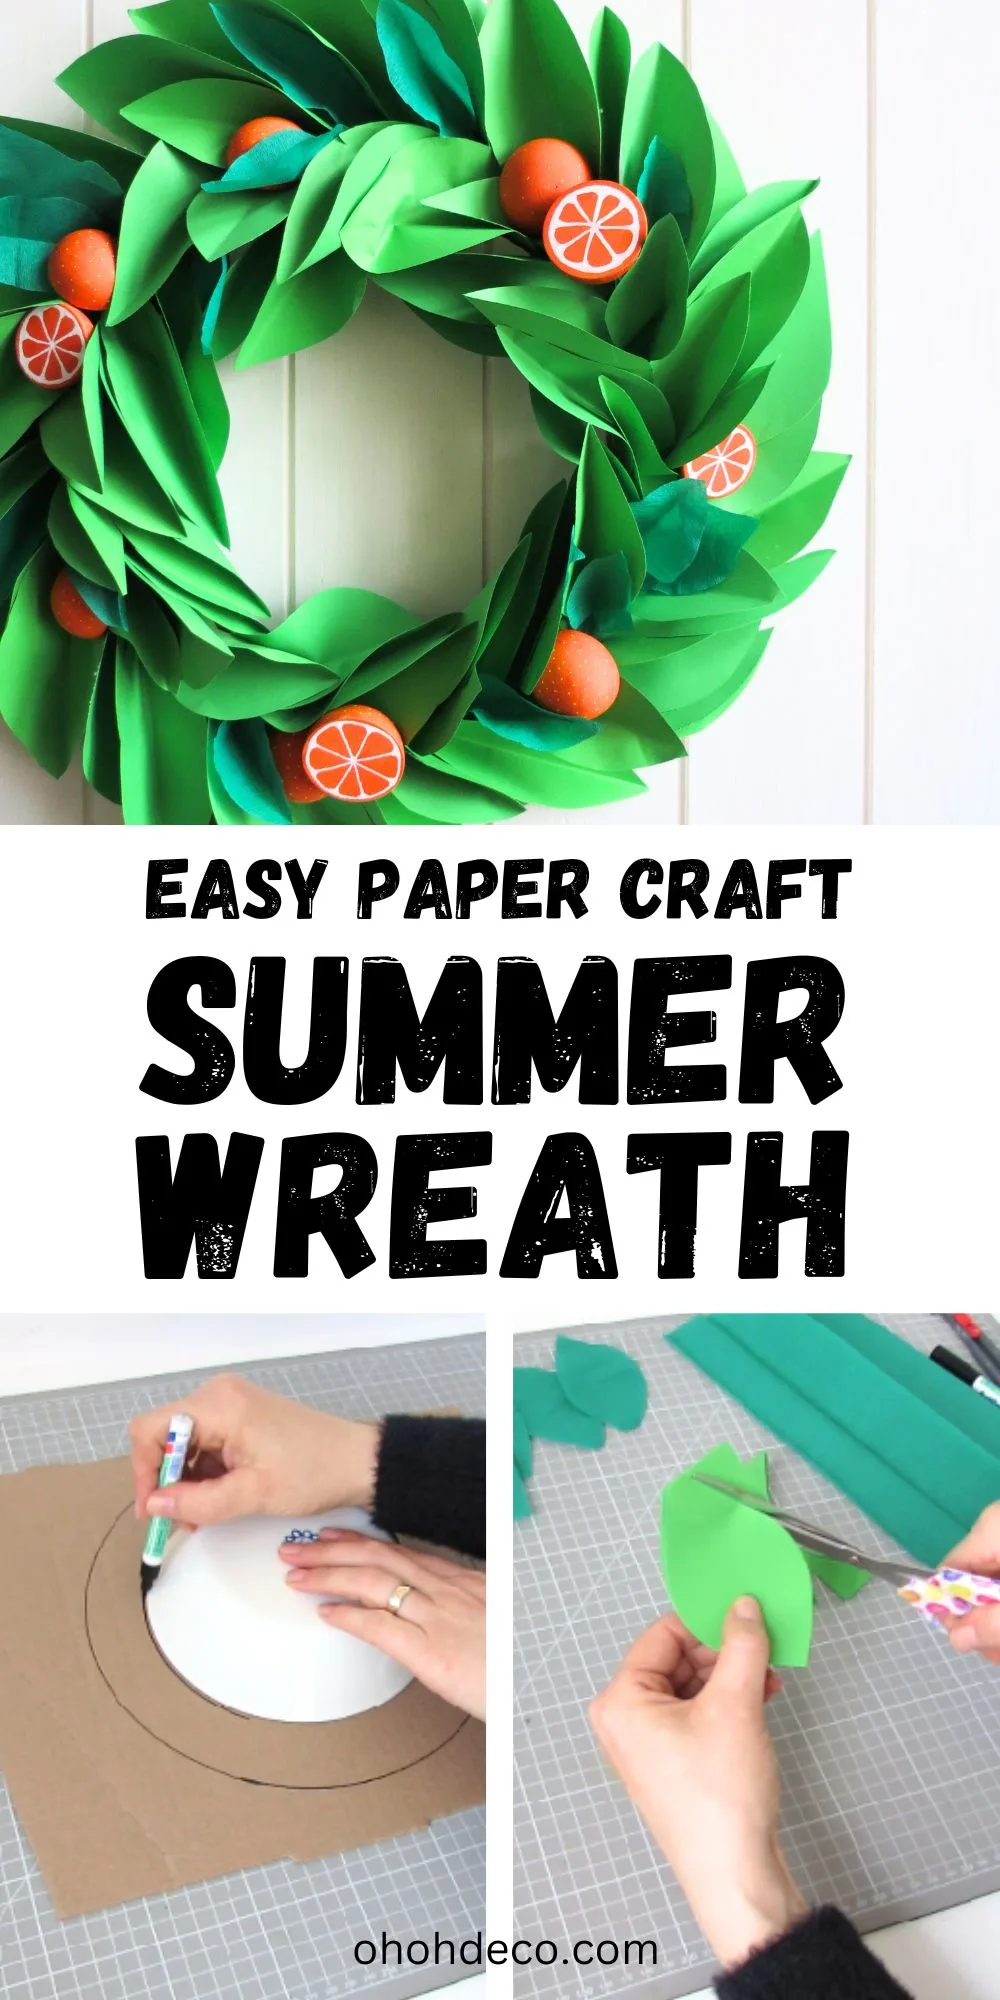
Take a piece of cardboard to make the base for your paper wreath.

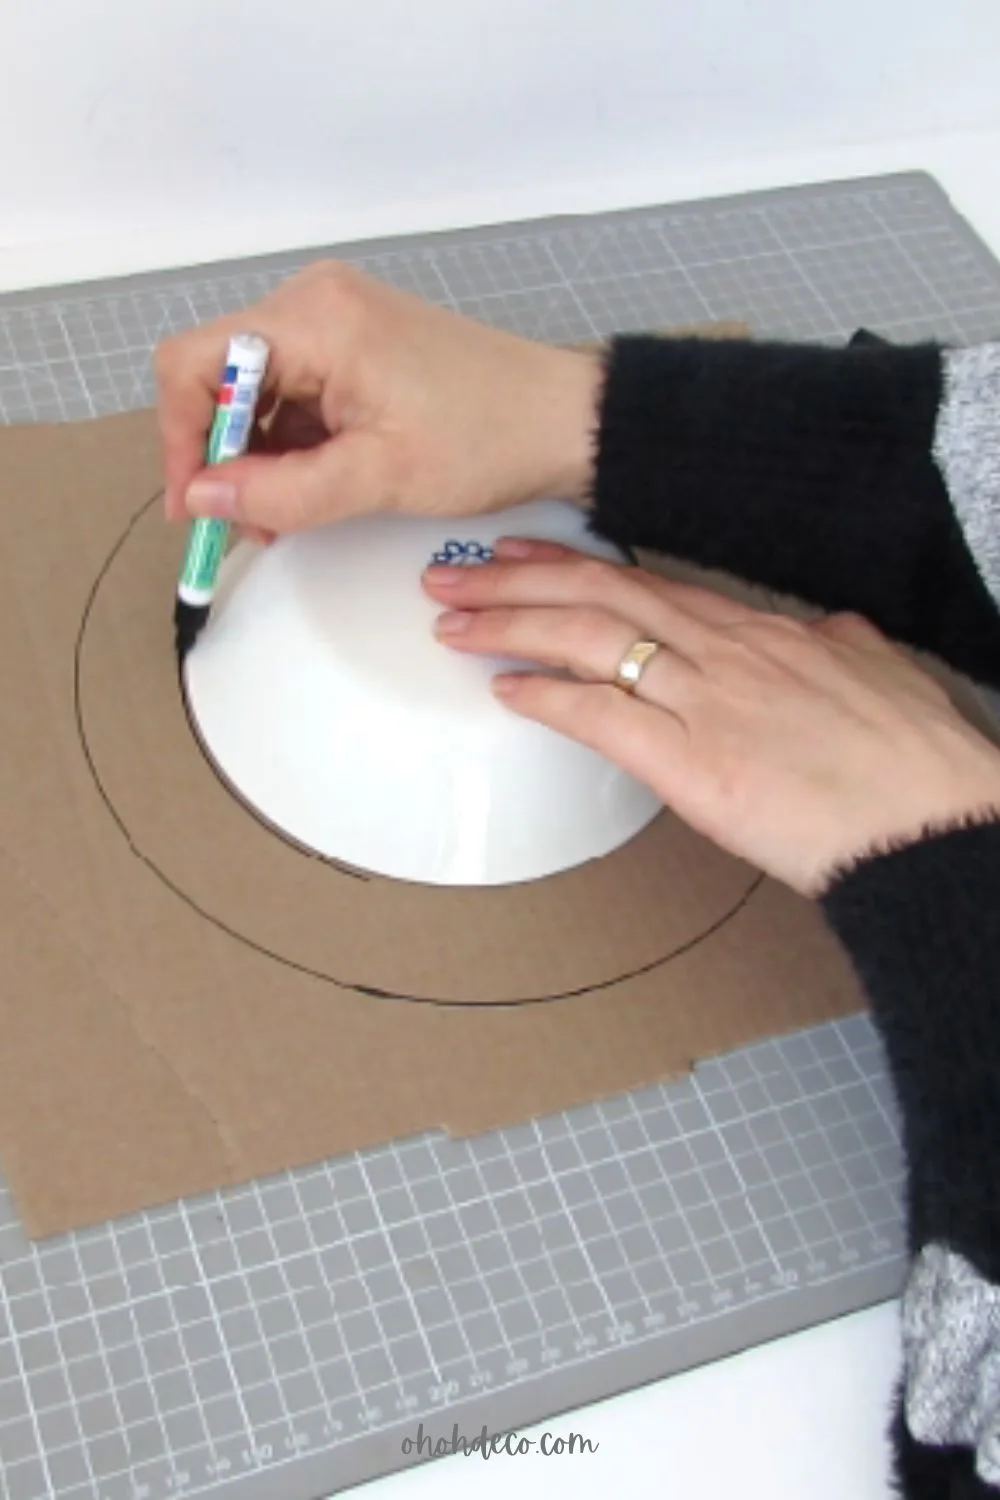
Use a small and a large plates to draw two concentric circles on the cardboard.
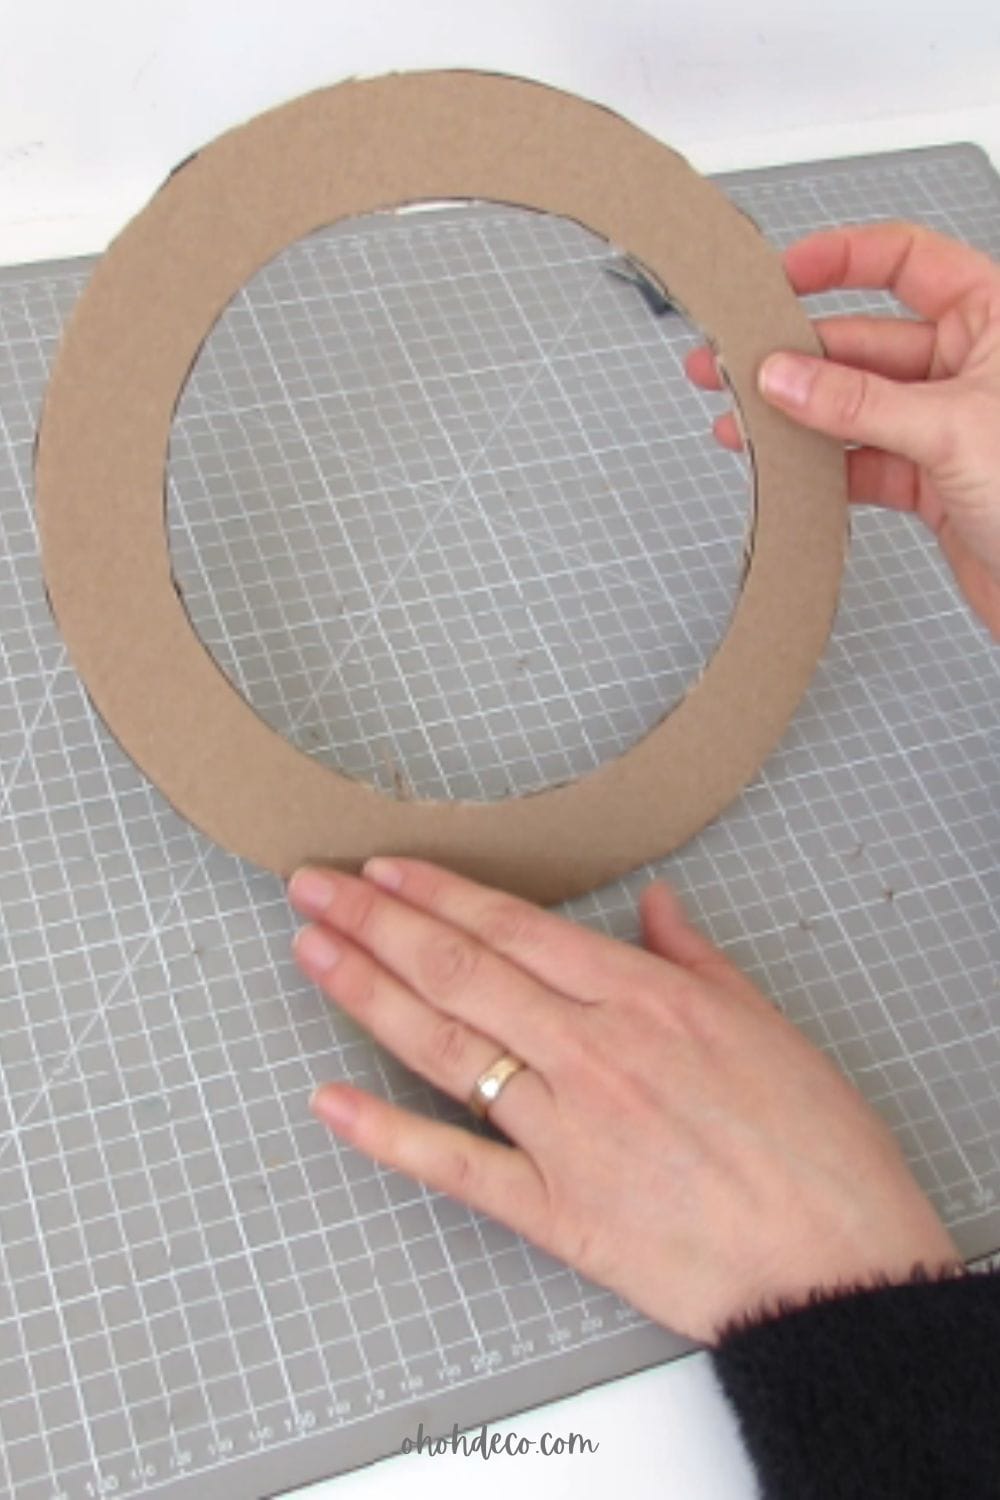
Use scissors and cutters to cut the cardboard and create the wreath base.

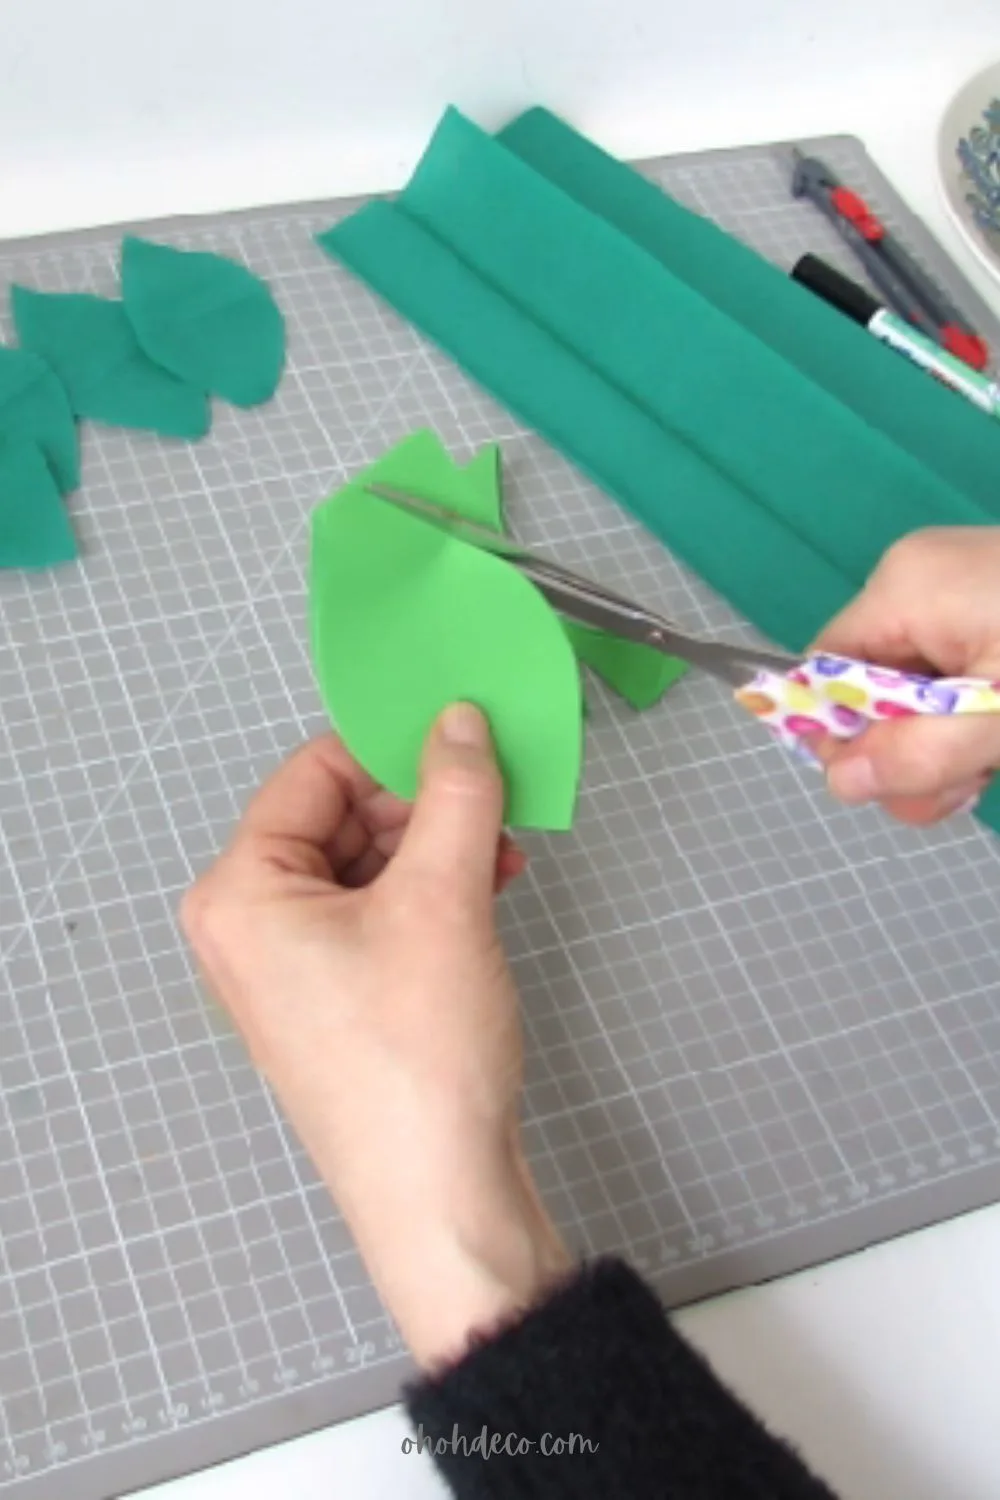
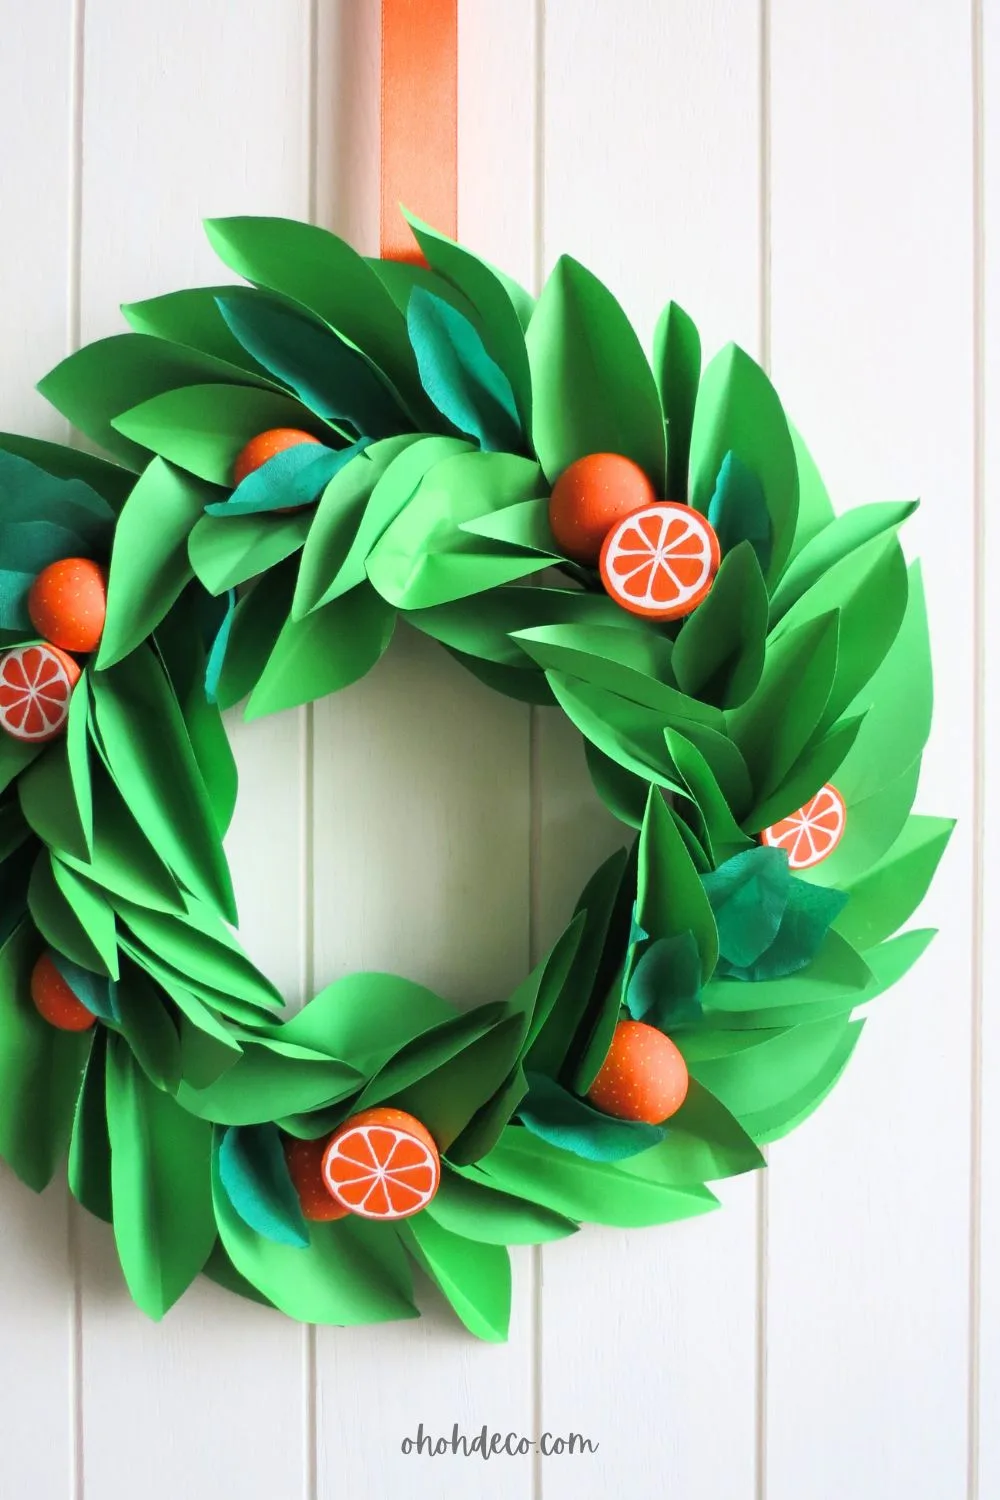
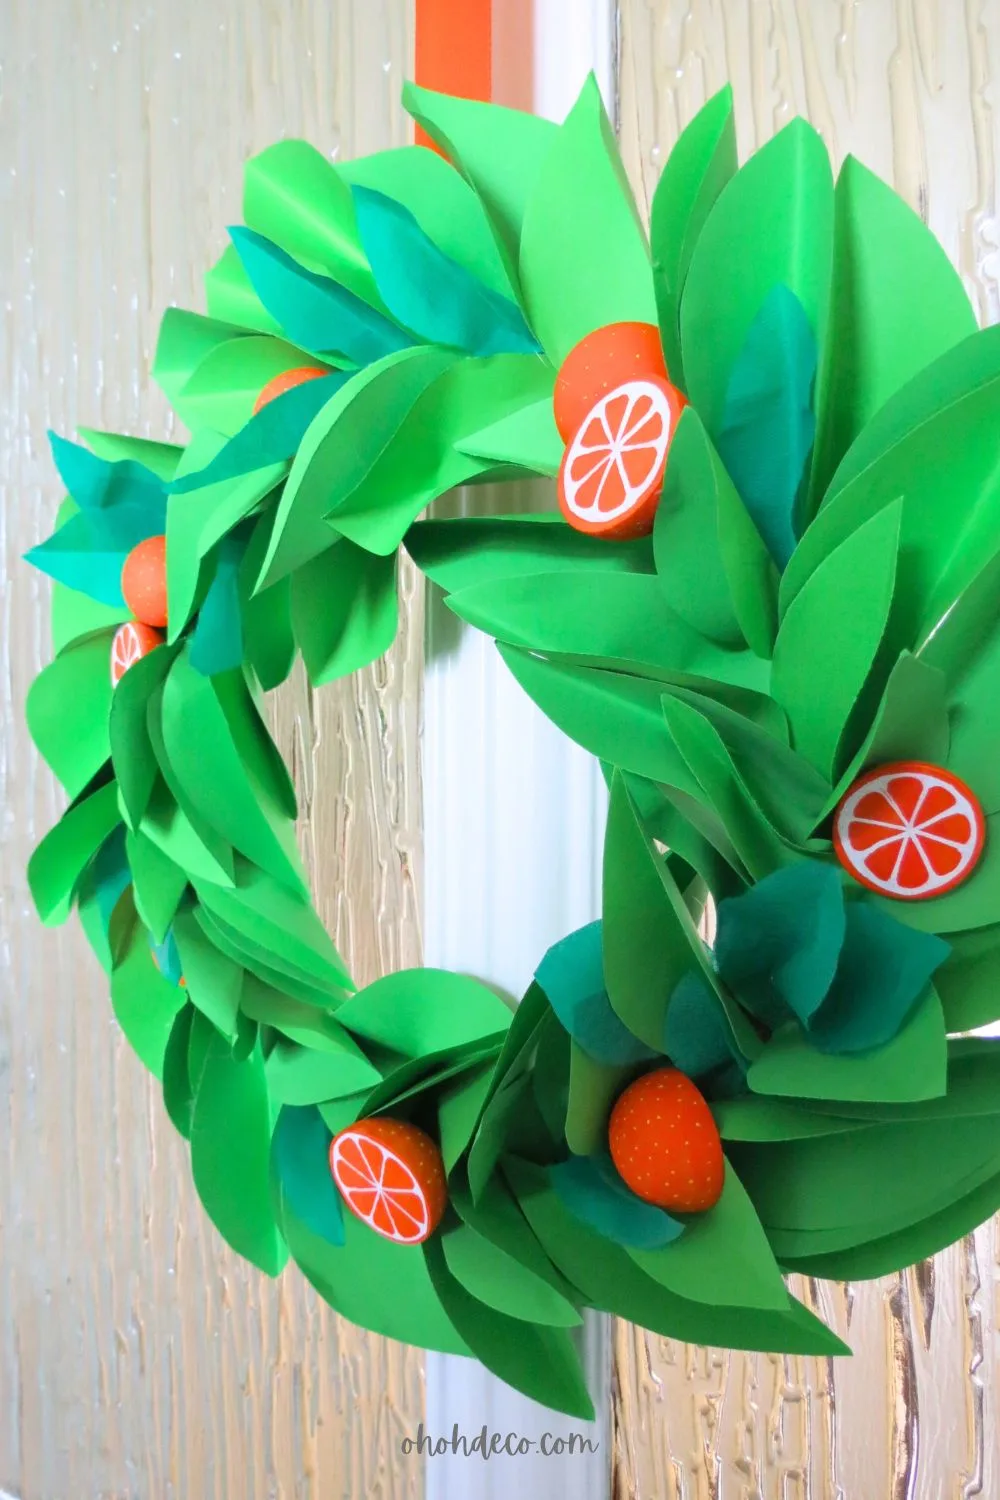
Take the crepon paper and the green sheets. Fold them and cut several leaf shapes in them. You will need a all batch of leaves to cover the wreath base.
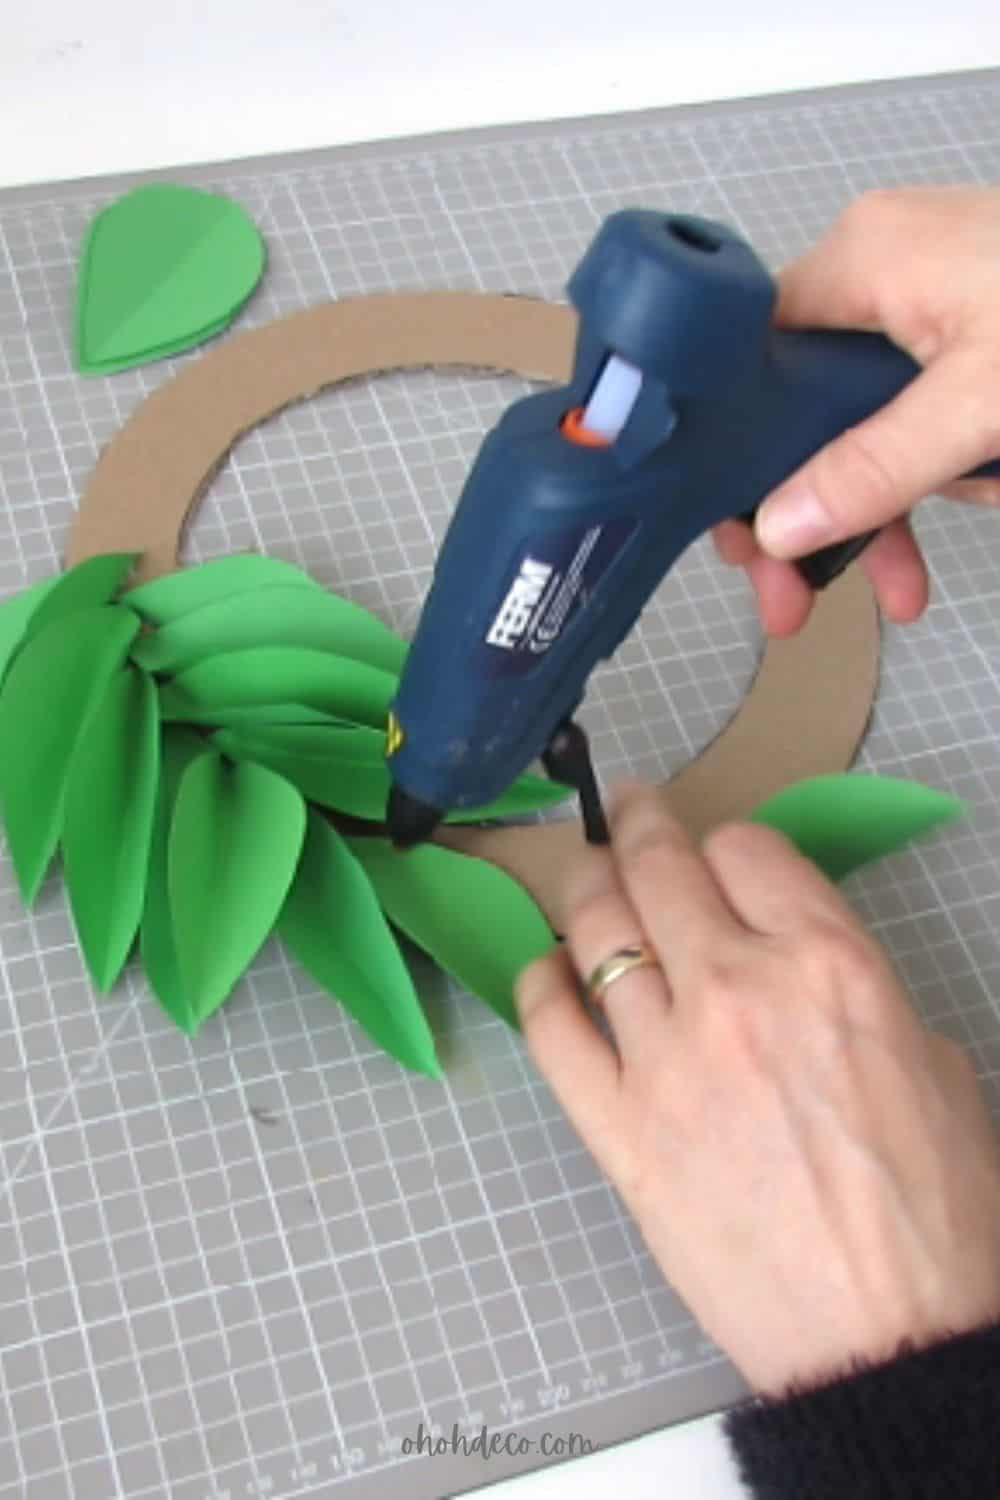
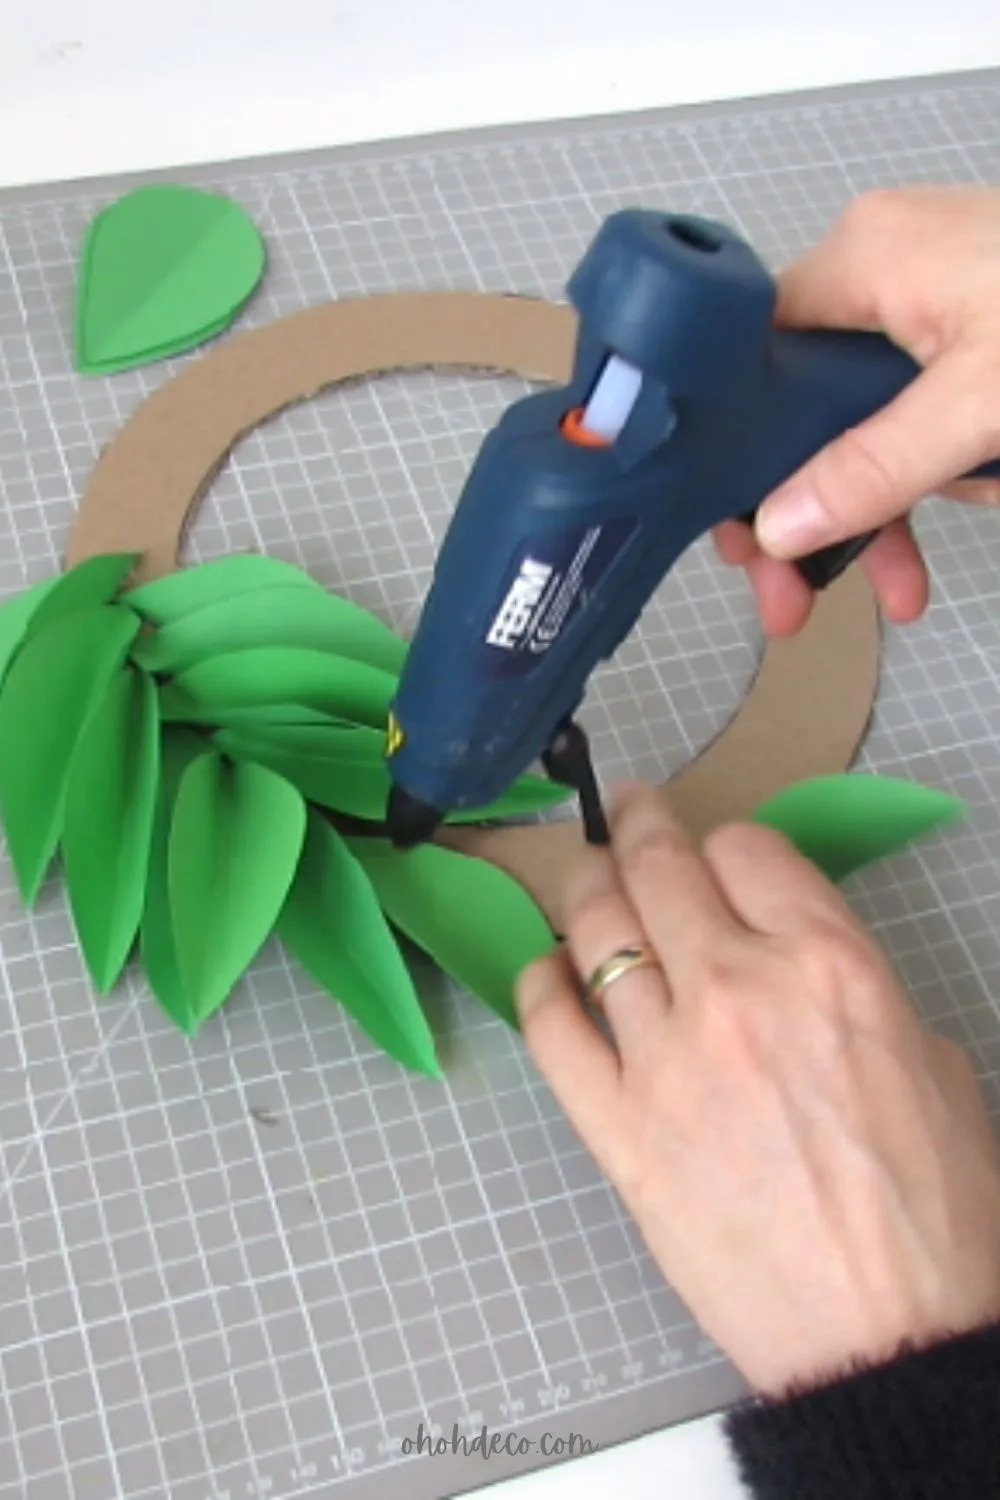
Glue the leaves on the cardboard base. You can use a glue gun or silicone glue.
Cover all the base with the leaves. This will serve as the foundation for your Summer wreath, which will be added in the next section.
Making the fruits
To make the oranges for your wreath you will need half wooden beads.

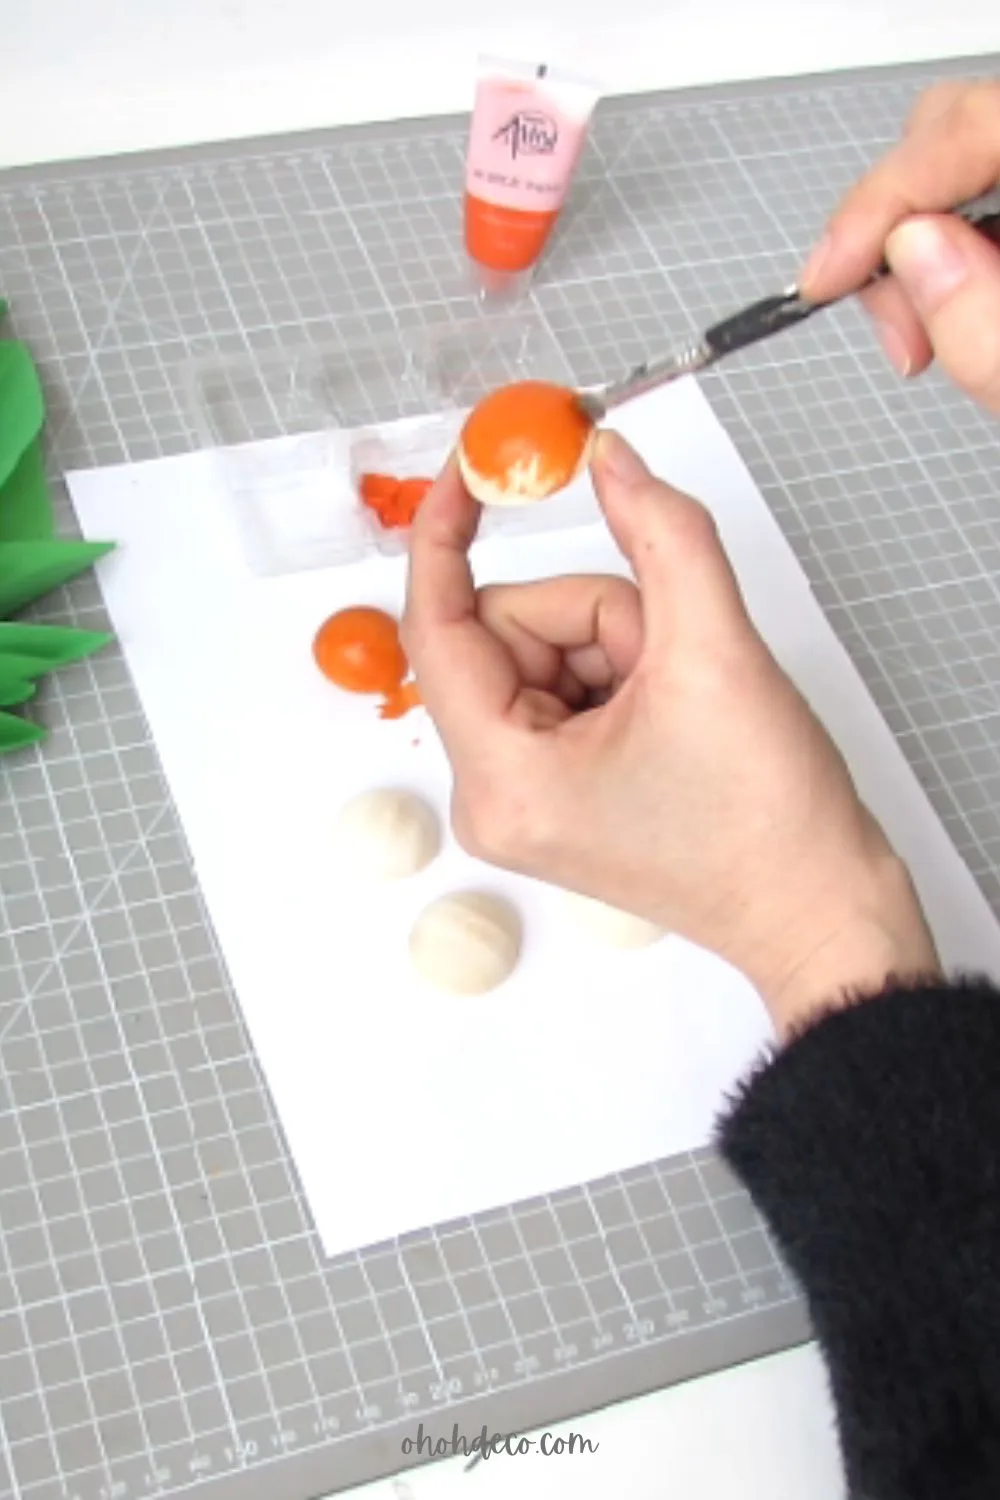
Use acrylic to paint the beads in a lovely orange color. Half wooden beads are availables in different sizes, I used 1 1/3 in. and 1/ 1/8 in. half beads. (3cm et 3,5cm).
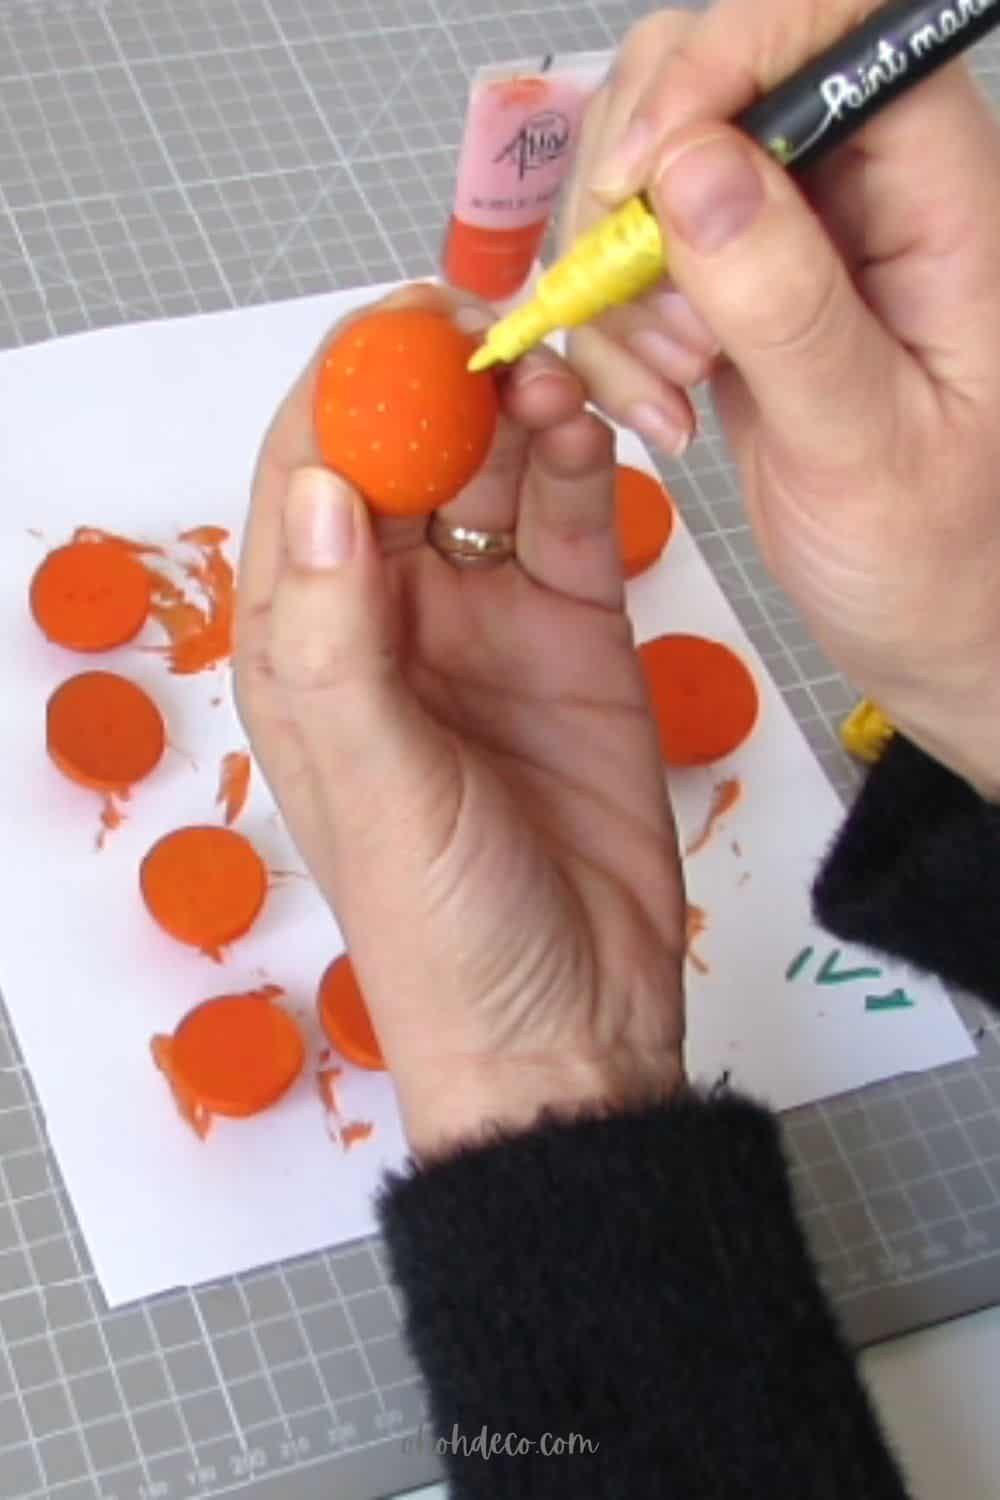
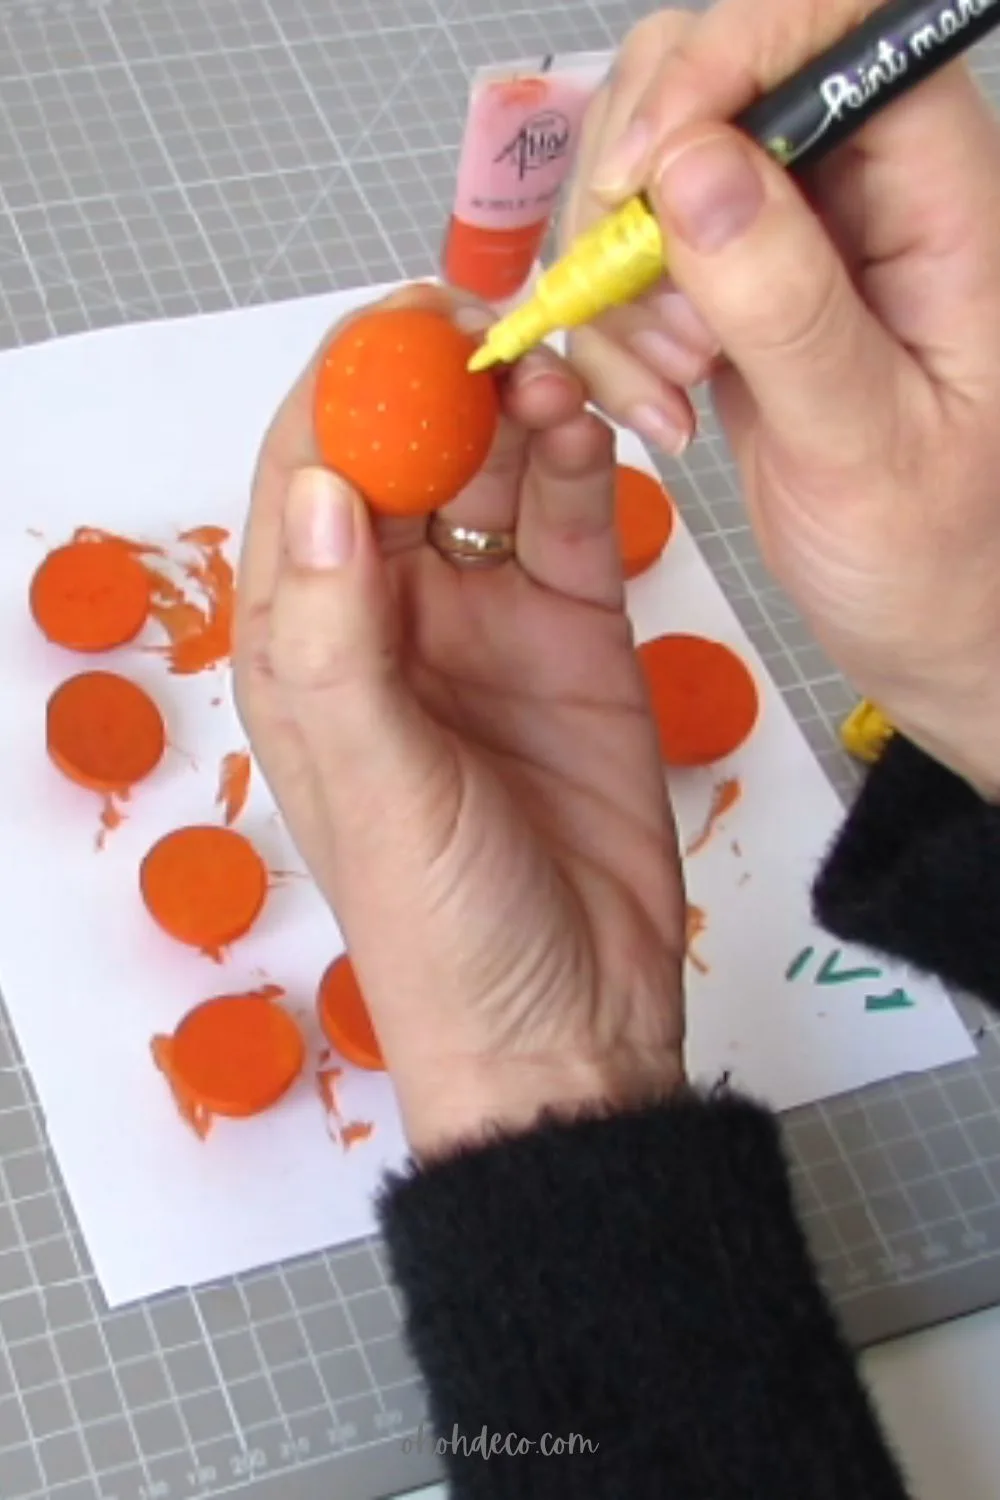
Once the paint is dry, use a paint marker to make small dots on the beads to simulate the orange skin.
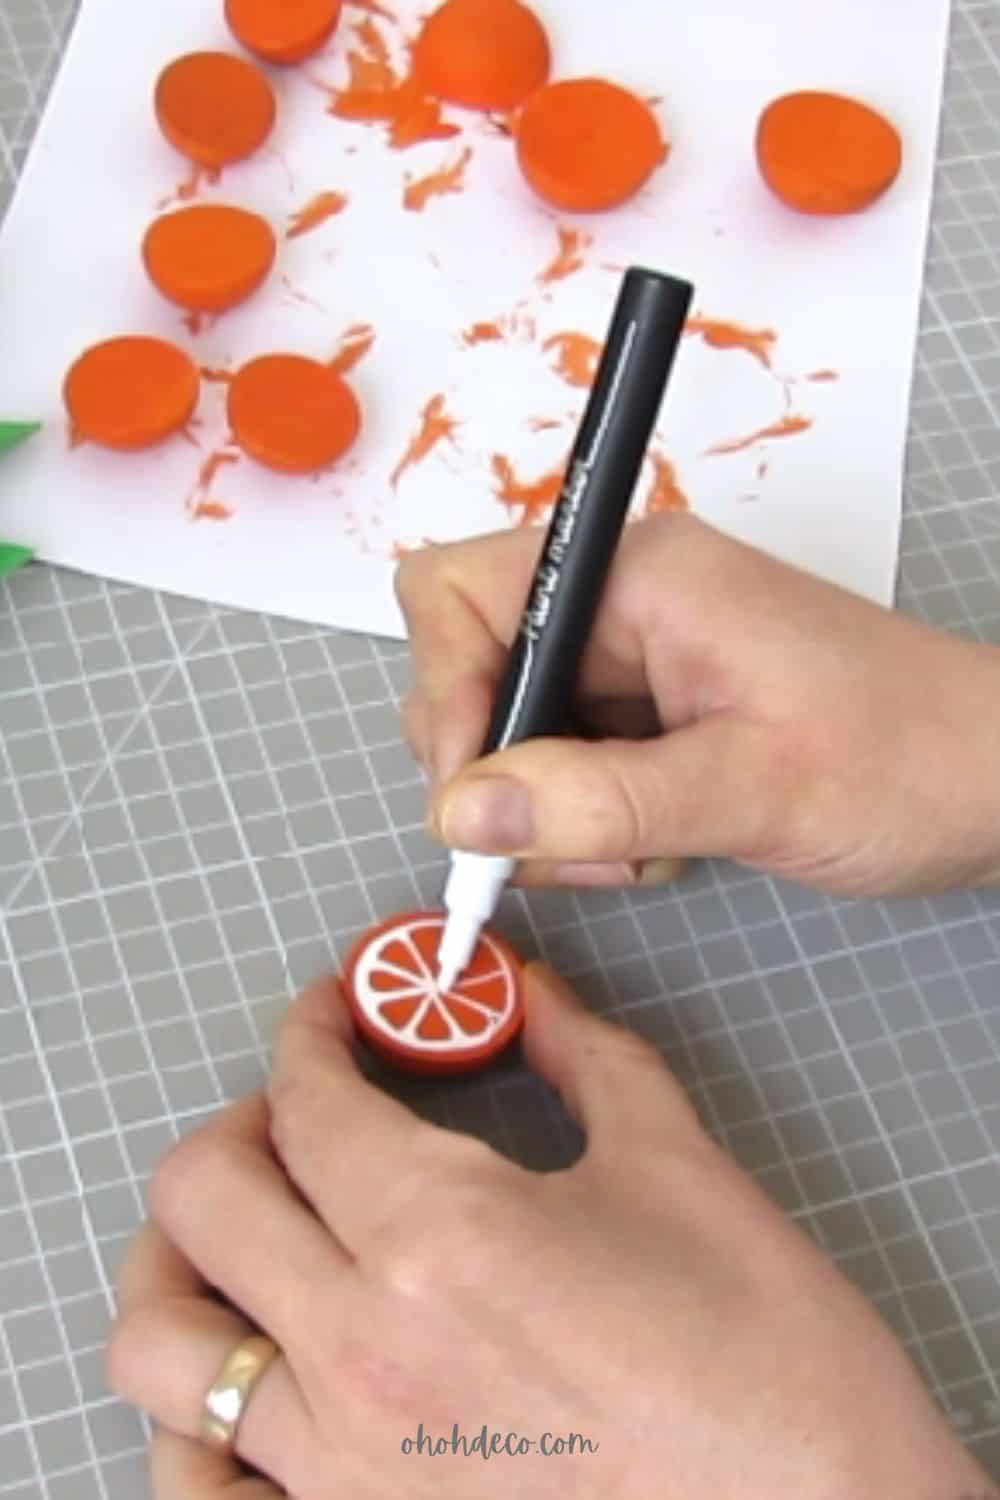
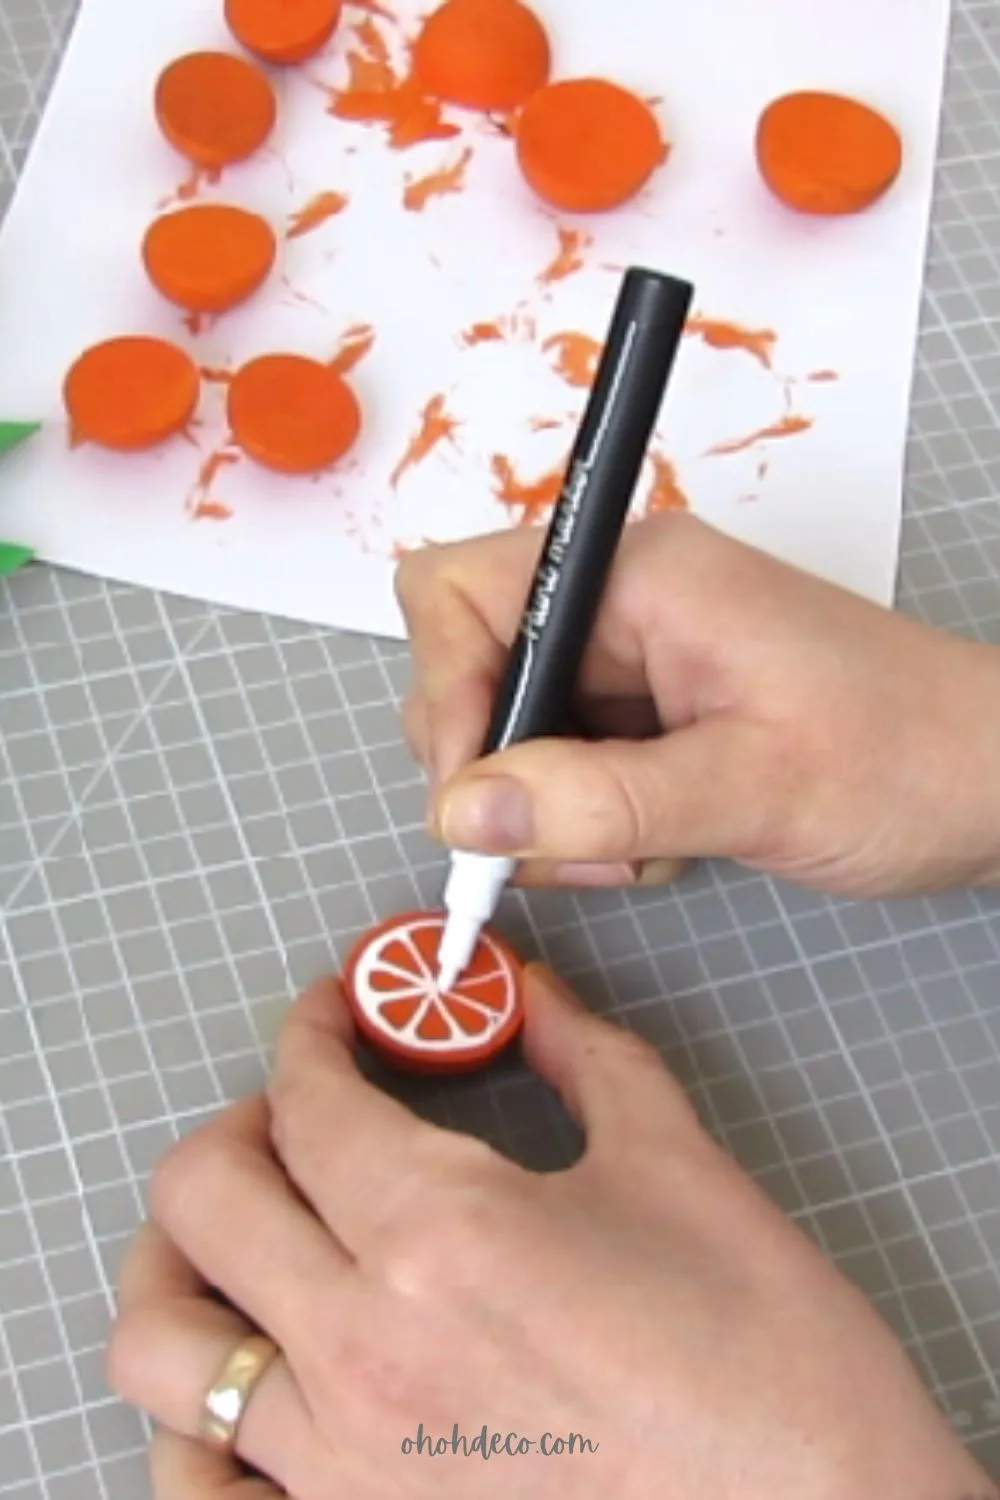
With a white paint marker, draw orange quarters on the flat side of the half-beads.
With your mini oranges ready, you are now set to assemble them onto your wreath base in the next section.
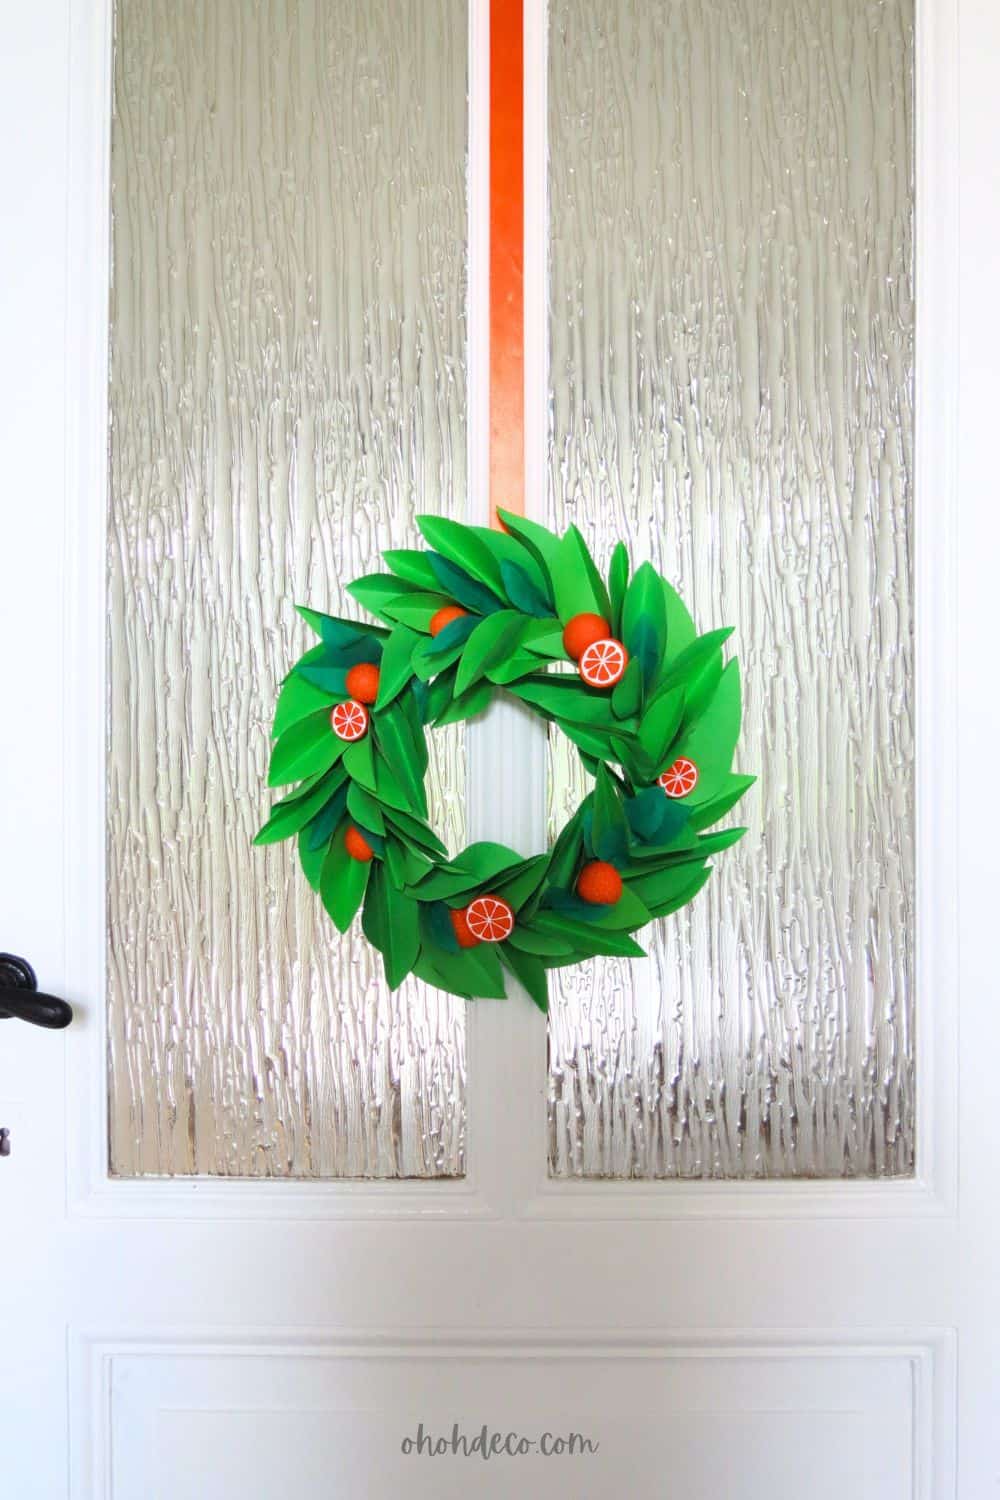
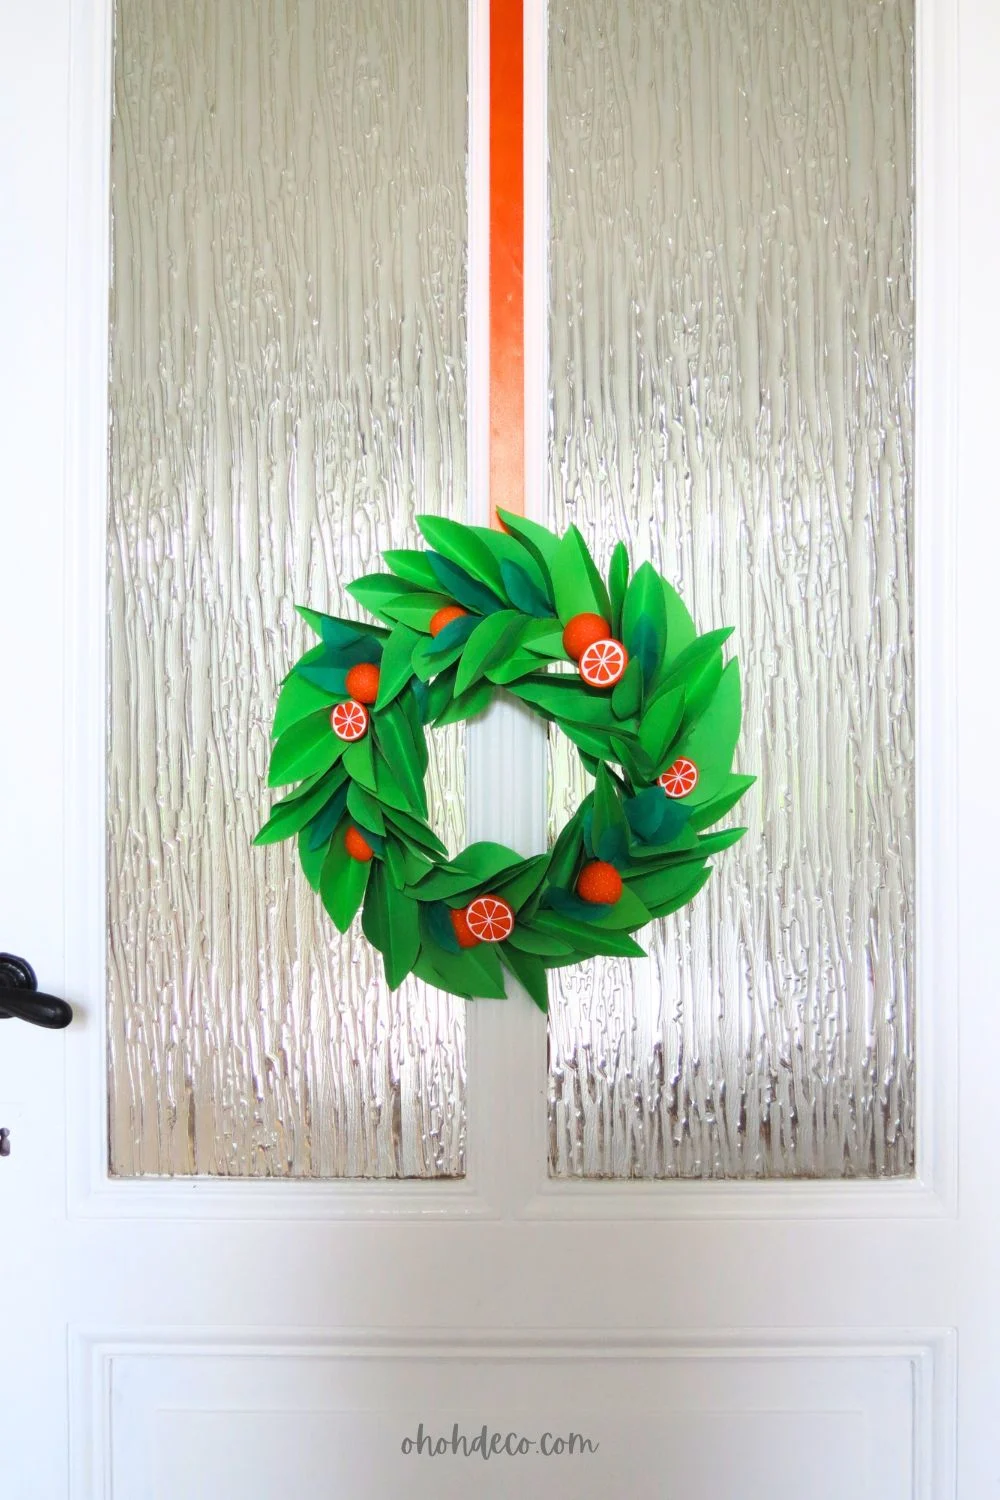
Assembling the Wreath
It’s time to finish your wreath. Start by arranging the mini oranges in a pleasing pattern around the wreath to create a dynamic look.
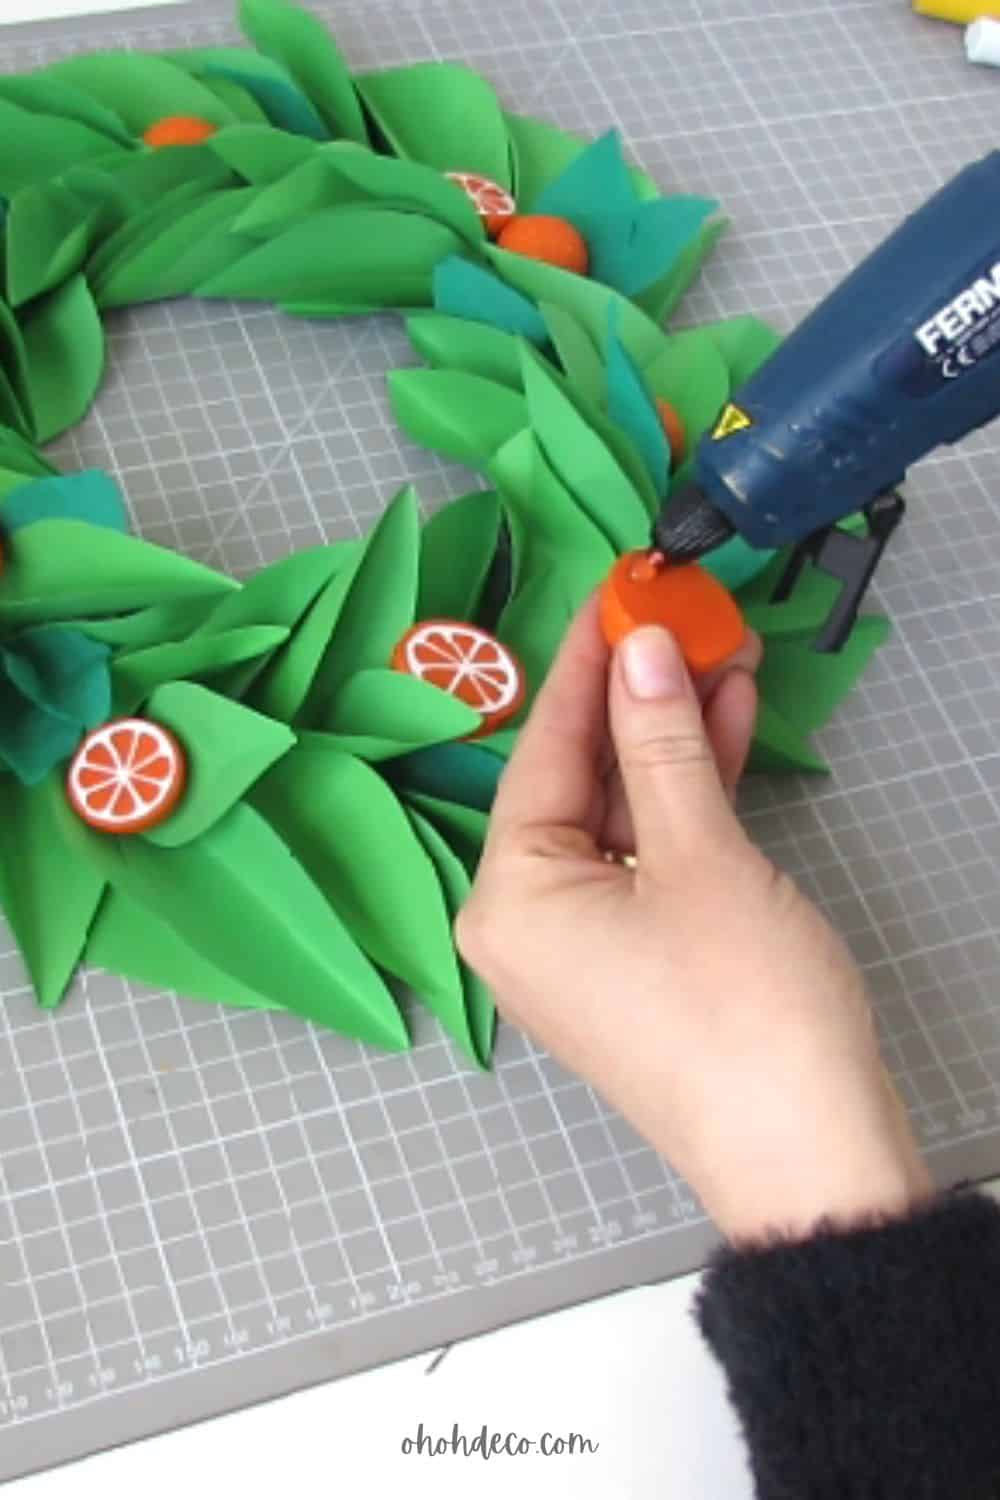
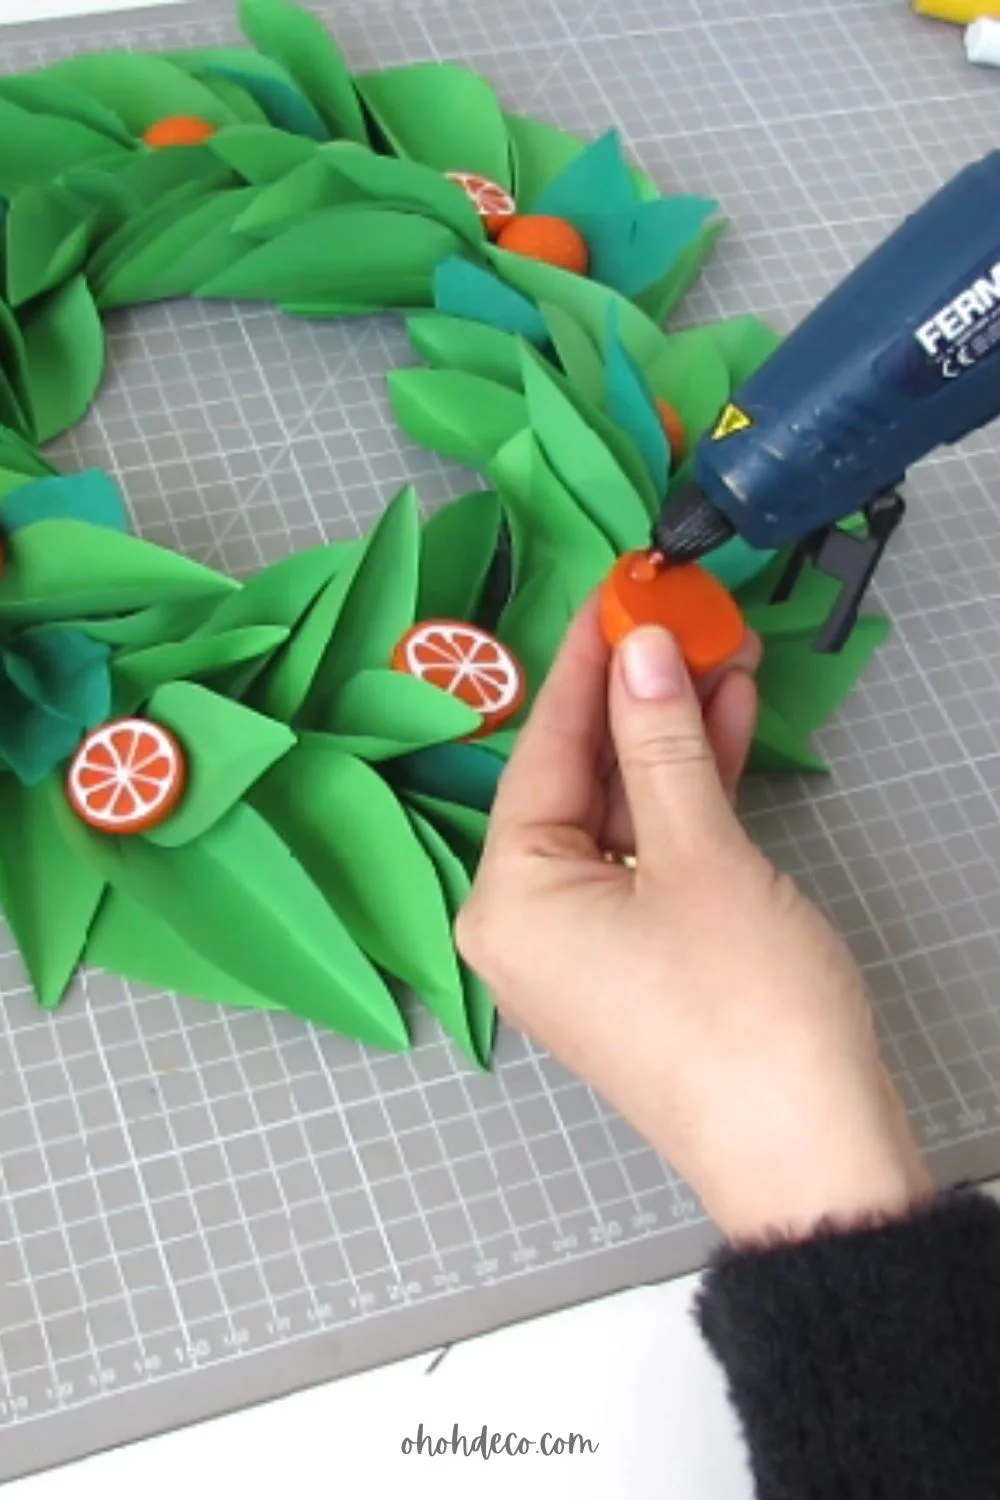
Use a hot glue gun to secure each orange to the base, making sure to space them out evenly.
Once all the oranges are in place, you can add more leaves or other embellishments to fill in any gaps and provide a finishing touch to your summer home decor.
Adding Final Touches
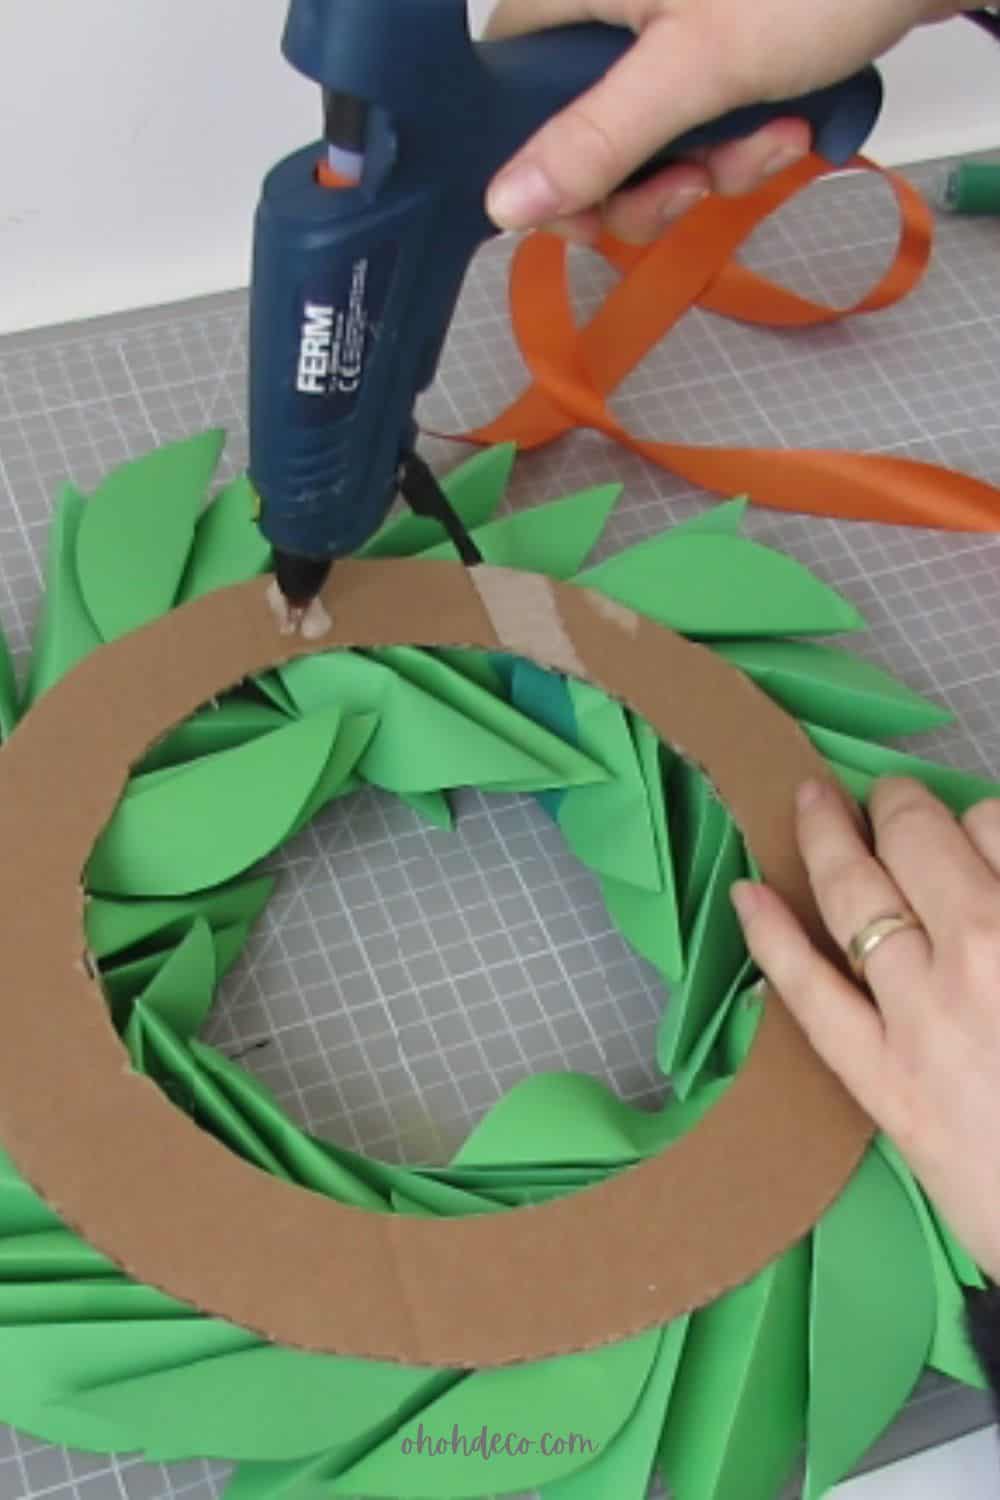
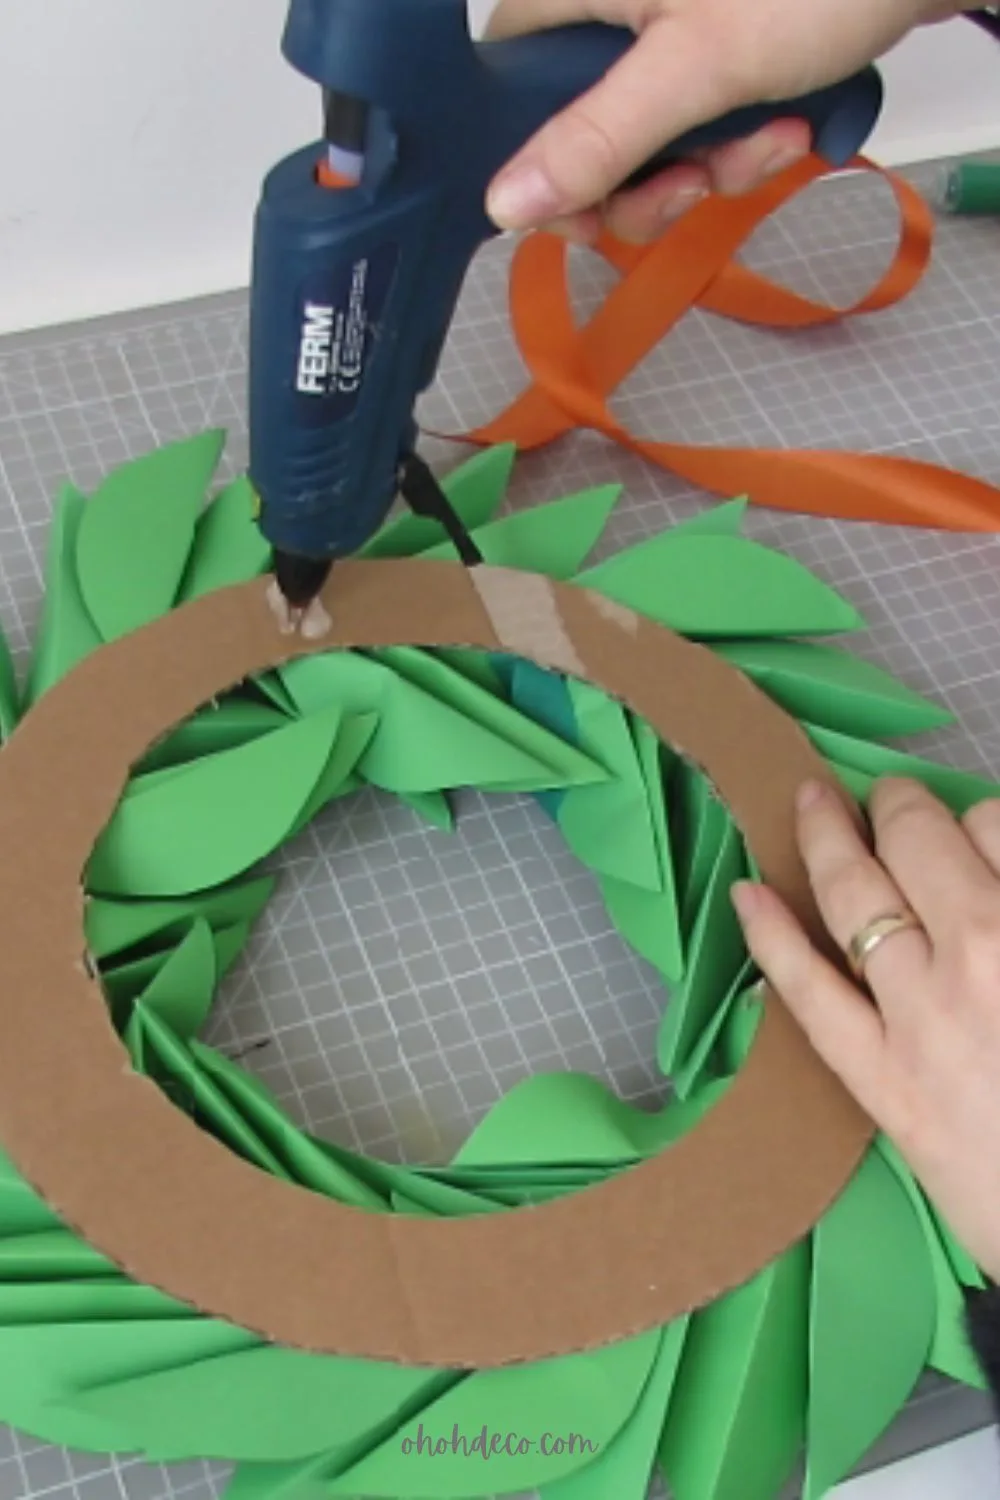
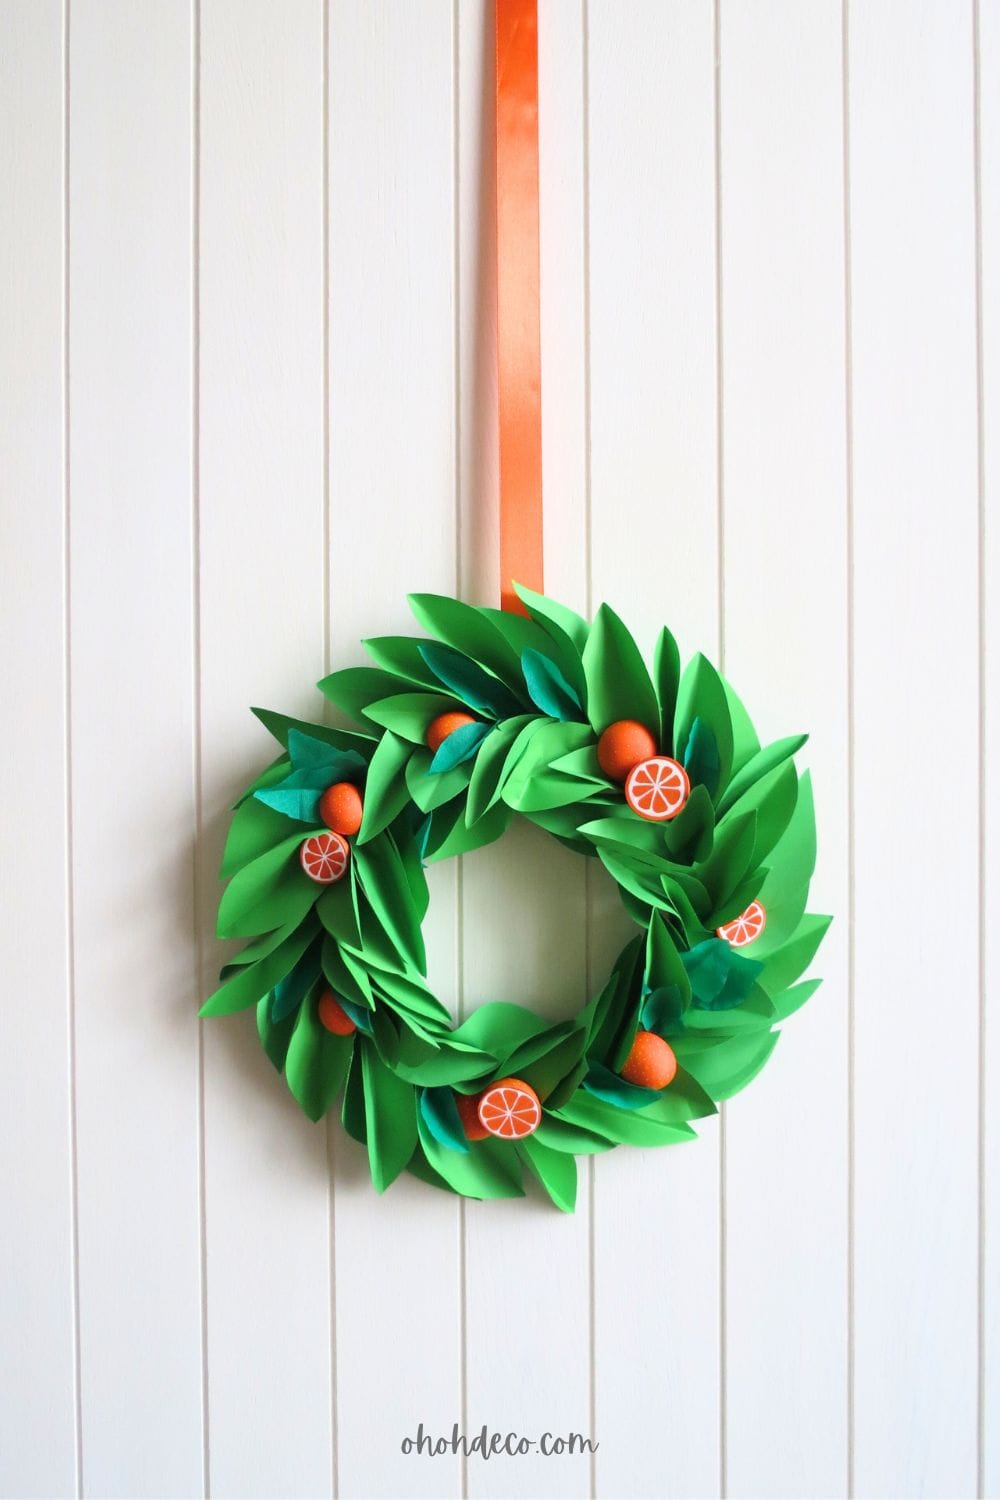
Add a colorful ribbon or twine to hang the wreath. Cut a piece of ribbon and glue it on the back of the wreath.

You could also experiment with adding small decorative elements like flowers or greenery to give your wreath a unique and personalized touch.
Don’t be afraid to get creative and let your imagination run wild as you put the finishing touches on your beautiful summer home decor.
Watch the Summer Paper Wreath tutorial on video.


In conclusion, creating a stunning paper wreath for your summer home decor is easier than you think with the simple steps outlined in this guide.
By gathering materials, creating the base, assembling the wreath, and adding final touches, you can add a touch of elegance to your living space.
Remember to embrace your creativity and experiment with colors and patterns to truly make it your own. So go ahead, start crafting and let your imagination run wild.
RELATED: Make a paper leaves garland in 30 minutes
RELATED: 41 Easy Sewing project ideas for Summer time
Want to remember it? Save this Summer Paper Wreath on your favorite Pinterest board.
Peg
Wednesday 18th of June 2025
Love the paper wreath❣️ so fresh and summery 🧡💚
amaryllis
Thursday 19th of June 2025
Thank you Peg. Have fun crafting and decorating for Summer.