

Learn how to make a practical and stylish DIY to hold your phone.
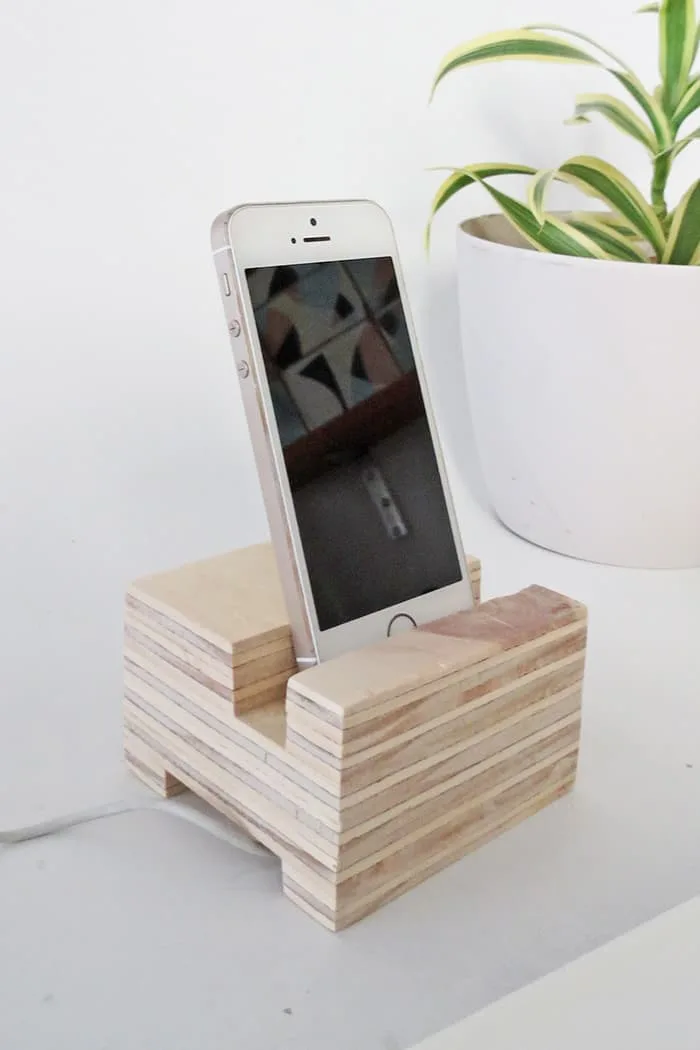
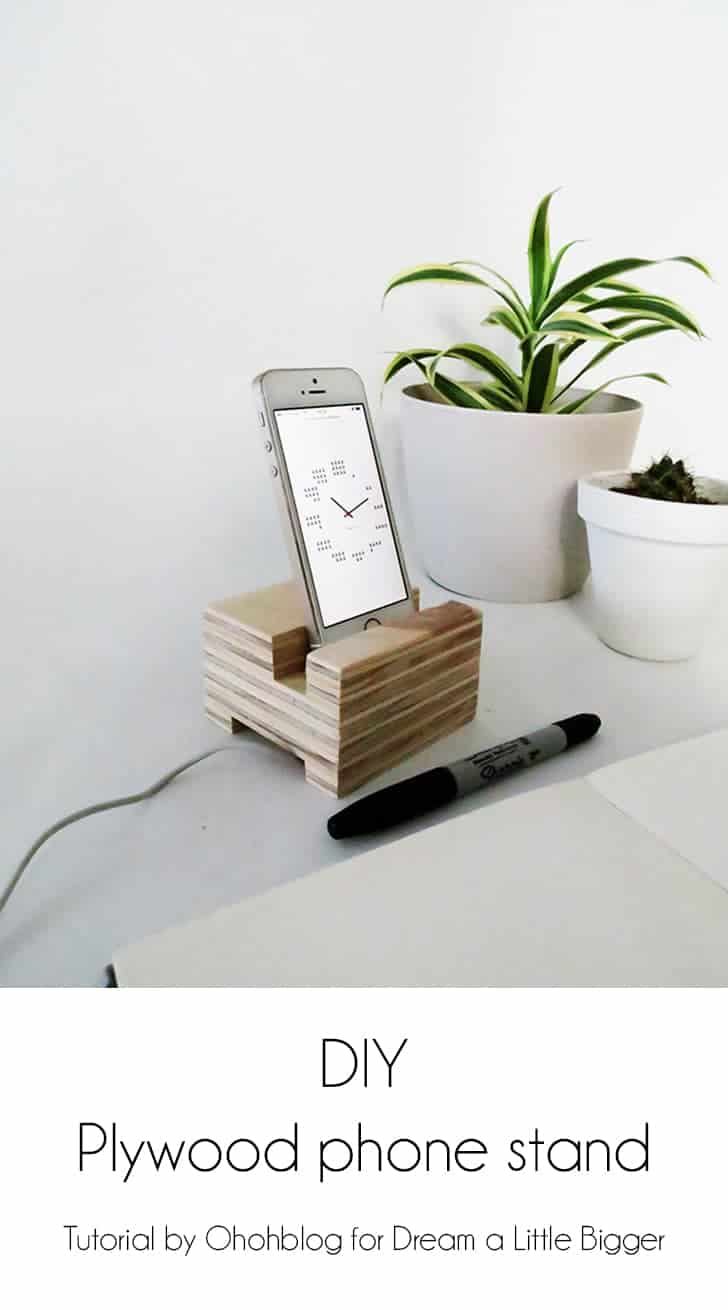
This is one of the most useful DIY I have ever made. I use it every day. It’s so practical for keeping hands free while still using the phone.
I use the wood phone stand all the time, making video calls when crafting or reading recipes while cooking.
It’s a quite simple project to make and it’s perfect if you want to use the reclaimed wood lying around!
Plus, this stand is sturdy enough to hold a tablet too.
[ This post probably contains affiliate links, our full disclosure policy is boring, but you can read it HERE ]
RELATED: Easy to make phone stand
RELATED: How to make paper photo frame
How to make a phone stand
Supplies you will need for the phone holder:
- Scrap plywood
- Wood glue
- Trigger clamps
- Saw with a miter box
- Drill
- 5/8 spade drill bit
I used 9 mm plywood, but any scrap wood plank you have around will work.
It’s easy to work with plywood as it is usually perfectly flat. If you have other plywood thickness leftover around, you can use them as well.
Try to be as close as the measurement I gave below as the weight of the phone stand plays an important role in its stability. Especially if you want to use it with both a phone and a tablet.
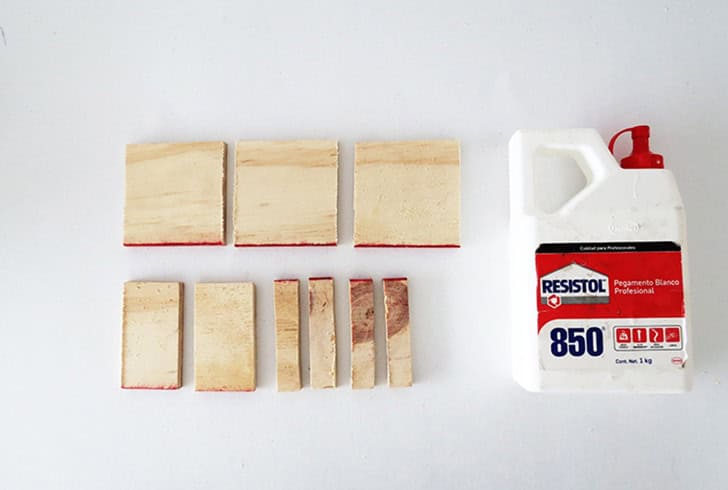
Cut the plywood pieces at the following dimensions:
[A] 3 pieces of 3 1/2 by 3 1/2 inches (8,5 x 8,5 cm)
[B] 2 pieces of 3 1/2 by 1 7/8 inches (8,5 x 4,7cm)
[C] 4 pieces of 3 1/2 by 3/4 inches (8,5 x 1.7 cm)
Depending on the size of the plywood piece you are working with, you may have to cut the pieces with a hand or power miter saw, or a jigsaw.
Tip: You can probably find some free plywood scrap at your local hardware store.
RELATED: DIY wall organizer
RELATED: DIY desk lamp

Step 1
Glue the 3 square pieces [A] on top of each other. Press them together with clamps while the glue dries.
Glue on top of each other the two medium rectangles [B], and press with clamps.
Take two of the small rectangles [C] and glue them on top of each other, and hold them with clamps too.
When the glue is dry remove the clamp.
Step 2
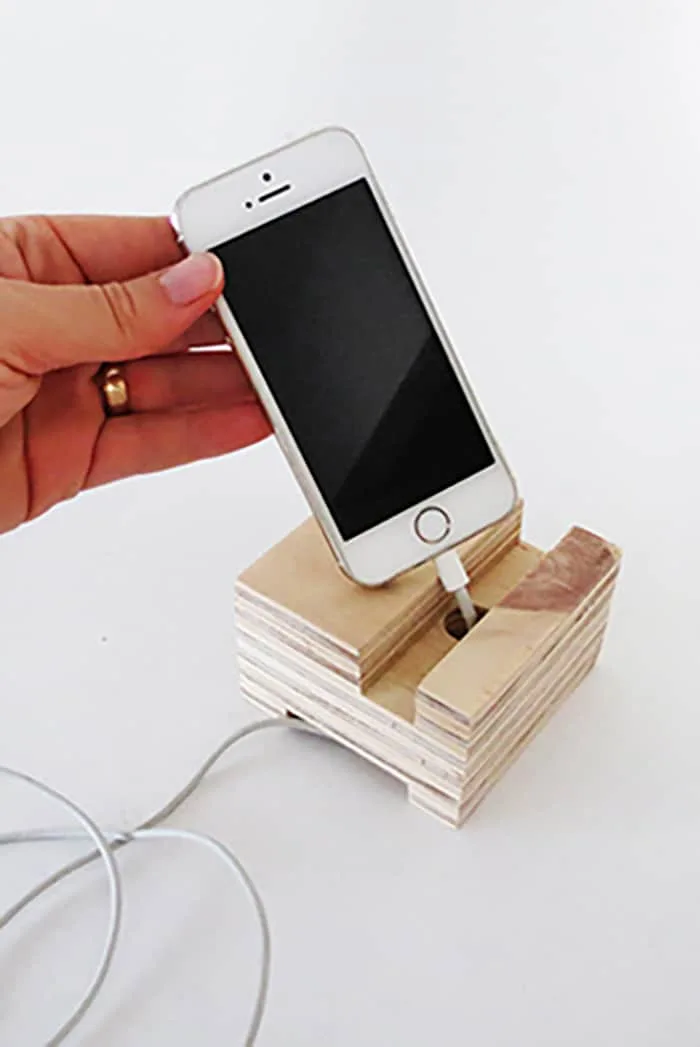
Take the square pieces [A] and glue the medium rectangle block [B] and the small block [C] on top.
Align the edges together so you have a gap between the top shapes to slide the phone in.
Again, hold with clamps while the glue dries.
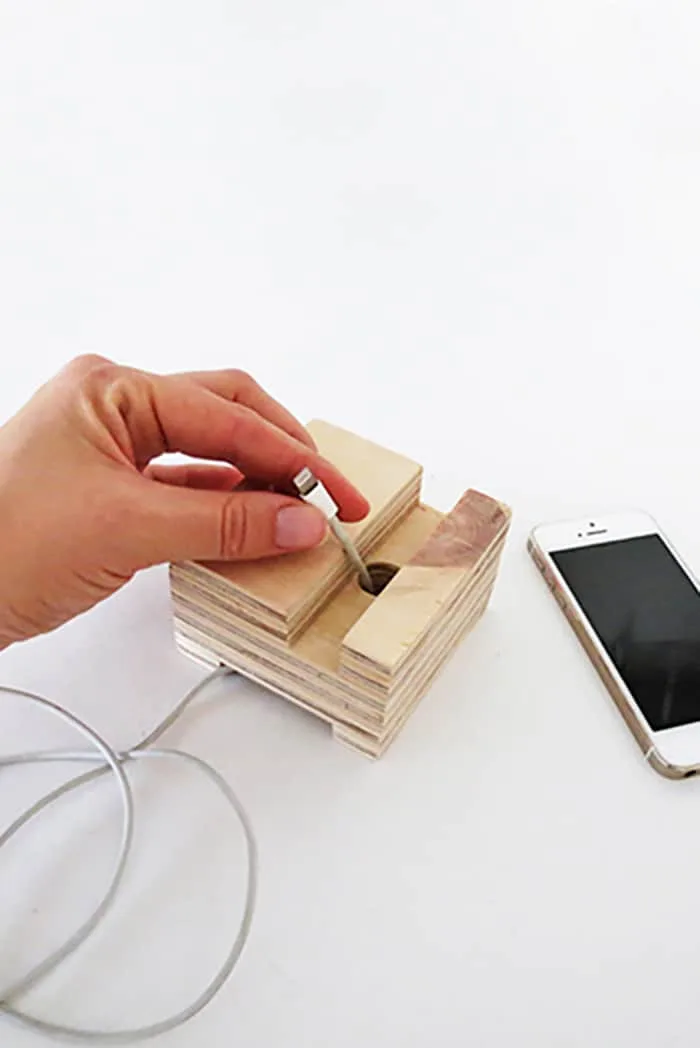
Step 3
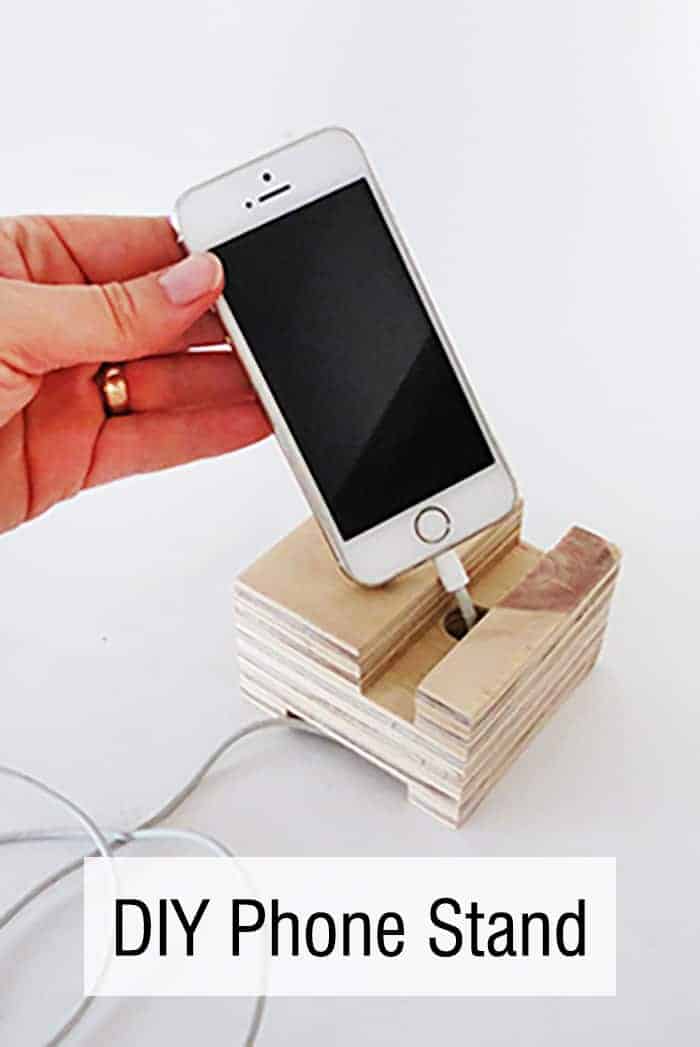
Take the 5/8 spade drill and make a hole in the center of the slot.
This will allow you to pass the cable and charge the phone when it’s on the stand.
Step 4
Take the last small rectangles [C] and glue them on the bottom, aligning with the same edges as the top pieces.
Again press with clamps while the glue dries.
Step 5
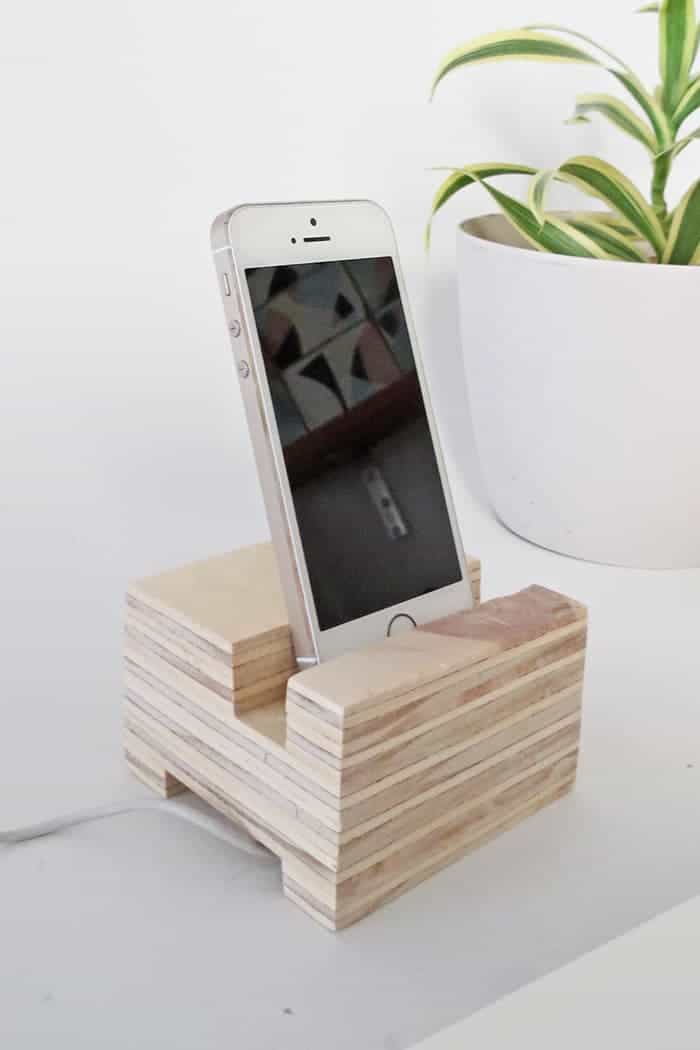
Sand the phone holder, stain varnish or paint as you like.

I will keep my homemade phone stand in natural color, I like how the plywood lines show.
This cell phone stand is practical and very sturdy. Perfect for the kids to use.
I hope you will enjoy building your DIY phone holder. I love to see what you make following my tutorials, don´t hesitate to share your creations in the comments.
RELATED: DIY desk caddy organizer
RELATED: DIY office storage ideas


Want to remember it? Save this DIY Phone stand in your favorite Pinterest board.

I wrote this tutorial for Dream a Little Bigger, you can read it HERE
You will find all the tutorials featured in the video on my “Best DIY” page.
Amaryllis