We’re all more or less addicted to our cell phones, and having a phone stand around makes life easier.
A few years ago I made a phone stand out of wood. Very simple and very effective, I still use it every day.
[ This post probably contains affiliates links, our full disclosure policy is really boring, but you can read it HERE ]
Frankly, I think having a phone stand in every room of the house could be useful.
I use it in the kitchen when I cook and need to follow a recipe. In the office when I need my phone to stand when working.
Sometimes I even use my DIY phone holder when I eat while chatting with my parents (who live 9000 km away).
Not to mention that I put the phone stand on a side table to watch a series on Netflix in the evening.
You get it, I needed more than one cell phone holder.
Nothing better than an easy DIY to solve this problem.
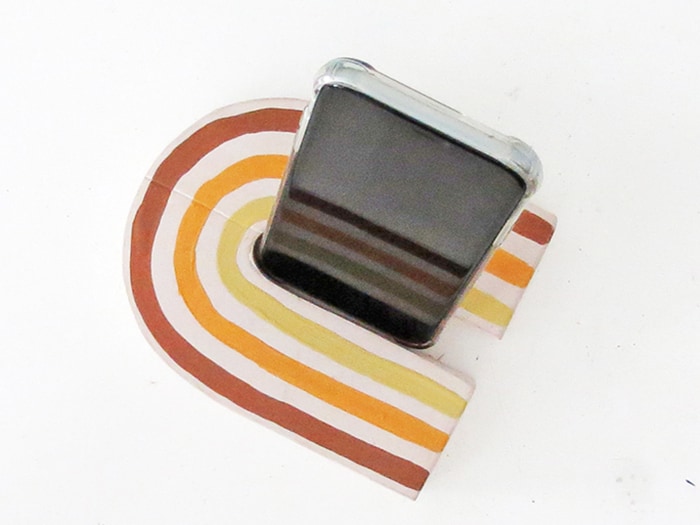
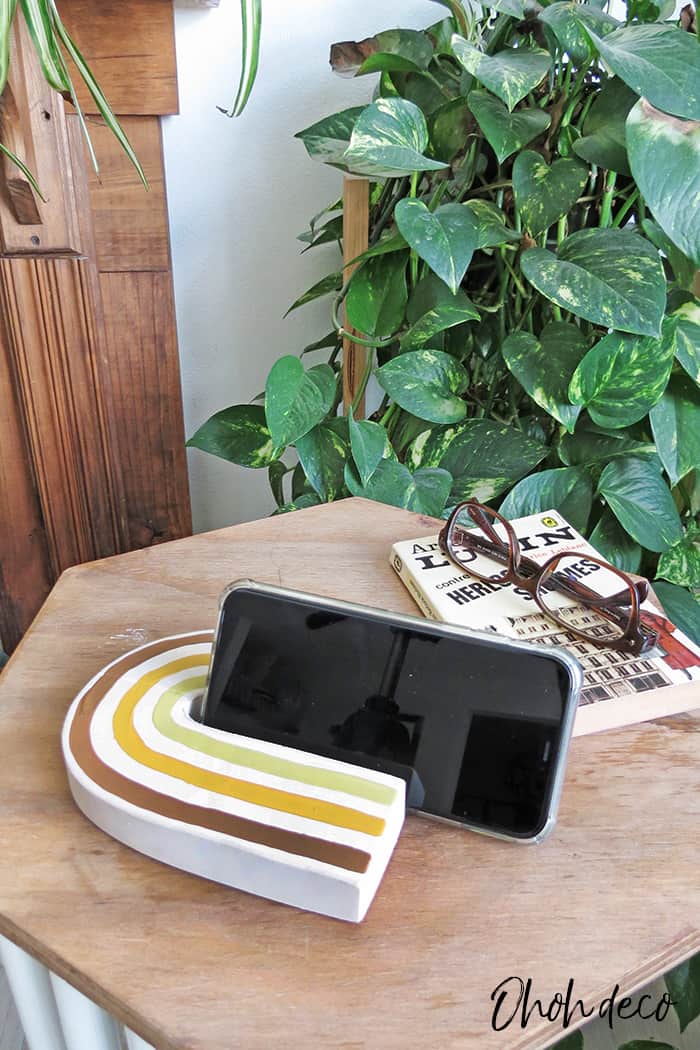
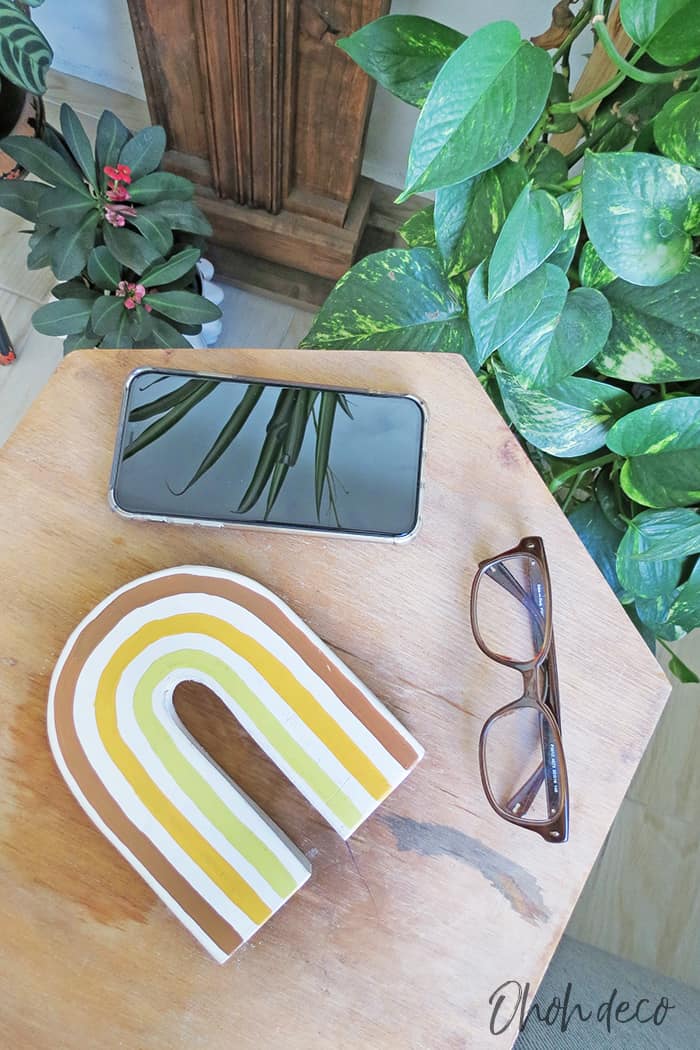
I specially like this homemade cell phone holder as it looks very nice even when not used.
Adding a little rainbow in the decoration is always a cute idea.
Scroll down for the supplies list, the step by step and the video tutorial.
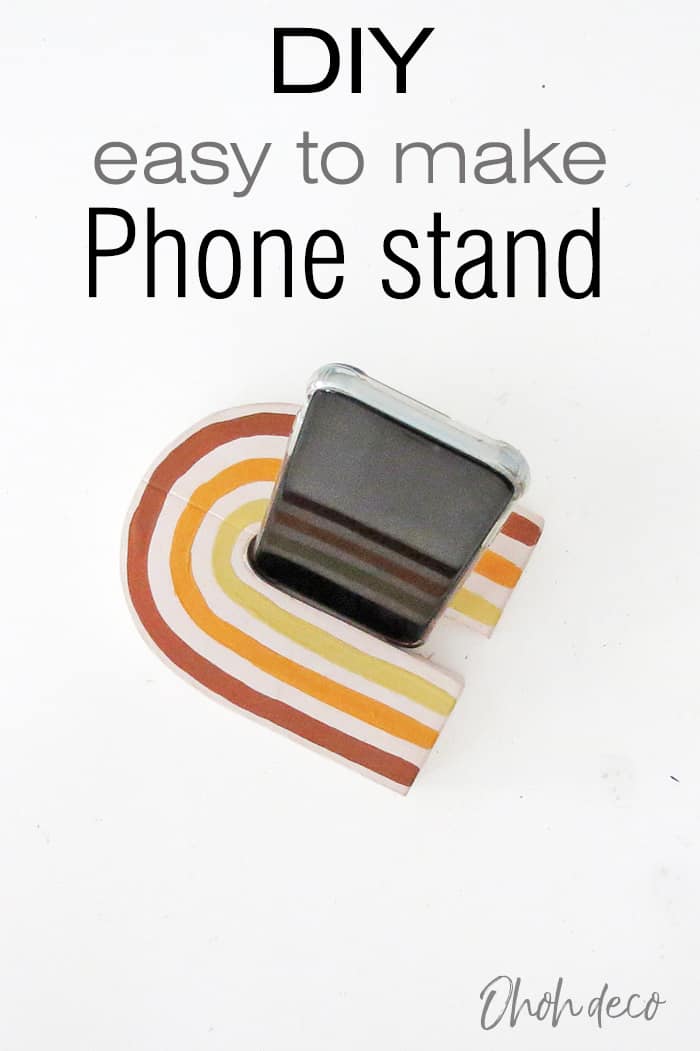
DIY cell phone stand
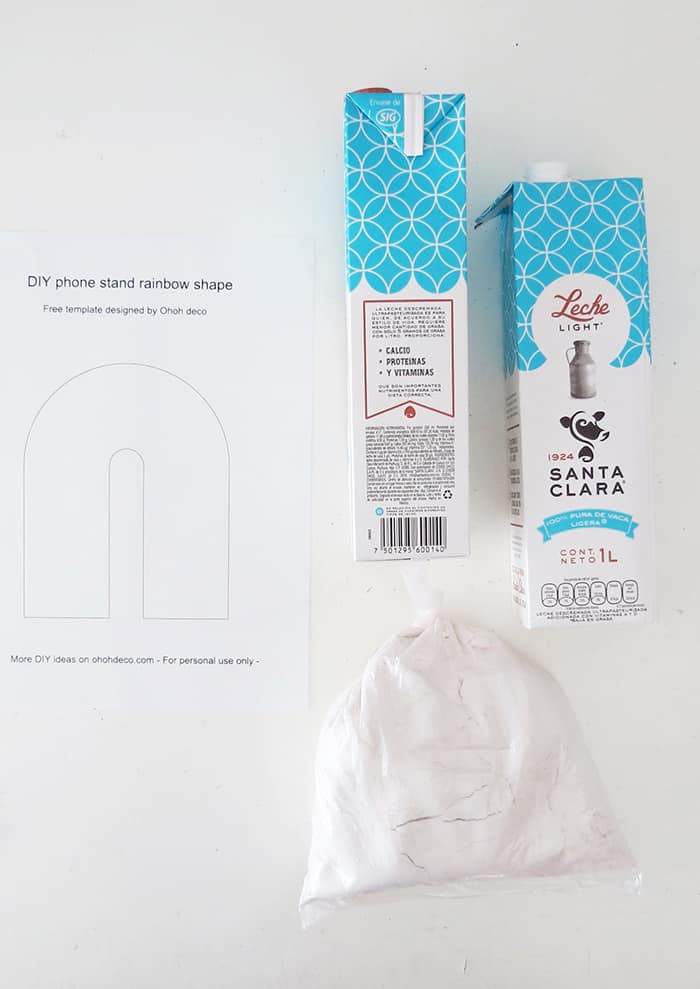
Supplies you will need to make a rainbow phone stand
- Plaster
- A bucket
- A spoon
- The free rainbow template
- Milk or juice cardboard containers
- Scissors
- Cutter
- A sharpie
- Masking tape
- Sand paper (grit 100 or less)
- Acrylic paints
- A brush
The FREE arch template is available in my resource library along with a load of other great prints and patterns.
All you need to do is fill out the form and check your inbox for a welcome email with the password in. Click here to get in >>>> FREE LIBRARY ACCESS
I suggest you work with a juice or milk cardboard container This material has a plastic layer inside that avoid plaster or concrete to stick to it when drying.
You can also create your phone stand mold with regular cardboard if you apply a coat of this product inside the mold before pouring the plaster.
RELATED:
RELATED: DIY Desk Organizer Caddy
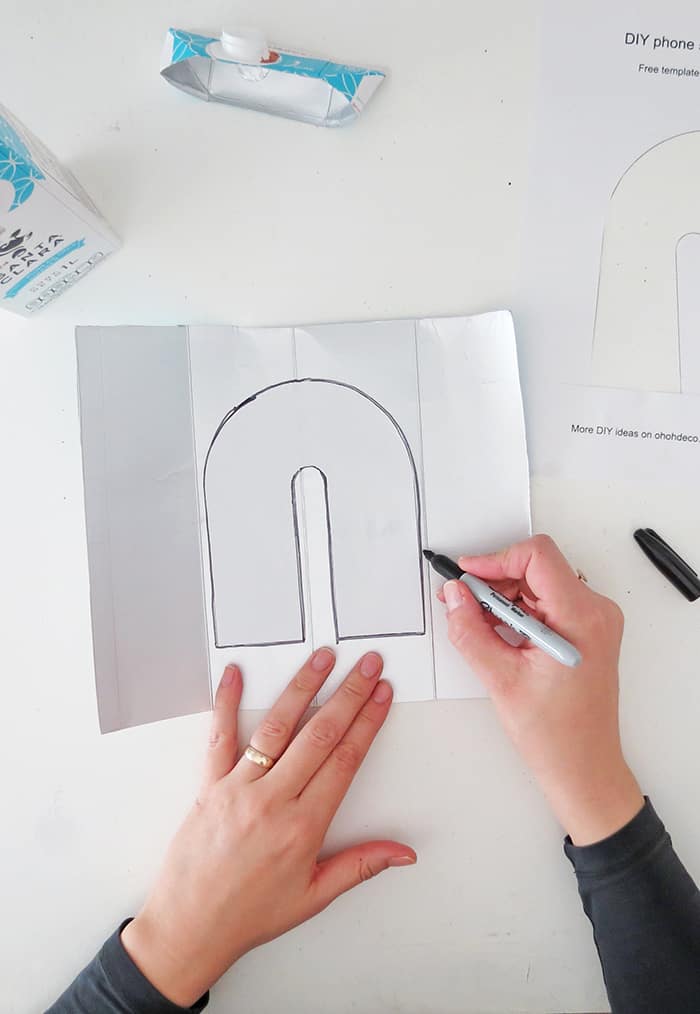
First clean and dry the milk or juice container, then open it to have a flat sheet.
Print the rainbow shape, which is available as a free download in my resource library. Cut out the shape and report it on the cardboard.
As the cardboard has a layer of plastic I used a sharpie to draw the rainbow.
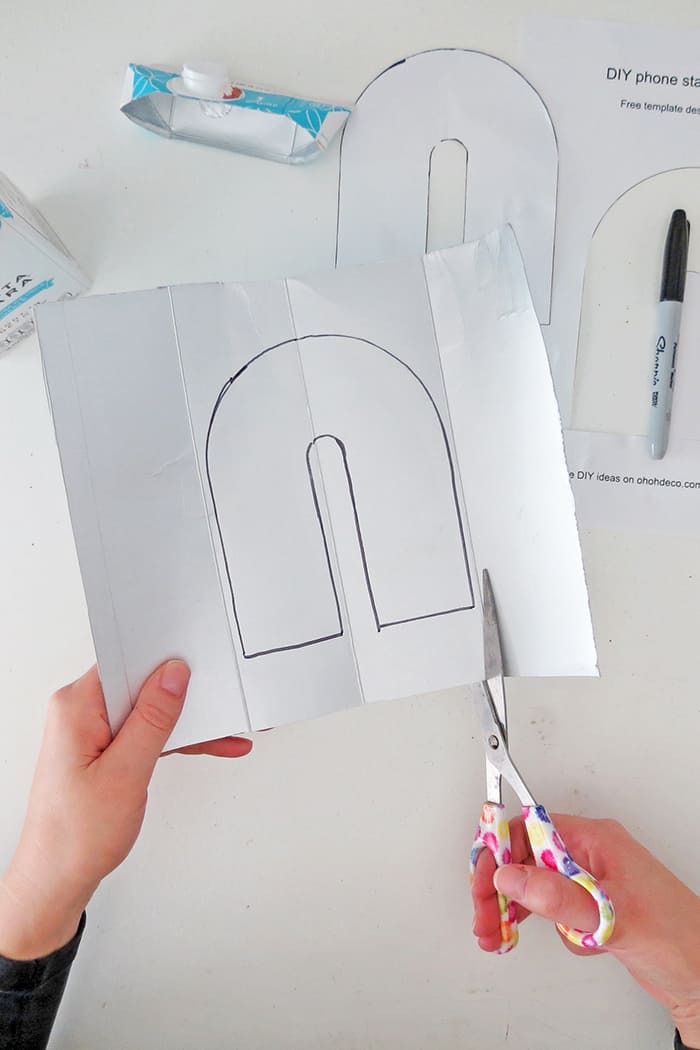
Cut out the rainbow shape.
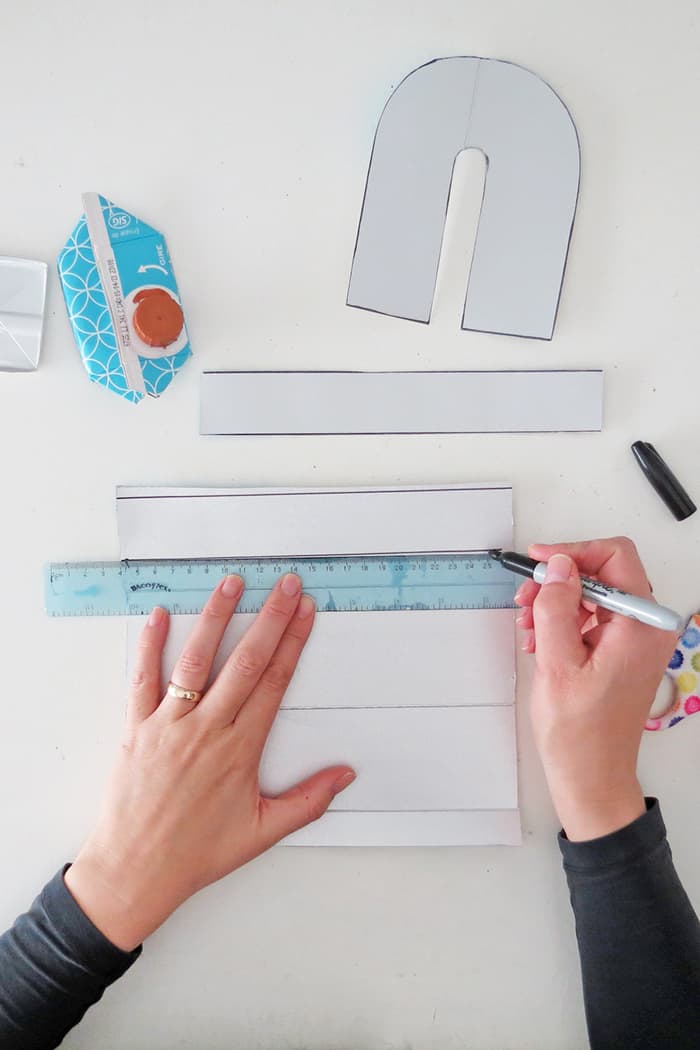
On the remaining space of the cardboard, trace strips of 1 inch (2,5cm) high and cut them out.
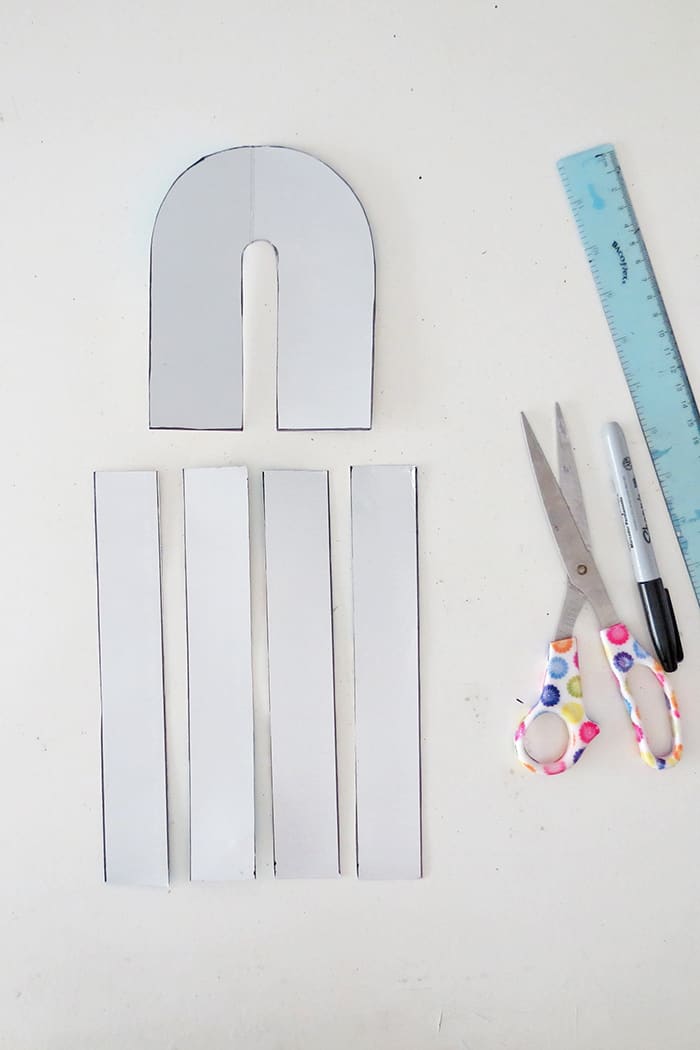
You need to have enough strip length to create edges all along with the rainbow shape.
Depending on the container size you have you may probably need more than one. In this case, just clean and open a second container to have an extra sheet of cardboard.

Use masking tape to fix the strips along the edges and create the phone stand mold.
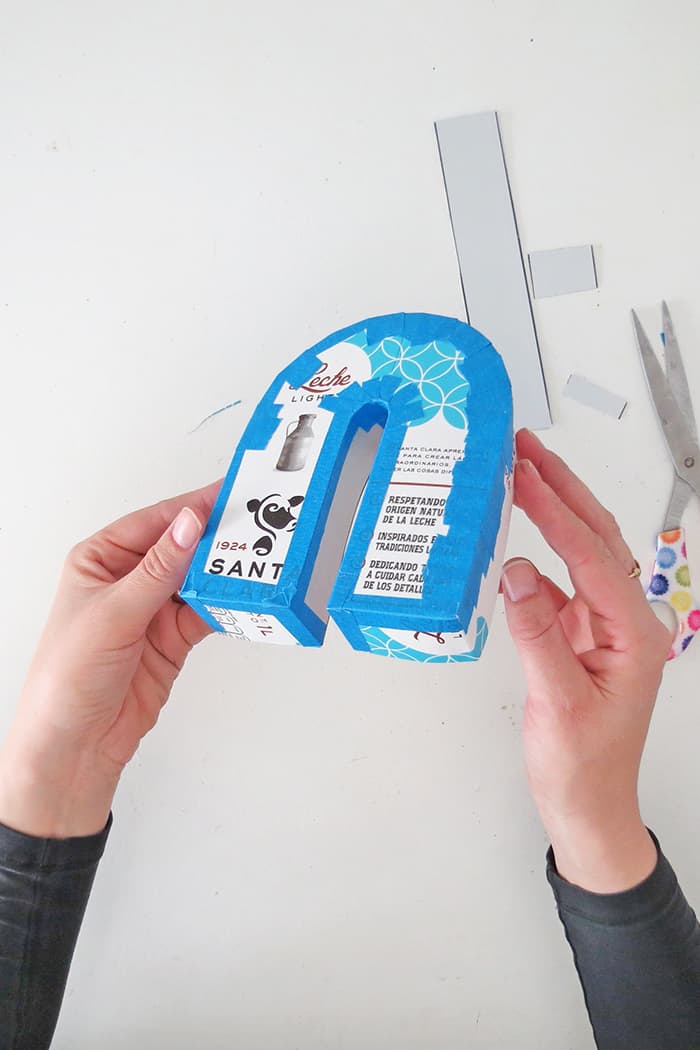
Ensure that all the edges are tight so that the mold is “plaster-proof”. Don’t hesitate to add extra masking tape if necessary.
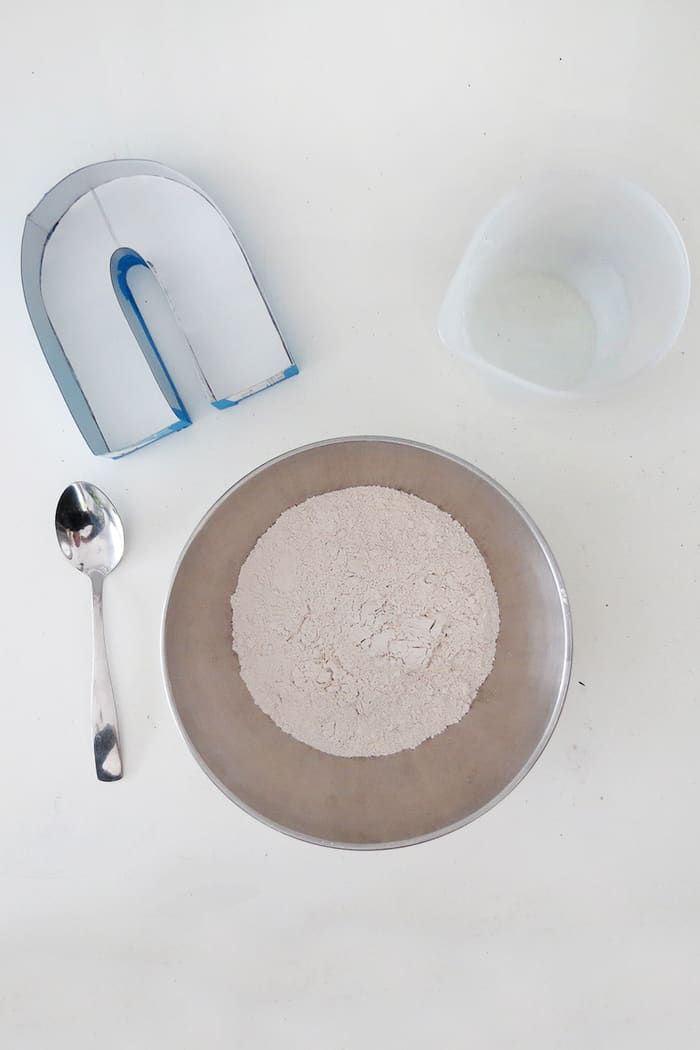
Put the plaster on a bowl and mix with water following the package instructions.
I used around 1 pound (1/2kg) of plaster to make the phone stand.
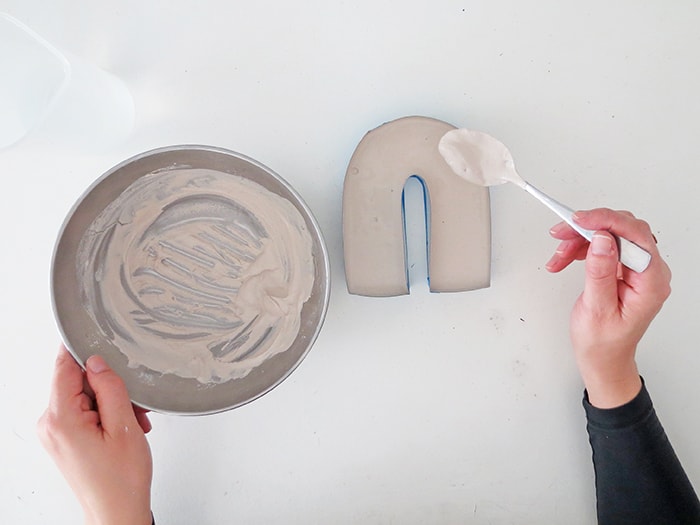
Pour the plaster into the mold. Tap smoothly the sides of the mold to level the plaster.
The plaster thickness must be around 3/4 in. (2cm)
Wait for the plaster to fully dry. It took 2 days in my case.
If you have any doubt you can refer to the package instructions.
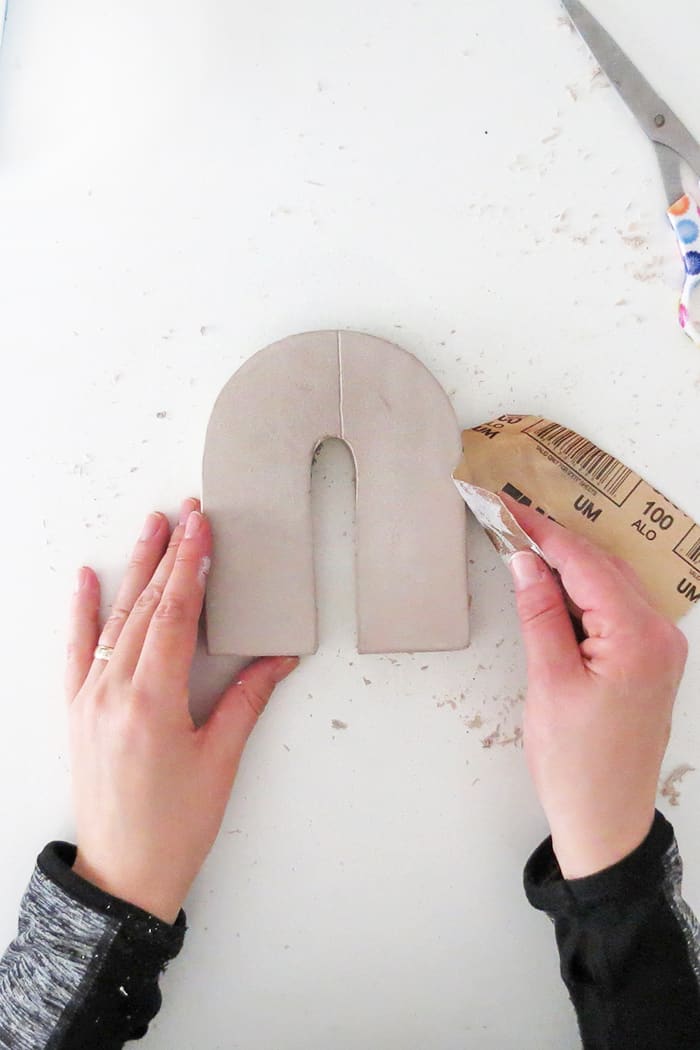
Sand the shape. You can use a 100 grid paper or thinner.
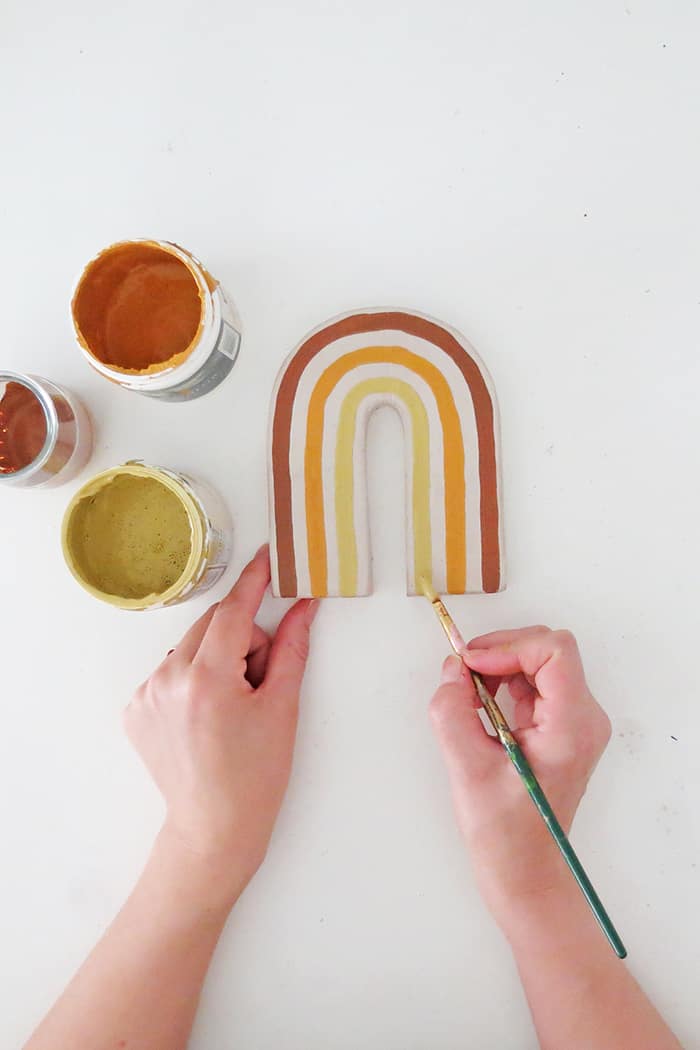
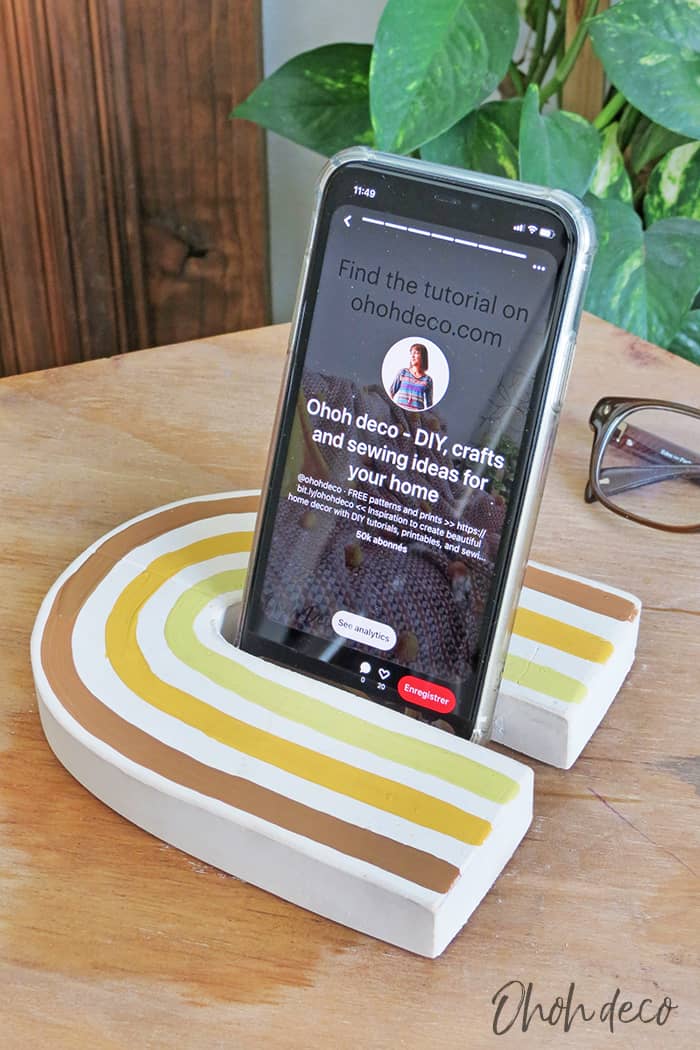
Choose 3 nice color shades and paint three arches on the plaster to make the rainbow.
I’m not very good at mixing colors to create nice shades. So instead of using craft acrylic I get interior paint sample. They offer a large range of trending colors that are easy to combine.
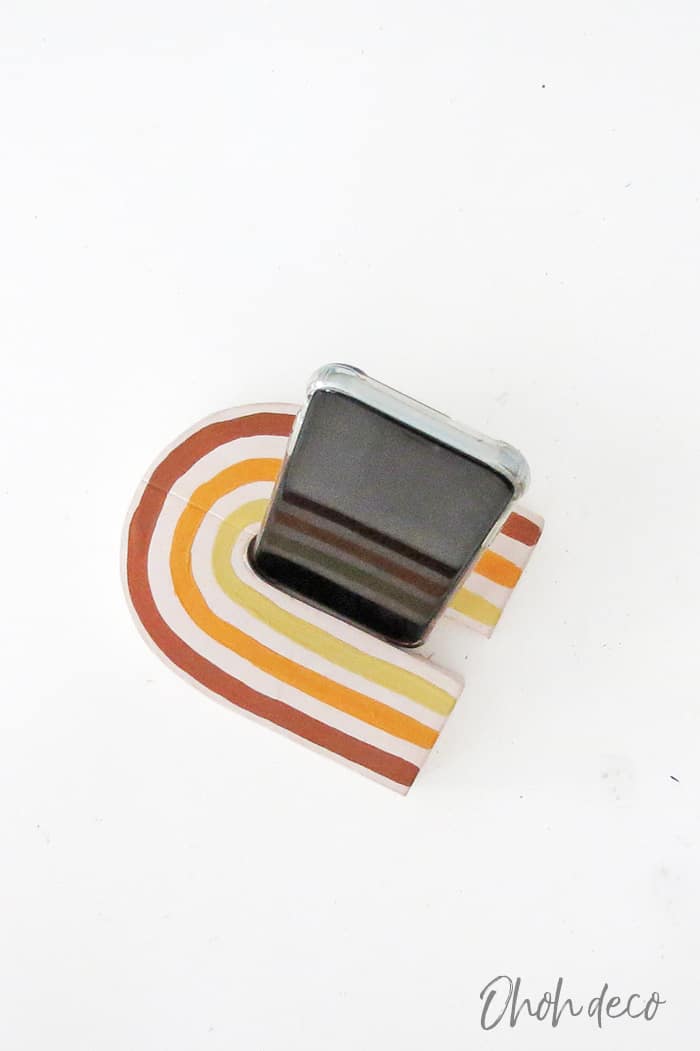
Let the paint dry, slide your phone in and enjoy!
You can place you phone vertically or horizontally. You can use the phone stand on your desk or on a table.
Watch the video to make your DIY cell phone holder
Follow Ohoh deco on YouTube a be the first to find out about the new crafty ideas!
RELATED: How to make a desk lamp with can
RELATED: The playroom upgrade with a rainbow mural
This homemade phone stand is super easy to make and looks nice even when you are not using it.
Adding a rainbow into decoration is always a nice idea, don’t you agree?
I enjoyed making this phone accessory. I may give a try in the future to make a diy a phone case.
Which colors would you like to choose to paint your phone stand? I wanted terracotta shades but ended up using the paint I had on hands.
I like it anyway! I hope you too! Remember you can grab the free template to make the DIY phone holder in the library.
All you need to do is fill out the form and check your inbox for a welcome email with the password in. Click here to get in >>>> FREE LIBRARY ACCESS
Want to remember it? Save this easy to make DIY phone stand in your favorite Pinterest board.
Ah I definitely need another stand for my phone, love this idea!
Thanks! It’s super easy to make and you can customize the phone stand with any color you like. It’s always fun to decorate with rainbows.
You’re a clever one, Ama! So send me the kids’ math homework and I’ll help you out. 😘 Hang in there, mama. Blue skies follow rainbows.
Hi Dinah, I’m glad you like this easy phone stand, and thanks for offering your help with math homework 😉 I like art classes much better! Well, I guess we all need to be a little more patient. I hope we will be back to normal soon. Take care!