
Back to school is just around the corner…or not. It’s very likely that kids will keep doing homeschooling, so a little organization is required.
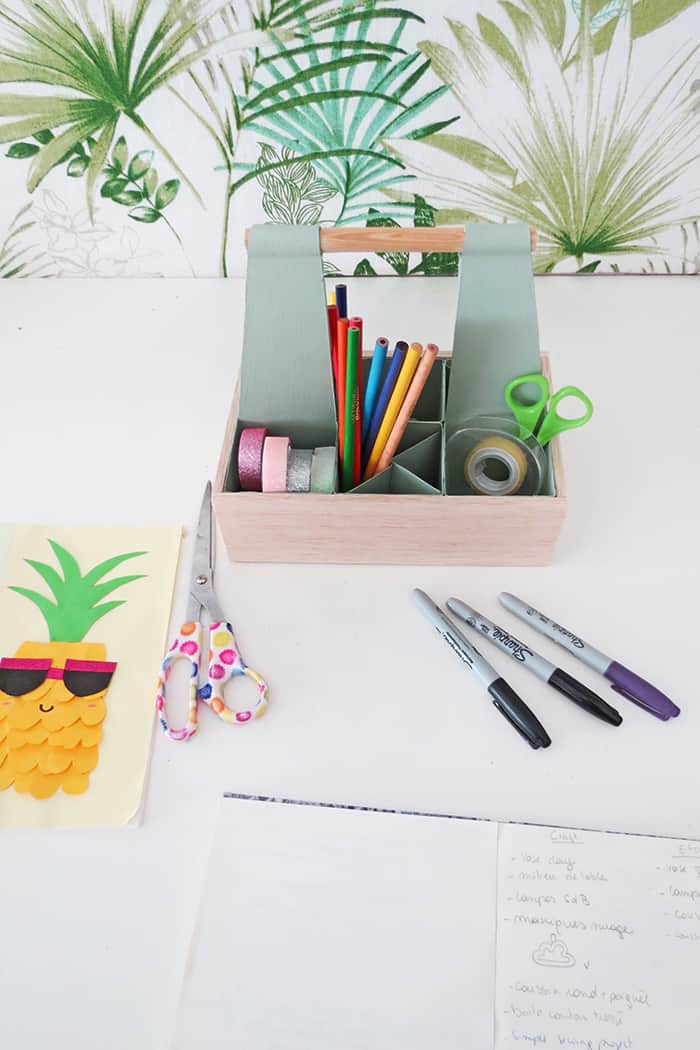
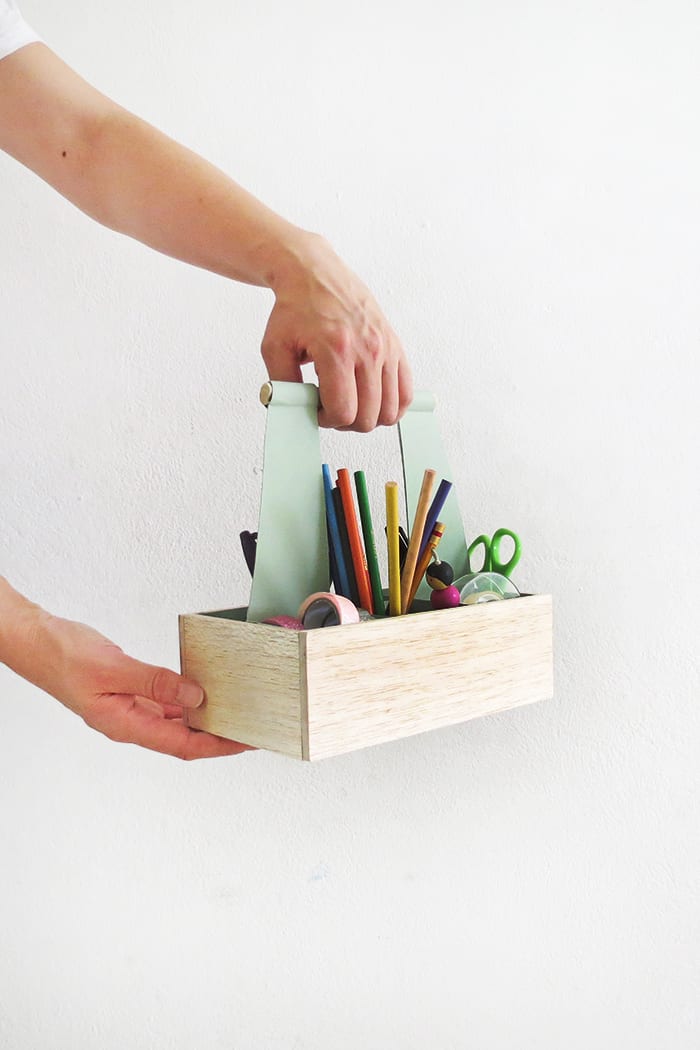
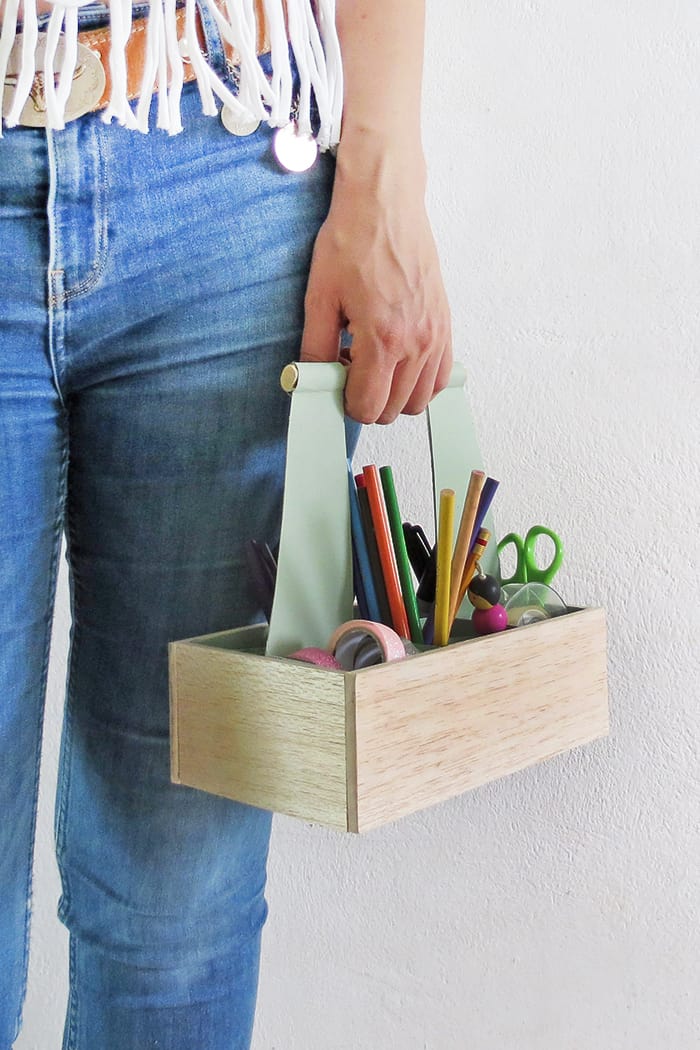
This DIY desk organizer is super easy and cheap to make. It’s practical, thanks to its handle you can use it everywhere and move it around the house easily. You can use it to organize your desk, to store crafts supplies or sewing material.
[ This post probably contains affiliates links, our full disclosure policy is really boring, but you can read it HERE ]
The office desk organizer is made out of recycled materials. Did you ever think milk cartons could look that pretty?
Watch the video and follow the tutorial below to make a DIY desk organizer caddy. I also give you some tips to simplify this DIY and make it easy to do for kids.
RELATED: How to sew a leather pencil case
RELATED: DIY recycled pencil box
How to make a DIY desk organizer
Materials you will need for this project
- 6 milk or juice carton (clean and dry)
- Balsa wood
- A piece of dowel (1/2 in.- 1 cm)
- A glue gun
- A ruler and a square
- A sharpie
- A cutter
- A pair of scissors
Watch the video tutorial of the DIY desk organizer caddy
Follow Ohoh deco on Youtube and be the first to find out about the new DIY.

Let’s start crafting this homemade desk organizer. First collect 6 milk cartons, clean, and dry them. I worked with square base cartons. You can make your DIY desktop organizer with rectangular ones too, just use 6 containers that have the same size.
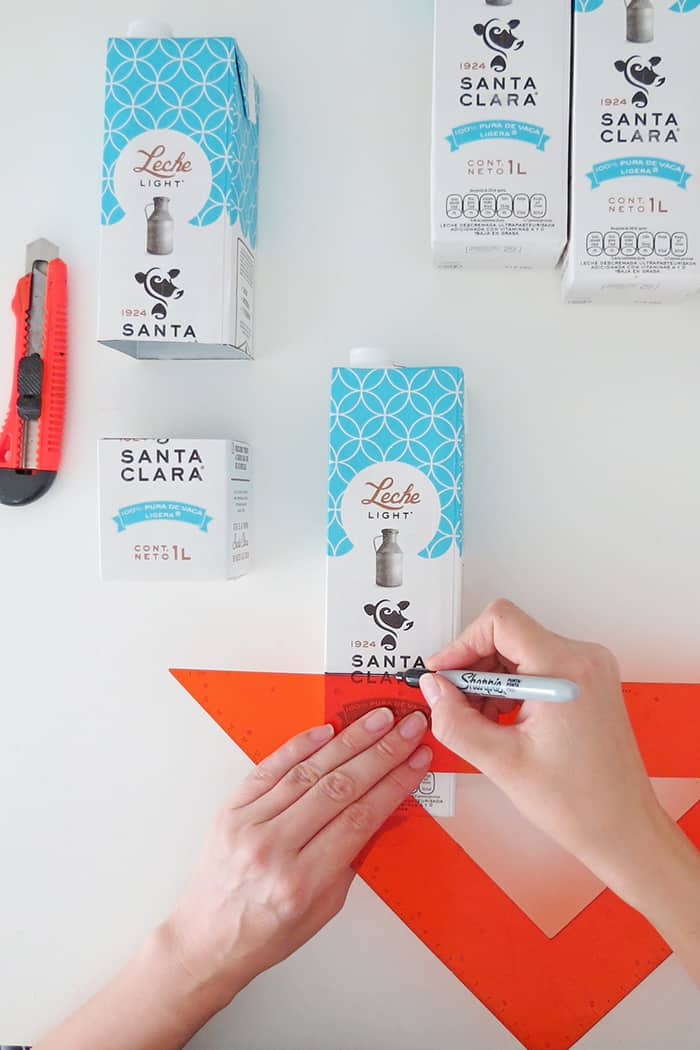
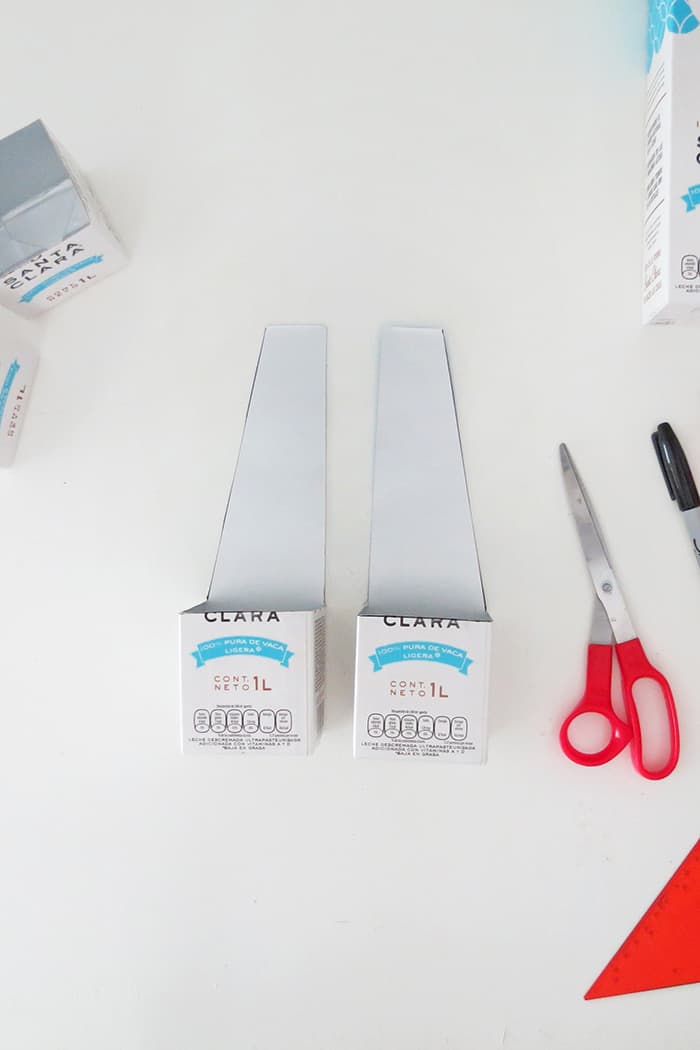
Measure 3 inches (7,5 cm) from the bottom and trace a line on all four sides. Cut following the line. Repeat this step with a second milk carton.
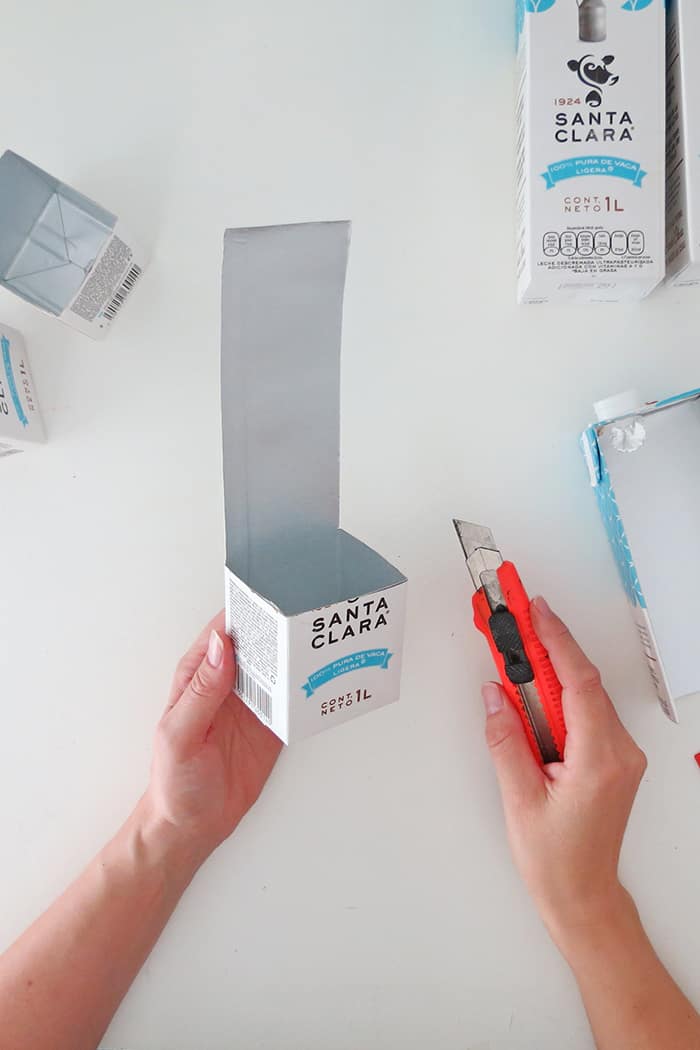
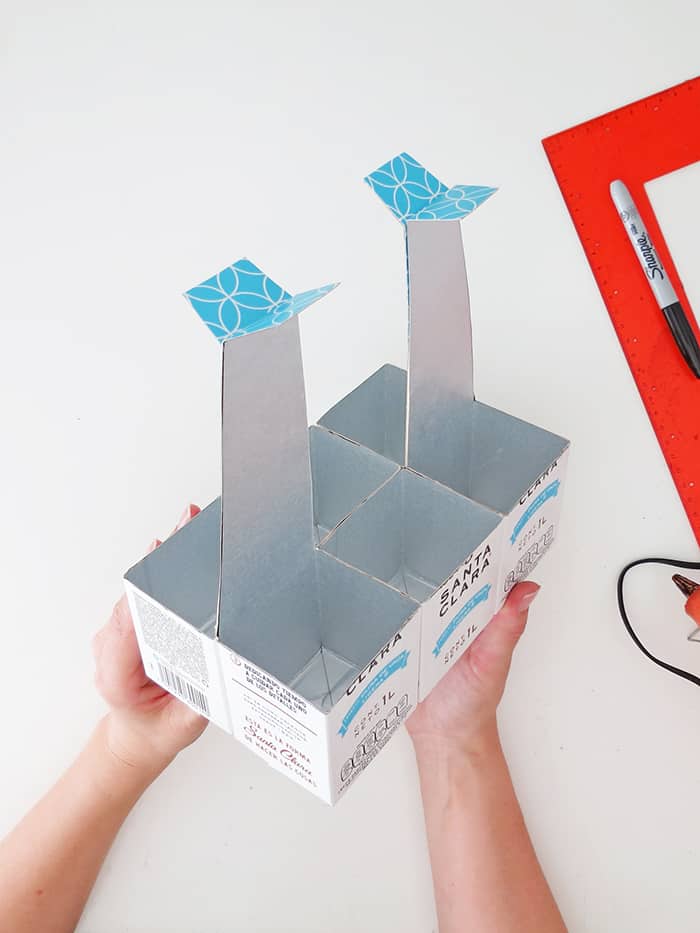
Take the third carton and again draw a line on all four sides at 3 in. (7,5cm) from the bottom. Cut 3 sides of the carton following the line. Cut the fourth side of the box following the edges. You must end with a small container with a long flap on one side.
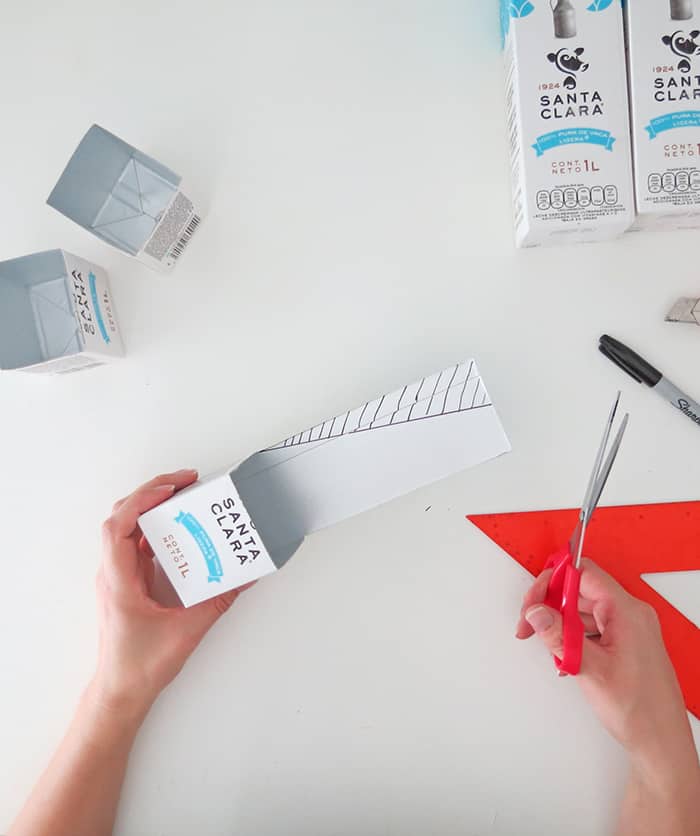
Take the top edge of the flap and measure to mark the center. Trace a line between the center mark and the box top edge. Cut along the line.
Repeat the previous step to make a second box with a flap. The diagonal on the flap must be opposite at the first one, like in a mirror.
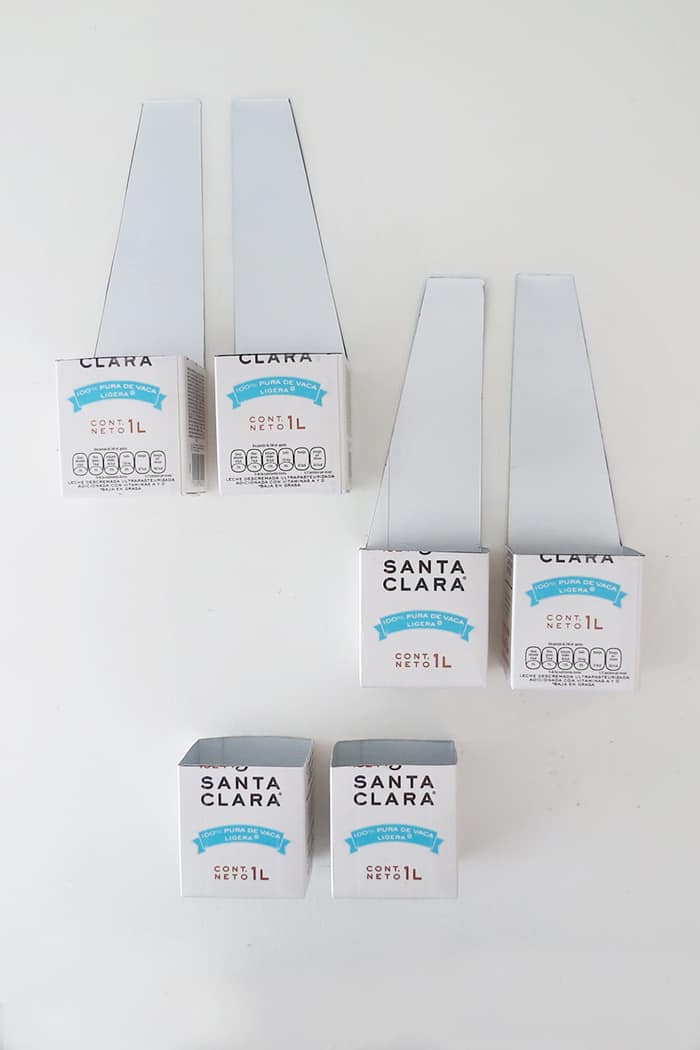
Make two more boxes with flaps, identical at the previous ones. This is what you must have at this point: 2 simple boxes, 4 boxes with flaps (2 with the diagonal on the right, and 2 with the diagonal on the left). Let’s continue making this simple desk organizer.
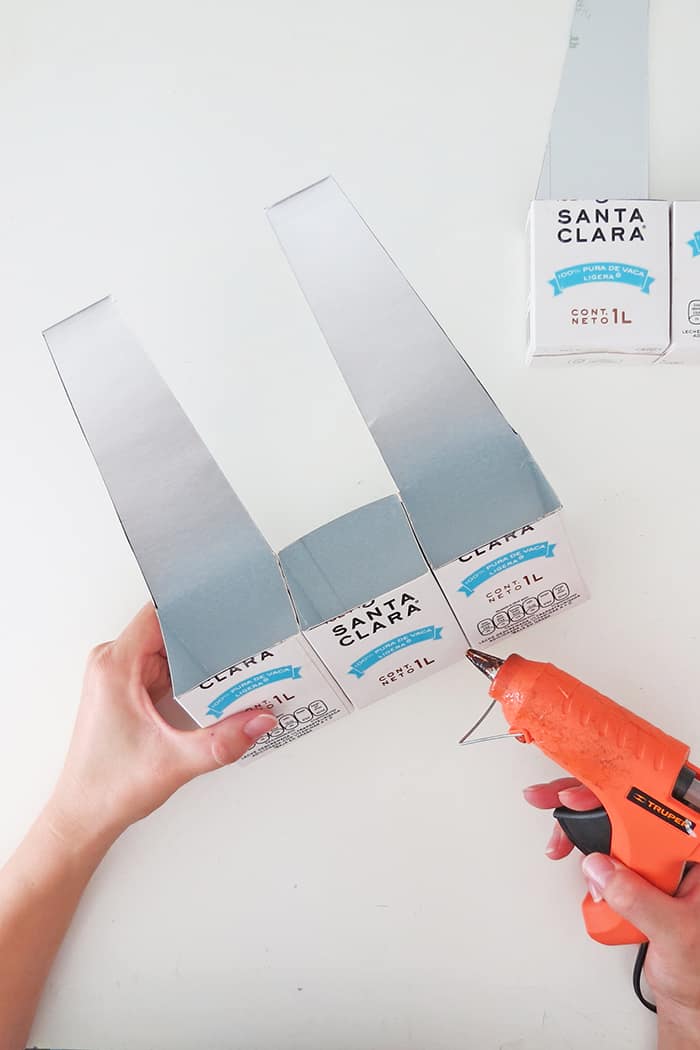
Time to assemble the DIY organizer. Place the boxes next to each other and add some glue on the sides. Press the sides together to ensure good adherence.
You can see the boxes order on the picture, it’s first a box with flap (diagonal to the right), then a simple box and to finish a box with flap (diagonal to the left).
Do it twice, to have two rows of boxes glued together.
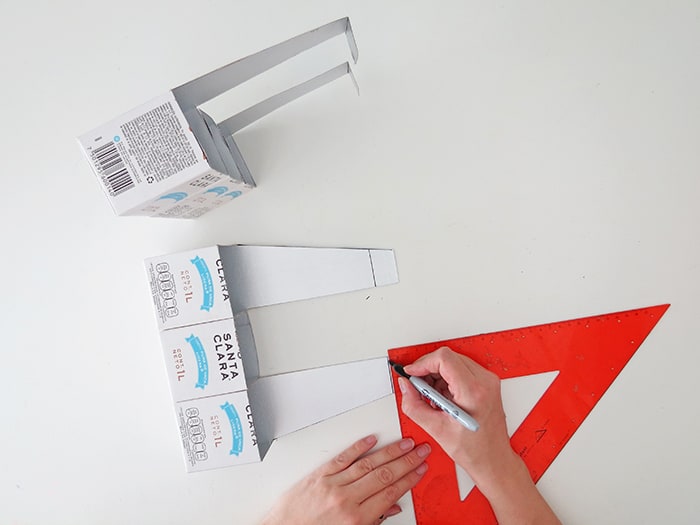
To place the handle on your DIY organizer, you need to fold the flap. Measure 1 in. (2.5cm) form the top of the flap, trace a line a fold following it. Repeat for each one of the four flaps.
Glue the two rows of boxes together. Add the glue on the flap sides. Press both pieces together to ensure good adherence.
Don’t glue the top of the flaps you have folded. You will need them to add the handle.
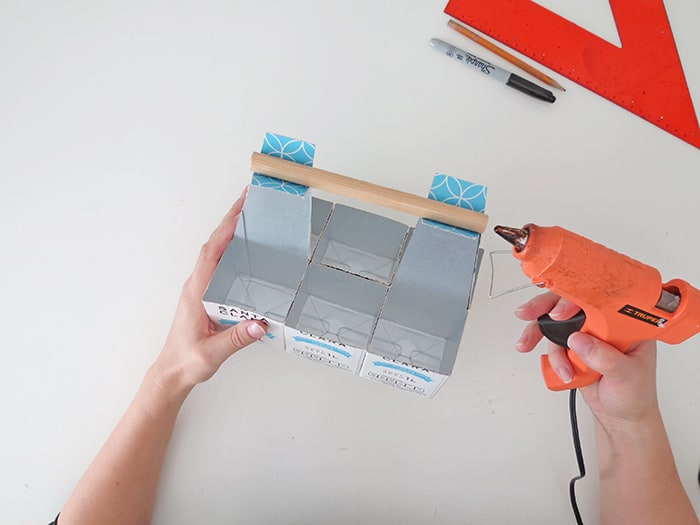
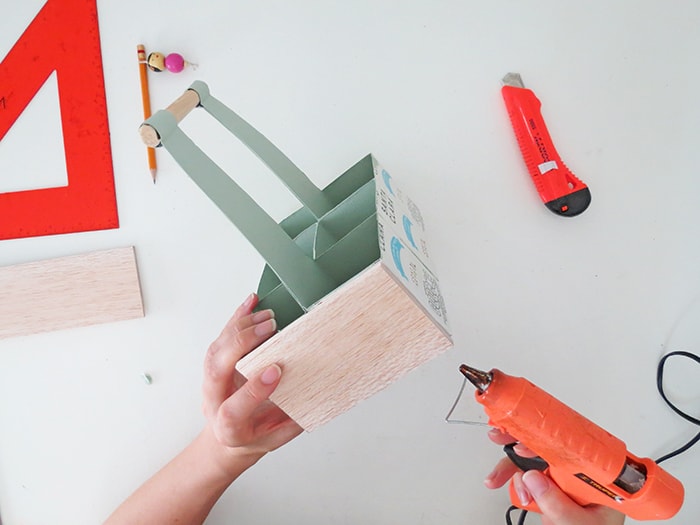
Cut a 1/2 in. (1cm) dowel to fit into the flaps. Sand the edges and glue the dowel into the flaps to make the handle.
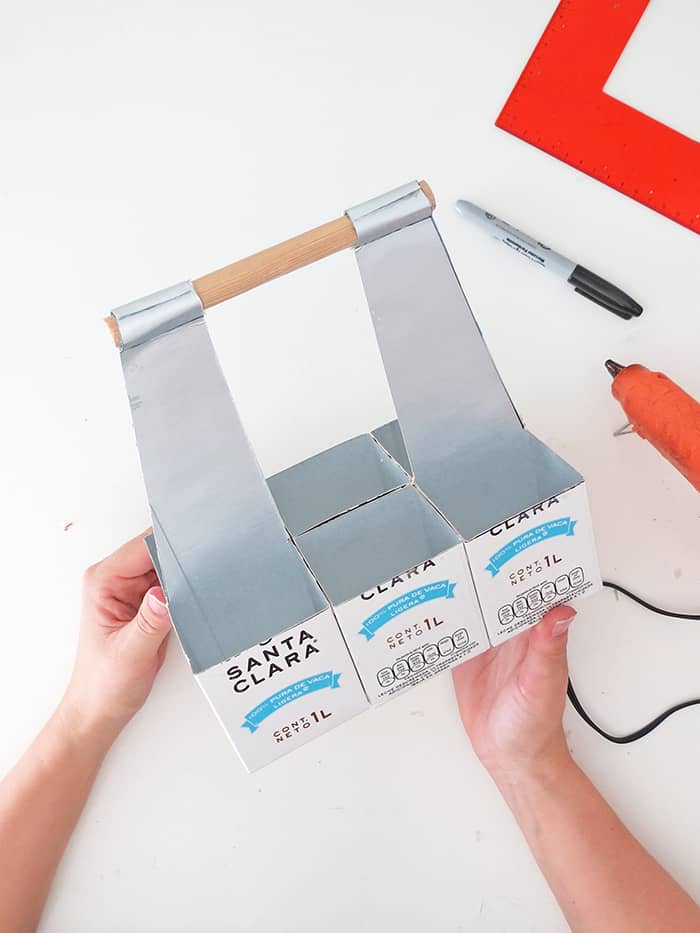
Add some more glue and wrap the end of the flaps around the dowel, so it will hold nicely the desk organizer handle.
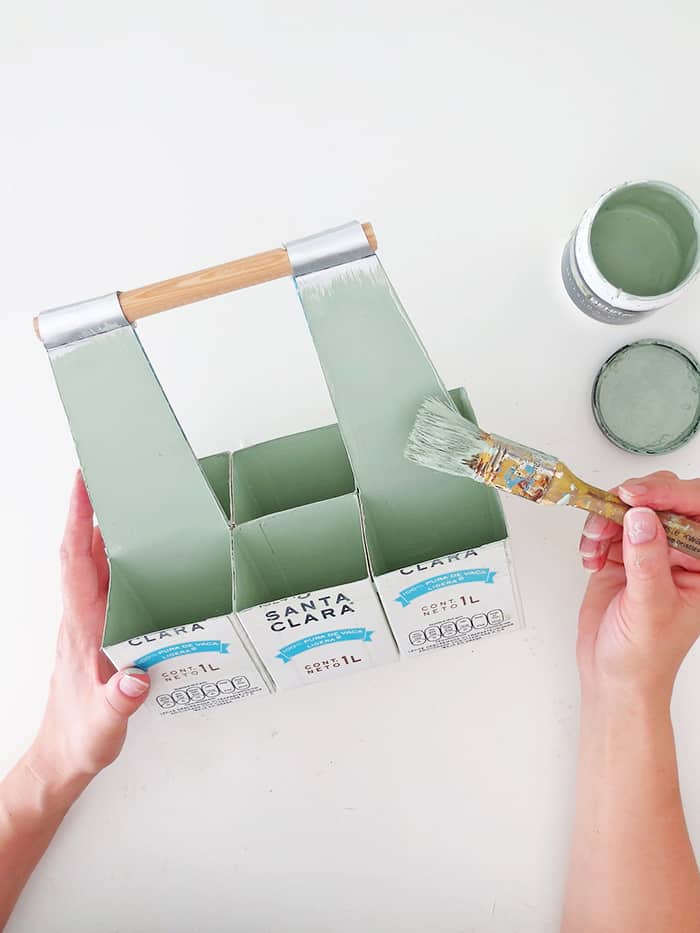
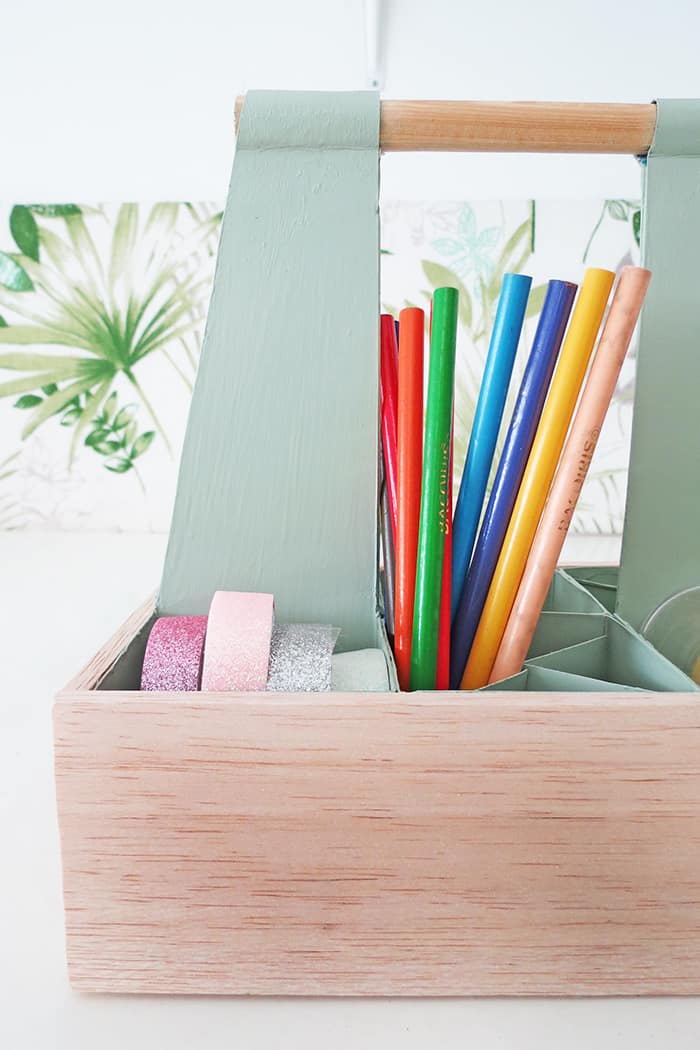
Paint the inside of the organizer caddy. I used my favorite paint. I should have put a coat of primer before.
The inside of milk cartons is cover by a slick grey layer, so I noticed some scratches in the paint. This kind of paint seems like a better option for this project.
Note that this painting step is optional, you can choose to let the desk caddy as it, with the silver coat visible. If you make this craft with kids, that will be the easiest solution.
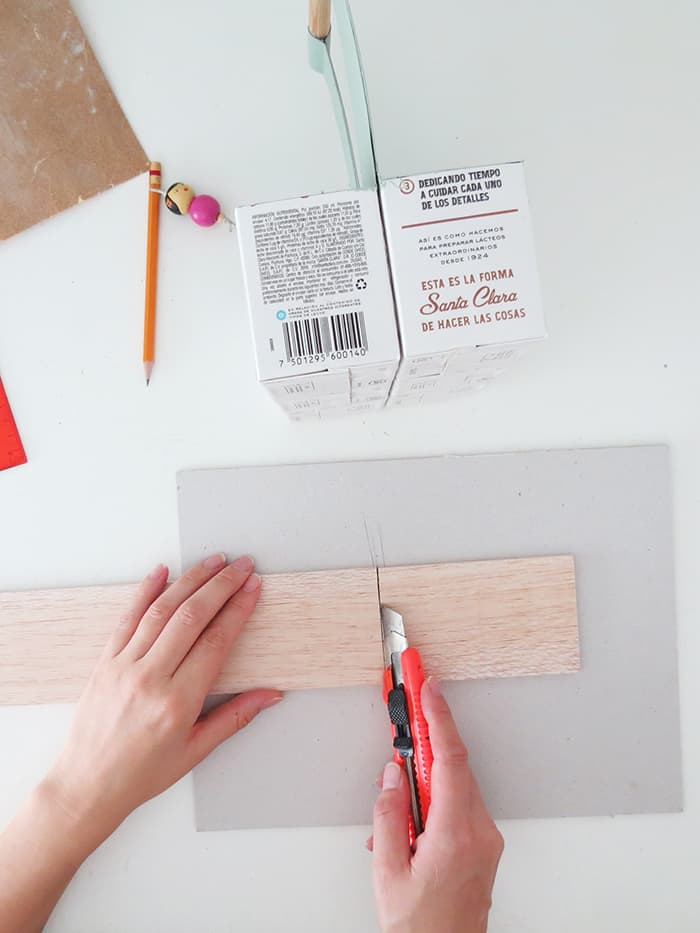
Let’s turn these milk cartons into a pretty wooden desk organizer by covering the sides with some balsa wood. Take a piece of 3in (7,5cm) width, and cut it at the small side dimension. Sand the edges.
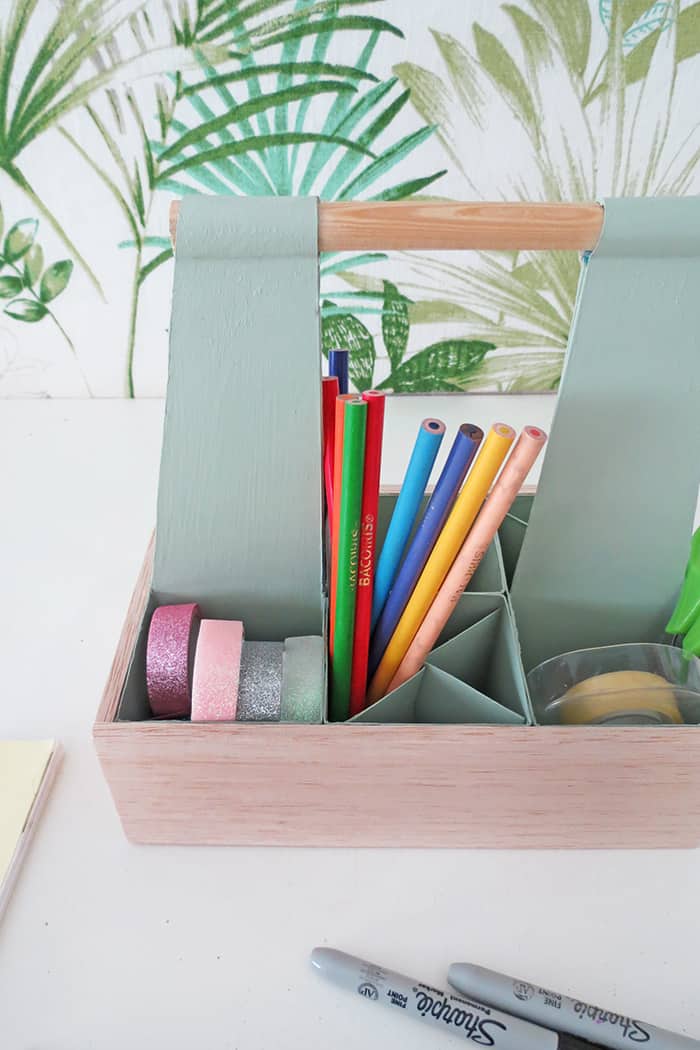
The wood looks great and I love how it turns out, it definitely makes this easy desk organizer look fancier.
Another good option will be to cover the sides with cute cardstock. There are so many pretty patterns, it’s hard to choose (maybe this one?).
Using cardstock instead of balsa is a great option if you want to make this cute DIY organizer with the kiddos. Cardstock is cheaper and overall easier to cut.
Apply some glue on the desk organizer side and glue the wood on it. Cut a second piece of wood to cover the other small side.
Continue the same way to then cover the two long sides
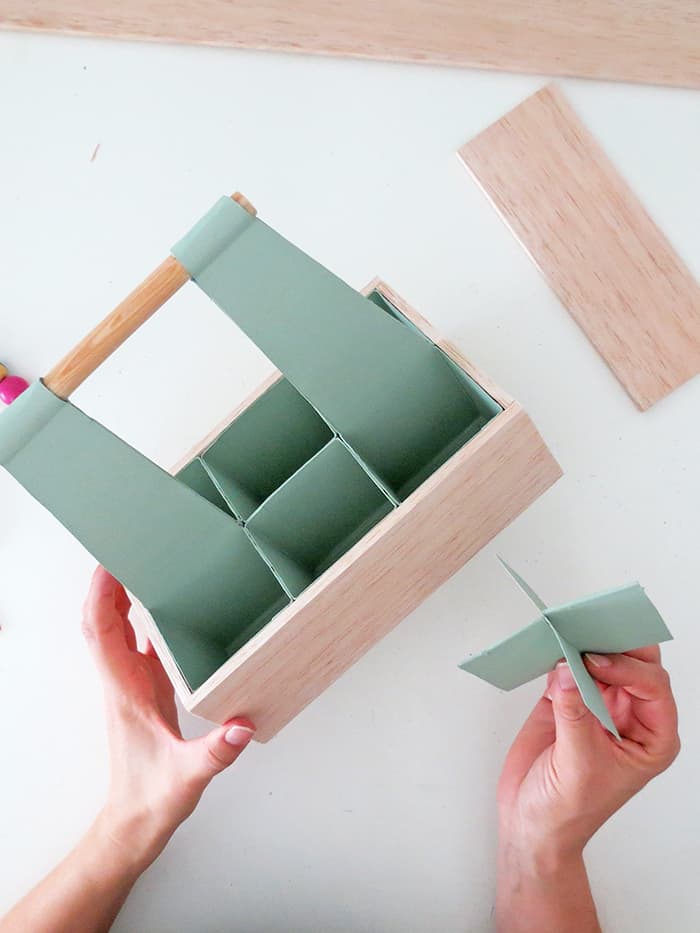
At this point, your desk or craft organizer is finished. If you like to store some small items in it you can cut two pieces of cardboard, and slot them to make a cross shape. Slide the cross shape in one of the compartments of the desk organizer to divide it.
RELATED: DIY beads dolls pencil toppers
RELATED: The DIY storages you need for your office
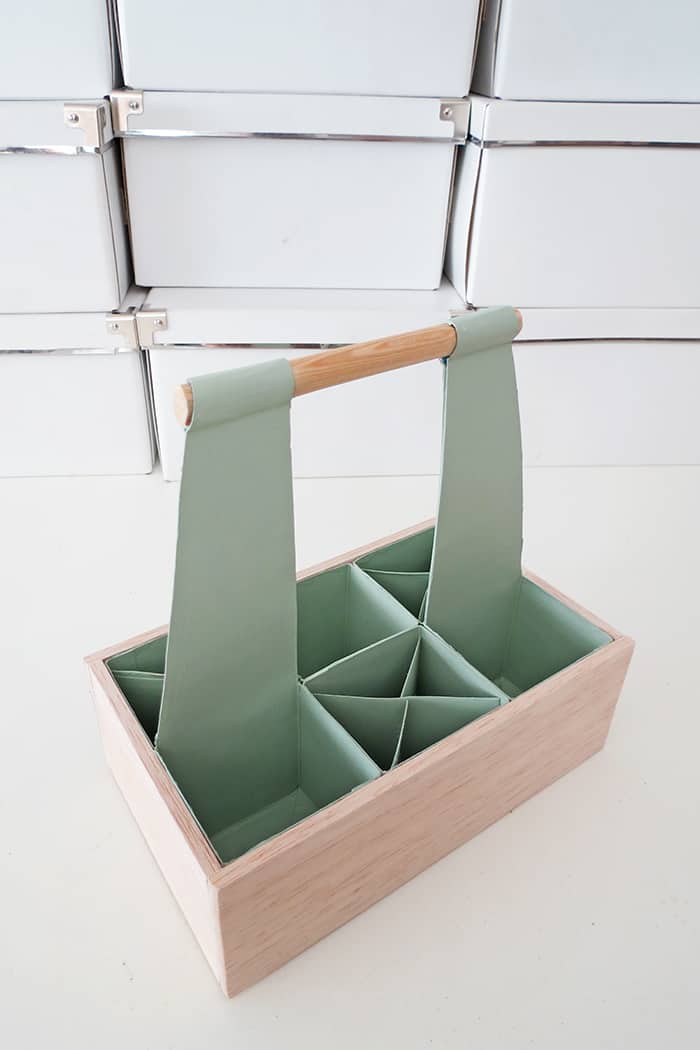
And done! You just made a cute desk caddy to organize your desk. It’s super easy to make and perfect if you are on a budget.
As you can imagine you can also use it as craft caddy and sewing supplies caddy…it’s super practical to organize all the supplies. You will probably need to make more than one!

As we have to homeschool our kids, this DIY organizer will help them keep their school supplies organized.
My kids do their homework on the dining room table, so it will be really easy to put everything away once they have to finish them.
No time to DIY?
Check these 5 good looking desk organizers under 15 dollars
- White and wood desk organizer
- Pen organizer storage
- Wire desk organizer
- Desktop storage
- Office storage caddy
You can also watch The DIY caddy desk organizer video tutorial
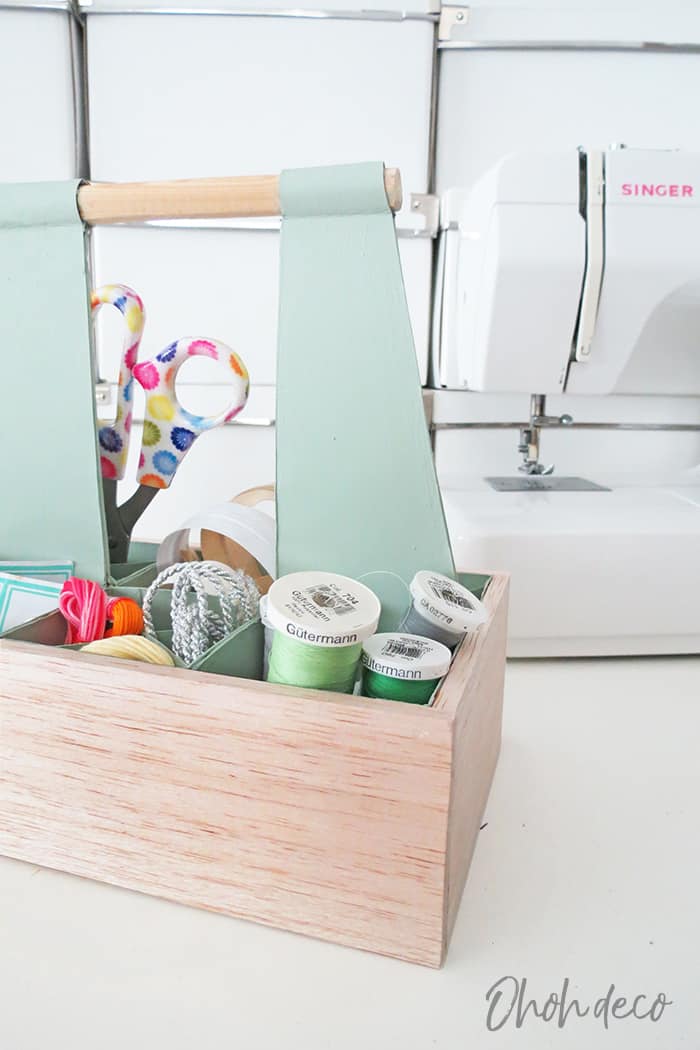
As you can see it works great as a DIY sewing caddy too.
Want to remember it? Save this DIY desk organizer caddy in your favorite Pinterest board

You will find all the tutorials featured in the video on my “Best DIY” page.
Amaryllis
I have made these before and used for multiple things but I made mine out of 6 pack boxes, for bottles. I have covered with scrapbooking paper, contact paper, wrapping paper, duct tape. It’s endless. But I do like the idea of balsa wood also. Just thought a 6 pack box may be more available for some people than small milk cartons. Thank you for your posts, love seeing your different ideas!!
Hello Kristy, great idea to use 6 pack boxes. Milk cartons are very common in Europe and Mexico, but not that much in the USA. Thanks for sharing this alternative so everyone can make a desk organizer easily. Have fun crafting!
Brilliant idea!! The milk cartons I normally buy are not as tall as yours (more rectangular here in South Africa) but can definitely be used similarly, they also end up in the trash all the time. Have to find out from my local wood supplier if they stock Balsa, otherwise, I’ll need to use card stock or cardboard Also great tip about the paint, saves a lot of disappointment if using the wrong type, thank you so much for sharing. Useful storage for my craft room.
Hello Yvette, I’m glad you like it. If you don’t find balsa you can use a piece of plywood sheet (3 or 6 mm). I used balsa because it’s easy to cut with a utility knife. But if you have a saw, or can borrow one, plywood will work as well. Have fun crafting.
great thanks for sharing the details cant find balsa then use table saw for wood cuts easy task:)
Hey Keith, I’m glad you found an alternative. Balsa wood is the easy way to make the caddy desk without using power tools 😉