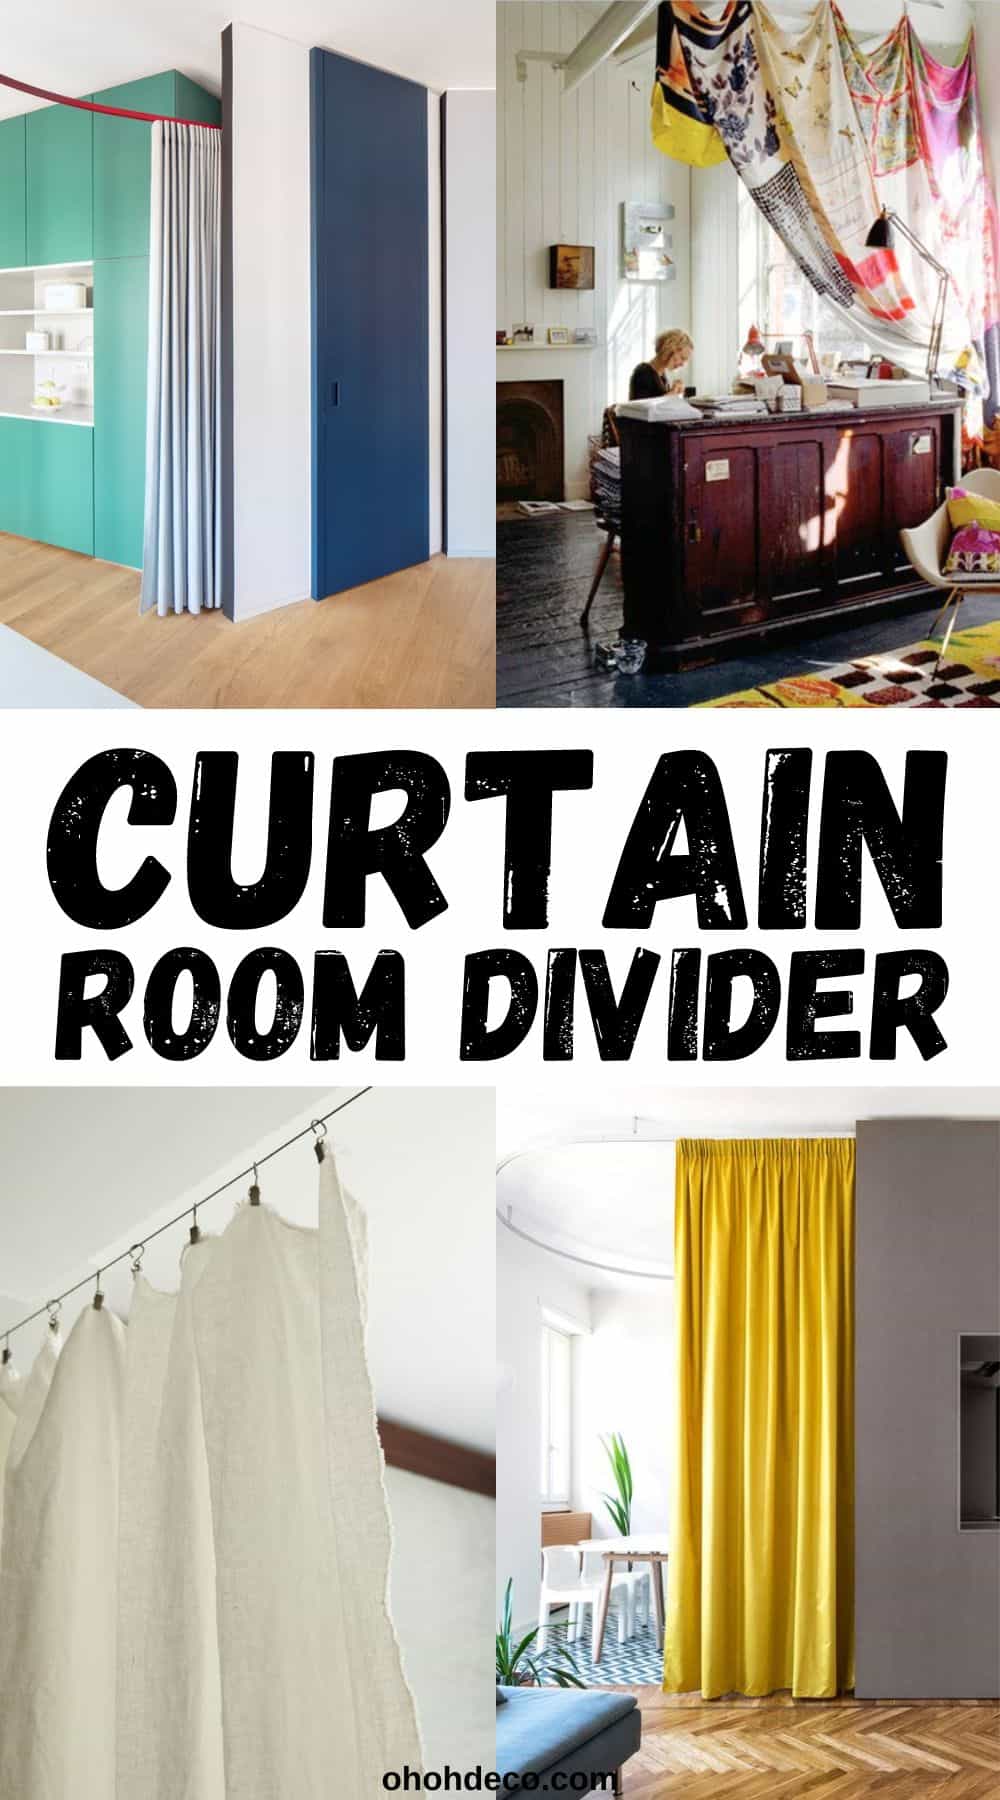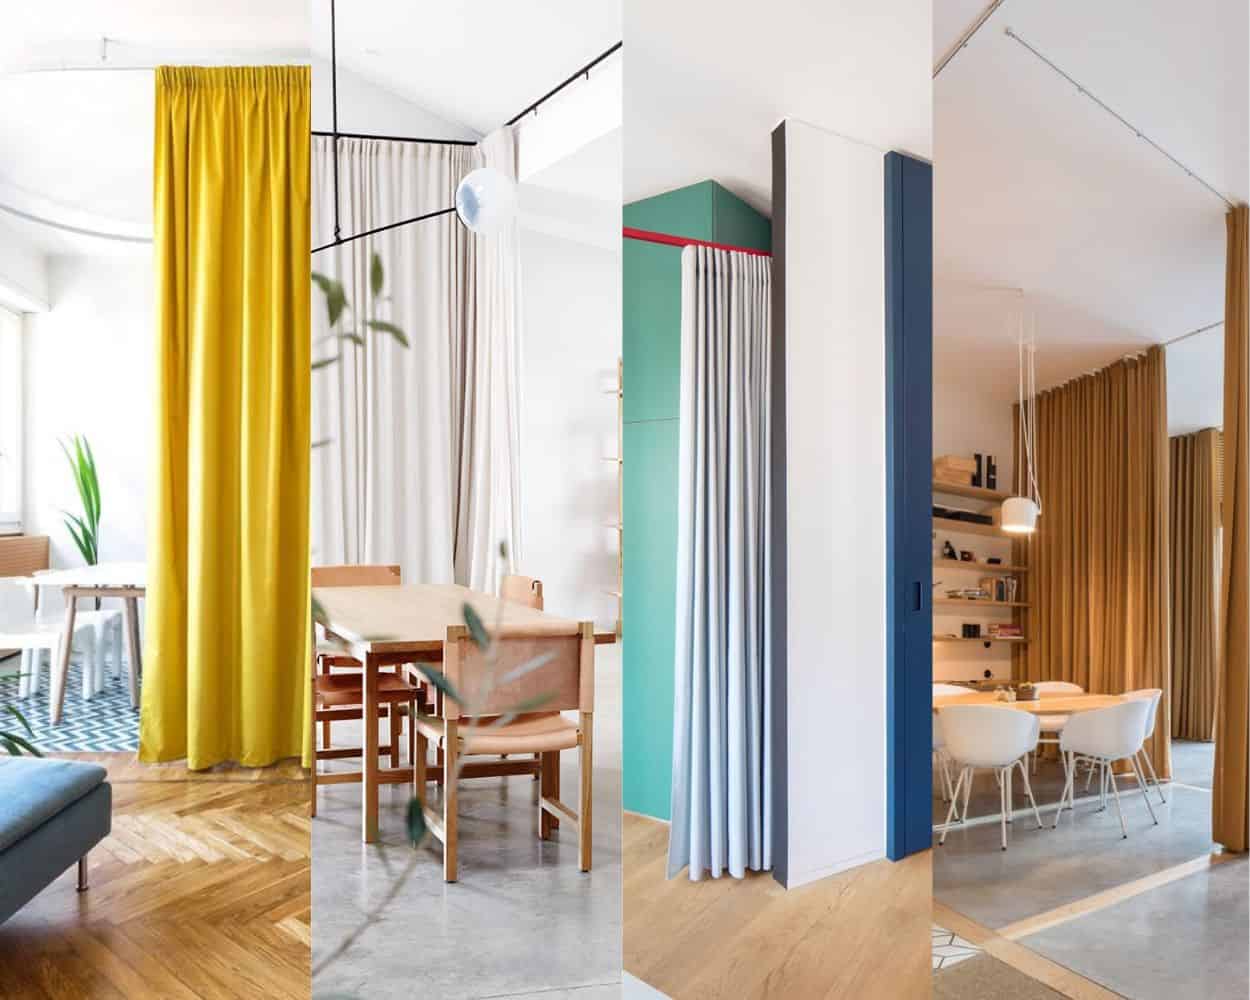
Using curtains as room dividers is a versatile and stylish way to separate spaces in your home without permanent structures.
Curtains provide a flexible solution that allows you to change the layout of your rooms easily and affordably. You can choose from a wide variety of colors, patterns, and fabrics to match your interior design, adding a personal touch to your space.
Additionally, curtains are easy to install and can be opened or closed depending on your needs, giving you control over privacy and light.
This approach not only enhances the aesthetic appeal of your home but also maximizes functionality, making it an excellent choice for apartments, studios, or any open-concept living area.
Consider incorporating curtains to create distinct areas within your home while maintaining an open and airy feel.
Here are some creative ideas and tips on how to use curtains effectively.
[ This post probably contains affiliate links, our full disclosure policy is boring, but you can read it HERE ]
1. Creating Different Zones
Using curtains to create different zones in an open living area like a small studio, loft, or office is an effective way to define spaces without permanent walls.
A few steps to take into consideration to create different zones with curtains.
Plan your layout and determine the zones you want to create in your space. Common zones include sleeping areas, living areas, dining spaces, and workspaces. Sketch a layout to visualize where each curtain will go.
Example Scenarios:
Small Studio Apartment:
- Sleeping Area: Use a ceiling-mounted rod to hang opaque curtains around your bed, creating a cozy nook that blocks light and offers privacy.
- Living Area: Separate the living space with sheer curtains that allow natural light to filter through while visually dividing the area from the rest of the studio.
Loft and open living area
- Work Area: Define a home office with opaque curtains that can be closed during work hours to minimize distractions and opened afterward to integrate the space back into the loft.
- Dining Area: Use sheer curtains to outline the dining space, adding a touch of elegance and keeping the area distinct yet connected to the living space.
- Kids’ Play Area: Create a dedicated play space in a shared room that can be easily hidden when not in use.
Open-Plan Office:
- Meeting Area: Create a private meeting space with floor-to-ceiling opaque soundproof curtains that can be drawn for confidentiality and opened for a collaborative environment.
- Break Area: Use sheer curtains to separate the break area from workstations, providing a relaxing space without completely isolating it from the office flow.
By using curtains to create different zones, you can maximize the functionality and aesthetics of your open living area, making it adaptable to various needs and activities.
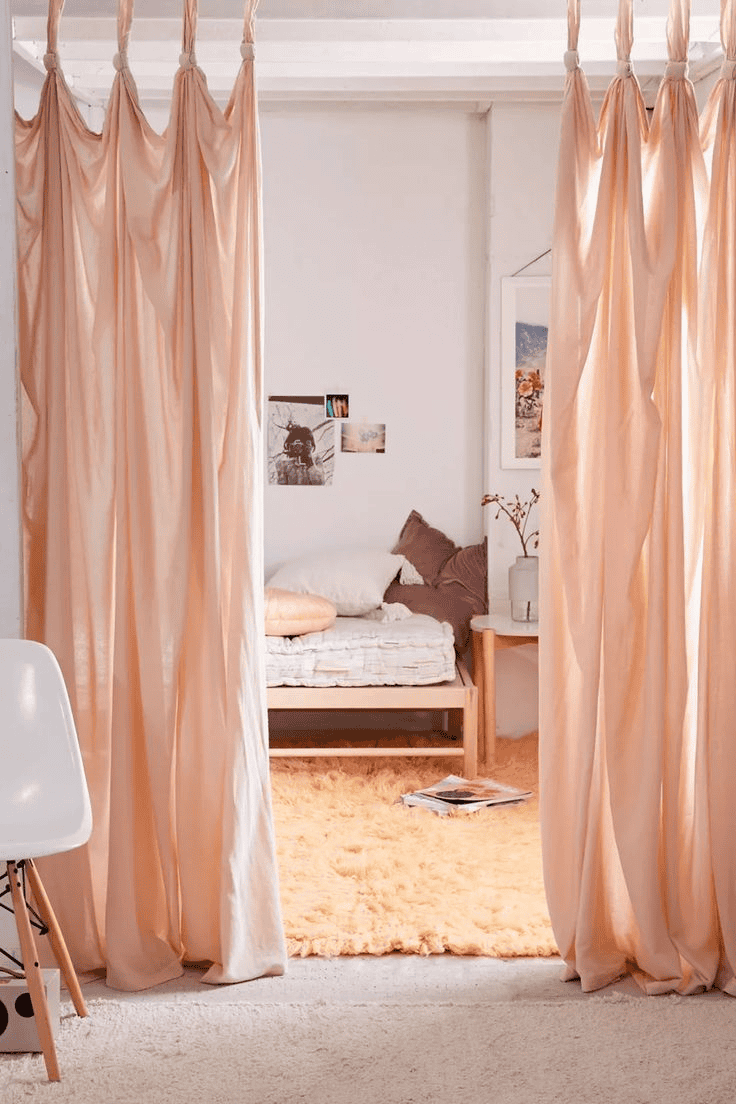
Photo: Urban Outfitters

Photo: Pinterest

Photo: Pinterest
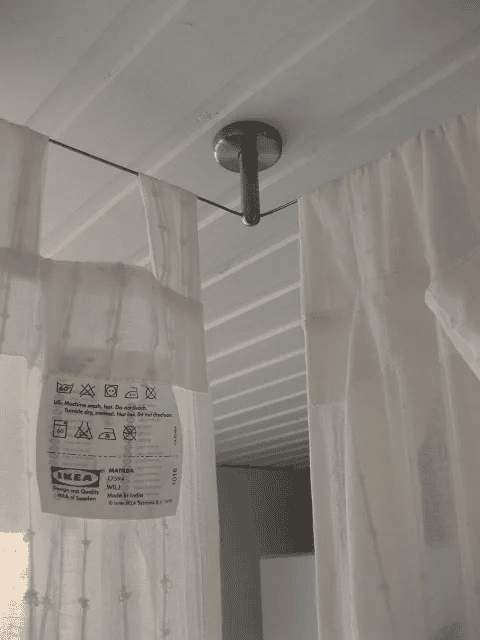
2. Ceiling-Mounted Curtain Rods
- Track System
Install a ceiling-mounted track system to allow curtains to slide open and closed smoothly. This works well for large spaces or to create temporary rooms.
Installing ceiling-mounted curtain rods is a straightforward process that can add elegance and functionality to your space.
Here’s a step-by-step guide to help you get started.
Begin by measuring the width of the area where you want to install the curtain rod. Mark the desired locations for the brackets on the ceiling, ensuring they are evenly spaced and aligned with each other.
Select ceiling-mount brackets that are compatible with your curtain rod. Ensure that the brackets are sturdy enough to support the weight of your curtains.
Using a drill, pre-drill holes at the marked locations on the ceiling. This will make it easier to screw in the brackets and prevent the ceiling from cracking.
Attach the brackets to the ceiling using the appropriate screws and anchors. Make sure they are securely fastened to support the curtain rod.
Once the brackets are installed, slide the curtain rod into the brackets. Secure the rod in place according to the manufacturer’s instructions, ensuring it is level and stable.
Finally, hang your curtains on the rod. Adjust the curtains as needed to ensure they hang evenly and slide smoothly along the rod.
By following these steps, you’ll have a beautiful and functional ceiling-mounted curtain rod that enhances the look and feel of your space.
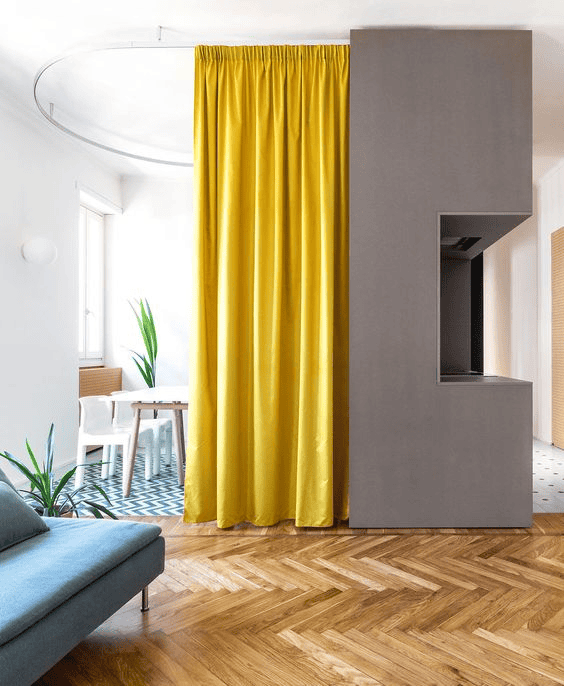
Photo: Pinterest
- Tension Rods
Using tension rods as curtain rods is an excellent renter-friendly solution that requires no drilling or permanent modifications. These rods are adjustable and can fit a variety of spaces. Here’s a step-by-step guide to help you install tension rods for your curtains room dividers.
Measure the width between the walls, the opening or the area where you want to install the curtain rod. Tension rods come in various adjustable lengths, so choose one that fits your measurement range.
Choose a tension rod that is sturdy enough to support the weight of your curtains. Lightweight curtains are better for tension rods to ensure stability.
Adjust the tension rod to the desired length by twisting or extending it according to the manufacturer’s instructions. Ensure the rod is slightly longer than the width of the space to create the necessary tension for a secure fit.
Hold the tension rod horizontally and place one end against one side of the wall. Compress the rod by pushing it inward, then position the other end against the opposite side. Release the rod slowly, allowing it to expand and hold firmly in place.
Ensure the tension rod is level and securely positioned. Give it a gentle tug to confirm it is stable and won’t easily slip or fall.
Slide your curtains onto the rod. For grommet or ring-top curtains, slide the rings onto the rod before positioning it in place.
Using tension rods as curtain rods is a quick, easy, and damage-free way to hang curtains, making it perfect for renters. This method allows you to enhance privacy and style without compromising your security deposit.

Photo: Pinterest
3. Choosing the Right Fabric for Curtain Room divider
Choosing the right fabric for a curtain room divider is crucial for achieving the desired aesthetic and functionality.
Here are some key considerations to help you select the perfect fabric.
Determine the primary purpose of your curtain room divider. If privacy is a priority, opt for thicker fabrics like blackout curtains or heavy-duty cotton. For a more open feel while still defining spaces, sheer or lightweight fabrics like linen or voile work well.
Consider how much light you want to filter through the curtain. Blackout fabrics block most light, making them ideal for creating a dark, private space. Semi-sheer fabrics allow natural light to pass through while still providing some separation.
Choose a durable fabric that can withstand frequent use, especially if the curtain will be opened and closed regularly. Fabrics like polyester, canvas, or denim are sturdy and long-lasting.
Match the fabric to your interior decor. For a modern look, consider sleek fabrics like polyester blends or faux silk. For a more relaxed, natural vibe, linen or cotton in neutral tones can enhance the space. You can also add a design element to your space by selecting patterned or textured curtains that match your decor.
Think about how easy the fabric is to clean. Machine-washable fabrics are convenient and practical for households with kids or pets. Fabrics that require dry cleaning might offer a luxurious feel but can be less convenient.
If sound control is important, look for thicker, heavier fabrics that can help dampen noise. Velvet or wool fabrics are good choices for this purpose.
By considering these factors, you can select a fabric that not only looks great but also meets your practical needs for a curtain room divider. Whether you prioritize privacy, light control, durability, style, or maintenance, the right fabric will help you create a versatile and stylish separation in your home.
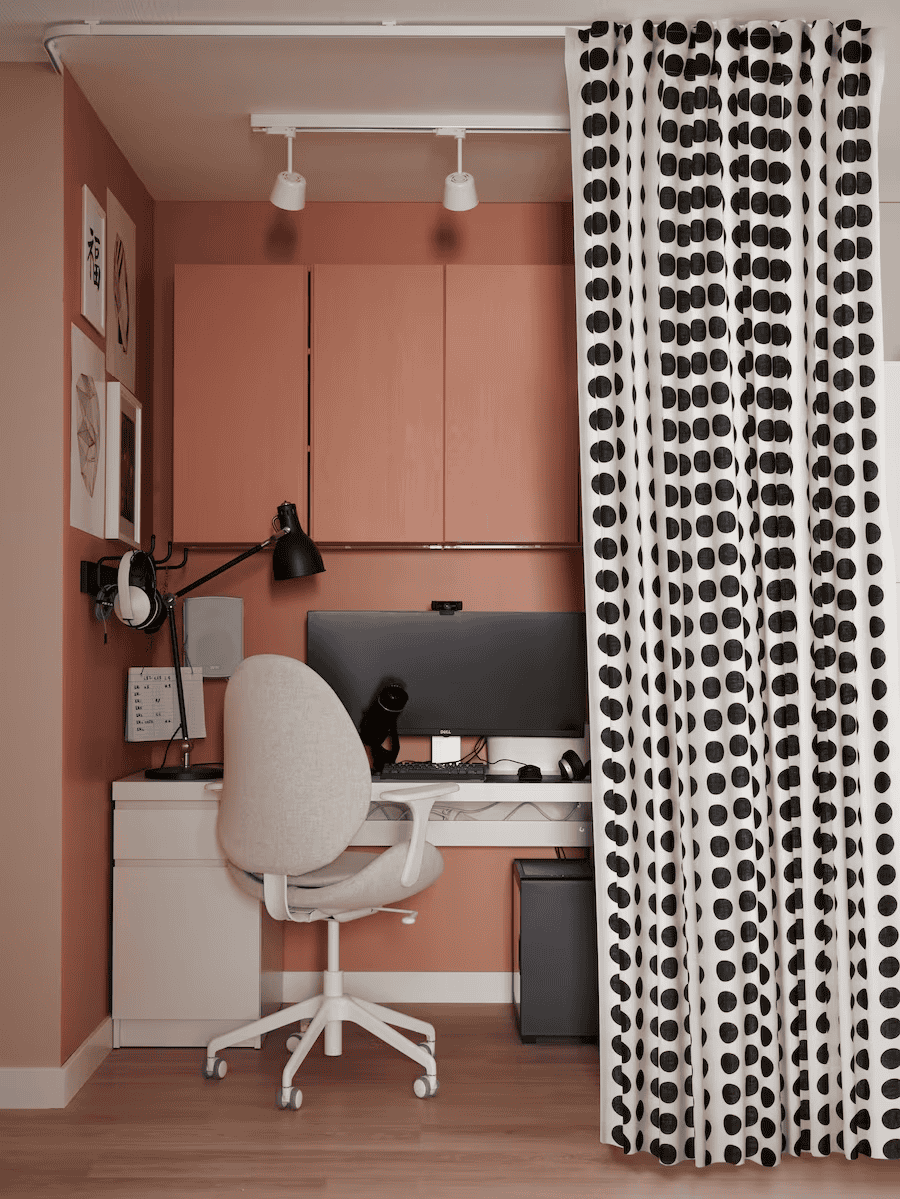
Photo: Ikea
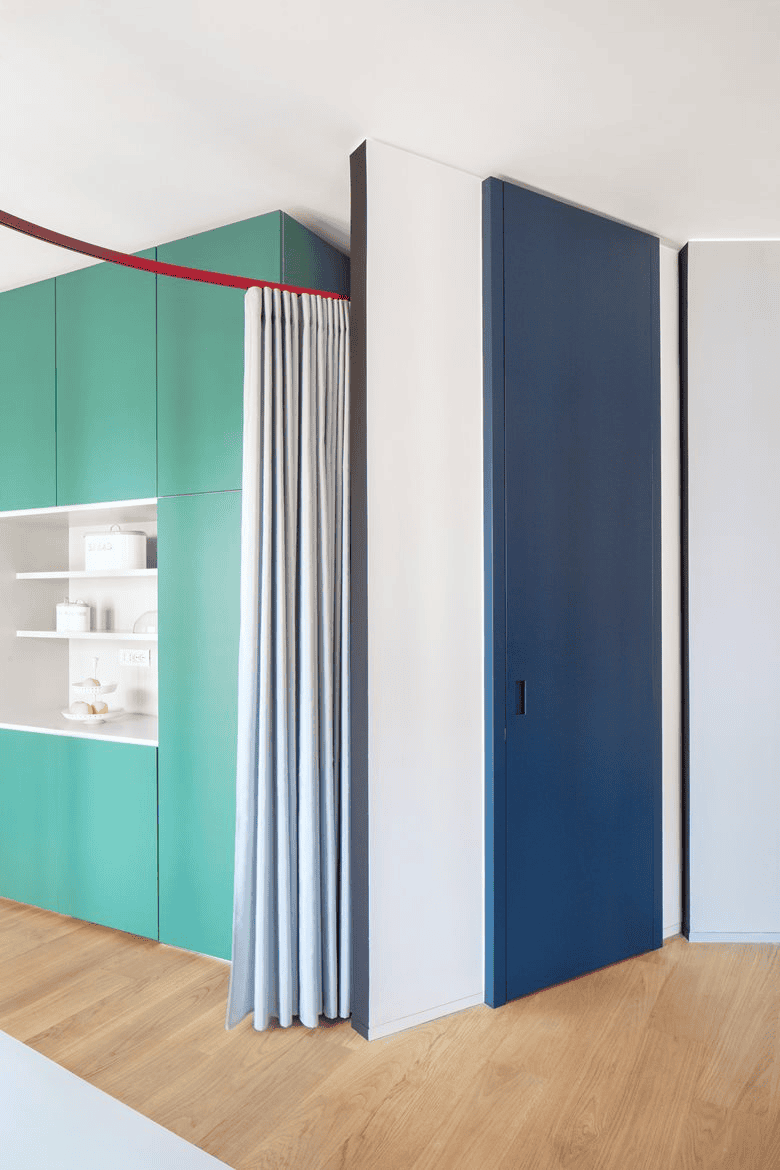
Photo: Archilovers
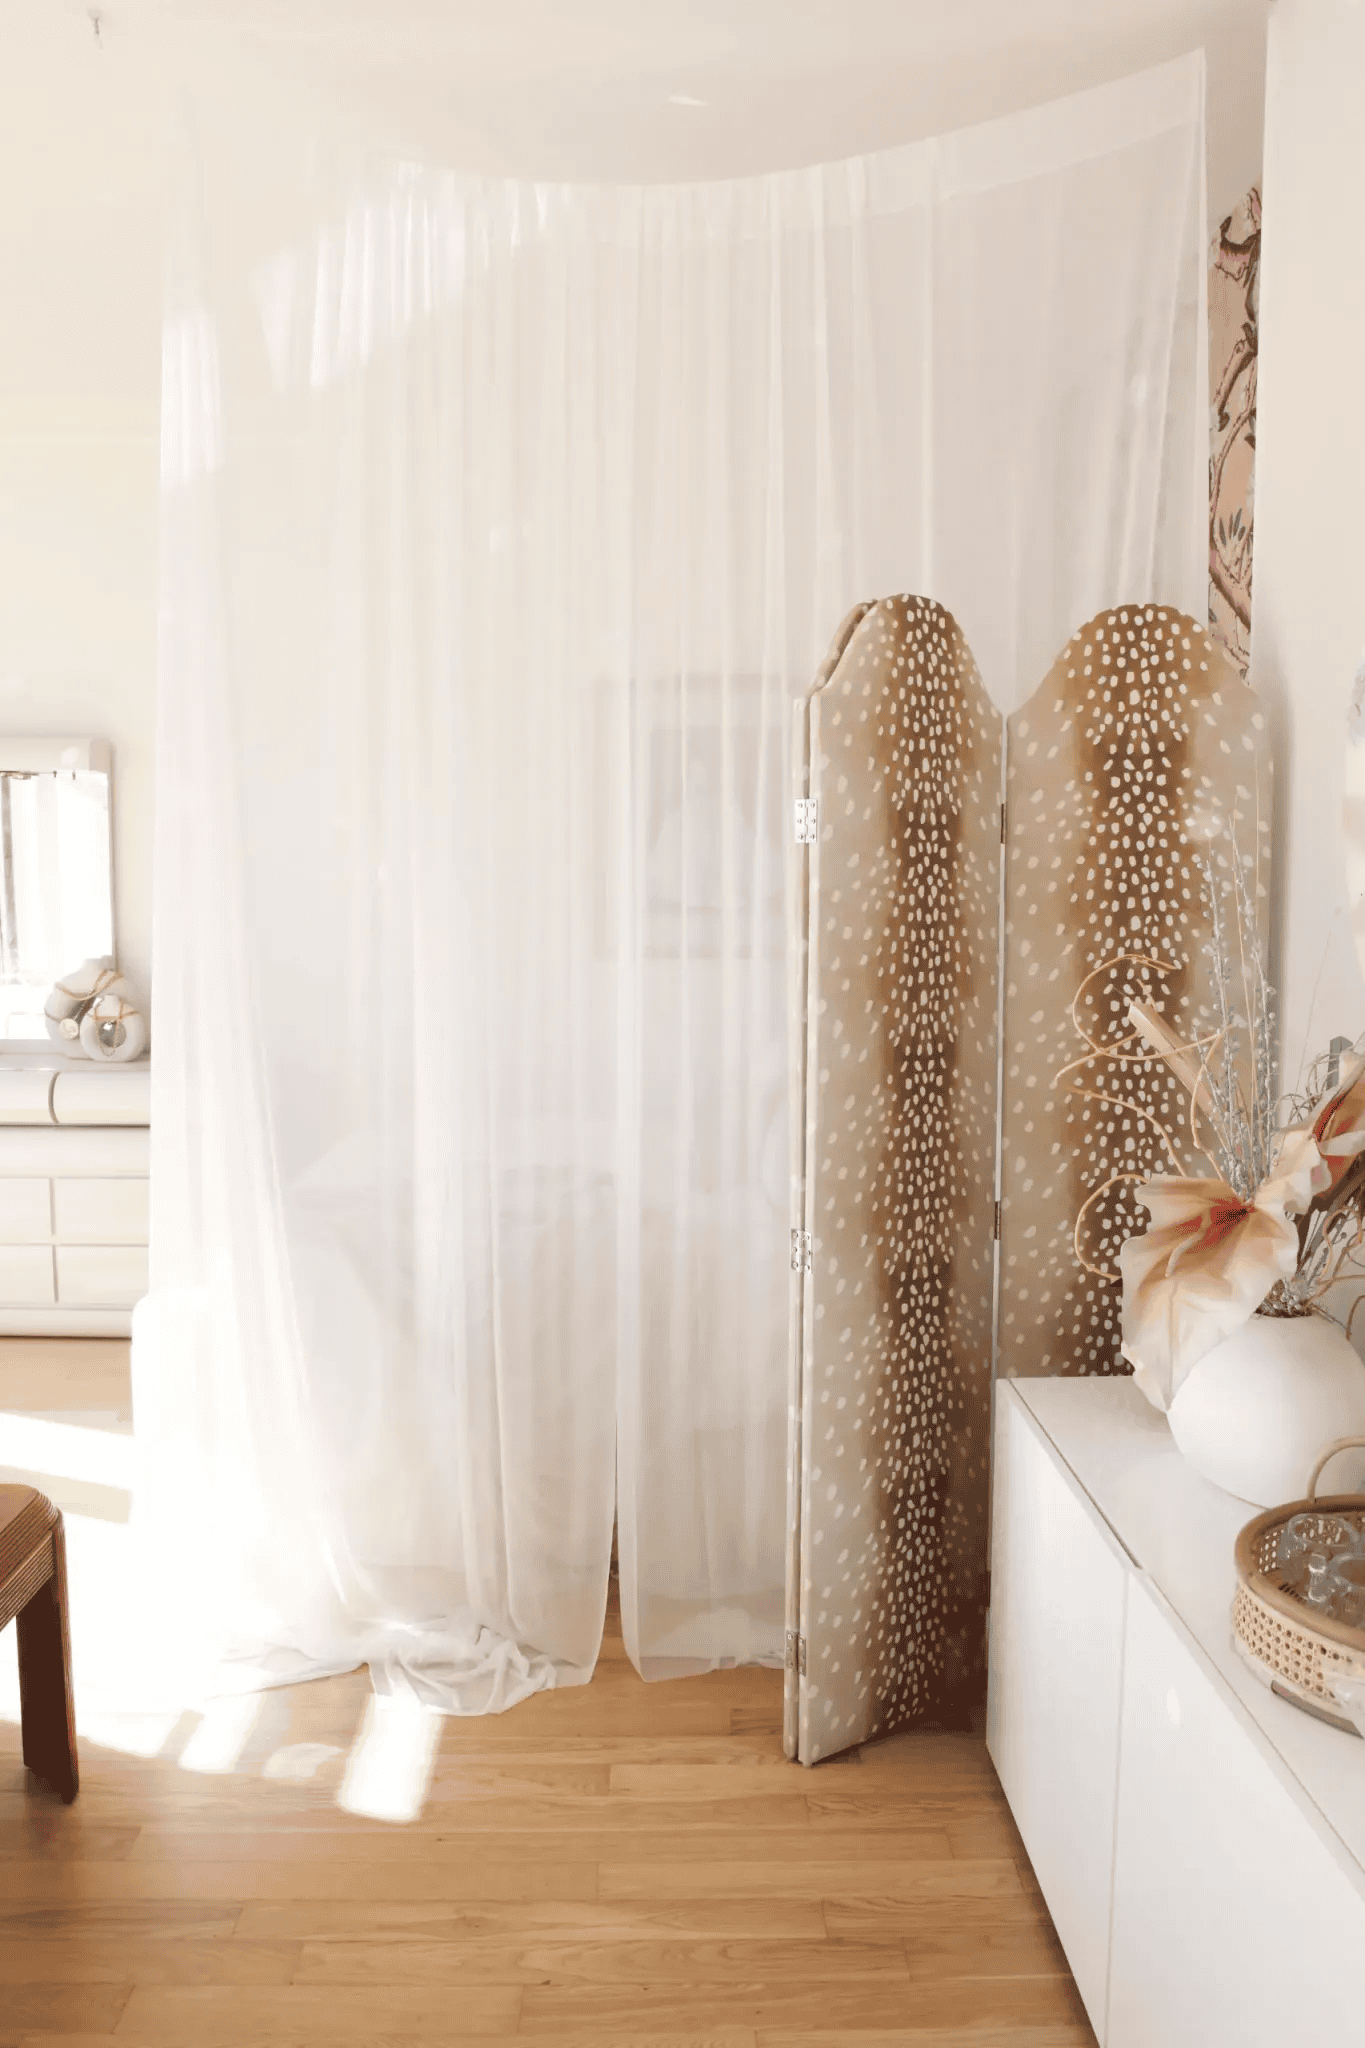
Photo: City Chic Decor
4. Layering Curtains
Layering curtains using a combination of sheer and opaque fabrics on a double rod setup is a straightforward process that adds depth and versatility to your space. This allows you to control light and privacy levels by adjusting the layers.
You will need a double curtain rod, a rod system with two separate rods, one in front of the other. You will also need sheer curtains (light, translucent fabric like voile or lace), and opaque curtains (thicker, heavier fabric like velvet, blackout curtains, or cotton). And of course mounting hardware (brackets and screws) and any necessary tools for installation.
Measure the width and height of the area where you want to hang the curtains. Ensure the double rod system will fit and allow the curtains to hang properly.
Mount the double rod brackets according to the manufacturer’s instructions. Typically, the brackets are installed close to the ceiling to create an illusion of height and make the space feel larger.
Slide the sheer curtains onto the back rod. These curtains will be closest to the area you are dividing.
Slide the opaque curtains onto the front rod. These curtains will be on the outer layer, providing privacy and light control.
Once both sets of curtains are hung, adjust them so they hang evenly and look tidy. Ensure the sheers are evenly distributed and can move freely along the rod.
During the day, you can keep the opaque curtains open to let light filter through the sheer curtains, creating a soft, diffused light effect.
At night, close the opaque curtains for privacy and to block out light.
You may enjoy a few extra tips for a seamless look.
Select sheer and opaque curtains in colors that complement each other and your overall décor.
For a polished look, ensure both sets of curtains are the same length, reaching just above the floor or slightly pooling on it.
Use tiebacks or curtain holdbacks to neatly pull the opaque curtains to the sides during the day, showcasing the sheer layer.
By following these steps, you can easily layer sheer and opaque curtains on a double rod, creating a functional and aesthetically pleasing window treatment or room divider.
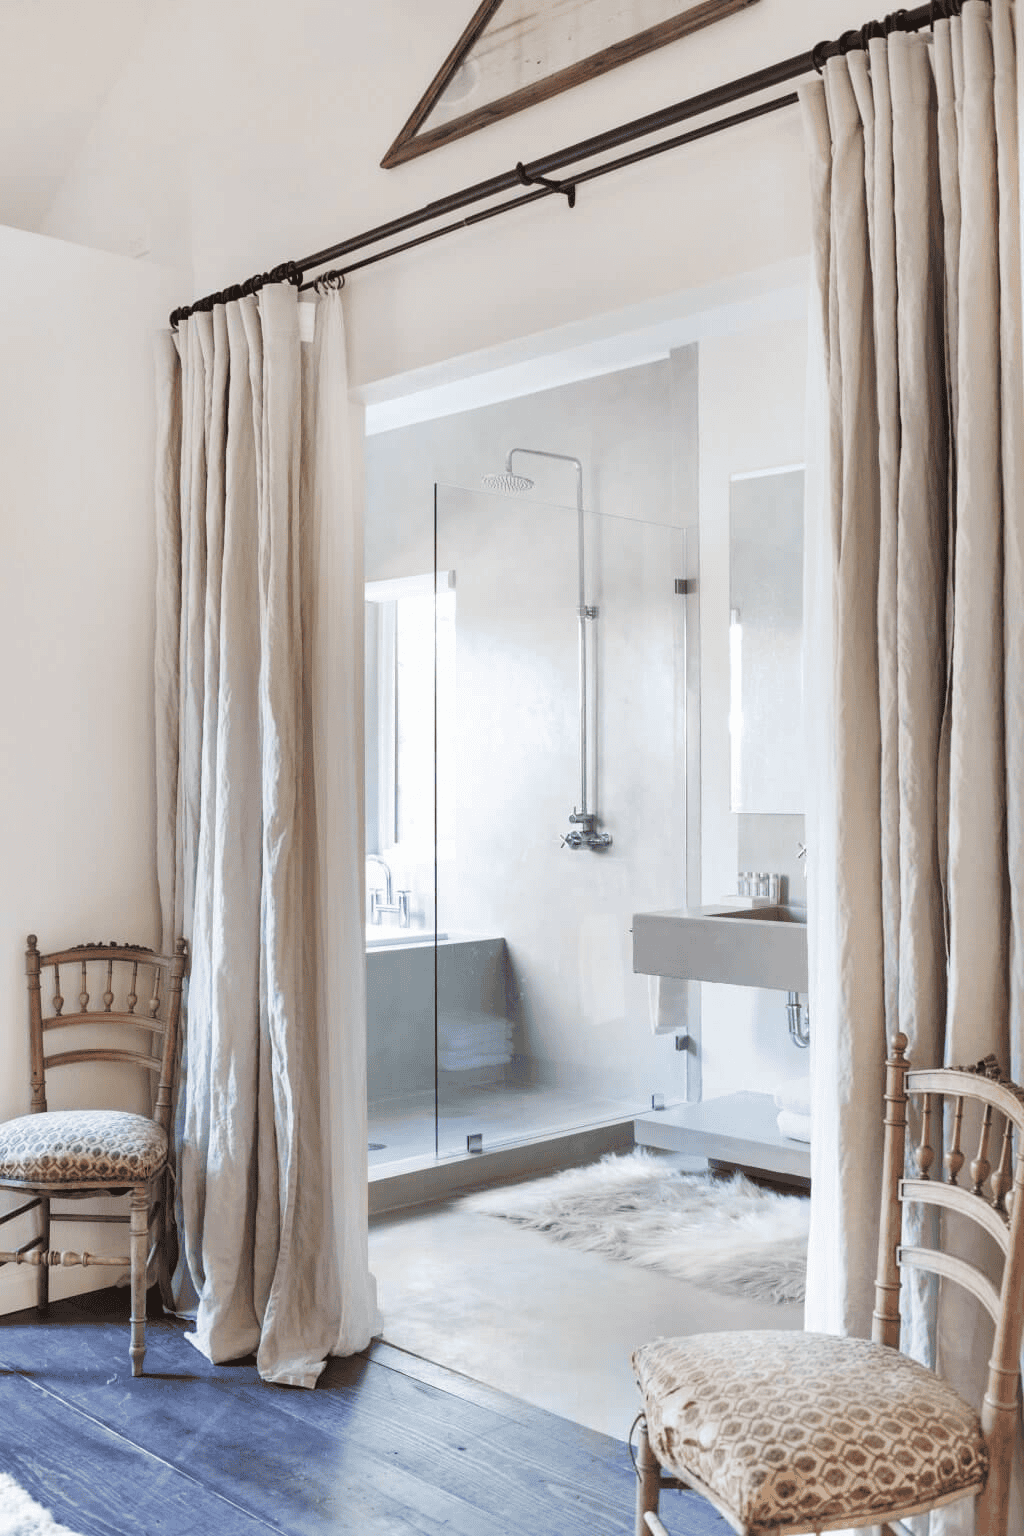
Photo: Pinterest
5. Accessorizing and Styling
Accessorizing and styling a curtain room divider with tiebacks and lighting can elevate the look and functionality of your space. Here’s how you can achieve a polished and stylish curtain room divider:
Tiebacks
Tiebacks are an excellent way to keep your curtains open and allow flexibility in how you use your space.
Select tiebacks that complement your curtains. You can choose among several options which include fabric tiebacks, rope, metal hooks, or decorative tassels.
Install tieback hooks on the wall or use magnetic tiebacks for a no-drill option. Ensure they are at a convenient height for easy access.
When you want to open up the space, use the tiebacks to pull the curtains to the sides neatly. This adds a touch of elegance and keeps the curtains from blocking pathways.
Lighting
Incorporating lighting into your curtain room divider can enhance the ambiance and functionality of the space.
Hang string lights along the top of the curtain rod for a soft, twinkling effect. This works well for creating a cozy, intimate atmosphere.
Use clip-on spotlights or clamp lamps to highlight the curtain and the space it divides. This can provide focused lighting for specific areas, such as a reading nook or workspace.
Install LED strip lights behind the curtain rod for a backlit effect. This adds a modern touch and can be adjusted to different colors and brightness levels to suit your mood and needs.
Ensure that tiebacks and lighting elements complement the curtain fabric and the overall room decor. Matching or harmonizing colors and materials create a cohesive look. Avoid over-accessorizing. Balance is key to ensuring the curtain room divider remains stylish and functional without overwhelming the space.

Curtains with string lights
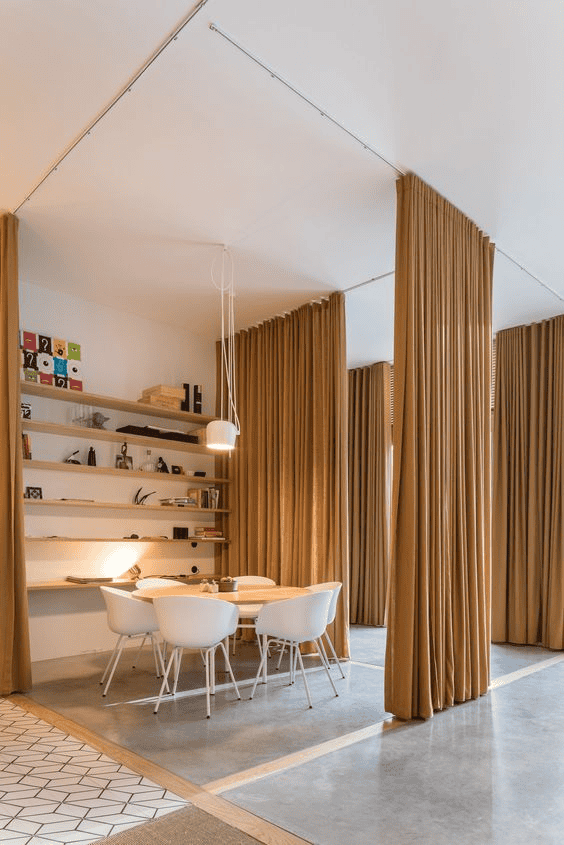
Photo: Deenze
6. DIY and Budget-Friendly Curtain Room Divider Ideas
Creating a DIY and budget-friendly curtain room divider is a great way to enhance the functionality and style of your space without breaking the bank.
Affordable options include repurposing existing curtains, purchasing budget-friendly ones from stores like IKEA or Walmart, or even making your own from fabric.
You can also be creative and use bedsheets, tablecloths, or even shower curtains as room dividers for a cost-effective solution.
Don´t forget to check at local thrift stores for affordable curtains and fabric.
Tension rods are perfect for renters or temporary solutions as they don’t require drilling. You can also hang curtains using decorative poles and hooks for an easy and stylish DIY project.
By following these steps and ideas below, you can create a functional and stylish curtain room divider on a budget. This approach allows you to personalize your space without significant investment.
Ikea hack Bedroom curtain divider
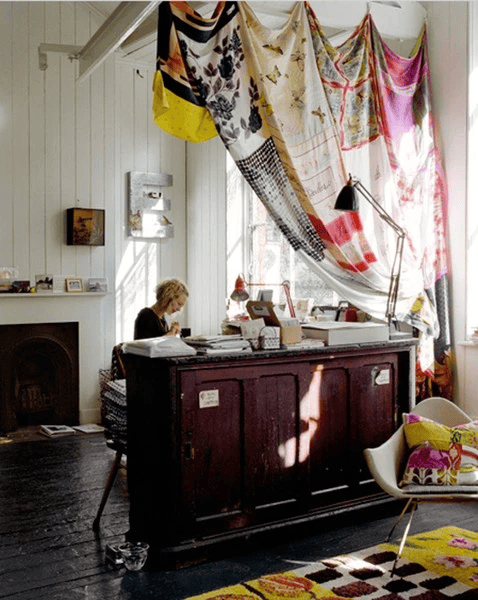
Patchwork curtain room divider idea (photo: The Yellow Cottage)

DIY hanging curtain room divider

Ripped linen room divider (Photo: Ellen Silverman)
In conclusion, using curtains as room dividers allows you to customize your space according to your needs and preferences. They are a flexible, affordable, and aesthetically pleasing option for creating functional and beautiful spaces in your home.
RELATED: 10 Creative Floor to Ceiling Room Divider Ideas
RELATED: How to build a simple room divider
Want to remember it? Save these Curtain Room Divider ideas on your favorite Pinterest board.