Counting down the days until Christmas is one of the most magical parts of the holiday season, especially when you have a homemade countdown to open each morning.
If you’re wondering how to make an advent calendar that is both budget-friendly and festive, this easy upcycled craft is the perfect weekend project.
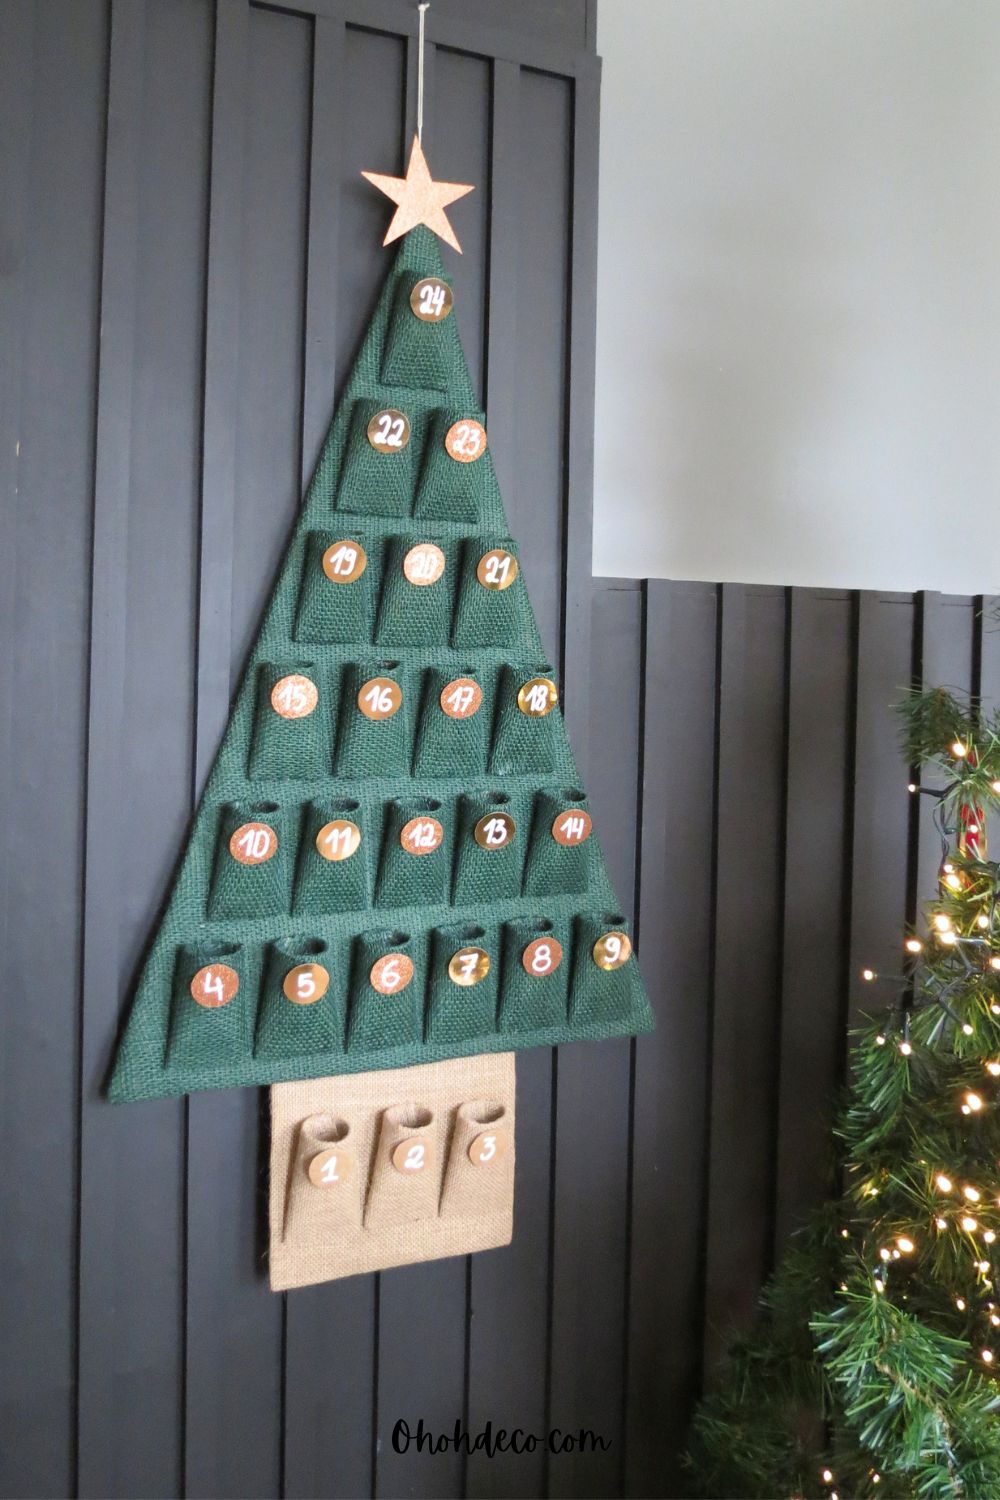
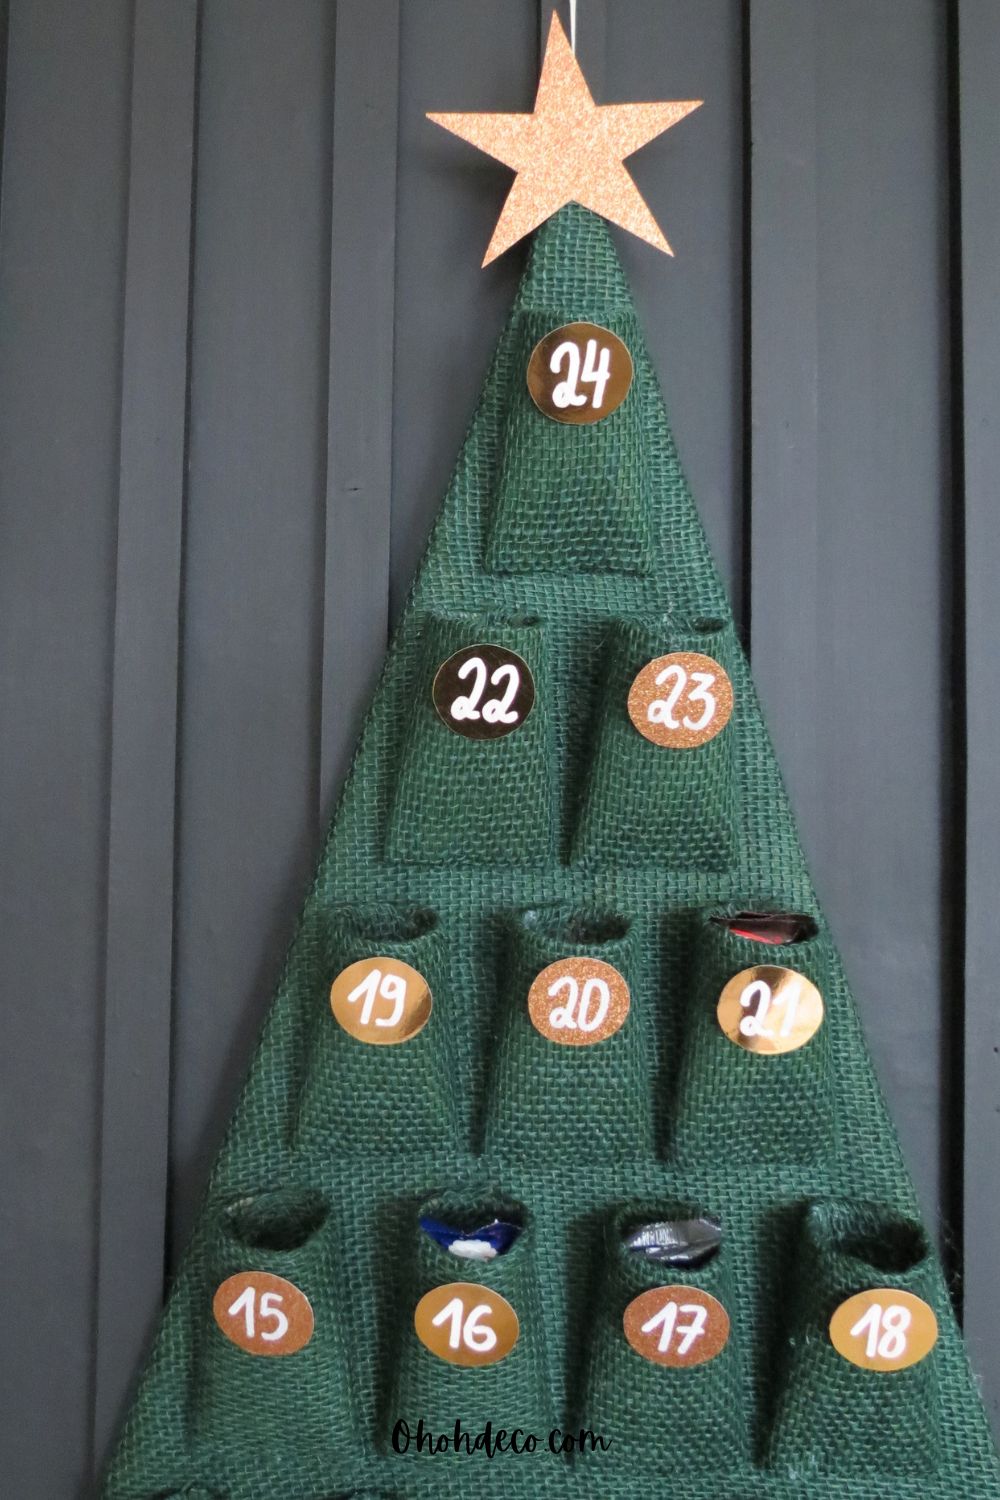
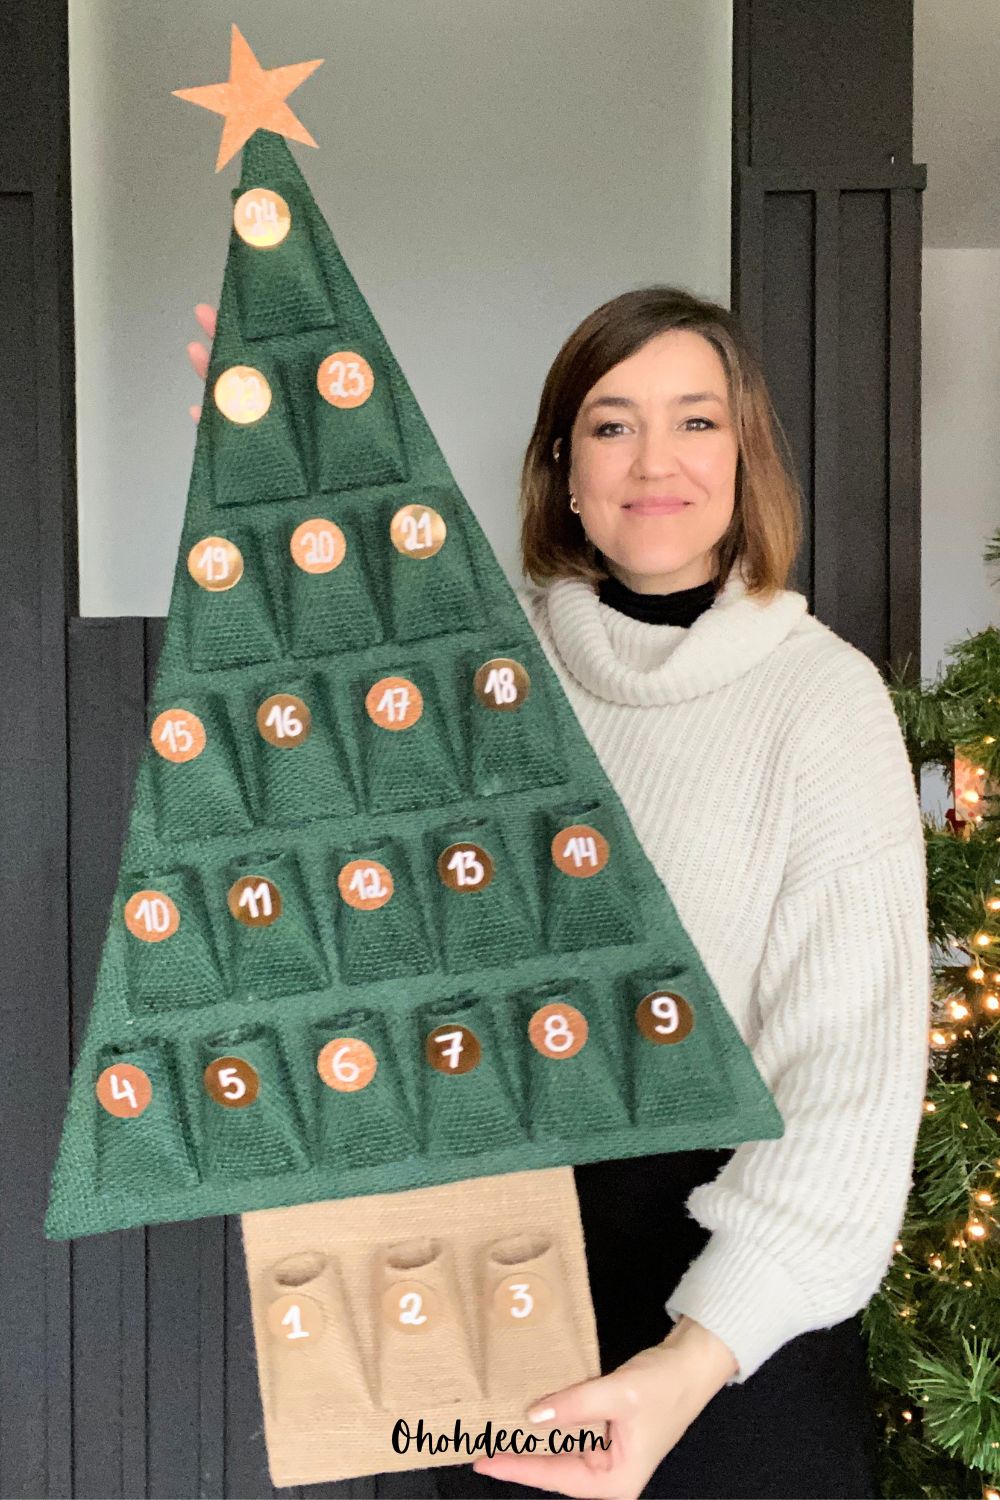
Using simple cardboard boxes, toilet paper rolls, and fabric scraps, you can create a charming, Christmas-tree-shaped advent calendar filled with pockets for treats, notes, and holiday surprises.
[ This post probably contains affiliate links; our full disclosure policy is boring, but you can read it HERE ]

Materials Needed
- 24 Toilet paper rolls
- Scrap cardboard (large enough to cut a tree triangle and trunk rectangle)
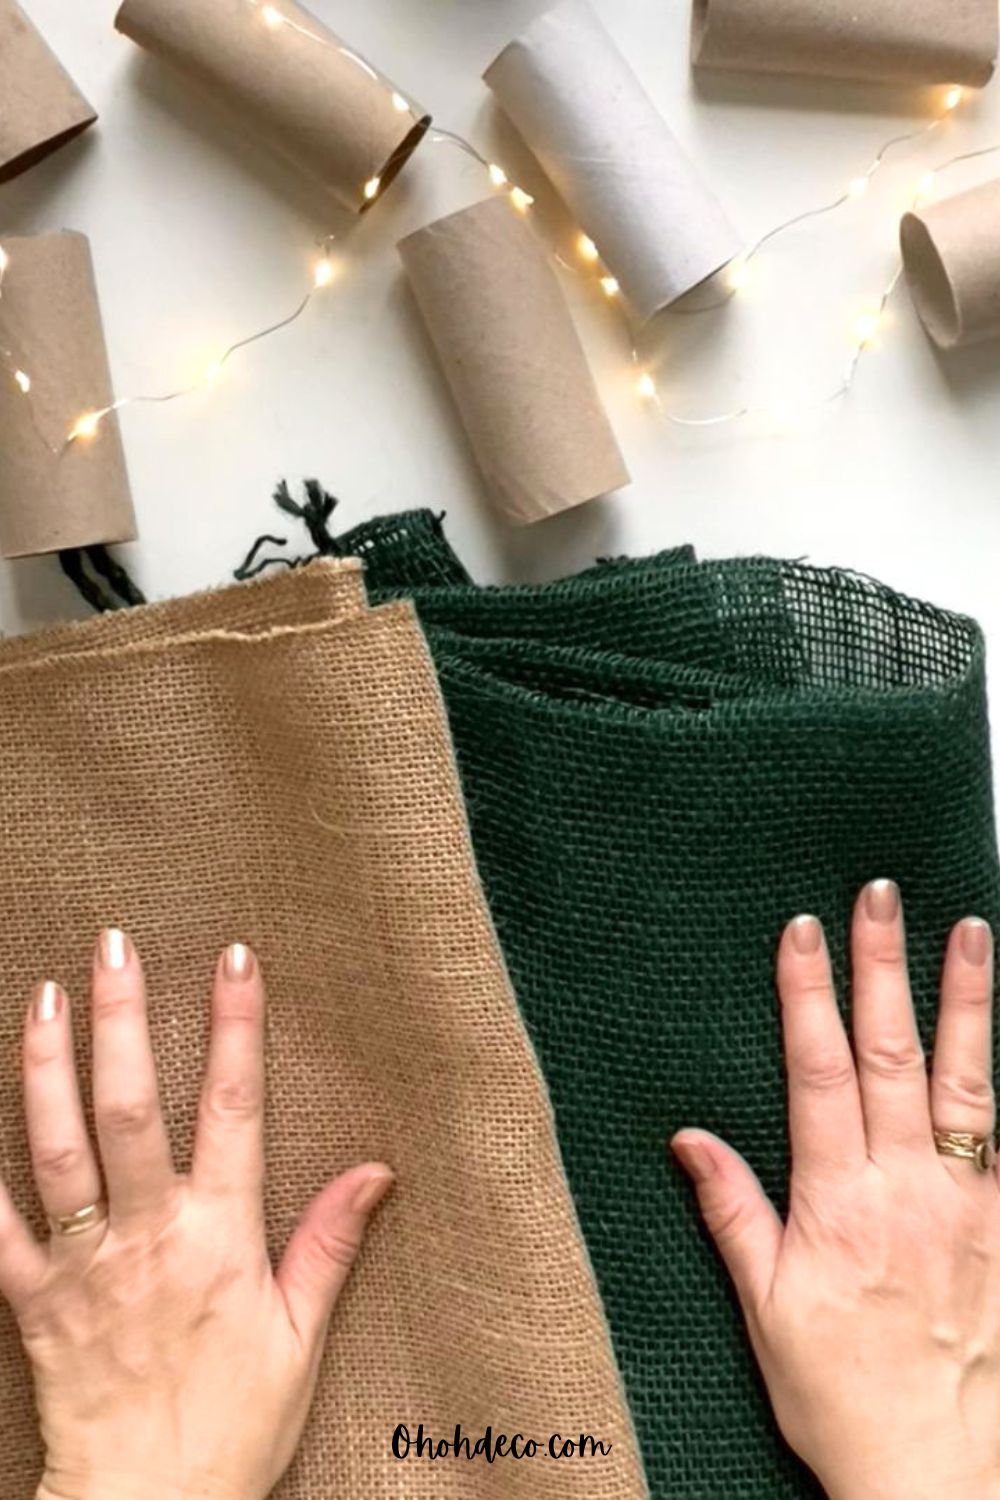
- Fabric: Green (for the tree) and brown/beige (for the tree trunk)
- Hot glue gun and glue sticks
- Clothespins (to hold glued rolls while drying)
- Scissors / Craft knife
- Decorative paper: Gold paper, glitter cardstock, and plain kraft cardboard
- Posca paint marker (or black permanent marker)
- Double-sided tape (or glue)
- Twine / Rope (for hanging)
This is the Fabric I used to make the Calendar
Step-by-Step Instructions
Step 1: Make the 24 Pocket Rolls
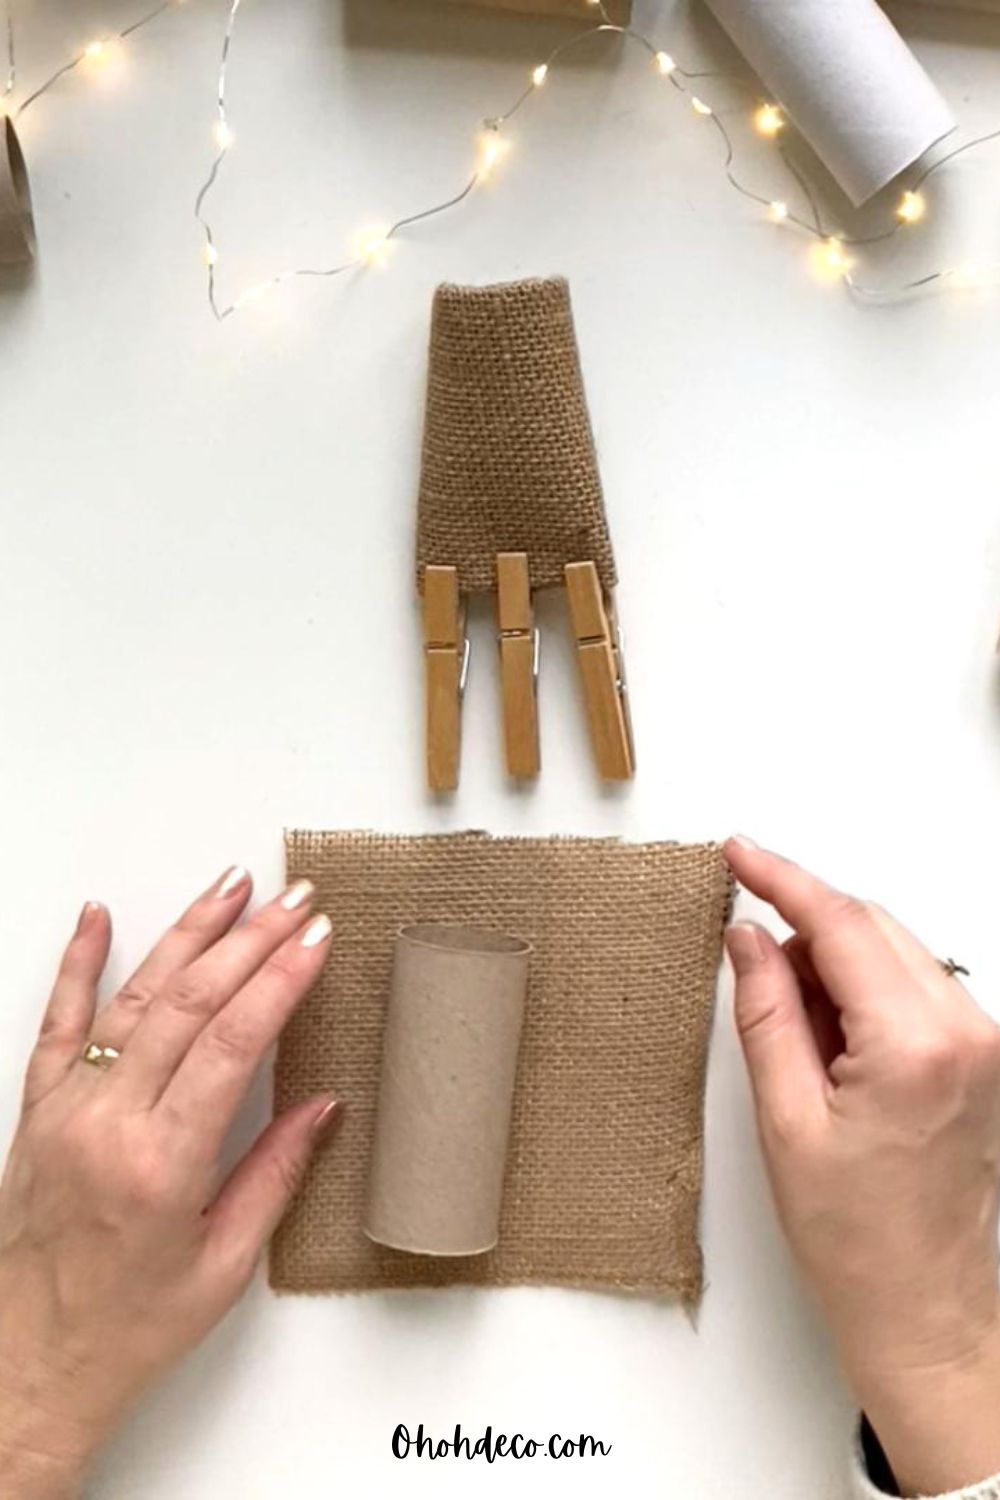
- Cut small pieces of fabric sized to wrap around a toilet paper roll with enough overhang on each end to fold inside.
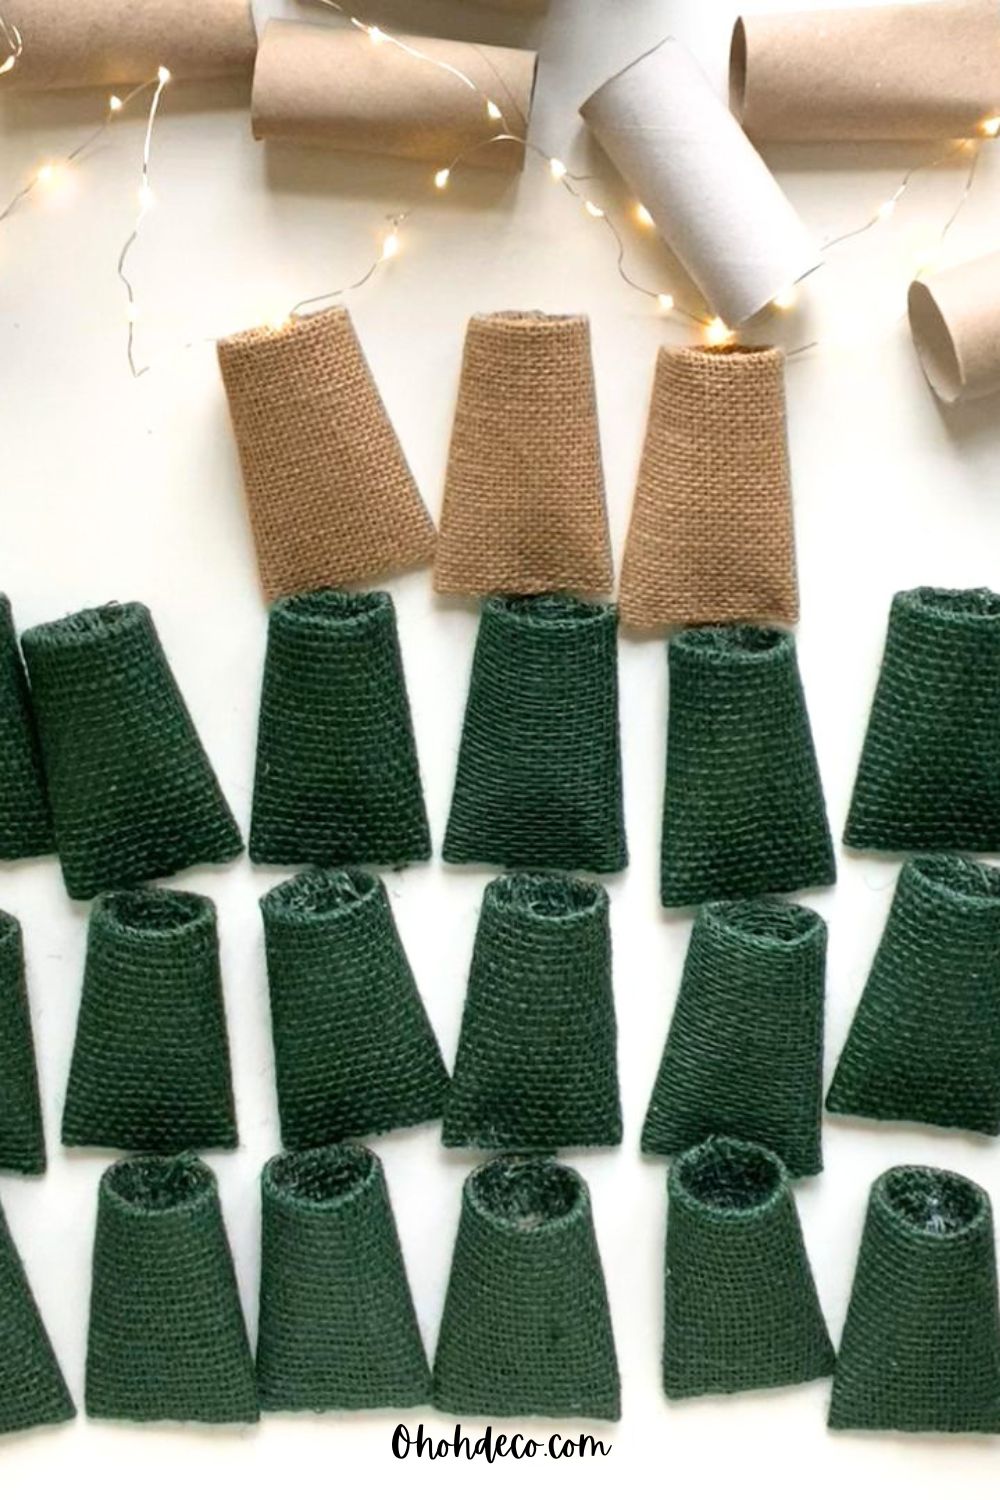
- Wrap 21 rolls in green fabric (for the tree part) and 3 rolls in brown fabric (for the trunk).
- Fold the excess fabric inside both ends of each tube to create clean edges.
- Pinch one end of each roll flat to create a sealed pocket bottom. Apply hot glue inside the fold and hold it shut with a clothespin until completely dry.
Step 2: Cut and Cover the Cardboard Base
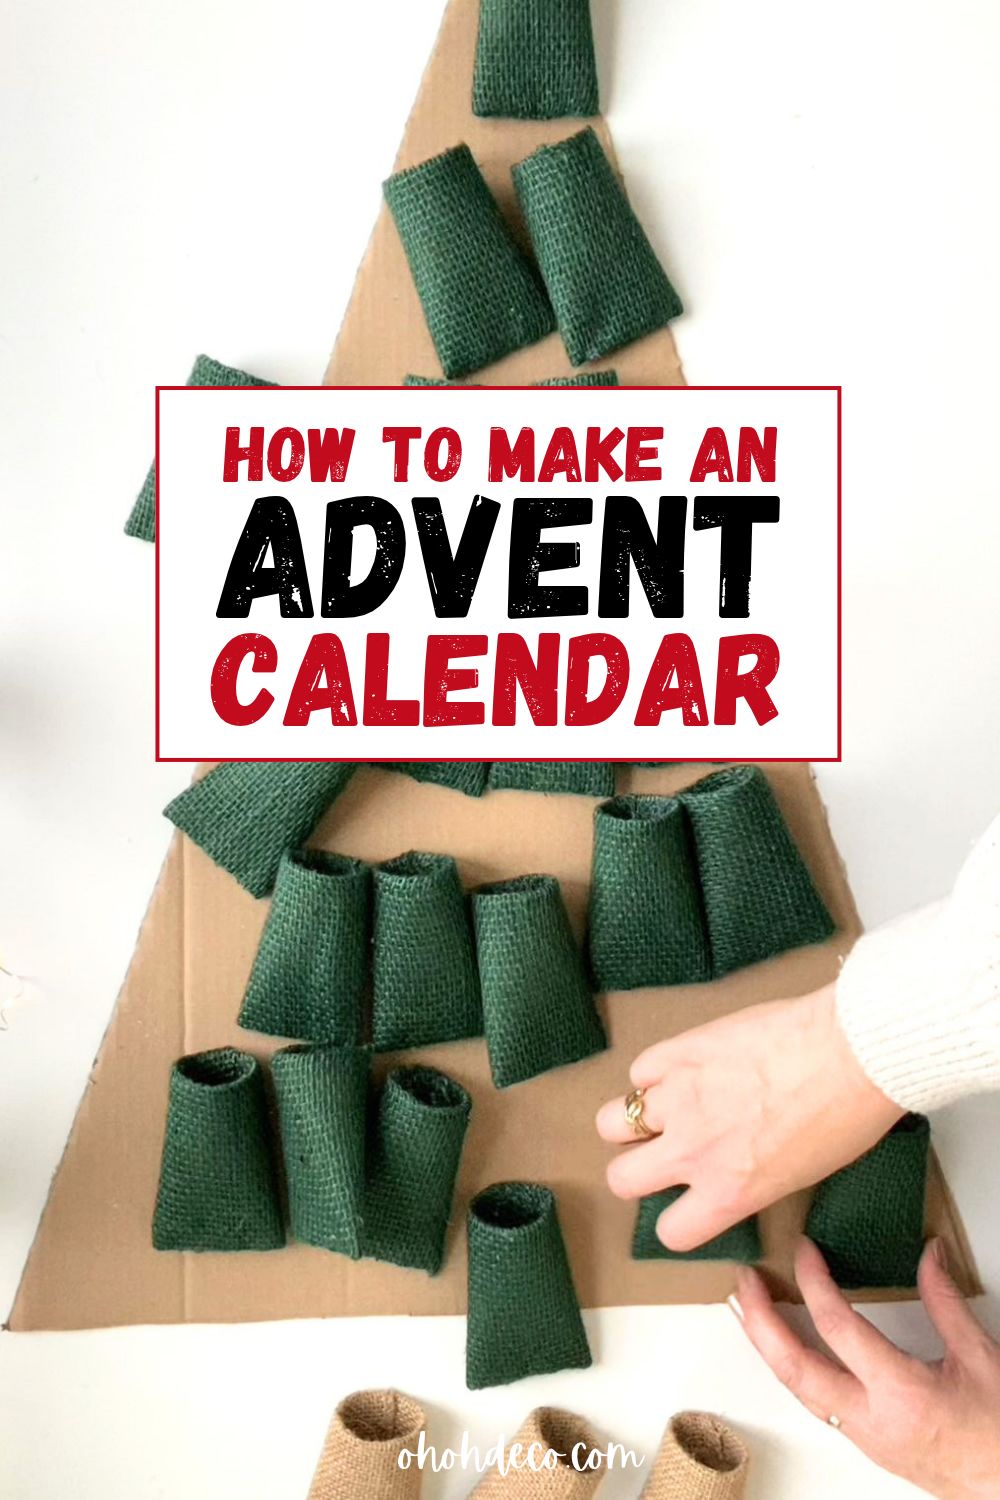
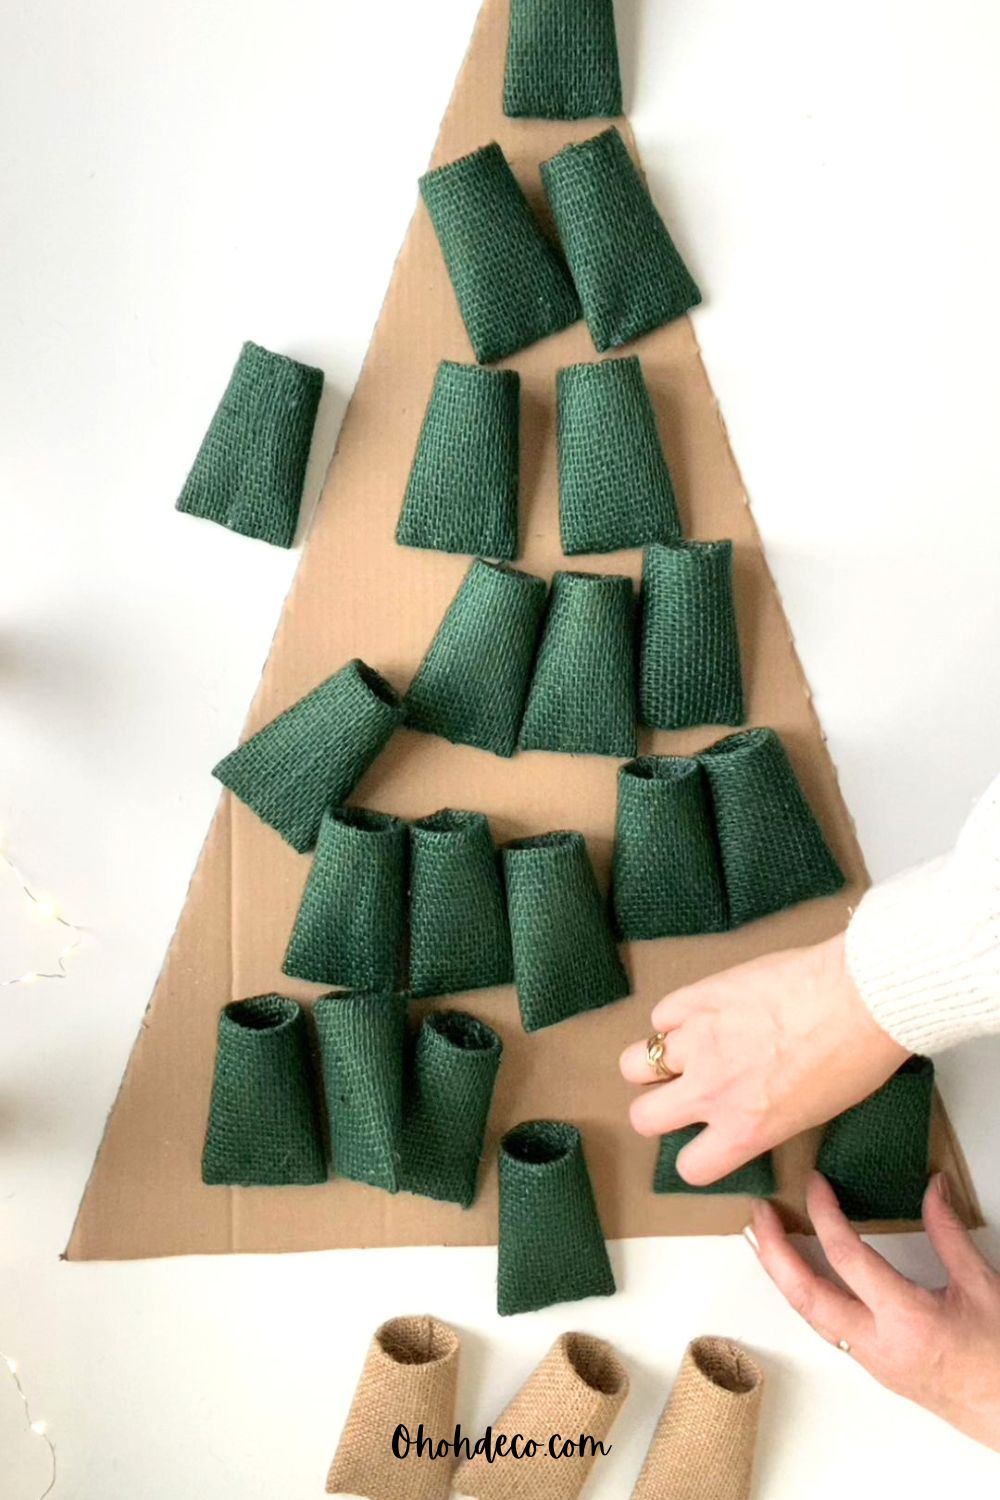
- Lay your cardboard flat and arrange the pockets in a triangular tree shape with the 3 brown rolls at the base to determine the right size.
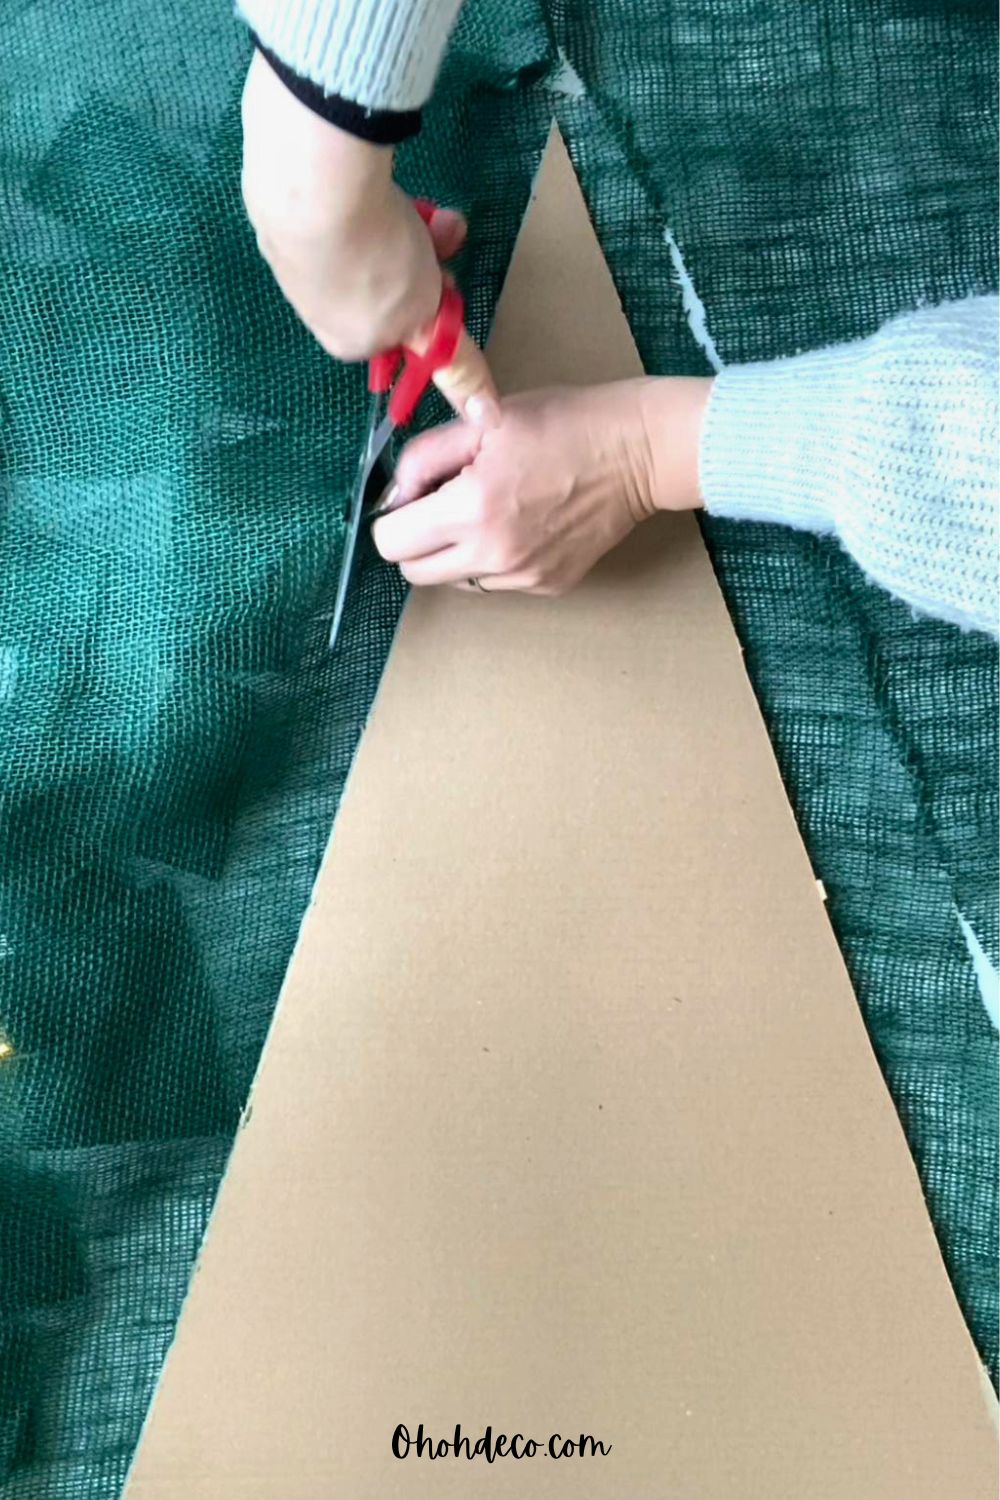
- Trace your triangle and cut it out. If your cardboard isn’t tall enough to include the trunk, cut a separate rectangle for the base.
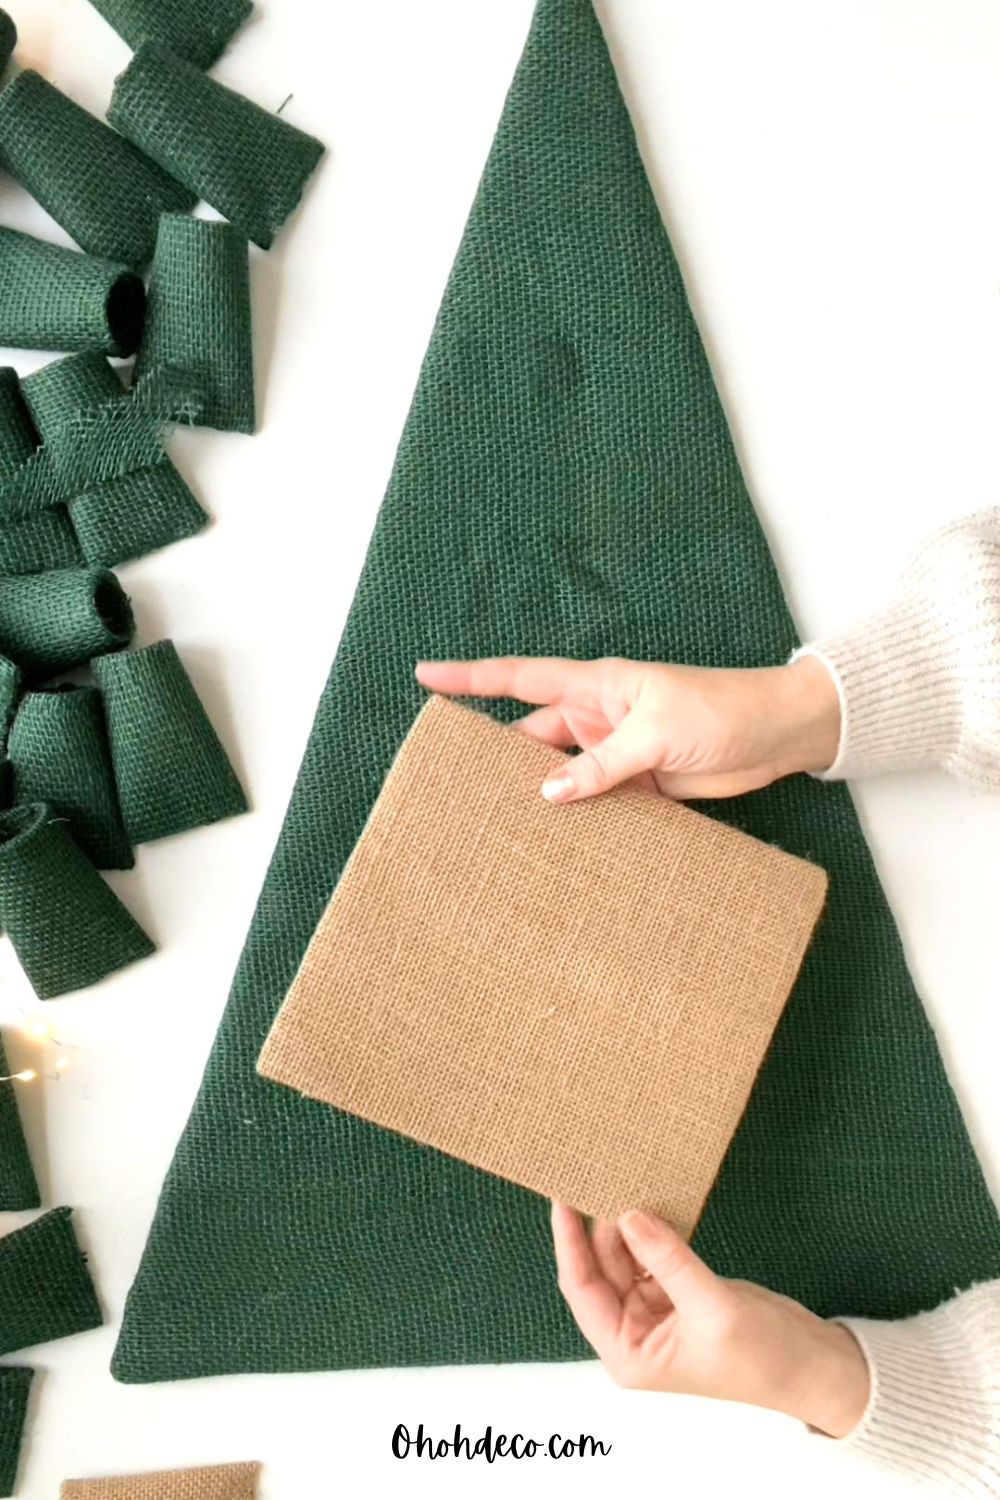
- Wrap the cardboard triangle in green fabric, folding the edges over and gluing them securely to the back.
- Wrap the trunk rectangle in brown fabric, then hot-glue the trunk piece behind the bottom of the green triangle.
Step 3: Glue the Pockets in Place
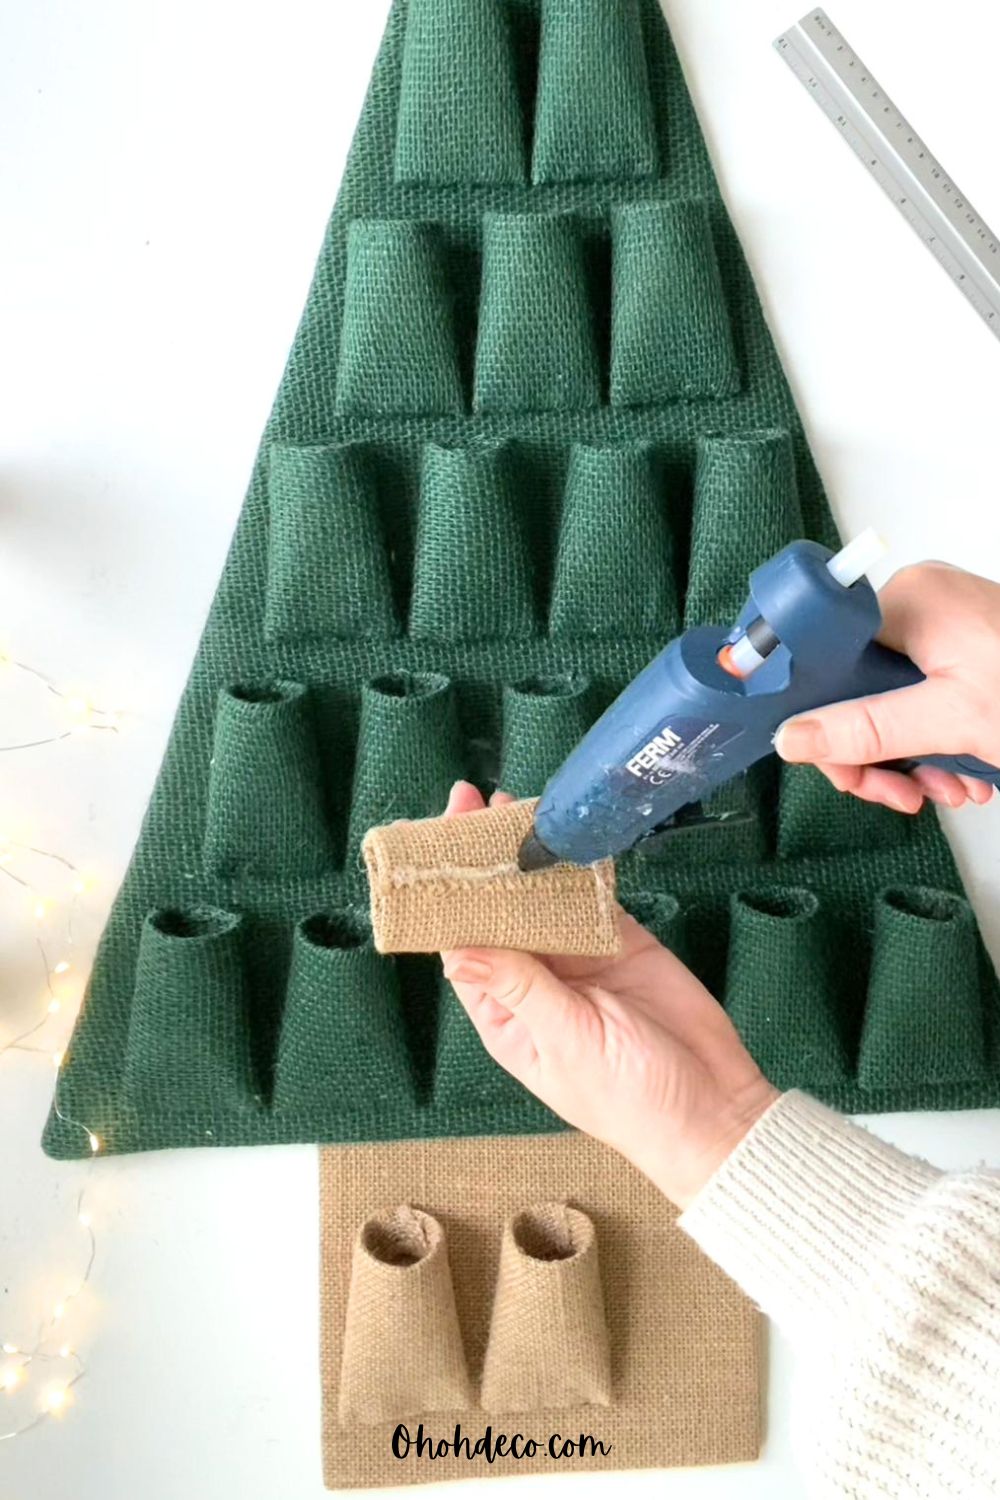
- Lay your fabric-covered tree shape flat and display all 24 pockets to make sure the spacing looks balanced.
- Apply hot glue to the back of each pocket in a “T” shape (along the bottom edge and up the center spine).
- Press each roll firmly onto the cardboard until everything is securely fastened.
Step 4: Add the Numbers and Tree Topper
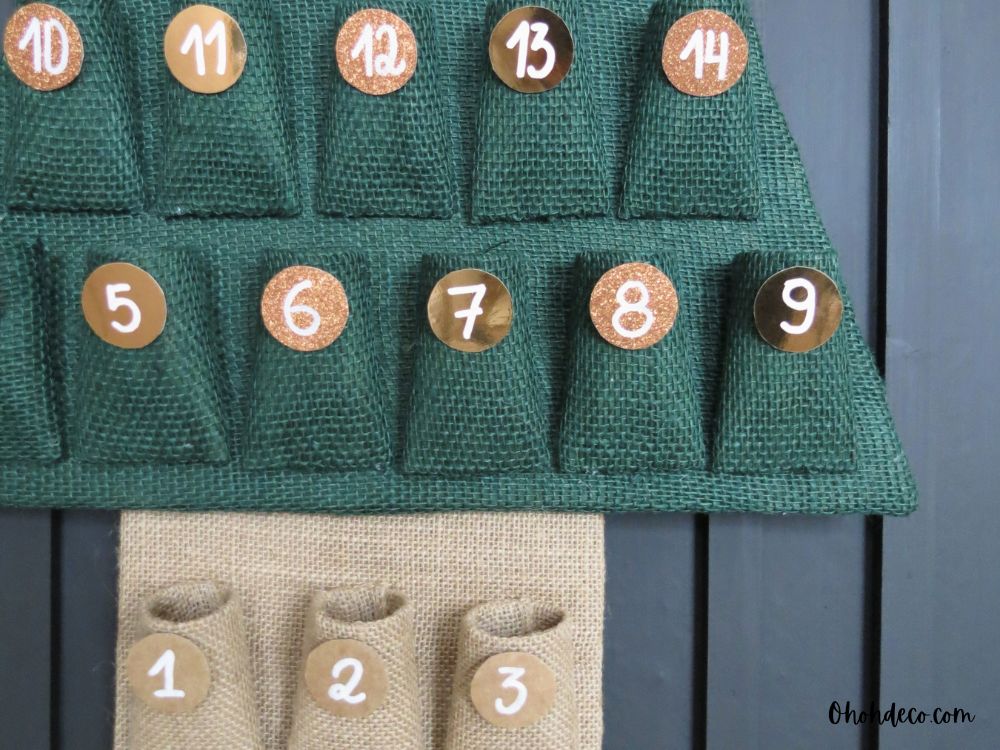
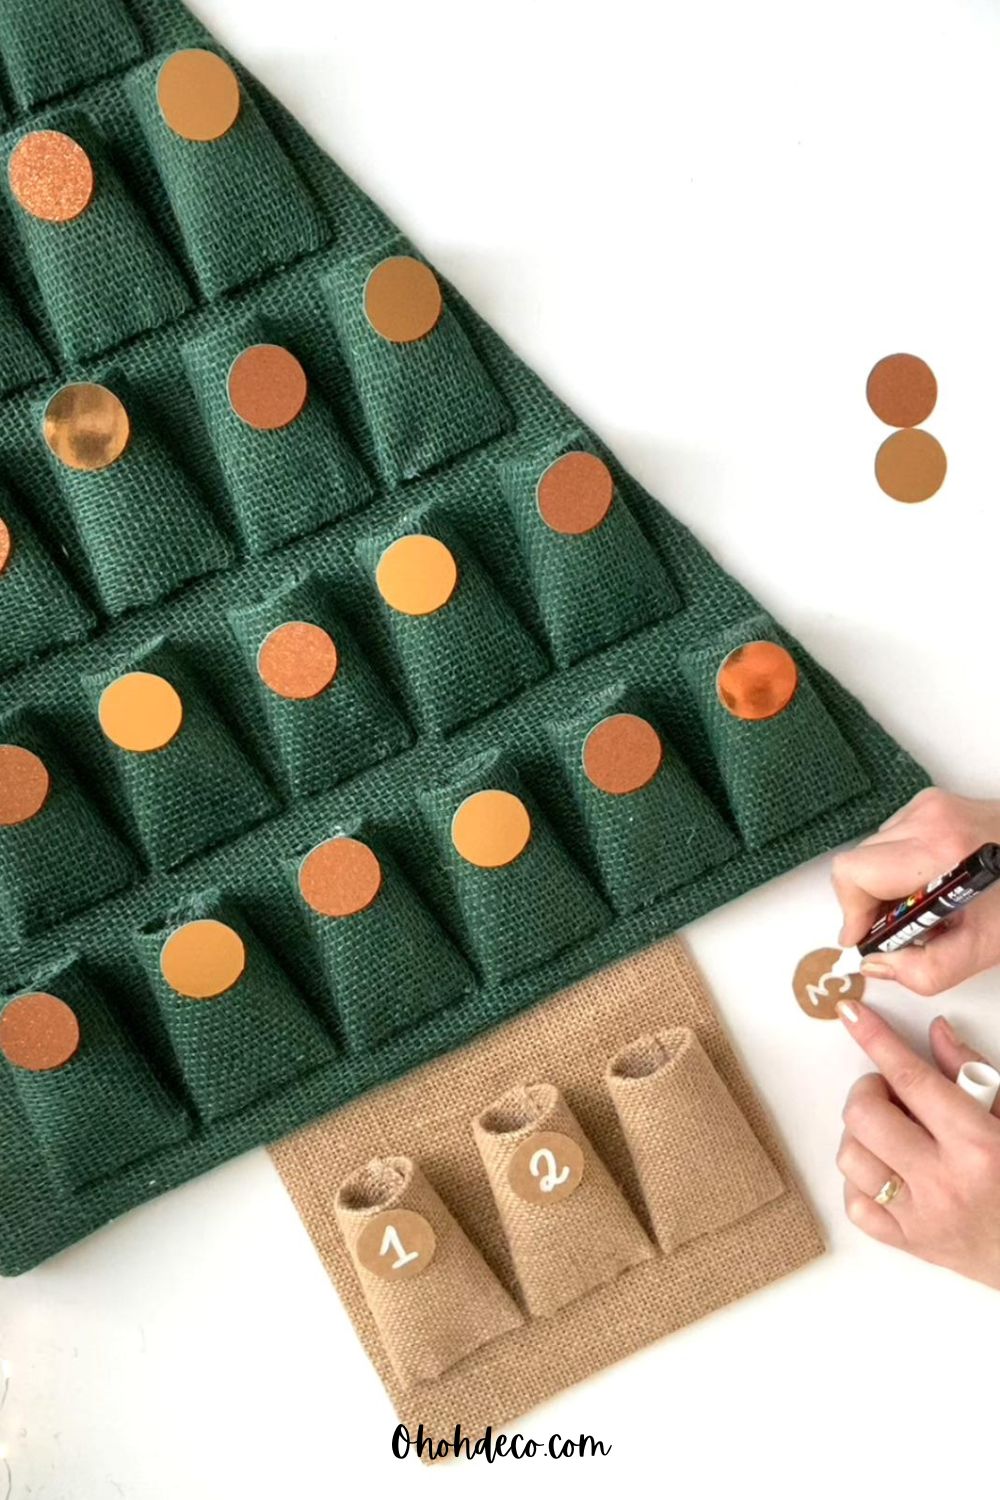
- Cut 24 small circles out of decorative paper. Use gold or glitter paper for the tree numbers (1–21) and kraft cardboard circles for the trunk numbers (22–24).
- Number the circles from 1 to 24 using a Posca marker.
- Attach each numbered circle to the front of a pocket using double-sided tape or a small dab of hot glue.
- Cut a star out of matching gold paper and glue it right at the top of your tree.
If you’d rather skip making your own labels from scratch, Amazon has plenty of ready-made ways to number your DIY advent calendar depending on the look you’re going for.
For a quick, effortless finish, you can pick up classic Christmas Advent Calendar Number Stickers.
If you want something reusable with a cozy, rustic feel, Wooden Advent Calendar Number Tags is a great option.
Finally, to elevate your display with a little shimmer or vintage charm, look for Brass tag Advent Number that give any countdown an instant upgrade.
Step 5: Add the Hanging Loop
- Flip the calendar over so the back is facing up.
- Cut a small piece of twine or rope, form a loop, and secure it near the top point with a generous amount of hot glue.
- Let it cool completely before picking it up.
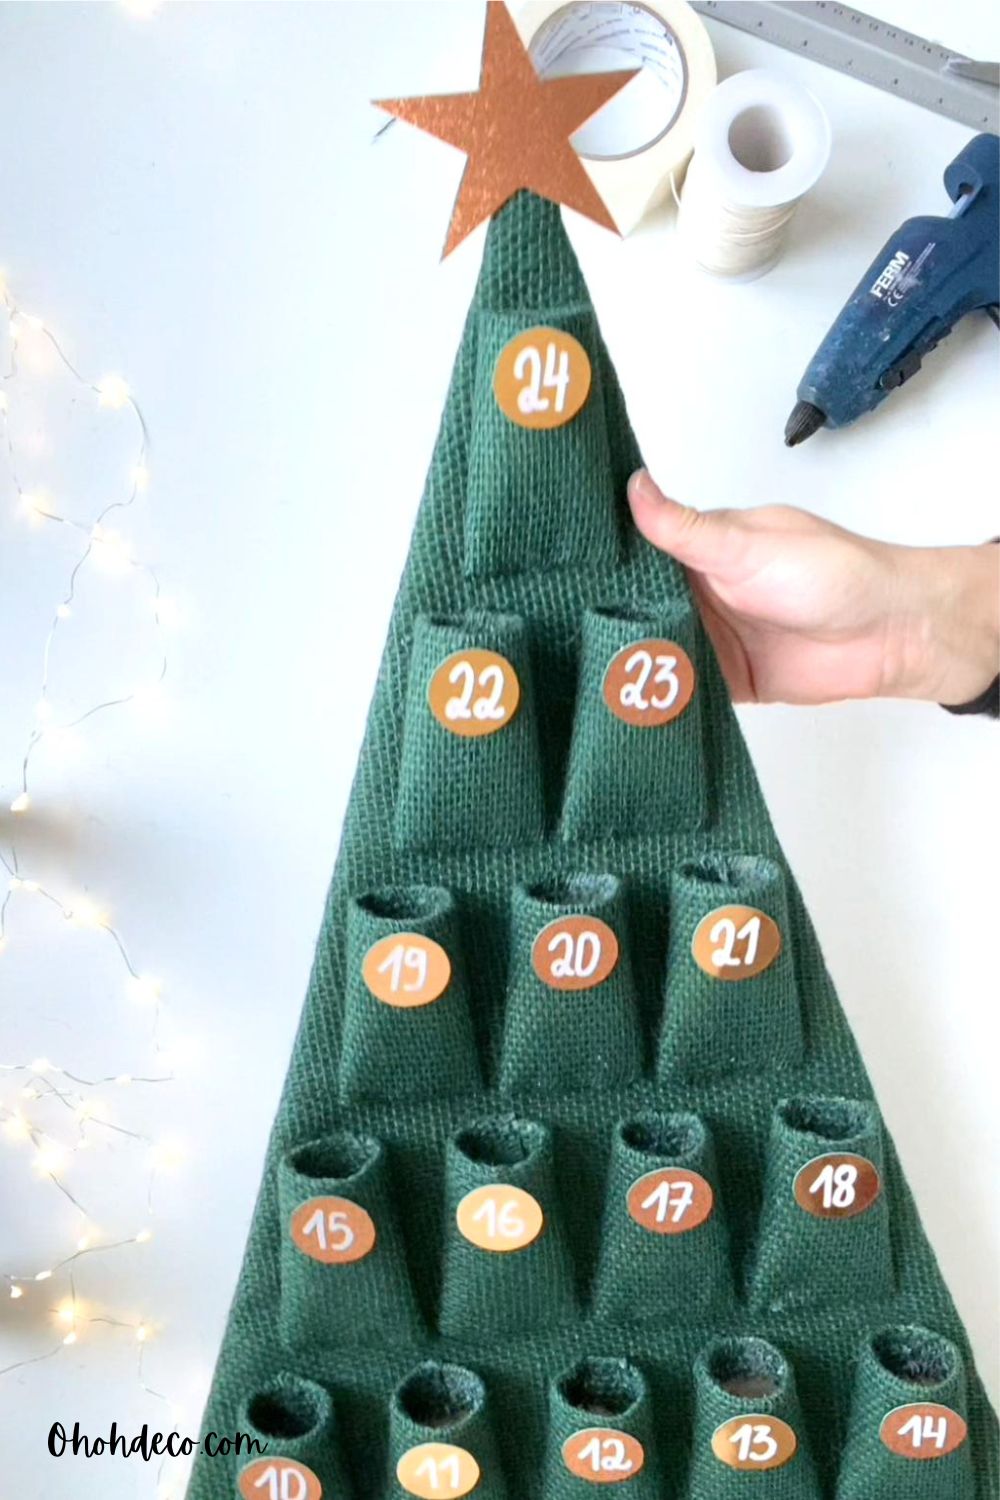
Watch the Step-by-Step Video Tutorial
Prefer to see each step in action before grabbing your glue gun?
Watch the How to make an Avent Calendar video below to follow along as we cut and assemble the cardboard tree frame, arrange the 24 toilet paper rolls, and add the finishing festive touches.
Hit play to get started and craft your own holiday countdown calendar in no time!
Creative Advent Calendar Fillers Beyond Traditional Candy
While chocolate and candy are classic countdown staples, swapping out sweets for small, thoughtful surprises makes the daily reveal feel much more personal and memorable. Whether you want to avoid a morning sugar rush for the kids or create a cozy, clutter-free tradition for adults, there are plenty of fun ways to mix things up
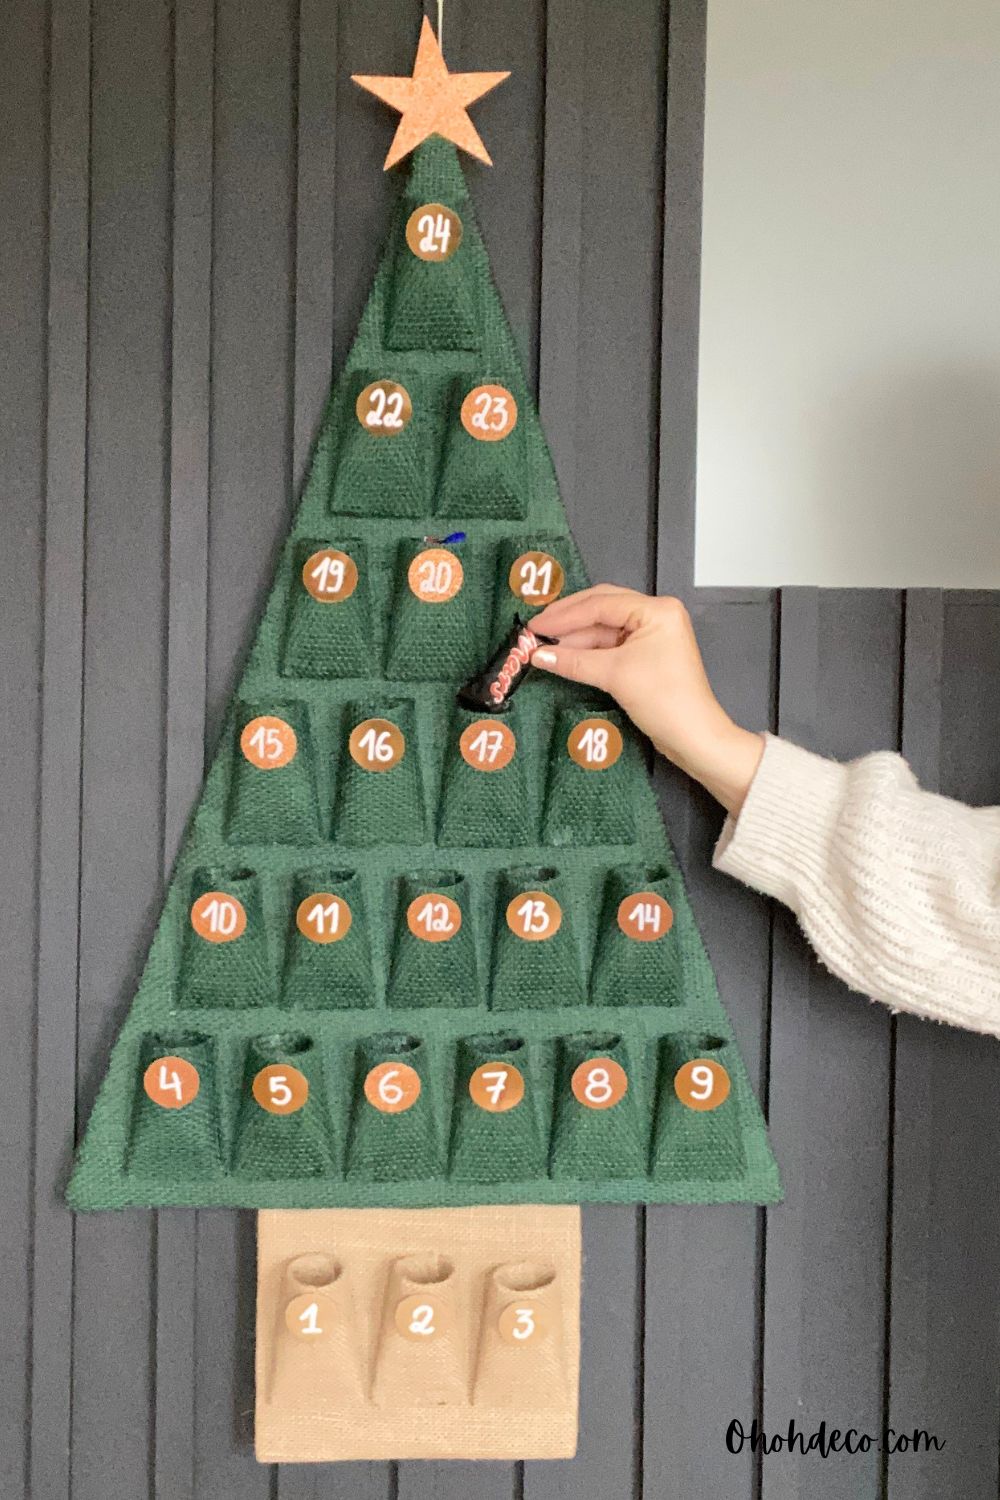
Experience & Activity Fillers (Zero Clutter)
- Festive Activity Prompts: Slip little notes with holiday bucket-list ideas (like “drink hot cocoa” or “drive around to see Christmas lights”) into each pocket for a family-friendly tradition you can reuse every year.
- Daily Holiday Jokes or Trivia: Write riddles on small slips of paper, or tuck in a few cards from a Christmas Trivia Card Game to read together at the dinner table.
For Kids
- Mini Building Sets: Divide a bulk pack of Mini Building Blocks across the 24 days so kids get a quick, screen-free morning activity.
- Sensory & Craft Toys: Mix and match Mini Squishy or Fidget Toys.
- Holiday Temporary Tattoos & Stickers: Cut up sheets of Christmas Temporary Tattoos so they fit easily inside tiny envelopes or matchboxes.
For Adults & Teens
- Cozy Warm Drinks: Separate a variety pack of Gourmet Hot Chocolate Mixes or Festive Tea Bag Samplers for a daily afternoon treat.
- Mini Tree Ornaments: Place a different Mini Christmas Ornament inside each day so the recipient can slowly decorate a small tabletop tree throughout December.
- Self-Care Minis: Fill larger pouches with individually wrapped Hydrating Lip Balms or Mini Hand Creams for winter skincare.
- Art And Crafts: Turn your advent calendar into a daily creative studio by filling each pocket with a tiny art supply or a mini DIY prompt.
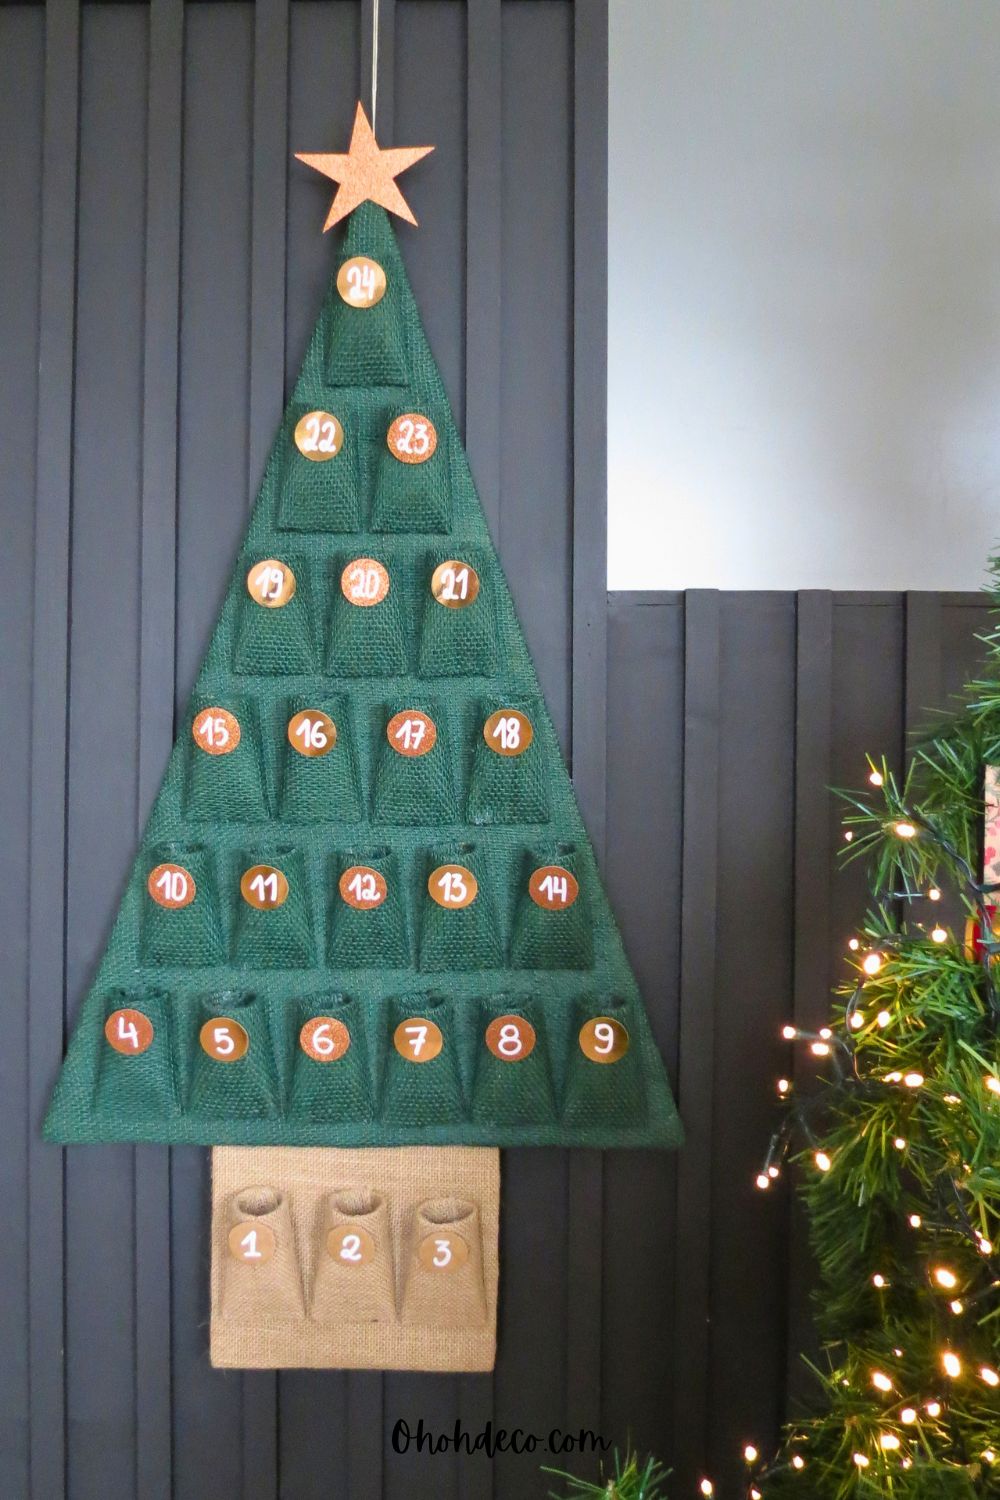
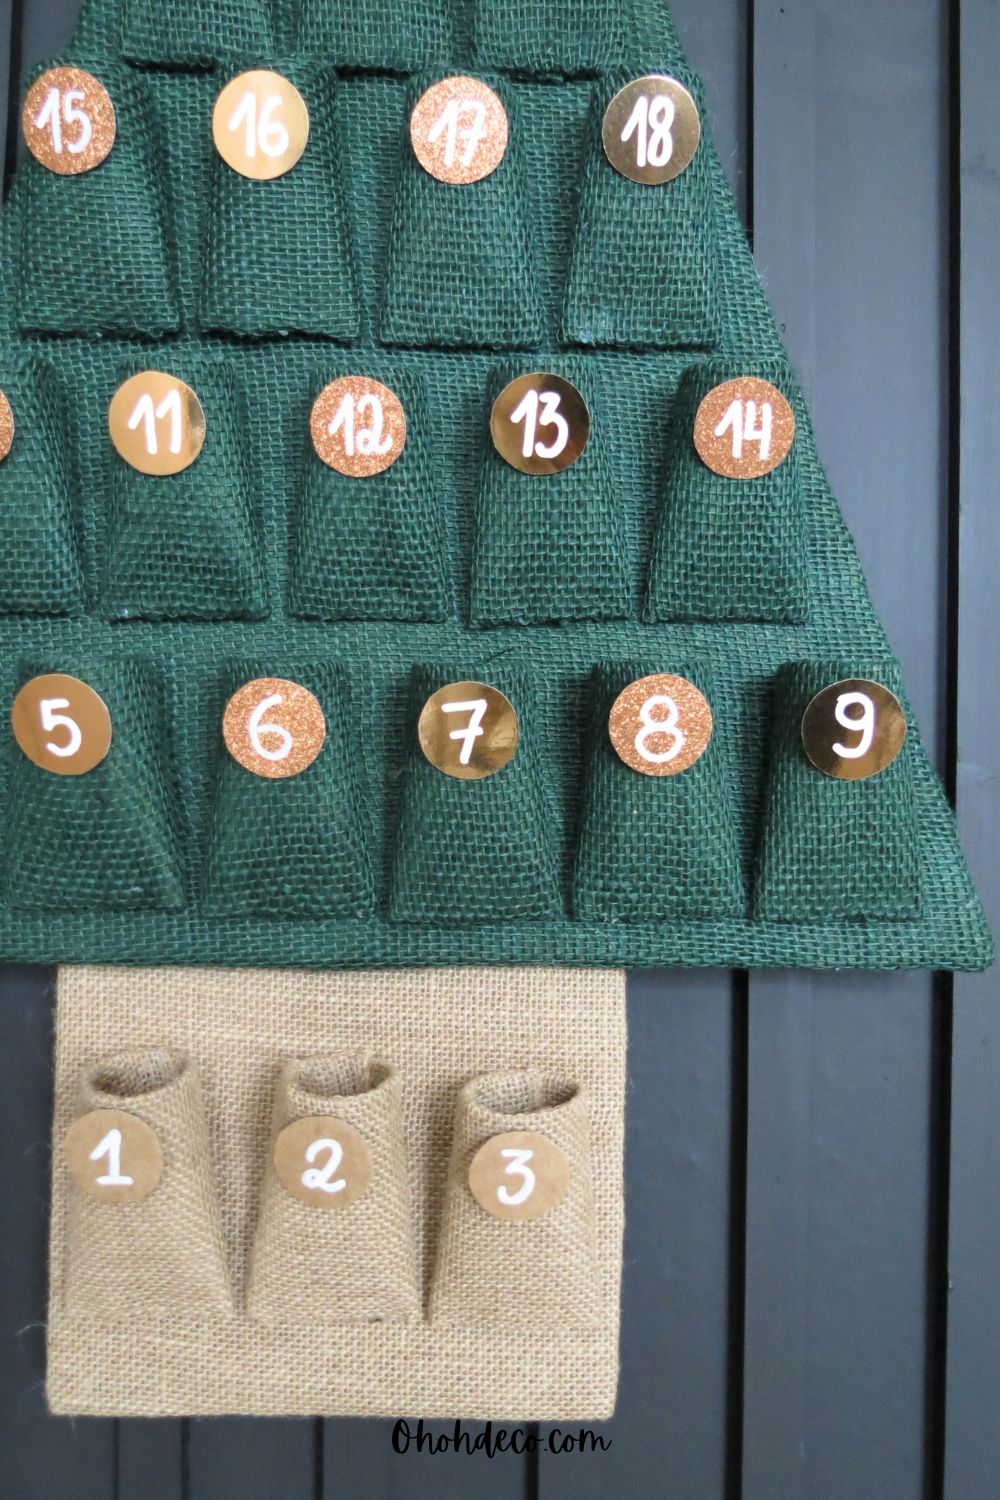
Conclusion
Learning how to make an advent calendar doesn’t require expensive store-bought kits or complicated woodworking.
With just a handful of recyclables and a little holiday creativity, you have a beautiful, reusable Christmas tree countdown ready to hang on your wall.
All that’s left to do is fill the pockets with chocolates, holiday candies, or little handwritten notes to kick off the festive season!
RELATED: DIY house Advent calendar
RELATED: Make an Advent Calednar with Toilet Paper Rolls
Want to remember it? Save this idea to make an Advent Calendar on your favorite Pinterest Board