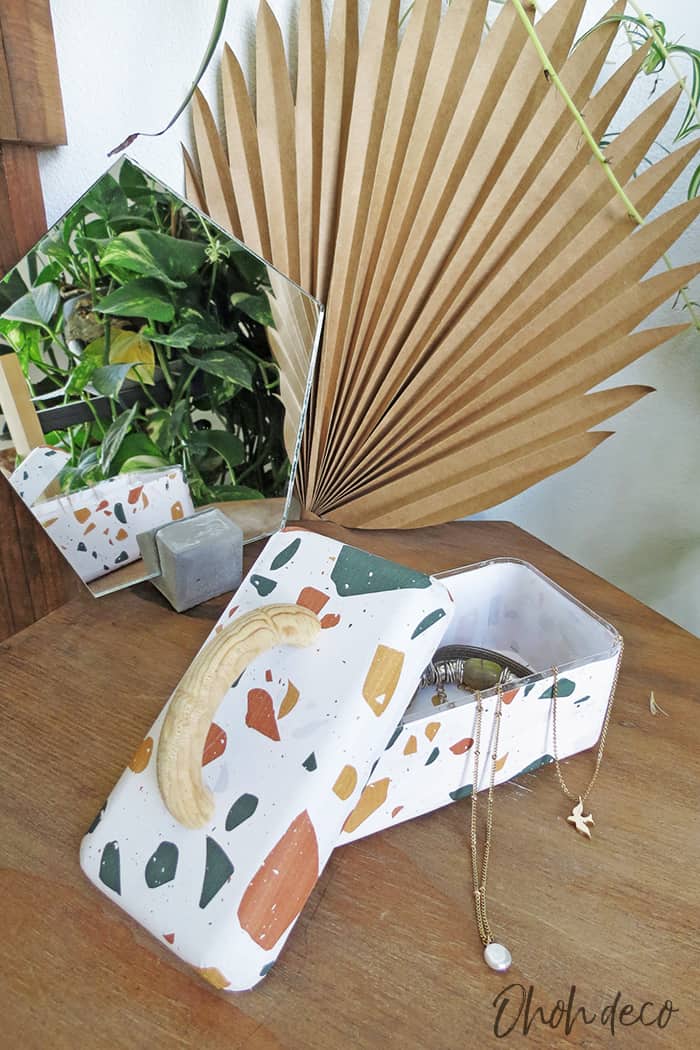
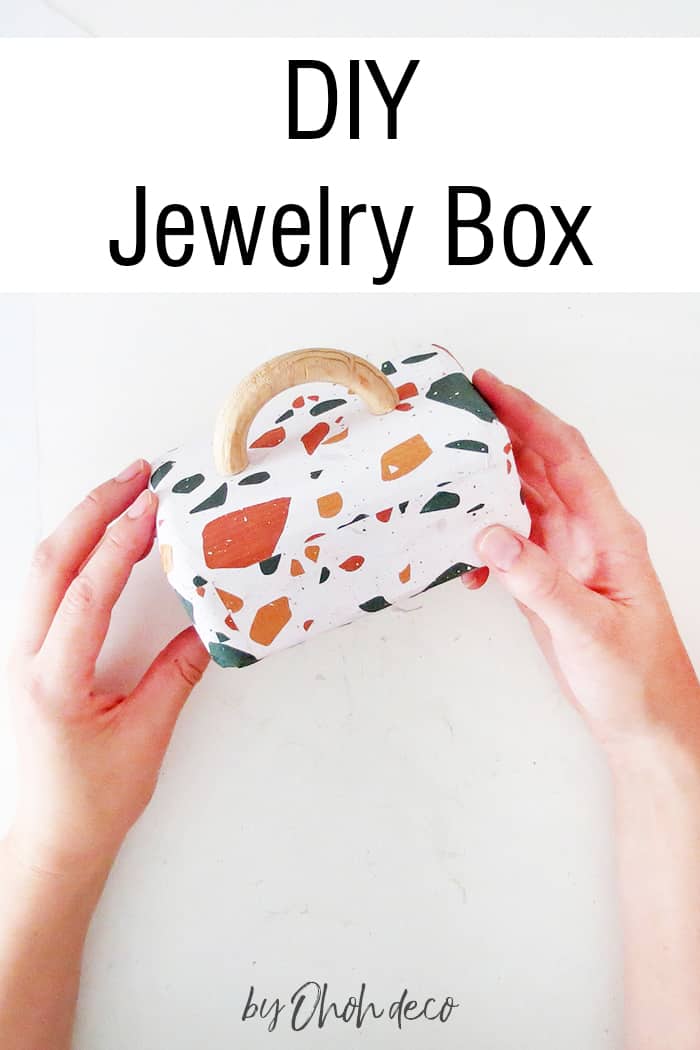
The most practical way to store and organize things is to use boxes. Nothing better than a pretty box to store jewelry.
I like this homemade jewelry box because it is made from a recycled chocolate box.
It’s a very easy and affordable DIY.
[ This post probably contains affiliate links, our full disclosure policy is really boring, but you can read it HERE ]
You can download and print your paper. This is the option I chose because it is easy and fast.
Plus, I just printed the amount of paper I needed to cover the box. It helps to avoid waste.
Otherwise, you can use any type of paper as long as it’s not too thick.
I suggest you some options below.
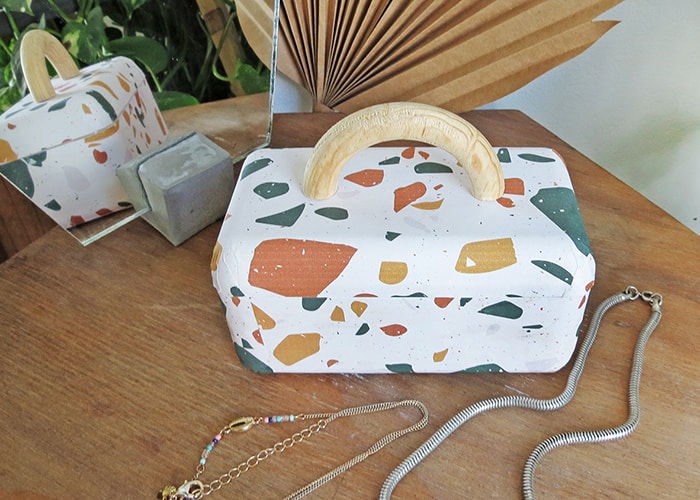
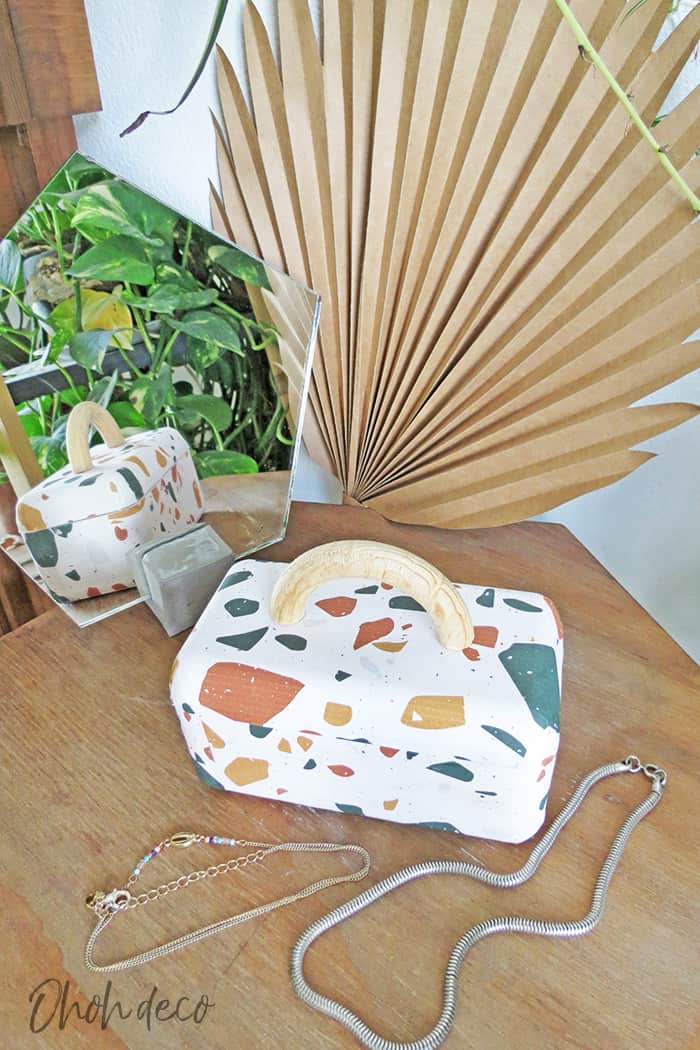
I made the box to store my necklaces.
The DIY jewelry box takes less than an hour to make, so you can make several if you have a lot of jewelry to organize.
RELATED: DIY Storage Boxes and Baskets
RELATED: DIY jewelry organizer
How to make a Jewelry box DIY?
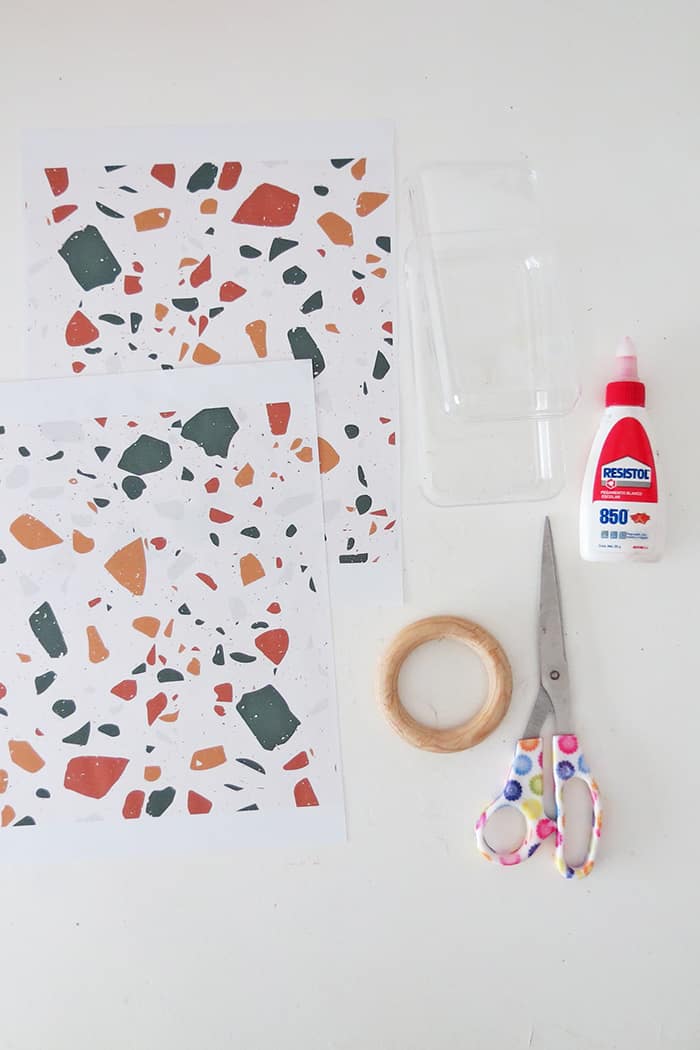
Gather the supplies you will need to create a handmade jewelry box:
- A plastic box (like this one)
- A nice printed paper
- Glue
- Scissors
- Wooden ring (80mm)
- A glue gun
- Hand saw
- Brush
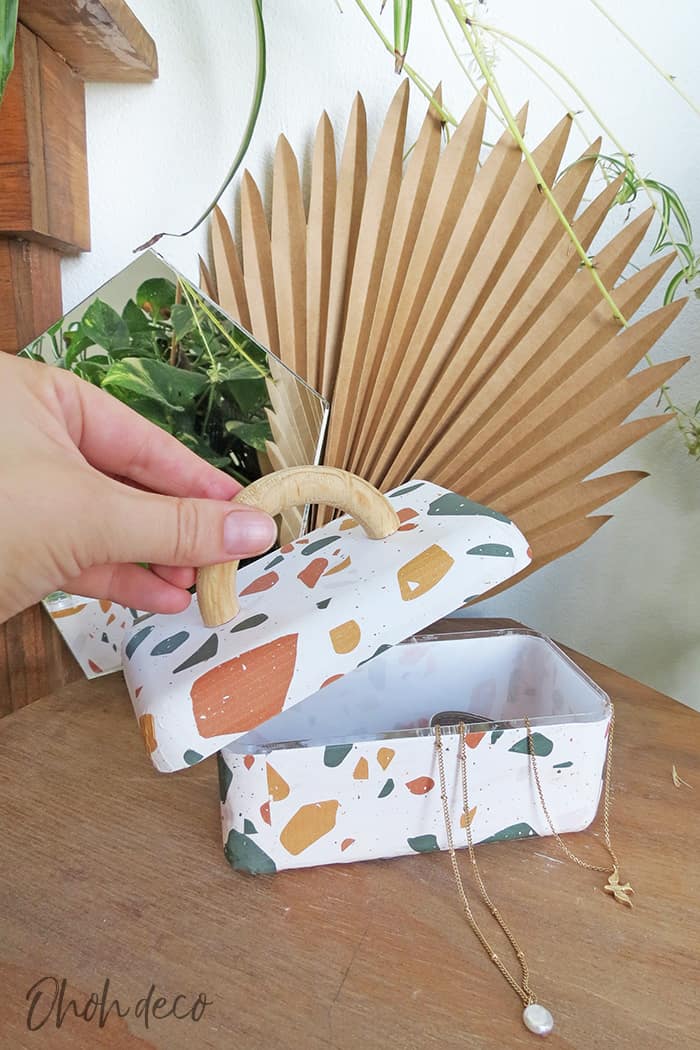
I reuse a well known chocolate box to make this jewelry organizer. So, the first step of this DIY is eating the chocolates to have an empty box…what a pleasant start!
To cover the box I purchase this printable paper. First because I love terrazzo and second because it’s an instant download. So I was able to print it right away to start my craft.
I also like that I was able to only print the amount of paper needed (two sheets) to cover the box. No wasted paper or scrap to store.
If you don’t like Terrazzo print, you can try some other designs like:
I just discover this Shop with All the pretty printable paper you can dream about
The digital print linked above come in JPEG format, which are easy to print. If you prefer buying already printed paper, it perfectly fine too.
Just choose a thin paper, so you can nicely wrap it on the box rounded corner. I give you some options below:

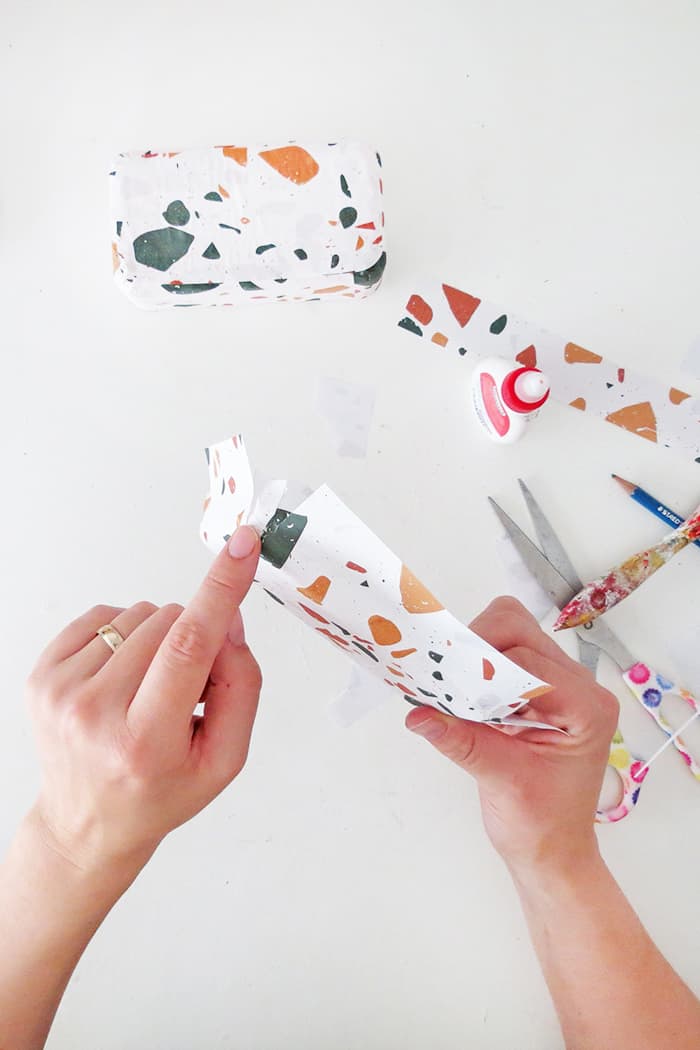
Spread glue on the box sides and apply paper on it.
The chocolate box has a small ledge that allows the lid to encase it.
Avoid sticking paper there otherwise you will not be able to close your box properly.
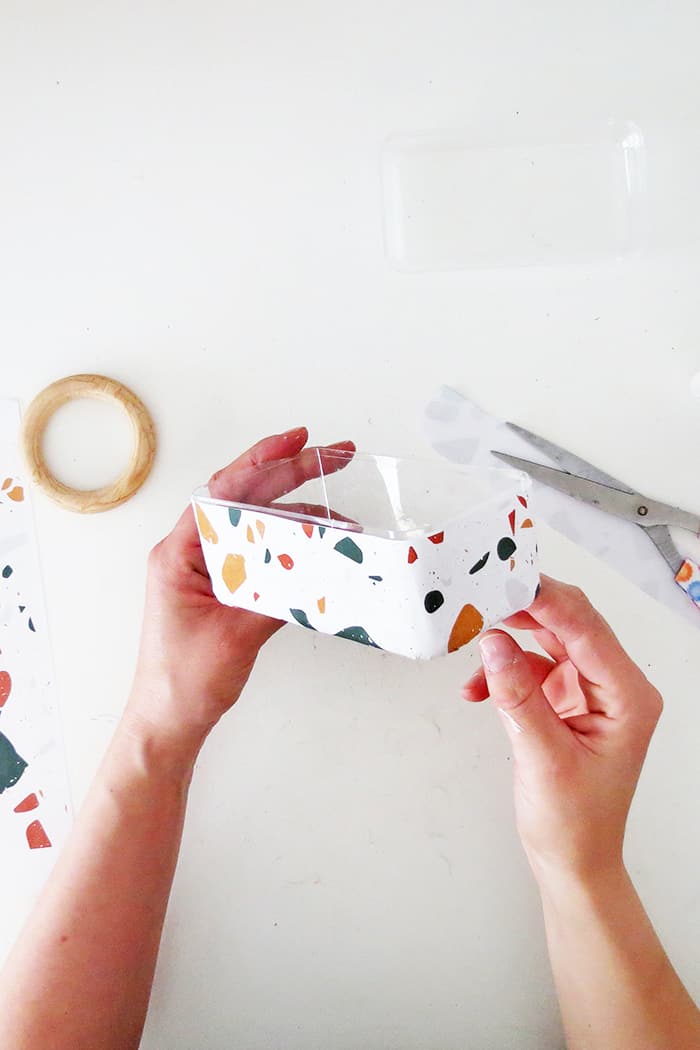
Smooth the paper well so that there are no air bubbles or glue.
Make some notches to fold the paper around the corner.
Add some glue to stick the paper around the bottom corners.
I suggest you to use this glue, it is much easier to use than the one I have.
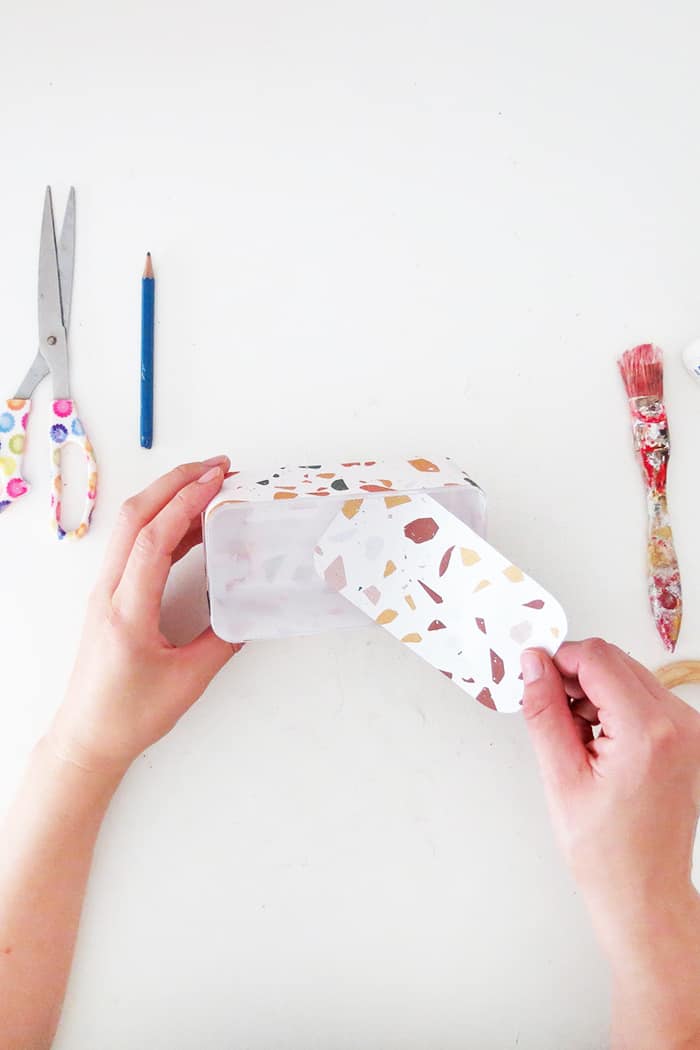
Cut a rectangle slightly smaller than the box bottom and glue it.

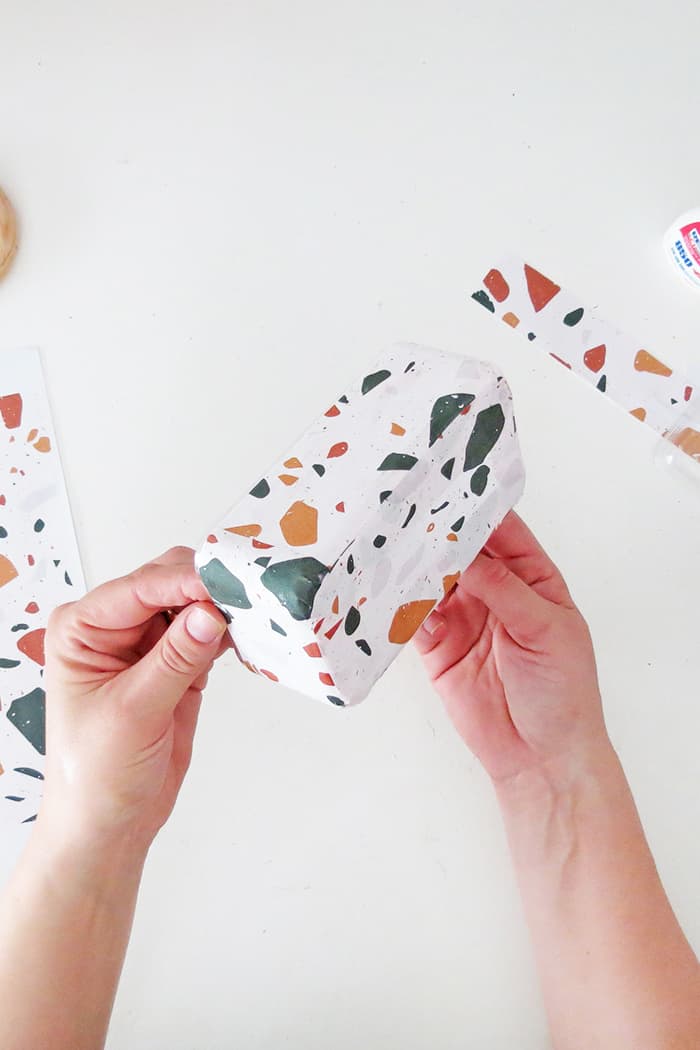
Take the lid and spread glue. Cut a paper rectangle bigger that the lid.
Place the paper on the top and press smoothly.
Cut some notches around the corners. Fold and glue the paper around the lid sides.
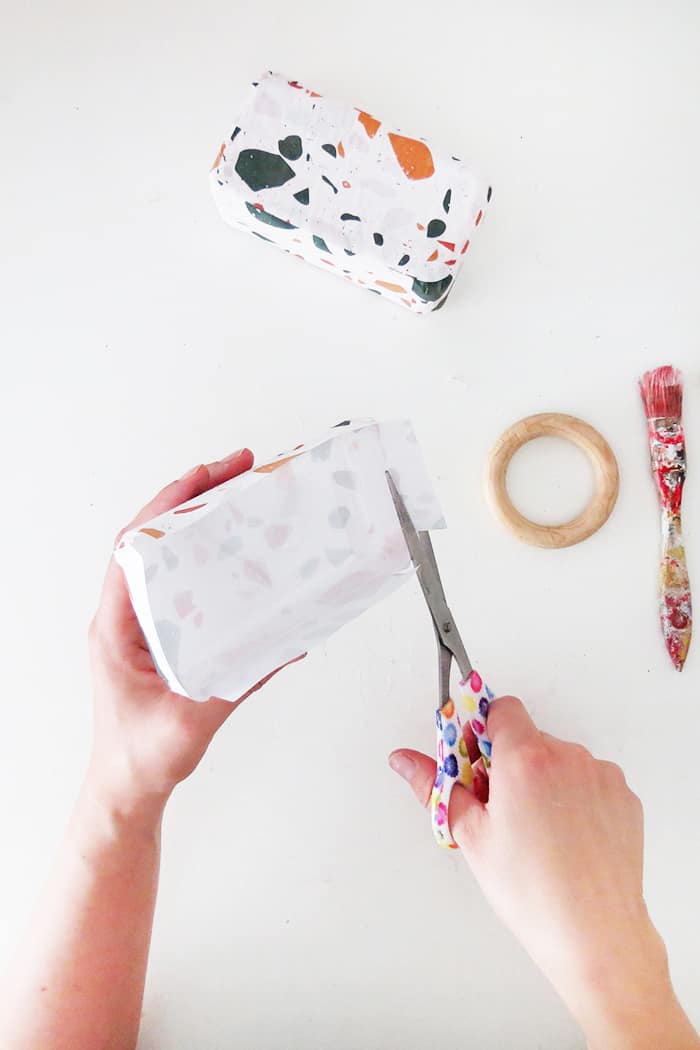
Trim the extra paper with scissors, following the lid edge.
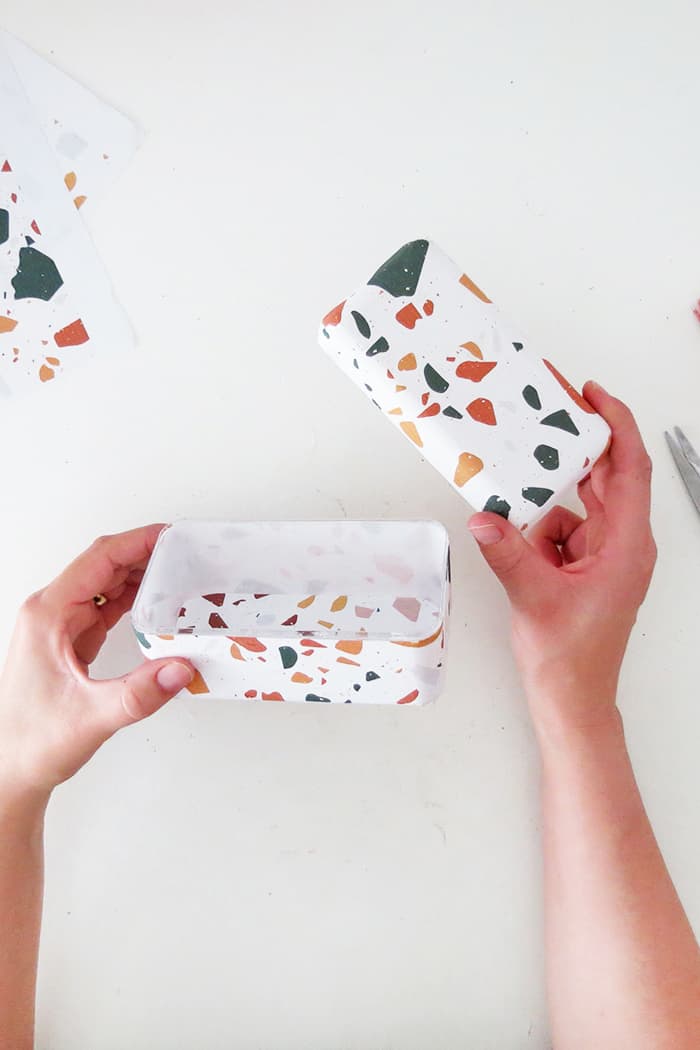
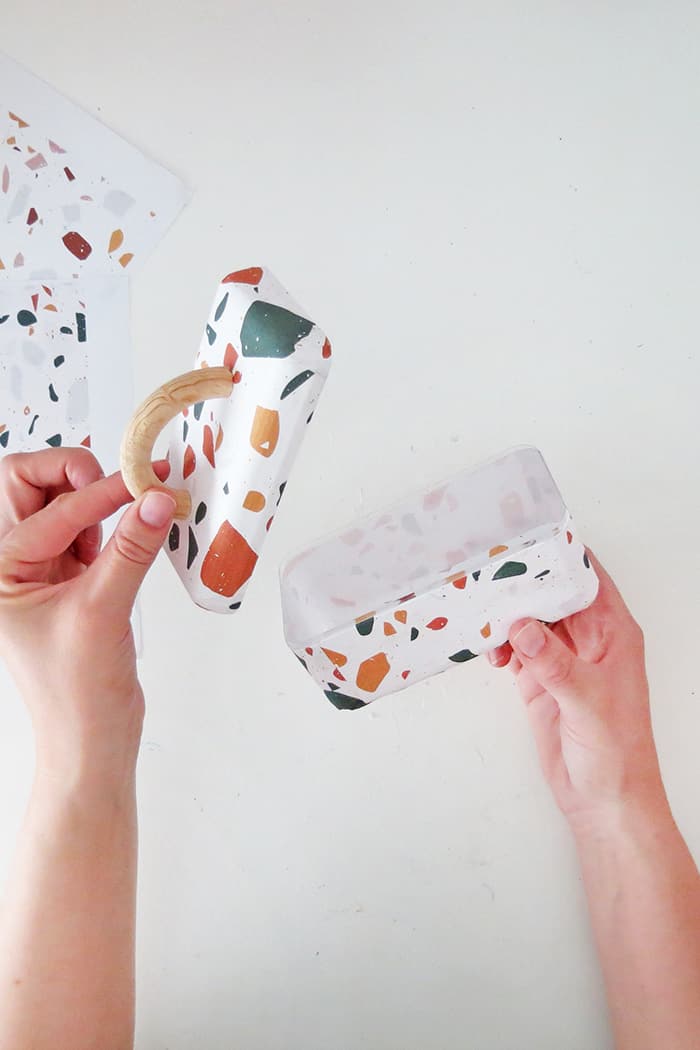
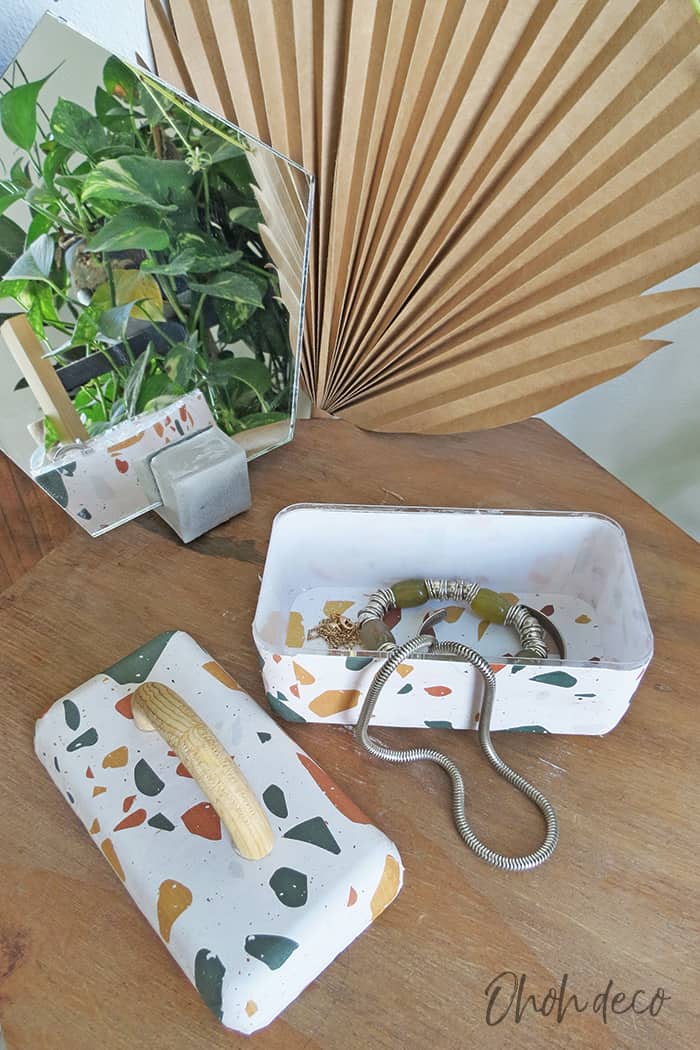
As I wanted the inside to look nice too. I cut a rectangle of paper and glue it in the bottom of the box.
Once the glue is dry, you can apply an extra coat of Mod Podge on the outside to help the DIY jewelry box to last in time.
Add a wooden handle to the jewelry box.
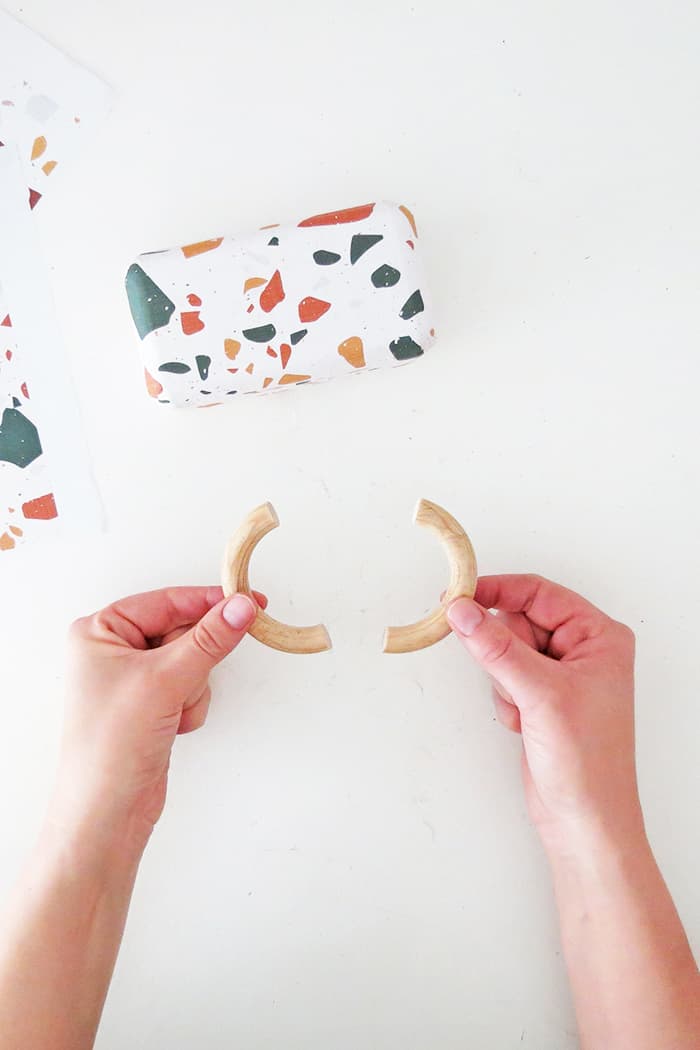
Take a wooden ring, like the one you use to hang curtains, and cut it in the middle. Sand it.
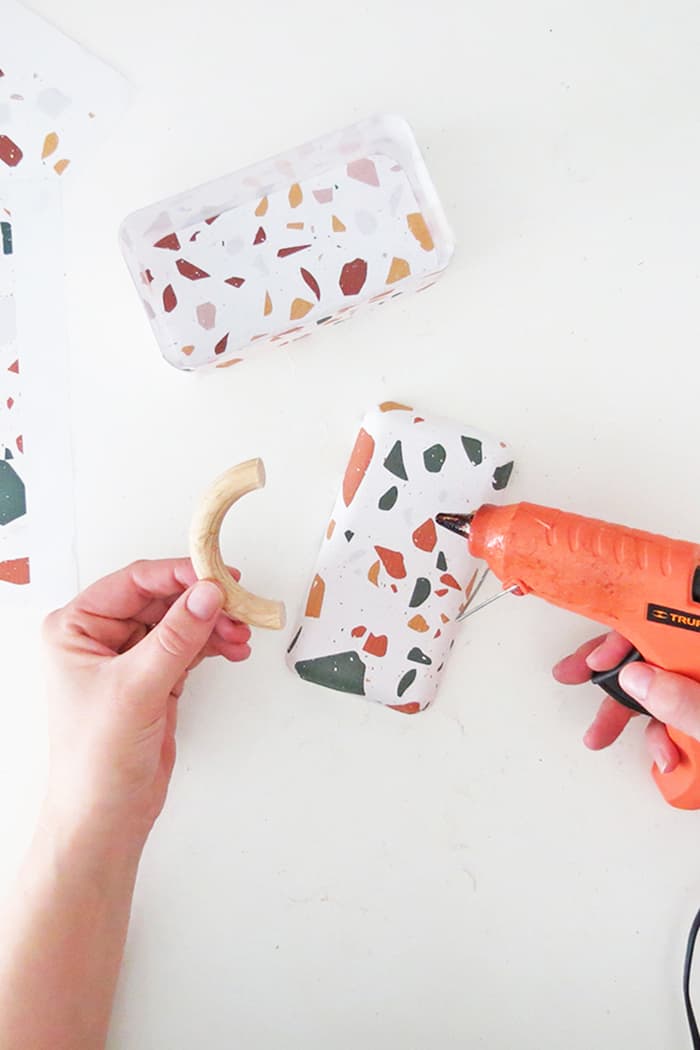
Add two dots of glue on the half ring ends and glue on the center of the lid. Press a little and done!
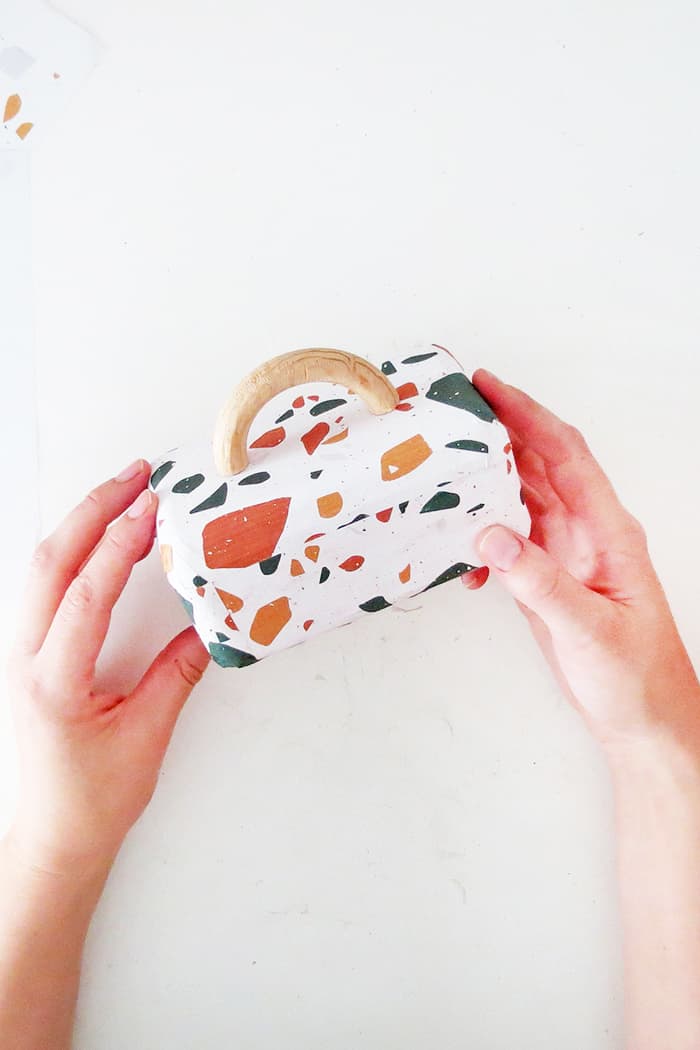
It’s that simple to make your own jewelry box.
RELATED: DIY wall earring holder
RELATED: How to make a wall art jewelry
I store some of my necklaces in but you can use this little box to store any kind of small items. Like make-up, office supplies, crafts supplies…
We will never have to many place to store and organize jewelry.
Watch the video tutorial to make a DIY jewelry box
Don’t miss the fun. Follow Ohoh deco on Youtube and be the first to find out about the new DIY and crafts ideas.
Tell me, do you like this recycling craft? Which paper would you lie to use to cover the box?
I love to see your creations, so don’t hesitate to share your DIY jewelry box with me. Have fun crafting!
Want to remember it? Save this Easy DIY jewelry box on your favorite Pinterest board.
You will find all the tutorials featured in the video on my “Best DIY” page.
Amaryllis
I just came across your site and saw your cute, cute, cute jewelry box! I think I need to eat some chocolates so I can use the container to me a box for me!
I host a link party that starts on Tuesday evening. I invite you to come and share some of your wonderful crafts that you make. My site is Grandma Ideas http://grandmaideas.com/.
I look forward to seeing you there!
Hello Nina, eating the chocolates is the best part of this DIY 😉 I will probably need to make more DIY jewelry boxes, hahaha! I will gladly take part in your link party, thanks for the invitation.