
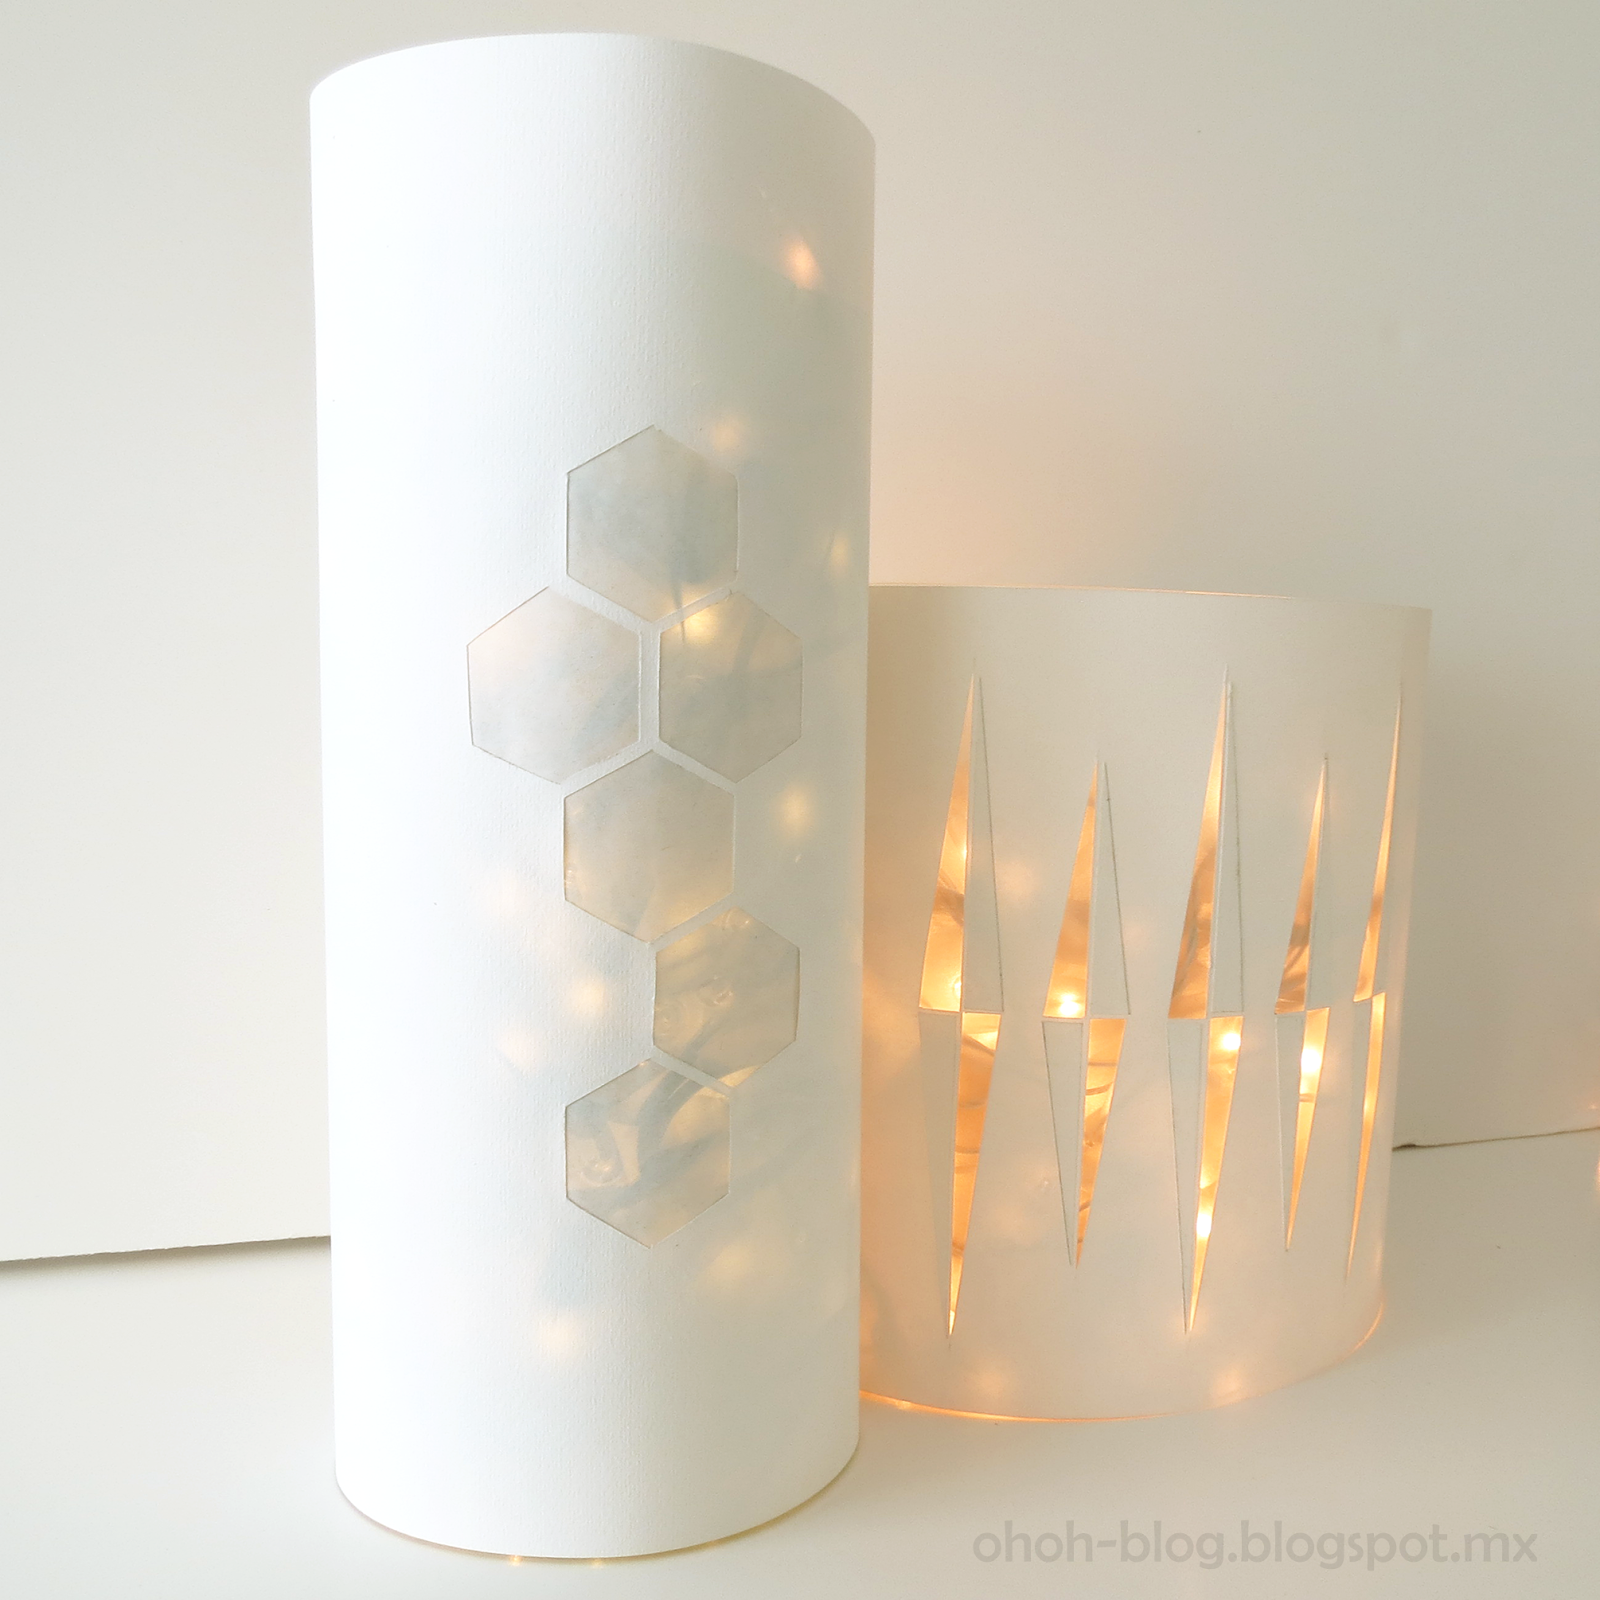
To start the year, a simple idea to use your Christmas lights throughout the year!
A pictures tutorial, you will find explanations of each step below.
Y para empezar, una idea sencilla de usar las luces de Navidad durante todo el año!
Un tutorial en imágenes, encontraran las explicaciones de cada paso abajo.


1.Take a large bottle of soda
2.Cut the neck
3.Make an opening to pass the electrical outlet
4.Fill with light string
5.It starts to be pretty
6.Wrap and stick a sheet of paper around the bottle
1.Tomar una botella grande de refresco
2.Cortar el cuello
3.Hacer una abertura para pasar la toma de corriente
4.Llenar con las luces
5.Empieza a ver se bonito
6.Enrollar y pegar una hoja de papel alrededor de la botella

Caution, use only strings with LED bulbs. Otherwise it may overheat and be dangerous (and smell melted plastic … believe me!)
Precaución, utilice sólo luces de bombillas LED. De lo contrario podría sobrecalentarse y resultar peligroso (y oler plástico derretido … créanme!)
Amaryllis
wonderful, thanks for sharing
martine
hi can u paint the bottle instead of wrapping it?
Hello Thando, paint can be an option if the bottle have a nice shape. Be sure to use paint that adhere well on plastic.
Superbe et merci pour le conseil "led"… ou alors … prévenir les pompiers 😉
i love this creation!!!!
Noemi
look my blog!!!!
https://piccolospaziovitale.blogspot.it
I love this. So Simple and beautiful. Thanks for sharing!
You're welcome…and I really like your blog!
Súper!!! me encanta!!! lo voy a hacer!!!
Gracias!!!
Jennyasecas
I See decopaged bottles, eith verry interesting uber decorative tissue paper or, have you seen some of the chic napkins. ..yeah baby
J'adore mélanger la récup et l’esthétisme j'adhère.
Je vais de ce pas faire ma propre lampe.
Preparation of a is nice and simple. And I appreciate on this post, that you have written the caution to use LED for safety.
So cuute
https://madeinmarie.wordpress.com/
Merci! Chouettes réalisations en Fimo sur ton blog!
I have a question. First of all I love the idea, but I don't know what type of paper you have used? Please explain.
Thankyou
Thanks. I used white Canson paper and I filled holes with regular print paper.
this is a cute idea but I dont have any LED lights on hand so I'm going to substitute glass containers instead.
This is such a great simple idea, that looks amazing too! I am ALWAYS searching for ways to use my Chridtmas lights all year round! But especially in the first few months AFTER Christmas. Winters in Canada can be Long & Dark, & I find Holiday Season goes by too quickly. Christmas is always under celebrated in my eyes. The only Celebration is the Day for the children, the build up before, the thought of bills after can make it all look so dark. I LOVE the feeling approaching CHRISTMAS!! SOO much excitement, happiness, & WARM Feelings in my Heart–I like leaving the lights around as loong as I can. This is the BEST WAY I have seen yet!!! THANK YOU
It's beautiful, but… I don't get it. Why is one so much bigger around than the other, and much shorter. And how were the cuts made? And what kind of glue did you use so the points would stick but no glue squirting out?
Hello, I used two different plastic bottles one of 2L an an other of 6L and I cut them with a utility knife at different high. I just wrap the paper around the bottle and glue the paper end together, pritt or white glue will work. I hope this help!
Well done! Nice post! This really helps me to find the answers to my question. Hoping, that you will continue posting articles having lots of useful information. Thanks a lot!
marmeren werkblad
Great Post. I love white led christmas lights but never do anything with them! Maybe this year I will get crafty
Me encanta la propuesta!!! ¿Podría decirme cómo hace las "figuras" que aparecen en los folios?.
Mucha gracias.
Hola, muchas gracias. Dibuje con un lapiz y una regla las figuras y luego las recorte con un cutter. Pegue atras un paper delgado (estilo papel chino o papel de calcar).