Are you tired of lugging heavy planters around your home every time you want to clean or switch up your room layout? Do you wish there was an easier way to plant and transport your greenery?
Look no further – DIY rolling planter is here to save the day!
With just a few simple materials and some handy tips, you can easily create your own mobile garden that will bring life and color to any indoor space.
In this article, we will explore how to make a DIY rolling planter, providing step-by-step instructions, and offer creative ideas for customizing your planter to suit your unique style. Get ready to say goodbye to heavy lifting and hello to effortless gardening!
[ This post probably contains affiliate links, our full disclosure policy is boring, but you can read it HERE ]
I’m a little crazy about indoor plants and I try to find affordable ideas to make beautiful planters.
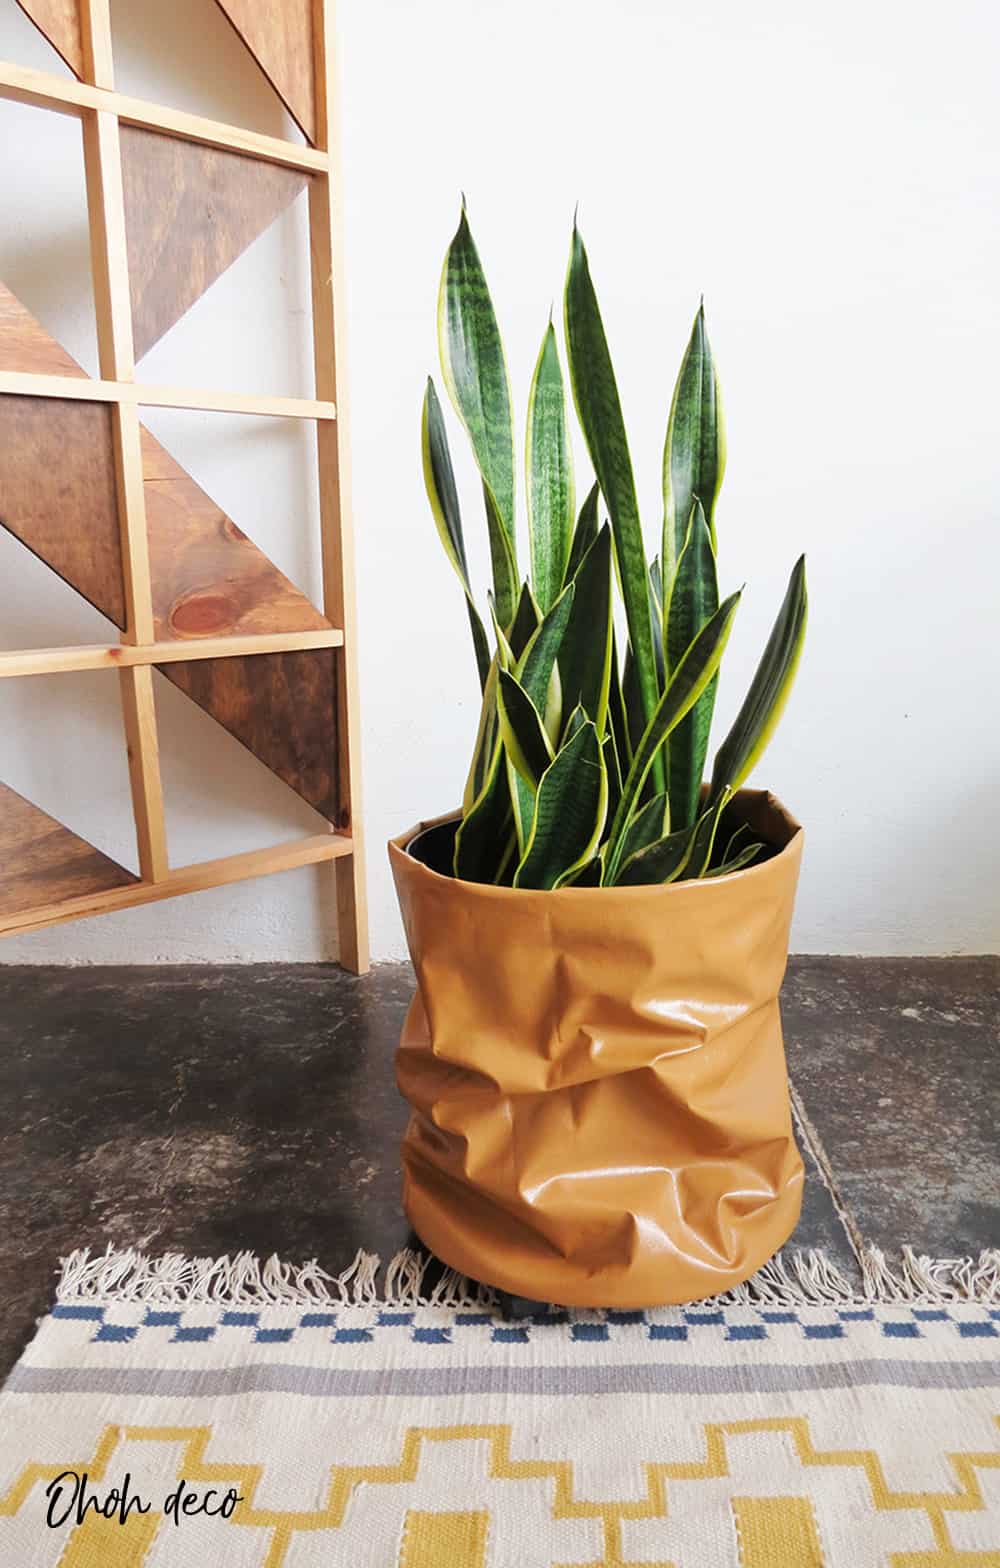
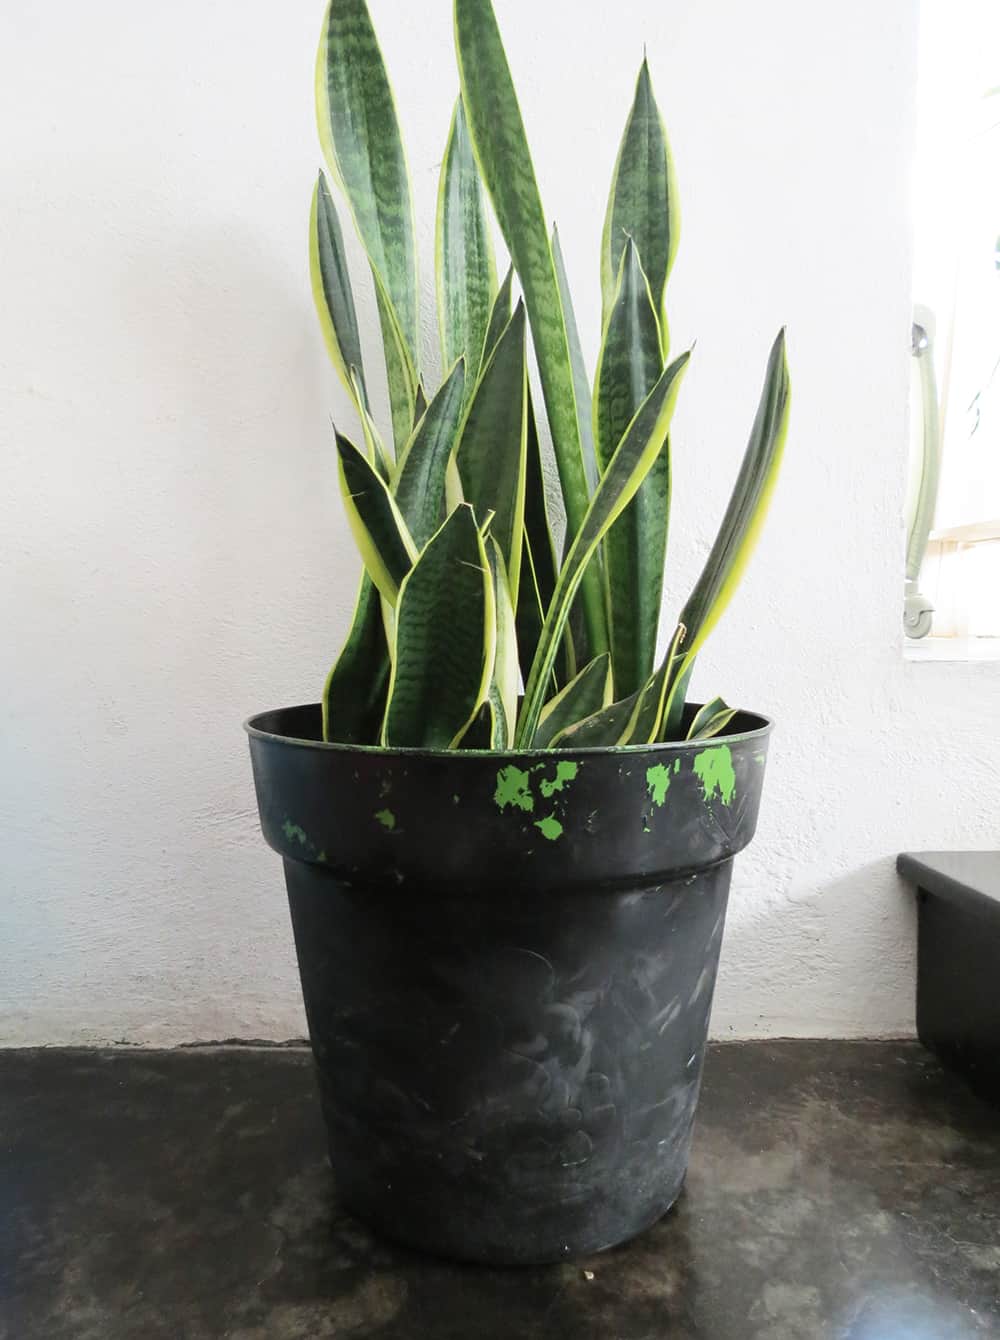
I bought a sneak plant years ago, it grows very well since. I put it on a 1 dollar store planter that I spray painted black. It did hold for a time but now the paint is flaking, so it was time for an upgrade.
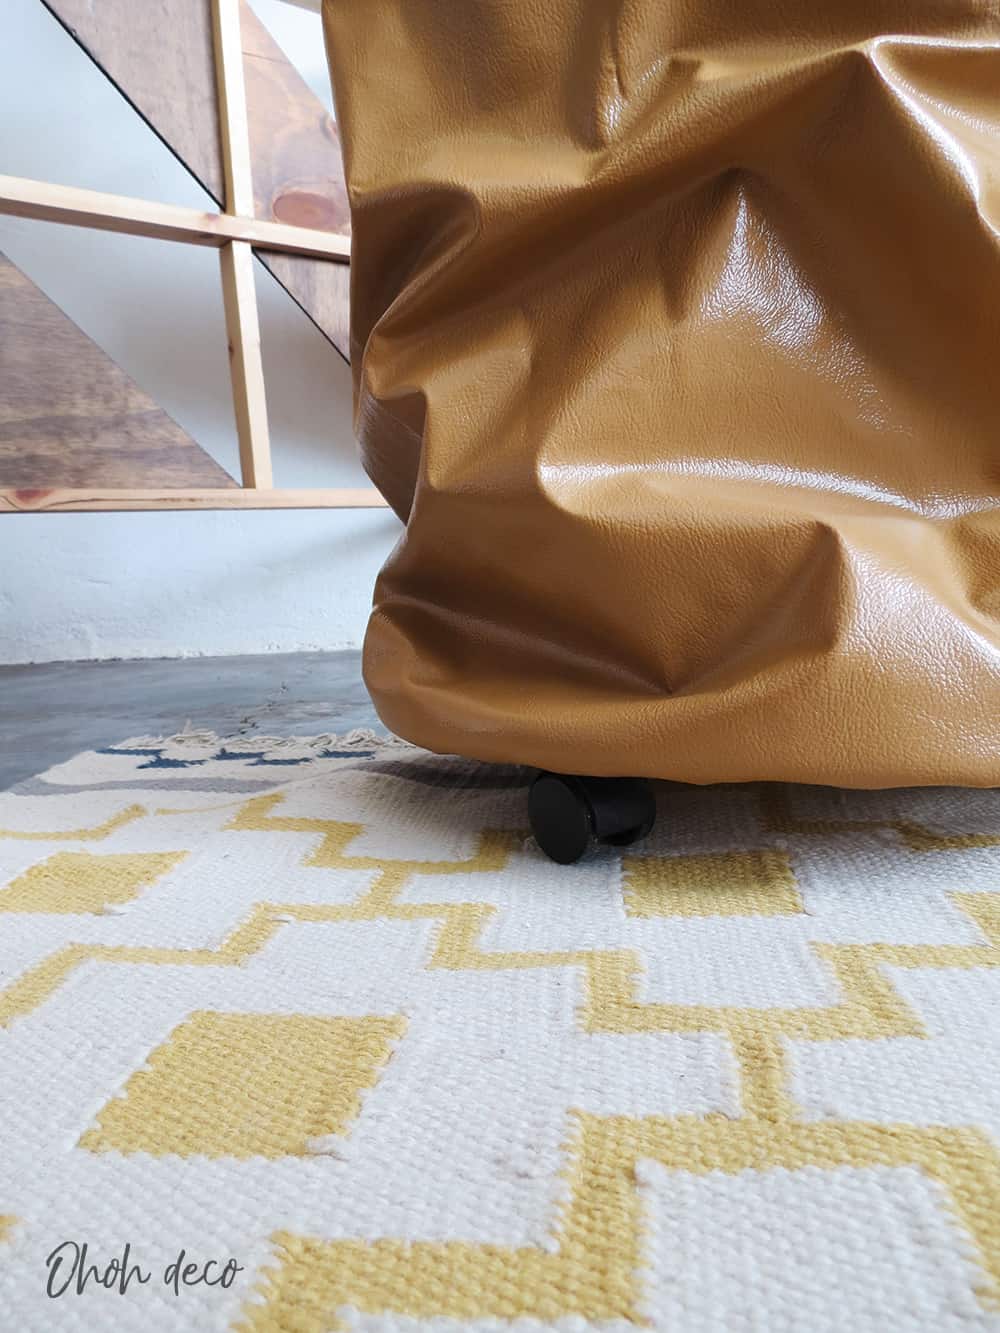
I also wanted to put the planter on wheels, it makes things much easier when cleaning.
How to make a rolling planter
Materials and tools you will need to make your rolling fabric planter:
- Plastic planter
- Upholstery fabric or faux leather
- A piece of plywood
- A jigsaw
- 4 wheels
- A stapler
- a drill
- A ruler and a pencil
- Scissors

You will use a piece of plywood board to make the bottom of the planter.
Place the larger side of your plastic planter on the plywood and report the circle shape. Cut the circle using a jigsaw and sand the edge to remove splinters.
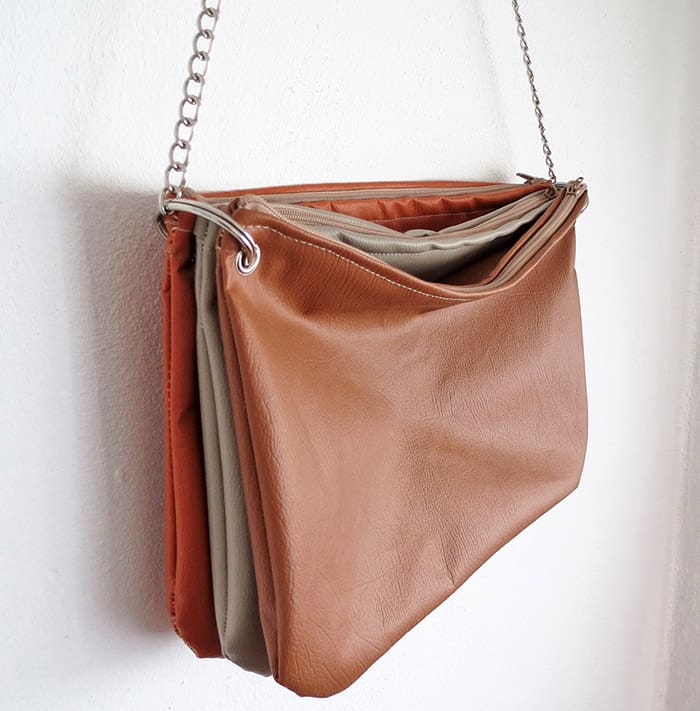
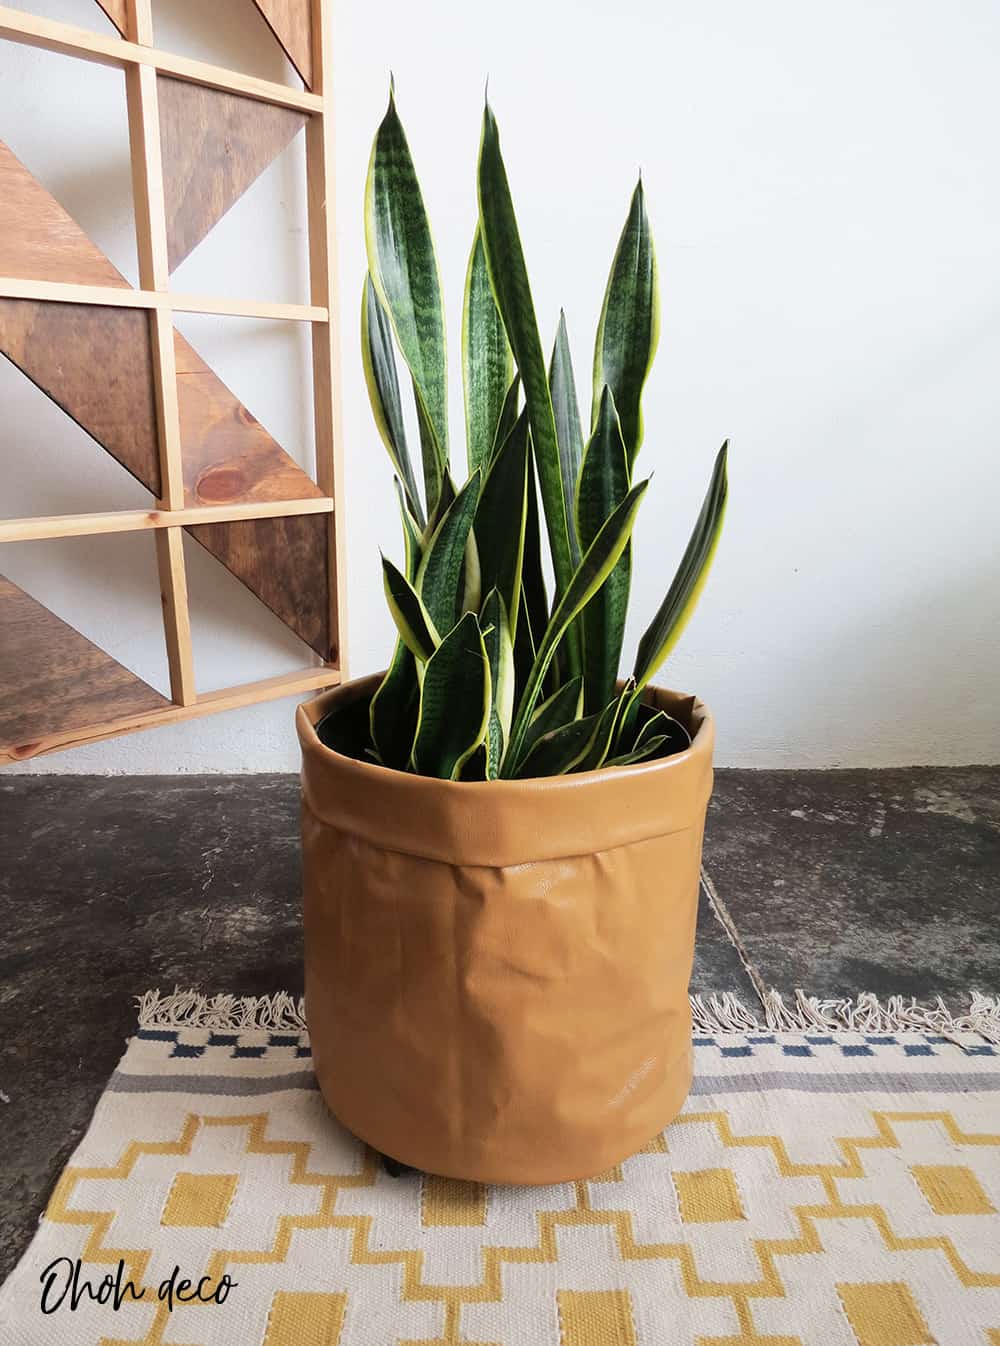
The side of the planter is made of fabric. I use fake leather, which I’m not totally happy with. I think it’s a little too shiny, I like this one much better…but at least it won’t get dirty with watering drops.
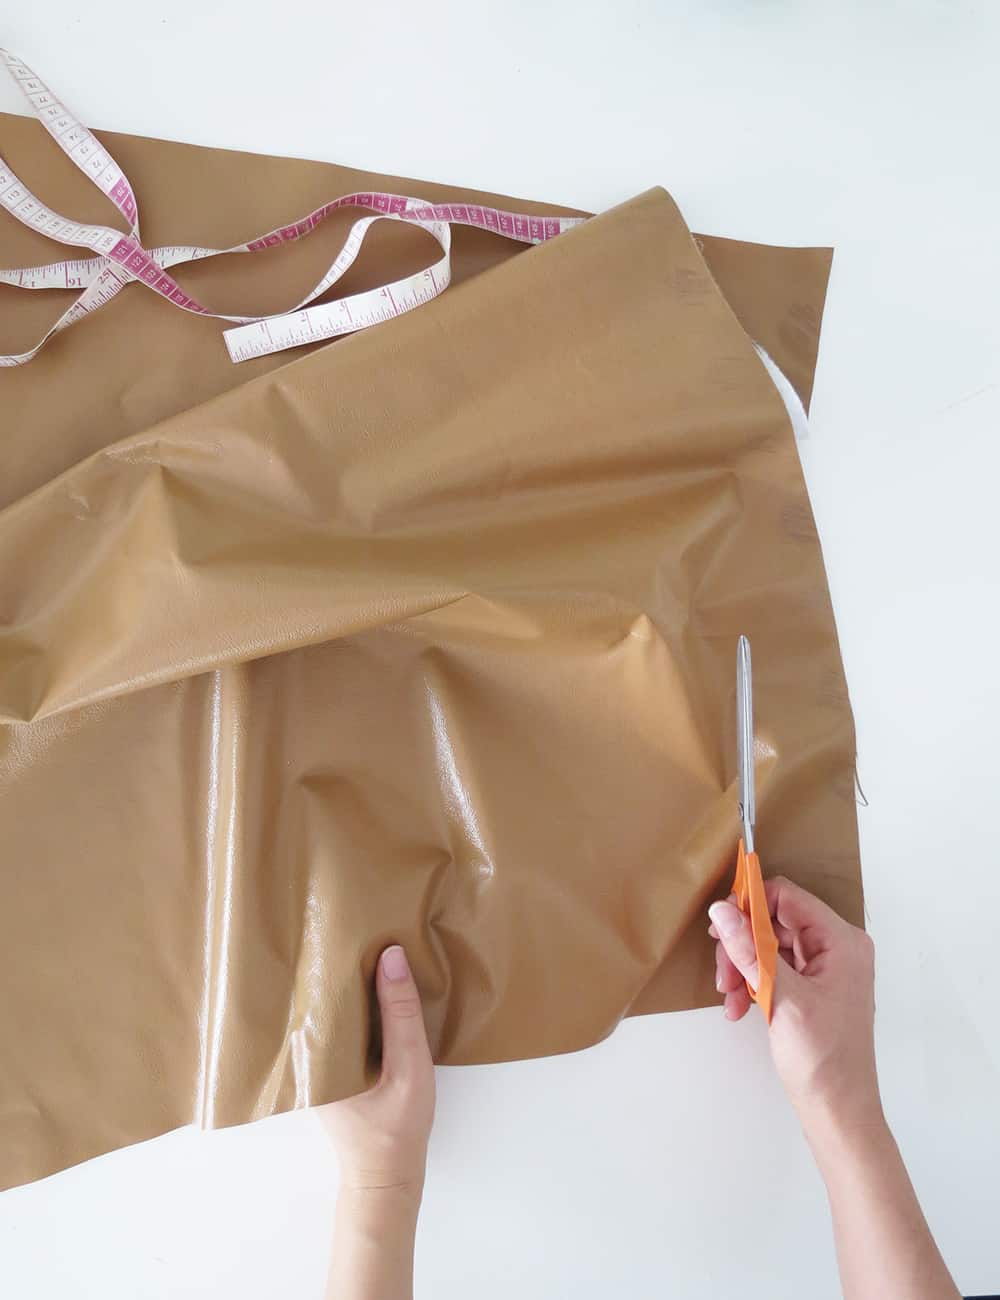
Measure the perimeter of the plywood circle and add 2 inches, this will be your fabric width.
For the fabric high, measure the high of your plastic planter and add 5 inches (to make a fold on top and be able to staple the fabric on the board).
If you want the inside of the planter to be lined, measure the height of the planter, add 5 inches and multiply this last measurement by two.
Here goes my example: my plywood circle is 44 inches diameter + 2 inches for the seams = 46 inches is my fabric width. My planter high is 15 inches + 5 inches = 20 inches is my fabric length. If you want the fabric to show inside: 20 inches x 2 = 40 inches for the fabric length.
Cut the fabric at the right dimension and fold it in the middle widthwise, wrong side out. Pin the edges and sew them together.
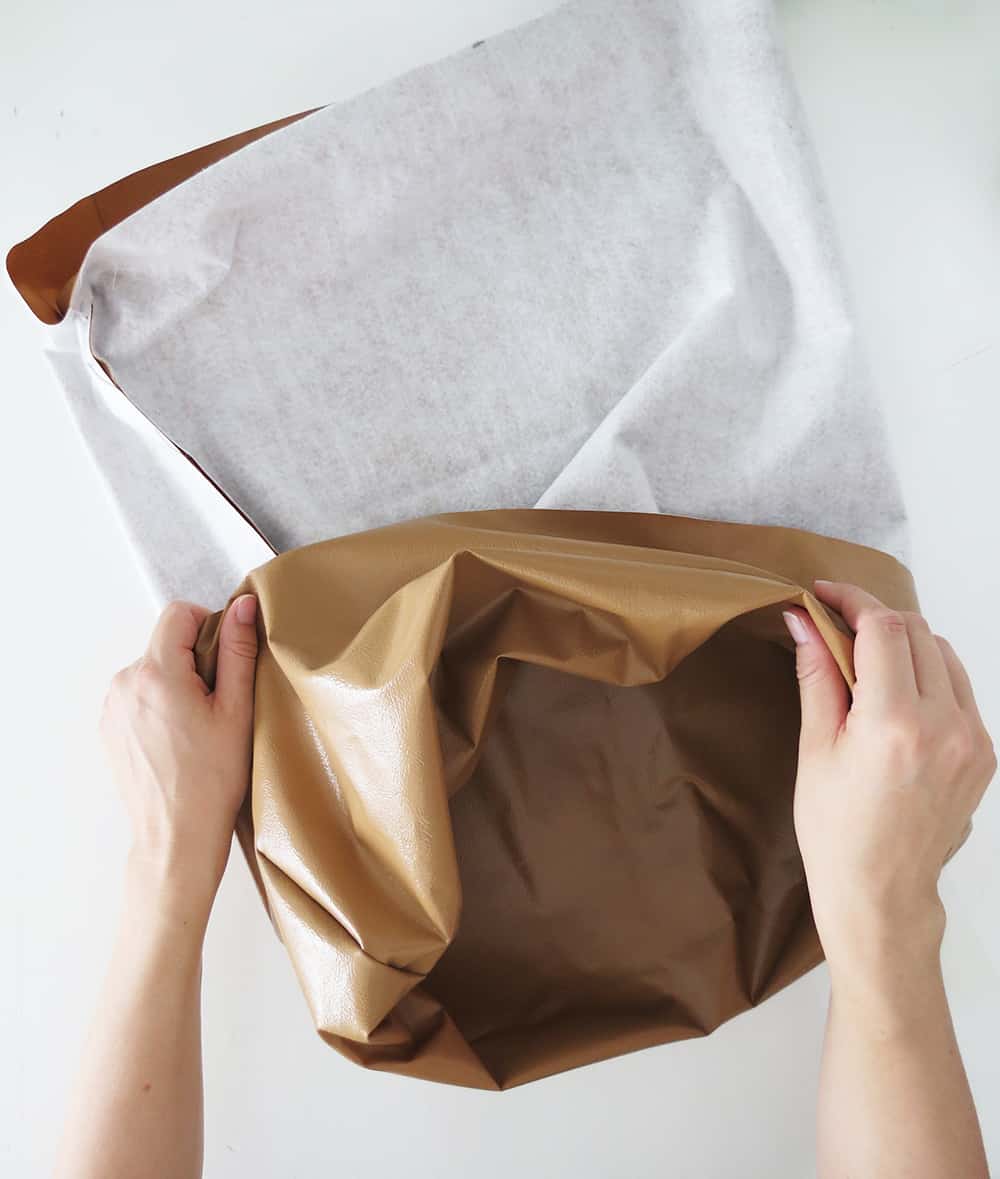
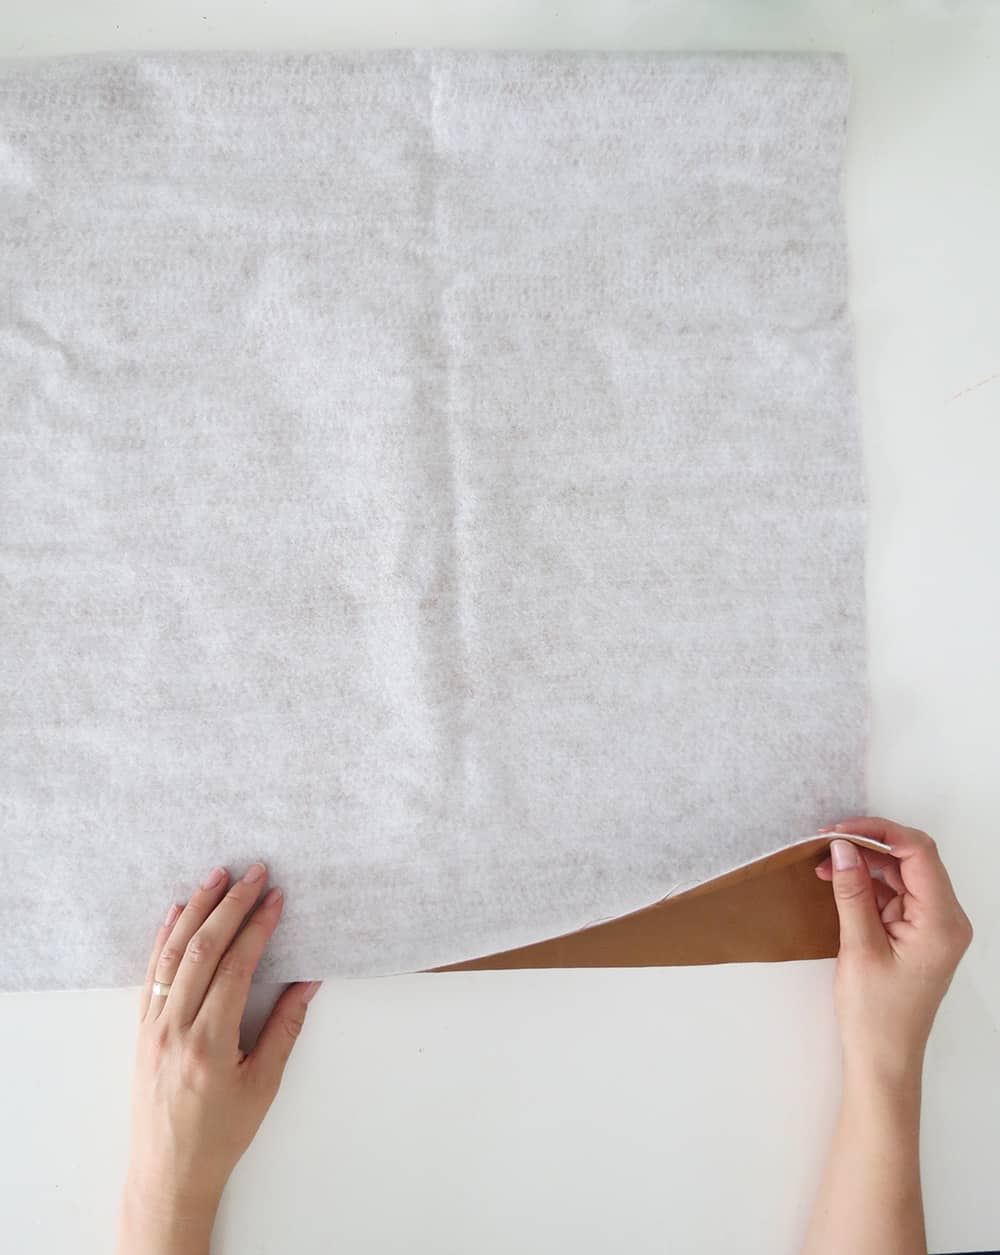
At this point you must have a fabric sleeve. Turn the fabric right side out.
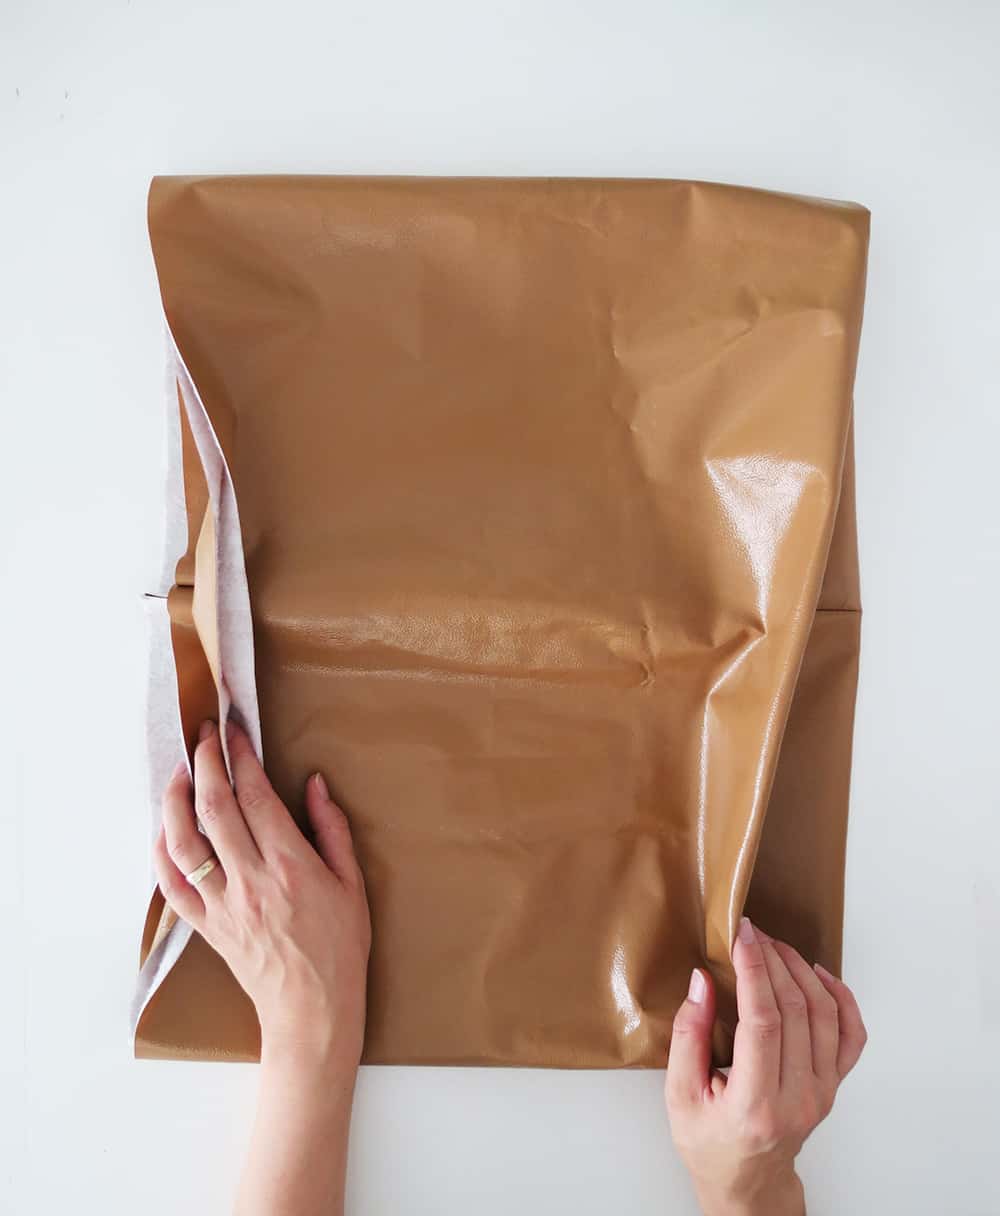
If you worked with double high just turn half of the fabric out, like I did. If not you need to make a fold on one of the edges and make a seam.
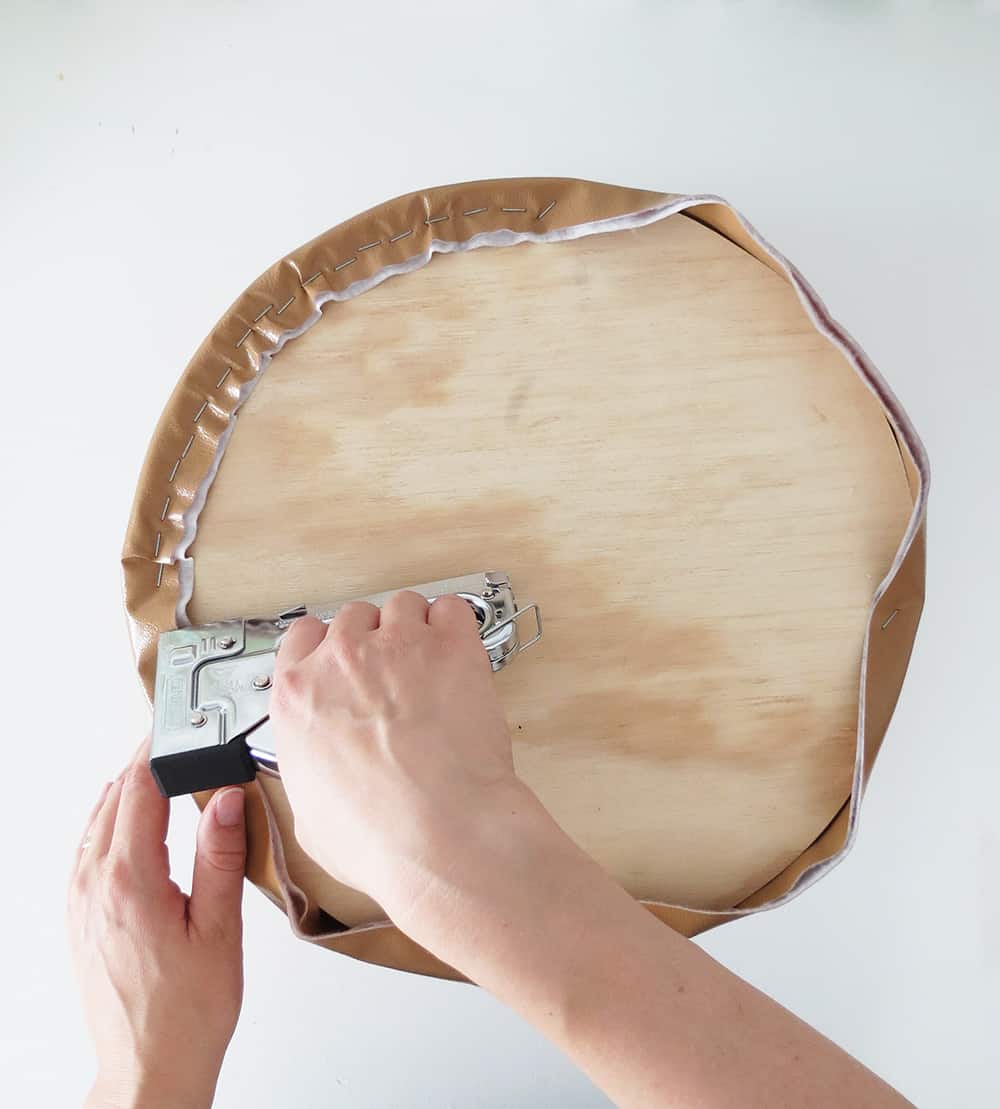
Place the plywood inside the fabric sleeve and staple the edge of the fabric on the back of the wood circle.
Be sure to staple the same amount of fabric all around the circle to have a straight top edge on your planter.
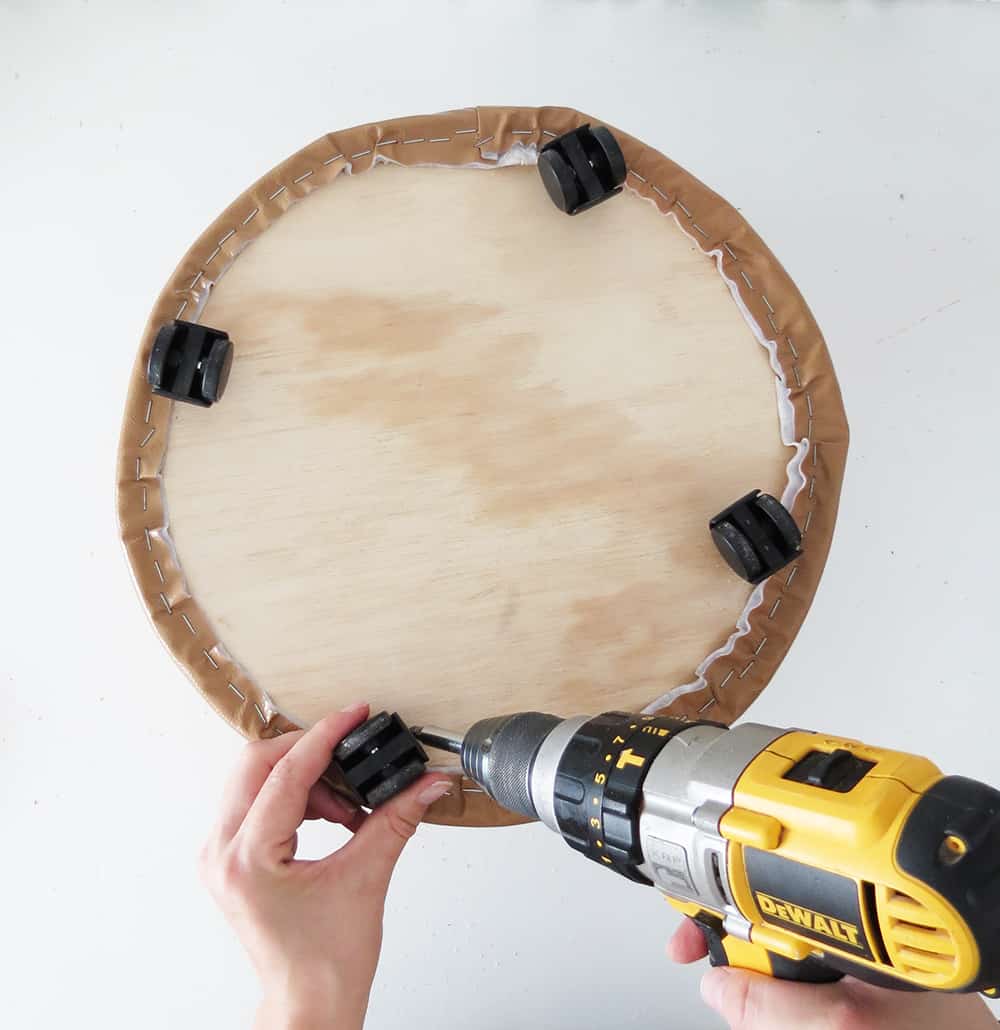
Screw the 4 wheels on the plywood. Flip your rolling planter, place the plastic planter inside, add soil and your favorite plant and ready!
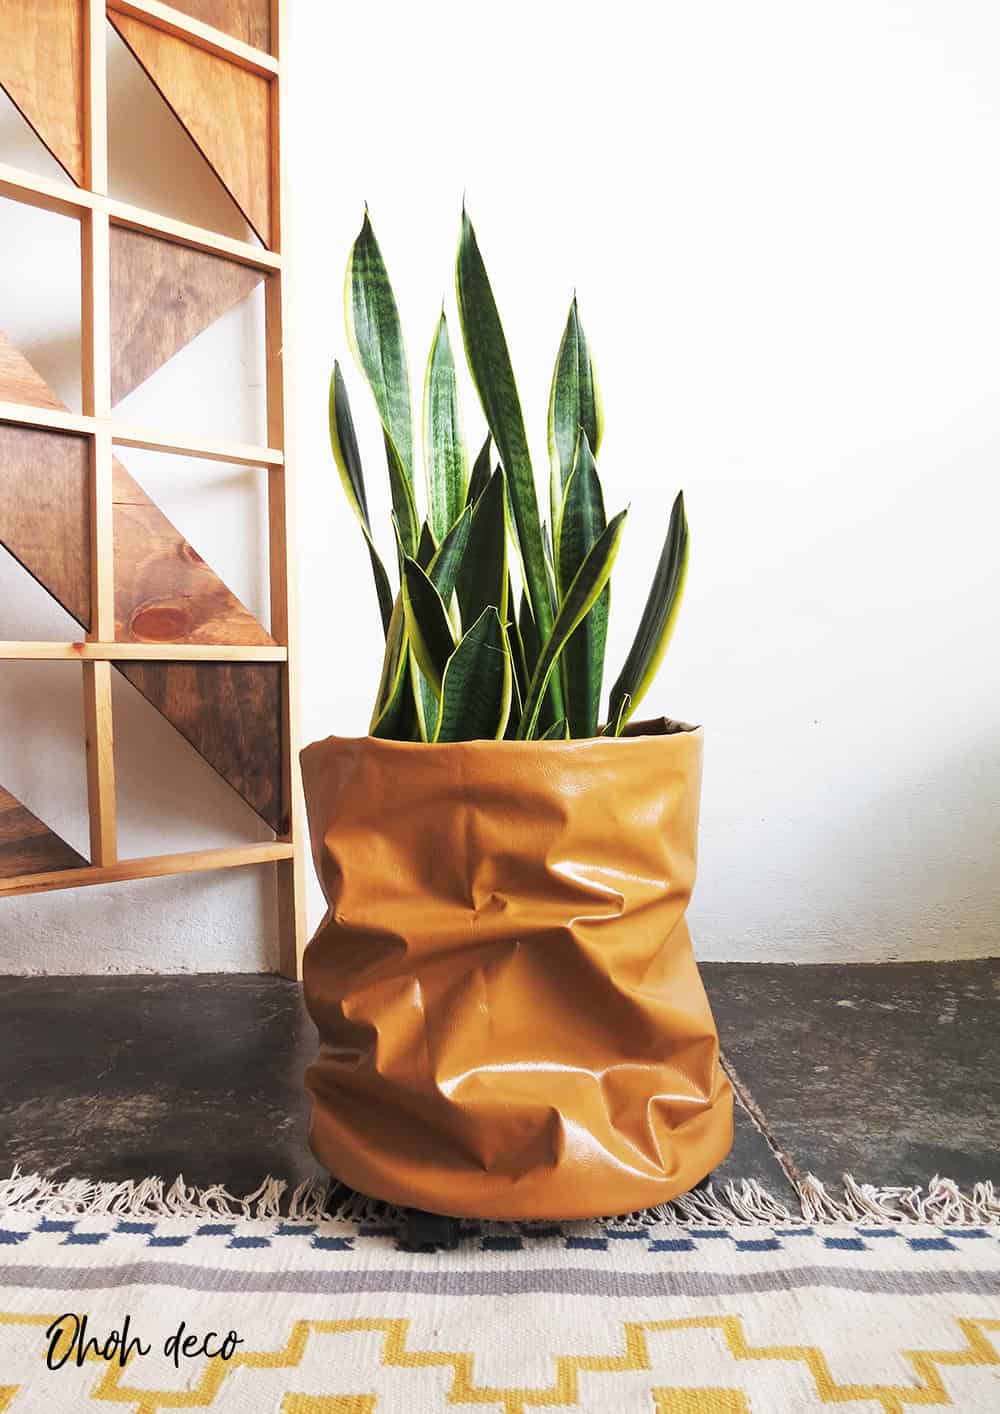
My initial idea was to make a fold with the fabric on top to have a clean look…but I kinda like the crinkle look better. What do you prefer?
You can barely see the wheels be here there are and they do make the cleaning much easier!

In conclusion, creating a DIY rolling planter with faux leather is not only a practical and stylish solution for your indoor plants, but it also allows you to exercise your creativity and resourcefulness.
From choosing the right materials to assembling the planter, we have explored the step-by-step process and provided tips to ensure a successful project. I hope to have inspired you to embark on your own DIY journey.
So go ahead and give it a try – you might just surprise yourself with the end result! Remember, the possibilities are endless when you think outside of the box (or planter, in this case). Get creative, let this be the beginning of your green thumb journey.
RELATED: 70 easy to make DIY planters
RELATED: Recycled tin can planters
Want to remember it? Save this DIY Rolling Planter in your favorite Pinterest board.
You will find all the tutorials featured in the video on my “Best DIY” page.
Amaryllis