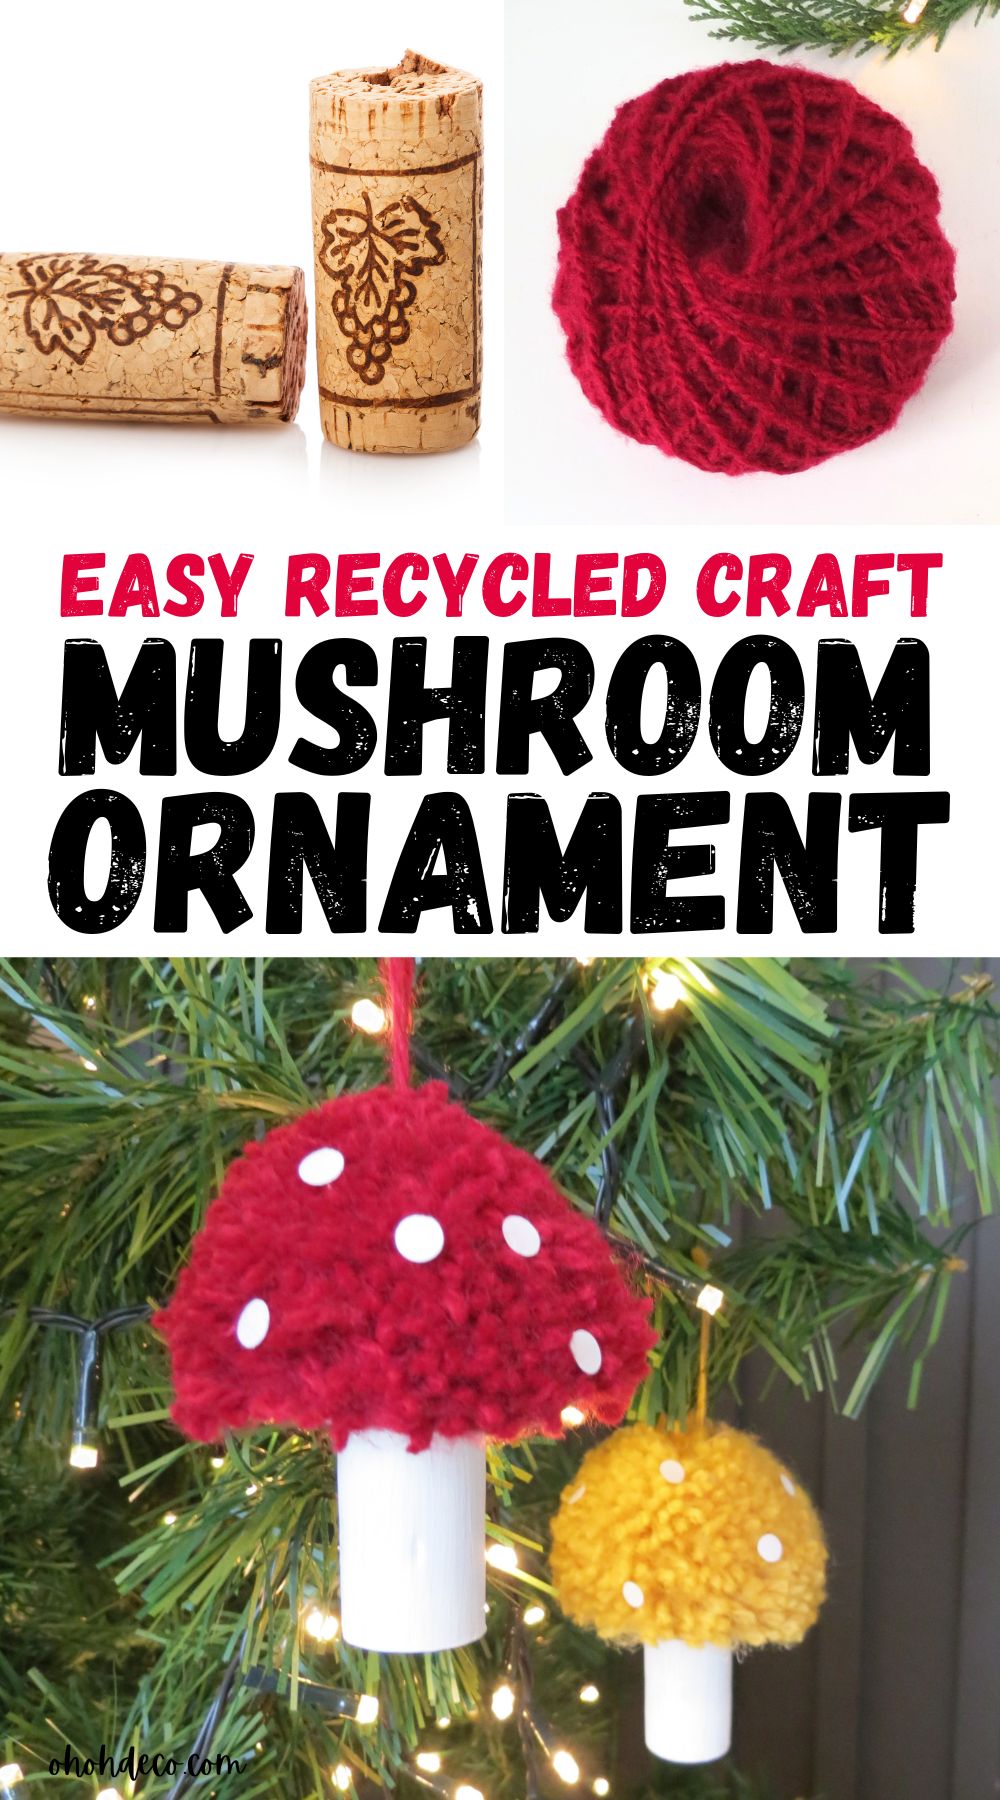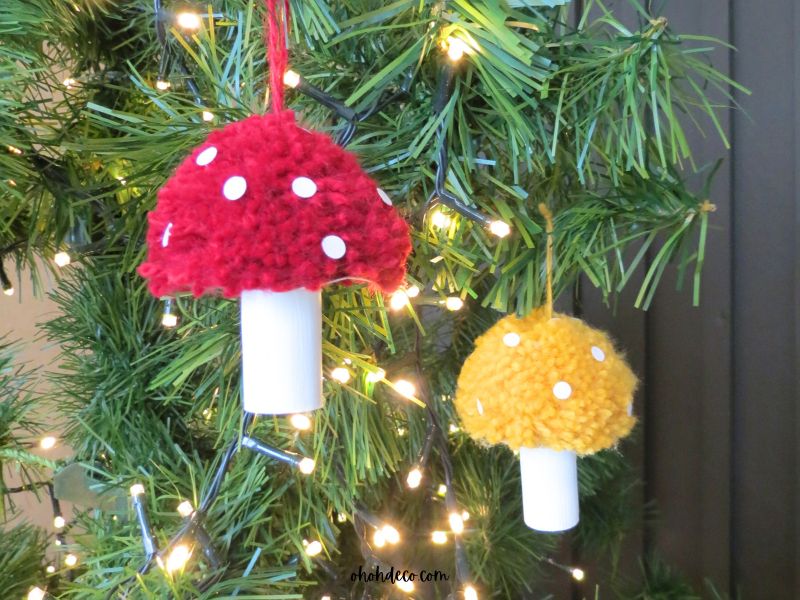
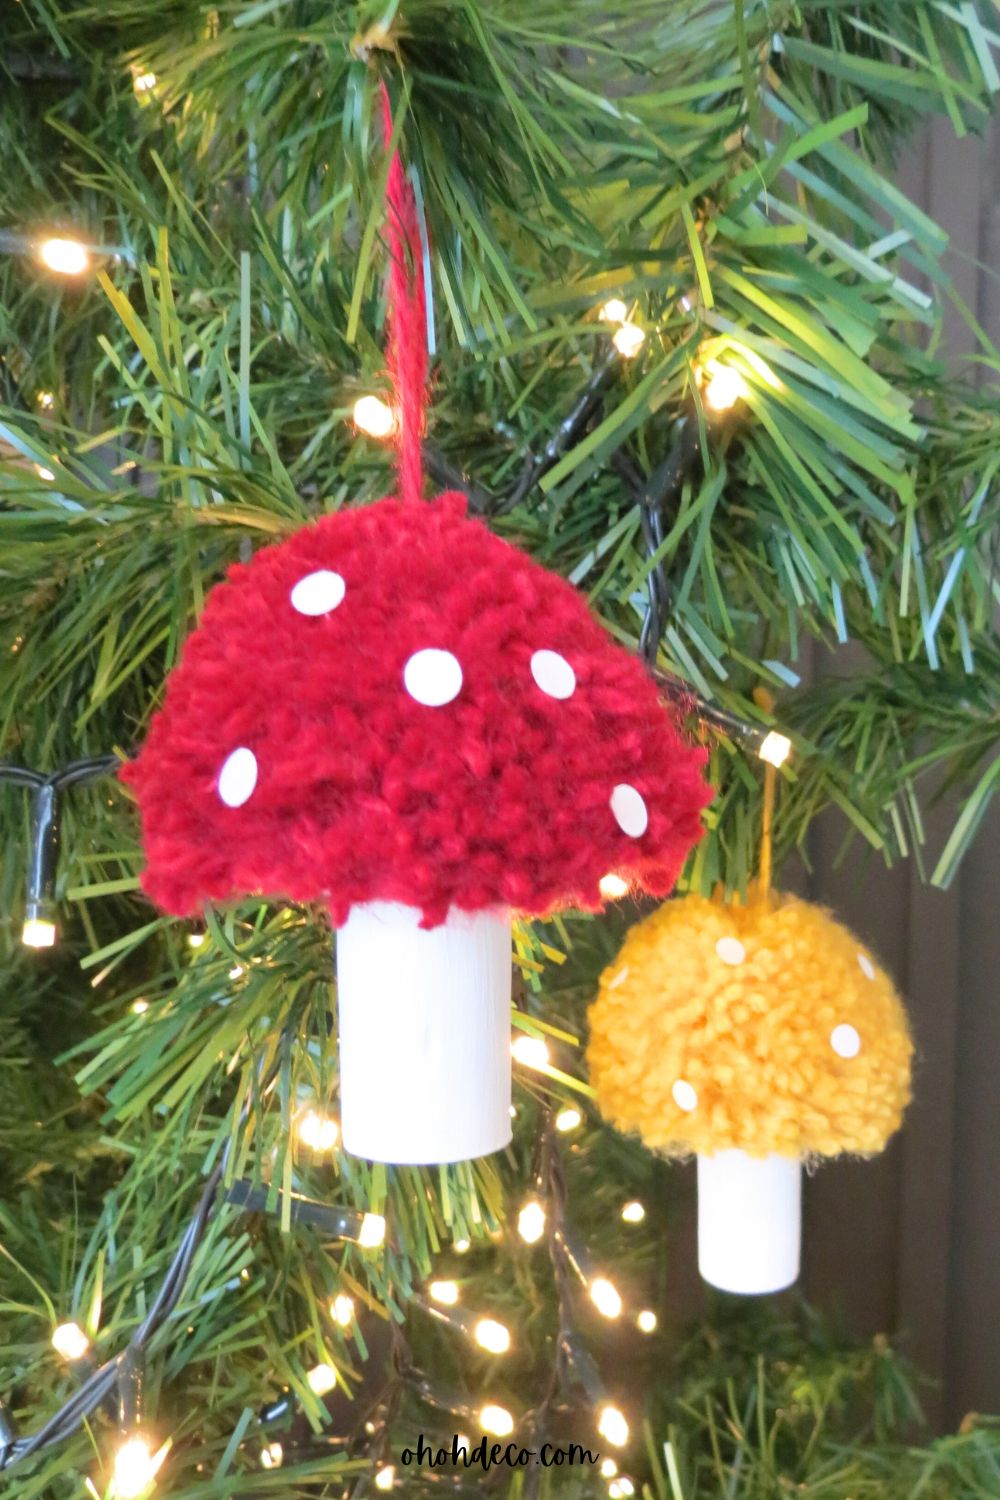
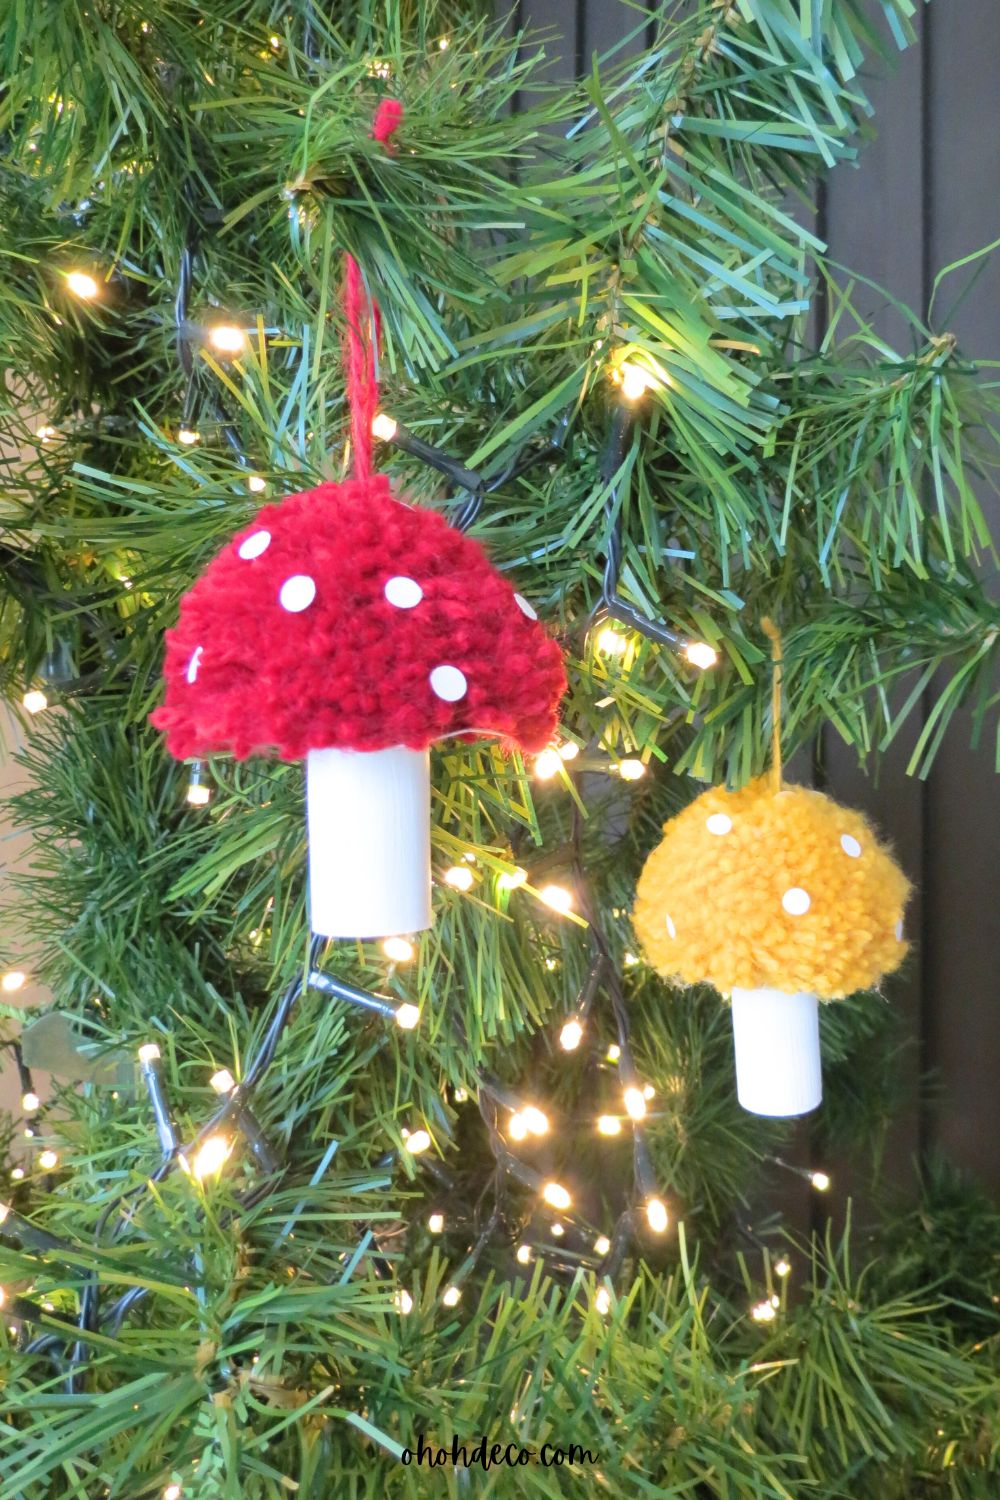
Creating a DIY mushroom ornament is a fun and creative project you can make using scrap materials you likely have lying around your home.
Start by gathering items such as old cardboard, yarn scraps, or even wine cork that will serve as the base for your mushroom.
[ This post probably contains affiliate links, our full disclosure policy is boring, but you can read it HERE ]
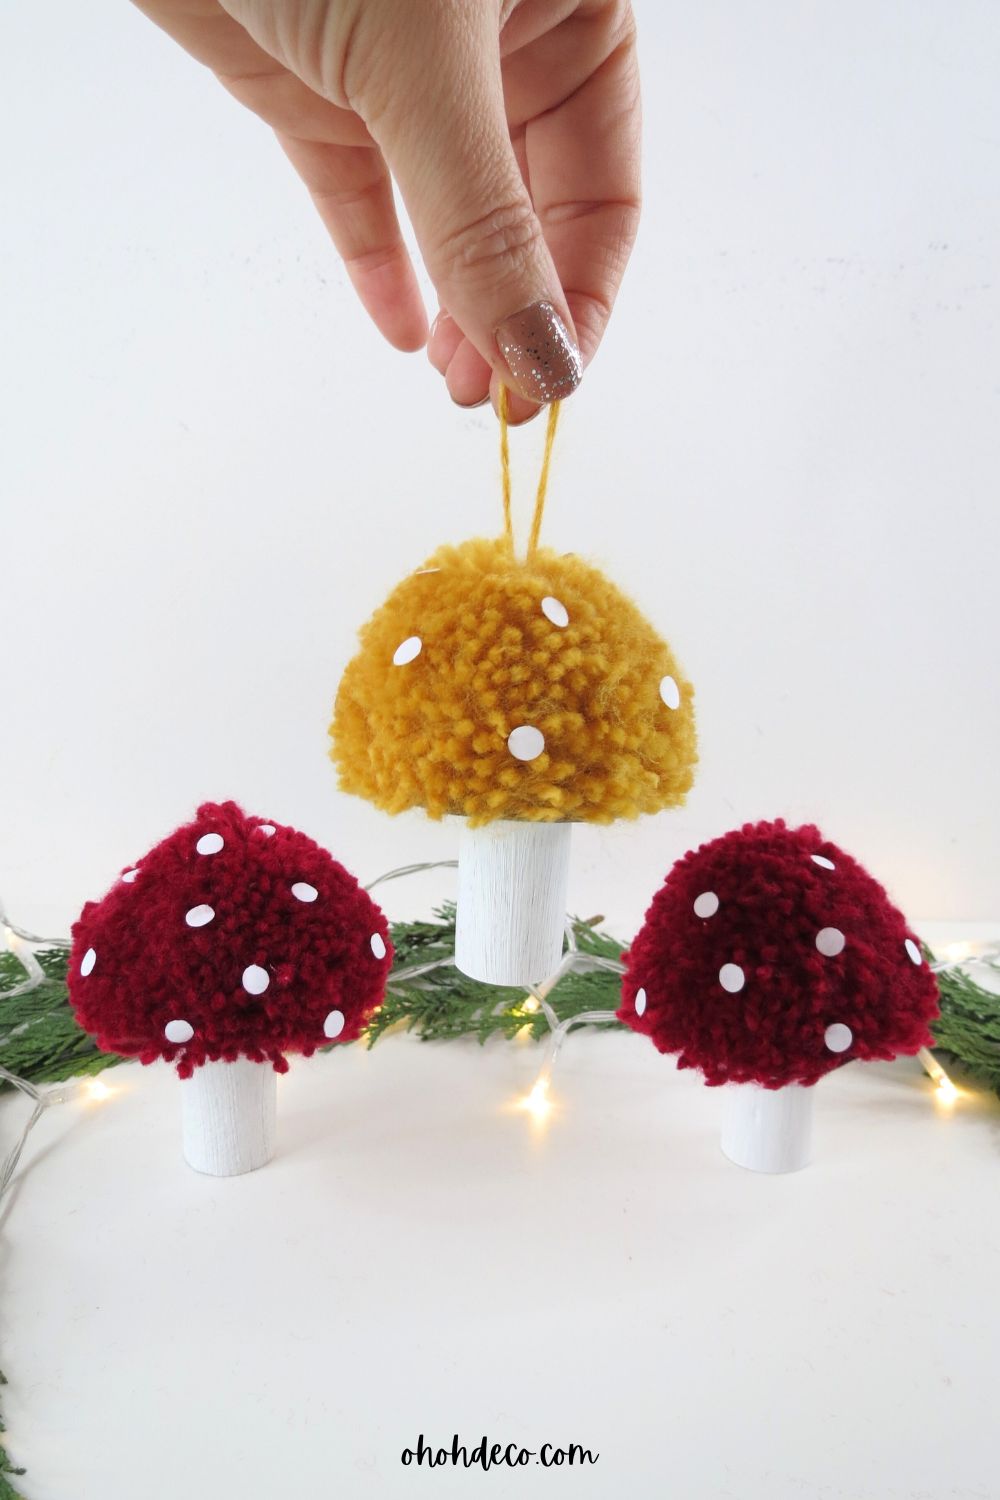
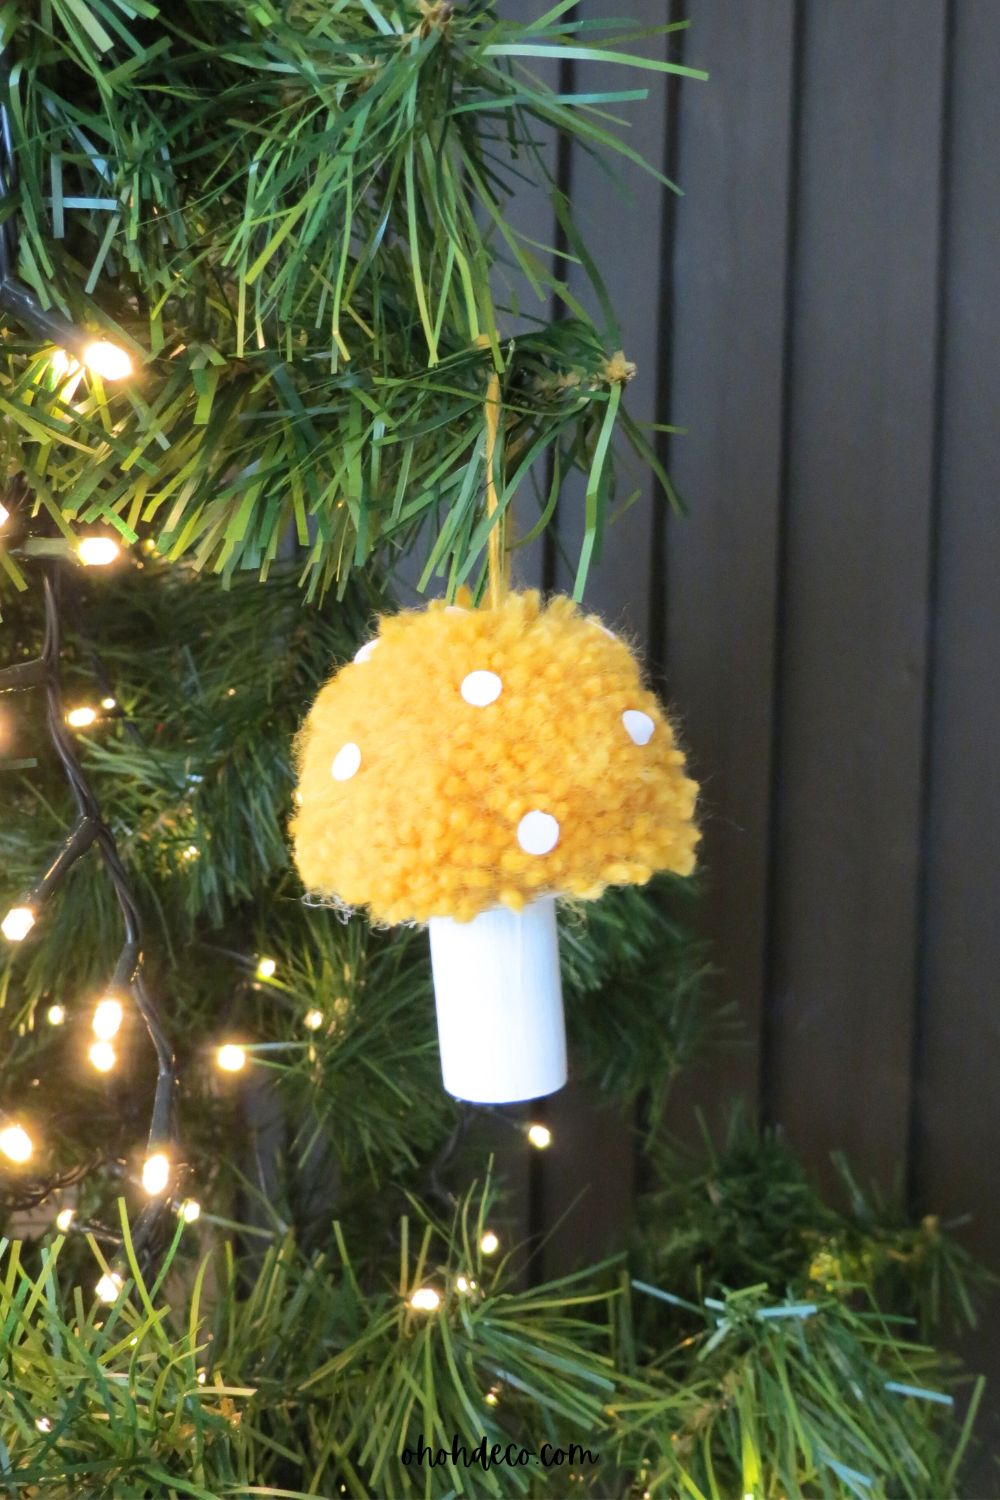
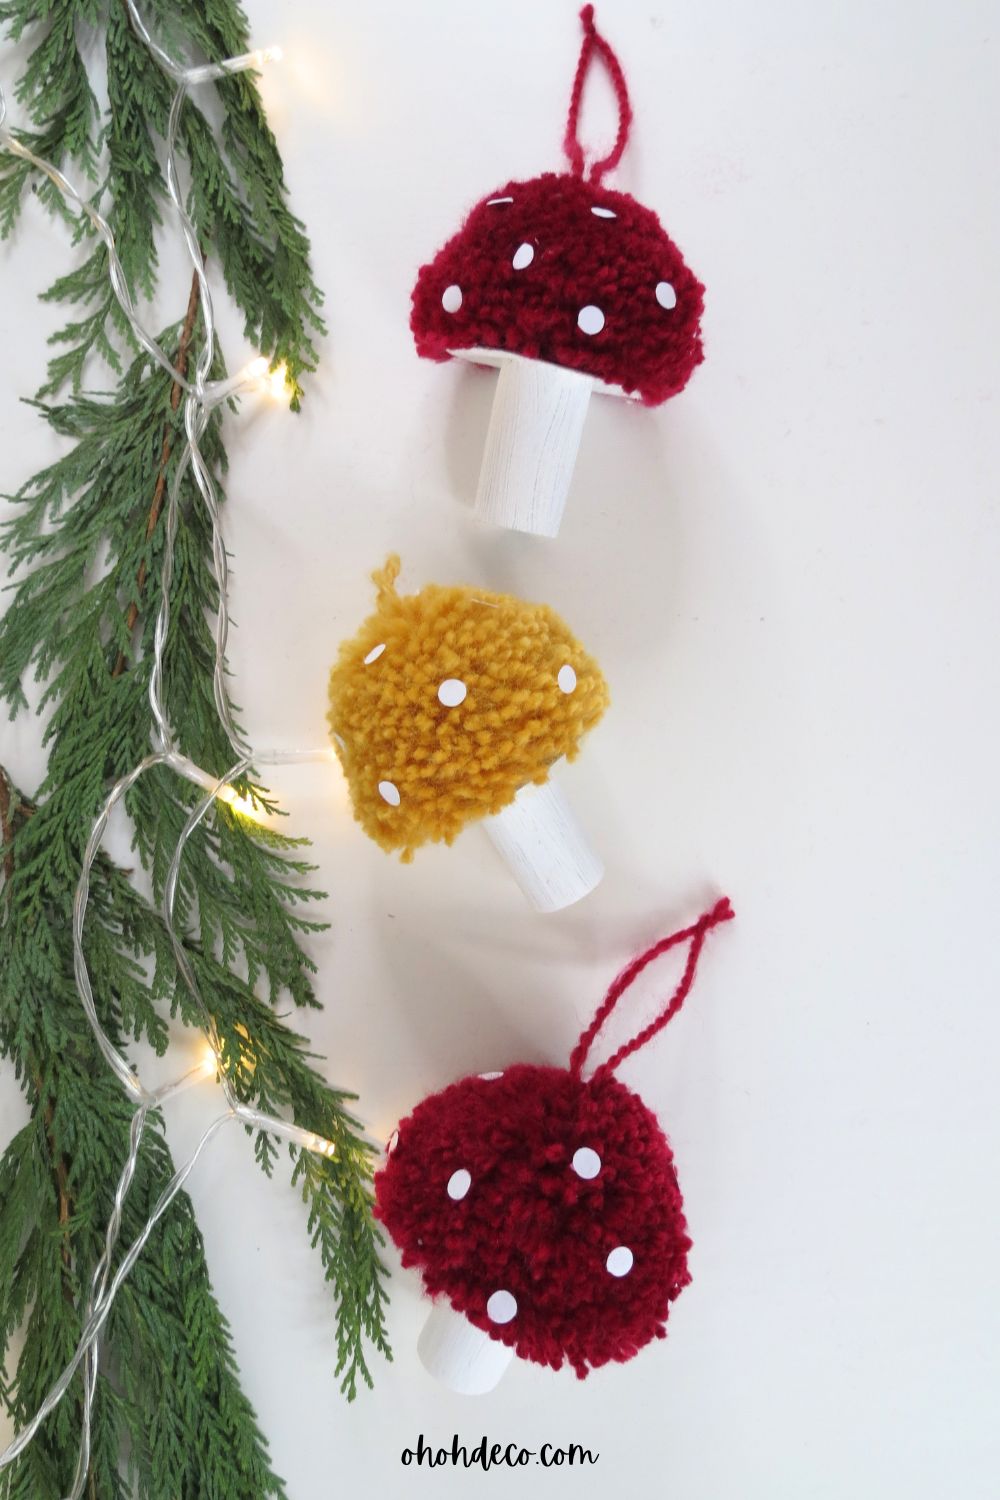
Unleash your creativity by crafting as many DIY mushroom ornaments as you like, experimenting with different color combinations to make each piece unique and vibrant.
This easy craft if perfect to decorate your Christmas tree but also allows you to repurpose materials that might otherwise go to waste. Enjoy the process and let your imagination guide you!
Gather your Materials
It’s time to collect all the materials you’ll need so that you can start your crafting project.
To create the mushroom ornament, you’ll require a pompom maker that measures 5.5 cm in diameter. This handy tool will help you craft the perfect fluffy base for your charming decoration.
You can easily find one for purchase through online retailers or at your local craft store. Alternatively, if you’re feeling a bit crafty, you can make a pompom maker shape using a simple piece of cardboard.
I provide links for all supplies but feel free to use items you already have at home. Consider repurposing cardboard from products or packages you receive.
Dive into your yarn scraps and see how you can use any leftover yarn you might have. This joyful season is also a great opportunity to save a few wine corks for this craft project.
How to DIY Mushroom Ornament
Let´s start crafting!
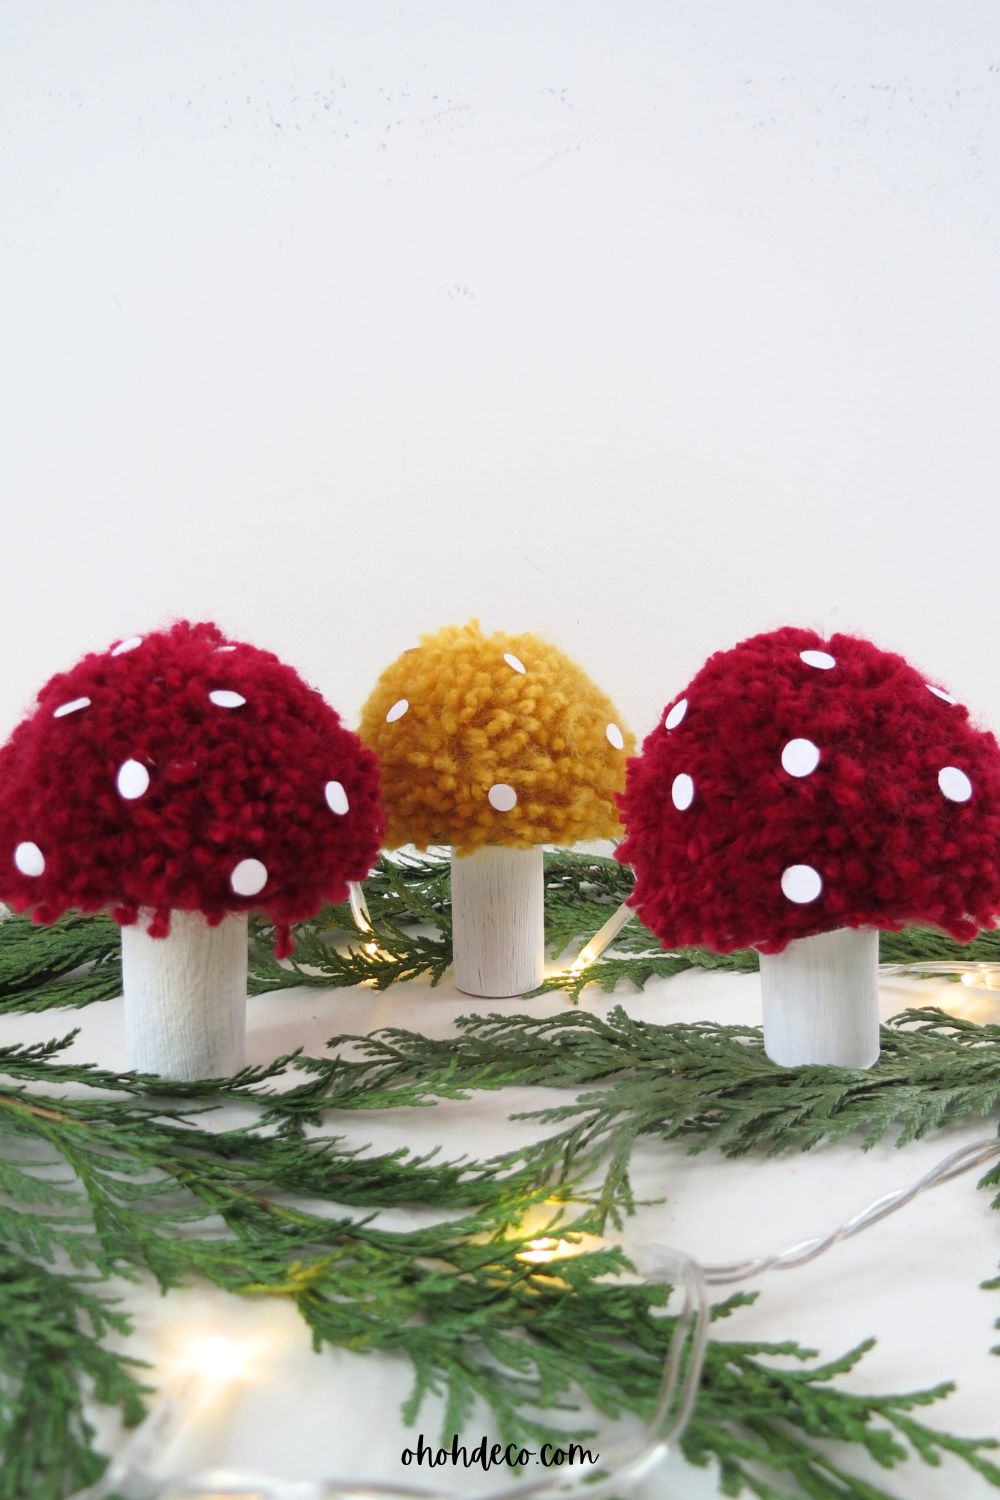
1. To create the mushroom cap, start by making a half pompom. Use a pompom maker with a diameter of 5.5 cm and wrap yarn around it generously to achieve a fluffy texture.
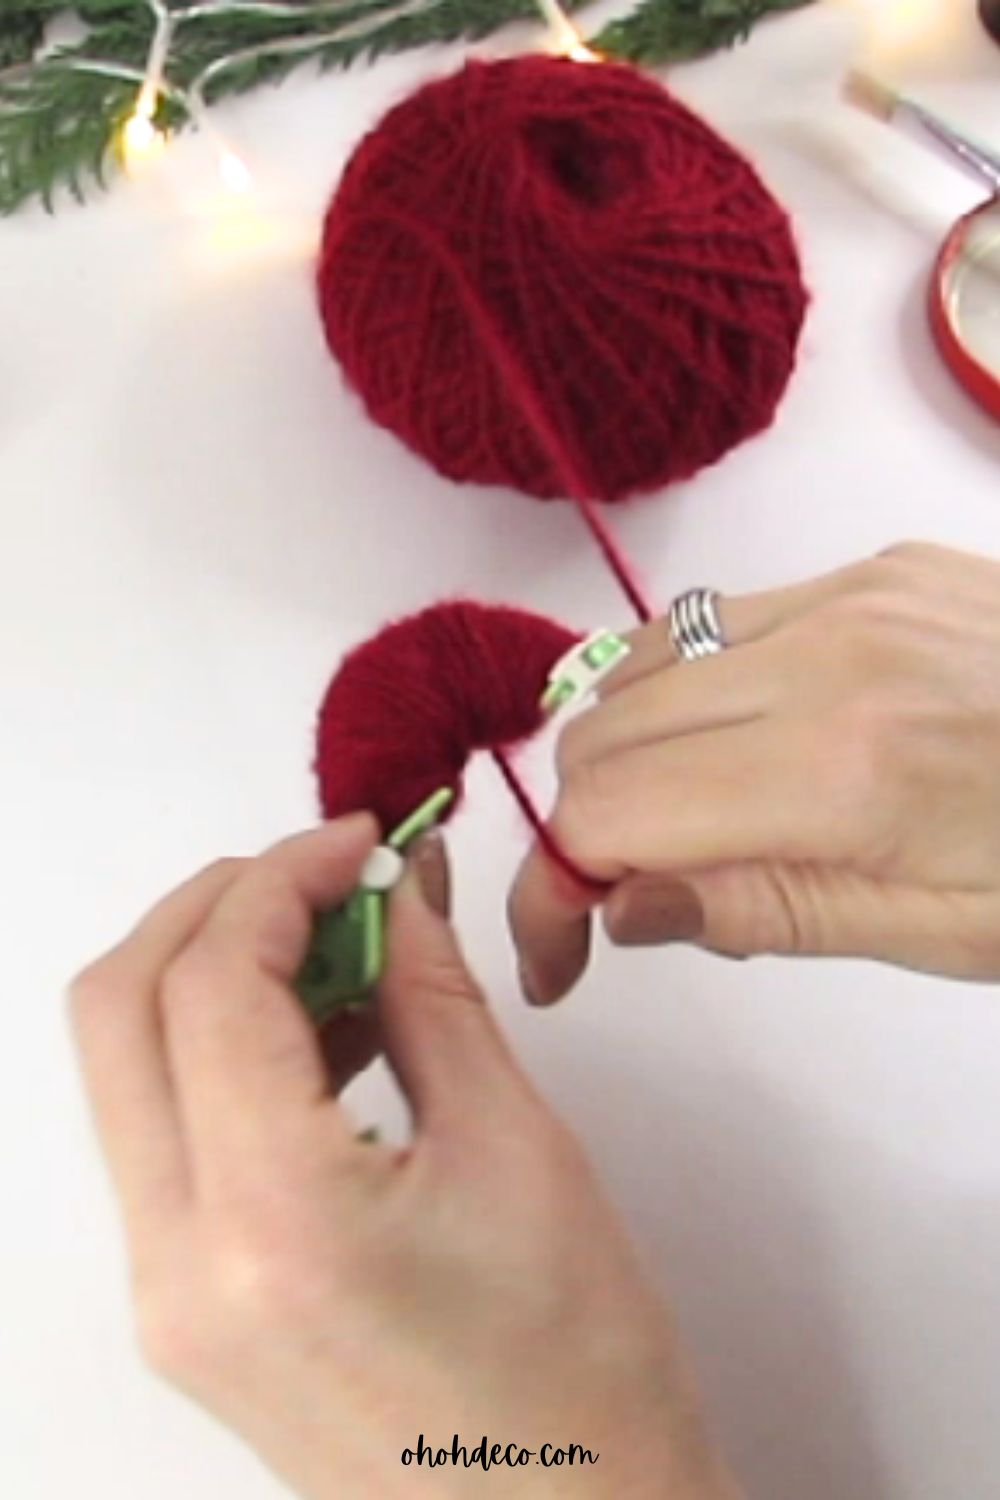
2. Once you’ve finished wrapping, cut the yarn around the top and secure it with a knot to hold the half pompom together.
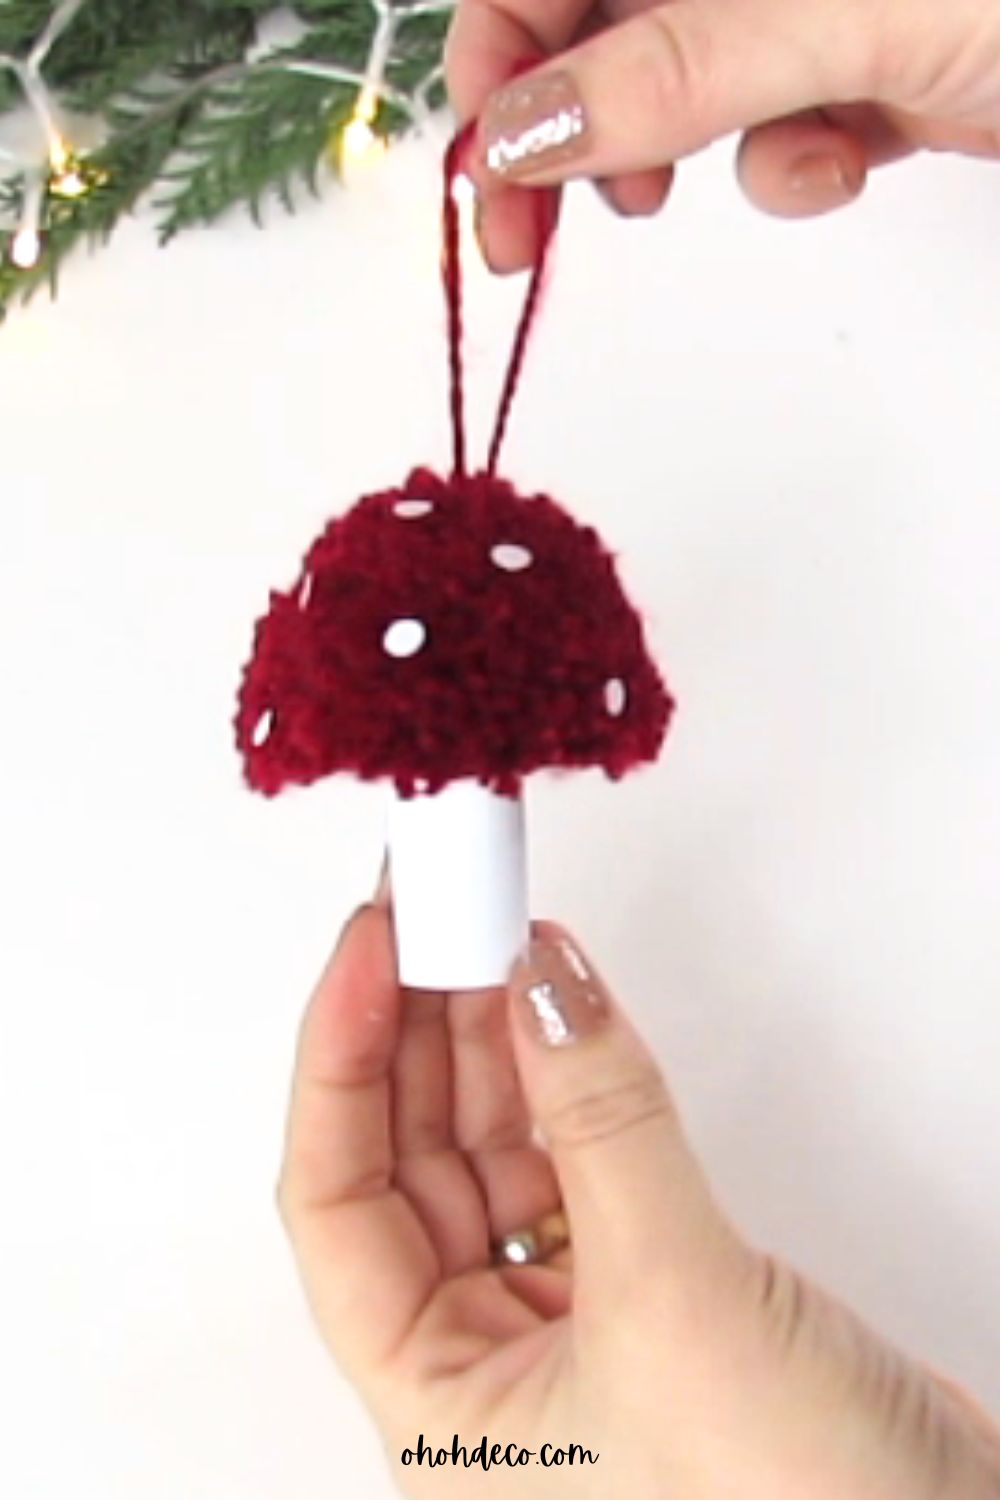
3. Use the long piece of yarn to form a loop for hanging your mushroom ornament on the Christmas tree.
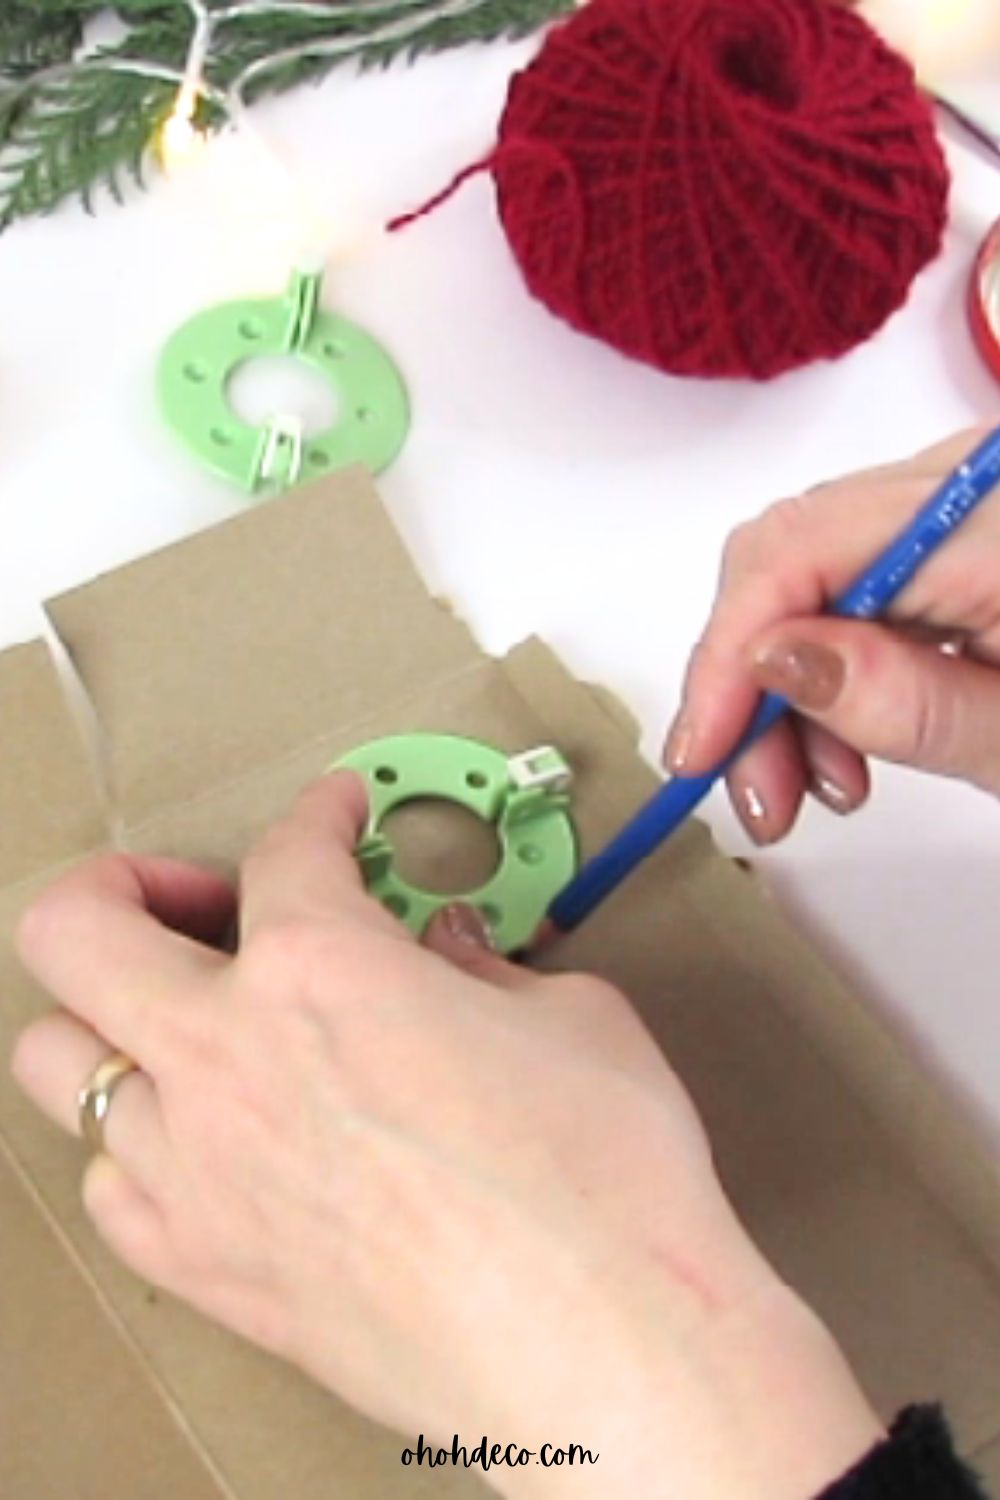
4. Set the pompom aside while you craft the mushroom’s stalk. Report and trace the circle shape of the pompom maker onto a piece of chipboard and cut out the circle.
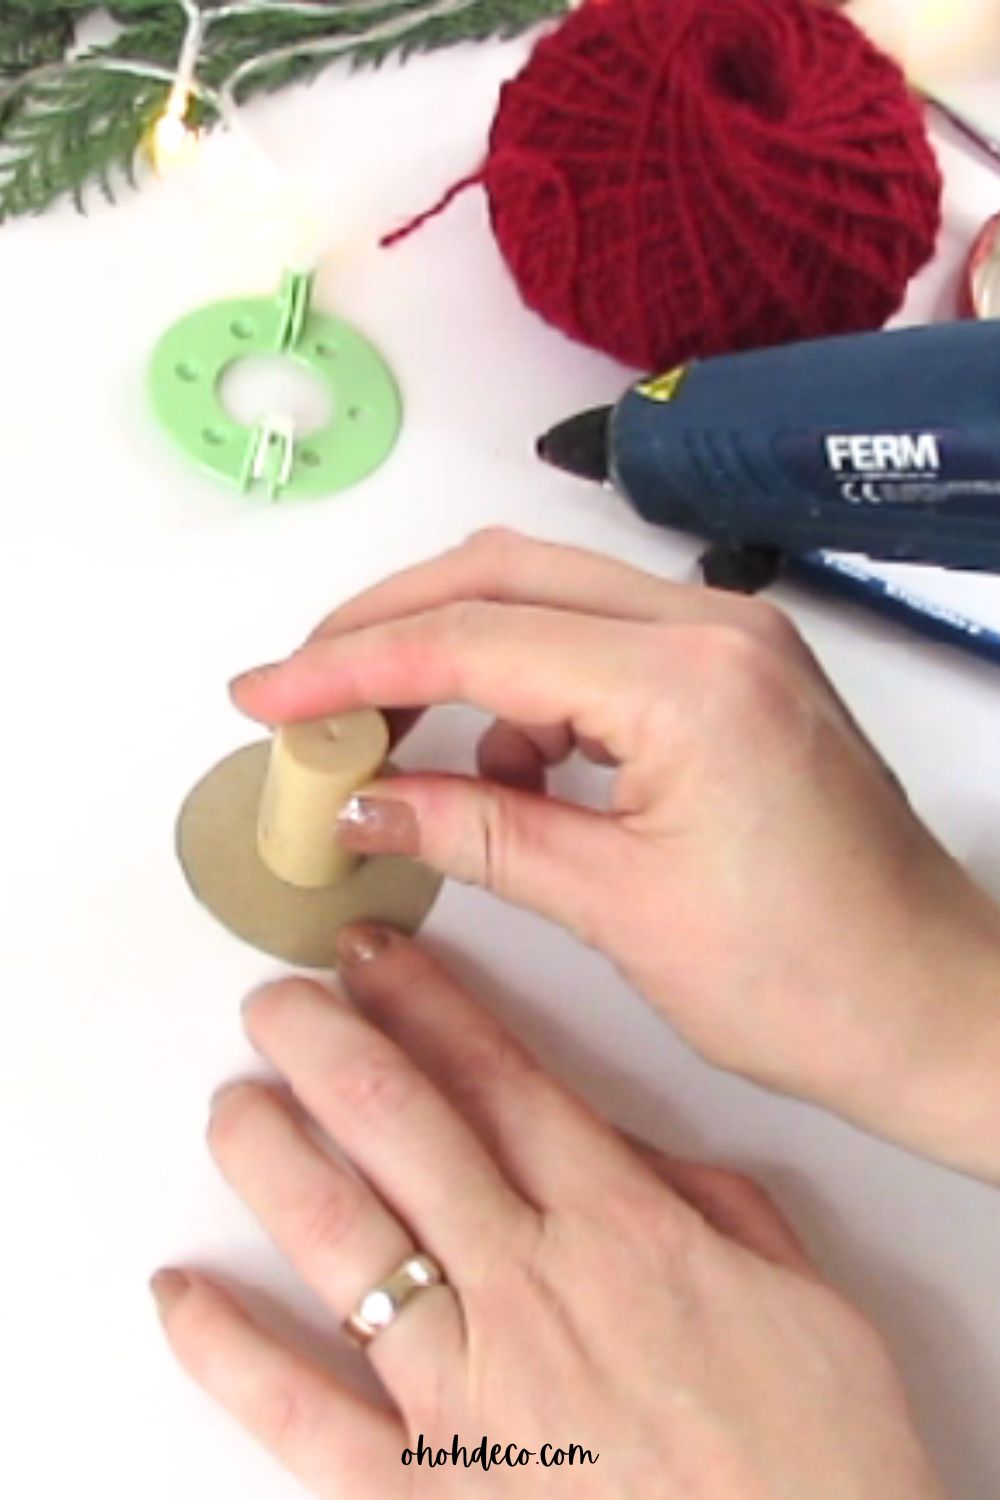
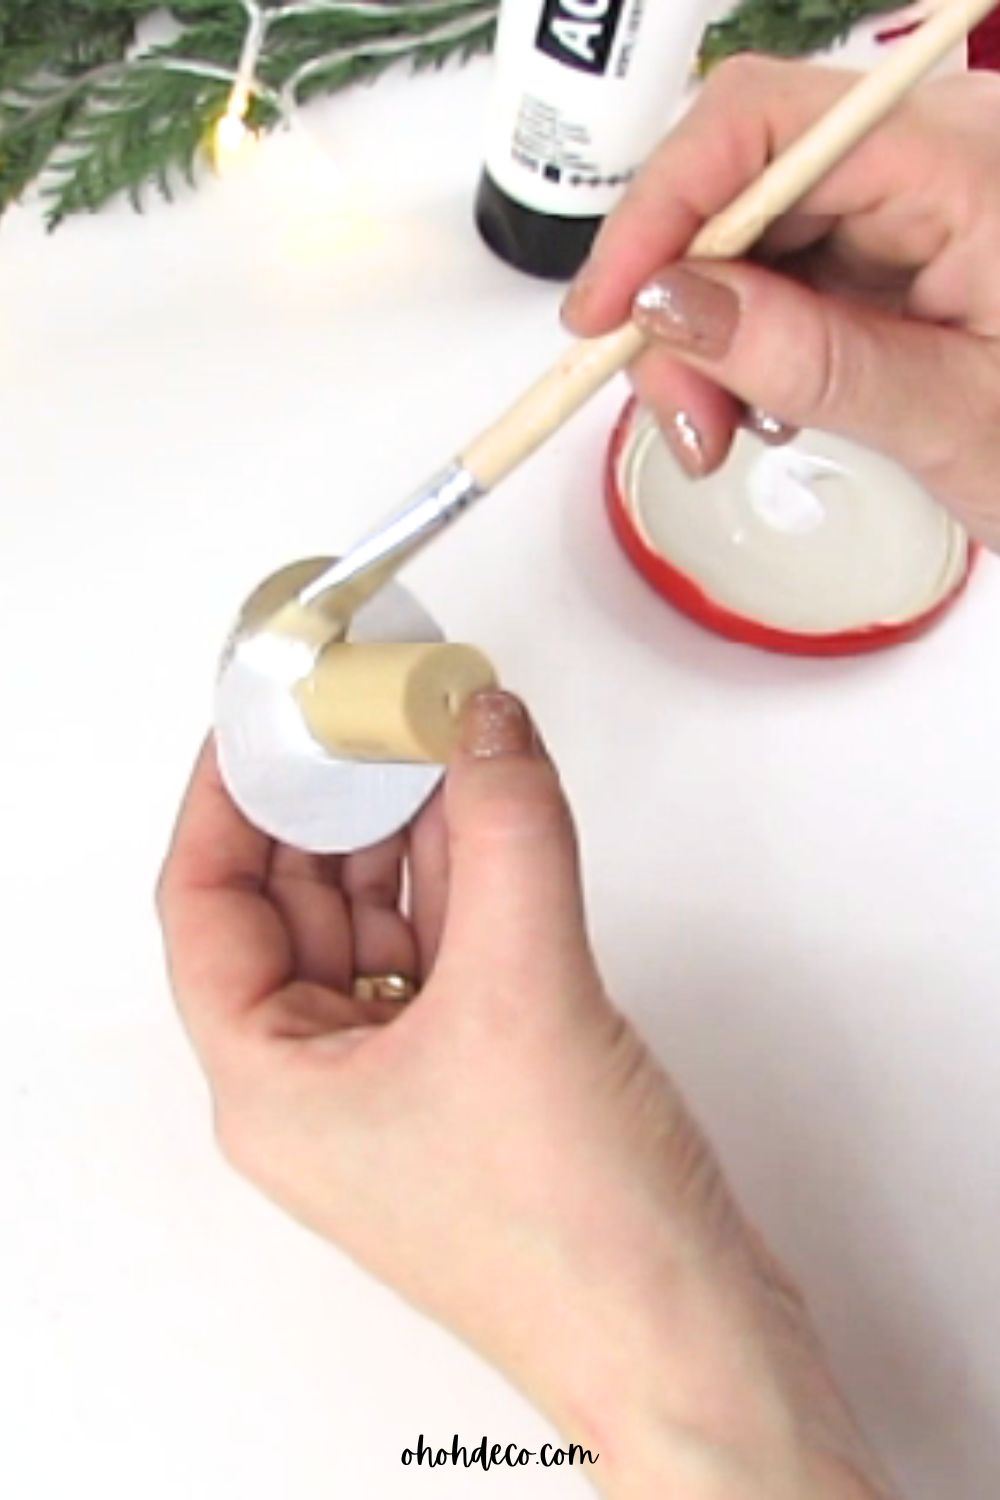
5. Glue a wine cork in the center of this circle.
6. Paint the base in your preferred color, such as white acrylic paint. Apply as many coats as necessary to fully cover the chipboard and cork.
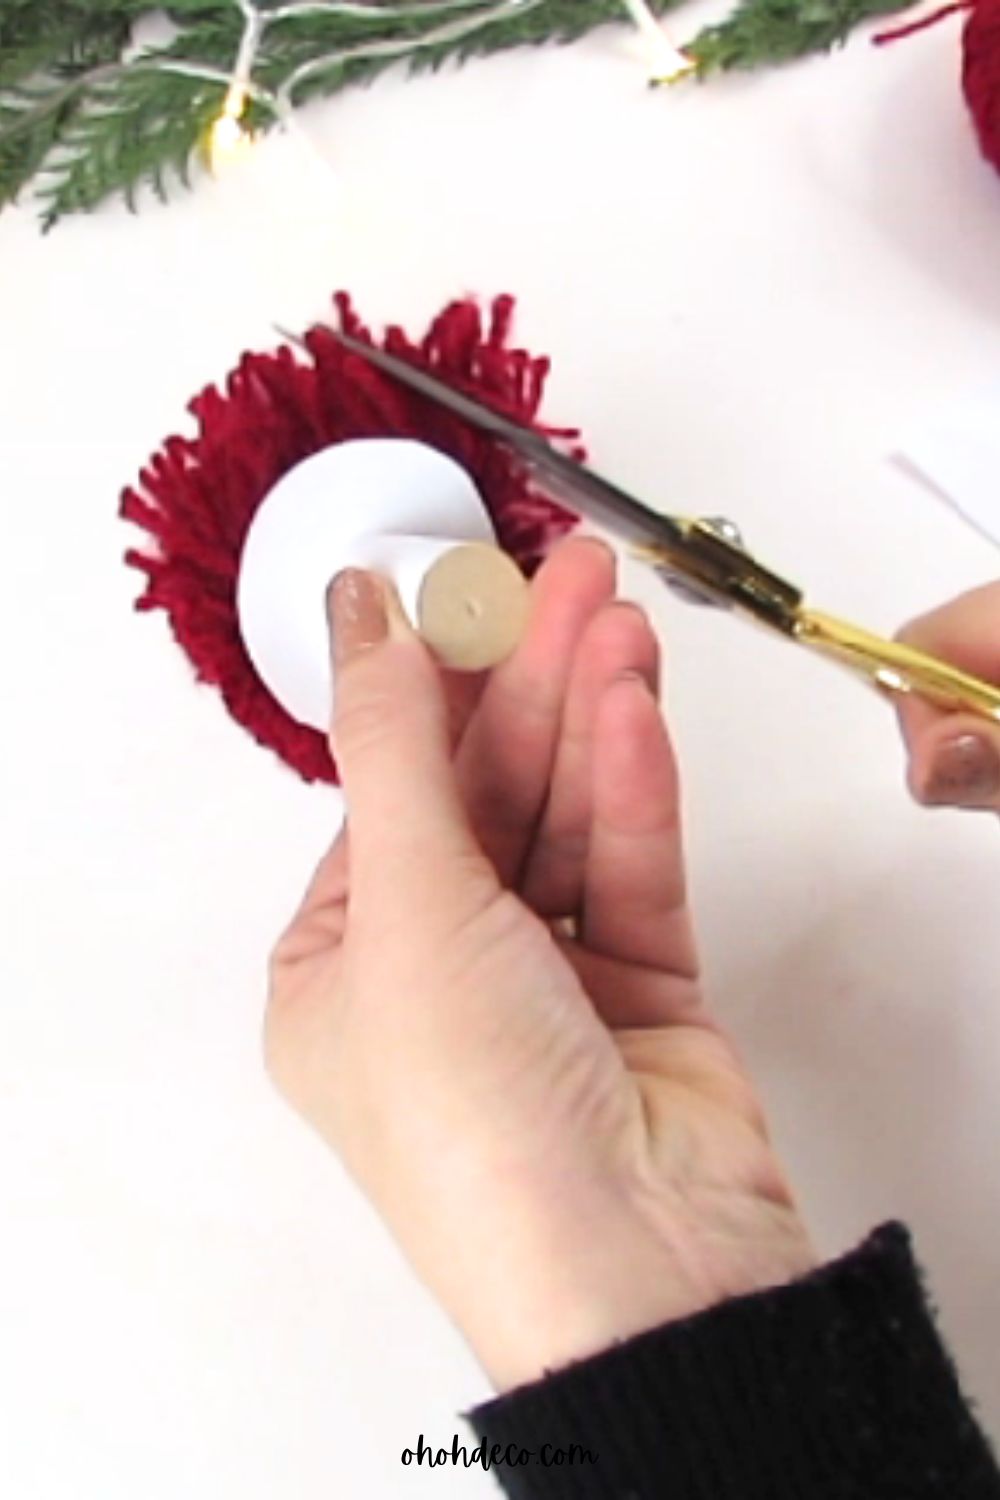
7. Once dry, add a generous amount of hot glue on the back of the chipboard circle and press it onto the flat side of the pompom.
8. Trim the yarn to shape the mushroom nicely.
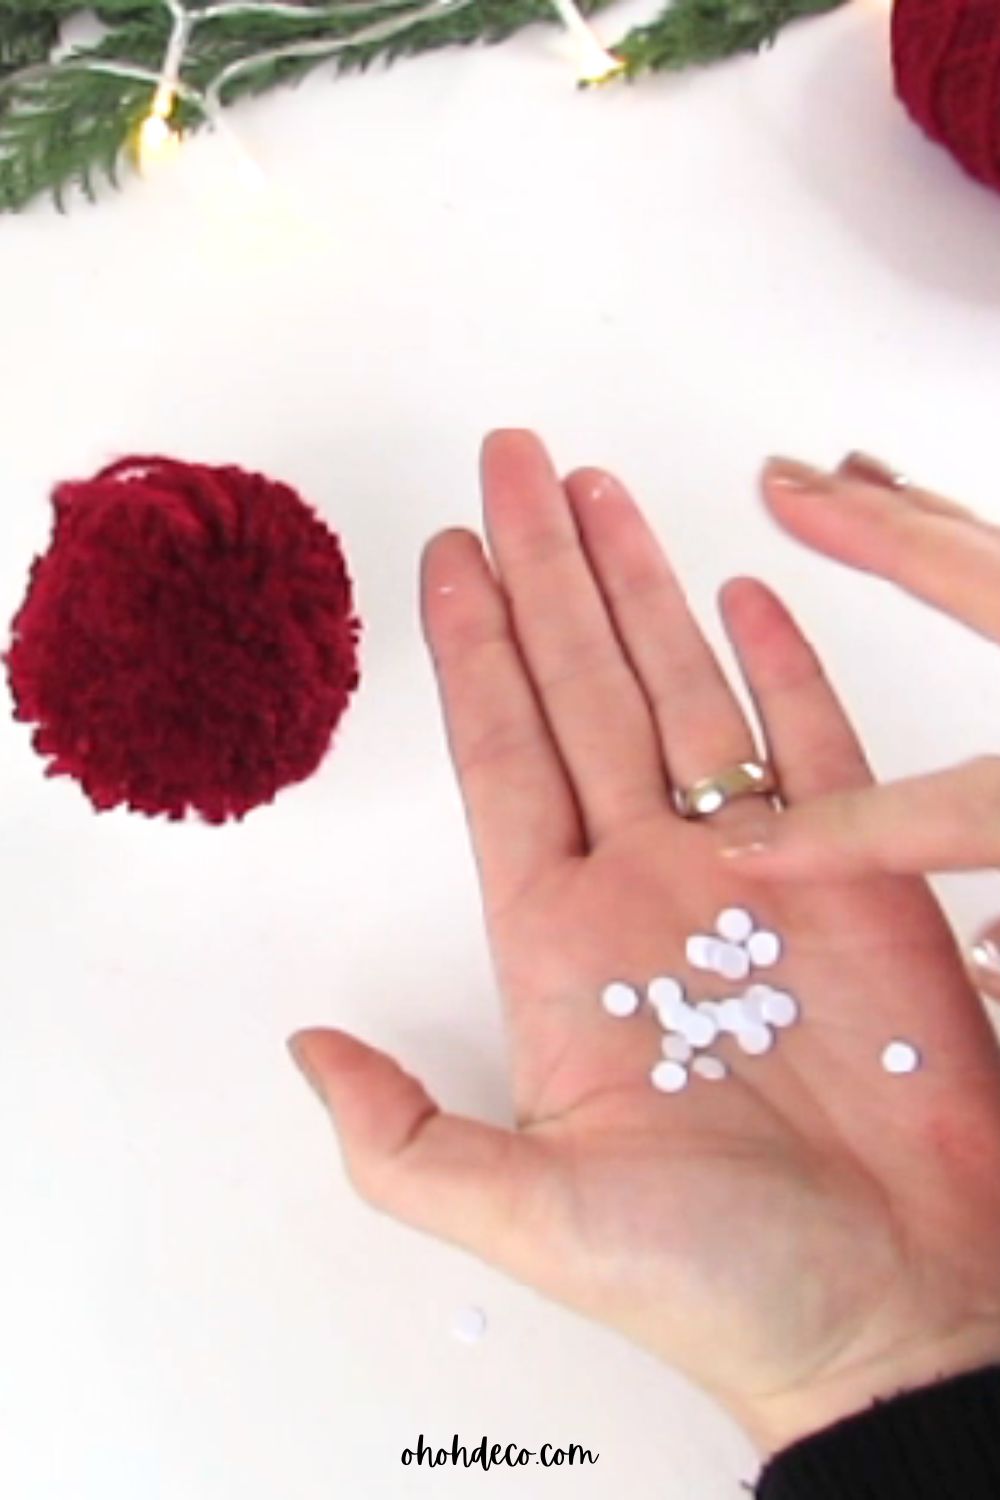
9. For a nice finishing touch, punch holes in a piece of paper and glue the paper dots onto the mushroom cap.
And voila! It’s that simple to create a mushroom ornament from scrap.
Watch the video to create Mushroom Ornaments
To help you create these delightful mushroom ornaments, be sure to watch the video for some enjoyable insights and discover additional helpful tips along the way.
These DIY Christmas decorations are very simple and enjoyable to create.
What yarn color do you like to use for your mushroom? Would you consider using this craft idea for other purposes than Christmas decorations?
I believe these charming mushrooms could also serve as delightful decorations for the Fall season!

.
.
.
.
.
.
This fun project not only sparks creativity but also promotes recycling, making it a delightful way to upcycle items that would otherwise go to waste.
So gather your materials and let your imagination run wild as you bring your unique mushroom ornament to life!
RELATED: DIY Mushroom Decorations: Easy and Affordable Idea
RELATED: From Trash to Treasure: Egg Carton Christmas Decorations
Want to remember it? Save this DIY Mushroom Ornament on your favorite Pinterest Board.