
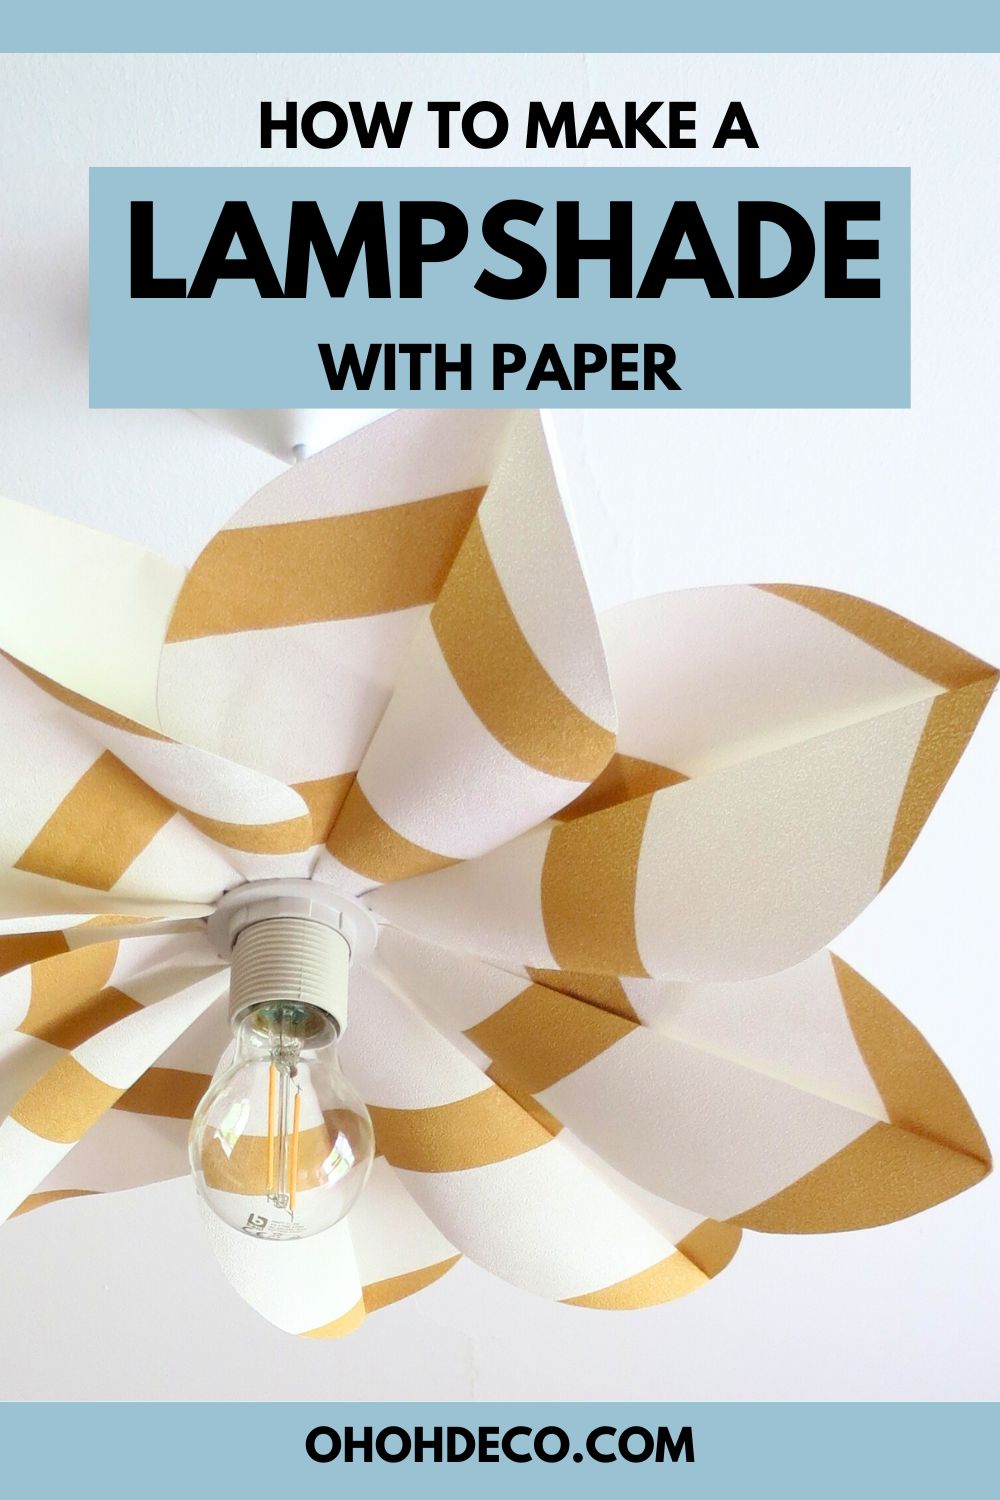
Are you looking to brighten up your living space without breaking the bank? Imagine creating a beautiful DIY paper lampshade that adds a warm and cozy glow to any room.
In this DIY tutorial, I will guide you through the process of selecting the right materials, creating the lampshade structure, assembling it, and adding those final touches that make all the difference.
With just a few simple steps and some paper, you can transform your space and add a personal touch to your home decor.
Let’s get started and light up your space with a budget-friendly DIY paper lampshade.
[ This post probably contains affiliate links, our full disclosure policy is boring, but you can read it HERE ]
Selecting the Right Materials
When it comes to creating your DIY paper lampshade, selecting the right materials is key to achieving the desired result.
Consider the type of paper you will use. You can work with wallpaper; it´s a great project to use the leftover you kept from your last room renovation.
You can also use cardstock paper; don´t hesitate to choose colorful cardstock for a unique look.
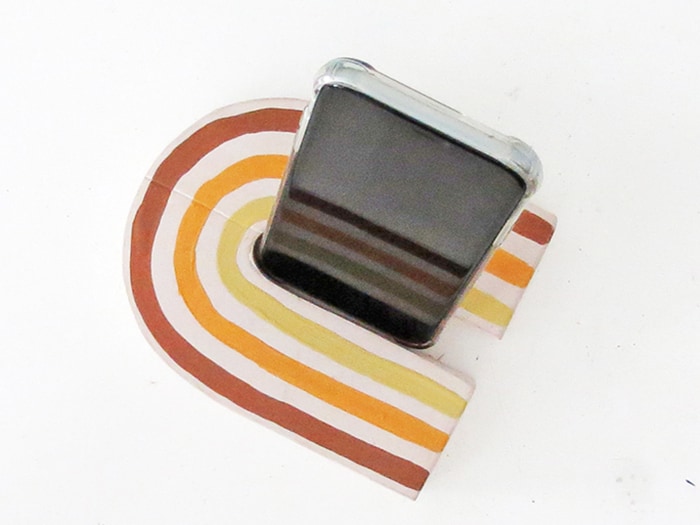
Additionally, think about the paper pattern as it will define the final design of your lampshade.
By choosing the materials that best suit your vision, you’ll be on your way to creating a stunning paper lampshade that will light up your space beautifully.
Supplies you will need to make the DIY paper Lampshade
- Wallpaper or Cardstock paper
- Scissors
- Glue stick
- Hot glue
- Lamp socket and wire
- Cardboard
Creating the Lampshade Structure
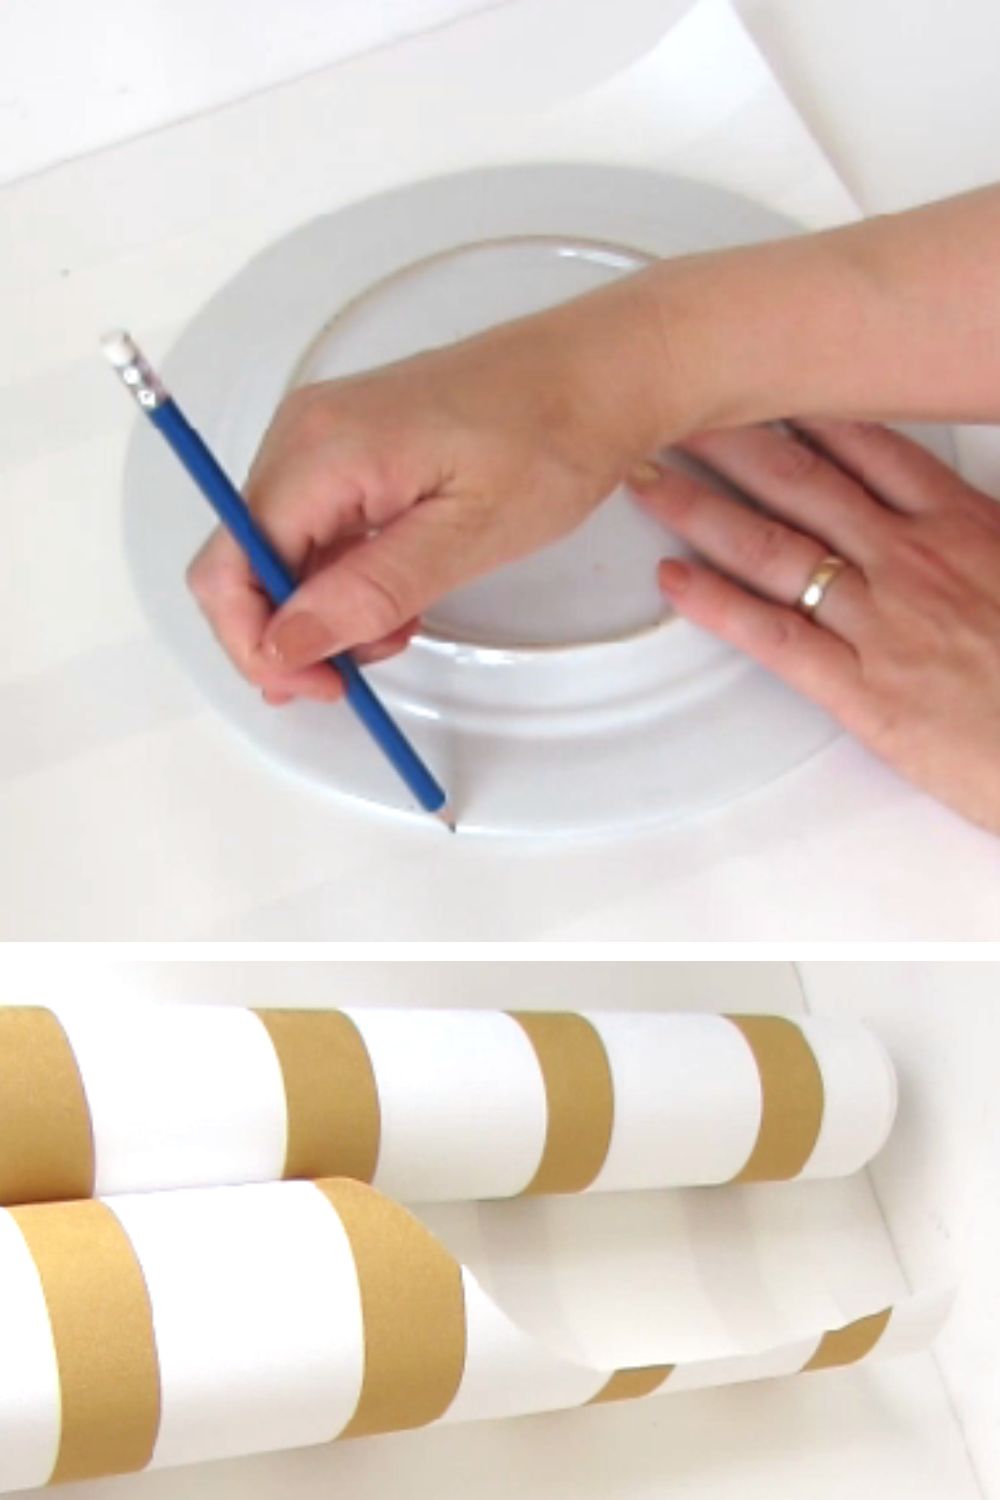
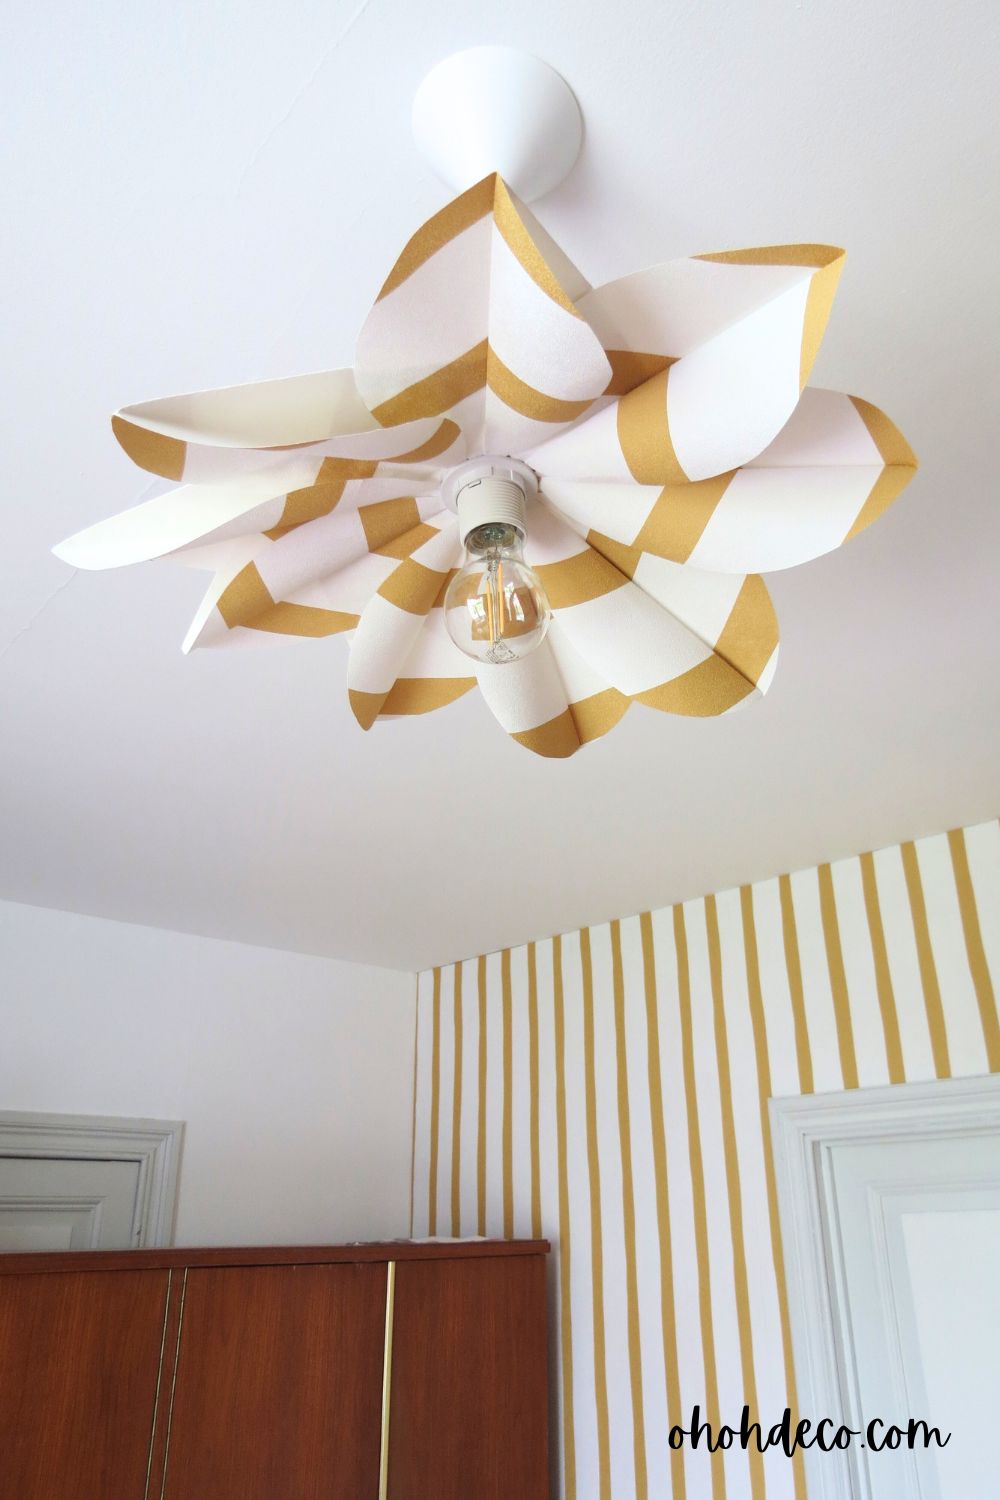
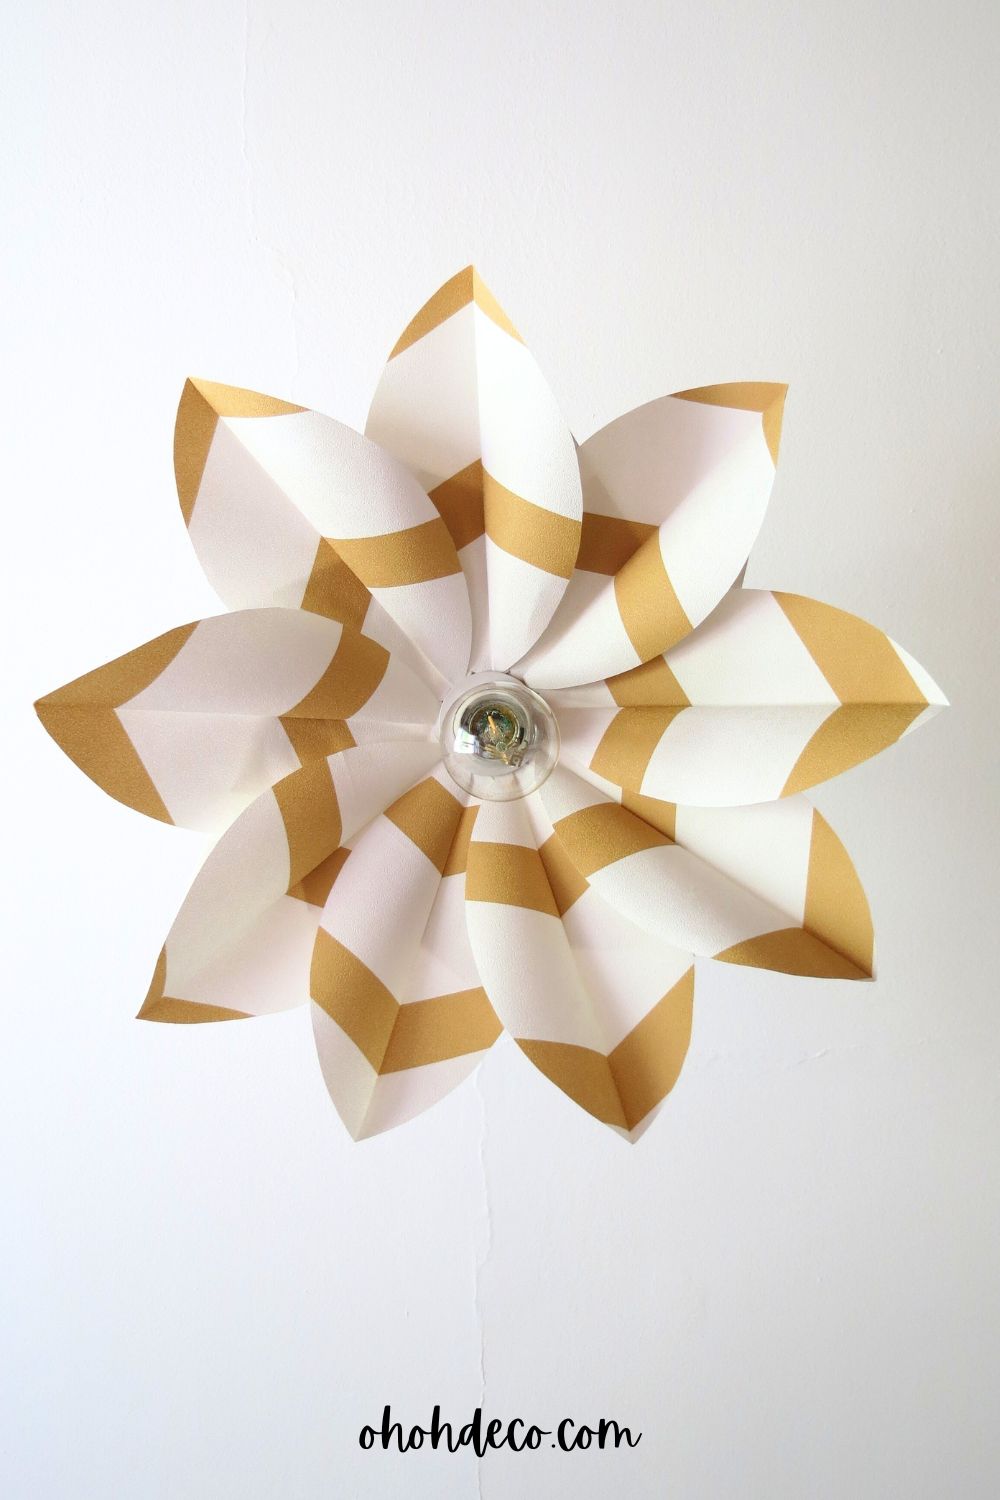
To create the structure of your DIY paper lampshade, you’ll need to start by drawing and cutting 8 to 10 circles on the paper.
To draw the circles you can use a plate as a template.
Please note that the number of circles depends on the size of your lampshade and how you arrange the petals. You will probably need between 8 and 10 leaf shapes.
.
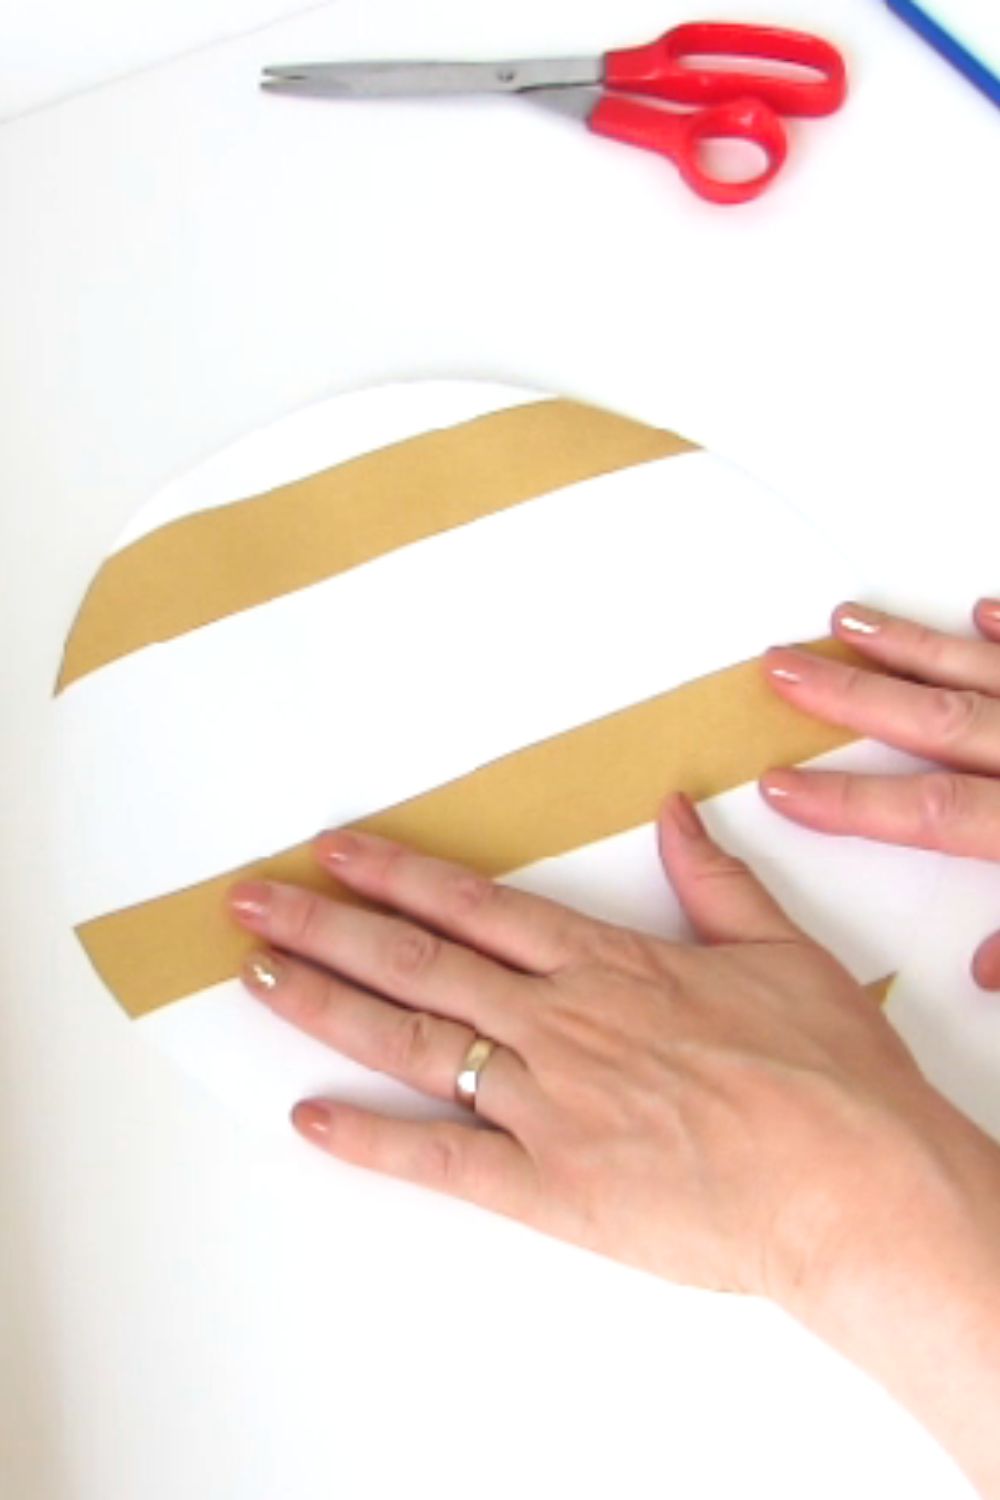
Once you have the circles ready, you have to fold each one to create the petals that compose the lampshade.

Take one paper circle and fold it in the center with the pattern inside. Then fold it in half again, mark the pleats, and open the last pleat.
Your paper piece is folded in half. Take the bottom tip, fold it until the tip reaches the center fold, and mark the pleat.
Open one of the rounded edges to make the leaf shape.
Add to hold the leaf shape in place, add some glue on the back flap.
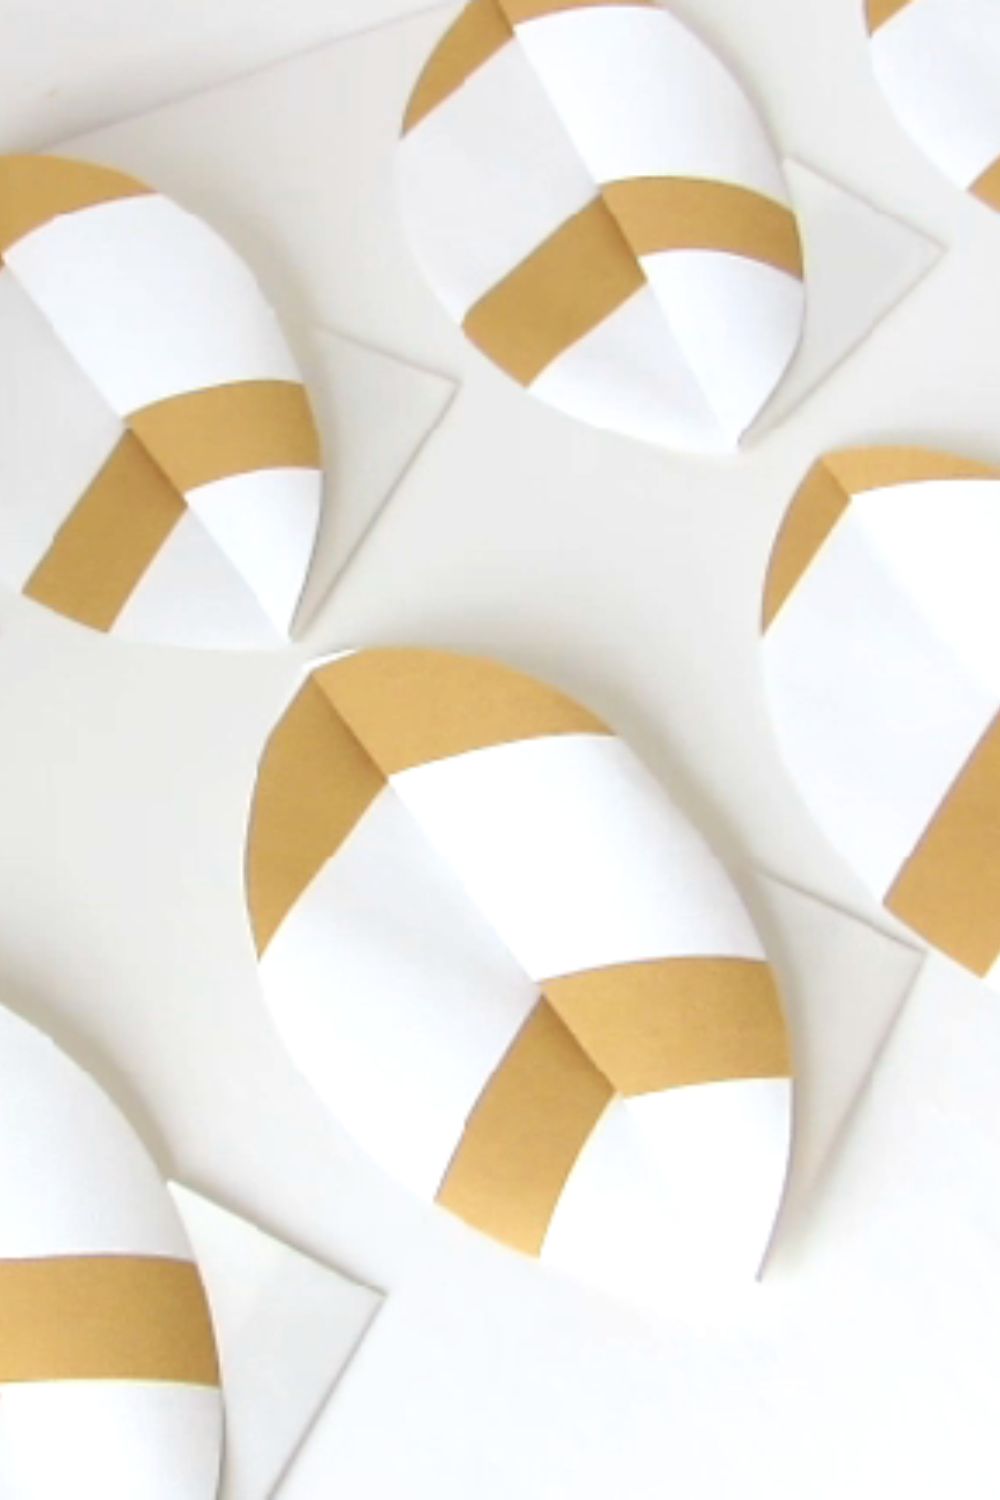
Repeat with the other paper circles. Depending on the size of your lampshade, you will need between 8 and 10 leaf shapes. I used 9 to make my lampshade.
Assembling Your DIY Paper Lampshade
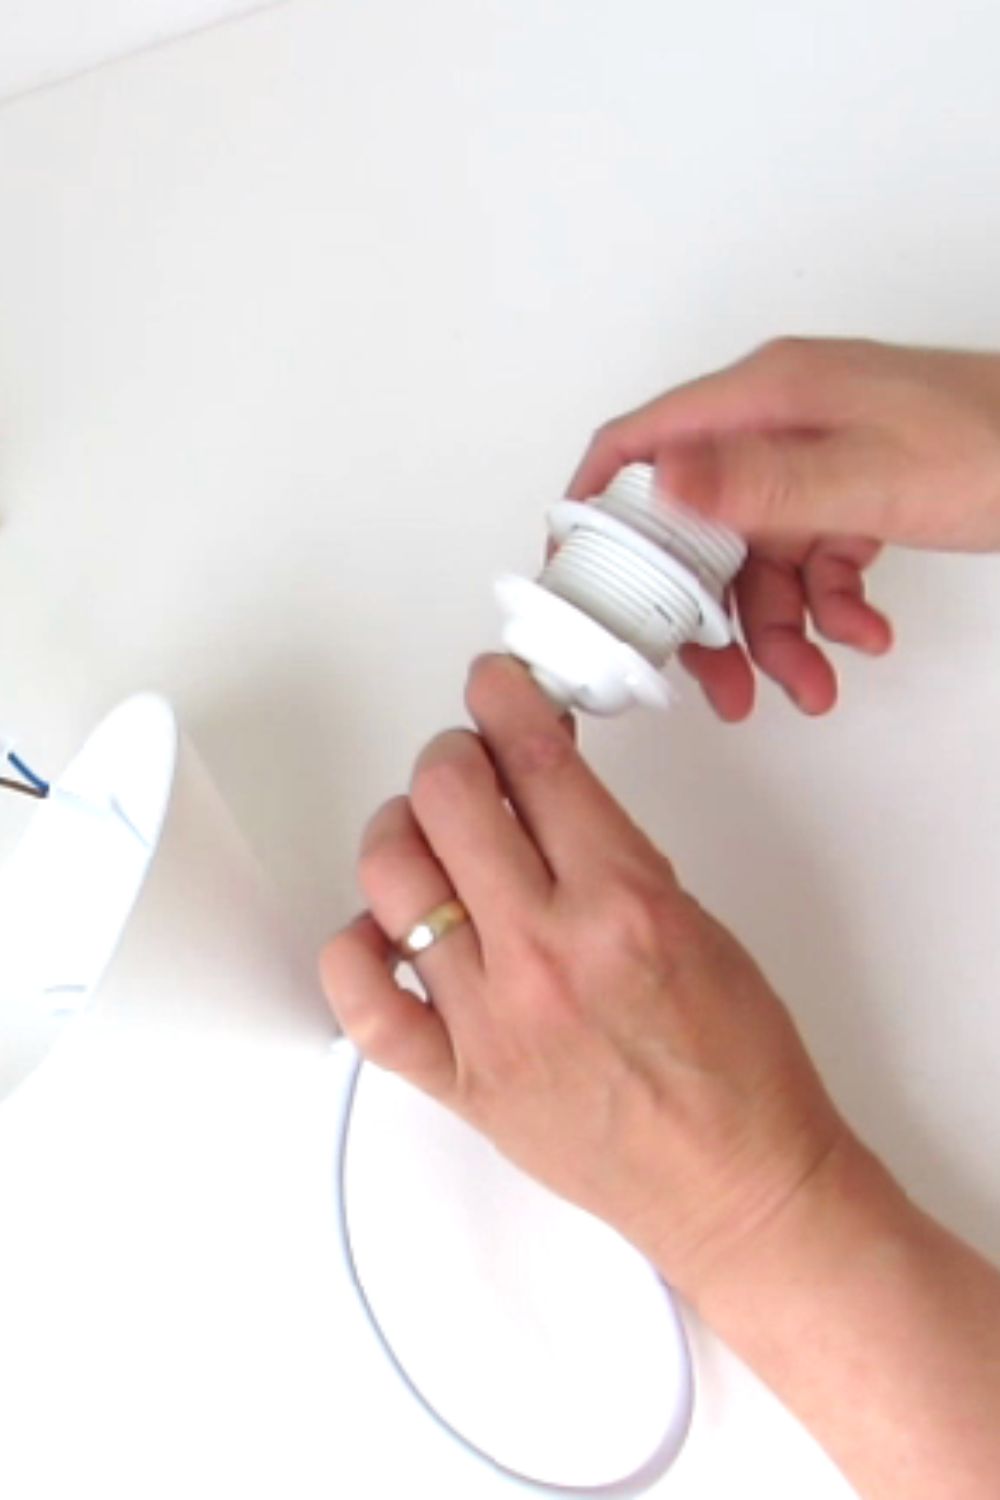
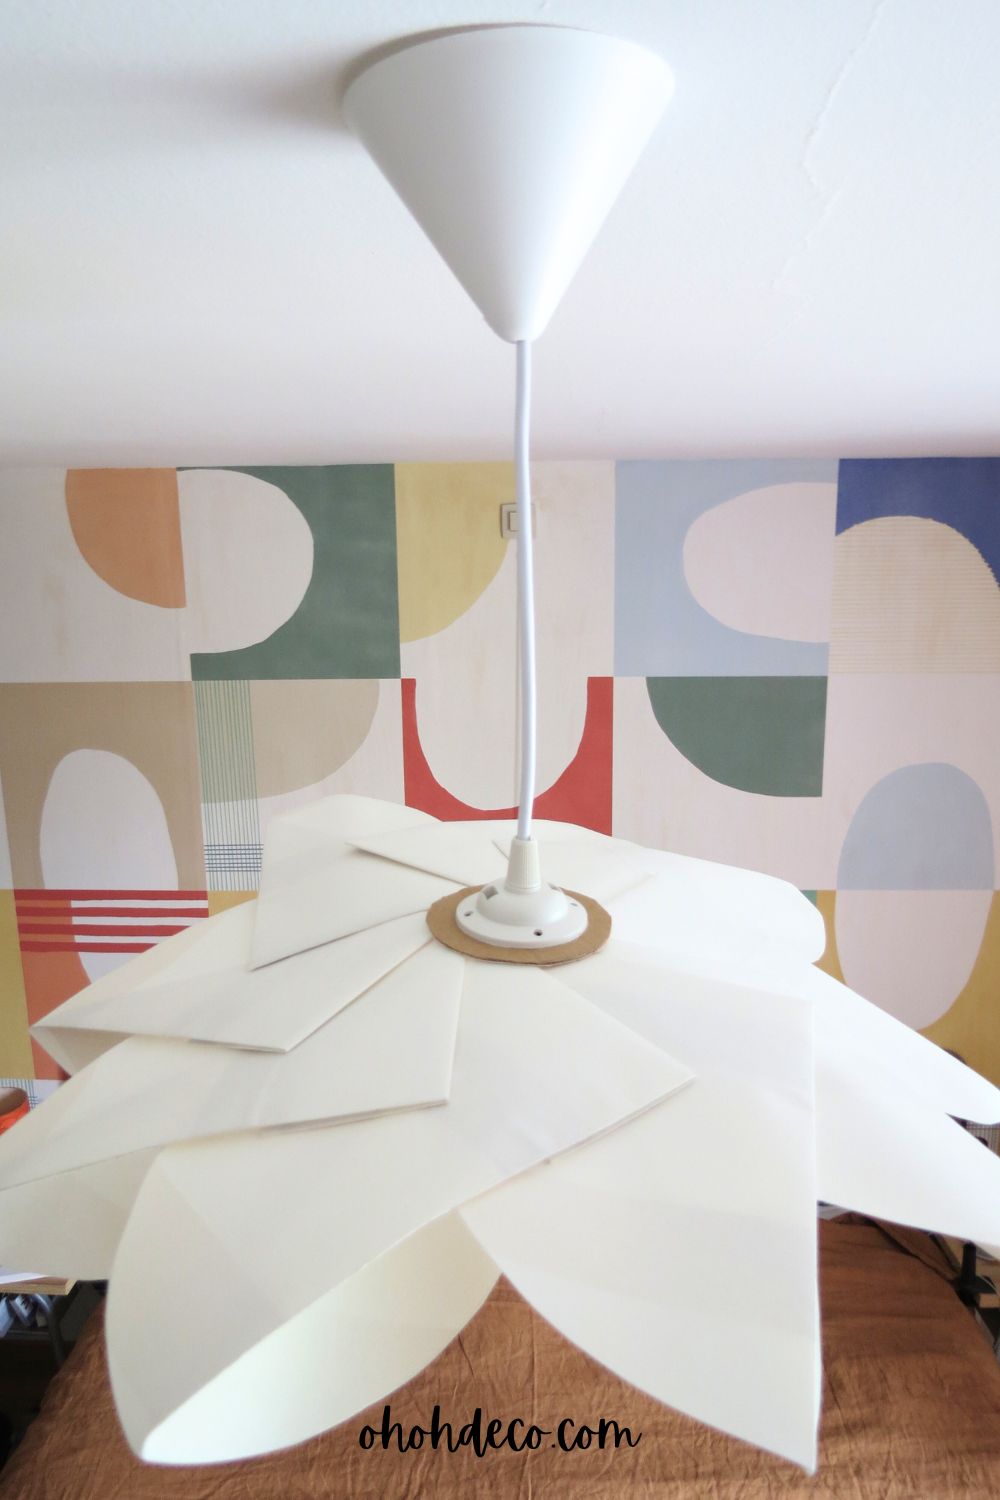
To assemble your DIY paper lampshade, start by unscrewing the bottom ring of the socket.
Place the socket ring on a flat surface and arrange the paper leaves around it.
Once you are happy with the lampshade design, glue the leaves with each other. Apply hot glue to the back flap of each piece and press the next one with it.
You can watch the video tutorial if you have any doubts.
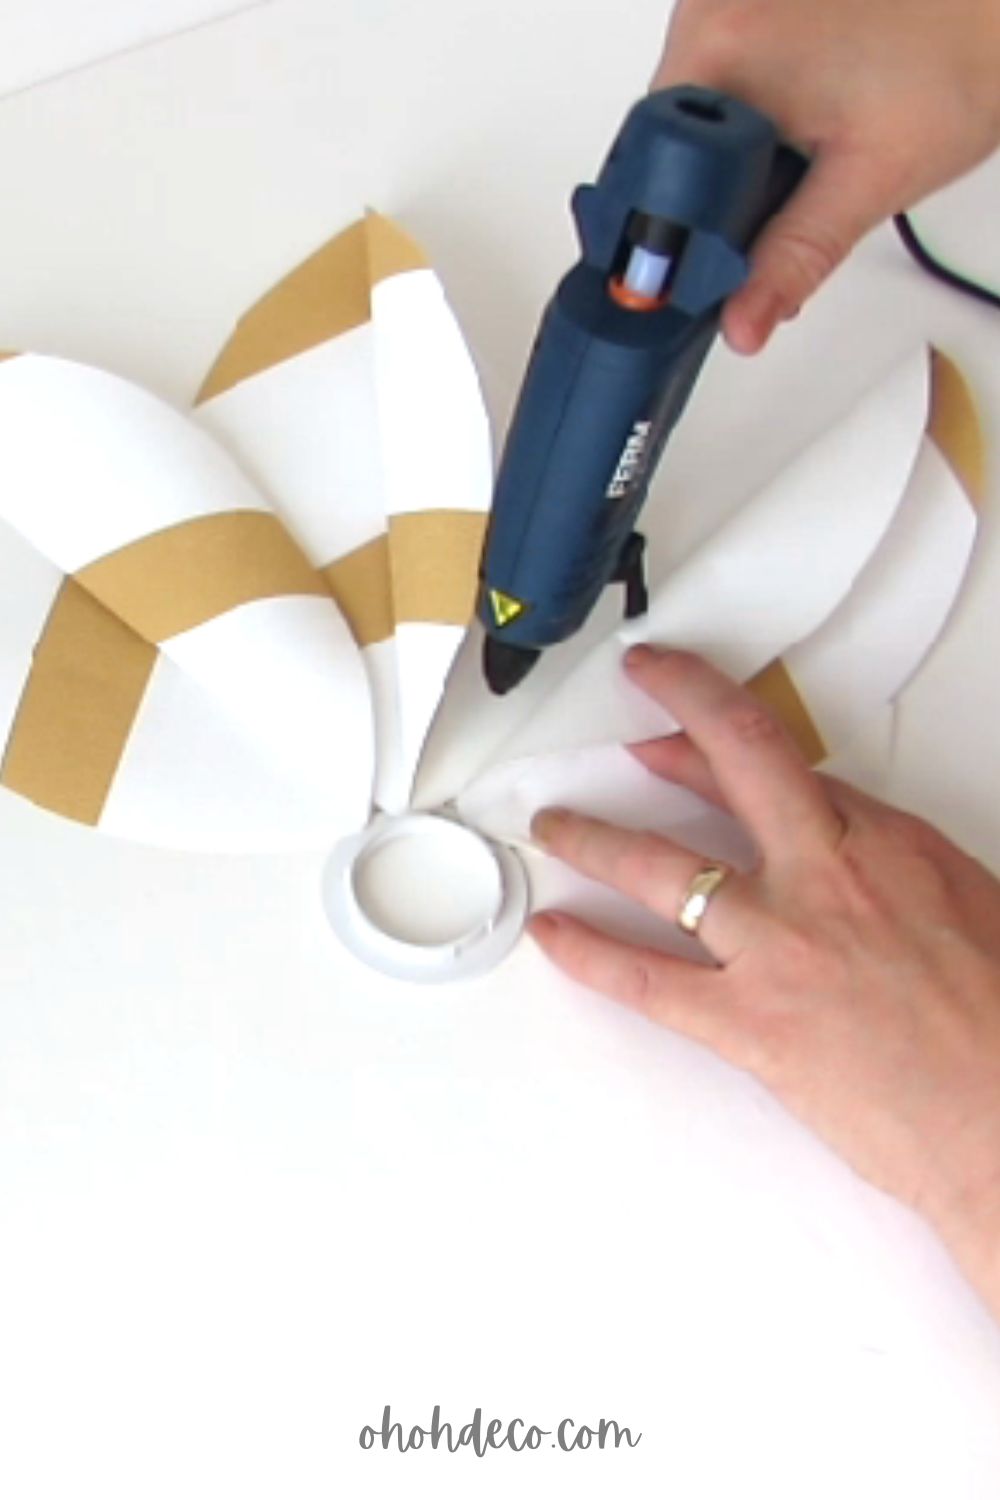
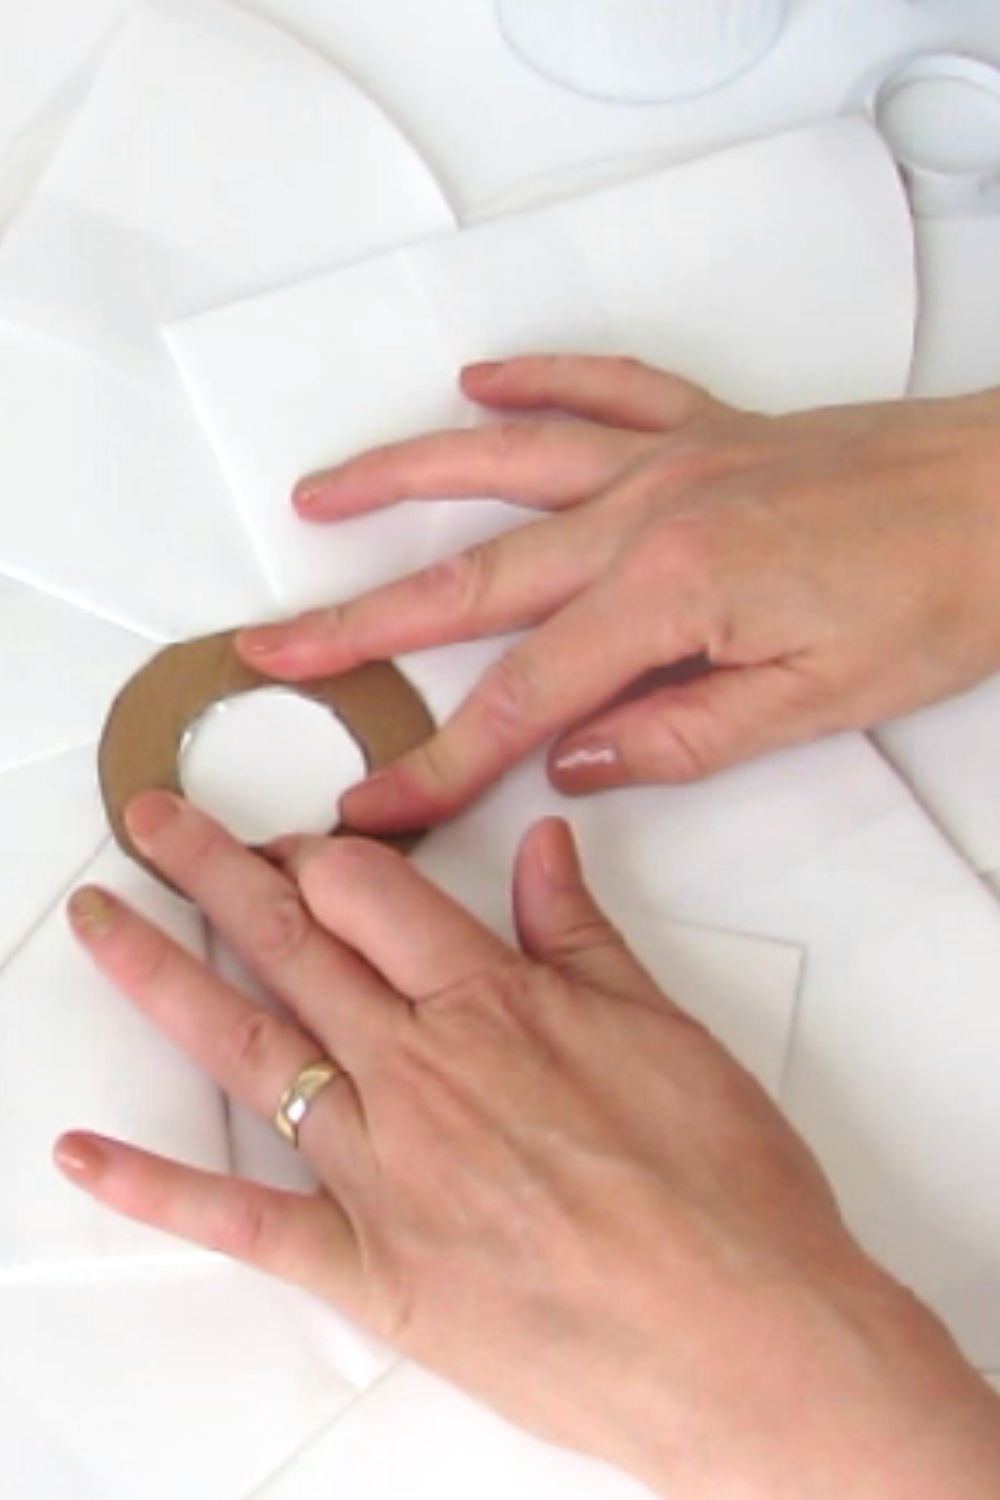
In a piece of cardboard cut a ring shape. The inside of the ring must be the same as the lamp socket.
Glue the cardboard ring to the back of the lampshade to enhance its strength. The larger the ring, the flatter your lampshade will appear.
For a polished look, you can either cover the cardboard with the same paper or paint it before adhering it to the lampshade.
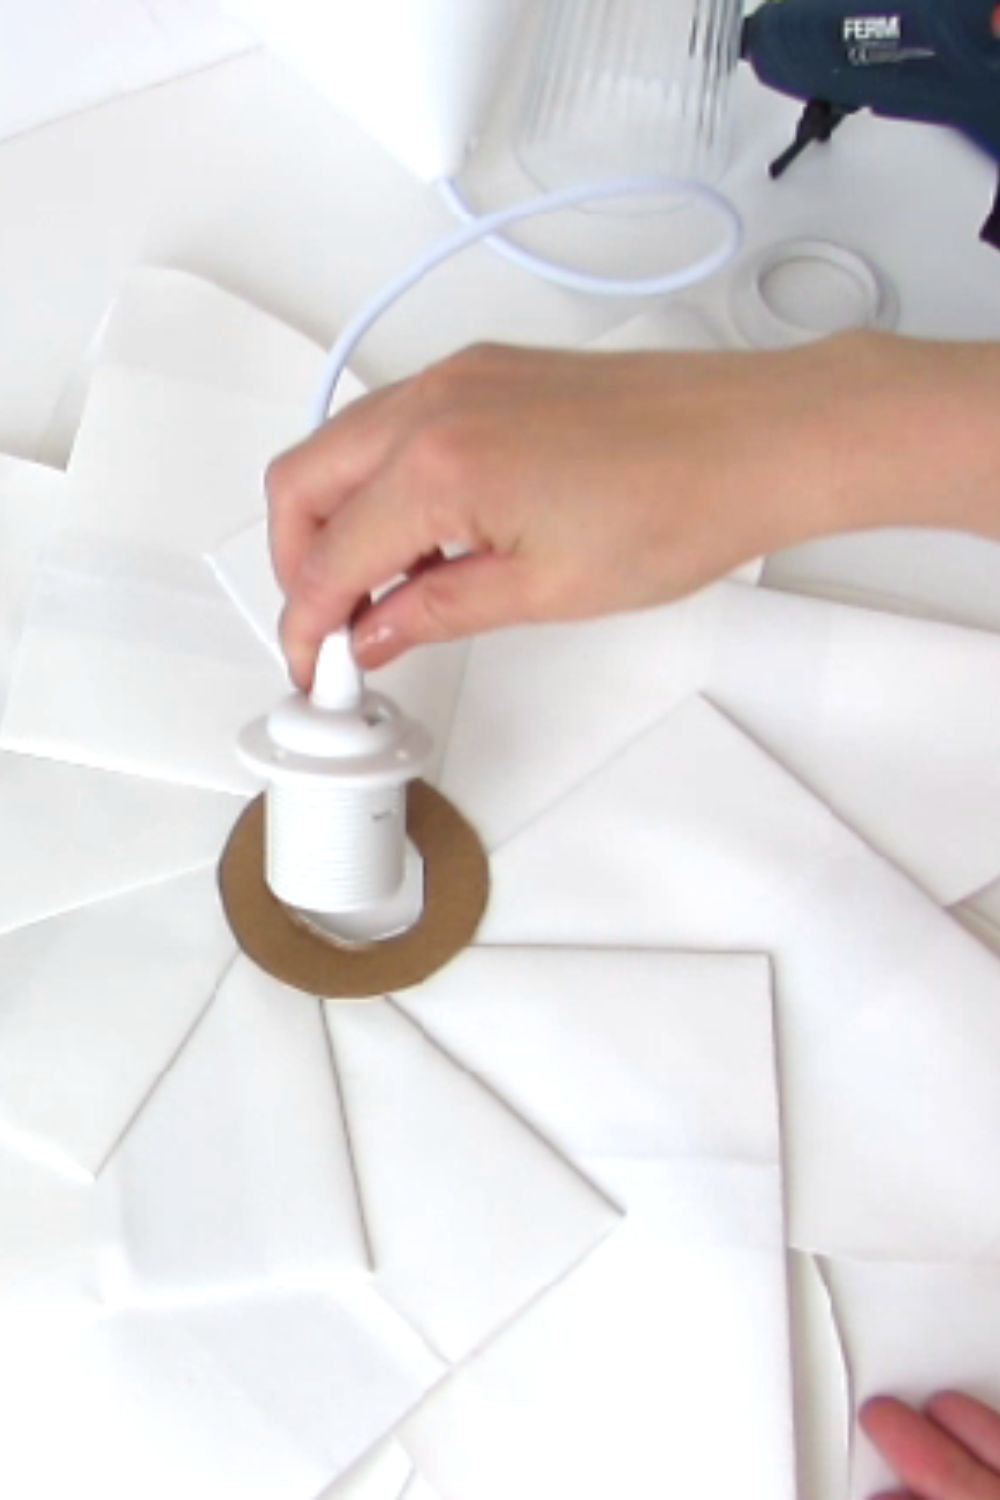
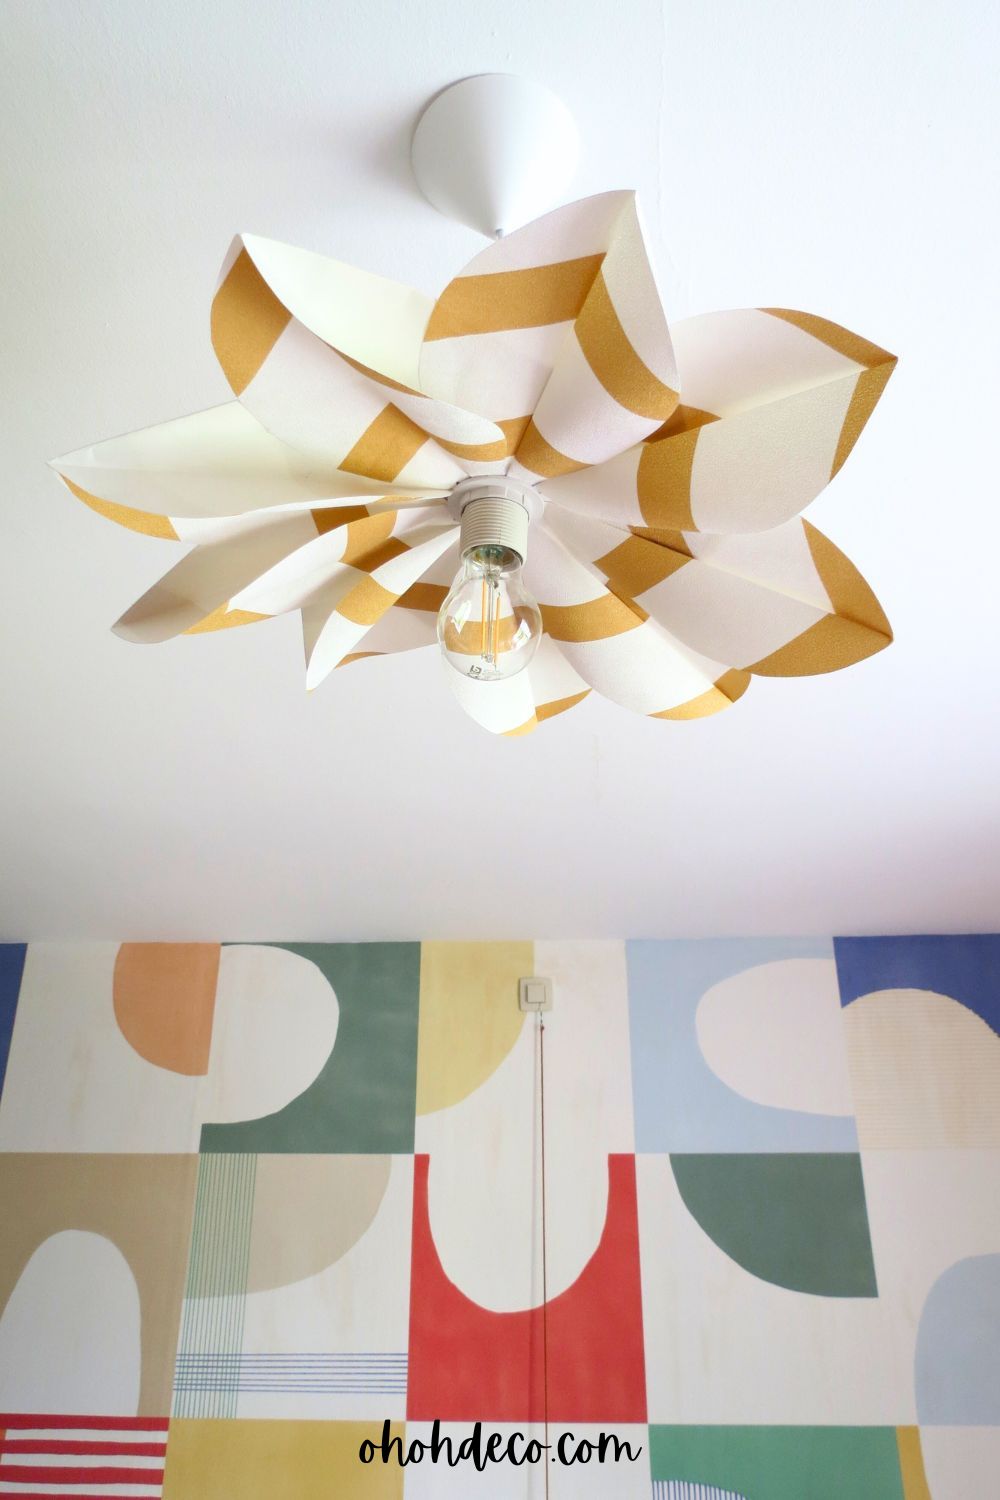
The final step to complete this DIY lampshade is to slide the socket into the center of the lampshade and screw the socket ring back on to secure the lampshade in position.
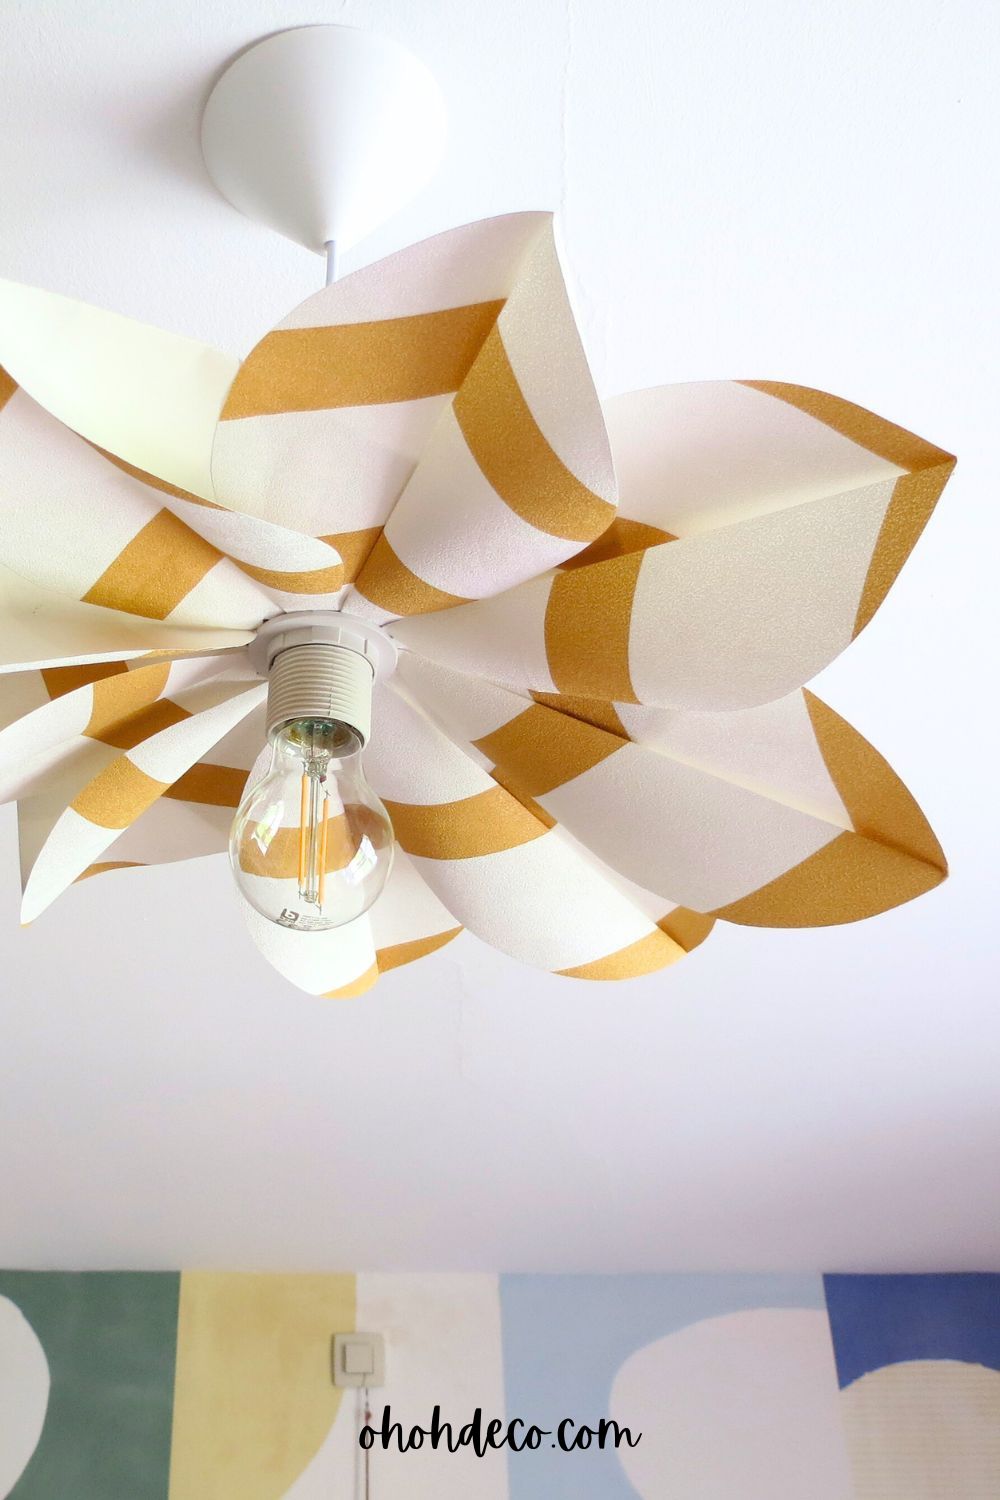
Now that your DIY paper lampshade is assembled and hung, it’s time to enjoy it!
Next, I will give you some extra ideas to add the final touches to truly make it your own.
Adding the Final Touches
Consider exploring various papers and patterns to add a personal flair to your lampshade. If you’re feeling artistic, you can hand-paint designs or motifs on the completed lampshade.
Don’t be afraid to play around with different textures and colors to achieve a distinctive appearance that showcases your style and individuality.
By adding these finishing touches, you can elevate your budget-friendly DIY paper lampshade into a one-of-a-kind piece that will light up your space creatively and stylishly.
Embrace the opportunity to transform your space and watch as your DIY paper lampshade lights up your world.
.
.
.
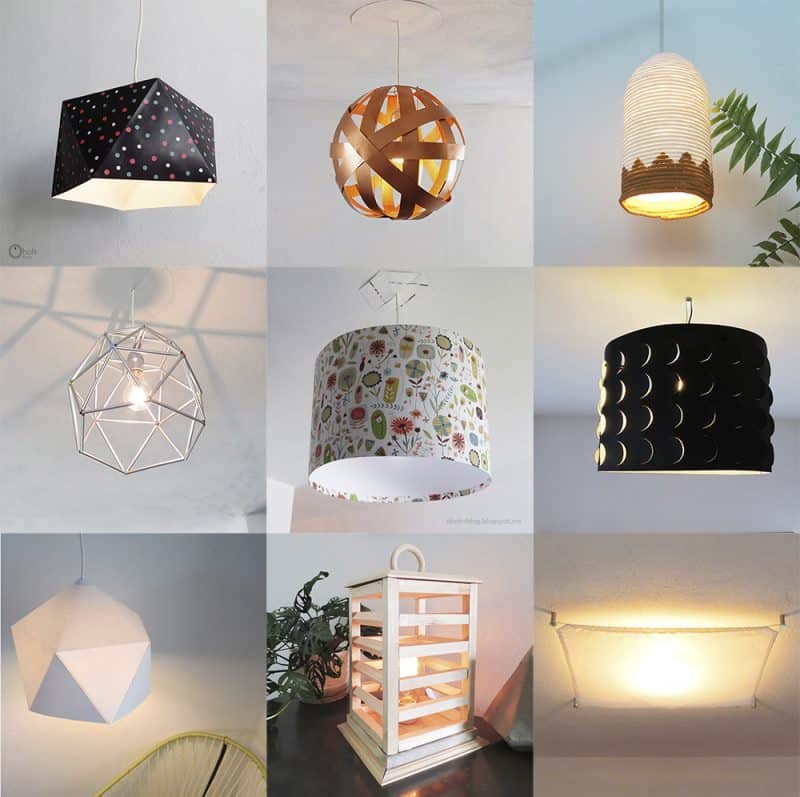
RELATED: DIY Paper wall lamp
RELATED: 18 ways to make a DIY lighting
Want to remember it? Save this DIY Paper Lampshade on your favorite Pinterest board
Instant room update! Shared your beautiful lampshade DIY on Crafts on Display today. It’s a genius decor hack for a custom look. https://craftsondisplay.com/home-decor/diy-paper-lampshade-235240/
Thank you for sharing. Can you please include a link to my post in your article?