![]()
Do you ever feel like your windows are missing something? Are you tired of the same old drab curtains or blinds? It’s time to elevate your window game and add some style making relaxed Roman shades.
These versatile window coverings not only add a touch of sophistication to any room, but they also offer a cozy and calming atmosphere. In this article, we will explore how to make relaxed Roman shades, from the materials you need to the step-by-step process, so you can transform your windows and your space. Get ready to make a statement and unwind in style.
[ This post probably contains affiliates links, our full disclosure policy is really boring, but you can read it HERE ]
Window treatment is an important part of the decoration. I feel a room isn’t completely finished if it hasn’t curtain, blinds or veils.
You can, of course, purchase already made curtains. But you may not find the size that fits your window, and often they don’t offer a nice variety of fabric.
True is that custom made shades or curtains can be quite pricy. So the best solution to take the cost down and have exactly what you want is making your own.
Below you will find a step by step tutorial that shows you how to sew relaxed roman shades. Don’t be scared by the length of the post, I took a lot of pictures as I wanted to detail every step and make the process easy to follow. You can also watch the video.
What is a relaxed roman shade?
First, you may wonder what is the difference between a roman shade and a relaxed roman shade. Both are similar, but the finish is a little different.
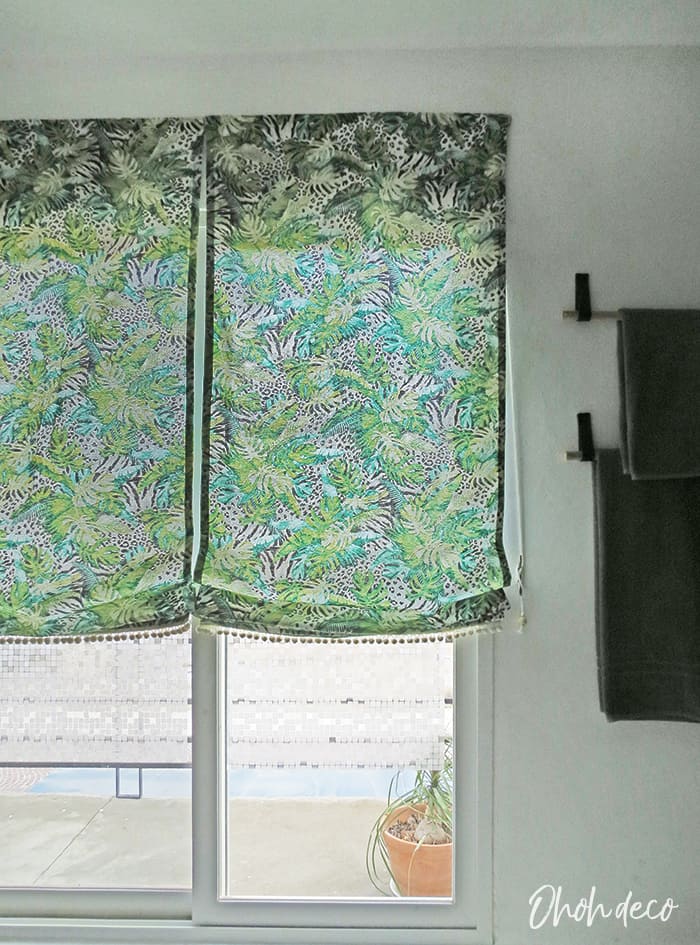
The roman shade is square and level, and the relaxed blind center is slightly lower than the edge, is more “relaxed”.
I made both, the relaxed blind is faster to make as you don’t have that many folds to sew and that many dowels to cut. However, if you like neat and clean finish you will prefer to make a classic Roman shade (following my tutorial).
RELATED: How to make roman blinds
RELATED: DIY curtain rods
How to take measure for your blinds?
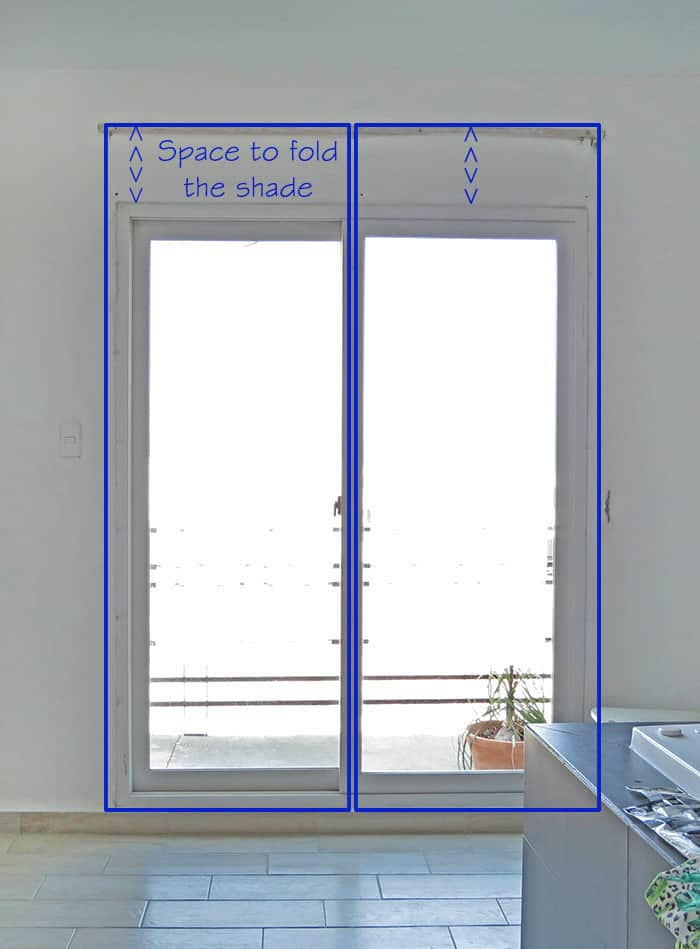
Before taking measurement you need to decide if you want inside or outside mounted shades. Inside mount blinds fit inside the window frame and will give you a clean look. Outside mounted blinds are mounted outside the frame, are a little wider, and cover the window frame when shut.
In my house, the windows are aligned with the wall and don’t have window frames, so I went for outside placement.
I prefer outside mounted blinds anyways. First, because the blind can be fixed higher on the wall and when it is open all the folds are placed along the wall instead of the window. So, It doesn’t reduce the window size and allows light to enter fully into the room.
Secondly, I live in a sunny area, so the blinds that remain folded in front of the window end up discolored by sunlight. I know that will not apply for everyone but it may help some to avoid the mistake I previously made.
Take the measurements. Definite the finish roman blind dimension (blue squares in the picture above). Think to leave more fabric on the top part, as you need some space to fold the blind above the window (only if you choose outside mounted shades).
Once you have your finished shade dimension, add 1 1/2 inch on each side for the seams.
Example: My finished blind need to be 33 inches wide x 88 inches high. Adding the seams allowance of 1 1/2 in., the fabric dimensions must be 36 inches x 91 inches.
TIP: If your window is quite wide, like mine, I suggest you make two blinds. When handmade, having smaller shade works best and lasts longer. Talking about my experience: I made lined roman blind in my daughter’s bedroom. The weight of the cotton fabric, more the blackout fabric, more the dowels made the blind panel quite heavy, and the rings that lift the blinds ripped out several times. So, if possible, lighter better.
What is the best fabric to Sew shades?
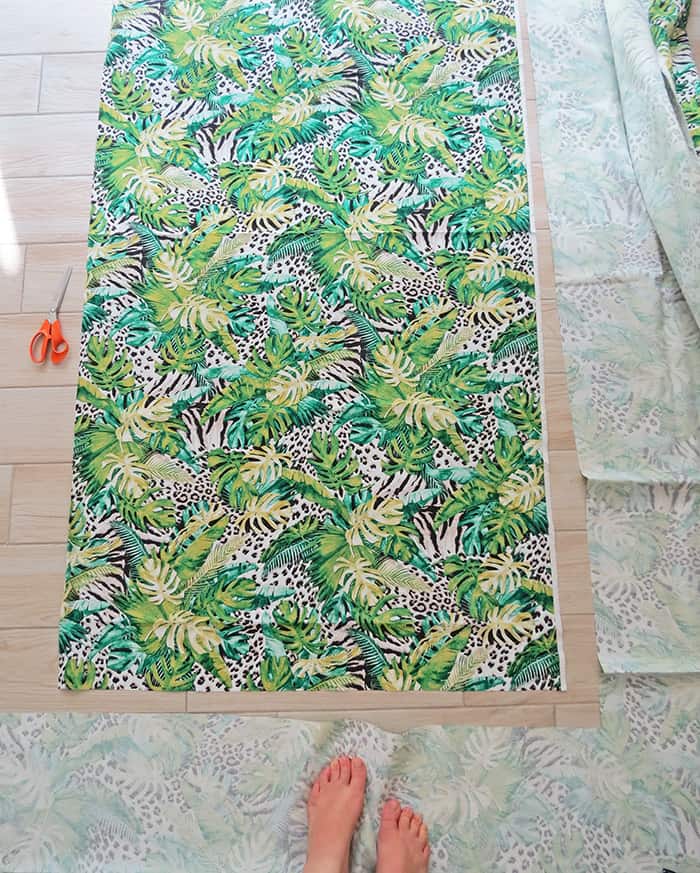
The best fabric to make relaxed blinds is medium weight cotton fabric. You can probably find a lot of nice print and color in the decoration section of your fabric store. Avoid too thin or too soft fabric.
This tutorial shows you how to make relaxed roman shades that are removable and washable, so don’t forget to wash the fabric before sewing. Cotton tends to shrink when washed and you don’t want your shade to be ruined after the first wash.
How to sew Relaxed Roman Shades
Materials you will need:
- Nice fabric
- Matching thread
- Plastic rings (or brass rings)
- 1/2 in. wooden dowels
- 1 x 2 wood trim
- velcro
- Eyescrews
- blind cord
- Rope cleat for blinds
Once you have chosen your fabric, lay it on the floor, report the measures (don’t forget the 1 1/2 in. seam allowance) and cut the fabric panel to make your shade.
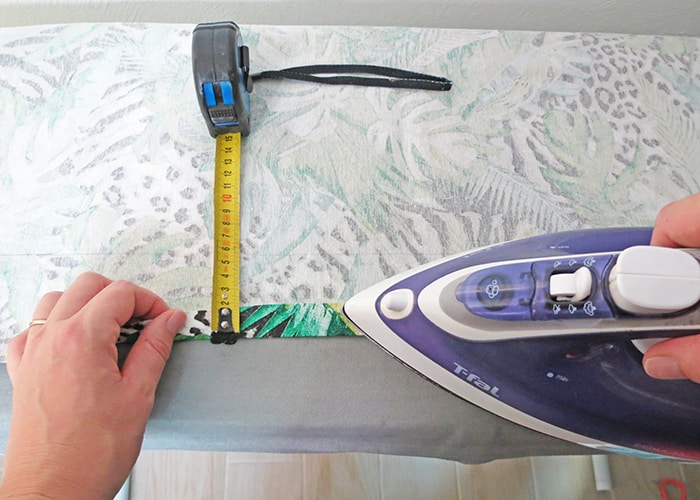
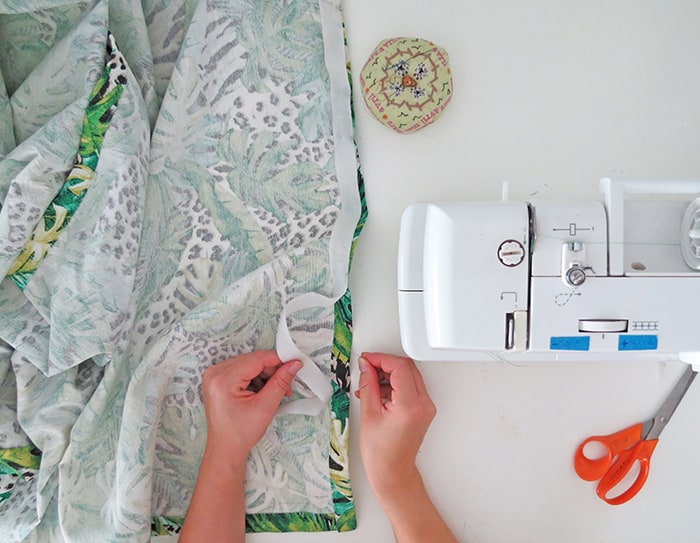
Make a double fold hem on the 4 edges.
No worries, it’s easy. Take your fabric edge and make the first fold of 3/4 in (2cm). Use a ruler to keep the measurement accuracy as you want to have a straight finished blind. Use an iron to mark the fold.
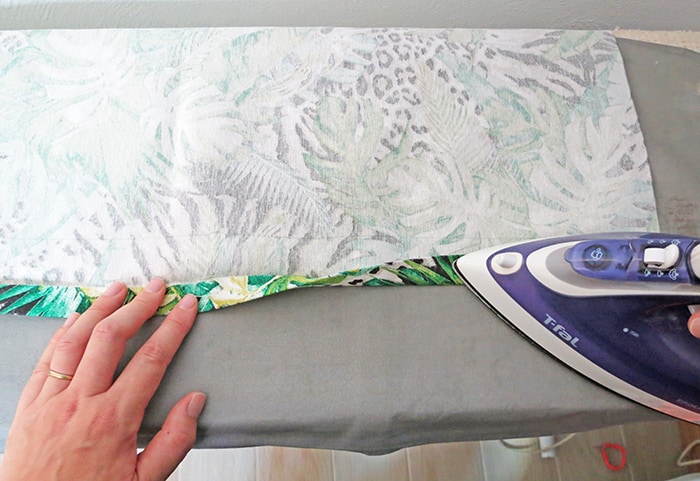
Fold the edge on itself, so the fabric raw edge is invisible. Iron to flatten the double fold. Do it on all 4 sides of the shade.
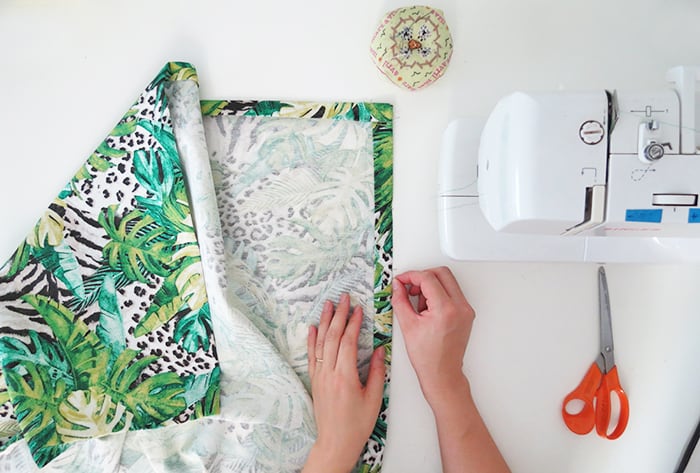
Pin the double folds.
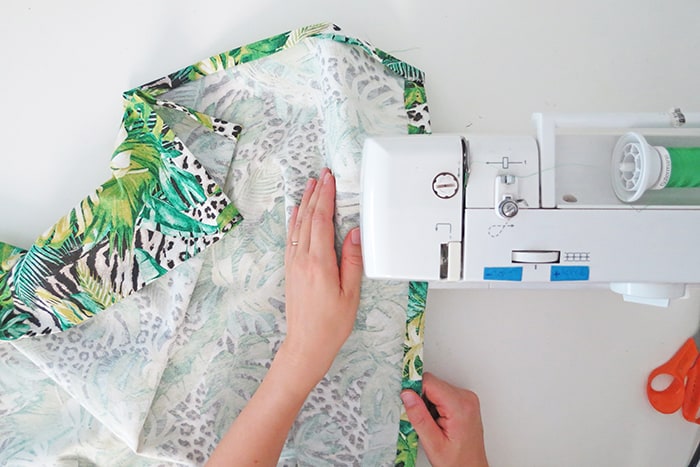
Sew the folds with straight stitches using matching thread.
Sew a piece of velcro along the top edge of the blind. This will allow you to take off the blind if you want to wash it.
TIP: It’s easier to sew the soft side of the velcro on the blind and glue the “spiky” side of the velcro on the wall. The “spiky” side abrade the thread when sewing, it breaks and it’s annoying.
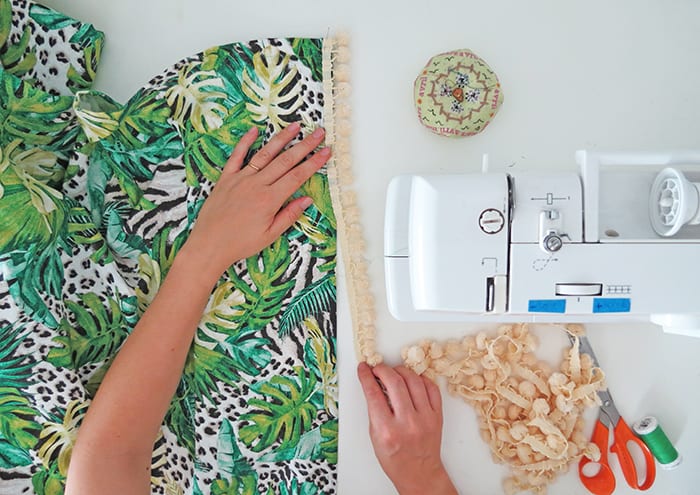
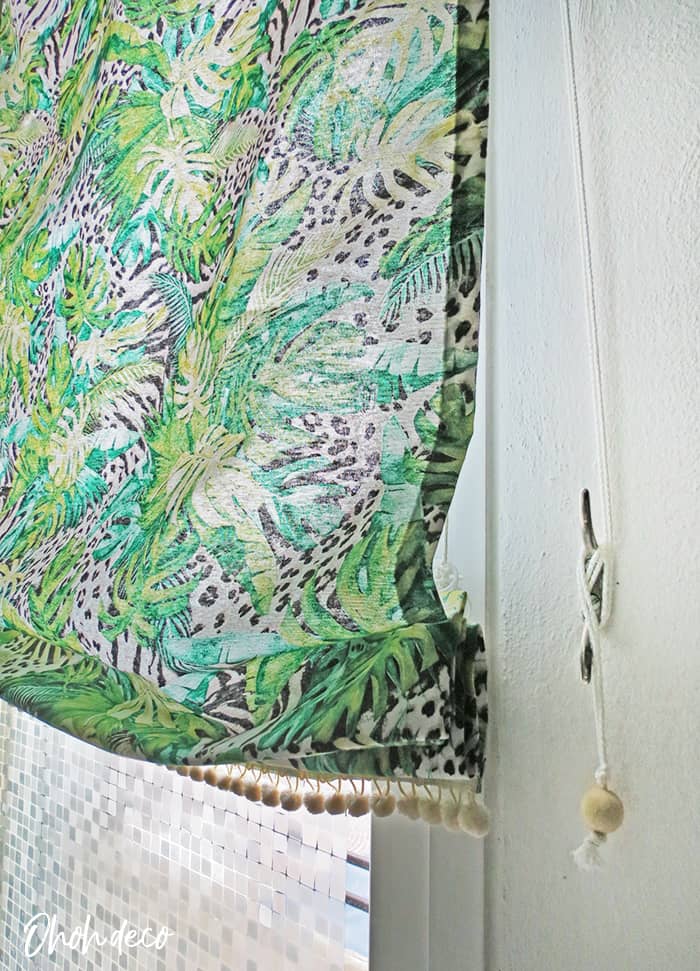
This step is optional, if you like you can sew a nice trim on the bottom edge of your blind. Don’t you think this rainbow trim is cute?
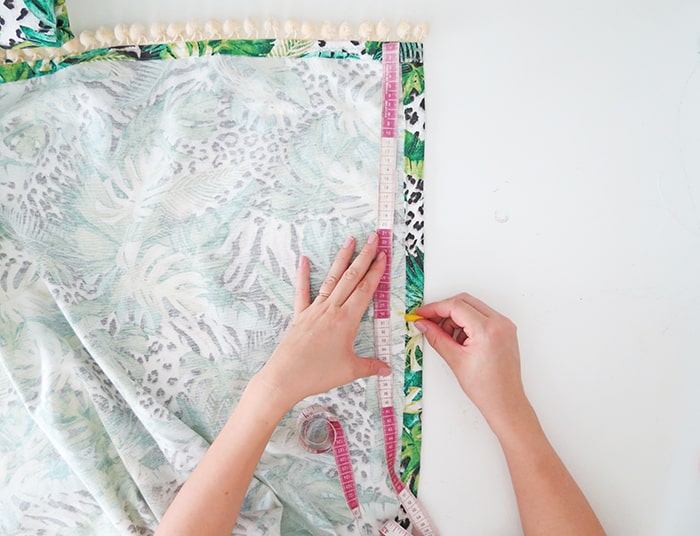
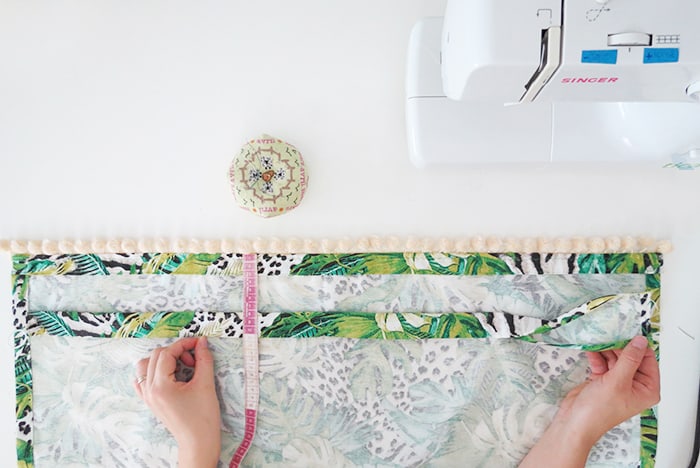
Time to make the mark to place the rings that will lift your blind. A good measure is to leave around 8 inches between each ring. As all the shade are not the same dimension you will have to calculate the distance that works for your shade.
Take your blind height and rest 2in. (for the trim on the wall), then rest 4 in. (as the lower fold won’t start from the blind bottom edge as we want to see the pompom trim when the shade is folded).
Take that number and divide it by 8. The result will give you the number of rings needed if you space them by 8 in. Likely you will end up will a decimal number, as you can’t sew a fraction of ring, you need to adjust the distance between each ring a little.
Example: My finished blind is 88in. high. So 88 in. – 2in. – 4in. = 82 in. Then 82 in. ÷ 8 = 10.25 … I can’t sew 10,25 rings. So instead I divided 82 by 8 1/5 which equals 10. That means I will sew 10 rings that will be placed at a distance of 8 1/5 in. from each other.
Once you have the distance between each ring start making the marks. Start from the lower edge of your blind, remember that the first mark is at 4in. from the edge and the following at the distance you calculated between rings (mine is 8 1/5 in.)
Same than above for measurement but in the metric system:
Take your blind height and rest 4cm (for the dowel on the wall), then rest 10 cm (as the lower fold won’t start from the blind bottom edge as we want to see the pompom trim when the shade is folded).
Take that number and divide it by 20. The result will give you the number of rings needed if you space them by 20 cm. Likely you will end up will a decimal number, as you can’t sew a fraction of ring, you need to adjust the distance between each ring a little.
Example: My finished bling is 224 cm high. So 224 cm – 4 cm – 10 cm = 210 cm then 210 cm ÷ 20 = 10.5 … I can’t sew 10,5 rings. So instead I divided 210 cm by 21 which equals 10. That means I will sew 10 rings that will be placed at a distance of 21 cm from each other.
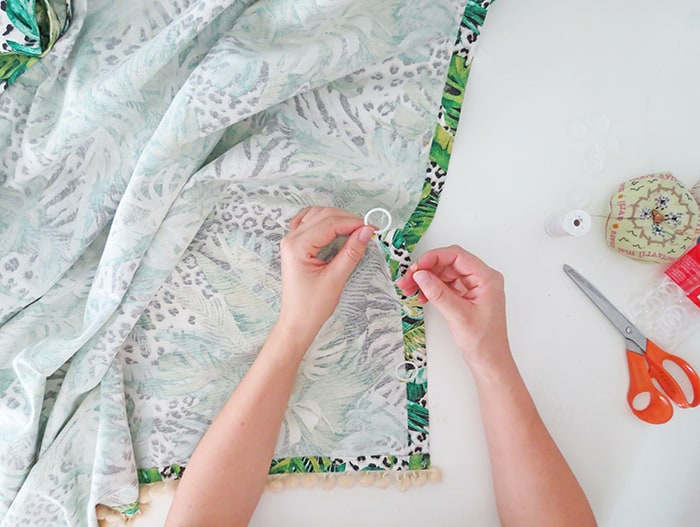
Sew a ring on each mark. The rings must be at the same height on both sides of the blind.
Try to sew them align with the edge of the fold so the stitches remain invisible and you stitch on a thinker layer of fabric so the rings will hold better.
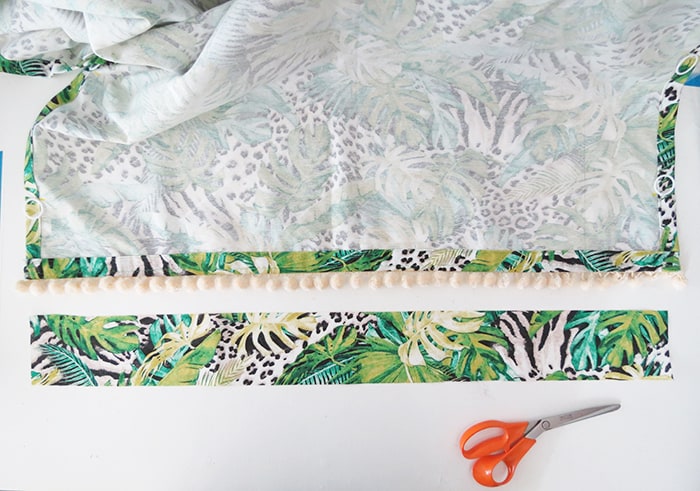
The last step before hanging the shade is to sew a tubular piece of fabric to slide a dowel in.
The dowel adds some weight to easily lift the blind, it also prevents the shade from pulling in on the sides.
Cut a rectangle in the same fabric. The length is equal as the blind width, the height depends on your dowel size.
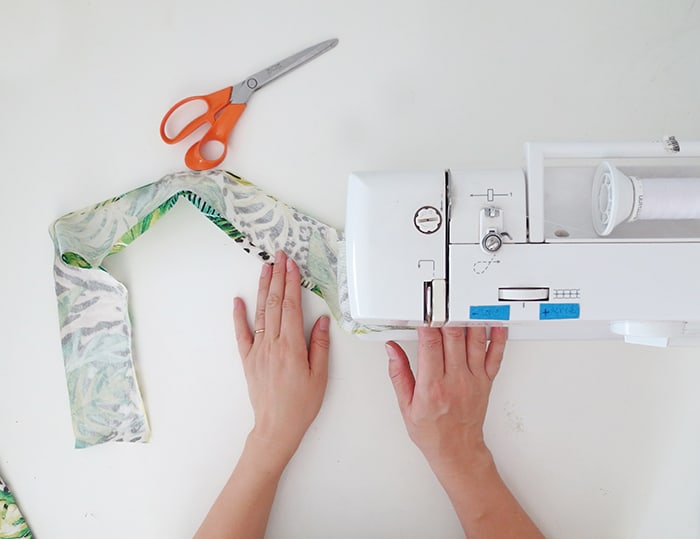
If you use a 1/2 in. wooden dowel, measure 4 in. high (10cm). Fold the small edges, pin, and sew. Use your iron to fold both long edges, a simple fold is enough.
Fold your rectangle strip longwise and pin it on the back of your blind.
The fabric to slide the dowel in must be placed between the two lower rings of your shade.
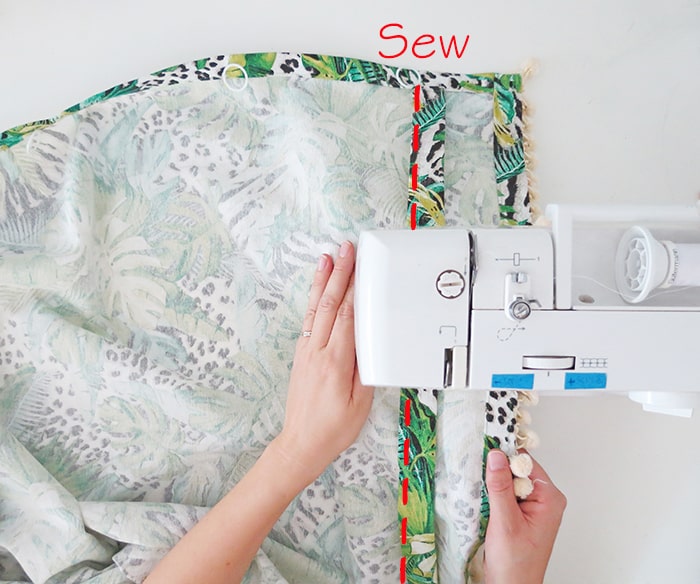
Sew the fold on your blind, the seam is on the side of the edges. You want to create a tubular shape to slide the dowel in.
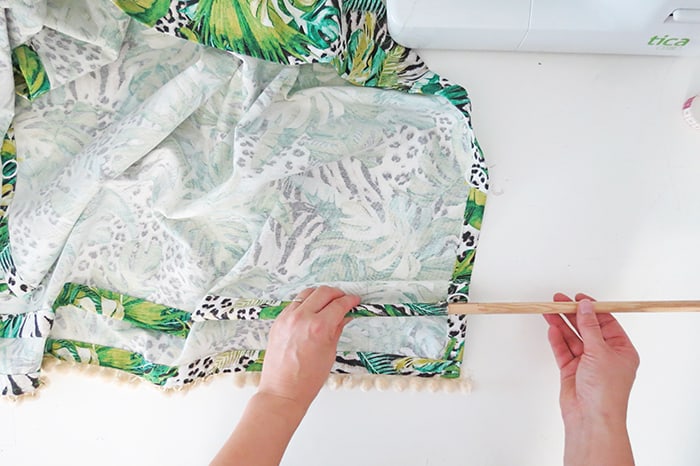
Cut the dowel at the same length and slide it inside.
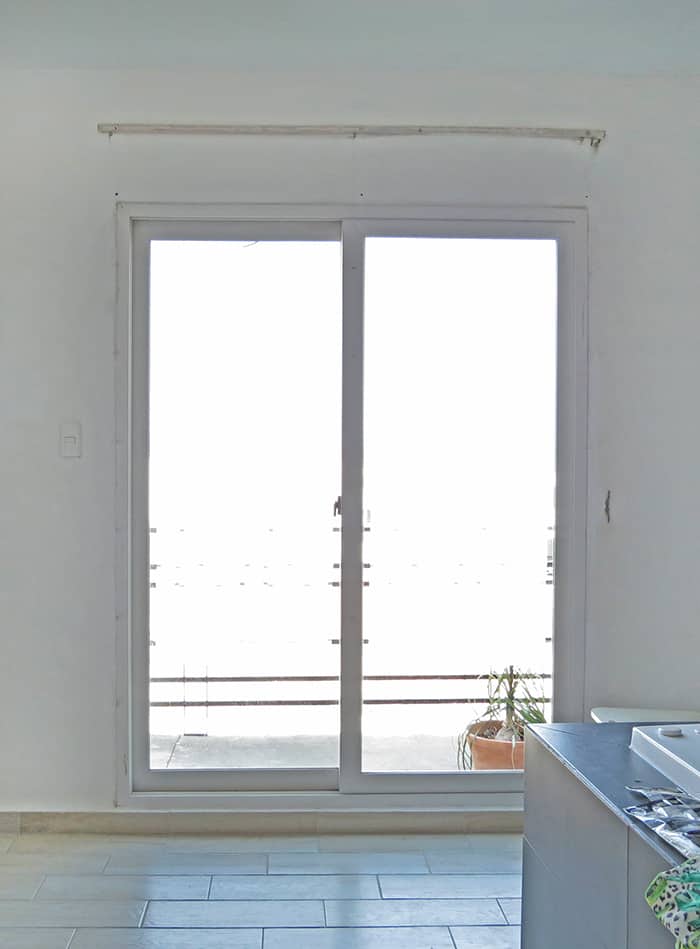
To hang the shade on the wall you have to screw a wooden trim above the window. The placement of the trim depends on your blind height, so double check before fixing it.
Once the wood is fixed on the wall, glue velcro on it. This will allow you to remove your blind for washing if necessary.
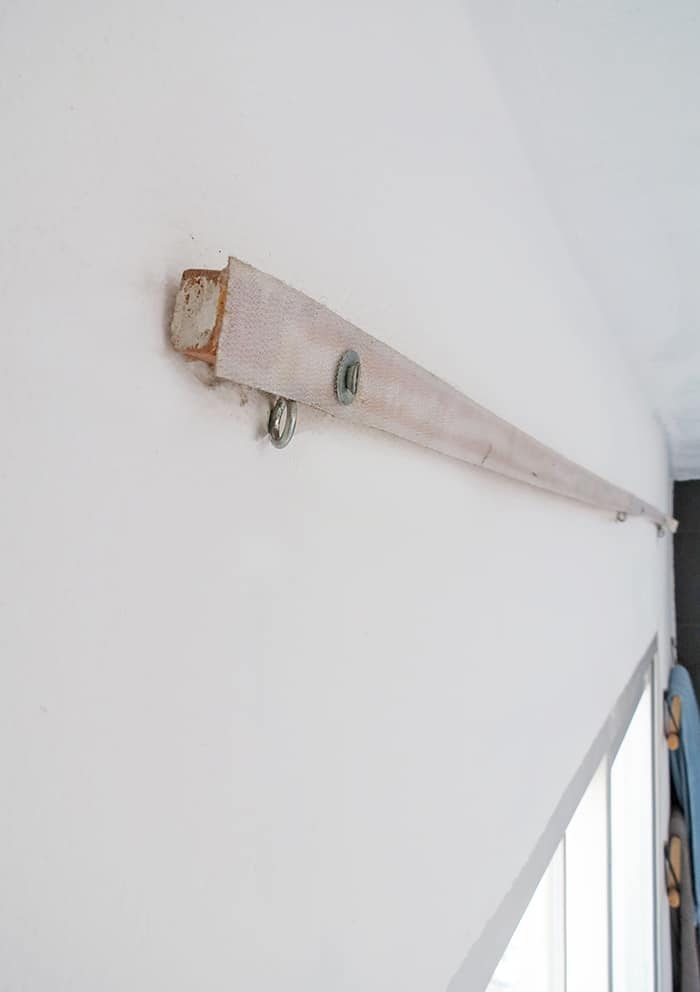
On the bottom of the trim, you need to fix eyescrews to pass the rope that will lift your blind. Each shade needs two hooks, one at each edge.
You can choose to first hang the blinds on the wall with the velcro and then pass the rope through the rings.
Or lay down the shade, the wrong side up, pass the rope thought the rings with the blind on the floor, then hang it on the wall and finish passing the rope thought the hooks.
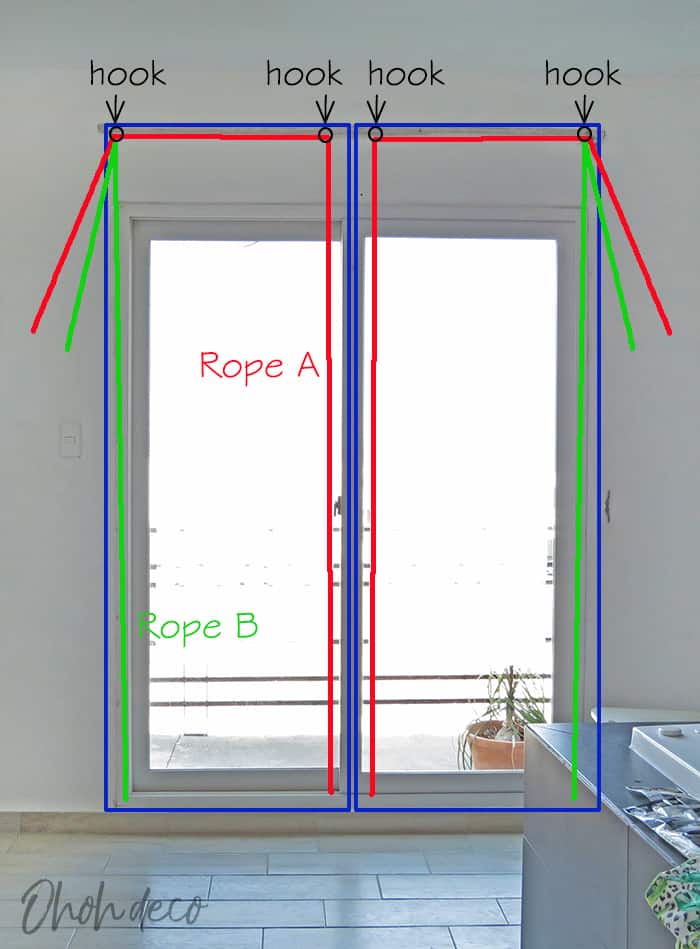
In the picture above, I show you how to pass the rope.
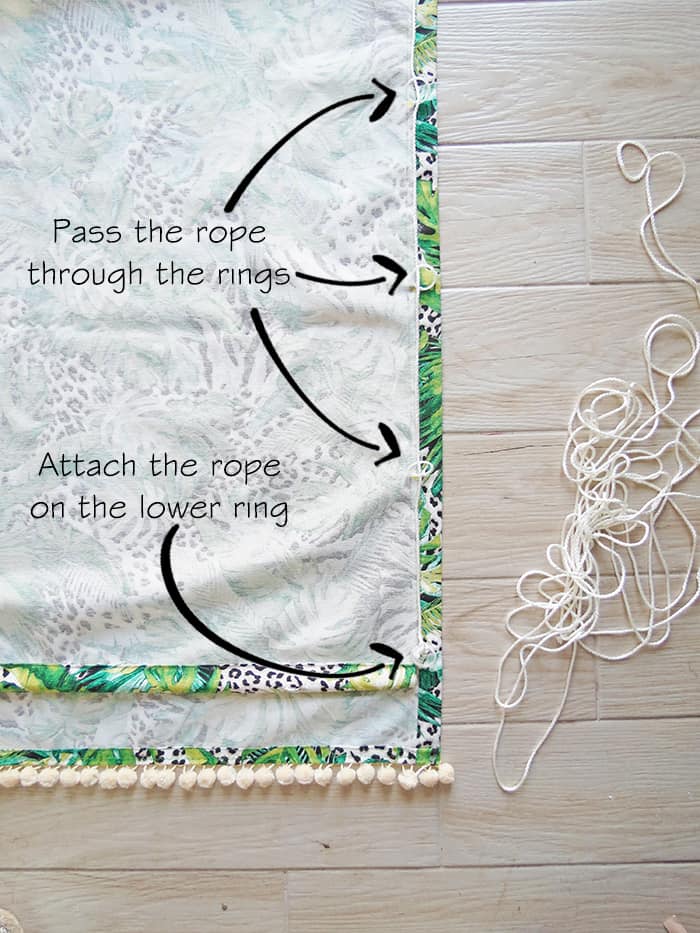
Attach the rope on the lower ring with a knot, then pass it through all the ring on the same side. Repeat for the opposite side with another piece of rope.
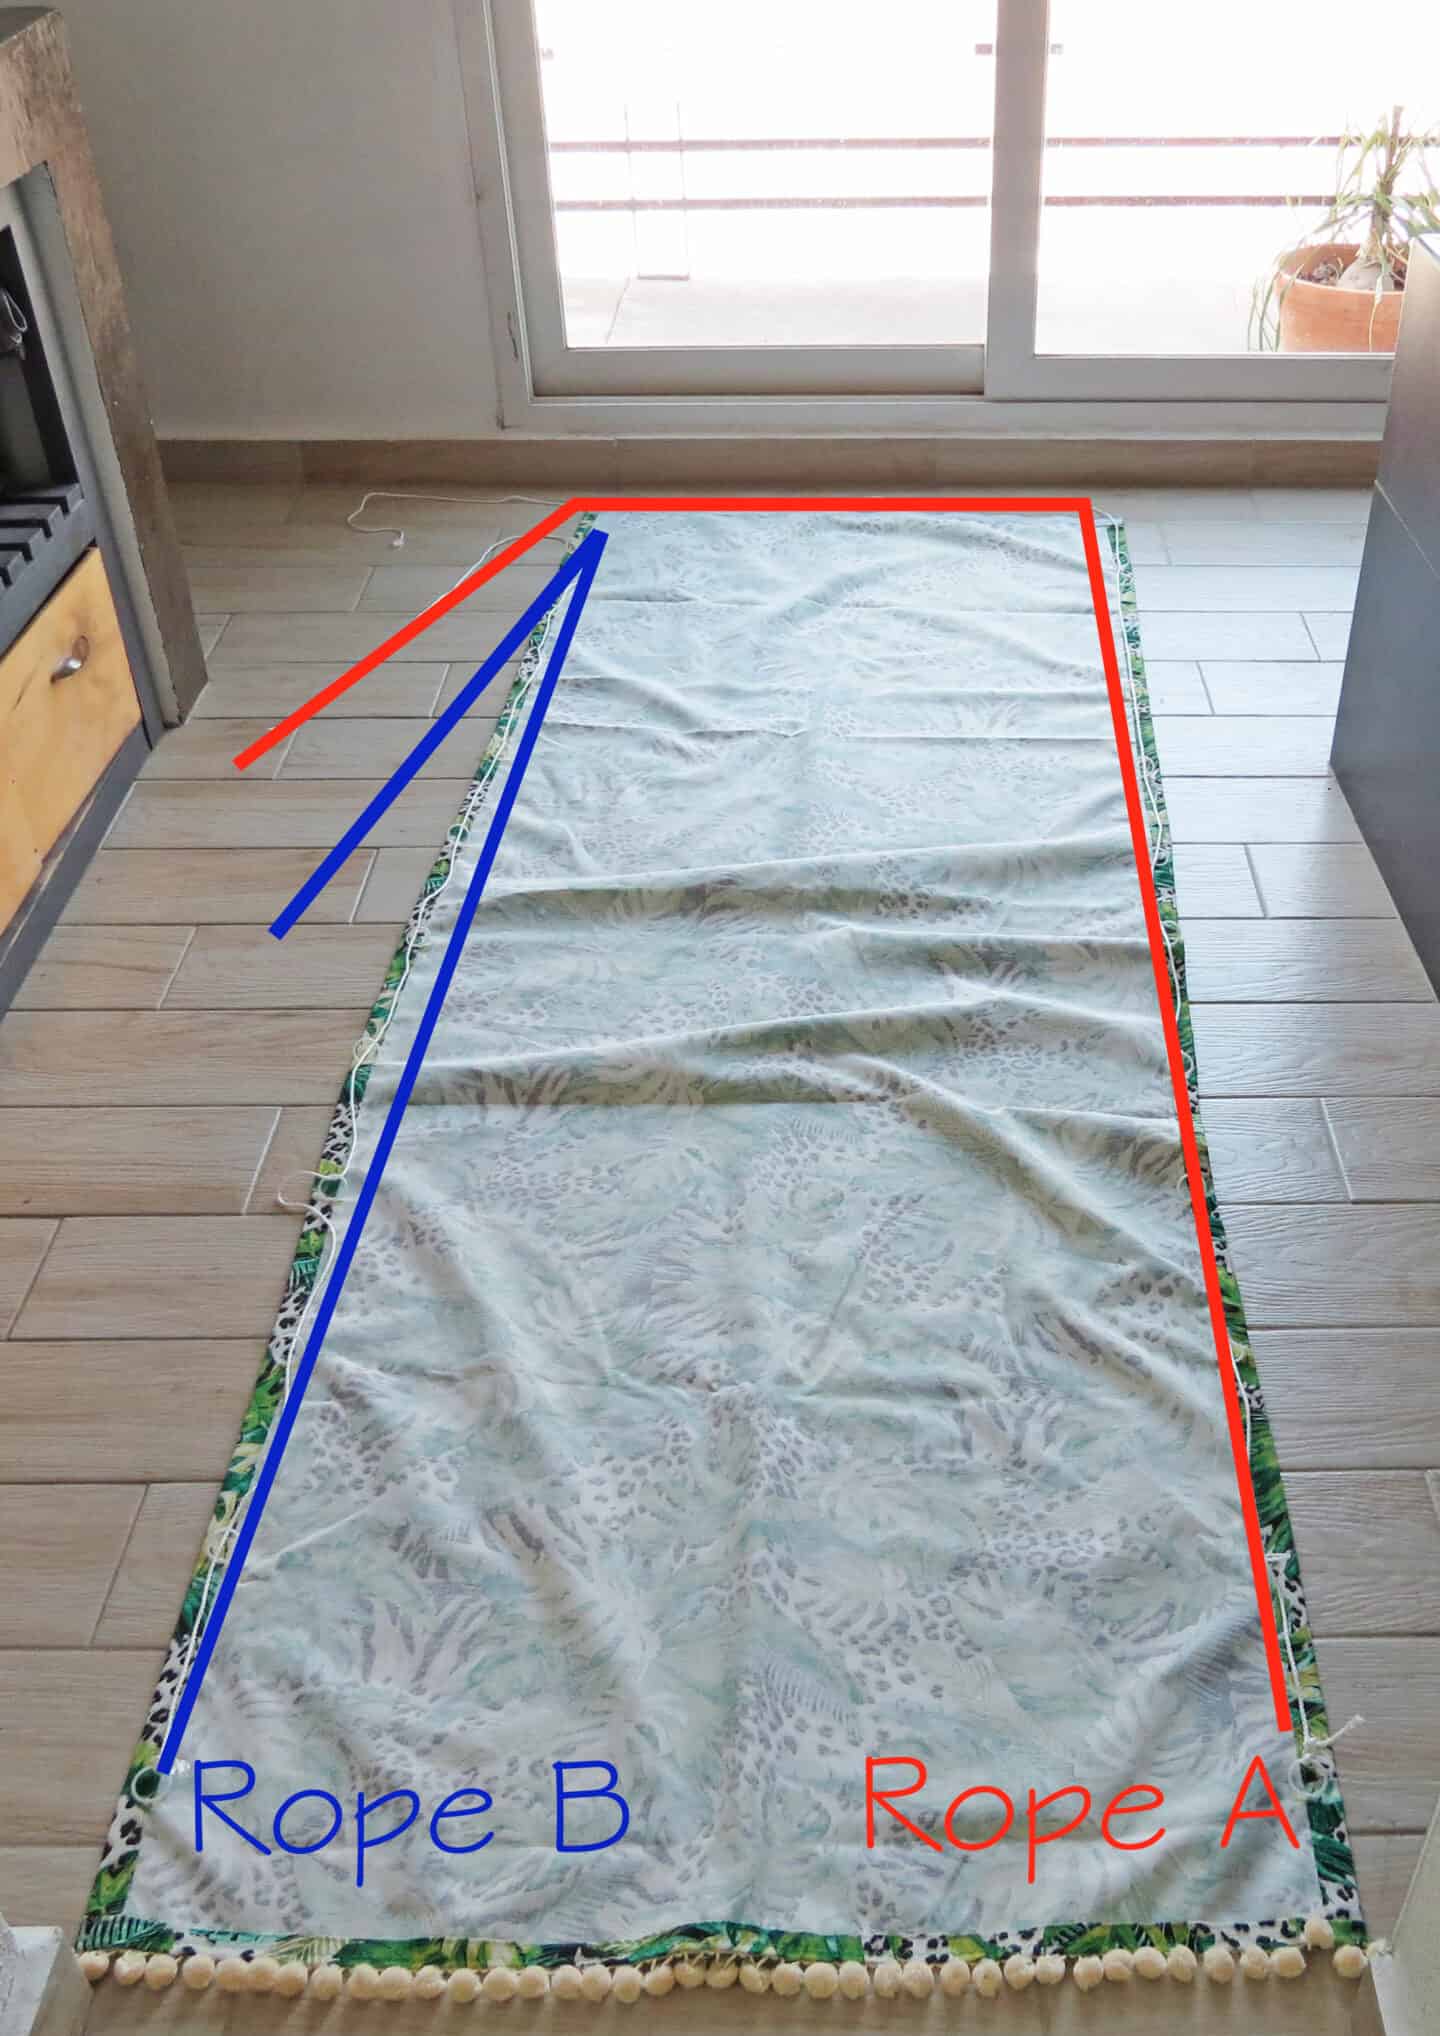
This is how the rope must be placed. The rope A is longer as you need to pass it through two hooks once hanged on the wall.
Remember that as the shade is laying wrong side up, you have to work “backward“. The shade on my pic will be placed on the right side of the window.
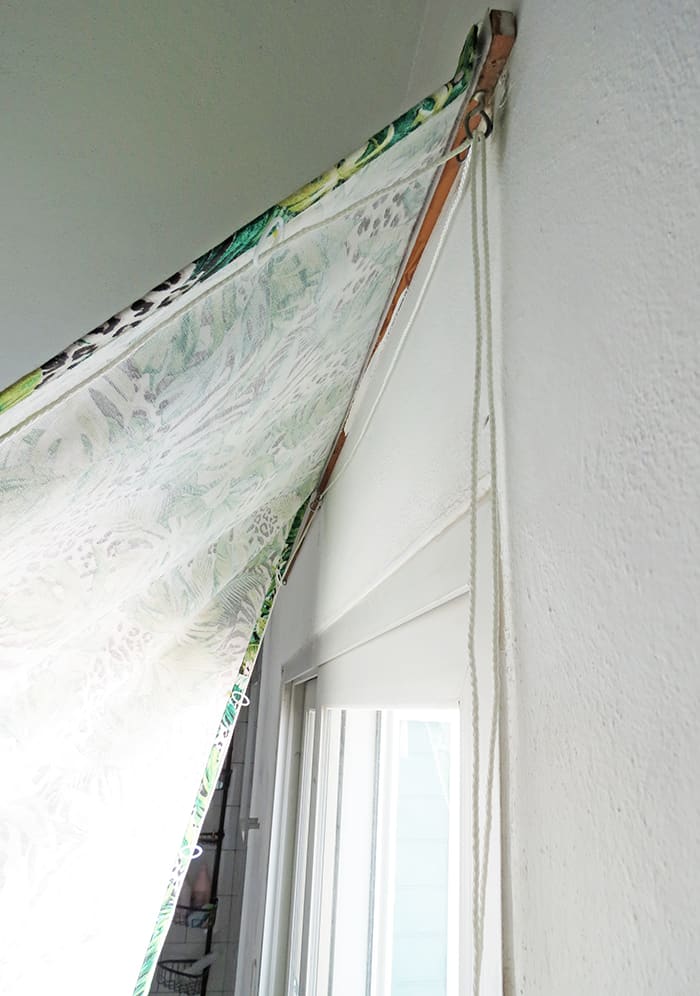
Place both velcros on top of each others to hang the shade on the wall, pass the “rope A” thought both hooks and the rope B to the side hook.
Pull the rope slightly to have them perfectly straight. Check that the blind bottom remain unfolds, and make a knot to attach both ropes ends together. Cut the extra length and done! You can add a bead or some tassels as cord ends if you want to make it fancier.
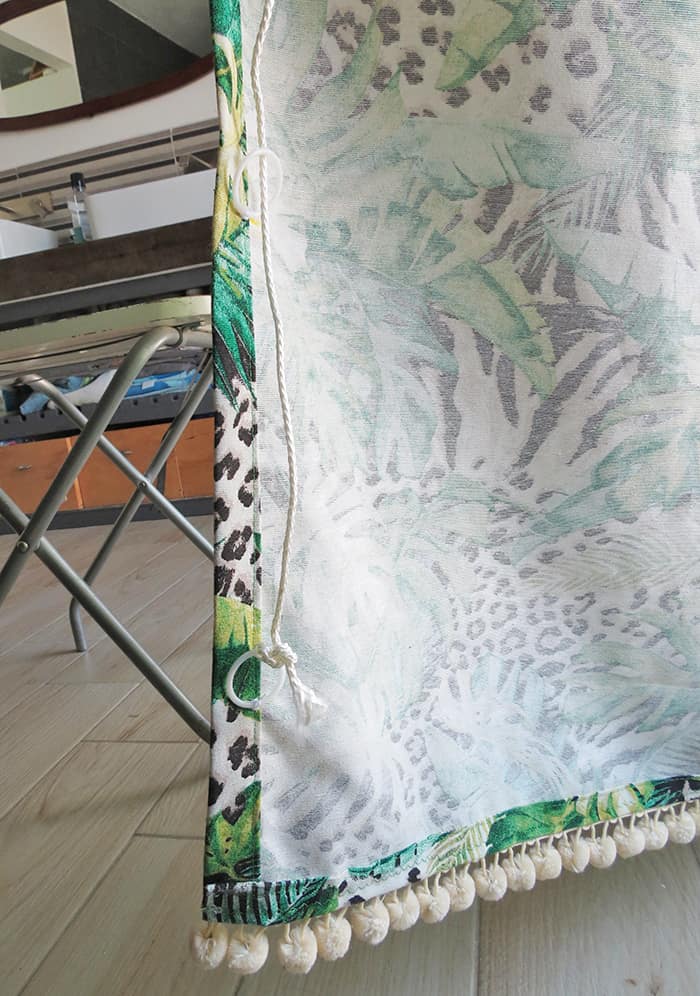
You can add a dot of glue to hold the knots if needed.
To attach the rope, and leave the blind open, fix a rope wrap on the window sides.
![]()
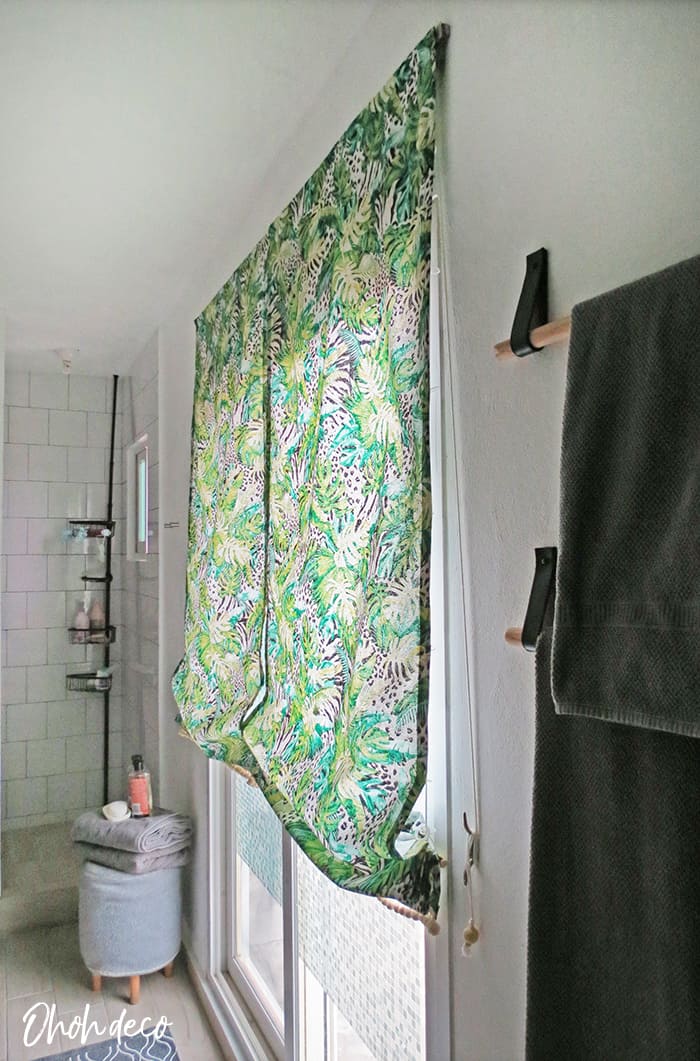
New blinds in our bathroom. I bought the fabric 6 months ago and I’m so glad I finally finished them.
I like the relaxed look of the blinds and they were easier to make than the roman shades. However, I prefer the clean look of classic roman blind better.
Another thing you need to know is that the fabric doesn’t always fold nicely when lifting up the blind. I know that with time it will fold better, I can also pass the iron to mark folds better, but as there isn’t a dowel to mark each fold it won’t fold as nicely as a roman blind.
What is great with relaxed shades is that the blinds are very lightweight and super easy to lift up and down.
In conclusion, I think relaxed shades may work best when you only have to use them occasionally.
I’m please with the blinds I made, I just want to share these details with so you can choose what works better for your window. What do you think? Would you give a try to make relaxed shades? Don’t hesitate to share a picture of your shade if you decide to make one.
RELATED: How to make roman blinds
RELATED: DIY curtain rods
![]()
![]()
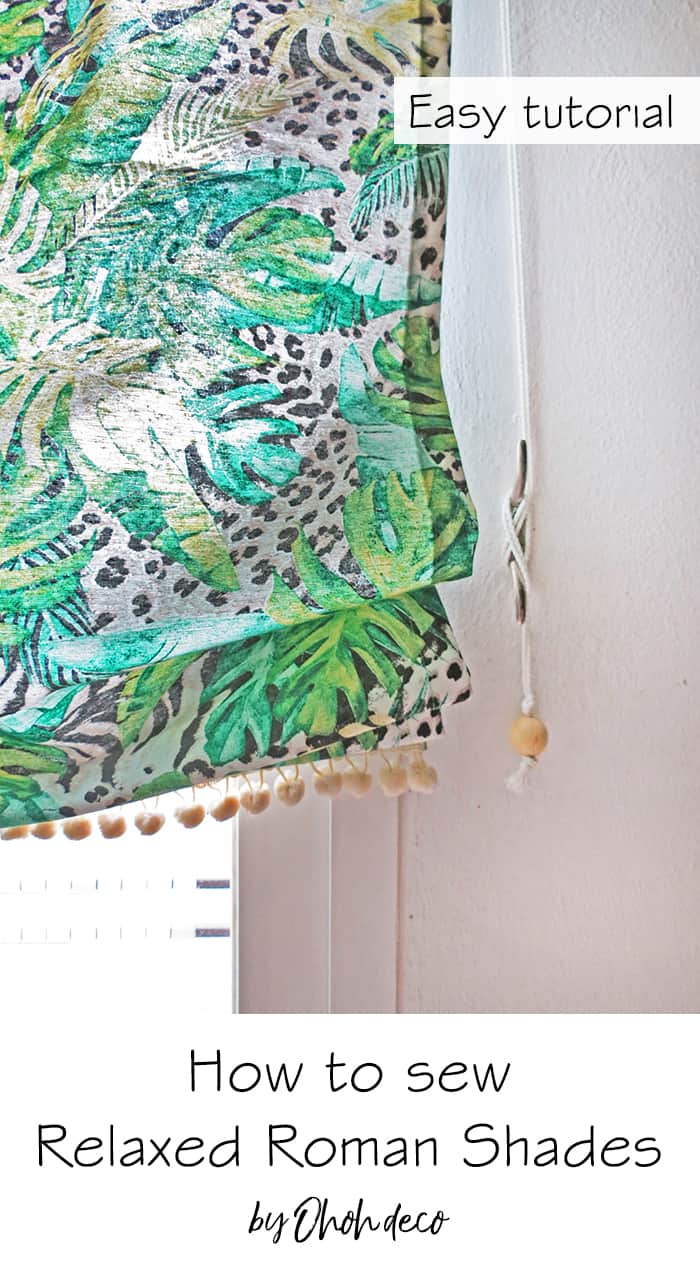
Want to remember it? Save this tutorial to make Relaxed Roman Shades in your favorite Pinterest board.
You will find all the tutorials featured in the video on my “Best DIY” page.
Amaryllis