A big trend in decoration lately is a simple interior with neutral colors and natural materials. There are so many ways to add a touch of nature in the home, like DIY Paper Palm Leaf.
To give your home decoration a natural vibe, you can integrate materials like wood, wool, linen, rattan, or simply add some natural elements like branches, driftwood, or palm leaves into your decor.
If what I just mentioned speaks to you, you will enjoy this DIY.
[ This post probably contains affiliates links, our full disclosure policy is really boring, but you can read it HERE ]
I’m showing you how to make palm leaves with brown paper, it’s super easy. Even if you don’t live in the tropics, you can still add an exotic touch to your decor.
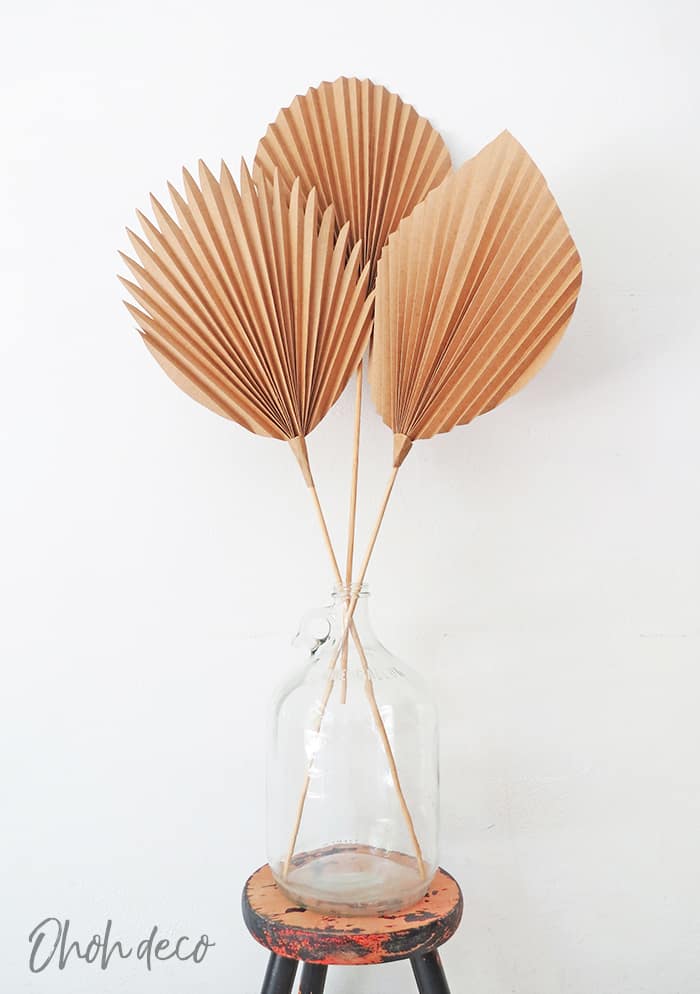
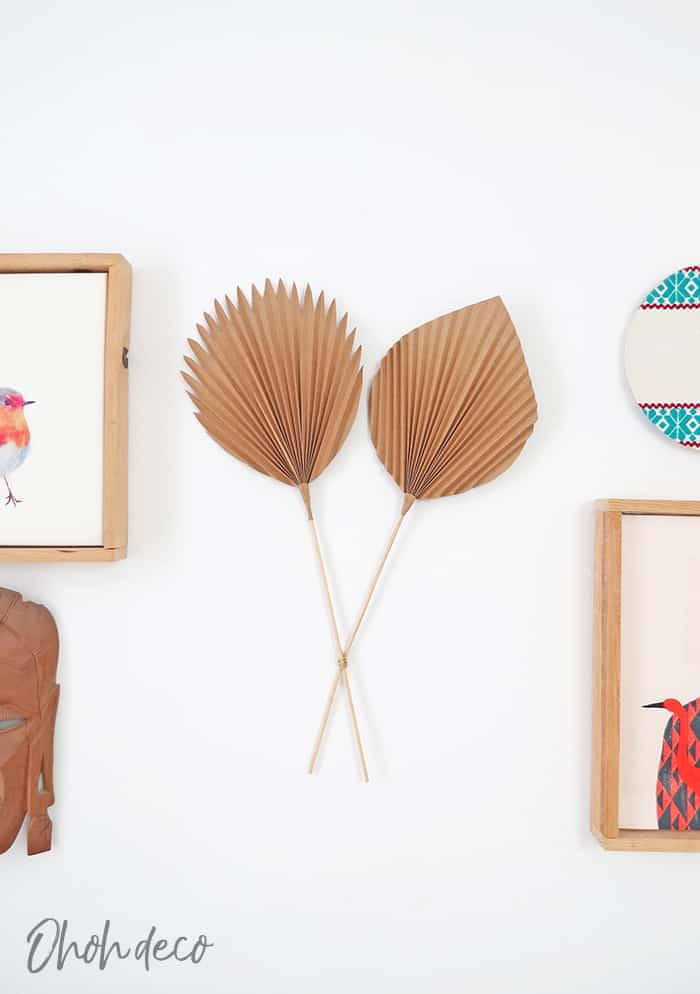
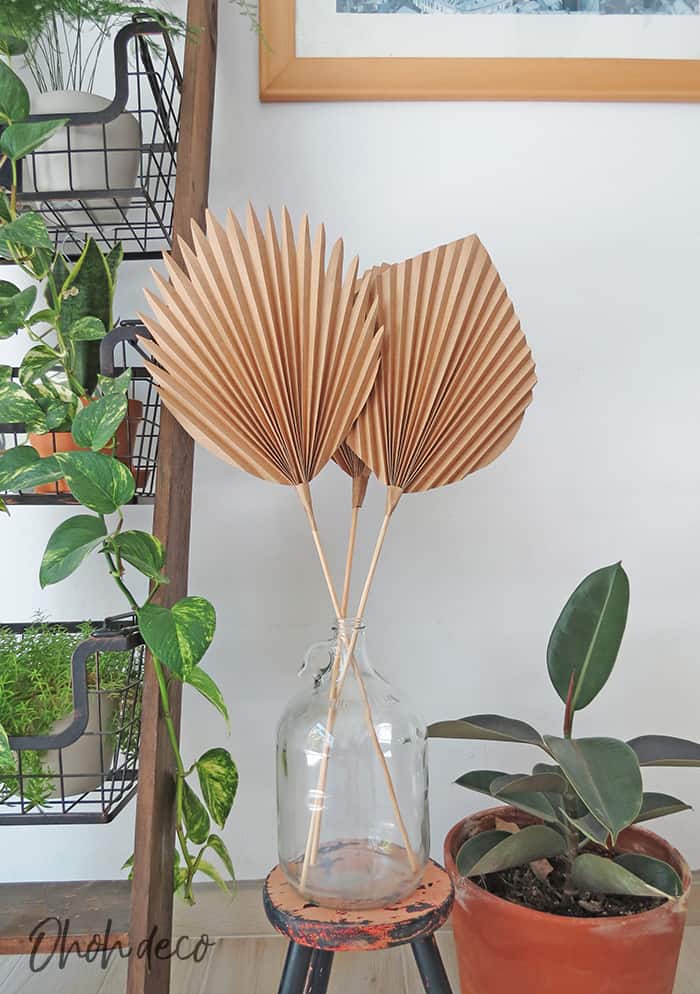
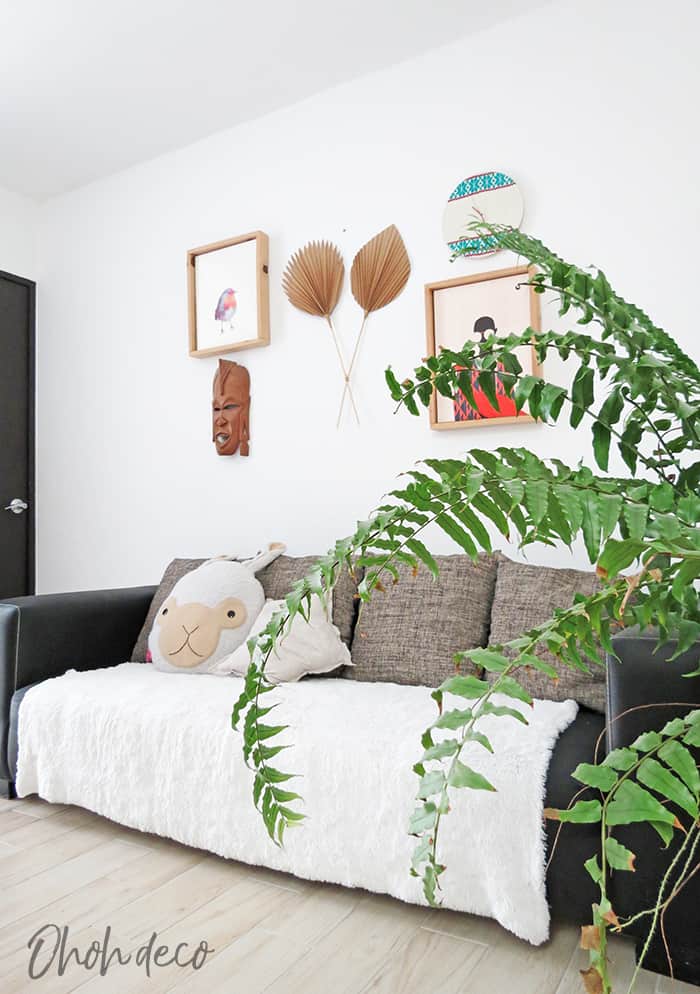
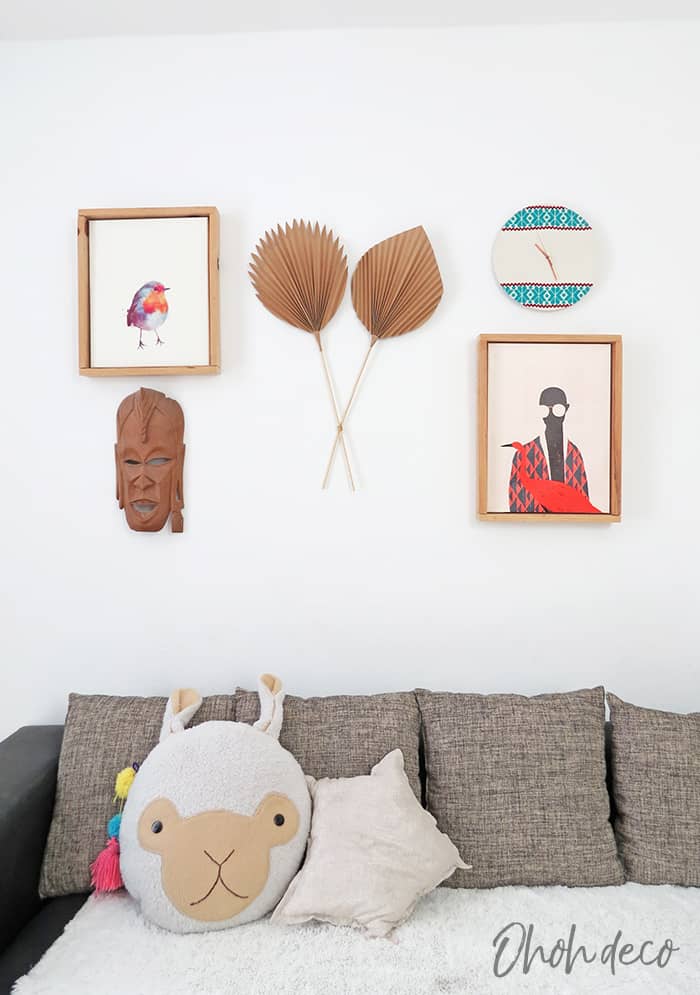
You can choose to hang your leaves on the wall or place them in a vase. I show you both variations, so you can display dried palm leaves all-around your house.
Supplies you will need to make the Palm leaf
- Brown paper
- The free palm template (If you already are a member, click HERE for direct access to download your template)
- A pencil
- A pair of scissors
- Brown tape
- glue
- Craft dowel
The FREE template printable is available in my resource library along with a bunch of other great prints and patterns. All you need to do is fill out the form and check your inbox for a welcome email with the password in. Click here to get in >>>> FREE LIBRARY ACCESS
The Paper Palm leaves look better with medium thickness brown paper, avoid using too thin paper as the leaves won’t be sturdy enough to hold straight.
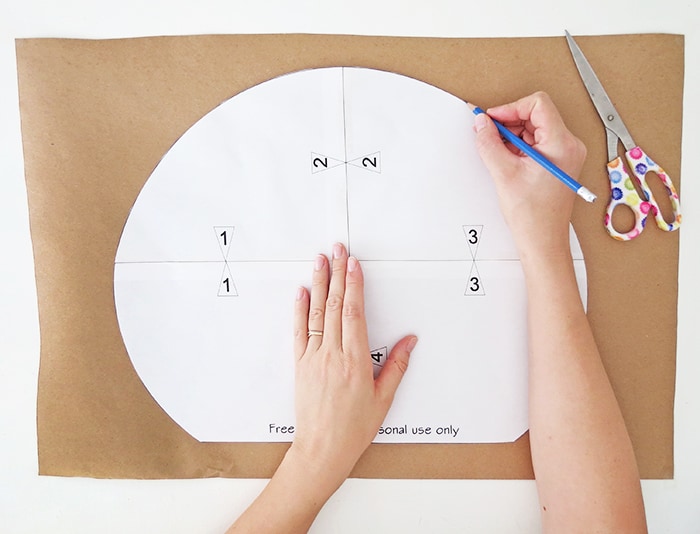
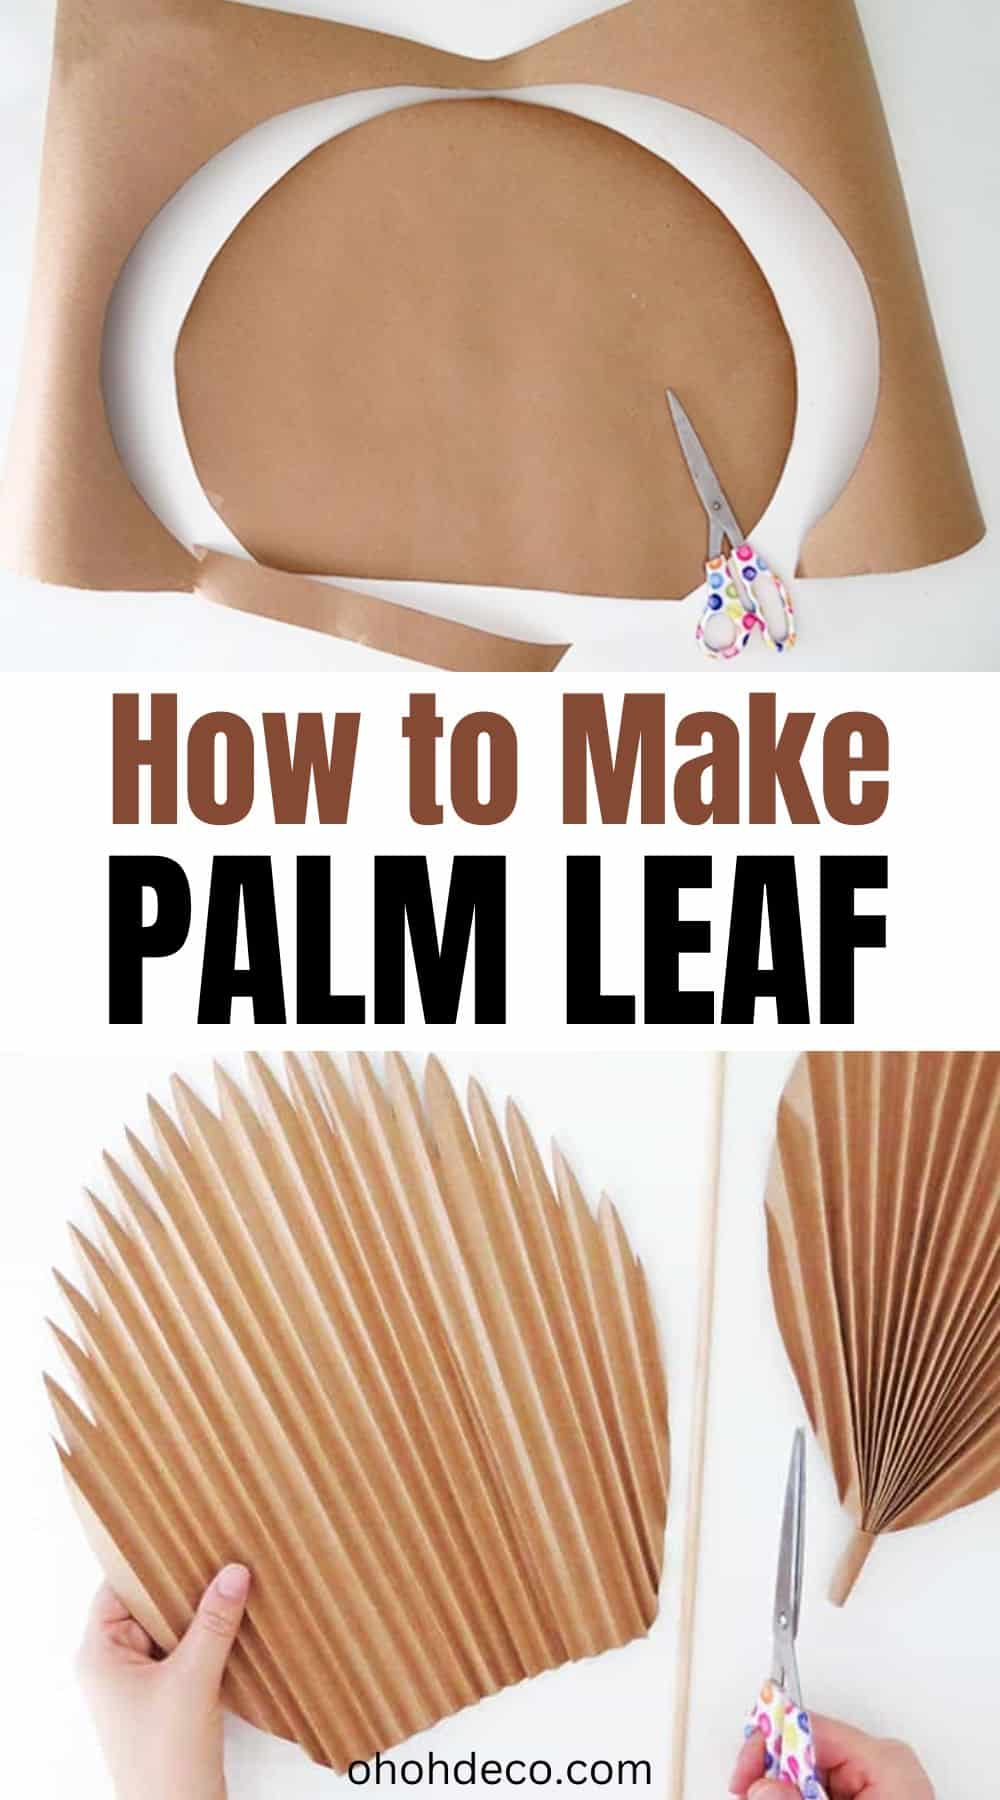
Start to download the template and assemble it. It’s quite easy.
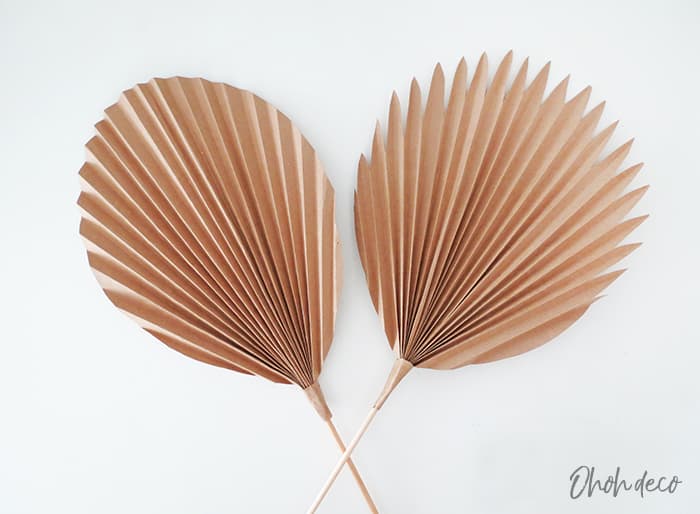
You have two different leaves shape template, each one composed of 4 sheets.
Cut along the straight lines and tape the sheets together. Help your self placing the numbered arrows facing each other.
Place the leaf template on the brown paper and report the shape using a pencil.
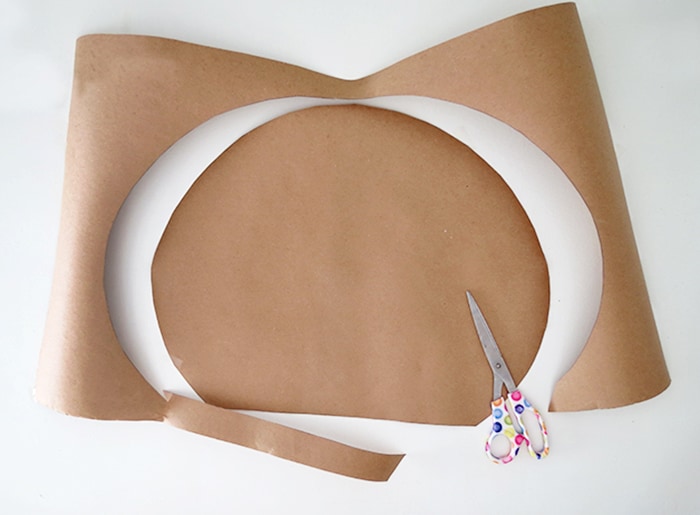
Cut the leaf shape out of the brown paper.
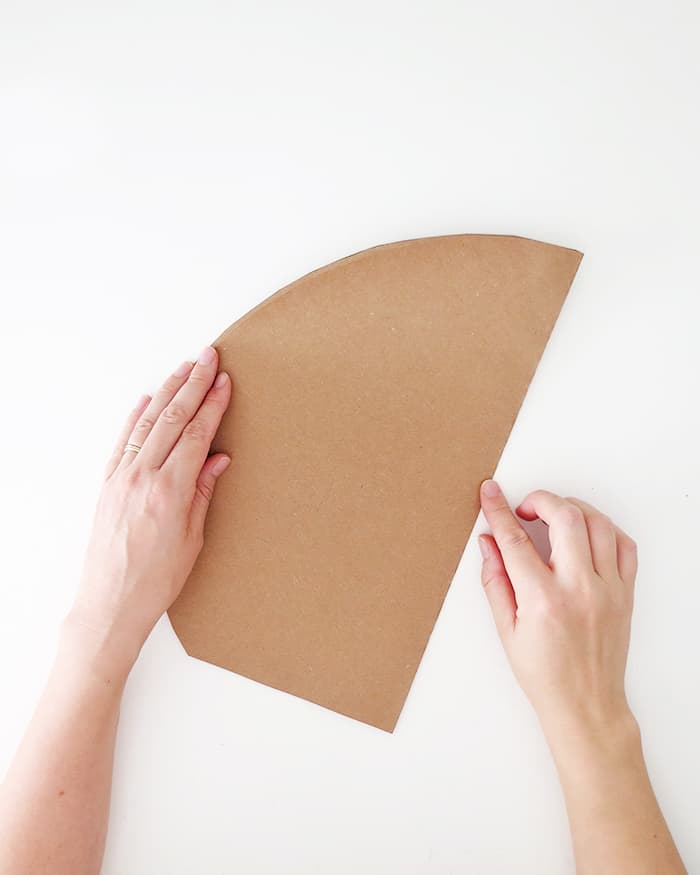
Take your leaf and fold it in the middle.
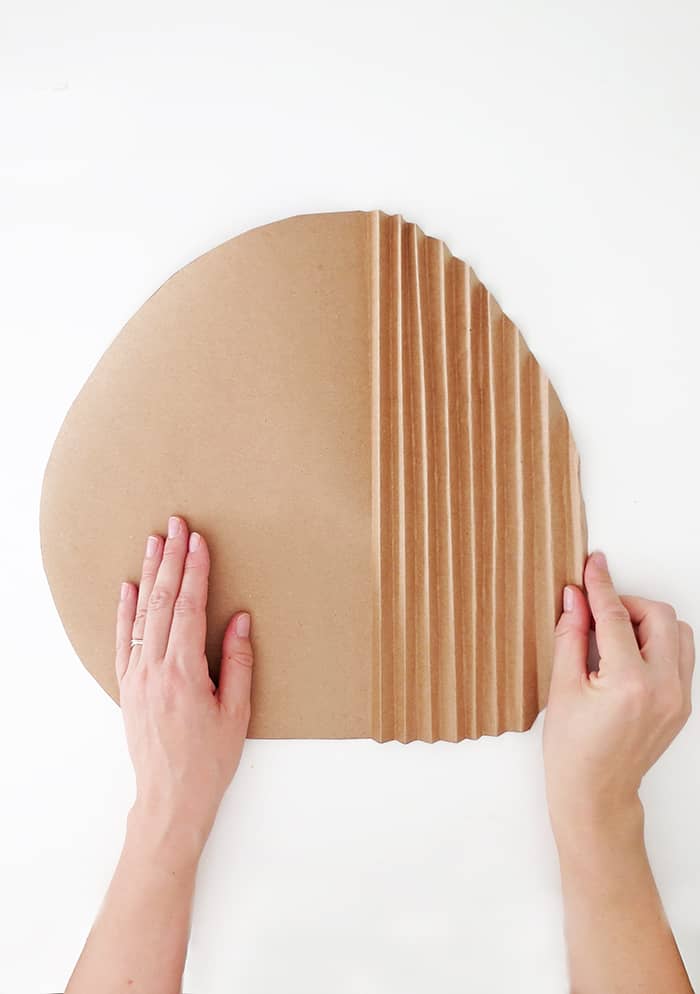
Open your leaf and starting from the center, fold the paper to make an accordion. Exactly like the ones we use to make as kids.
Try to keep the folds straight and with the same width. A good measure to have between each fold is 1/2 inch (1 cm).
Once you are done folding one half, get back to the center fold and start folding the second part of your leaf.
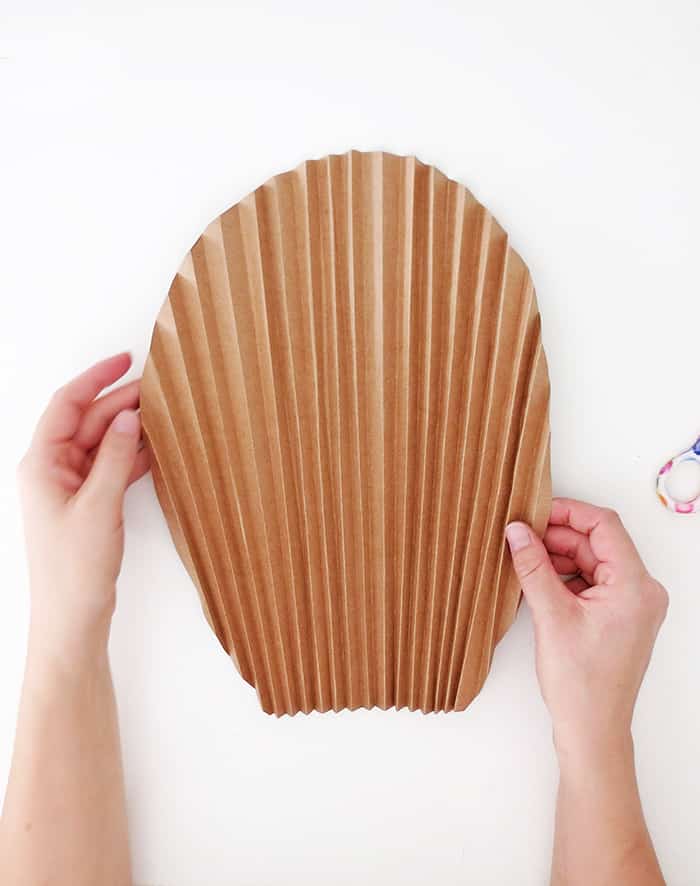
Unfold a little your leaf and pinch the bottom. To hold the bottom folds together and make the “stem” base, wrap tape around it.
The best is to use brown tape if you don’t have any you can use transparent tape and after all cover it with a piece of brown paper.
Get ready to make a bunch of paper palm leaves and grab this tape to make the craft easier.
And done! You just make a nice paper palm leaf.
Below I show you how to cut the palm edge to make tips and give the leaf another look. I also explain how to add a dowel if you like to make a stem.
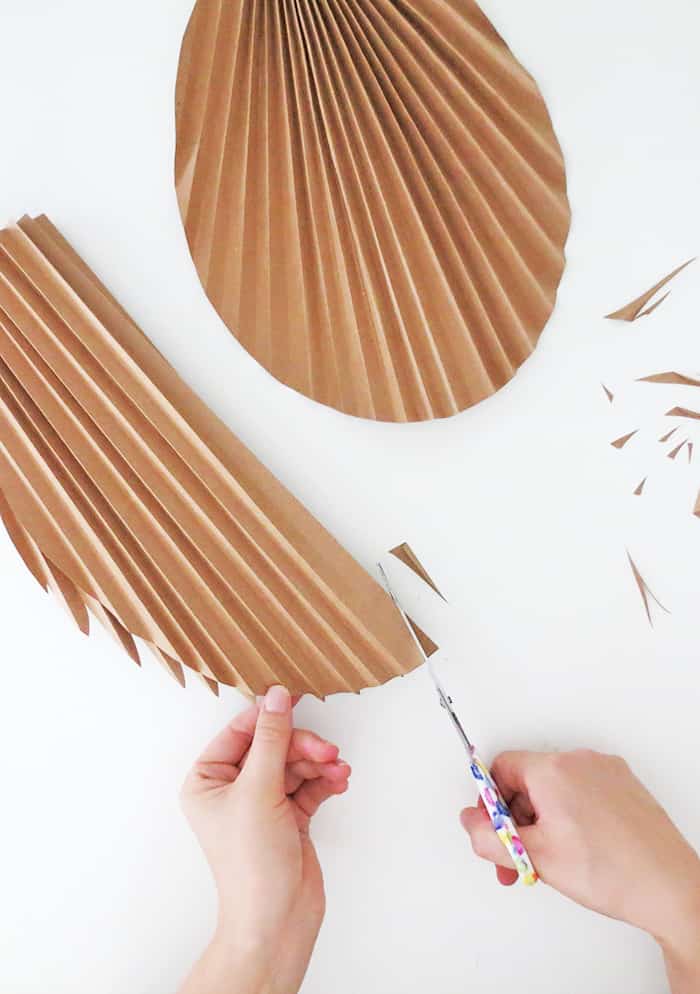
If you want to make a palm leaf with tip edges you need to cut little notches all around the palm edge.
Please note that it’s easier to do this step before wrapping the tape to hold the bottom of the palm together.
You have to cut the notches on all the folds that are on the same side.
I explain: the folds are alternate, one up the other down. You take whatever you want, all the up folds or all the down folds, it doesn’t matter. You pinch the fold and cut a triangular shape along the fold. Keep cutting all around the leaf, always taking the same side of folds.
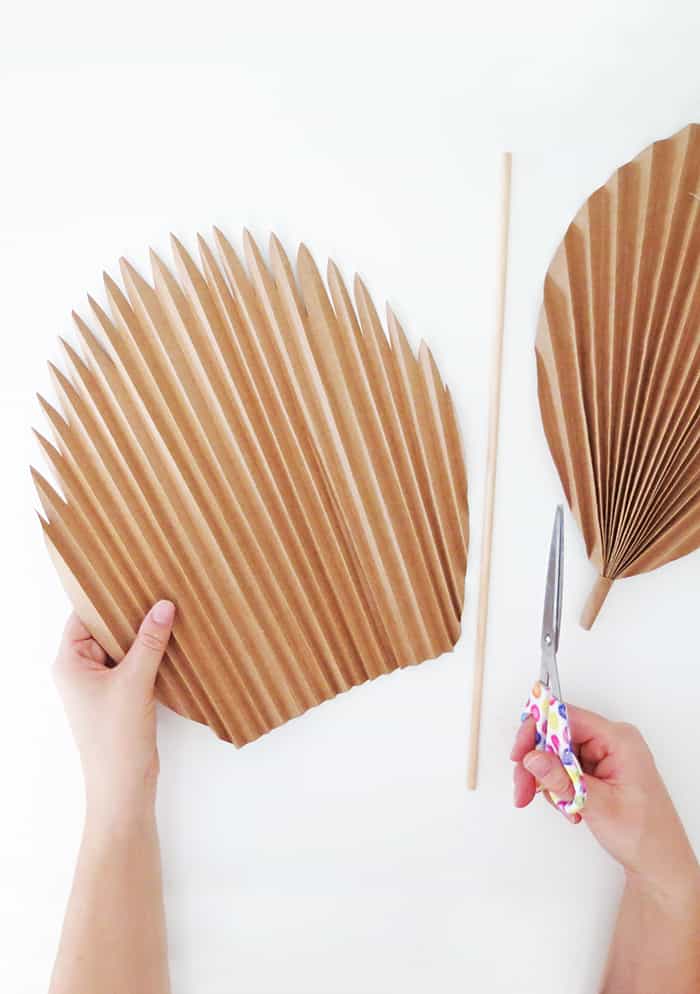
Open your leaf and adjust the notches if necessary, I cut some tips to make them sharper.
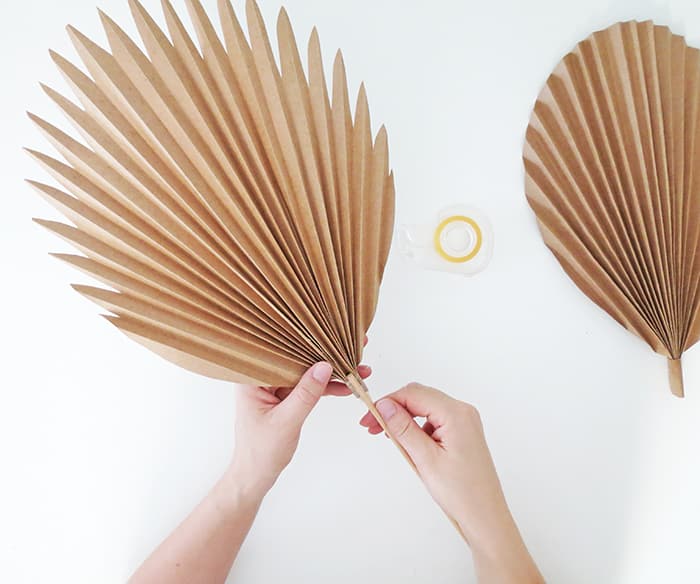
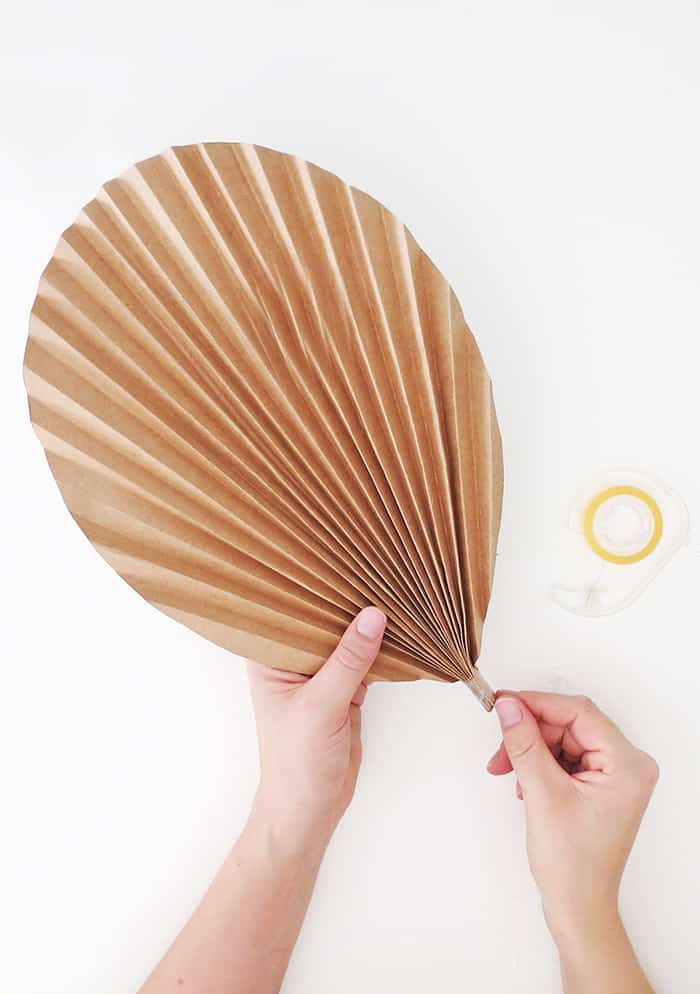
To add a stem, open the centerfold at the bottom of the leaf, add some glue and fix the dowel.
Wrap some tape around the dowel and the bottom folds to hold the palm and the dowel together.
Have fun watching the video tutorial to make DIY paper Palm Leaf
RELATED: 25 DIY you can make with Rattan
RELATED: Make a paper plant that looks better than a real one
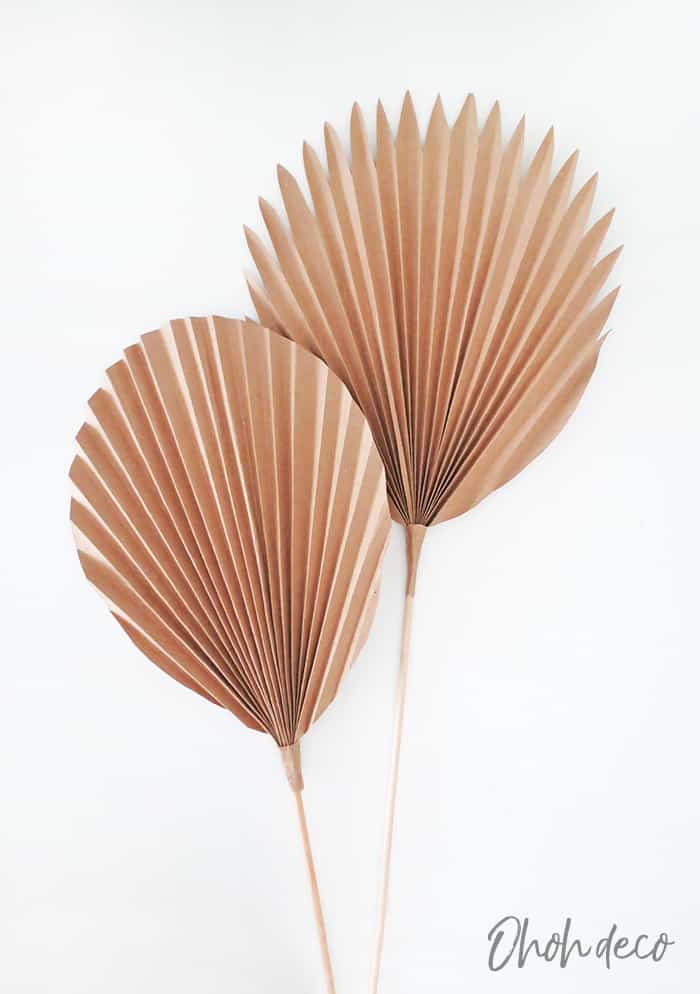
And done! What do you think? It’s a super easy paper craft to make. I find it quite relaxing to make the folds.
You can hang a palm leaf as wall decor, to do so just use double-sided tape or this tape to hold the leaf in place.
Another decoration idea is to display the palm leaves on a vase or a glass bottle. This craft is so easy to make that it’s also a great option for party decor.
Tell me where would you like to display your paper dried palm leaves?
I love to see what you create with my tutorials, leave a message in the comments, or drop me an email at amaryllis(at)ohohdeco(dot)com.
Have fun crafting!
Want to remember it? Save this DIY paper Palm leaf tutorial in your favorite Pinterest board
You will find all the tutorials featured in the video on my “Best DIY” page.
Amaryllis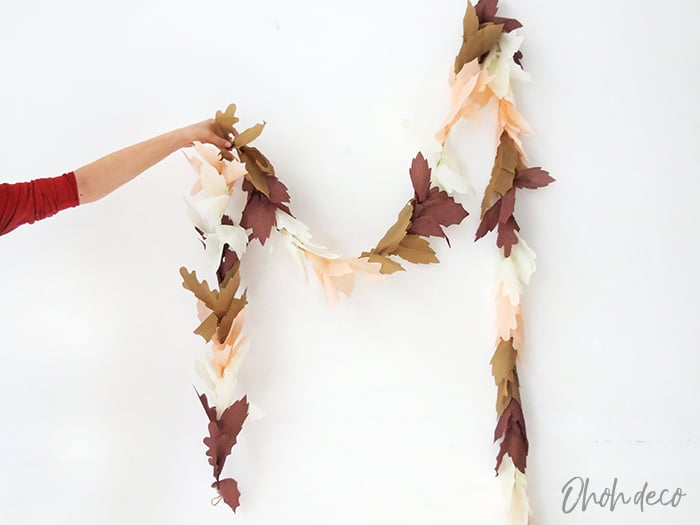
For the pointy one, did you cut the leaf shape before folding or after?
Hello, I cut the shape before folding. You can download the leaf template on my library, it’s free 😉
The link to download the template seems different than the one that is in the video. Is there another link available?
Hello Lesley, You can have access to all templates and patterns in the library
It´s free, you can get your password HERE