


Sewing your own clothes is fun and very satisfying.
But working with a pattern and starting with a complicated garment can be intimidating.
I, therefore, suggest that you start by sewing a very simple clothing piece without a pattern.
This skirt is a perfect project if you are new to sewing.
[ This post probably contains affiliate links, our full disclosure policy is really boring, but you can read it HERE ]
I give you all the measurement instructions, and you can follow the tutorial on video or the step-by-step instructions below.
This wrap skirt is easy to make and you can adapt the length according to your taste.
I made a maxi skirt but you can also sew a midi skirt or a knee skirt, as you prefer.
Are you ready to get started? Let’s sew this easy skirt.
Easy to sew Skirt
Supplies you will need to make a long skirt:
- Lightweight fabric
- Matching thread
- Scissors
- Seam ripper
- Sewing machine
To make my skirt I used 2 yards of polyester peachskin fabric. You can choose any lightweight fabric to make your skirt. I’m a size large, so if you want to make a long skirt and your size is above mine I suggest you get a little more than 2 yards of fabric.
RELATED: The easy dress sewing tutorial
RELATED: The easy shirt sewing tutorial


The best about this tutorial is you can adapt it to sew a skirt the length you want. I decided to make a maxi skirt but you can choose to make a midi skirt, a knee skirt or a mini.
First, decide the length of the skirt and then take the measure starting from your waist to where you want the skirt to end. Stay still when taking this measure, and ask for help if you want. Once you have this measure add 2 inches for seam allowance.
If you are unsure of the skirt length you want, cut the fabric a little longer. It’s always possible to cut it off after-all.
I’m tall, so the high of my skirt is 1 yard and 3 inches (1 m).
Now you have to calculate the width of your skirt. Measure your waist and multiply by 1.33. You do this because it’s a wrap skirt and the fabric must overlap on the front of the skirt.
Then you add once again the dimension of your waist size to be able to gather the fabric.
In summary: Your waist measure x 1.33 + your waist measure again.
I give you my example: 36 in x 1.33 = 47.88 in. and 47.88 in + 36 in = 83.88 in
Same example but in centimeter: 86 cm x 1.33 = 114.38 and 114.38 + 86 cm = 200.38 cm
So I cut a rectangle of 84 in by 1 yard. ( 200cm x 100cm )

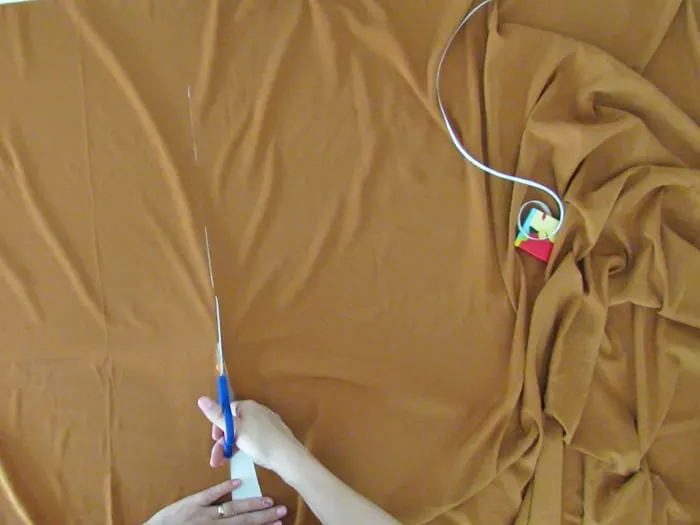
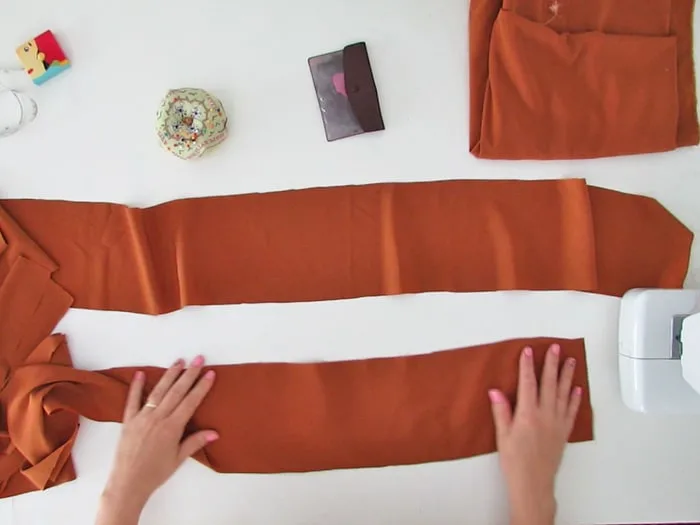
Now that you have the dimension of the rectangle, you can cut the fabric. Remember you can make the skirt the length you like.
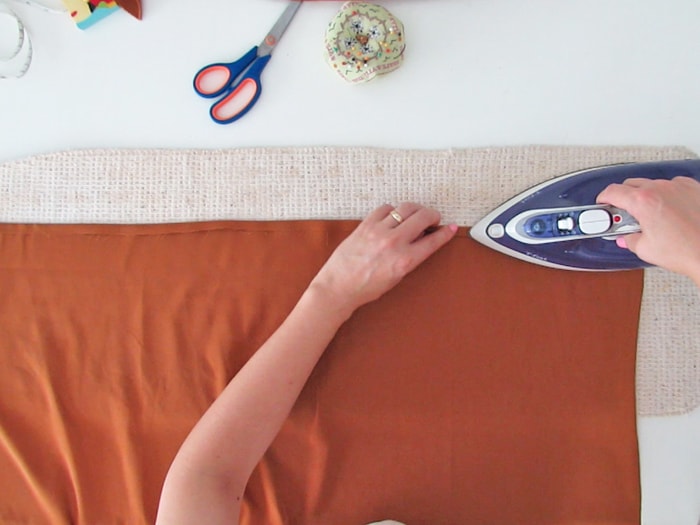

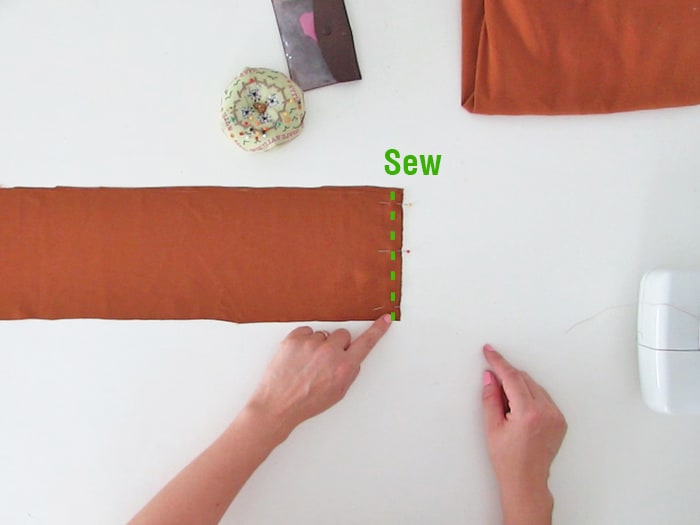
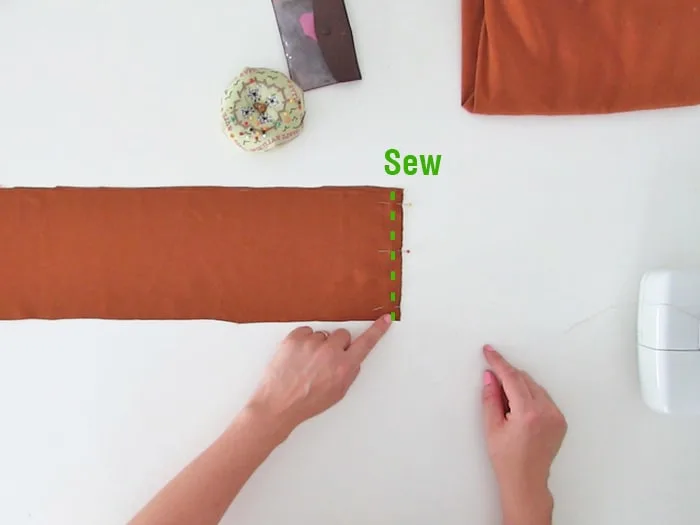
Once the skirt rectangle is cut, make a double-fold hem on the two vertical edges of the skirt. By vertical edges, I mean the fabric edges that go from the belt to the skirt bottom.
Fold, iron, pin and then sew.
You don’t have to sew the bottom hem of the skirt yet.

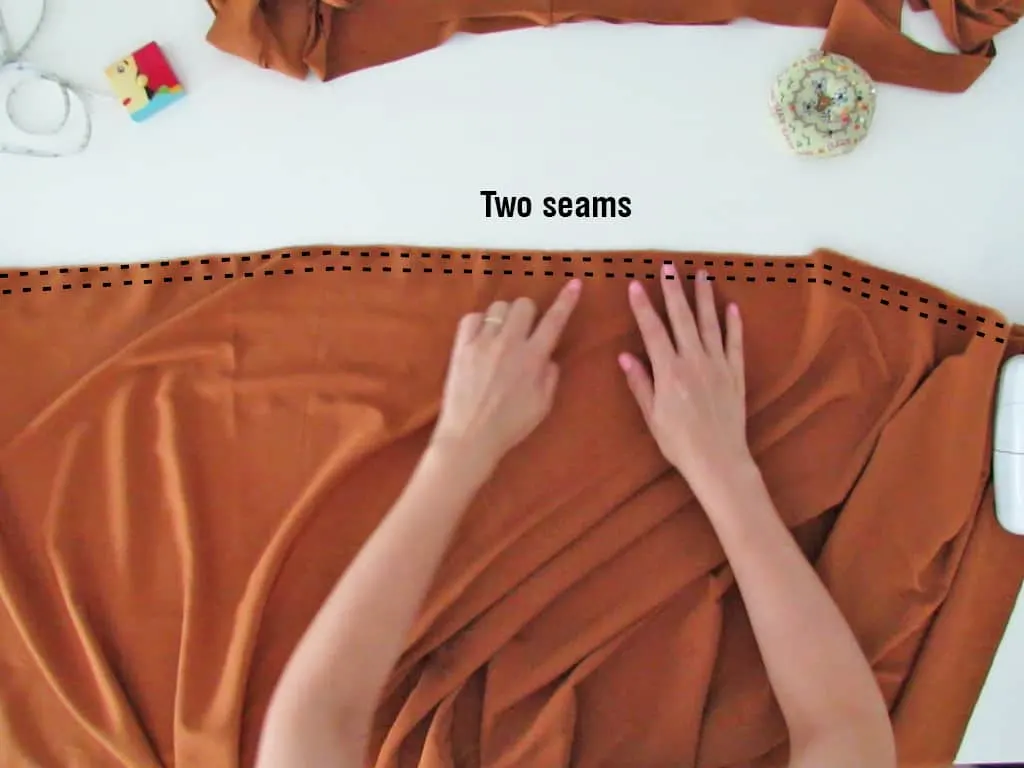
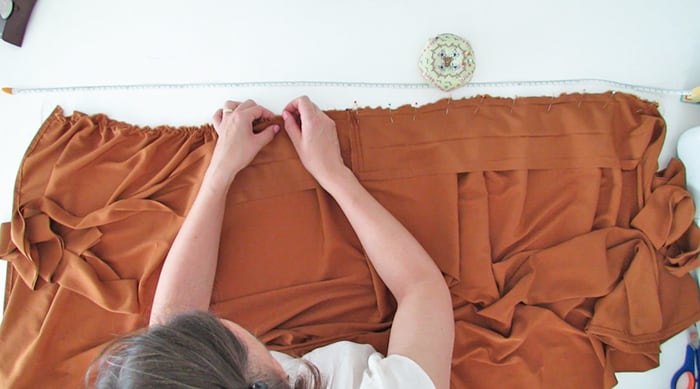
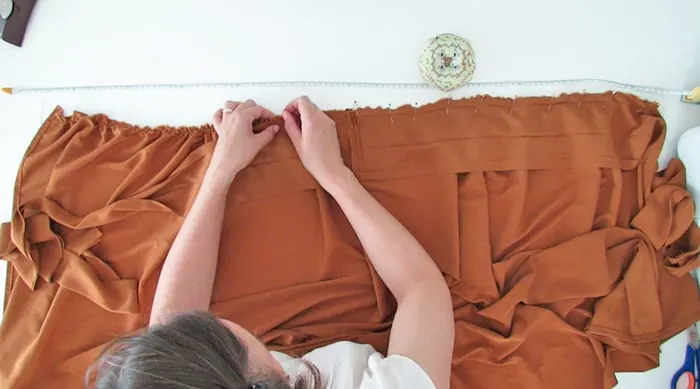
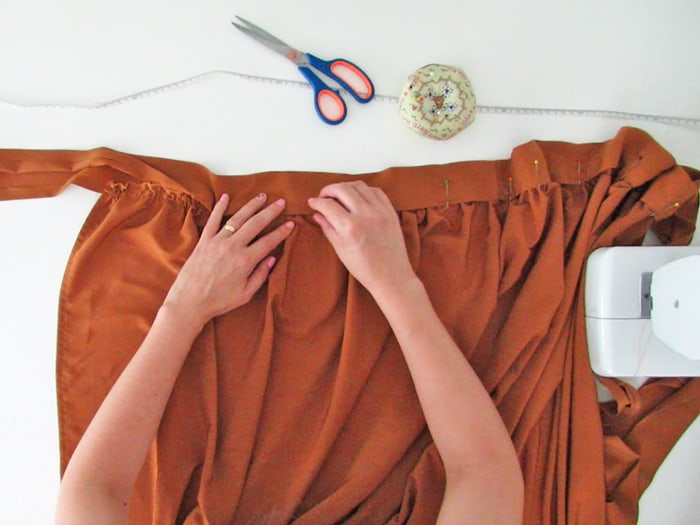
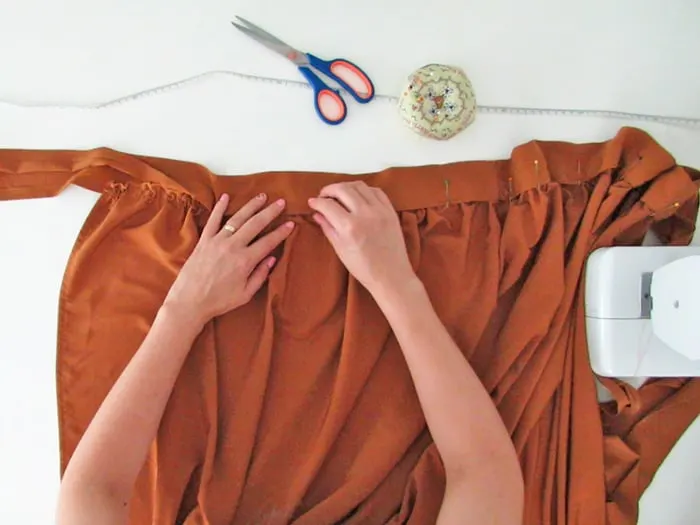
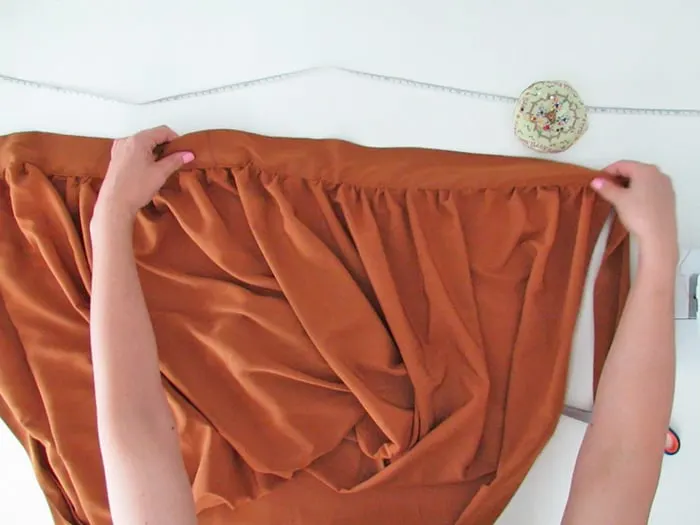
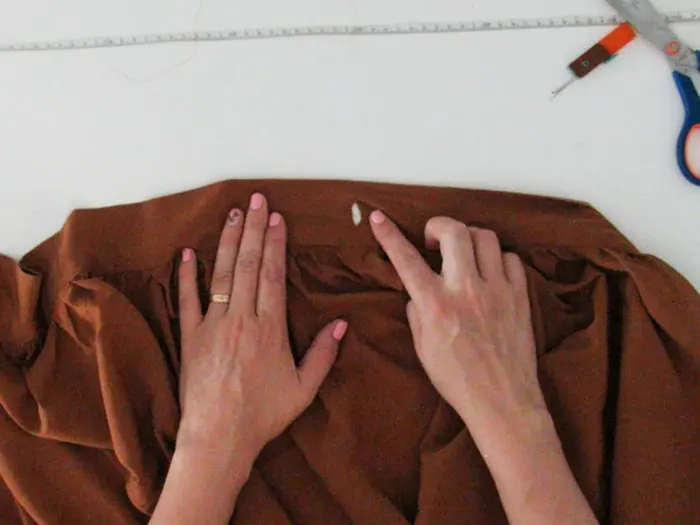
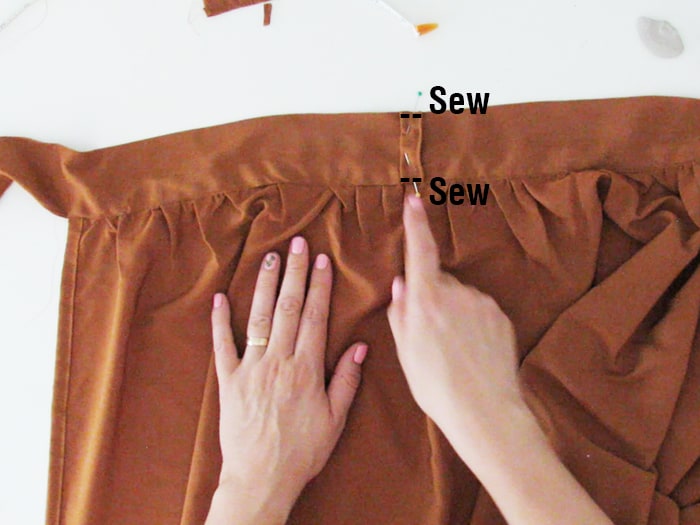
Take the top edge of the skirt and gather the fabric around the waist.
To gather the fabric, make two seams with straight stitches (number 3 or 4).
The seams should be parallel and approximately 1/2 in. (1cm) apart.
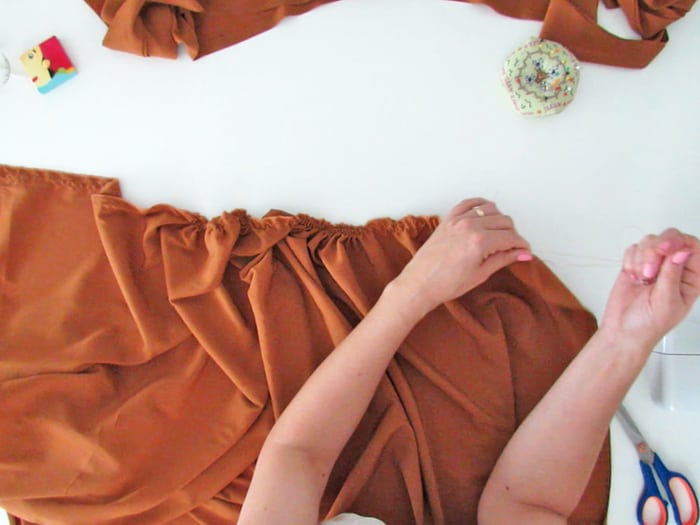
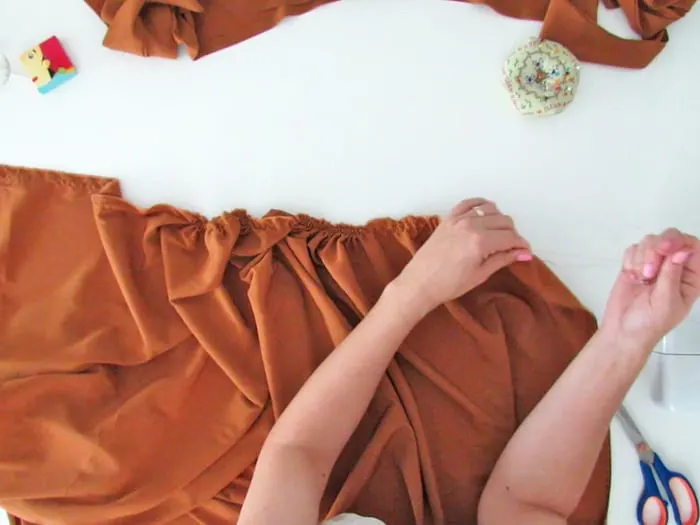
Leave enough thread length when you have finished the seams. Take the top threads of the seams and pull them to gather the fabric.
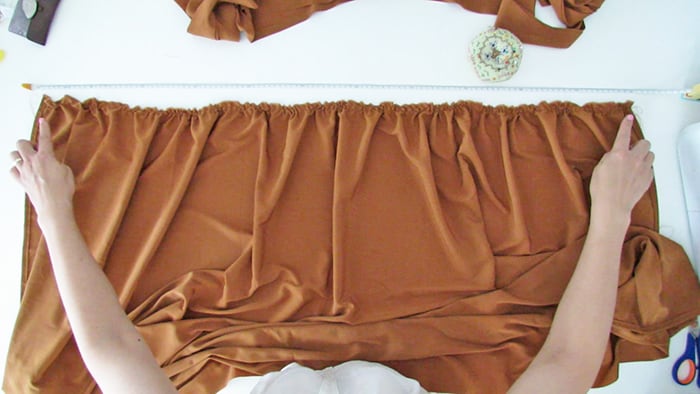

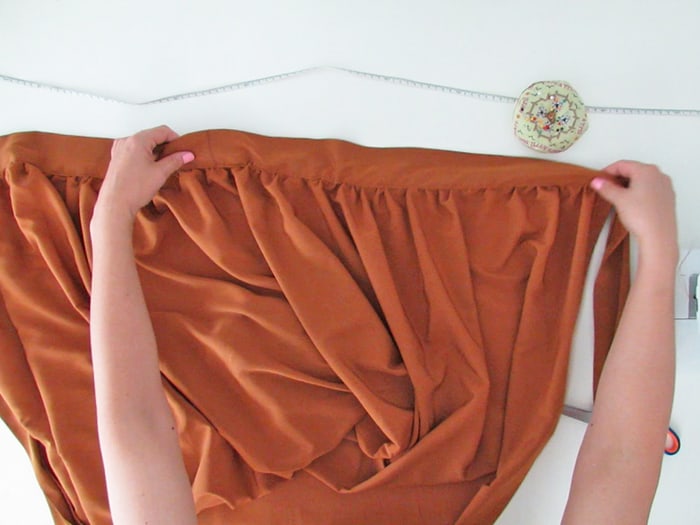
Distribute the “pleats” evenly across the length of the skirt. Take your ruler and check that the skirt width is accurate. It must be your waist measure x 1.33. You already calculate it to cut the rectangle.
The gathered fabric must have this length so the wrap skirt fits nicely. If it’s too short “ungather” the fabric if it’s too long gather the fabric more. In both cases check that the pleats and distributed evenly along the waist.
Set your skirt aside for a moment, it’s time to cut the belt pieces.
RELATED: Succulent pillow pattern
RELATED: How to make reusable makeup remover pads
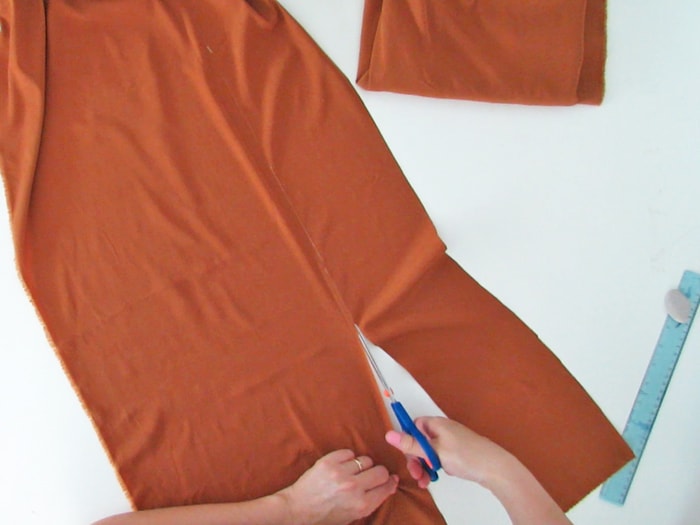

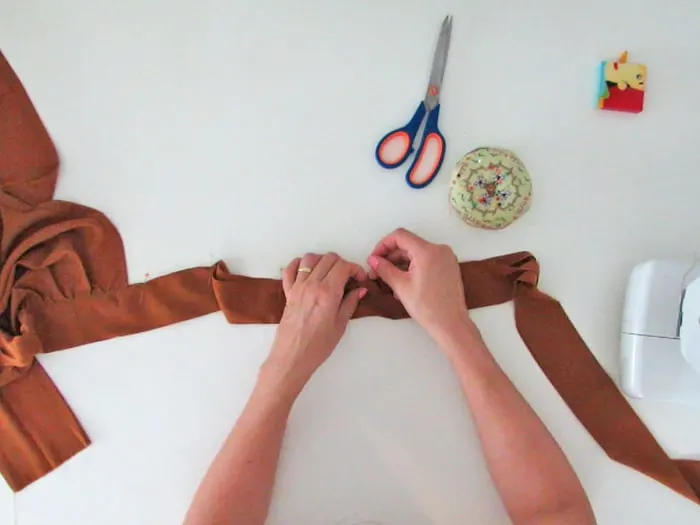
Beside the rectangle to make the skirt you will need a long strip of fabric to make the skirt belt.
Cut two rectangles of 6 in. (15 cm) high in the width of the fabric.
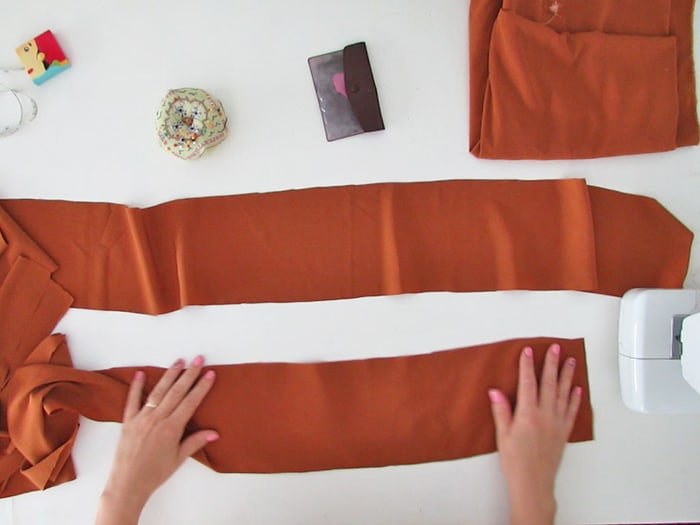
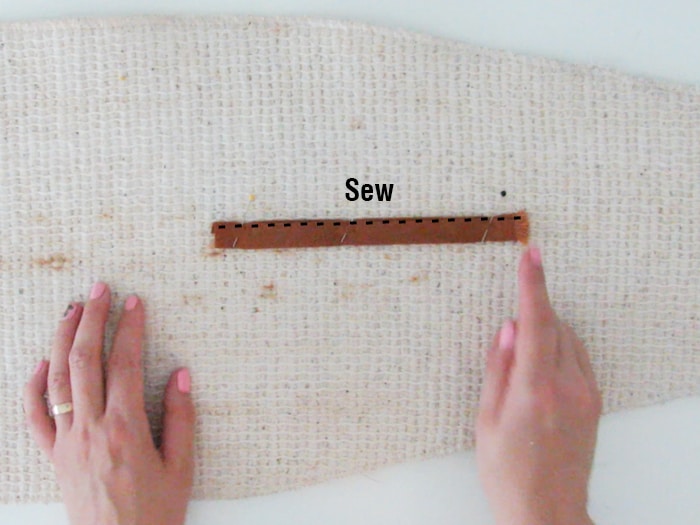
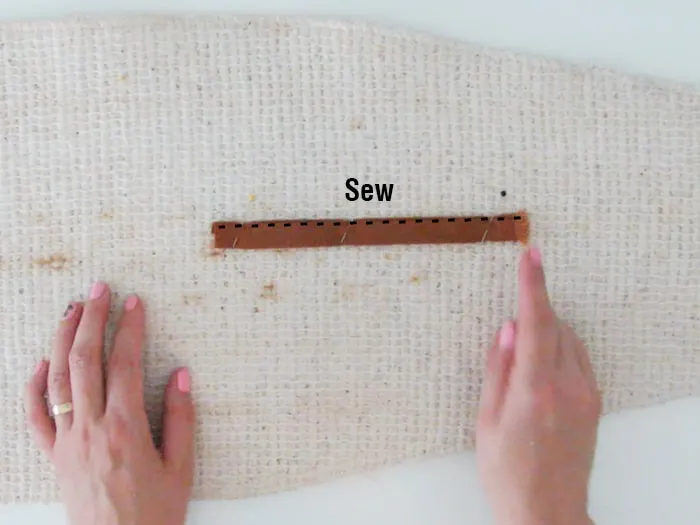
Place the two long pieces you cut for the belt on top of each other, right side facing. Pin the small edges together and sew.
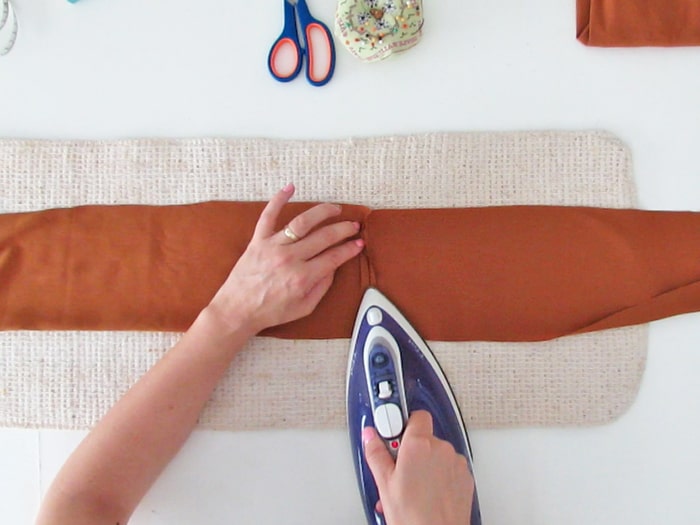

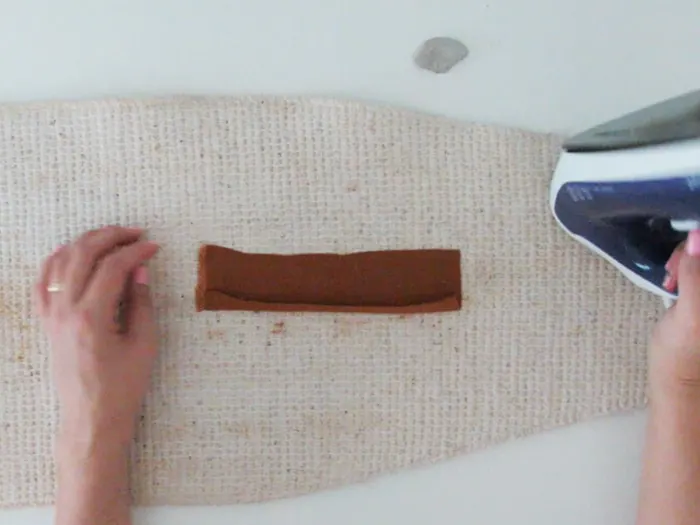
Open the seam and iron.

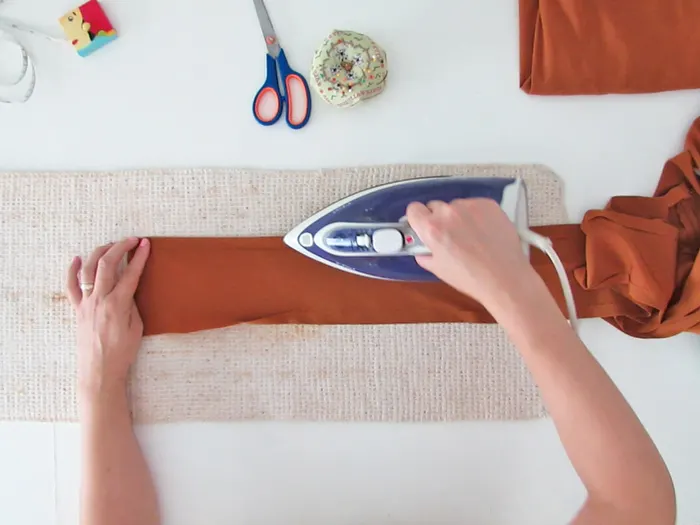
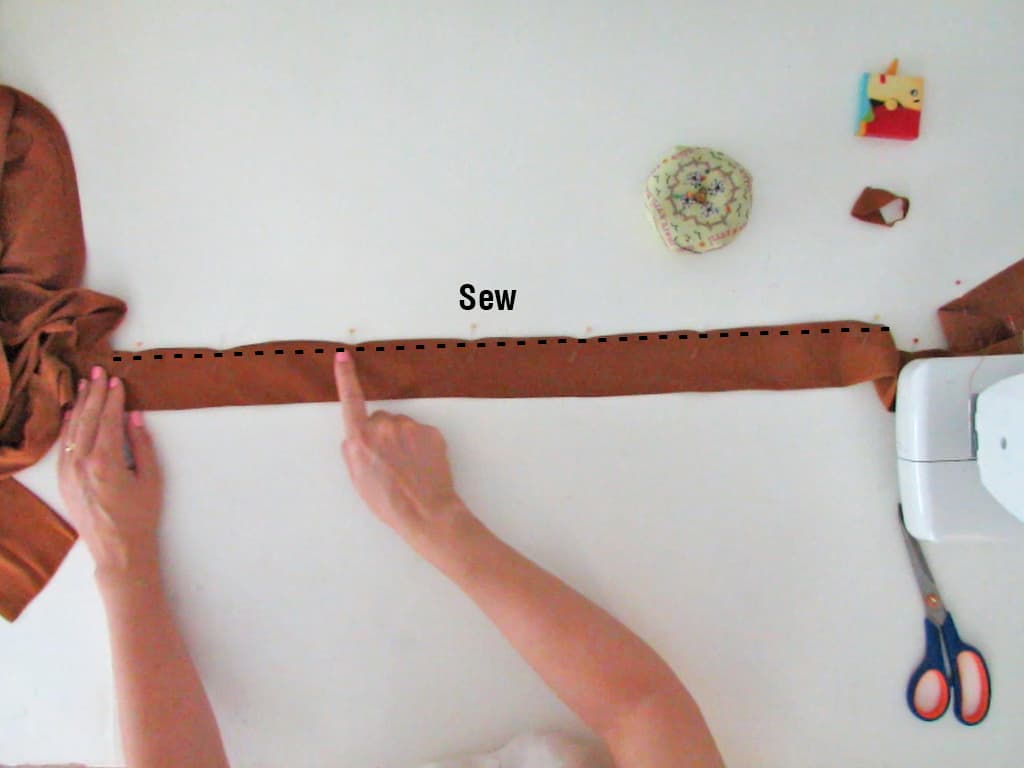
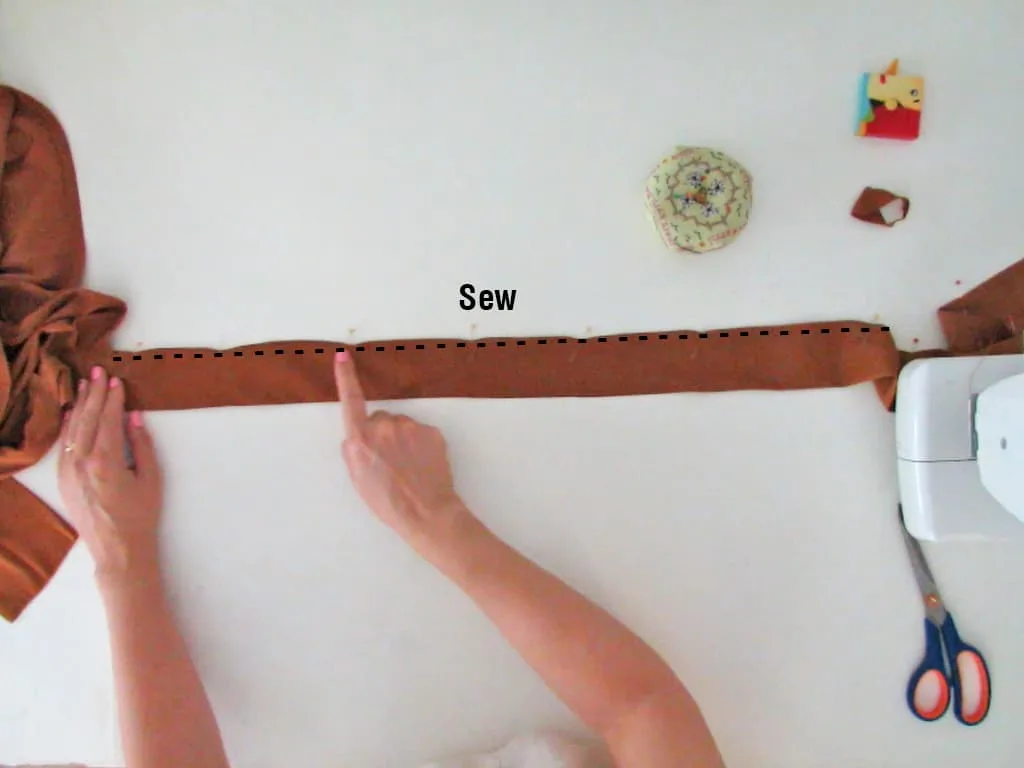
Iron a 1/2 inch pleat along the entire length of the waistband. Do it on both sides.
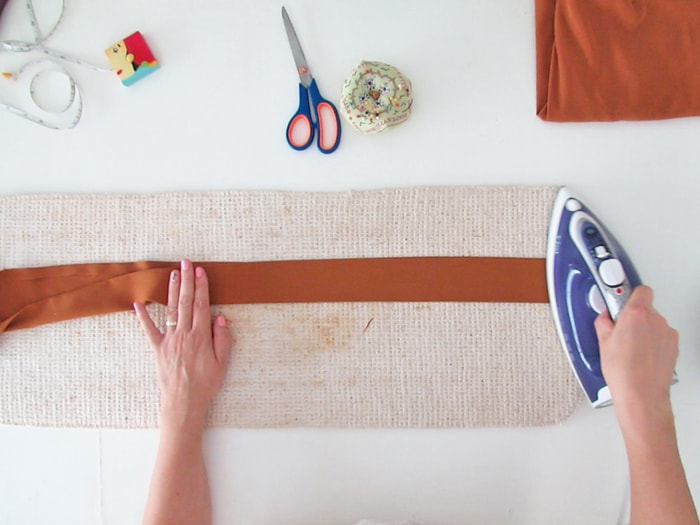
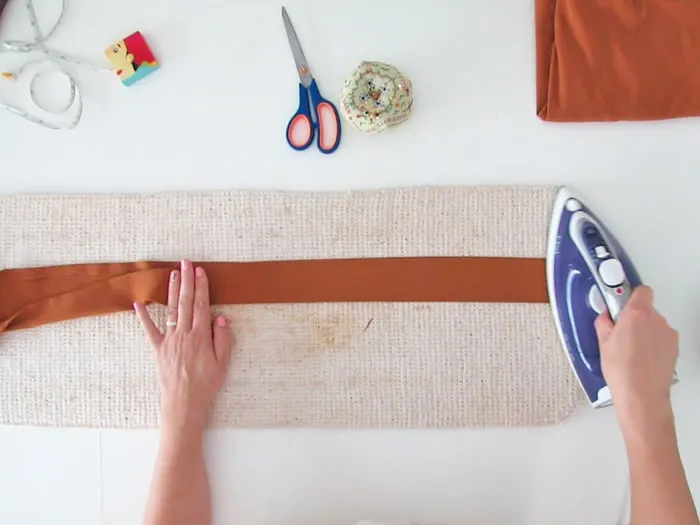
Then fold the belt in the middle lengthwise. The pleads are on the inside and the right side of the fabric is facing out.
Time to sew the belt on the skirt. Take the skirt and place it wrong side up on a flat surface. Measure and mark the center of the waist edge.
Take the belt, align the seam you have on your belt with the central mark you made on the skirt. So the belt seam will be on your back when wearing the skirt.
Align the belt and the skirt edges and pin. The belt piece is open and wrong side facing up.
Sew the belt with the skirt following the fold you previously marked with the iron on the belt.
Remove the pins.
Flip the skirt, the right side is now facing up.
Fold the belt over. You already iron a central plead so it’s easy. Pin the edge of the belt on the right side of the skirt and make a seam.
The lengthwise belt fold you previously iron along the edge must be hidden. Try to sew as close as possible as the belt edge, 1/4 in. (5mm) from the edge will be great.
Great! Now the belt is sewn with the skirt. There are still several steps to complete to finish the skirt but you can try it on if you like.

Take one end of the belt, the “ribbon” part, and pin the edges together.
Sew along the edge to finish the skirt belt. Repeat on the other side. I like to have long ribbons to make a bow tie but you can trim the belt as the lenght you like before sewing.
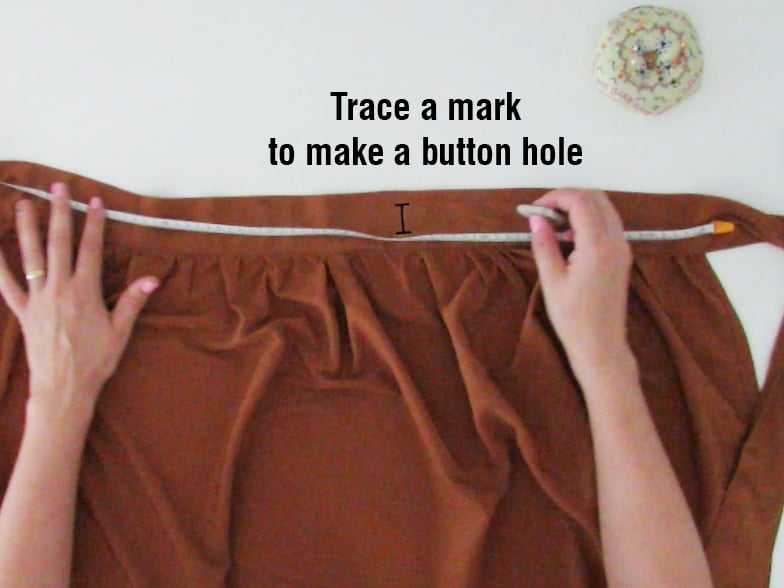
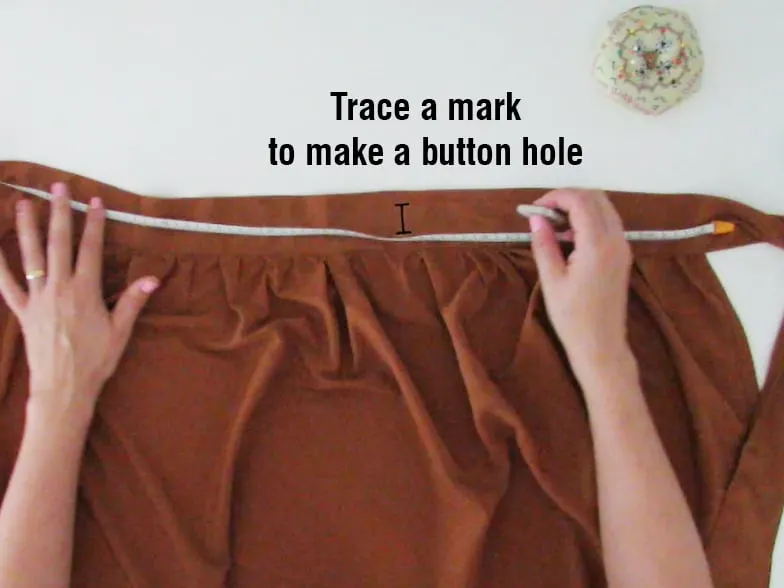
For your skirt to fit well around your waist you will make a button hole and a belt loop to pass the belt ribbon through them.
Take the skirt and lay it flat, right side up. Measure 1/4 of the width of the skirt and make a mark. Take that measure on the skirt waist, don’t include the ribbons lengths.
Draw a “Ɪ” on the mark you made on the skirt belt. Make a button home on the belt. If you don’t know how to do it, you can watch this easy tutorial. It’s very easy.
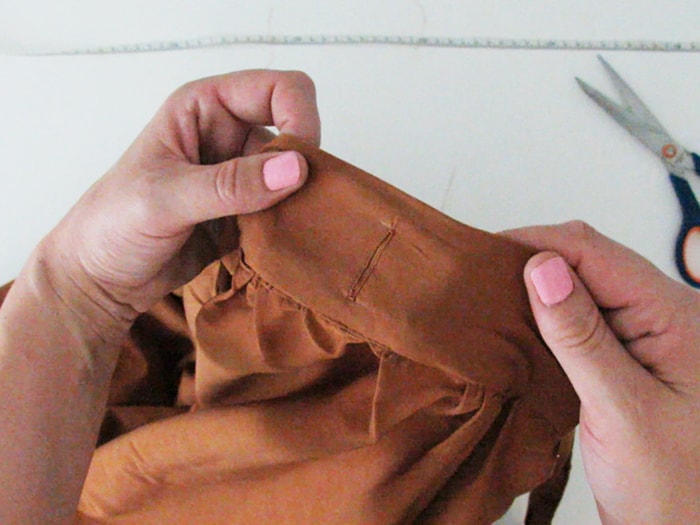
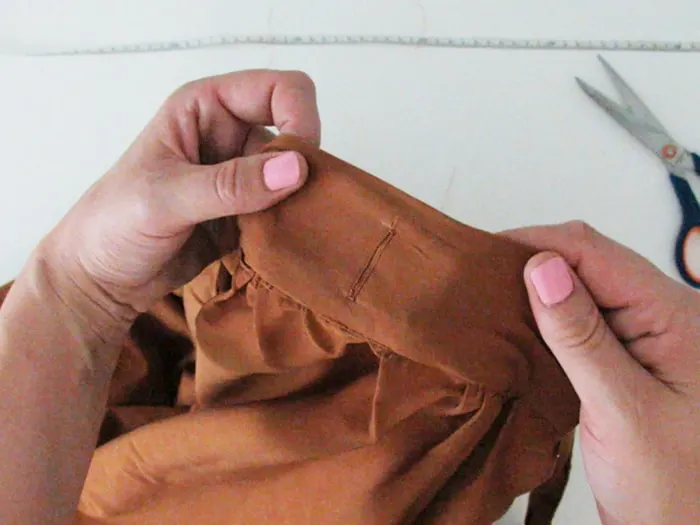
Once the seams are made around the mark, open the button hole with your seam ripper. Be careful not to cut your seams.

And done, the button hole is made, you can now pass the belt ribbon through it.

Time to make the belt loop. Cut a rectangle of fabric of 3 by 2 in. (8x5cm). Iron a pleat on each lenght side.
Then fold the fabric in the center, pin and sew along the edge.

Lay the skirt flat again, right side up. Measure one quarter of the width on the belt. Take that measure on the opposite side of the button hole.
Place the strap on the skirt belt and fold the ends inward. Pin and sew the ends on the skirt belt. Remove the pins and done, you just sew the belt loop.


The last thing to make is to sew the bottom hem of the skirt. You can try your skirt and check that the length is accurate before sewing the hem.
Once you are happy with the skirt lenght, iron a double fold-hem. Pin and sew.
Remove the pins and done! You just finish your wrap skirt!
Iron the skirt for a better finish and enjoy wearing it!
RELATED: How to Sew Bolster Pillow to store your winter duvet
RELATED: How to make a sock doll
Watch the video tutorial to Sew this Easy skirt
Don’t miss the fun. Follow Ohoh deco on Youtube and be the first to find out about the new DIY and crafts ideas.

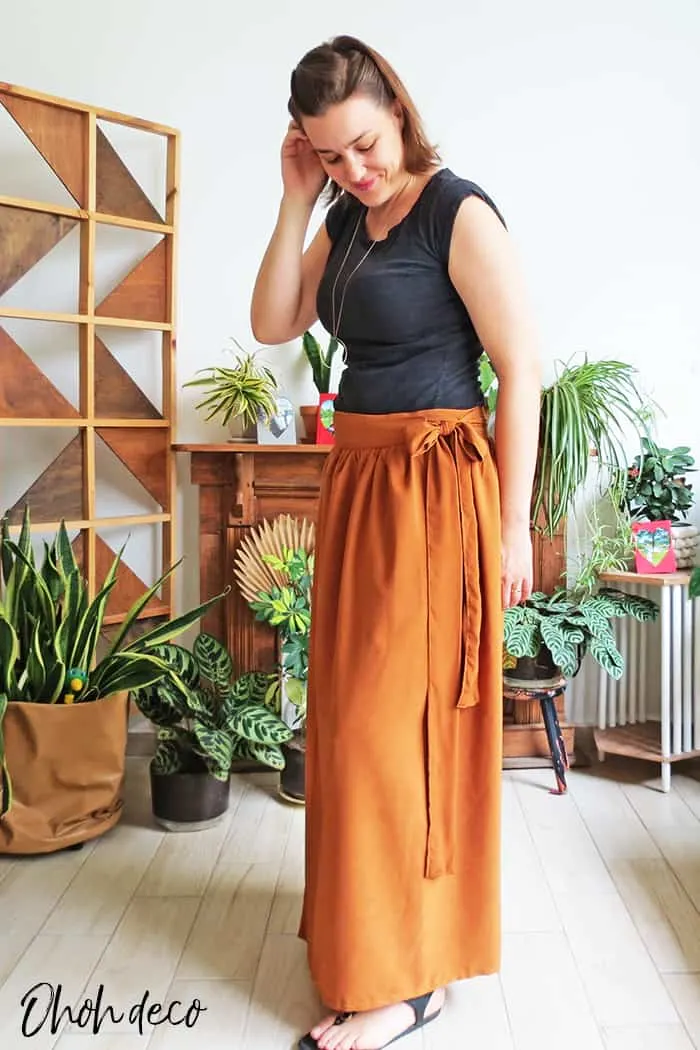
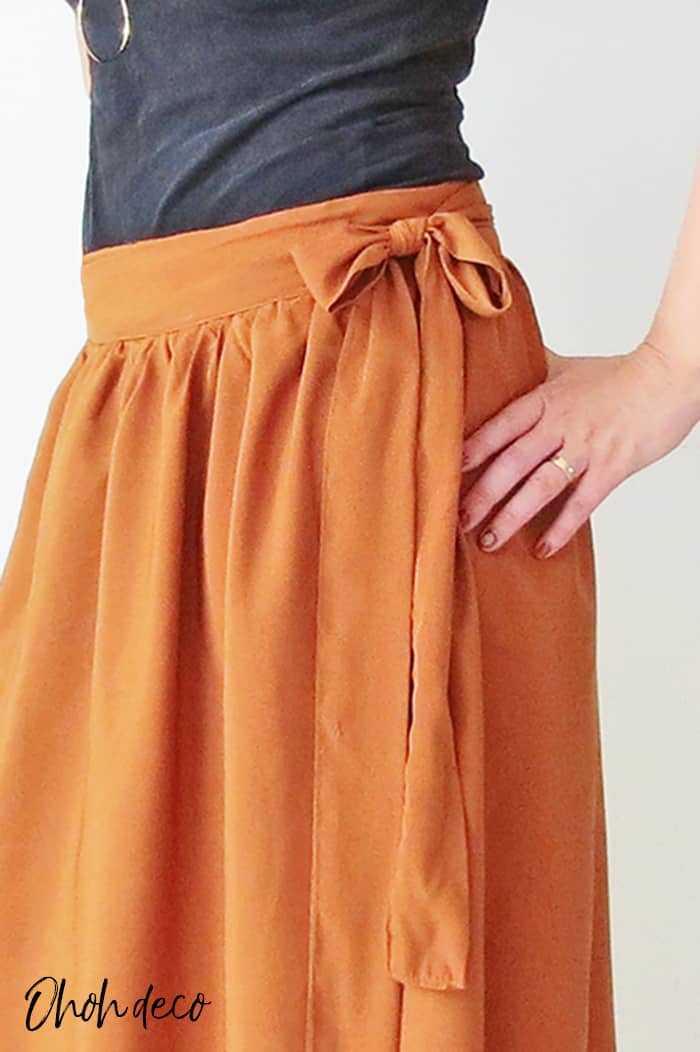
Wrap the skirt around your waist. Pass the belt ribbon through the button hole and the belt loop and attach with a knot.
You can make a flat knot or a bow tie. You can wear the bow on the side or on the back.
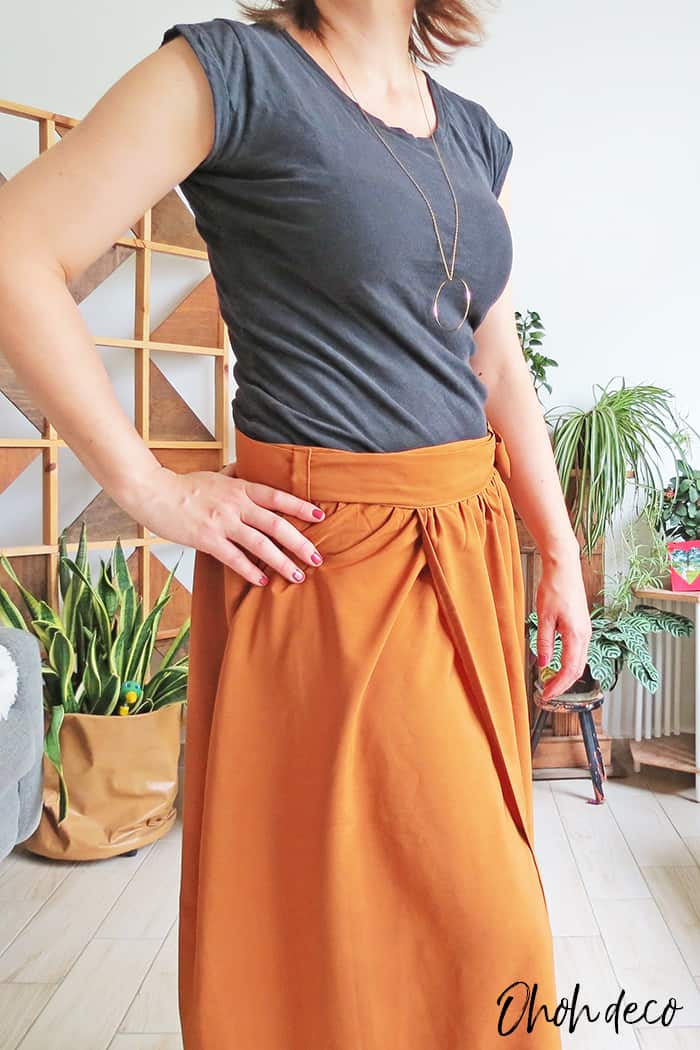
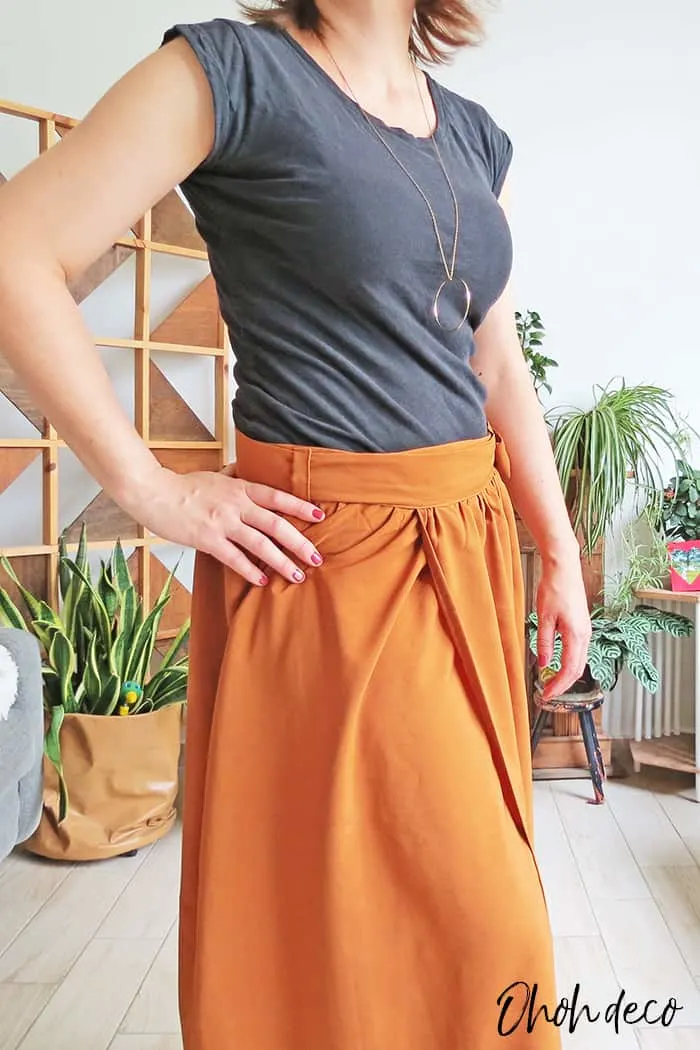

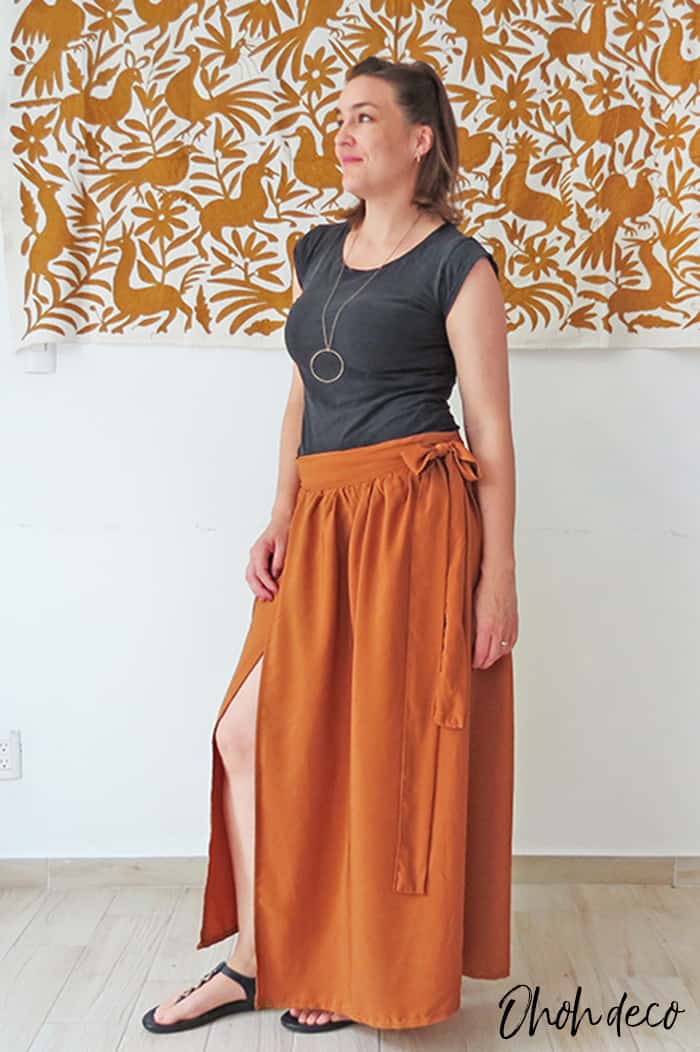
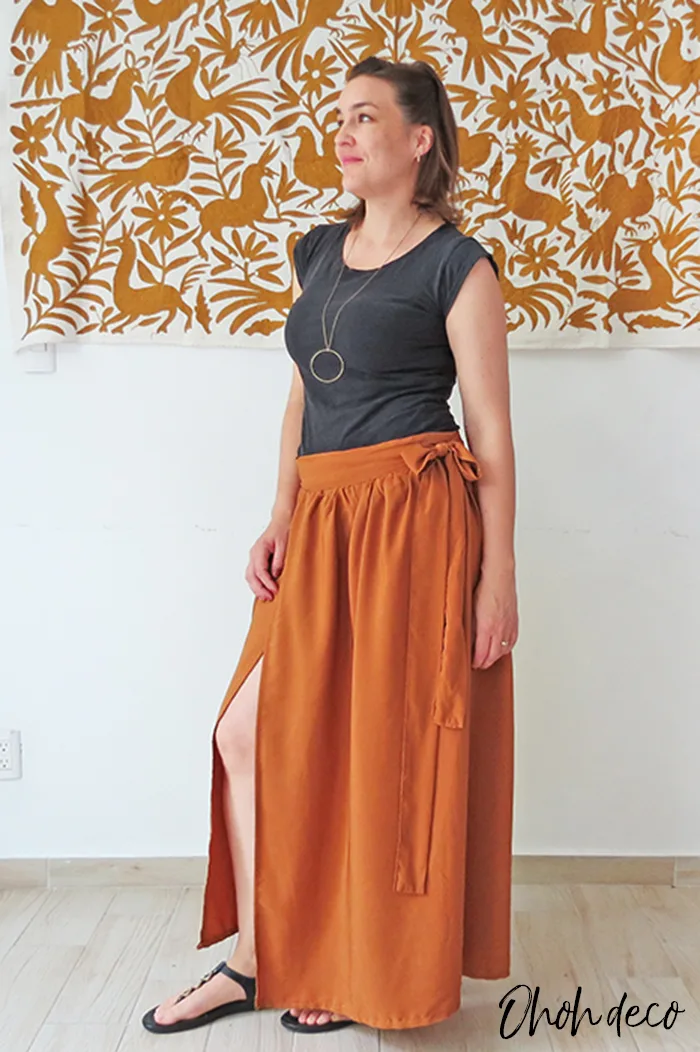
It’s a very comfortable skirt to wear, and the front overlap nicely so even when you sit you can keep your legs covered. Well, I prefer it that way. You wear it as you like 😉


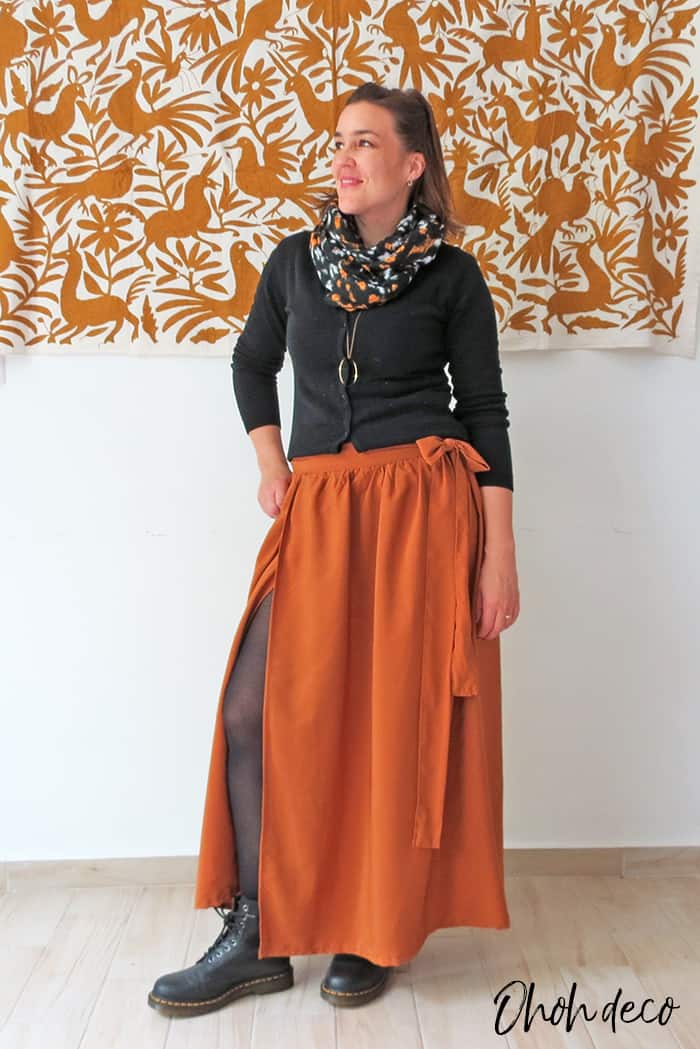
You can also wear the skirt with a sweater and a scarf. So depending of the fabric you choose this easy skirt is also wearable in autumn and winter.

And when my outfit match with my home decor and my dog…I take one more picture!


I hope you will enjoy sewing this easy skirt!
Want to remember it? Save How to sew a Skirt on your favorite Pinterest board.
Amaryllis
Stephanie
Friday 3rd of January 2025
I've been looking at wrap skirts and I'm not a sewist but wouldn't it be better to start with the largest measurement the hips?
Violeta
Wednesday 19th of June 2024
Your wrap skirt turned out so pretty, what a fantastic idea for a summer skirt! I wanted to drop a quick message to let you know that I’ve featured your tutorial on Crafts on Display, hope you enjoy it! https://craftsondisplay.com/sewing/easy-wrap-skirt-tutorial-114932/
amaryllis
Thursday 20th of June 2024
Hello Violeta, Thank you for featuring the skirt tutorial on your page!