
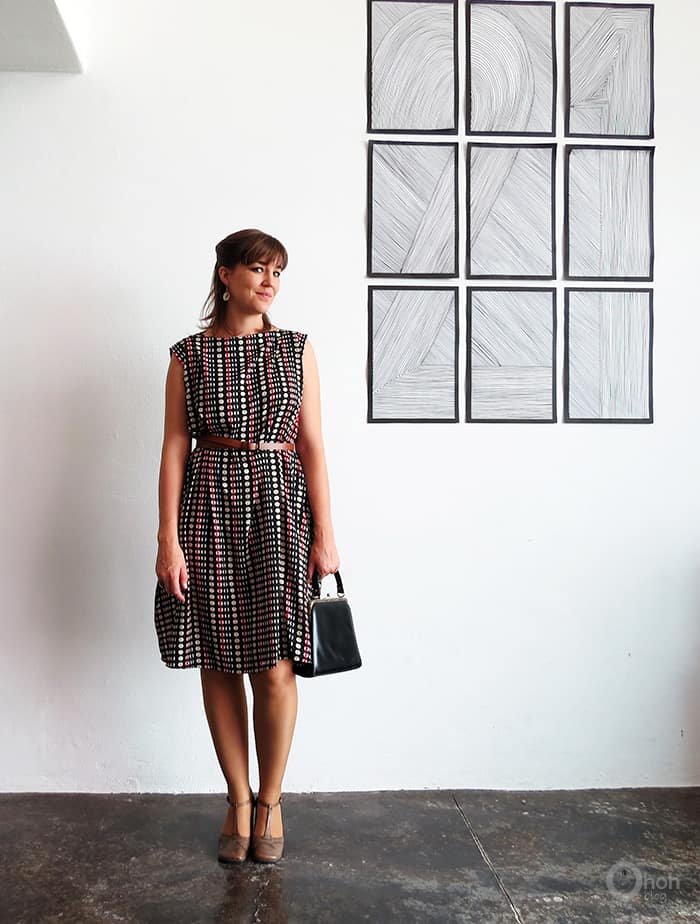
When I purchased this fabric, I was thinking of using it to make some wall art in my bedroom. Once back home, I realized that the pattern wouldn’t match in the room.
I guess I was just looking for an excuse to buy this nice fabric coupon!
Anyway, the dotted pattern and the vintage colors will work perfectly for a dress. I like sewing clothes for myself even if I don’t do it very often.
Most of my sewing projects are for the home: A one-hour floor cushion, a cloud potholder, or some fabric baskets. It’s quicker than sewing a garment piece.
Whether it’s for the few clothes I sew or the home decor accessories, I really have to think of adding some hang tag to my next sewing project, it will make it more special.
Online, you can design by yourself hang tags the way you want, it seems quite simple. Did you ever try?
I made this simple dress without a pattern. As you liked the easy shirt sewing tutorial, I tried to work the same way: simple shape and easy sewing. I hope you will enjoy it!
[ This post probably contains affiliates links, our full disclosure policy is really boring, but you can read it HERE ]
The easy dress sewing tutorial
Materials you will need to make your dress:
- Fabric
- Thread
- Pins
- Fabric scissors
- Tape measure
- Sewing machine
I choose some light fabric, it looks like lycra but it’s not stretch (I can’t remember the name).
I bought a 7 feet long coupon. This dress is adaptable to the length you want to wear, from a mini shirt to a maxi dress.
RELATED: Easy shirt sewing tutorial
RELATED: How to sew a succulent pillow
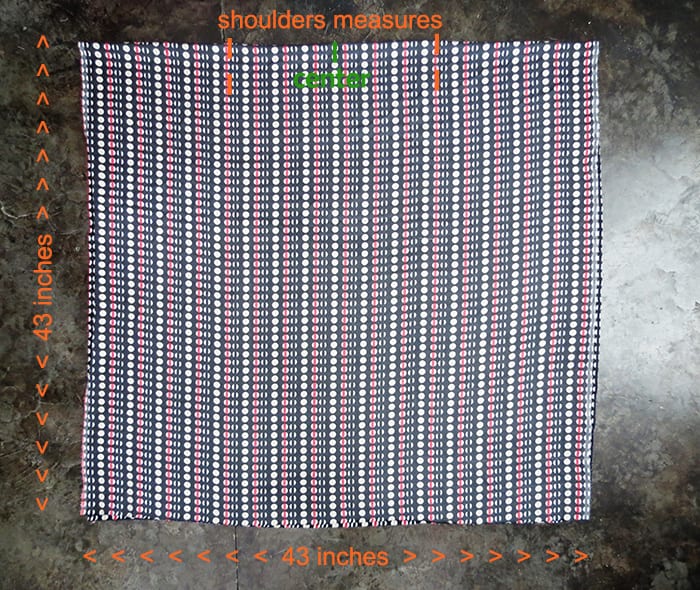
First, you need to take your shoulders measurements (aka the distance between your shoulders).
Fold the fabric in the middle lengthwise, and mark the center with a pin. Report your shoulders measurements, centering them on the fabric.
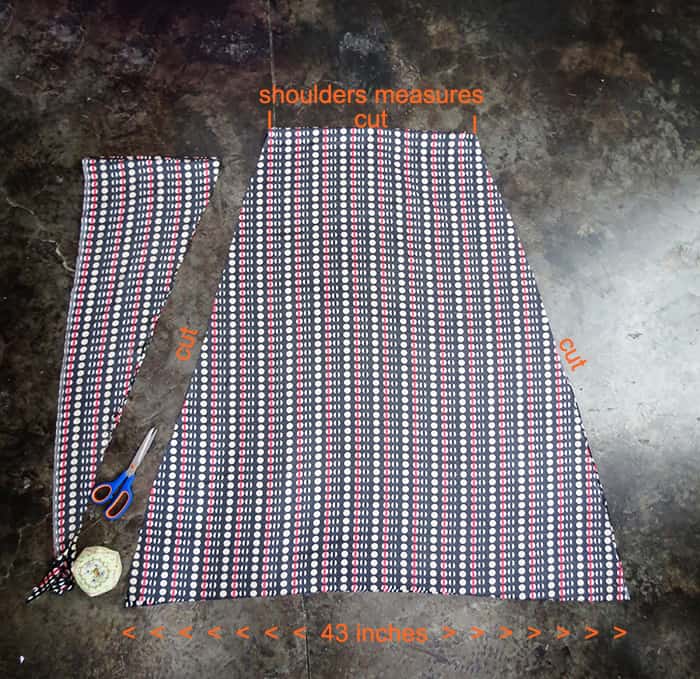
To make the trapeze shape, trace two 2 oblique lines on each side.
Each line will join the shoulder measurement point and the fabric edge. Cut along the lines.
Use your first trapeze as a pattern. Place it on the fabric, pin, and cut to have a second identical trapeze shape. Serger all edges.
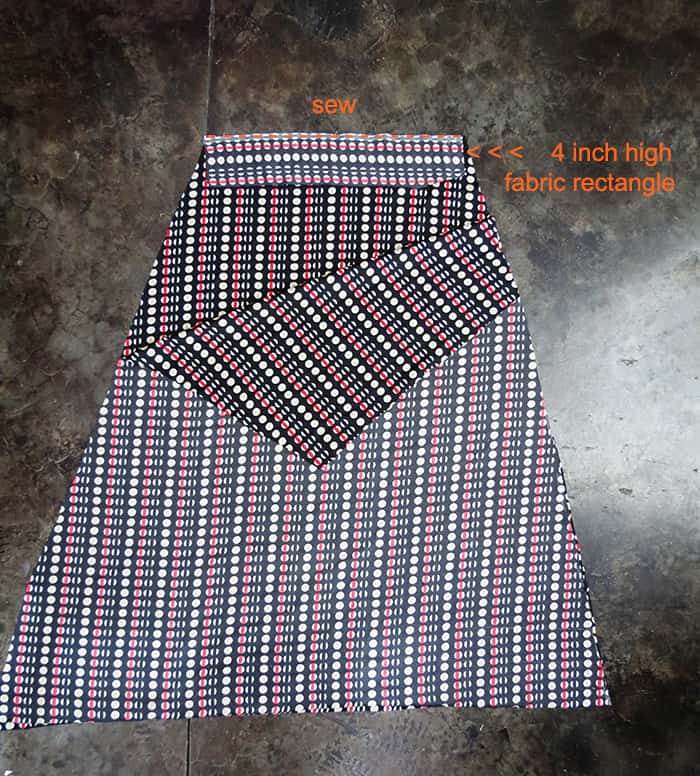
In the scrap fabric, cut two rectangles, the same length as the top part and 4 inches high. Serger the edges of the rectangles.
Pin one rectangle on the trapeze top side, right side on the right side.
Make a seam on the top part to sew both pieces together. Repeat the same on the second trapeze piece. Iron the seams.
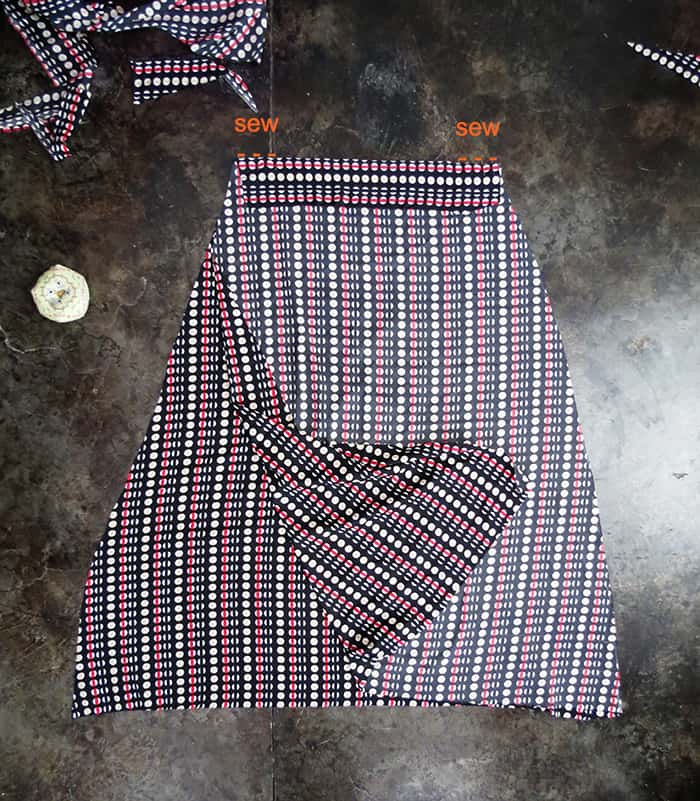
Put the two trapezes on top of each other, right side on right side.
To sew the straps of the dress, make a 2 inches seam on each side, as close to the edge as possible.
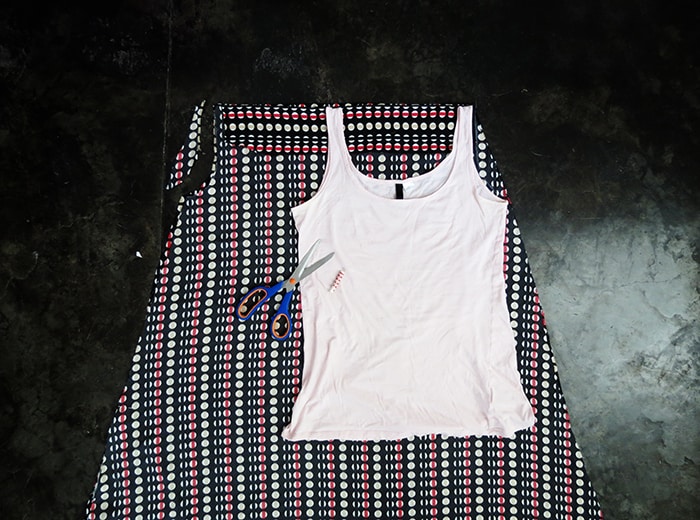
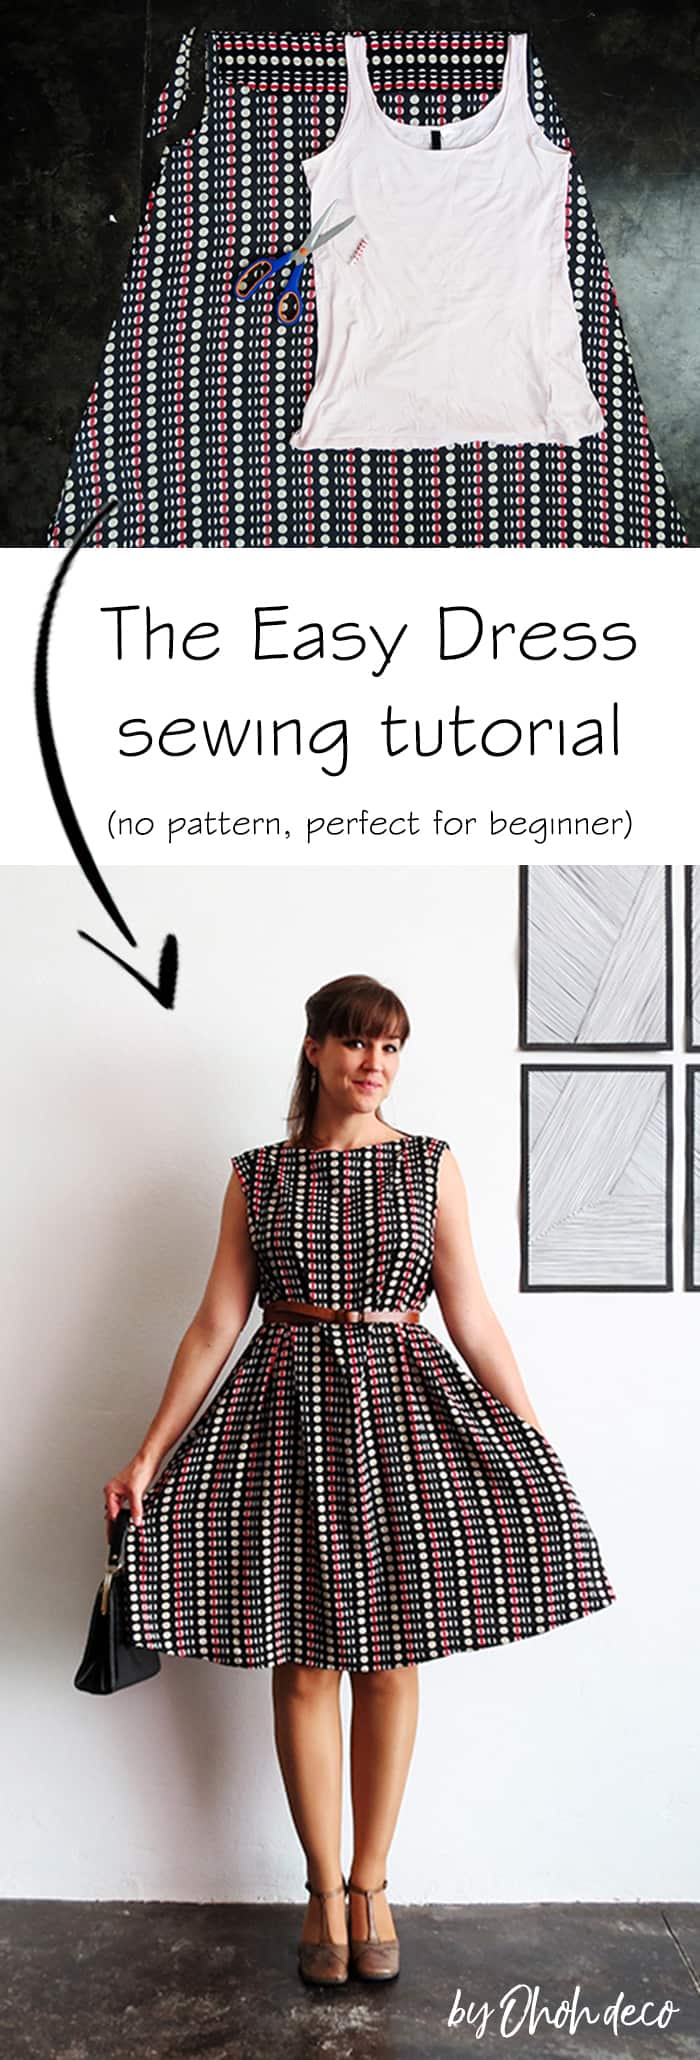
Grab one of your tank top to make the arm openings. Place the top on the fabric and report the shape on one side then on the other. Cut out the shape on both sides.
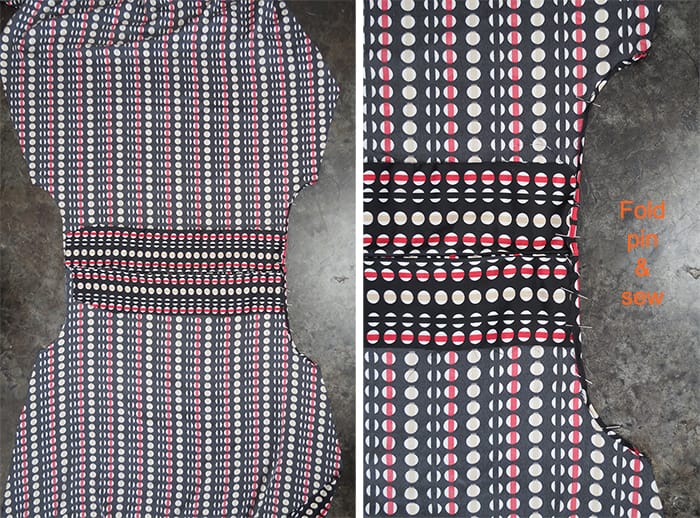
Open the dress and fold the fabric on the arm openings. Pin them and sew them.
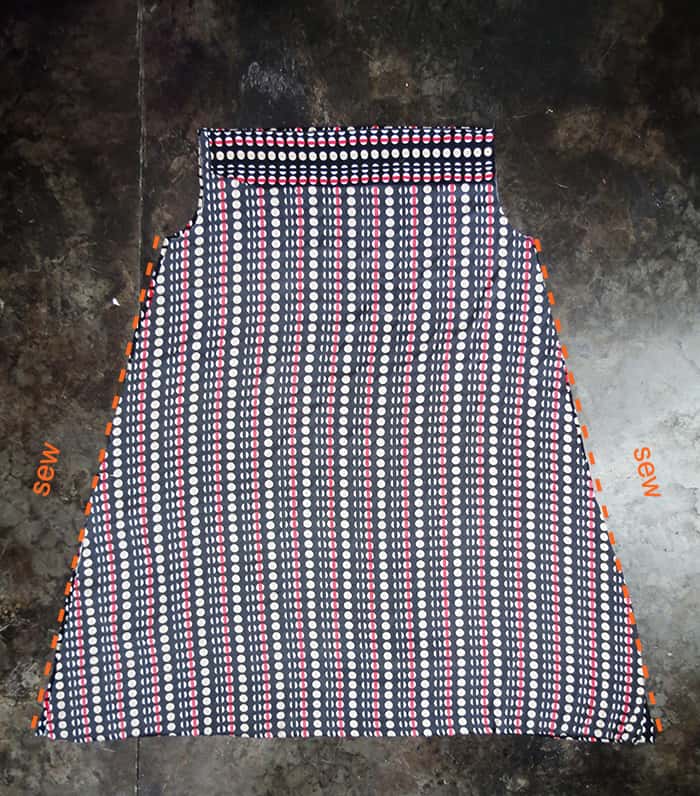
Put back the two dress part on top of each other and sew the edge together.
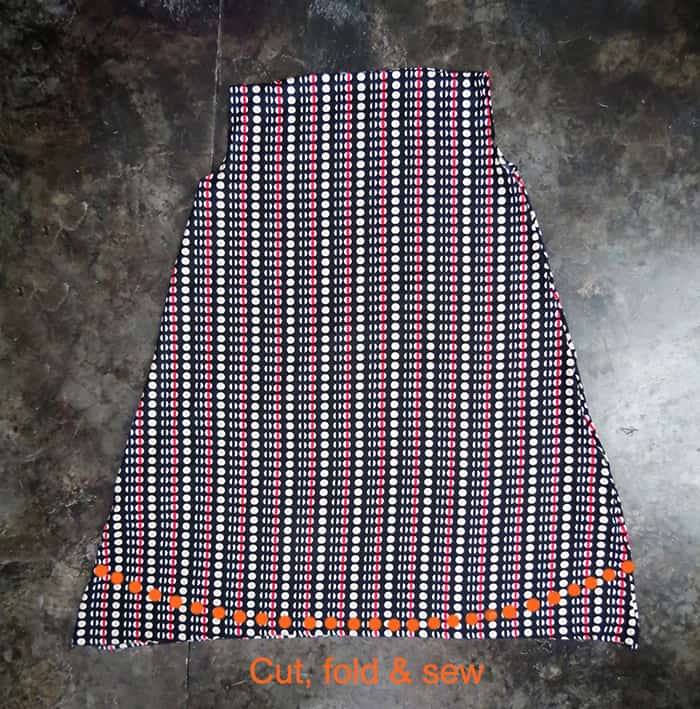
Almost done! The last thing is sewing the bottom edge.
The easier is wearing the dress and ask someone to draw the bottom line on the fabric, at the high you like to wear it. Cut a little below the line, make a fold and sew.
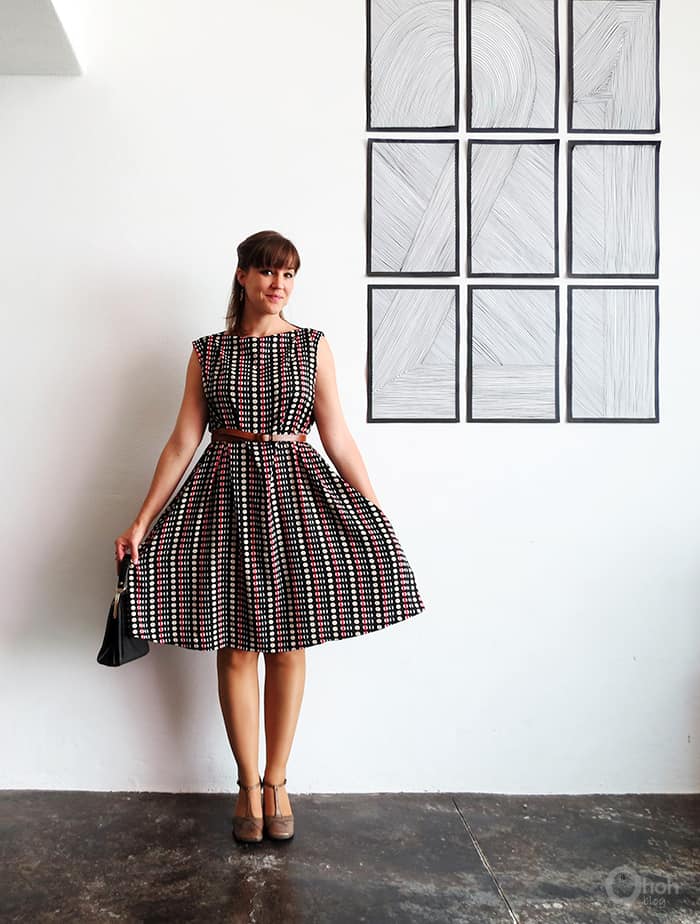
Put the dress on, and wear it with a belt to mark the waist!
RELATED: 41 Easy Sewing project ideas for Summer time
RELATED: How to Sew a Skirt
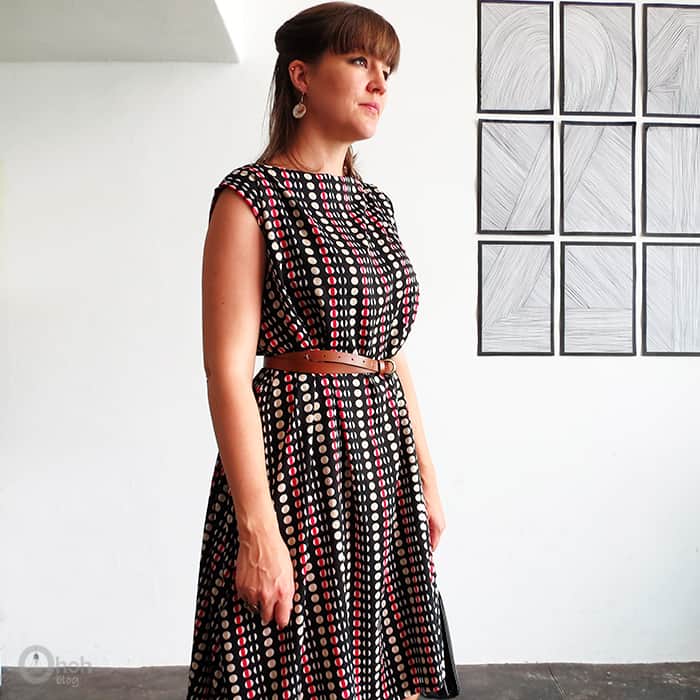
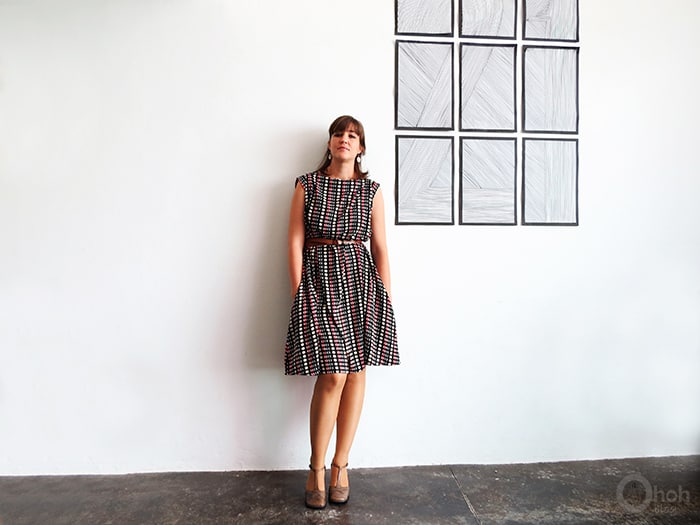
I choose to add pockets to the dress. I had to make several attempts to position them correctly. It wasn’t as easy as I thought.
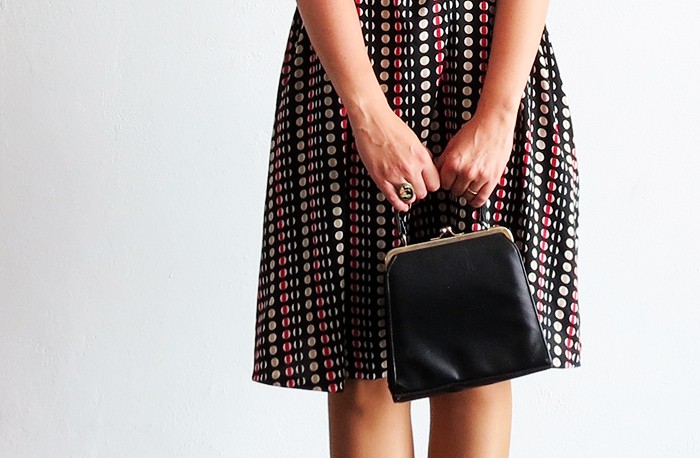
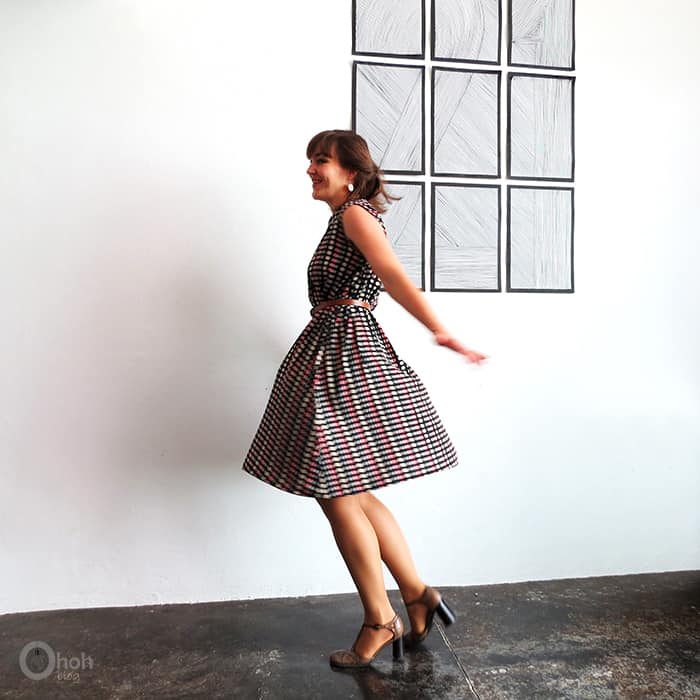
Want to remember it? Save this Easy Dress sewing tutorial on your favorite Pinterest board.
I love the fabric Annie choose to make her dress, so lovely!
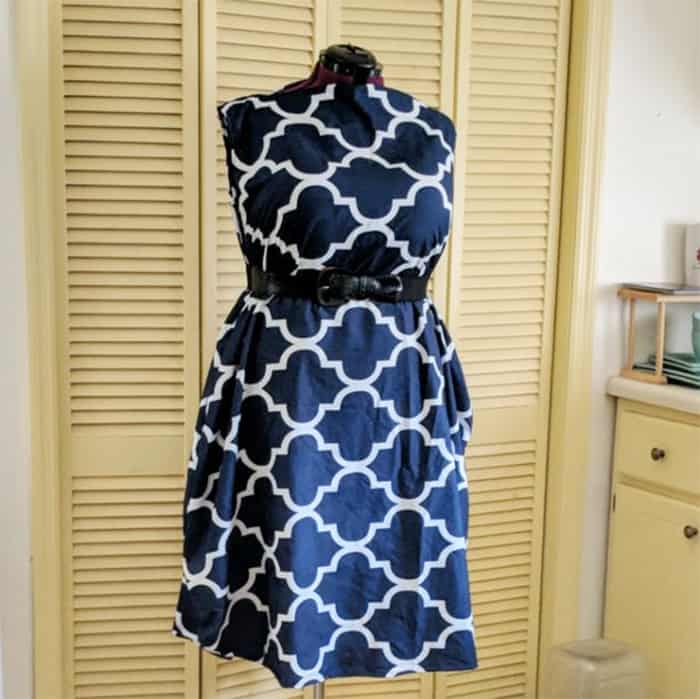
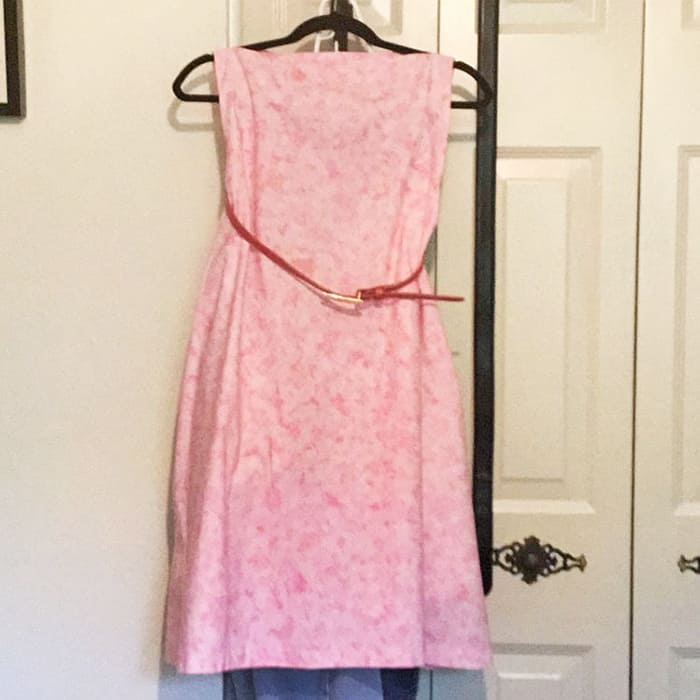
Look at the cute dress Ana made!
You will find all the tutorials featured in the video on my “Best DIY” page.
You may also like this project:

Adorable! I love that you put in pockets. Great work!
Thanks kath. I had a hard time sewing the pockets but I'm happy with the result! Every dress should have pockets…so useful!
thanks for the instructions – you made it look so easy. Irene from Brazil
Hello Irene, I'm glad you liked it! Have fun sewing!
Cute dress, easy to make, I'm going to have to give this a try! Thank you
You are right, very easy to make! Enjoy sewing it!
super easy! Thank you for sharing your instructions and pictures – I have to sew one dress immediately!
Greetings from Austria!
Have fun sewing!!!
One of my all time favourite dresses completely died after many years of use, so I cut up the good parts for scrap stash and hung on to the pockets (which hung loose inside ) I have pre made pockets! I just trace the shape,sew and insert them into the side seam. Right at my wrist. Way too easy!
Very good upcycling idea! Thanks for the tip Margaret
This is a gorgeous dress. I am thinking of making it breastfeeding friendly… do you think that would be possible?
Hi Beck, maybe if you put some buttons on the shoulders straps? The dress top is wide enough to easily be unbuttoned. Let me know how it works.
I love it. Will be making one soon.
Greetings from Victorville, CA.
Thanks Marifer, have fun sewing!
Good job Ama, you're the best….Magali from Qro
Hi Ama, lovely shoes as well, where are they from? Thanks, Kirstie.
Hello Kristie, I bought those shoes like 15 years ago…I guess they are kind of vintage now 😉 They are still in good shape because the heel is quite high and I don't wear them very often!
Bonjour Ama!
Je viens de découvrir ton blog car je cherchais une jolie robe à coudre moi-même et que j’ai flashé sur la tienne!!
Et en regardant ton blog j’y ai également trouvé d’autres beaux projets qui se trouvent désormais sur ma to do liste !! Merci pour ce partage !!!
J’ai lu que tu vivais au Mexique avec ta famille – wow !! Est-ce que vous vous y plaisez ? Est-ce que ton mari est Mexicain ?Je trouve ca génial, car c’est très enrichissant, et du coup les enfants doivent eux aussi parler plusieurs langues ?! Pour ma part je suis Francaise, marié à un Allemand, et nous vivons en Angleterre. Nos deux enfants parlent les trois langues, et je trouve ca super pour eux !
Concernant la robe, je voulais te demander quelques précisions stp. J’ai besoin de la faire d’ici début juillet.
1. Avant de mesurer la distance entre les épaules, je n’ai pas compris s’il fallait plier le tissu en deux dans le laize de facon à mesurer et couper les deux trapèzes et ainsi obtenir le devant et le dos en une seule fois, ou bien as-tu fait l’un après l’autre ?
2. Je comprends bien le vocabulaire de ce que tu dis là: “Trace a line between the shoulders measurements point and the fabric edge. Cut along the line. Repeat on the opposite side. Cut along the fold to have two trapeze shapes. Serger all edges. »mais de quelle « opposite side » s’agit il ? Et de quel fold ?
3. Faut il prendre les instructions et mesures telles que tu les donnes ou y a-t-il des marges de couture à rajouter, et si oui où ? (je pense que non mais je voudrais être sûre). Qu’en est il des facing (rectangles pour les deux parties correspondant au col) ?
Et toi qu’as-tu pris comme marge de couture ?
4. “To sew the straps of the dress, make a 2 inches seam on each side.”: À combien de distance du bord conseillerais tu de coudre?
5. Et pour l’ourlet du bas, on voit sur la photo que la coupe est arrondie. Si je coupais droit, cela modifierait t’il le résultat final de la robe ?
Je te remercie mille fois pour tes conseils !!
À bientôt !!
Laurence xx
Salut Laurence,
Waouh, trois langues pour tes enfants c'est quand même impressionnant! Merci pour tes commentaires, j'en ai profité pour détailler un peu plus le tutoriel….en espérant que ça clarifie les explications.
Voici les réponses a tes questions, j’espère que ça t'aideras:
1. Tu plies le tissu en deux pour être sure que la mesure des épaules est centrée sur ton tissu car tu vas employer toute la largeur pour le bas de la robe.
2.En fait j'essaye juste d'expliquer comment tracer le trapèze. Il faut tracer deux lignes obliques, qui relie les mesures des épaules et les coins inférieurs du carre de tissu. Ensuite tu emploies ton premier trapèze comme "patron" pour en découper un second identique.
3.Les marges de coutures sont comprises, mais les mesures sont a adapter en fonction de ta taille. J'ai fait des coutures de environs 1 cm.
4. Le plus près possible du bord.
5. Si tu le fais droit ça va être moche, l'ourlet de ta robe ne sera pas droit (plus long sur les cotés).
Bonne couture, A+
This dress came out so well…love it…classy! I do want to make this. Thanks for sharing! 🙂
This is such a classic dress. There are a plethora of ways to make this dress with fabric.
Thank you very much.
Wonderful dress, I'll try it! 🙂
One question though. Zippers are not needed at all? Is it easy to put on/off the dress? You mentioned that the fabric is not stretch.
Thanks, Zsofi
Hello Zsofi, The dress is loose enough and you don't need any zipper to easily put it on and off. And it's nicer to wear it with a belt to mark your waist. Have fun sewing!
I tried this but unfortunately I took soo much out of the arm section and my my head doesn't fit.Trying to figure out how I can salvage it. Or maybe make a new one as this was so easy to follow.
Hello Diane, Too bad it didn't work, maybe you can turn you first attempt into a skirt and try to sew the dress again with a new fabric coupon? Let me know how it turns out!
Thank you for the clear instructions and pictures. Love it. Will be making this! Thank you for sharing.
Done!! My first ever hand sewn dress! I just have to find a belt that works with it (or make one?) The only adjustment I made was to use my leftover fabric and cut out the top twice as a lining, since the fabric I used is very thin. I also felt it would be easier than folding and pinning and sewing the seams. It worked like a charm. zip zip done. And the upper part of the pattern should work great as a flowing A-line top for those 1-2 yards of fabric I found the other day.
Thanks so much Ama for taking my sewing to the next level!
I’m so glad you made a pretty dress! I would love to see a pic, you can send me an e-mail at [email protected] if you like to share it!
Yay I finally made this – it has been sitting in the “to make” section of my brain for ages!! My son was busy playing minecraft so I thought I’d just get on with it and am really pleased with the result. Absolutely love that this has no darts, zips or anything complicated and love how the belt just pulls it all together. I think I’ll add some pockets next time. Thanks so much for sharing your tutorial.
Thanks for your nice comment, and good for you that you found time to sew for yourself.
Hi there, Ama,
I found your tutorial when looking for easy sewing tips for beginners and love it! I started sewing couple of weeks ago and I have to mention here that I do not come from a family where sewing was a thing. So, I have to rely on ma pitiful will and a bit of luck:)
I would love to sew this one for a friend who is a very voluptuous girl, I guess size XL and I would like to ask you how can I adjust the measurements in order to make it fit her. I found a great fabric in a nearby shop but have NO idea how much of it I should get.
Many thanks and greetings from Prague!
Klara
Hello Klara, The easier would be to take her measurements, shoulders, hips and the distance between shoulders and knees (if you want the same dress lenght as I did)! Or maybe you can work using one of her shirt as reference for the shoulder measures… So the top of the trapeze shape must be her shoulder measurement. The high of the trapeze must be the distance between the her shoulders and her knees. And before cutting the trapeze you will have to verify that it’s wide enough for the hips. So check the width of the trapeze at half height, it should be a little more than half of the measurement you took for the hips. It’s possible that you will end up with a larger base trapeze that the one I did. As reference I’m a size 40. I hope this will help you. Let me know how it turns 😉
haha, not pitiful but pitbull will:)
Can anyone suggest a specific fabric that worked well with this pattern? I would like to try it, but I don’t have much knowledge of fabrics. Thanks!
Hello Anna, I would suggest a chiffon or crepe fabric…just keep in mind your need a soft hand and fluid drape when choosing your fabric.
The dress is so cute and you look gorgeous! Thank you for sharing!
Thanks for your nice comment Janna!
I really can’t wait to try this! But one question: Can i use a harder fabric. I bought way to much and want to make a dress out of it.
Hello Emma, I guess it depend how hard is the fabric…you may not have the same finish and you will probably have thicker folds on the waist.
Hey there!
My name is Stephanie from the US (east coast).
I am currently having some trouble with understanding the measurement of the shoulder length. How do I center my shoulder measurements onto the fabric? So from shoulder to shoulder going across my measurement is 18 1/2. How do I center that onto the fabric?
Hello Stephanie, mark the center of your fabric and report 9 1/4 (which is half your 18 1/2 shoulder measurement) on each side of the center mark. And done, you have your shoulder measurement reported on your fabric. I hope it makes sense and helps you to make your dress.
Thank you so much for this pattern! I made it as my second ever sewing project and it turned out perfect! So much fun to make and simple!
Anyway to make the neckline not pucker? Used cotton and this pattern is not working
Hello Kaitlin, As the neckline is straight the fabric will always pucker a little. It works great with thin fabric. Cotton is thicker and stiffer, so maybe you can cut the neckline with a slightly rounded shape so that the fabric does not crease when you wear the dress.
Thanks so much for this free tutorial and pattern. I’m a bit of a sewing hack so I appreciate the casual instructions! It’s getting hot here in Vancouver, Canada, so I’ve been wanting to sew myself a new dress! I made the dress using a bit of a stiffer cotton and found it to be a little strange at the neckline – cutting into my chin! So I put on my fashion designer hat and have been going wild! I added darts at the side of the chest, swept the skirt across from the left at the waist and pinned it just under the right breast, and cut an off centre collar that hangs down in front (to solve the awkward neck problem). A few more embellishments and I’ll be ready to wear it out! Thank you again!
Hello Laura, Indeed if the fabric is too thick the neckline will be straight and it will be neither pretty nor comfortable. I’m glad your tailoring skills were able to solve this problem. Hope you send me a picture of the finished dress! 😉
Thanks for sharing your feedback!
Ohhhh and I almost forgot that I wanted to add pockets! That will come next!
I made that dress. Thank you for the easy step by step guide.
Thanks, I´m glad you like it! You can tag me on IG if you post a pic of it 😉 @ohoh.deco