Lighting is an important element of the decoration. Having nice lamps makes all the difference.
It’s a beautiful decorative object and it allows you to create different atmospheres according to the needs of each room.
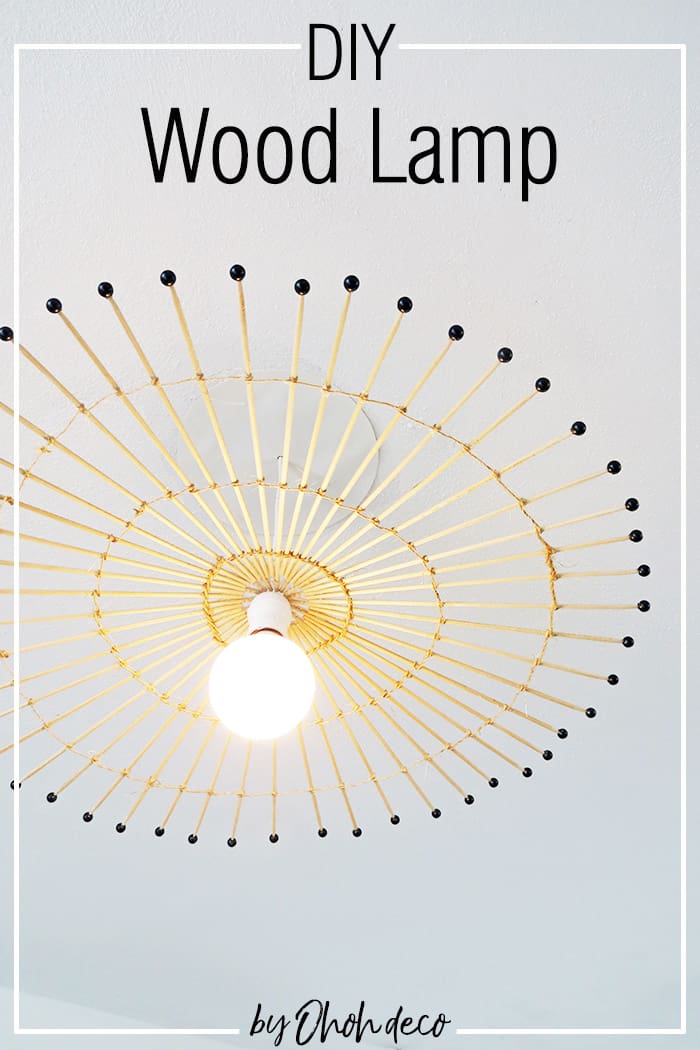
I will show you how to make a wood lamp. This DIY is super easy and doesn’t require any tools.
Indeed this lampshade is made with skewers and rope! Super simple I told you. Are you ready to craft?
[ This post probably contains affiliate links, our full disclosure policy is really boring, but you can read it HERE ]
Making lamps and lights is one of my favorites item to DIY. You can have a look at this post to see more DIY lighting ideas.
How to make a lamp out of wood
Supplies you will need to make a DIY wooden lampshade:
There are different sizes of skewers, I recommend you take long ones, like these.
And if you like to add a pop of color to the lampshade, you can try making it using these fun skewers or different wooden beads. These shaped beads will give a cute look at the lampshade, perfect for a kid’s room.
You get the idea, you can customize this lampshade as you like to give it your personal touch.
RELATED: Paper Lampshade DIY
RELATED: DIY Lampshade from scratch
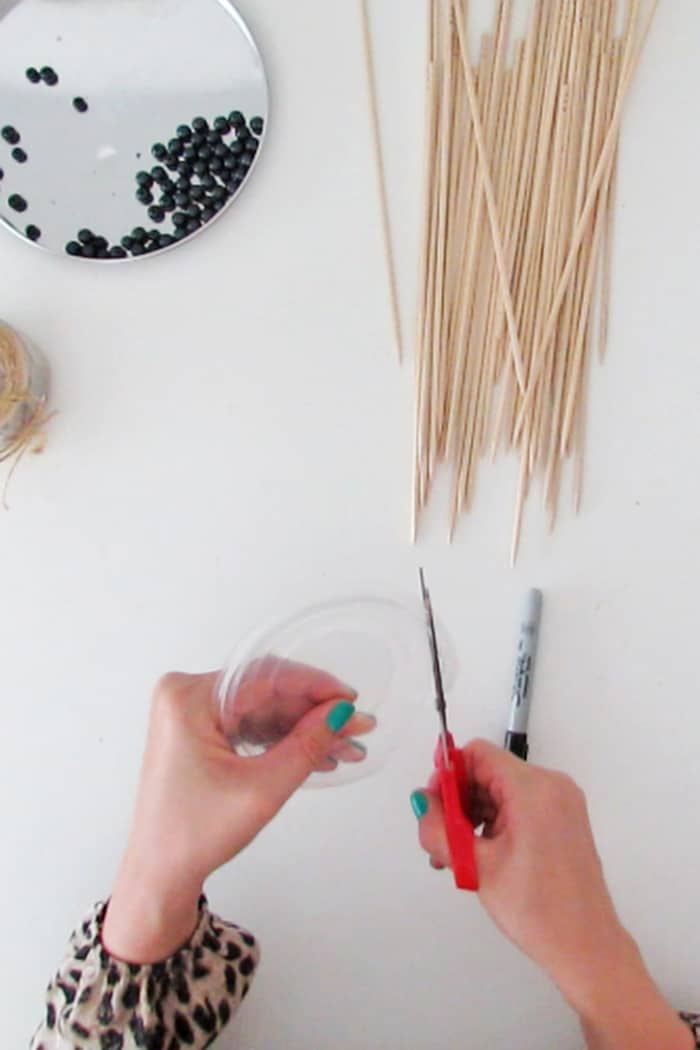
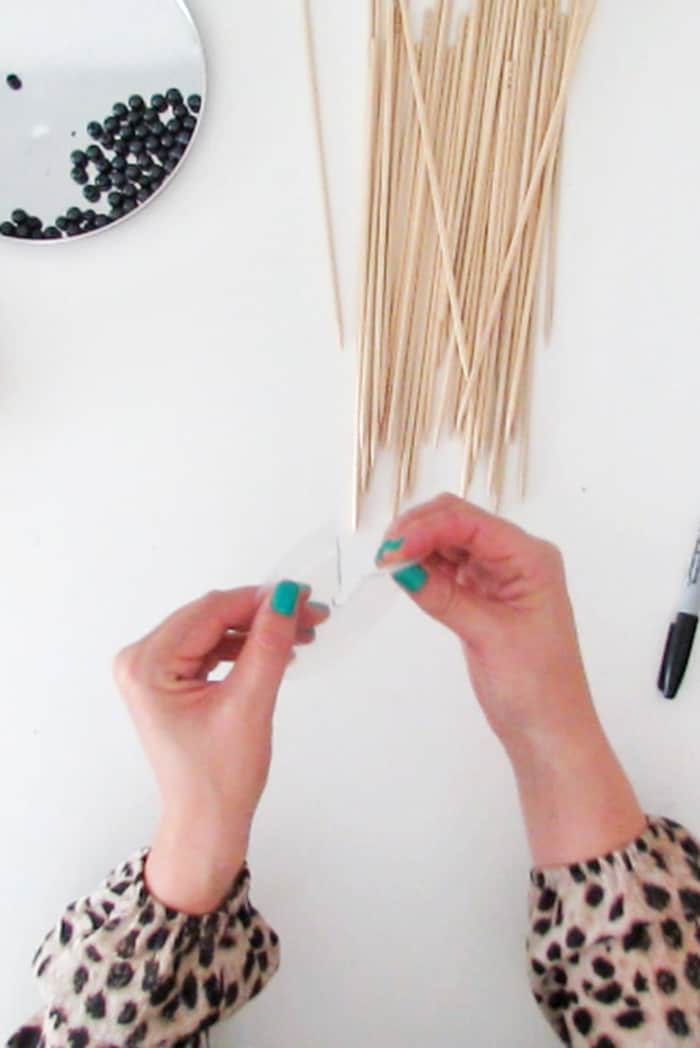
Take the plastic lid and cut the edge to have a flat piece of plastic. If possible work with a transparent lid so it doesn’t show that much once the lampshade is finished.
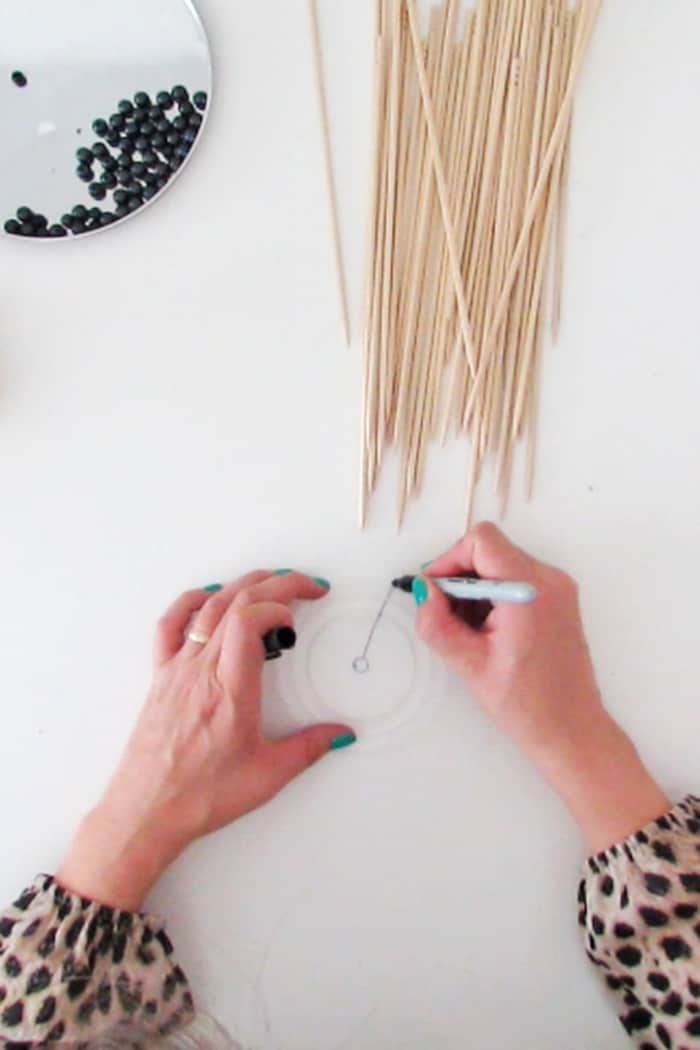
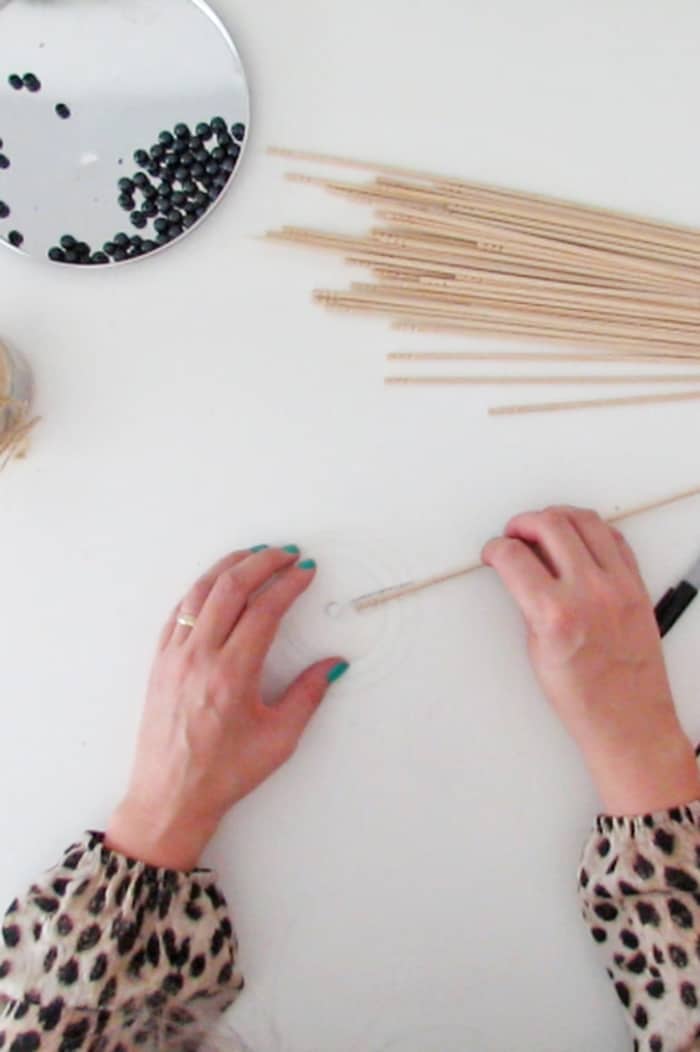
On the lid draw a small circle on the center and a line between the drawn circle and the edge. Cut following the lines.
You will pass the cable wire thought the cut and hang the lampshade placing it around the cable wire.
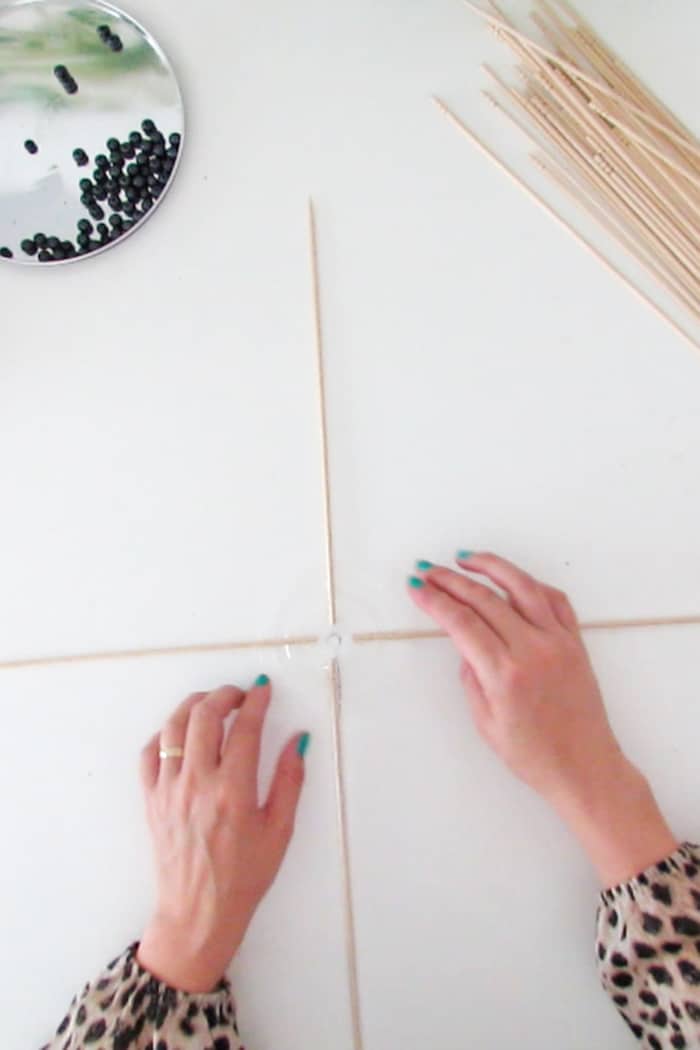
Time to glue the skewers on the lid to create the lampshade.
Start by gluing the first skewers along with the cut you made on the lid. Remember this cut must remain open so you can hang the lampshade.
All the skewers are glued with the tip side on the outside edge of the lampshade.
RELATED: Paper Lampshade DIY
RELATED: How to make a rope lampshade
Glue three more skewers to form a cross shape. The idea is to place the skewers evenly around the lid to have a homogeneous layout.
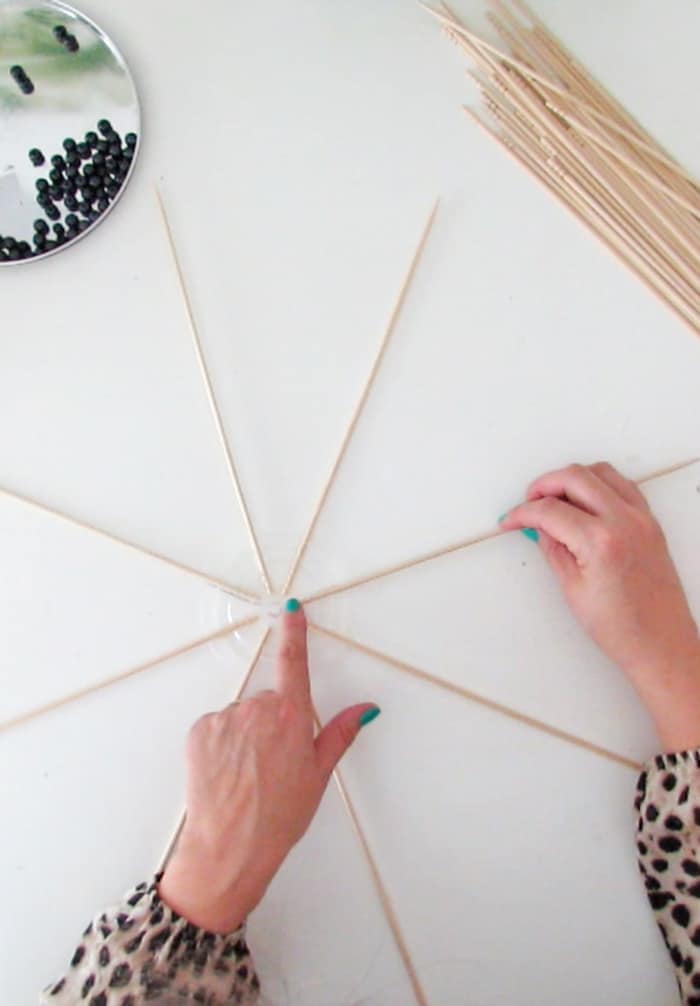
Using the glue gun, attach 4 more skewers on the lid. You now have 8 skewers glued.
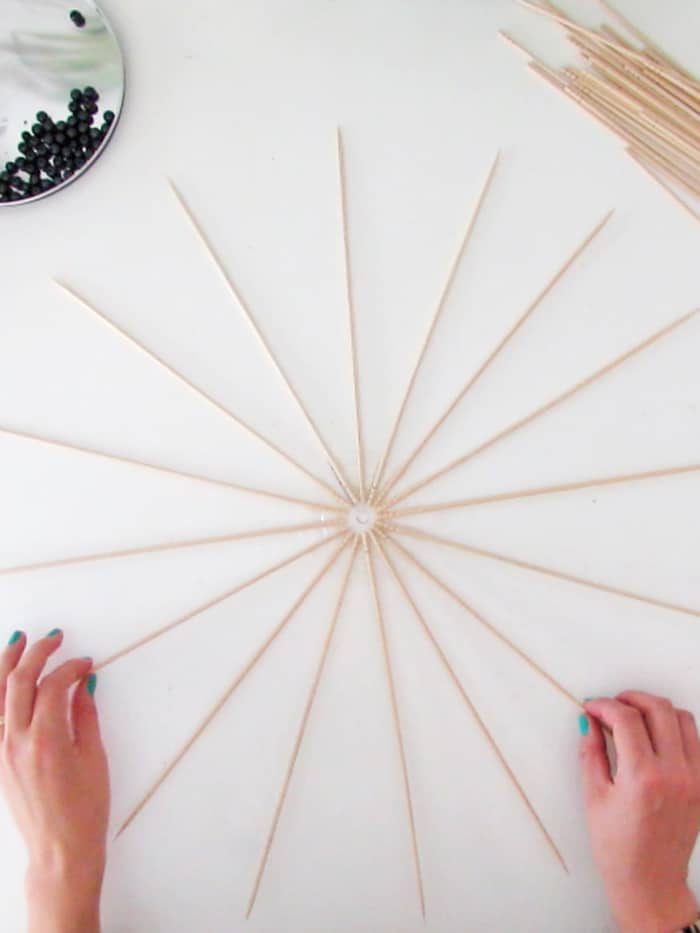
Glue 8 more skewers on the lid. And again place them evenly, center each new skewer between the ones all ready attach on the lid.
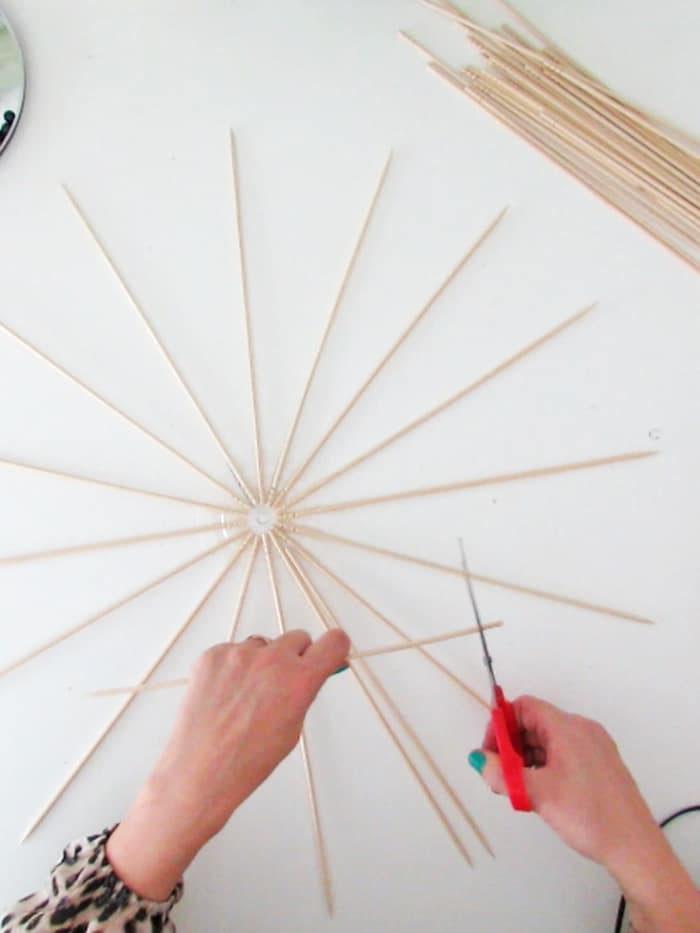
You still need to glue more skewers but before placing them on the lid you need to trim them a little.
We want the edge of the lampshade to have a nice circle shape, with all the skewers ends at the same distance. So you will need to cut the skewers top.
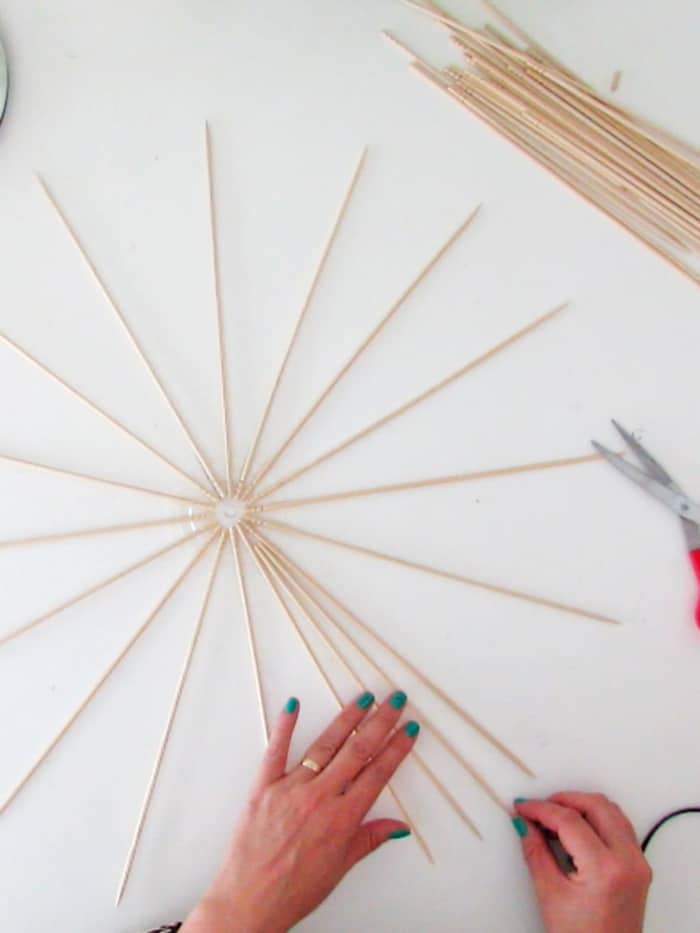
Trim the top and place two more skewers between each glued skewer.
Again check that all pieces are place evenly and that the outside edge of the lampshade have a nice circle.
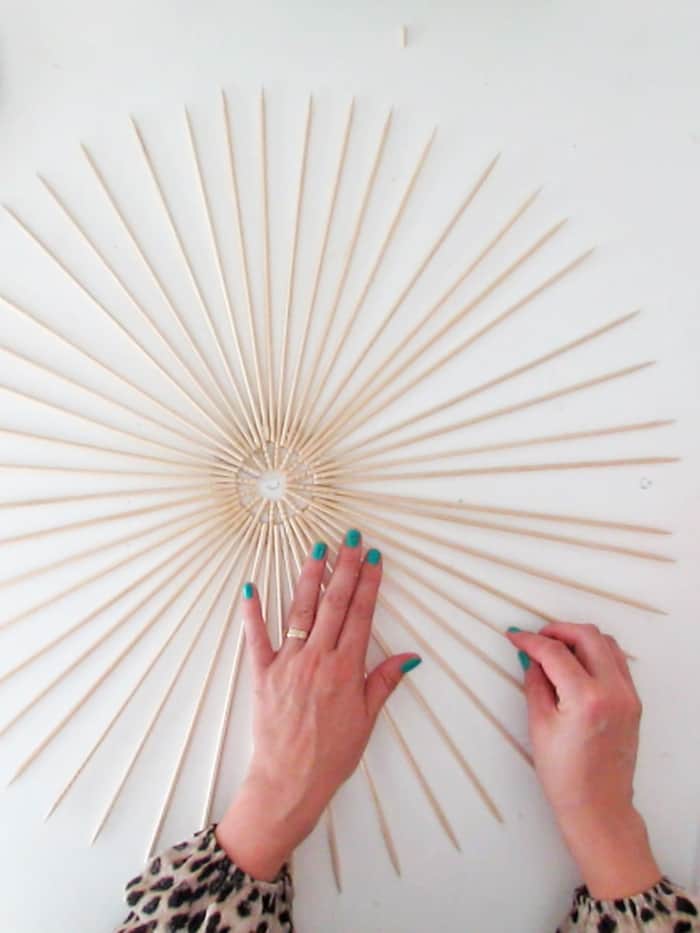
This is what your lampshade must look like at this point. As you can see you can still access the cut made on the lid to slide the lampshade around the wire cable.
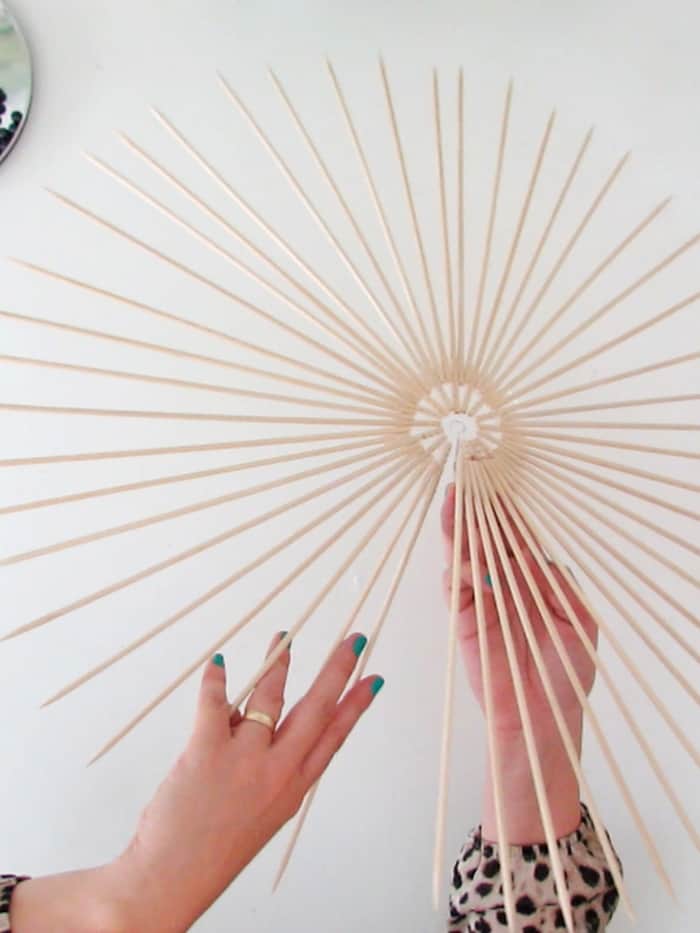
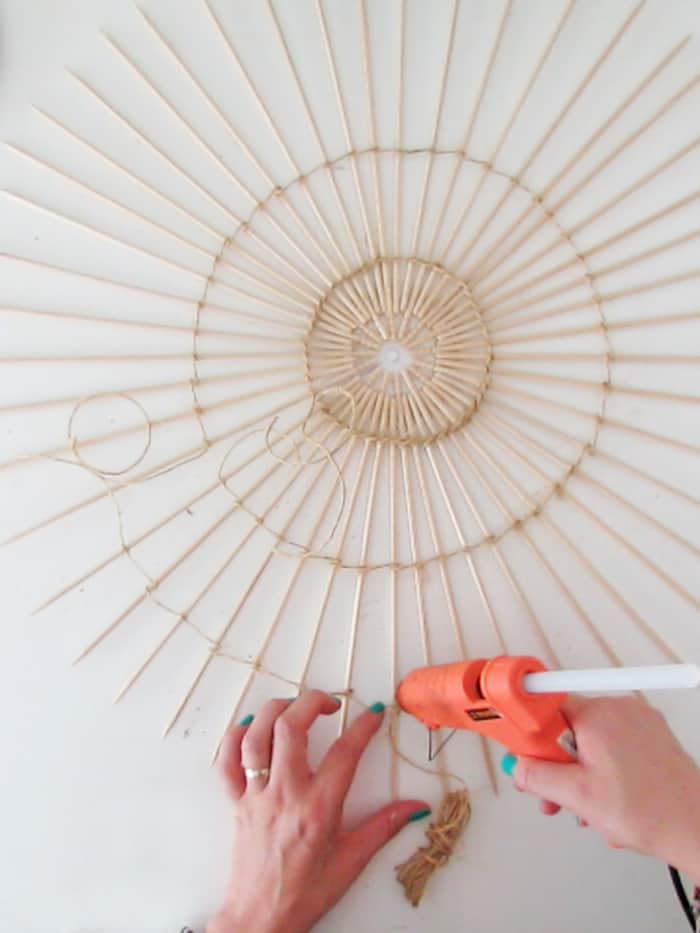
Time to wrap some rope around the skewers.
Take the skewer that is next to the lid cut. Attach the rope with a know on this skewer. Slide the rope knot next to the lid edge.
Let an extra rope lenght on one knot side, you will need it when hanging the lampshade.
Wrap the rope around each skewer, add a dot of glue every 2 – 3 skewers.
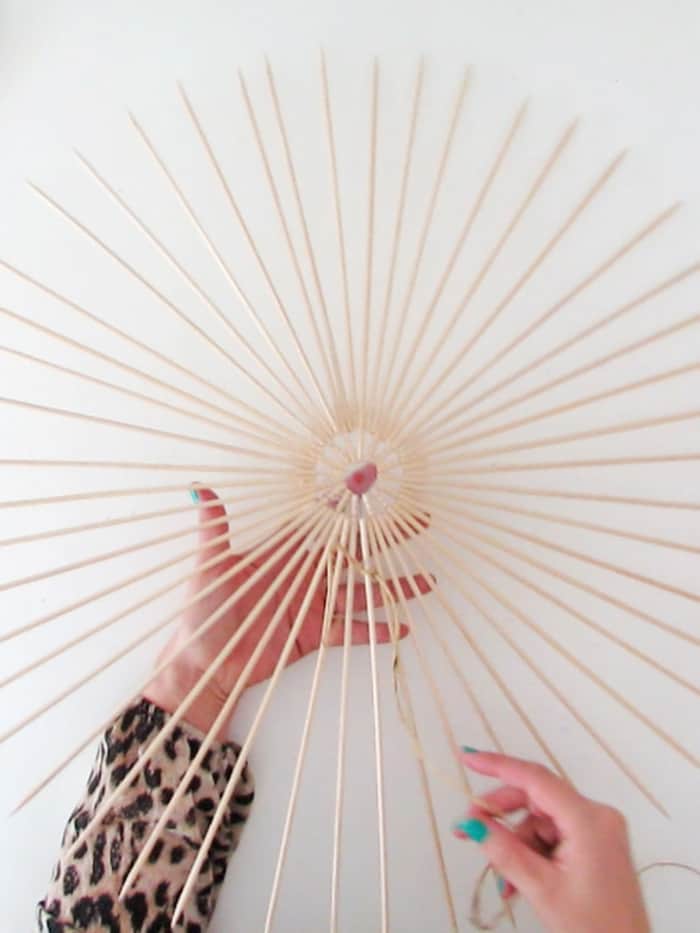
Wrap the rope around the lampshade and finish on the last skewer with a knot. Leave extra lenght of rope when making the knot.
Remember the lampshade must remain open so you can slide it around the cable wire.
Wrap a second row of rope. Start on the same skewer next to the lid cut by making a knot.
Then wrap the rope around the skewers, adding a dot of glue here and there. Finish on the last skewer with a knot, leaving some rope lenght.
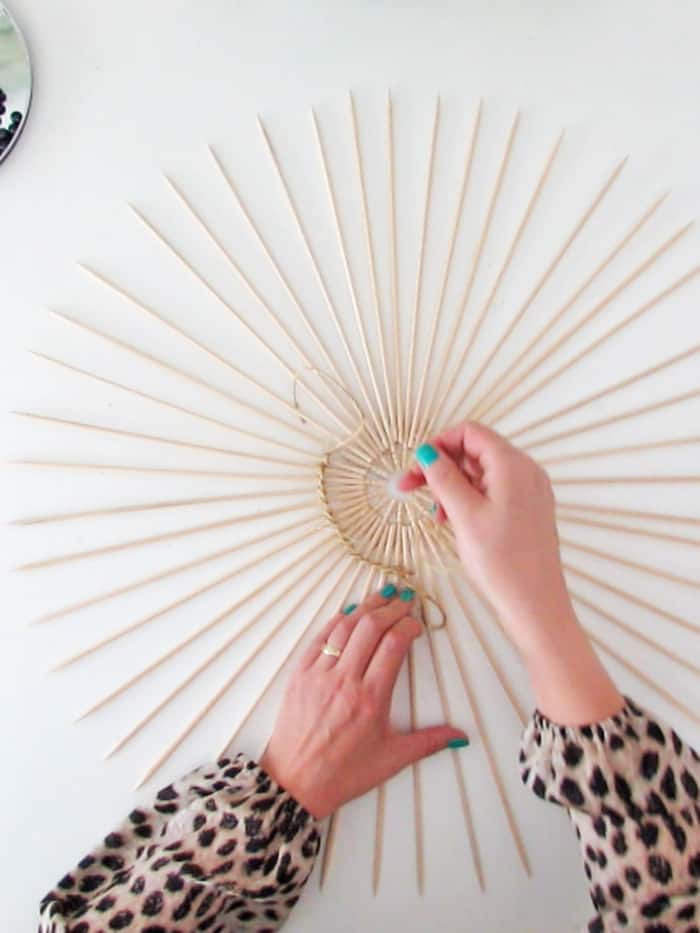
And again, make a third row of rope. Same as before, you start on the same skewers with a knot and then wrap the rope around each skewer.
As the distance is bigger you will have to add glue on each skewer to hold the rope in place. Finish with a knot.
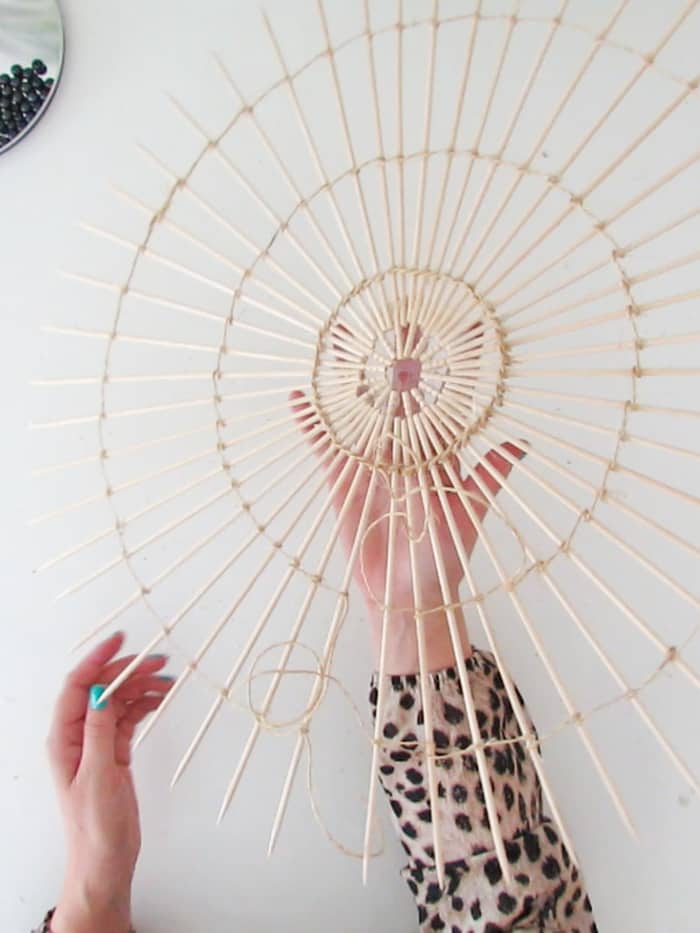
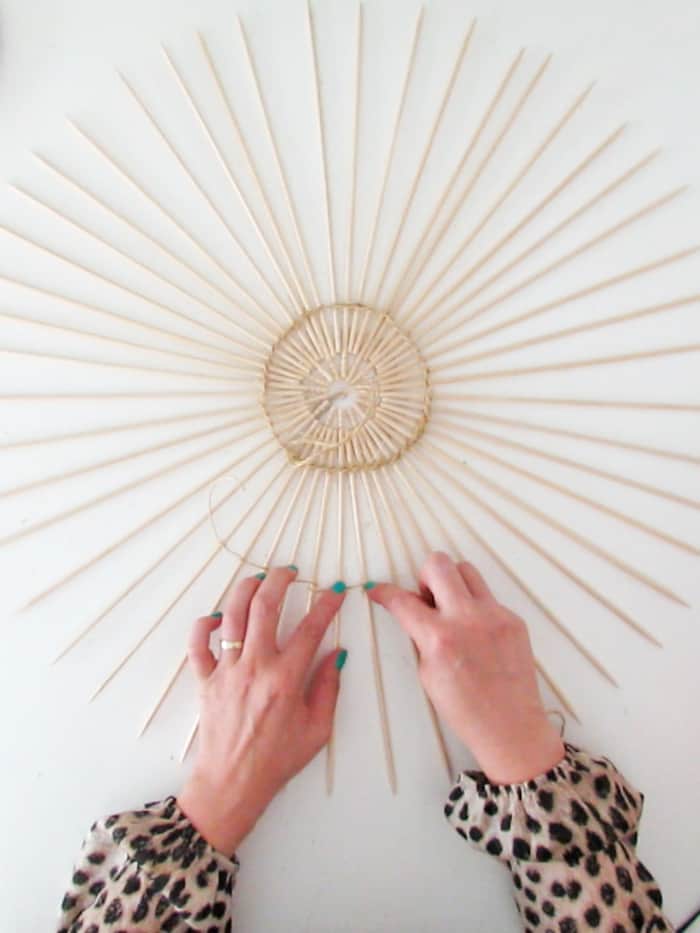
This is what your lampshade must look like at this point. As you can see one part of the lampshade is still open so you can place it around the cable wire.
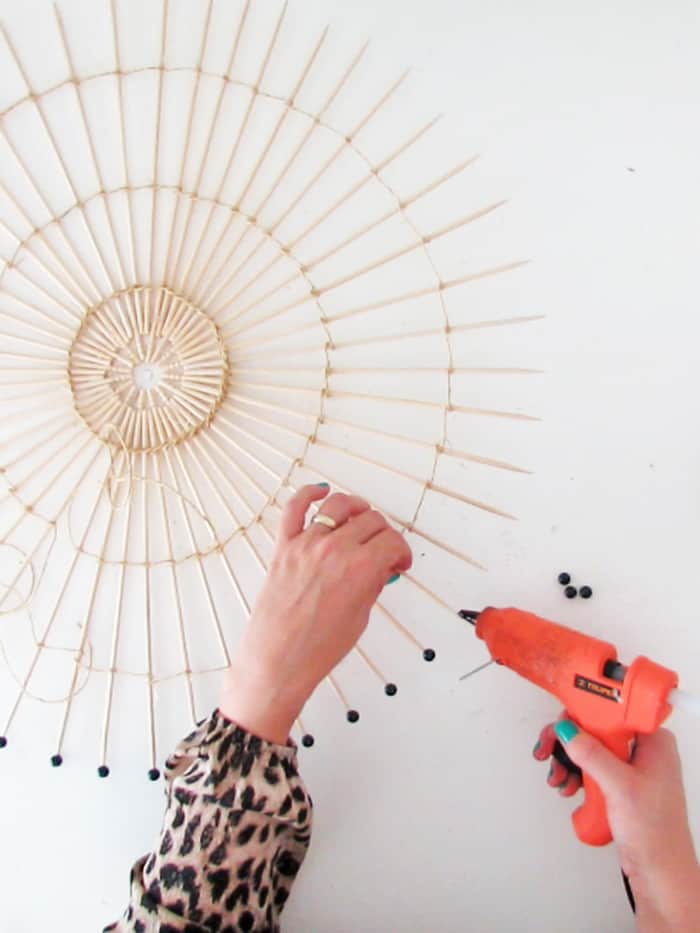
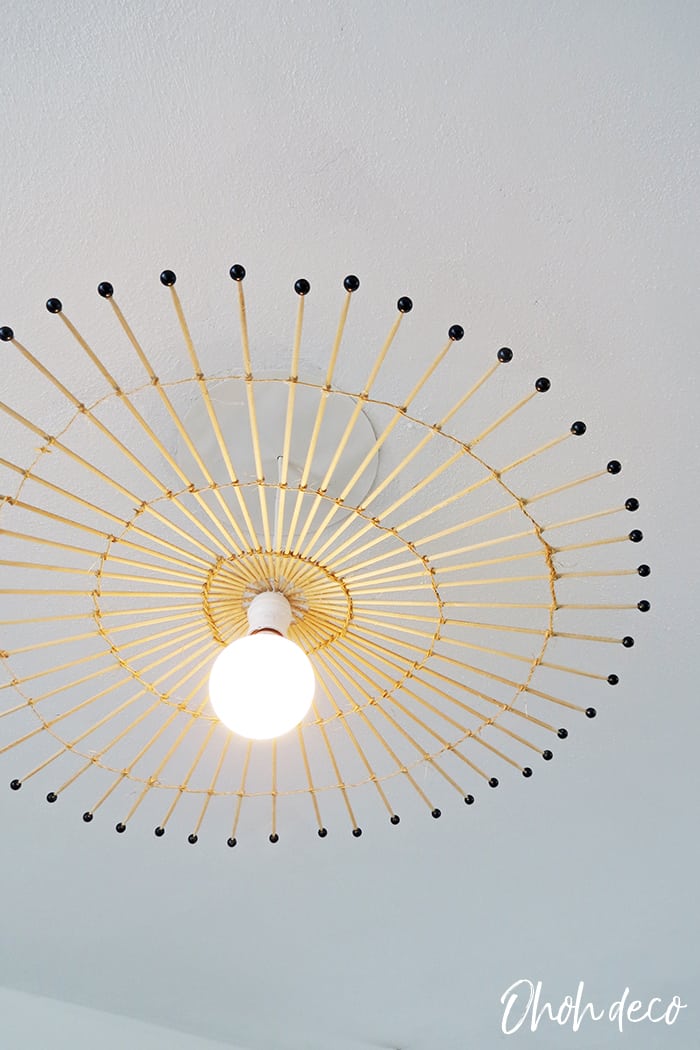
Glue beads on each skewer tip. I choose black beads but you can work with natural one or shaped ones, as you like best.
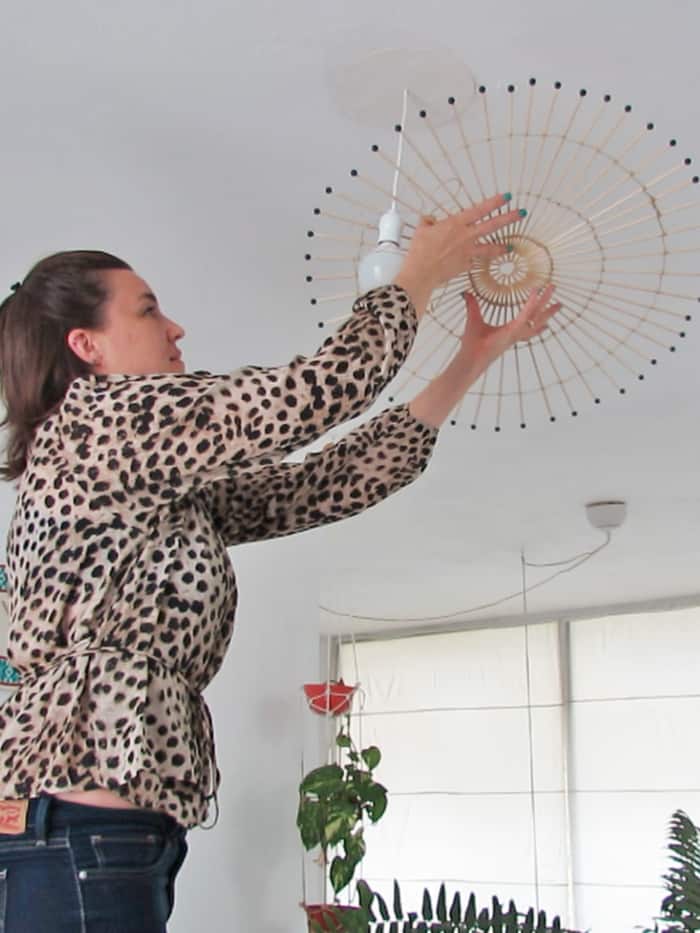
Time to hang the DIY lampshade. Slide the shade around the wire cable.
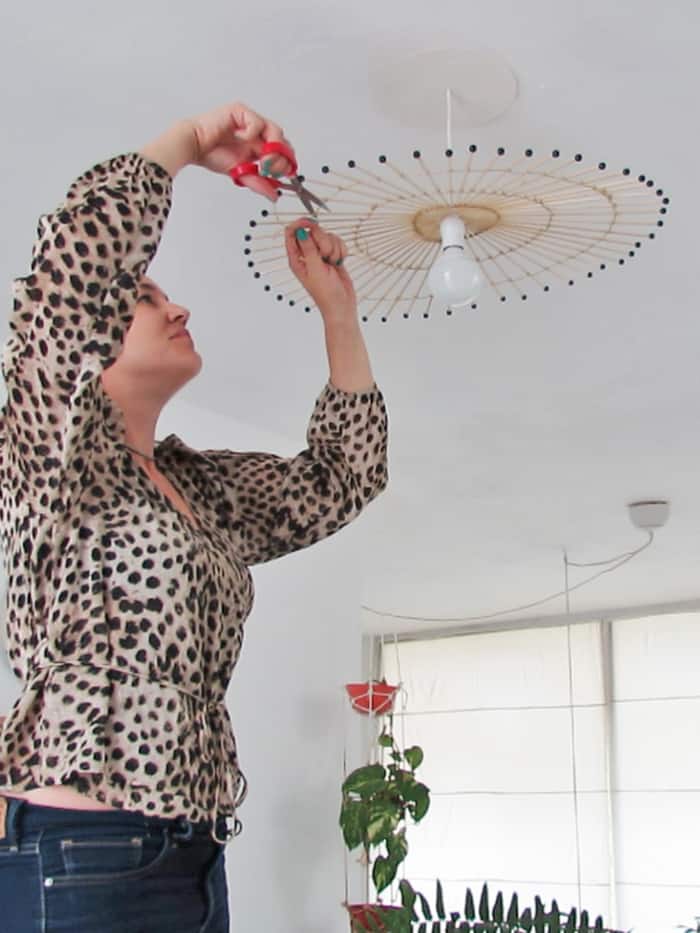
Make the knots to finish the 3 row you made with the rope. Then cut the extra rope lenght and done!
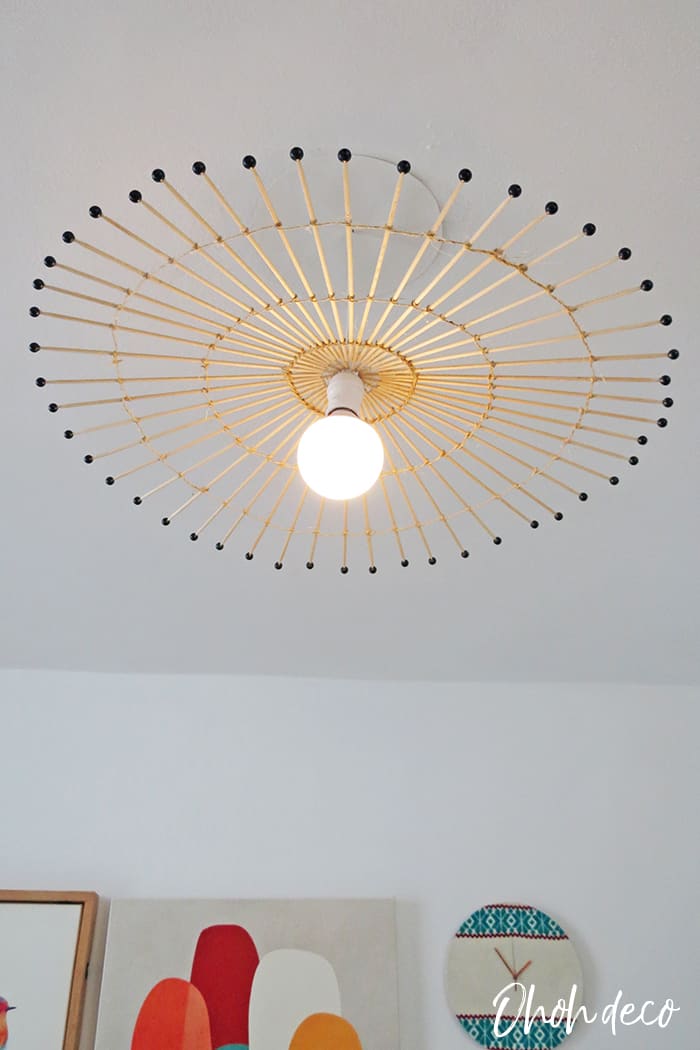
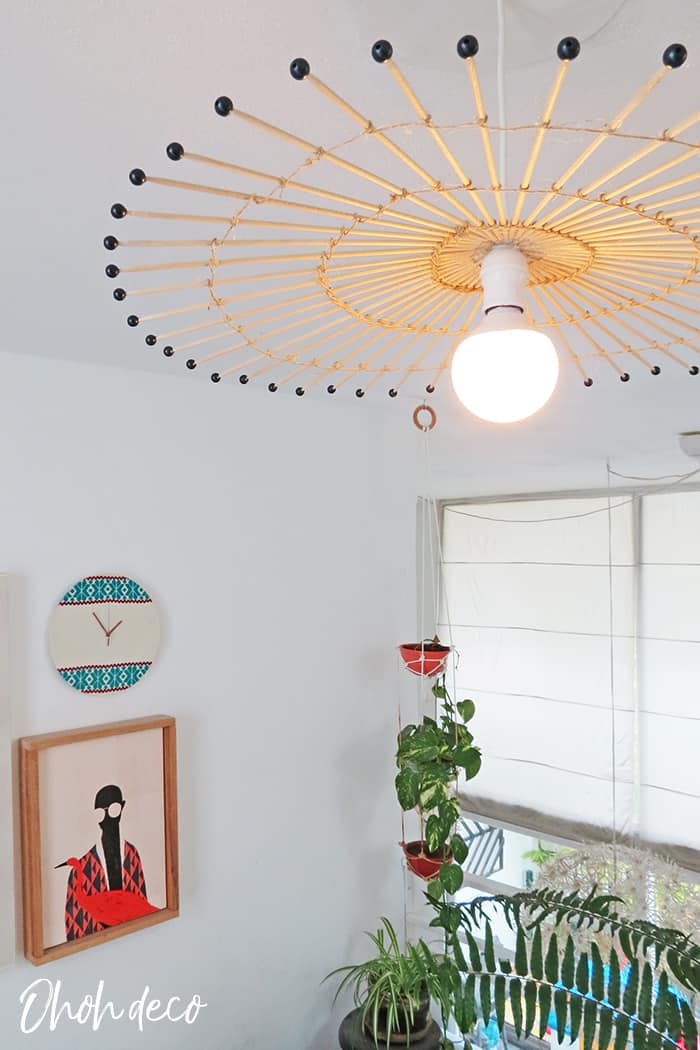
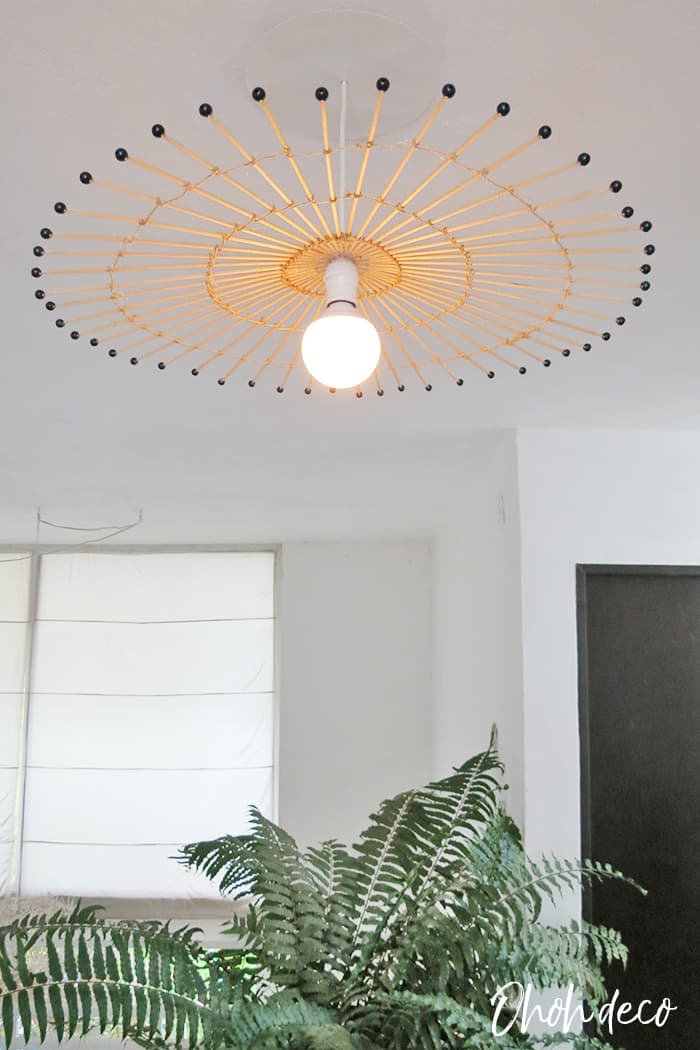
Enjoy your new boho lampshade.
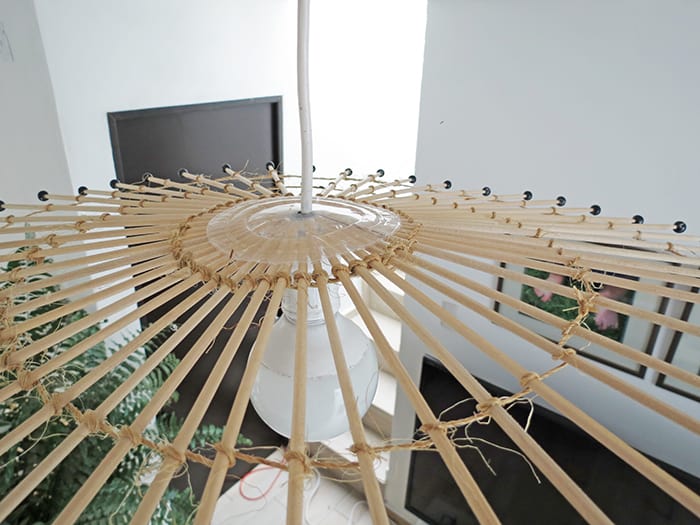
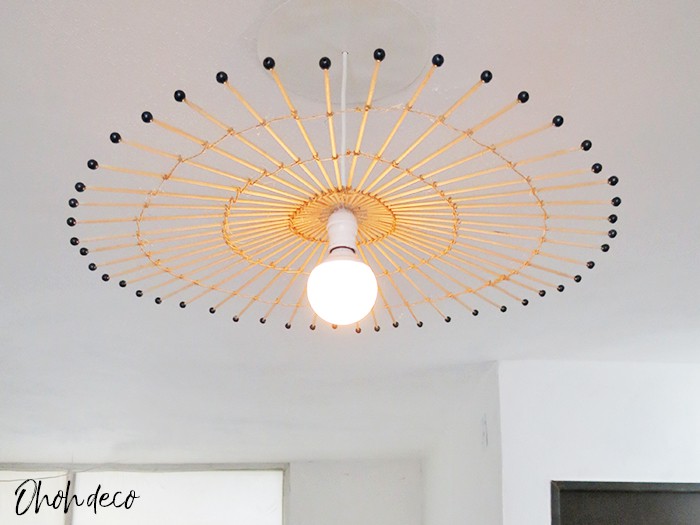
As you can see the cable wire pass in the center of the lid, were you cut the small circle.
You can still see the plastic lid. I didn’t mind because it’s hanged close to the ceiling so you can’t see it.
If you want to hang your lampshade lower, above a table for example and that the lampshade top will be visible you can cover the plastic lid with rope.
Just wrap and glue some rope to cover the plastic and the lampshade will look nice from above too.
Watch the video tutorial to make the DIY Wood Lamp
Don’t miss the fun. Follow Ohoh deco on Youtube and be the first to find out about the new DIY and crafts ideas.
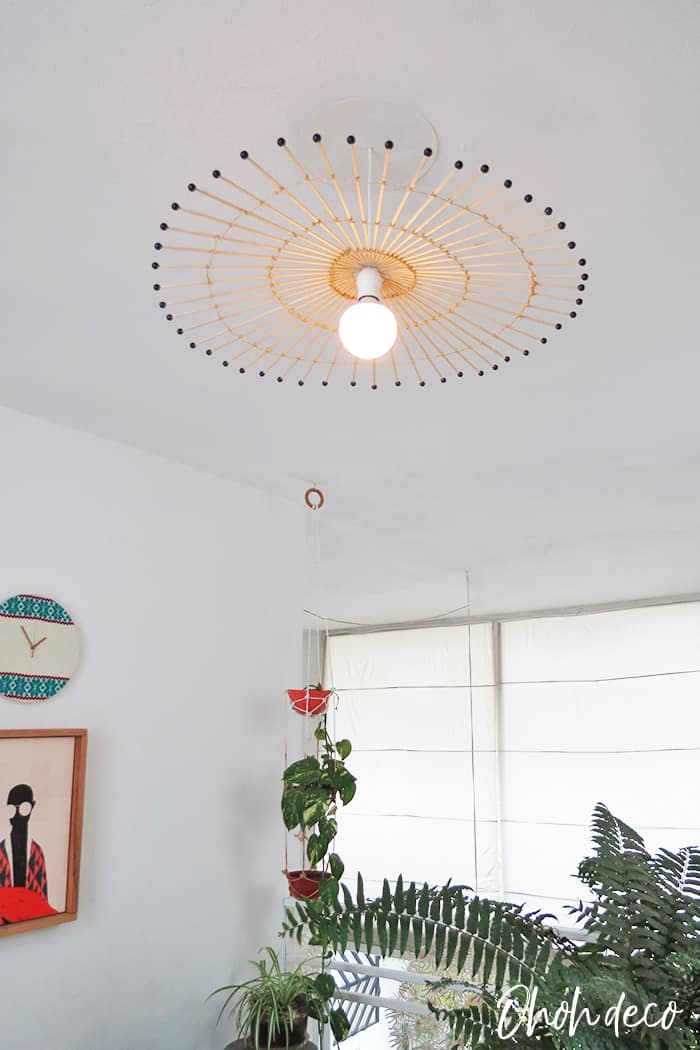
Not bad for a DIY lamp! What do you think? Do you like this easy idea? Where would you like to hang this homemade lampshade?
RELATED: DIY paper house cord light
RELATED: DIY lamp cage and bedroom accent wall