
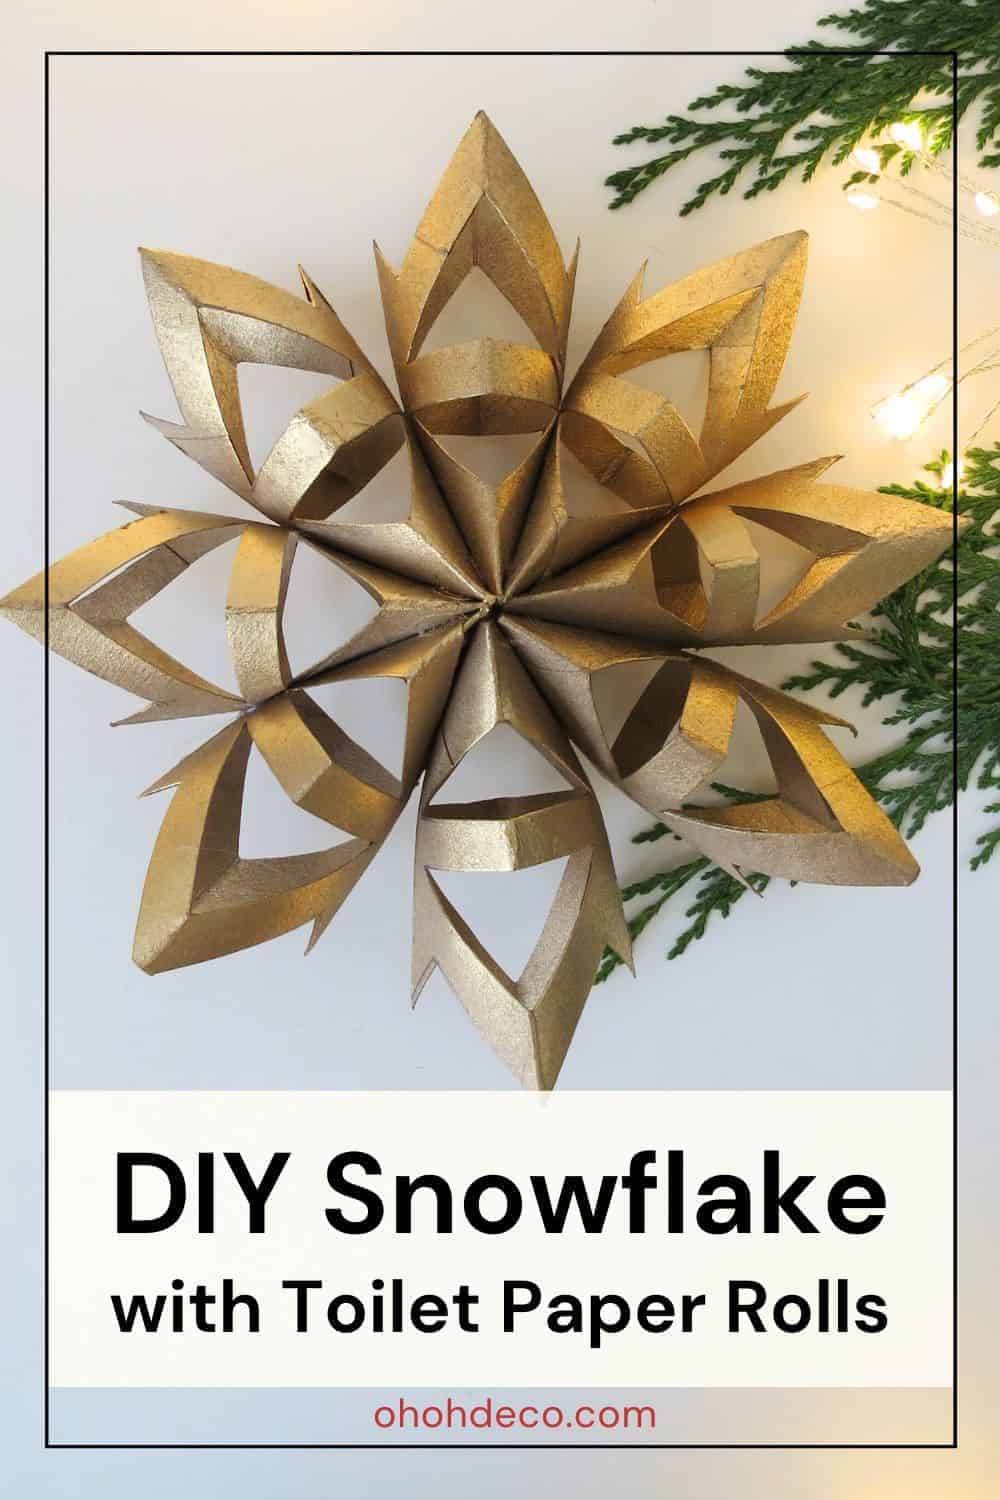
Looking for a way to give new life to those empty toilet rolls? Get ready to be amazed as we unveil a delightful transformation that will turn them into delicate and enchanting toilet paper roll snowflakes ornaments. Welcome to a world where trash becomes treasure and creativity knows no bounds.
In this article, we’ll guide you through the step-by-step process of crafting these winter wonders that will add a whimsical touch to your home. From gathering the materials to adding the finishing touches, we’ll show you how to bring the beauty of delicate snowflakes to life using what was once considered trash. So, grab your imagination and let’s embark on this crafting adventure together!
[ This post probably contains affiliate links, our full disclosure policy is boring, but you can read it HERE ]
Gather Your Materials
Before we dive into the crafty process, we must first gather our materials, ensuring we have everything we need to bring these delicate snowflake ornaments to life. The beauty of this project lies not only in its simplicity but also in the fact that most of the required materials can be found around the house.
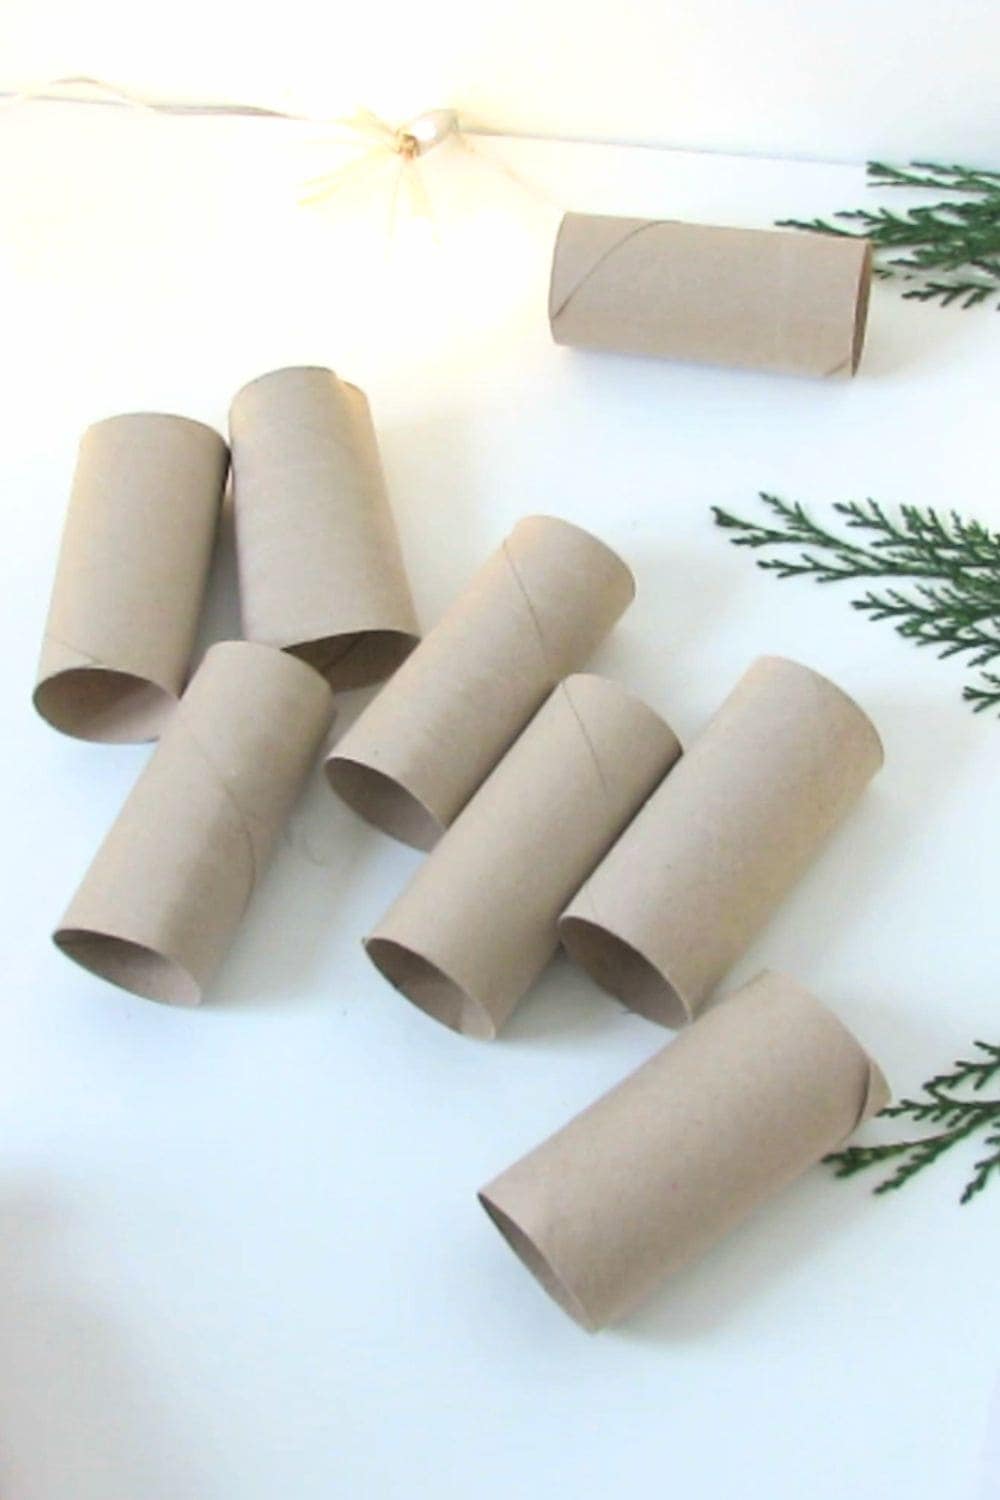
- 8 Toilet paper rolls
- Scissors
- Pencil
- Glue gun
- Paint (I used this one)
- Decorative elements of your choice ( like this, that or even that )
With these items at the ready, we are well-prepared to embark on our DIY ornament journey.
RELATED: How to make Christmas ornaments with toilet paper roll
RELATED: 30 Toilet Paper Rolls crafts ideas for adults
Prepare the Toilet Paper Rolls
To prepare the toilet paper rolls for their transformation into delicate snowflake ornaments, we need to ensure they are clean and ready for crafting.
First, carefully remove any remaining toilet paper from the rolls.
Next, flatten the toilet paper rolls using your hands or a flat surface. Applying a bit of pressure, gently press down on the roll to flatten it out. This step will make it easier to work with the rolls when it comes time to cut and shape them into snowflakes.
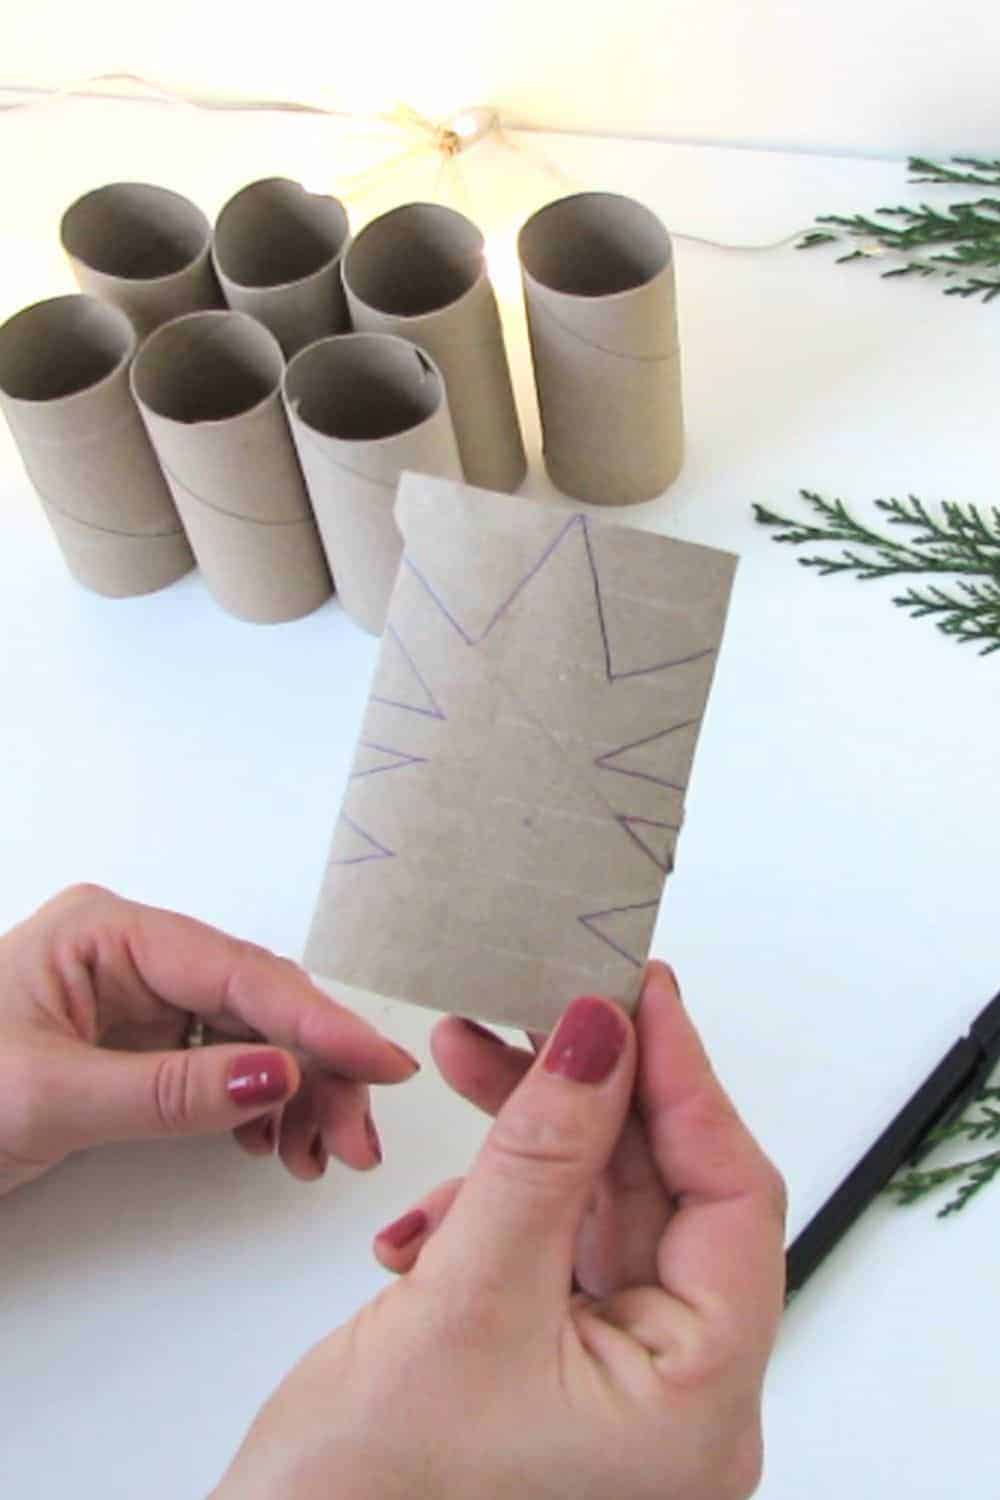
After flattening the rolls, draw a few geometrical shapes on the cardboard. Ensure that your design is symmetrical. You can help yourself with a ruler.
The marks will serve as a guide for cutting the rolls, ensuring that each snowflake ornament is symmetrical in shape.
Cutting the Snowflake Shapes
With the rolls adequately prepared, we are now ready to move on to the next step – cutting the snowflake shapes. This crucial step is what truly brings our delicate toilet paper roll snowflakes to life. To begin, carefully follow the marks on the tube, using sharp scissors or a craft knife to cut along the lines. Take your time during this process, as precision is key in creating symmetrical snowflake shapes.
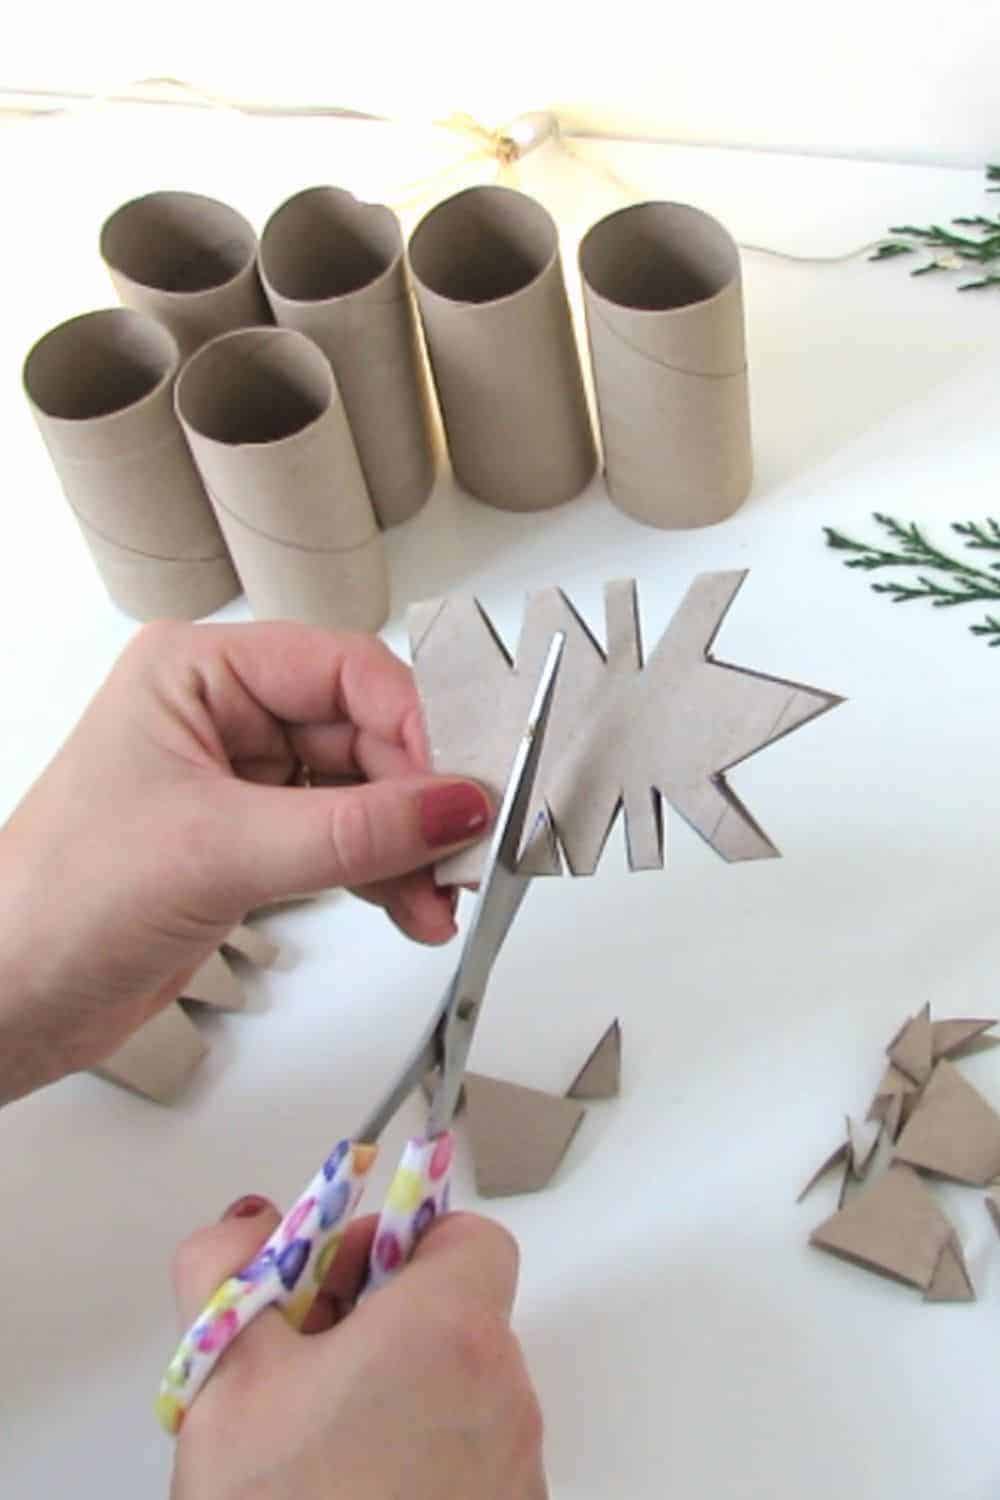
Remember, no two snowflakes are alike, and that’s what makes them so enchanting. Embrace the uniqueness of each cut, knowing that it adds character and depth to your ornament.
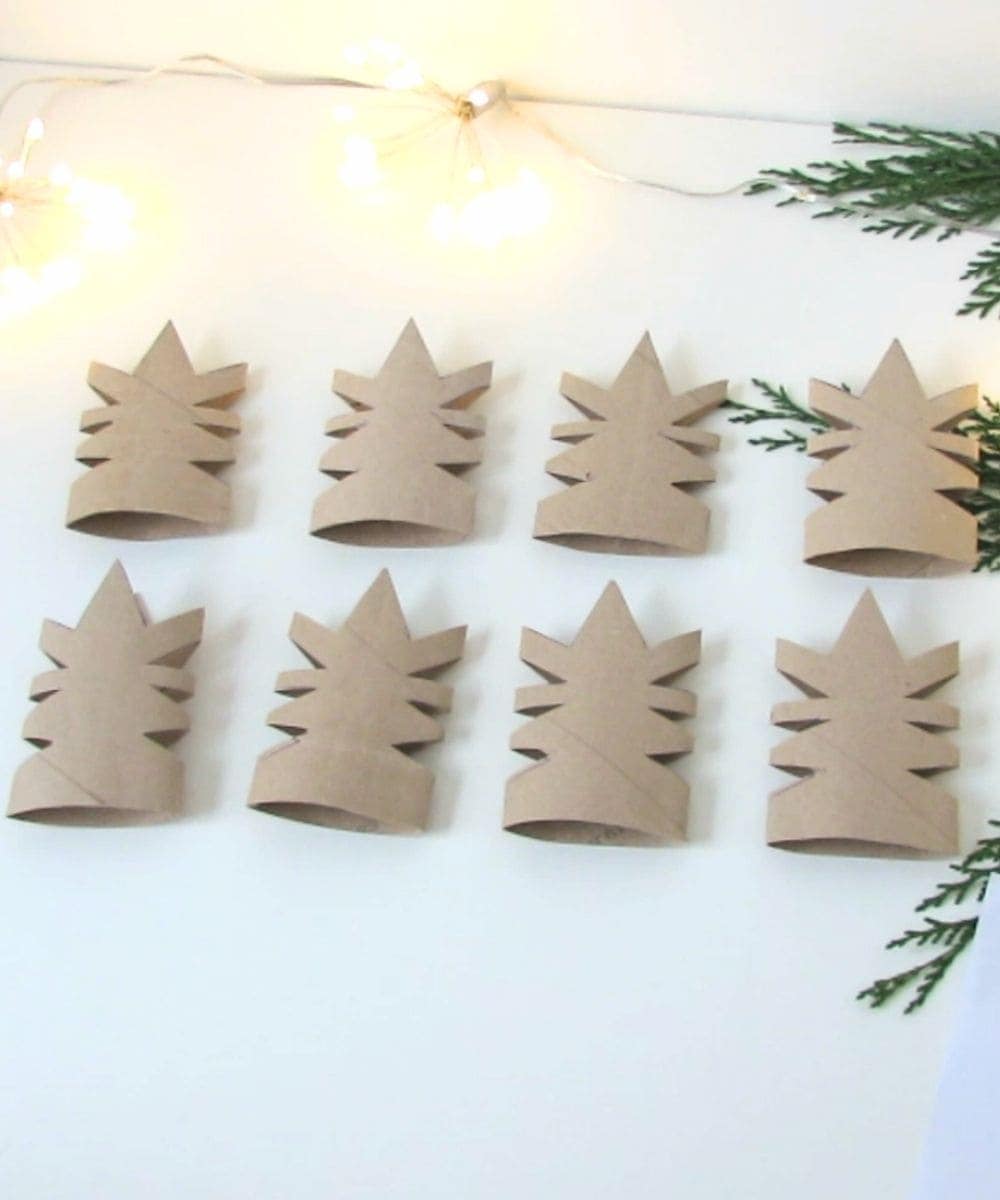
Now that you’ve cut your first tube into a snowflake shape, use it as template to reproduce the same cut out lines on the others toilet rolls.
To make one snowflake ornament you will need 8 toilet paper rolls.
As you slice through the paper rolls, you’ll notice that each cut segment will begin to take on its unique form, resembling the intricate patterns found in real snowflakes. Be sure to cut all the way through each section, but avoid making cuts that are too close together, as this could weaken the structure of the snowflake.
Feel free to experiment with different cutting techniques and styles to add a personal touch to your ornaments. You can make elegant, lacy designs with softly curved edges or create more intricate patterns with sharp angles and intricate cutouts. Let your creativity guide your scissors as you transform each plain tube into a one-of-a-kind snowflake masterpiece.
RELATED: Easy to make 3D Paper house
RELATED: Toilet paper roll flowers
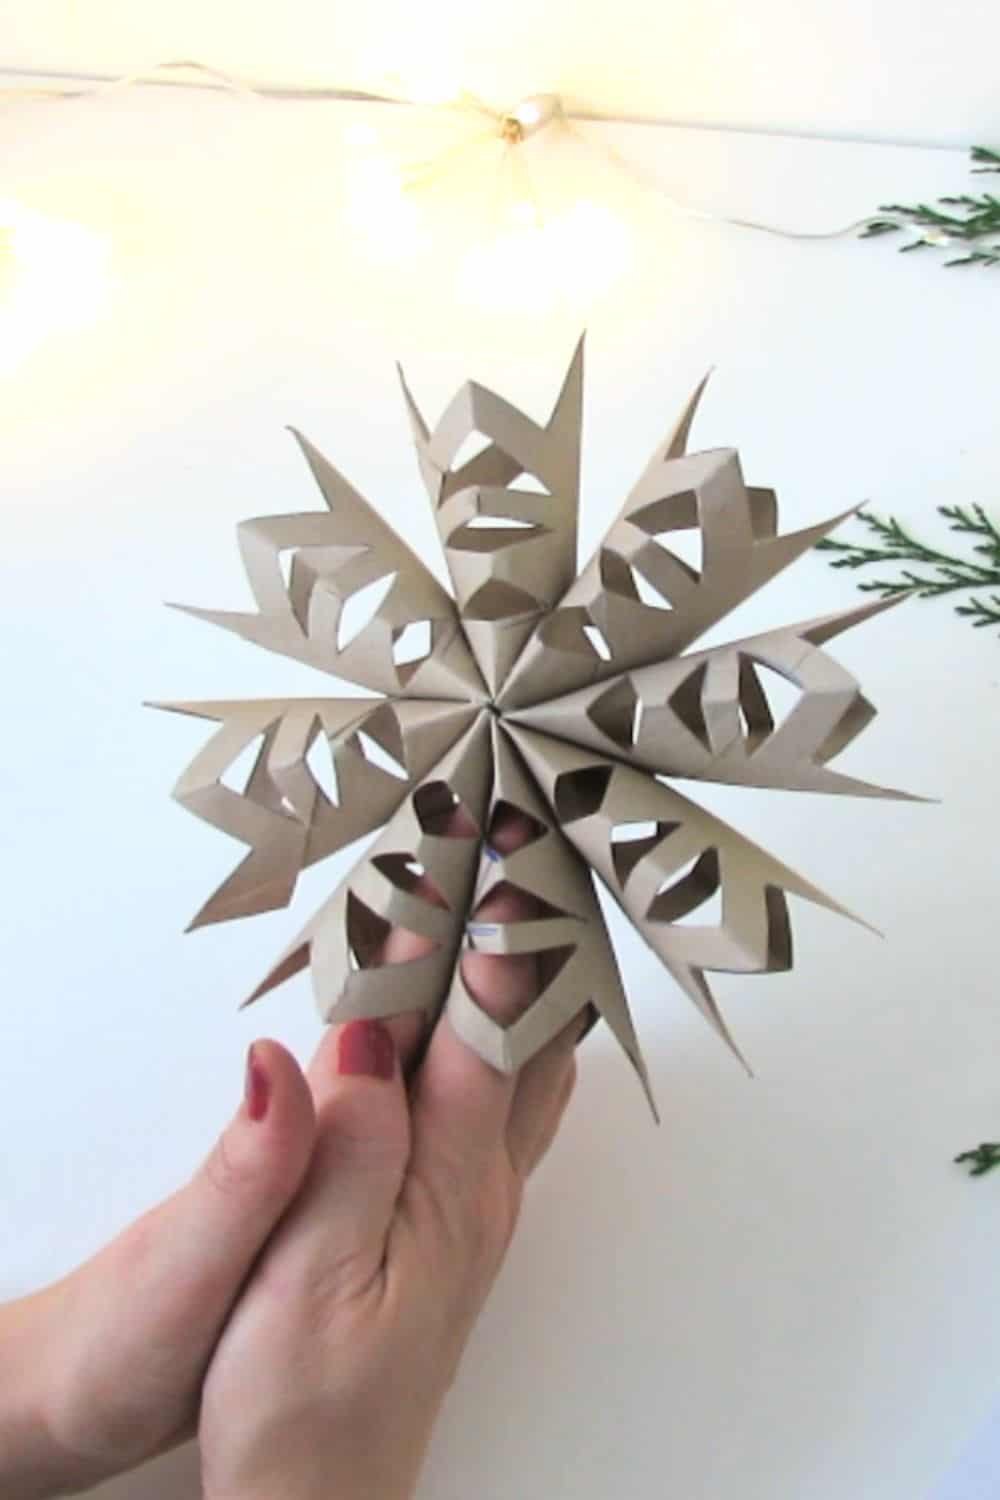
Assemble the Ornament
Now that you’ve skillfully cut your snowflake shapes, it’s time to assemble the ornaments.
To begin assembling the ornaments, take one snowflake shape and lay it flat.
Add hot glue next to the base and an other small strip of glue in the center or the tube. Place a second tube on top and press to adhere.
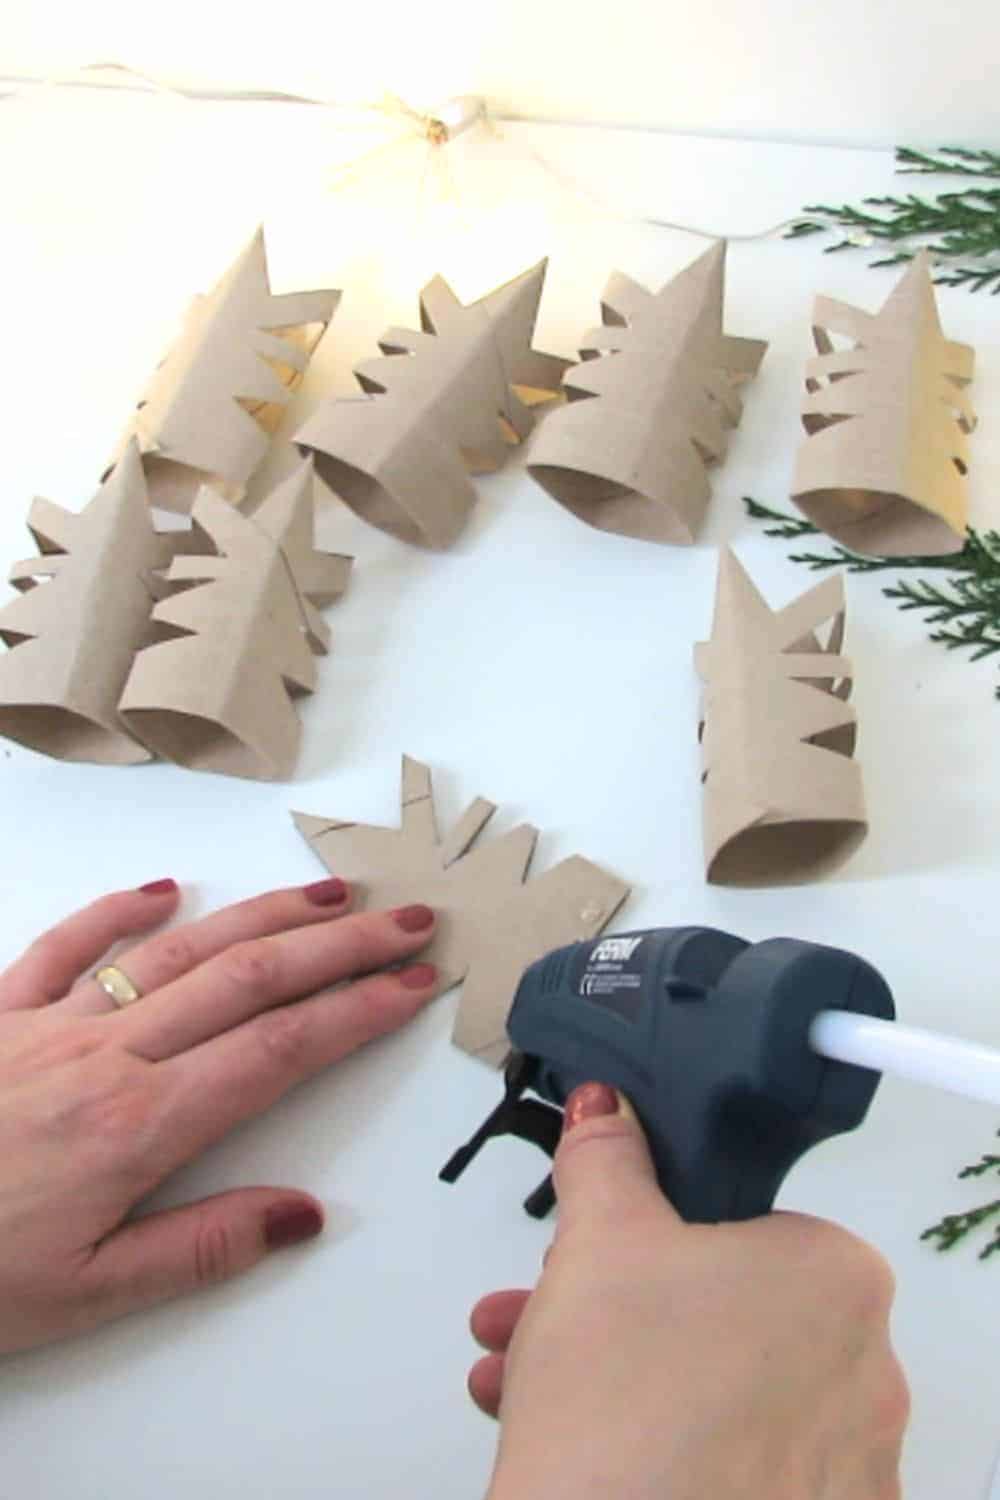
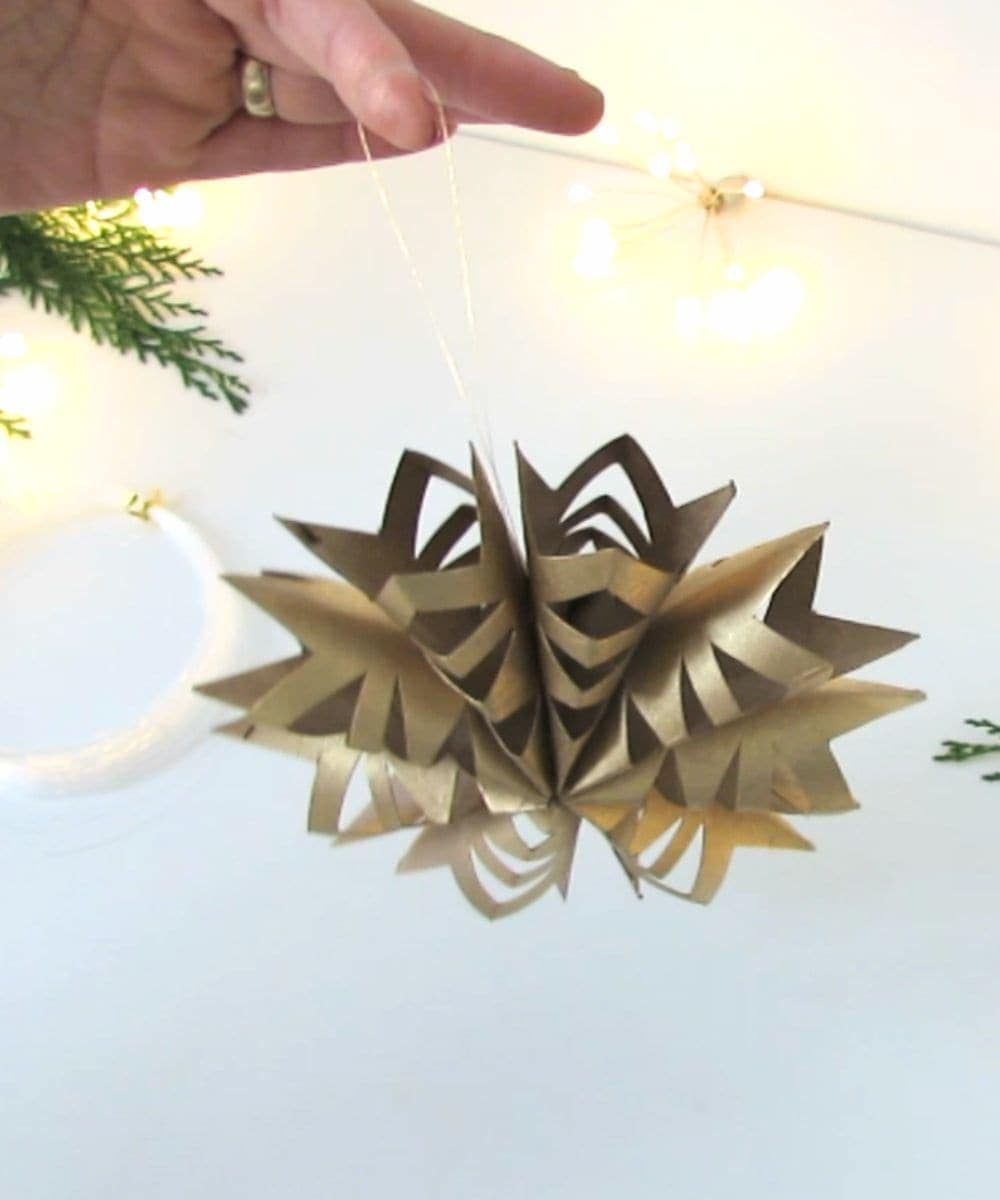
Repeat the process to glue all 8 toilet rolls on top of each other.
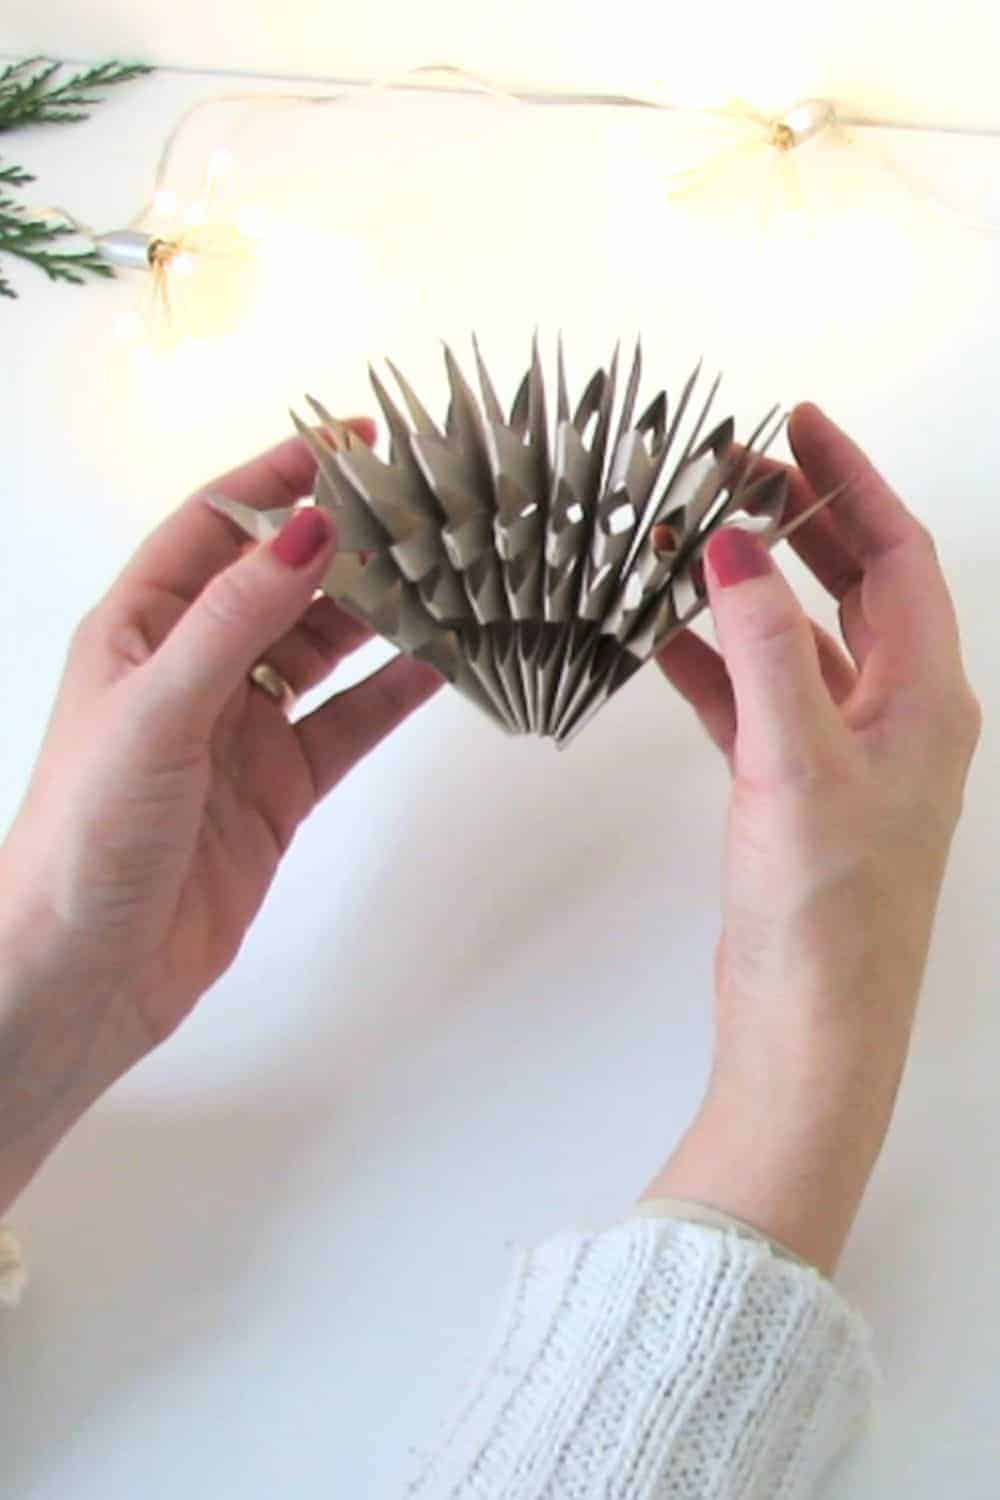
Once all the tube are glued, open them to make the snowflake shape and glue the last two sides together to hold the shape in place.
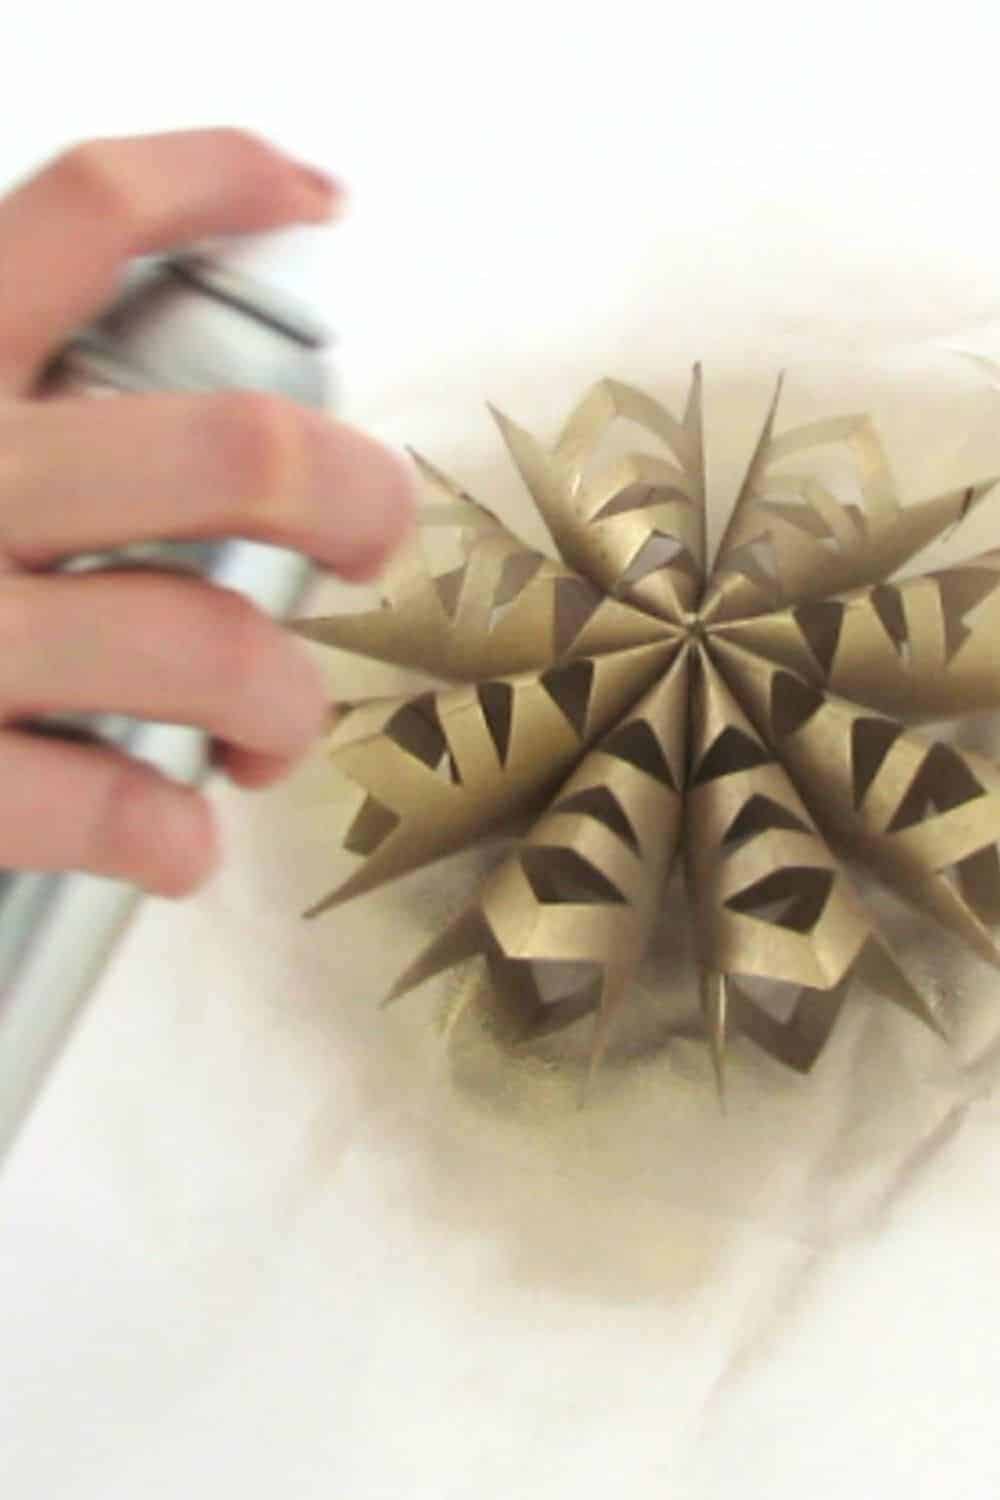
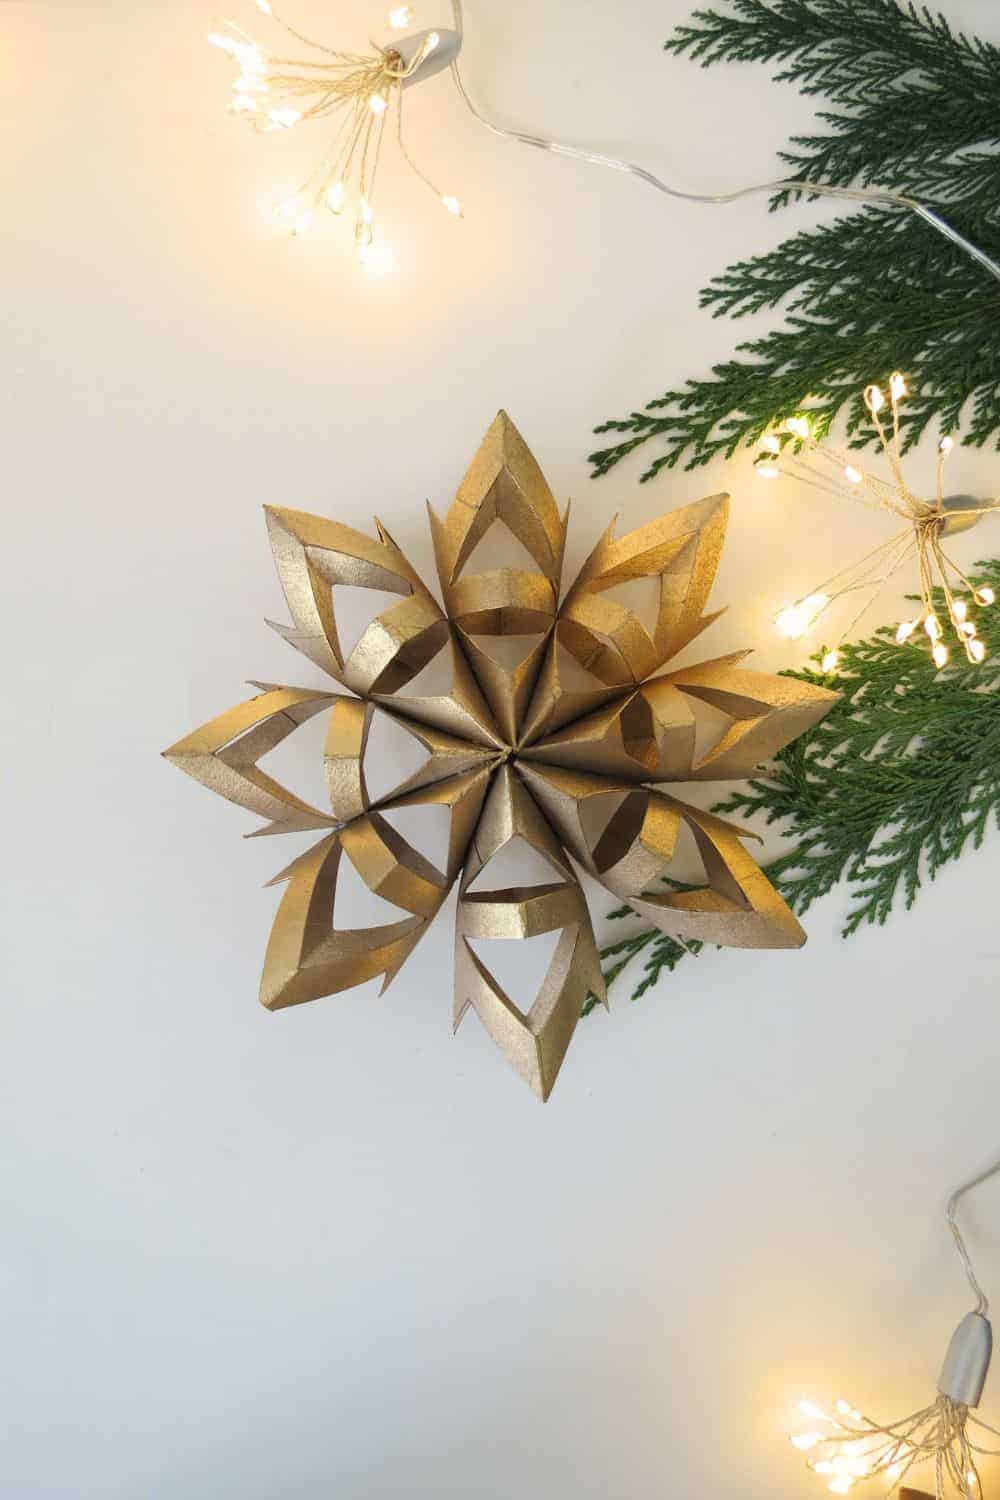
Decorate and Personalize your toilet paper roll snowflakes
With your assembled snowflake ornament complete, you’re now ready to move on to the next step: decorating and personalizing. Let’s continue transforming these toilet paper rolls into enchanting winter wonders.
To begin consider painting your snowflake ornaments. You can apply a thin layer of acrylic paint with a brush, or for a faster result you can use spray paint.
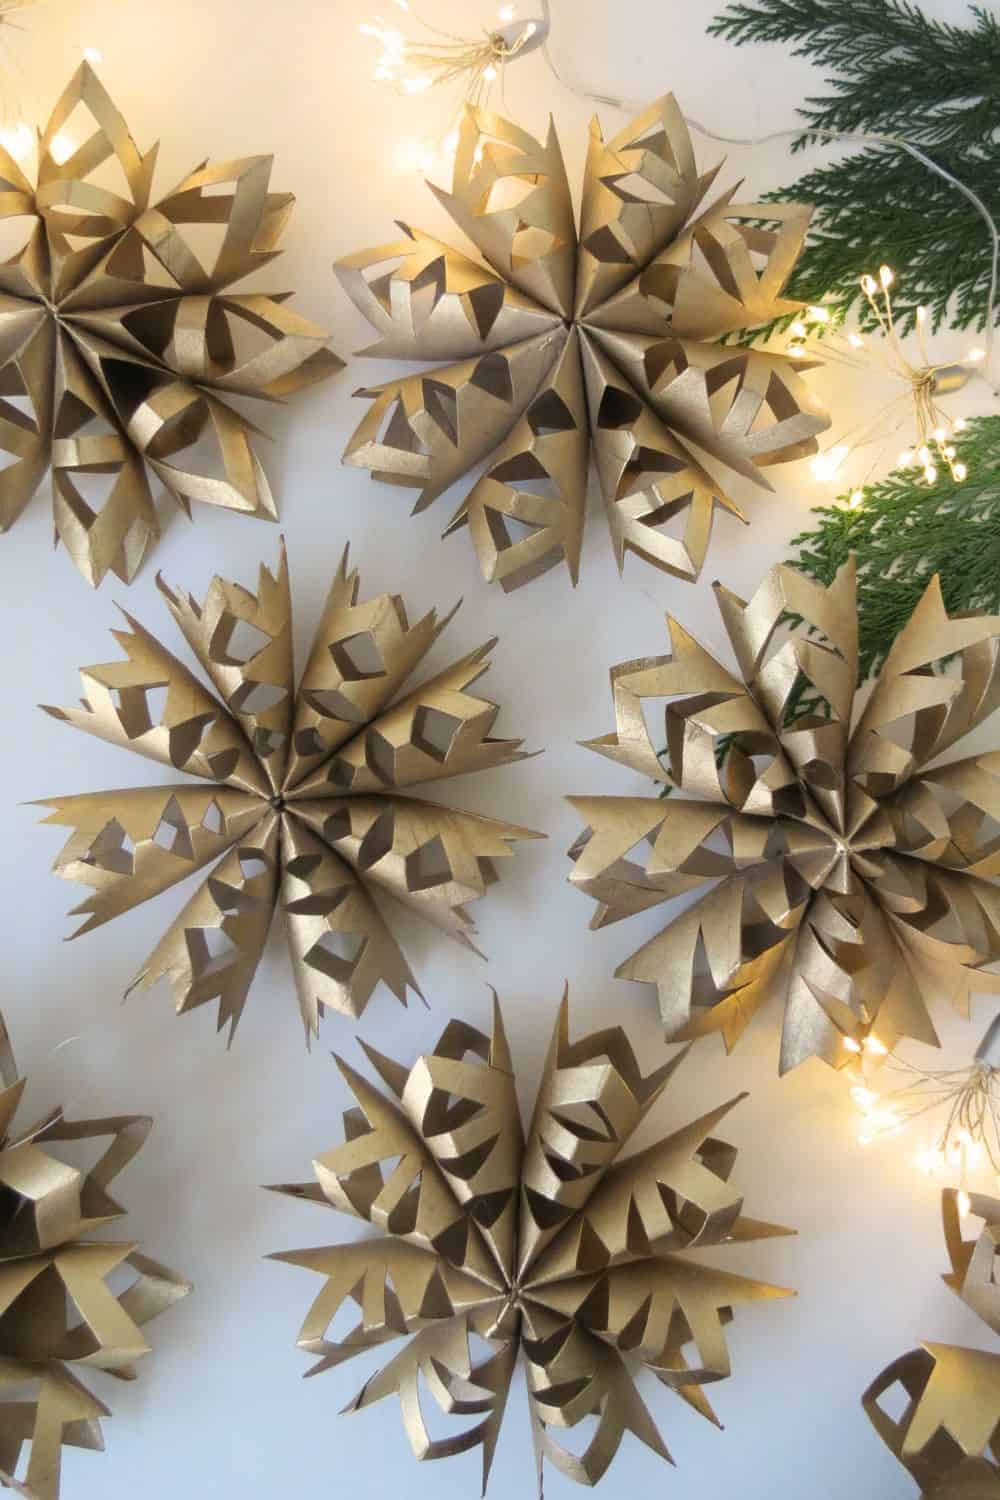
Choose any color that match your Christmas decor: White, blue, gold, silver, or more.
Once the paint is dry you can experiment adding a touch of glitter, paint, or incorporate other festive elements as beads or sequins.
To add glitter on your snowflake ornament, put some craft glue to specific areas of the snowflake and then gently sprinkle the glitter over the glue. Let it dry for a few minutes before shaking off the excess glitter. The twinkling effect will add a touch of magic to your snowflakes, capturing the essence of a fresh layer of frost on a cold winter morning.
For those looking to further personalize their snowflake ornaments, you can explore other festive elements to incorporate. Consider attaching small decorative beads or sequins to the tips of each snowflake arm using hot glue. The added sparkle will catch the light and give your ornaments an extra dimension.
With each unique touch, your DIY ornaments will transform from mere toilet paper rolls into delicate works of art. Let your imagination guide you and add the finishing touches that reflect your personal style and the spirit of the holiday season.
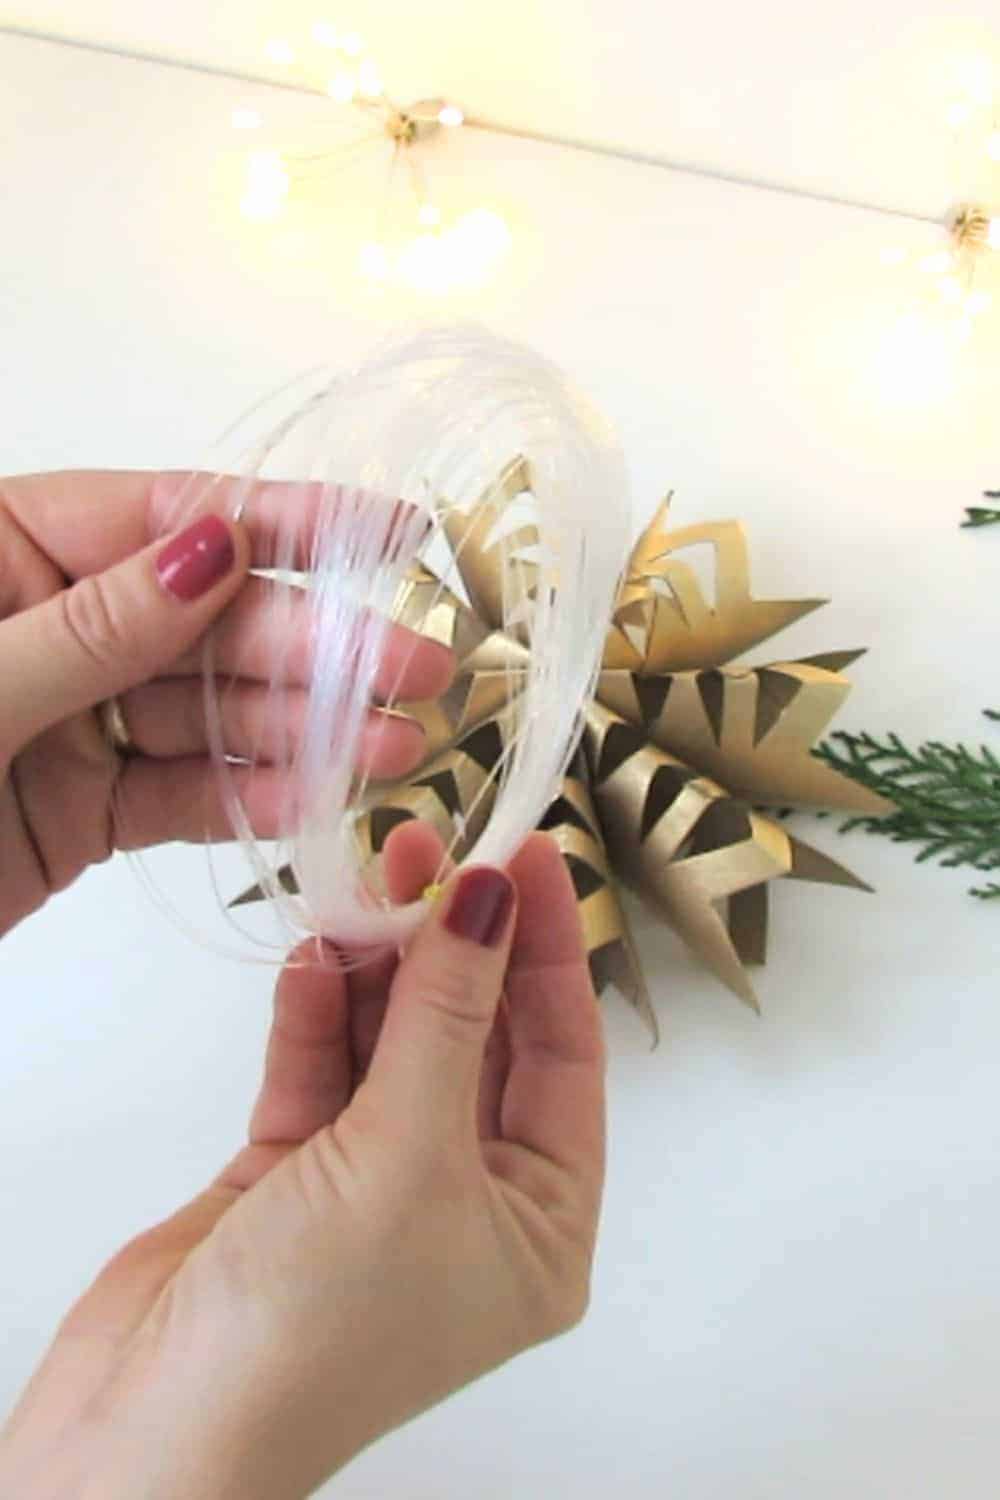
To hang the snowflake on the Christmas tree or in front of a window, cut a piece of ribbon, twine rope or nylon thread. Fold it in the middle and glue both sides in between two rolls.
Remember, even the most ordinary materials can be transformed into extraordinary creations. Embrace the art of repurposing and uncover the hidden treasures that lie within the world of crafting. Toilet paper rolls may have once been considered trash, but with a little creativity, they can become the epitome of both usefulness and beauty.
So go forth, gather your materials, and let your creativity unfold. Your home is waiting to be adorned with the enchantment of delicate snowflakes, born from the humblest of beginnings.
RELATED: How to make a paper gift bag
RELATED: Paper Bag Crafts – Easy DIY Ideas to Transform Your Home
The snowflakes toilet paper roll tutorial is also available on YouTube
Want to remember it? Save these DIY Toilet Paper Roll Snowflakes on your favorite Pinterest board.
I love your idea for Toilet Paper Rolls snow flakes. Yours is much better than cutting slices of one roll to make a snowflake.
Yours is also much easier to spray paint. The little slices scatter every where when spray painted!
Beautiful diy, thank you! I will enjoy making these with my grandkids.
Thanks Maggie! I´m glad you like this easy DIY idea, Have fun crafting with your grandkids!
Love the snowflake! Can’t wait to try!
Thanks! Have fun crafting for Christmas
Awesome!
Love it Awesome!
Thank you, Have fun crafting snowflakes!
These are so easy and fun to make. Thank you for the share! My class took much joy from this activity.
Thanks for your message! I´m so glad your class had fun making snowflakes ❄
These are beautiful but I’ll have to make them next Christmas as I have no saved toilet paper rolls!
Thanks! You have a year to save a lot of toilet paper rolls 😉
I added a roll and it still looked amazing! Tried some lace trim and gold accents on mine and it was gorgeous. What a genius sustainable project!
Hello Christina, I´m glad you liked it and that you had fun making it and personalized it! Thanks for sharing more ideas to customize the snowflakes.
I wish there was an actual pattern my brain & my hands are not exactly working perfect these days I find it easier to trace something than try free hand
Hello, you can also cut notches without previously tracing them if it makes it easier for you.
What a great idea. Thank you for sharing. I will send more friends to your sight.
Thank you so much Mary!
Instead of that lady time you glued them, I’d use a small paper clip (painted the same color) to hold it open; that way, they’ll lay flat & you can store them away for next year.
Great Idea to store them easily! Thanks for sharing Cheryl!
I started with your idea and made it a little differently. I could not smash the toilet paper rolls, so I moved to paper. I used your pattern to make the leaves. I just had to make them out.of paper. I traced the patteron the fold of a piece of paper. I did not glue them together until after the next step. On each petal we either stenciled and colored items with crayons on half or we used Christmas stickers on half. I think they came out beautifully for my group of women at the Nursing home. I took pictures of the final snowflake which will fly in our halls. Thank you for the idea.
Hello Cynthia, thanks for sharing your version of the snowflake decorations ♥ Enjoy the holidays