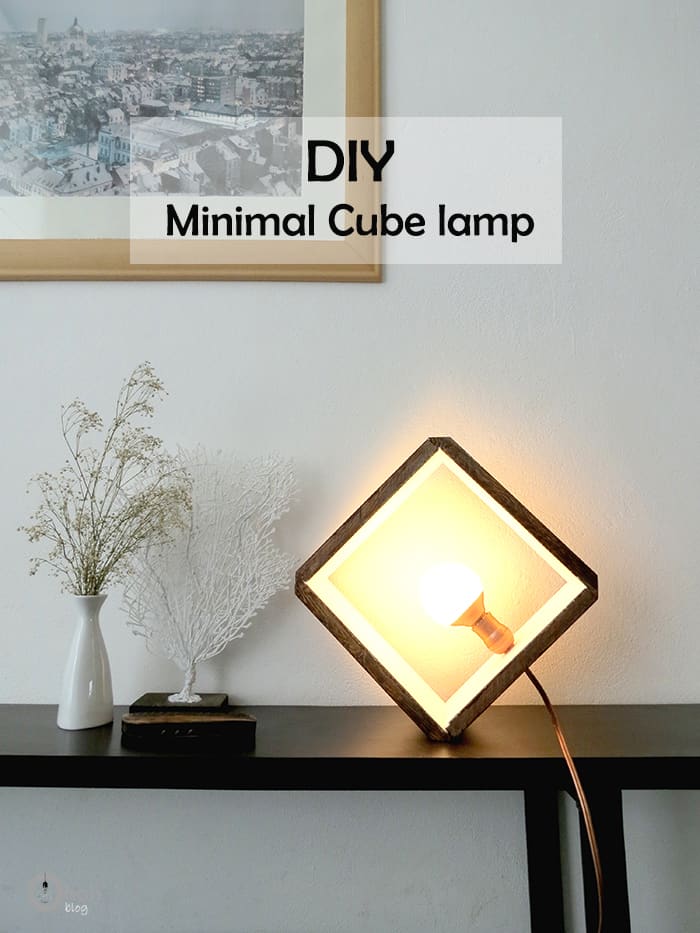
Create a unique unique DIY wood lamp that will add a touch of handmade charm to any room.
Lighting is an important part of home improvement and it can really make a huge difference in a room. It’s always nice to use different lighting points, to be able to modulate the light and create a different atmosphere. If you want some tips about lighting and how to set it up properly in the different spaces of your house, you will enjoy reading my article about lighting tips.
Making a DIY wood lamp can be a fun and rewarding project. Here’s a step-by-step guide to help you create a modern cube light. You can build it with some scrap wood, so it’s fairly cheap to make.
[ This post probably contains affiliate links, our full disclosure policy is boring, but you can read it HERE ]
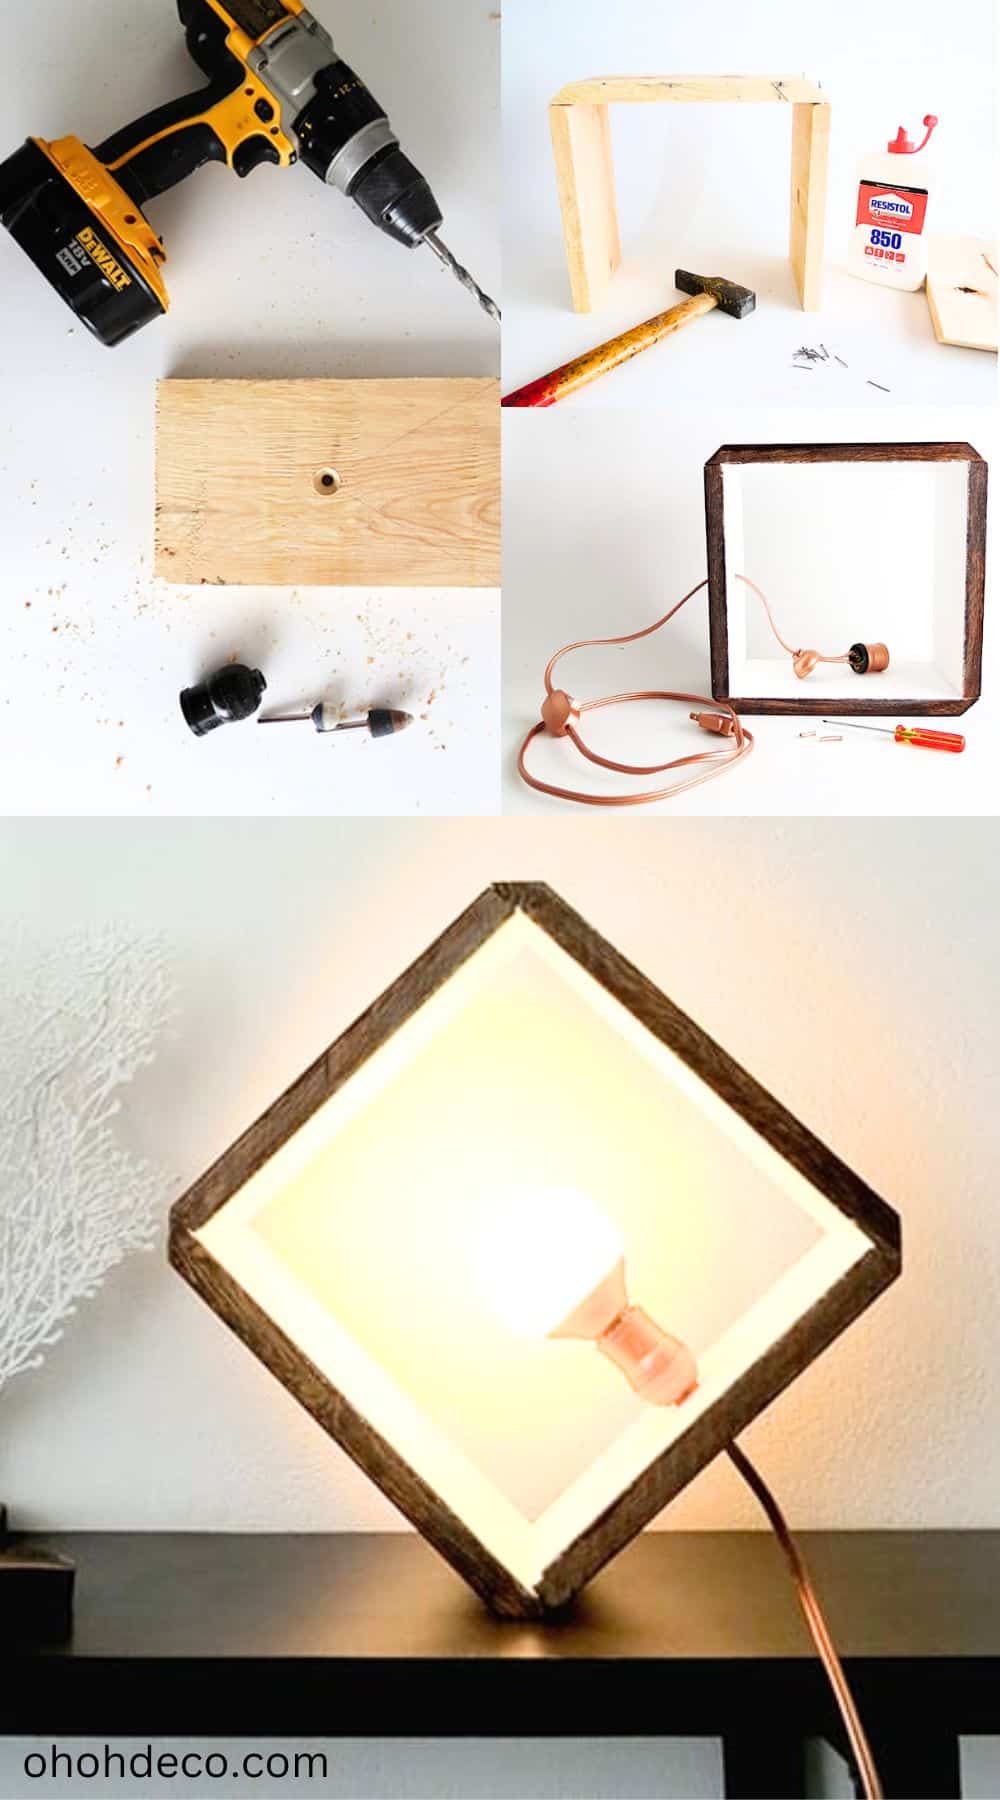
How to build a Lamp
Materials you will need to make a DIY wood lamp:
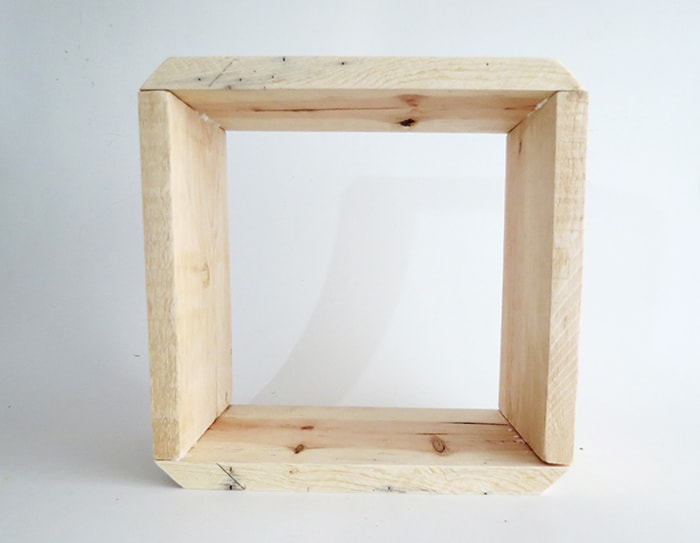
- 2pieces of wood 5′x 9′ cut straight
- 2 pieces of wood 5’x 9′ cut with two 45 angles (9′ being the smallest side)
- Smalls nails
- hammer
- wooden glue
- wood stain
- white paint
- varnish
- brushes
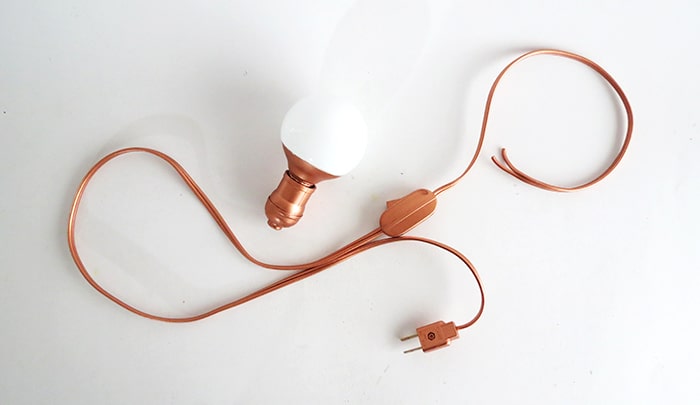
- Decorative bulb
- wire, plug socket, switch and plug (this kit is great)
- drill
- screwdriver
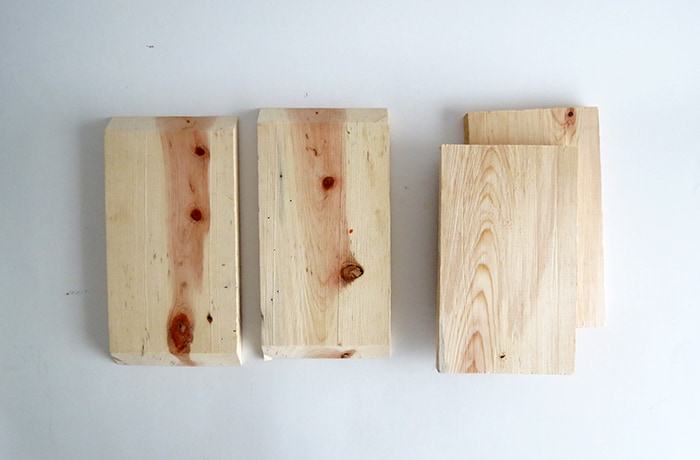
Makes it easier and ask at your hardware store to make the cuts.
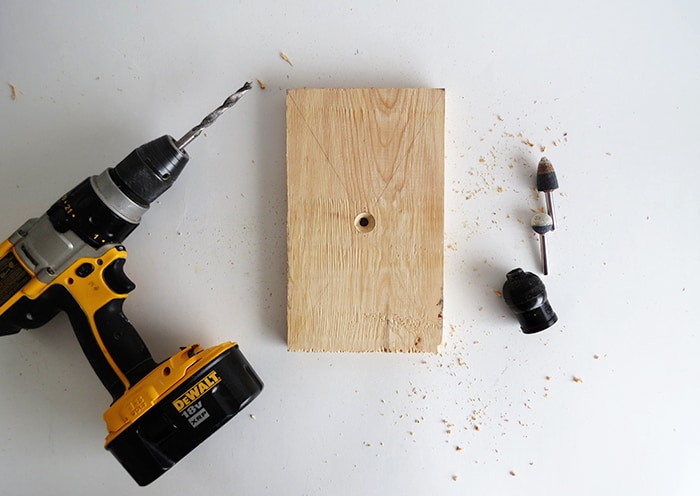
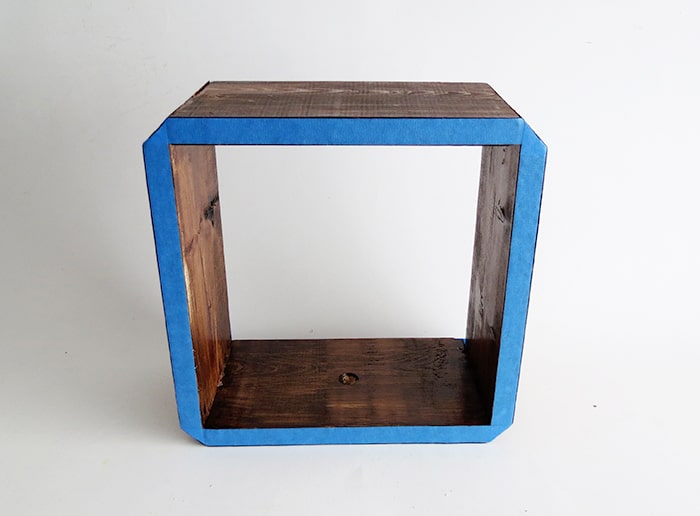
Take one of the wood pieces with straight edges. Mark the center and drill a hole to pass the cable. The plug socket base must fit in it too. So you will probably have to sand the edges to enlarge it.
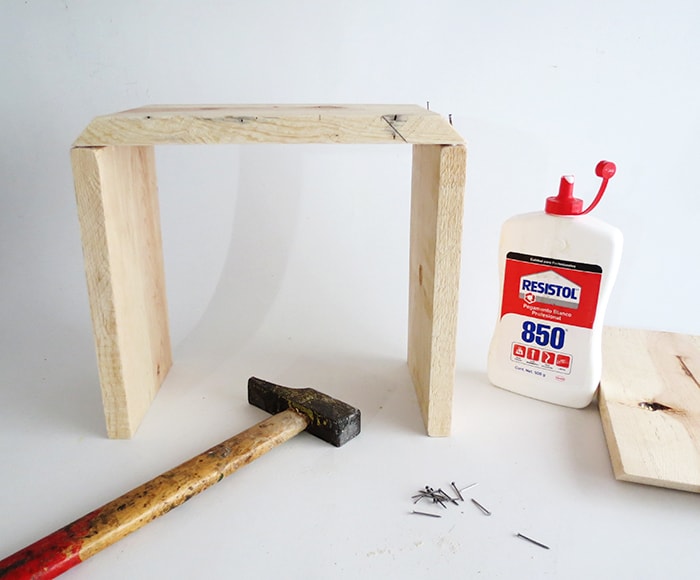
Glue and nail the four sides of the cube together.
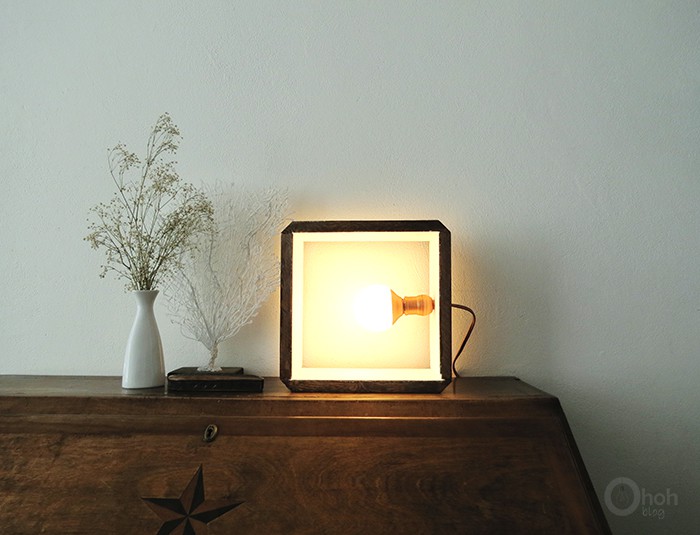
When the glue is dry, sand it and stain it (if you like to). Protect the edges and paint the inside in white, this will gives a nice light reflection.
Assemble the plug and the switch on the wire. I decided to spray paint everything in copper for a nice finish. If you don’t feel comfortable about messing with electrical supplies you can find already assembled wire kit in stores. And if you are lucky they may have nice colors!
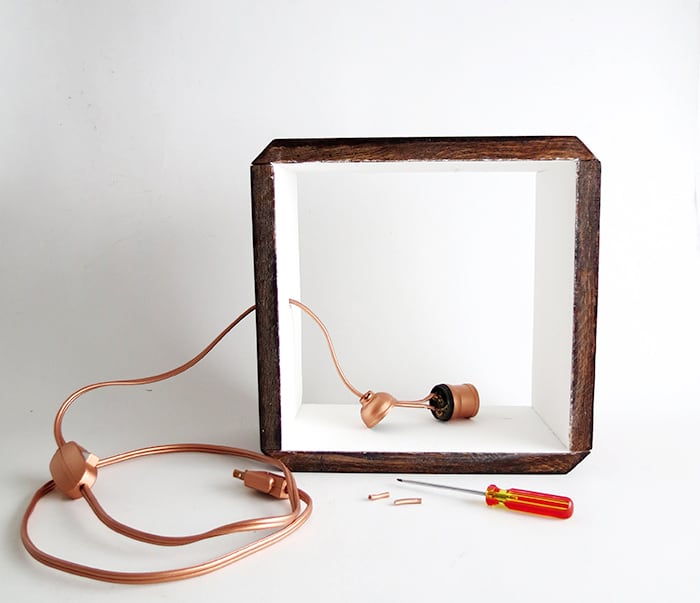
Pass the wire into the hole and fix the bulb socket with the wire. You just have to slide a wire in each contact point and turn the screw to lock.
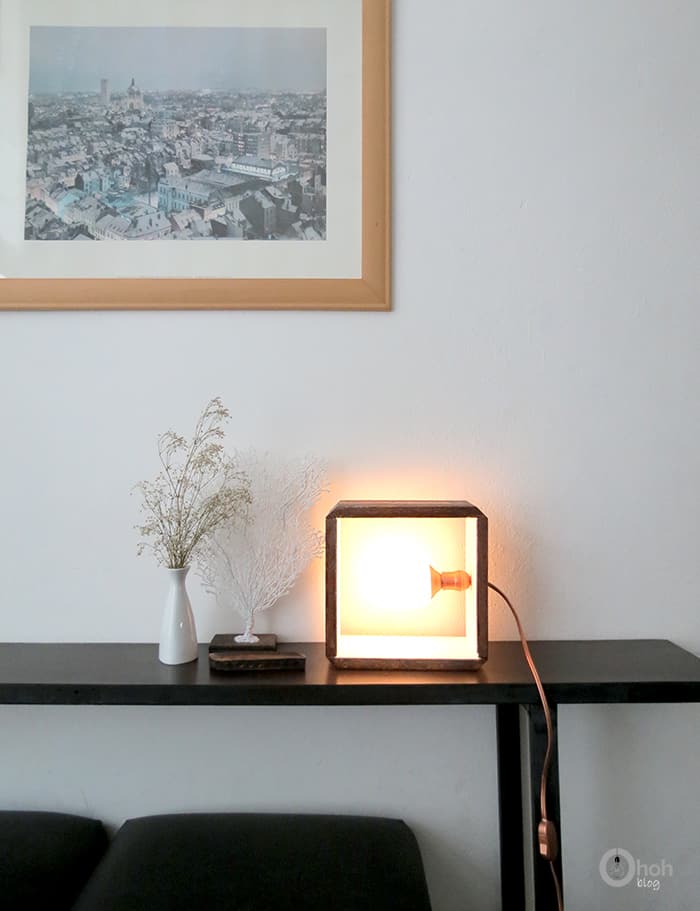
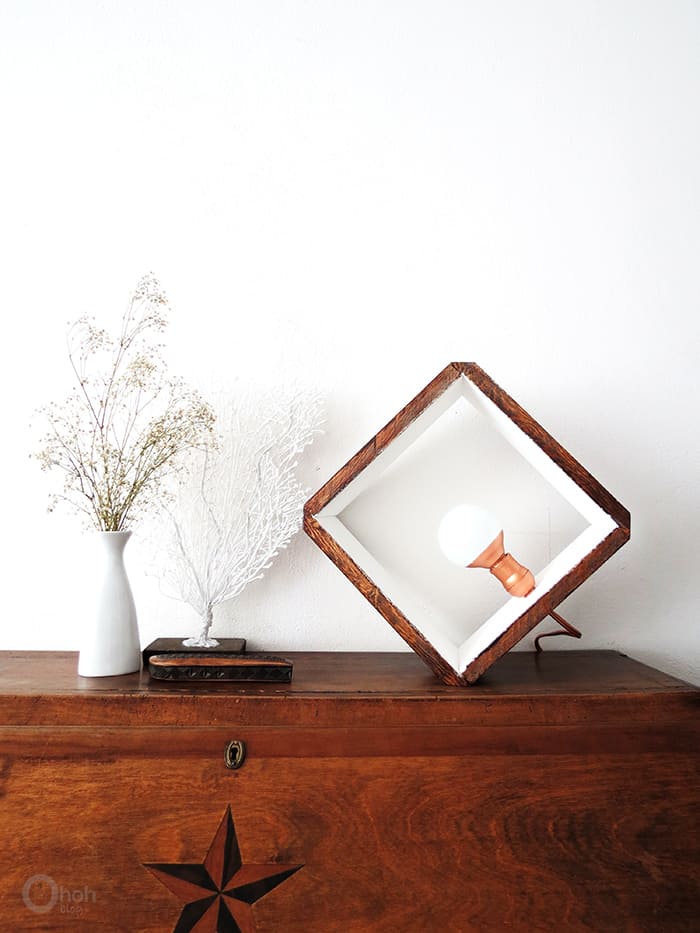
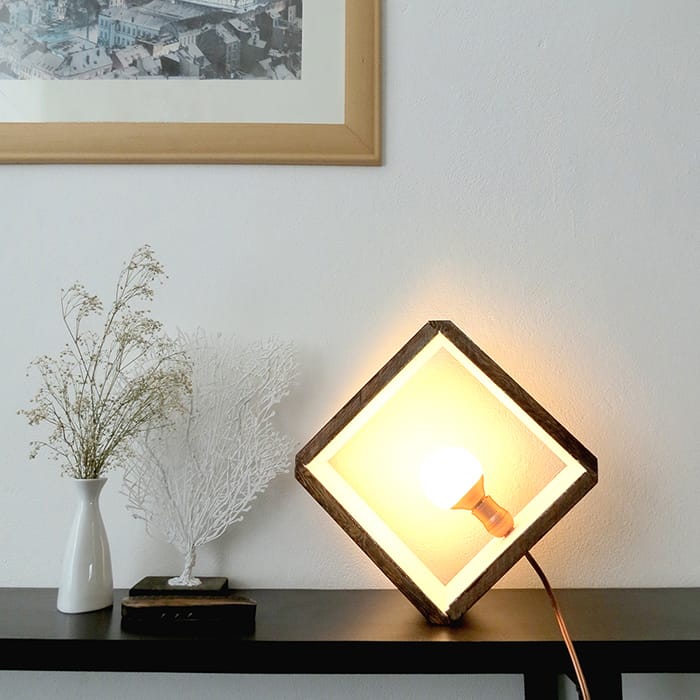
And done! A nice modern lamp! you can place it on one side or on an angle.
Different lighting can significantly impact the atmosphere of a room. By mixing and matching different lighting types and techniques, you can create a variety of atmospheres to suit different occasions and moods in any room.
PS: I made the fake coral with my glue gun, read my post to know how!
By following these steps, you can create a unique DIY wood lamp that adds a touch of handmade charm to any room. Have fun crafting and Enjoy your DIY project!
RELATED: Easy to make DIY Paper lanterns with lights
RELATED: Paper Lampshade DIY
Want to remember it? Save this DIY Wood Lamp in your favorite Pinterest board.
You will find all the tutorials featured in the video on my “Best DIY” page.
Amaryllis

Très chouette la lampe à 2 positions, mais c'est vrai qu'un p'tit coup de ponceuse ne fera pas de tort pour les prochaines réalisations dixit le ponceur fou 😉
C'est sure que ce sera plus facile que de poncer a la main!
It was very helpful,thanks