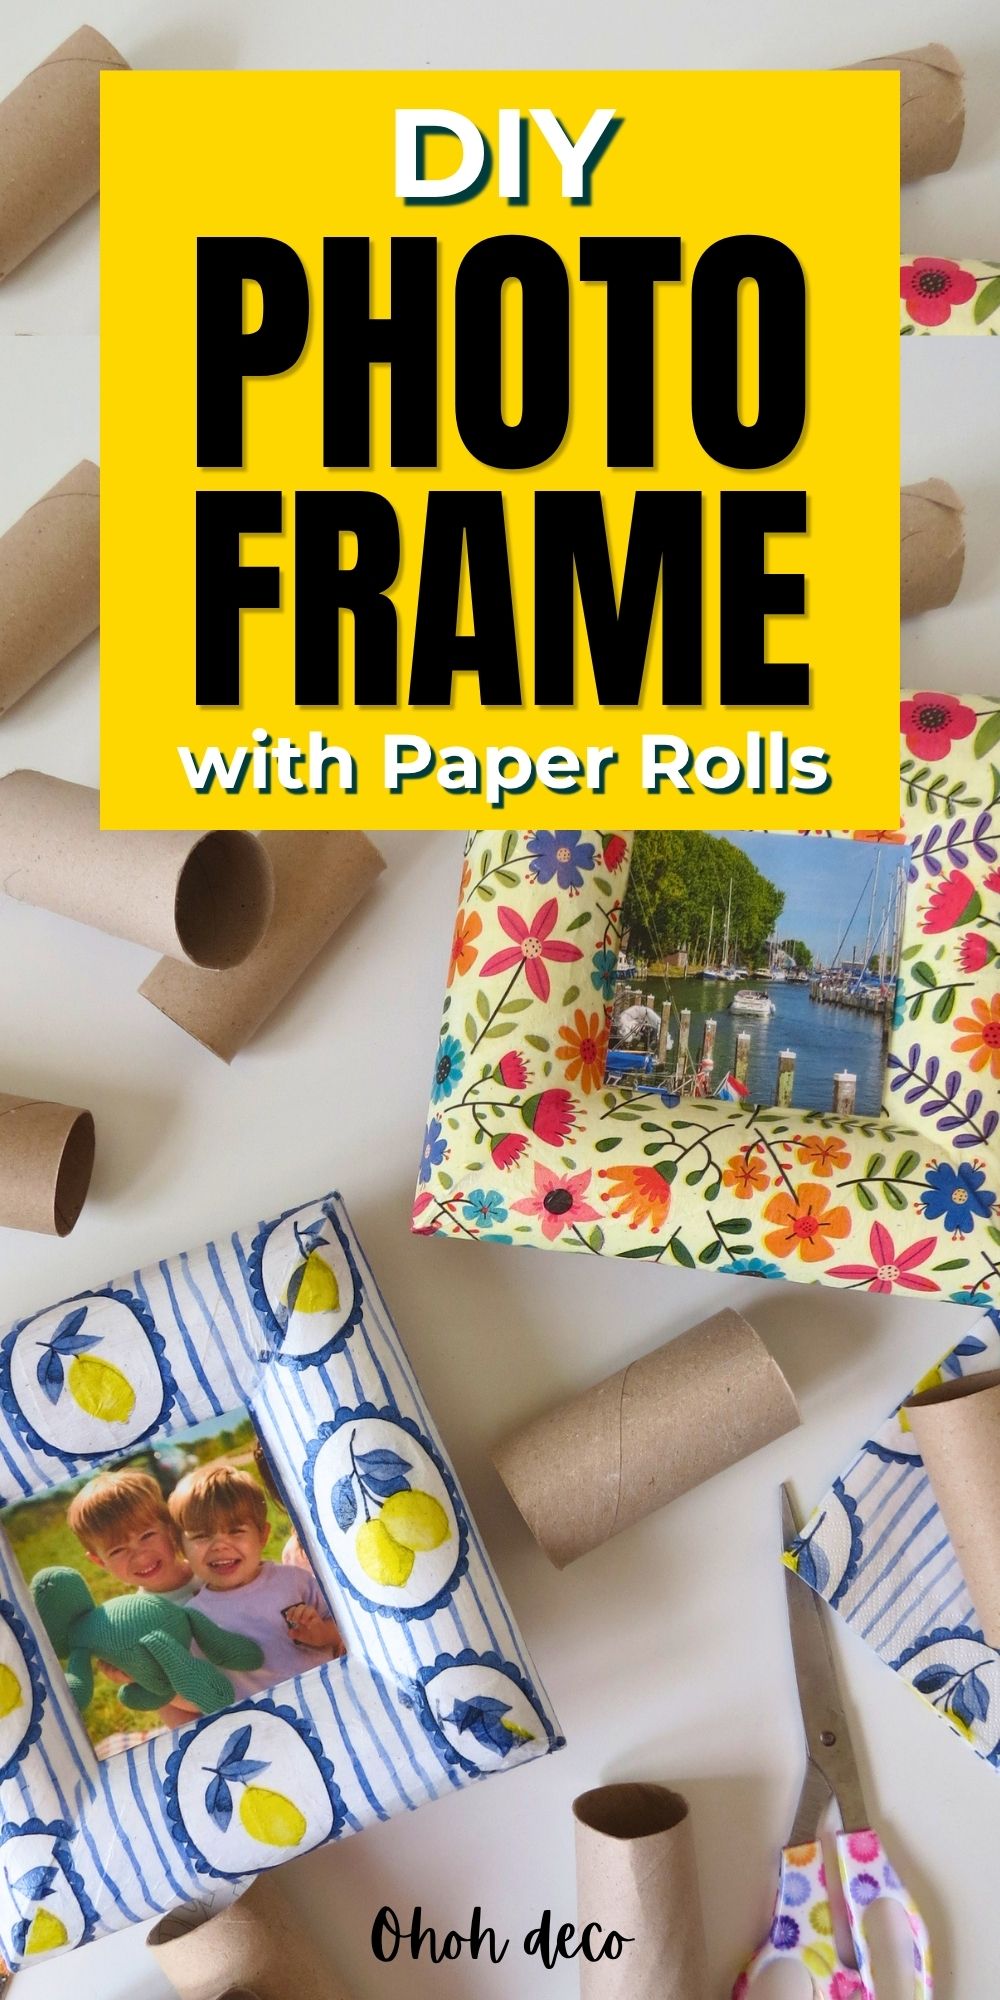
Turn humble toilet paper rolls and cardboard into a lovely handmade DIY photo frame that’s perfect for decorating your home or giving as a heartfelt present.
This upcycled craft is budget-friendly, beginner-friendly, and surprisingly sturdy. You can hang your finished frame on the wall or display it on a console table, shelf, or any furniture you like.
Let’s transform everyday materials into something beautiful!
[ This post probably contains affiliate links; our full disclosure policy is boring, but you can read it HERE ]
Materials You’ll Need
- 4 toilet paper rolls
- Cardboard (for the frame back)
- Ruler
- Scissors or craft knife
- Masking tape or craft tape
- Your favorite photo
- Double-sided tape
Optional:
- White paint (acrylic works great)
- Paintbrush
- Decorative paper napkins (for decoupage)
- Varnish glue (Mod Podge or similar)
- command hooks for hanging
Step-by-Step Tutorial to Make a DIY Photo Frame
Step 1: Prepare the Toilet Paper Rolls
Take 4 toilet paper rolls and press each one flat with your hands.
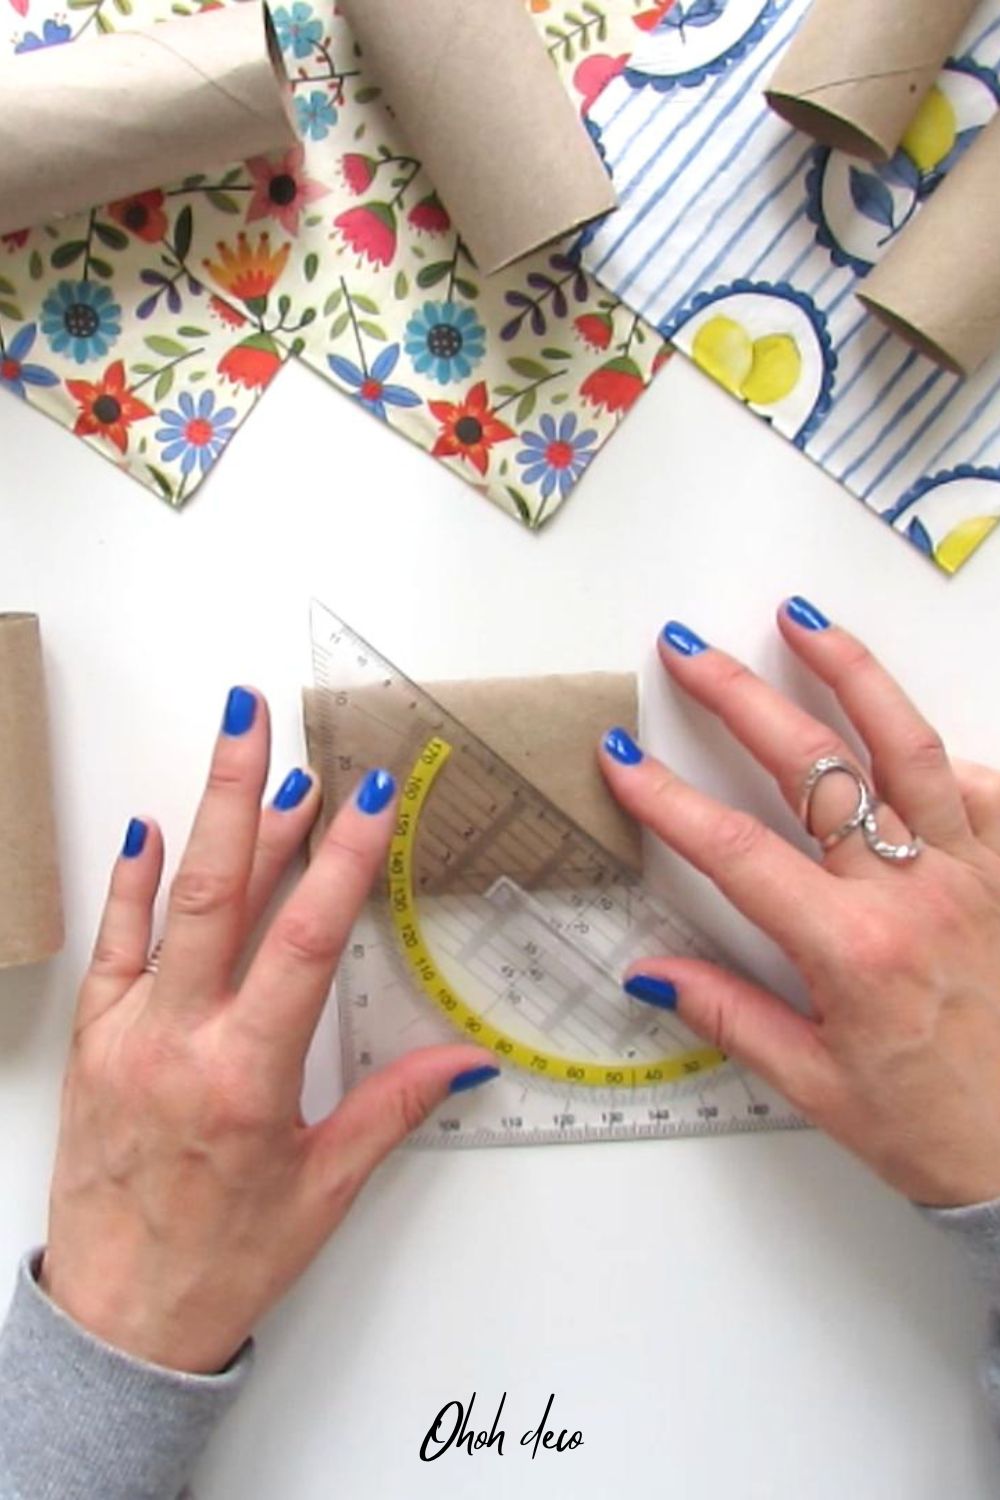
Step 2: Cut at an Angle
Using a ruler as your guide, cut one side of each flattened roll at a 50-degree angle. This angled cut will help create neat, professional-looking corners for your frame.
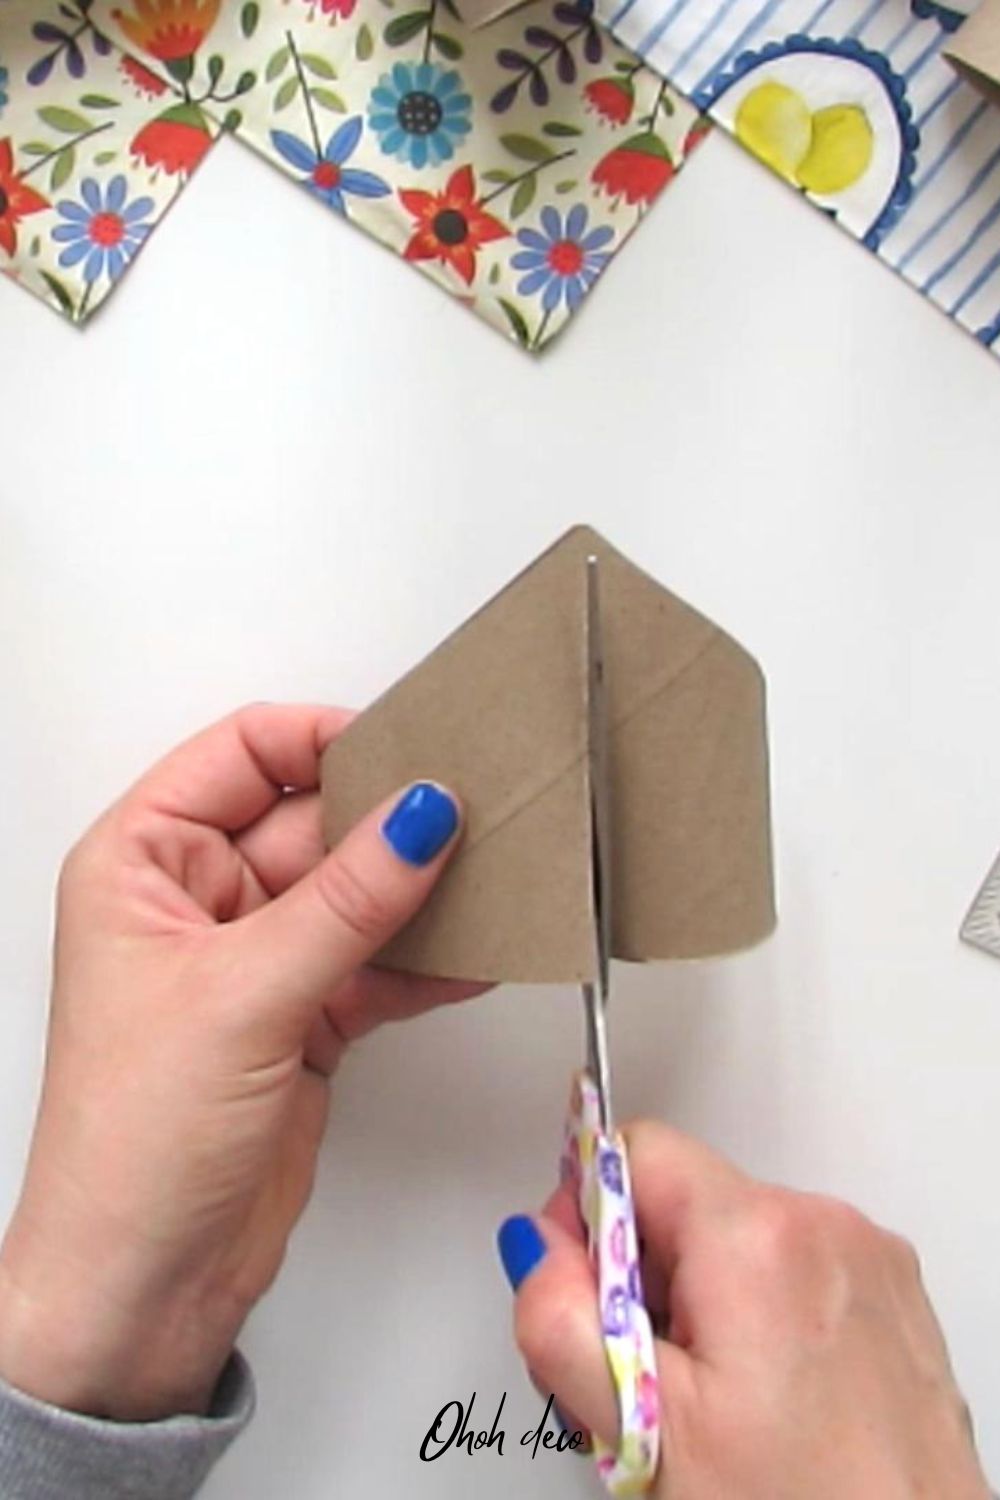
Step 3: Open the Rolls
Cut along the natural folds of each toilet paper roll to open it up completely into a flat piece.
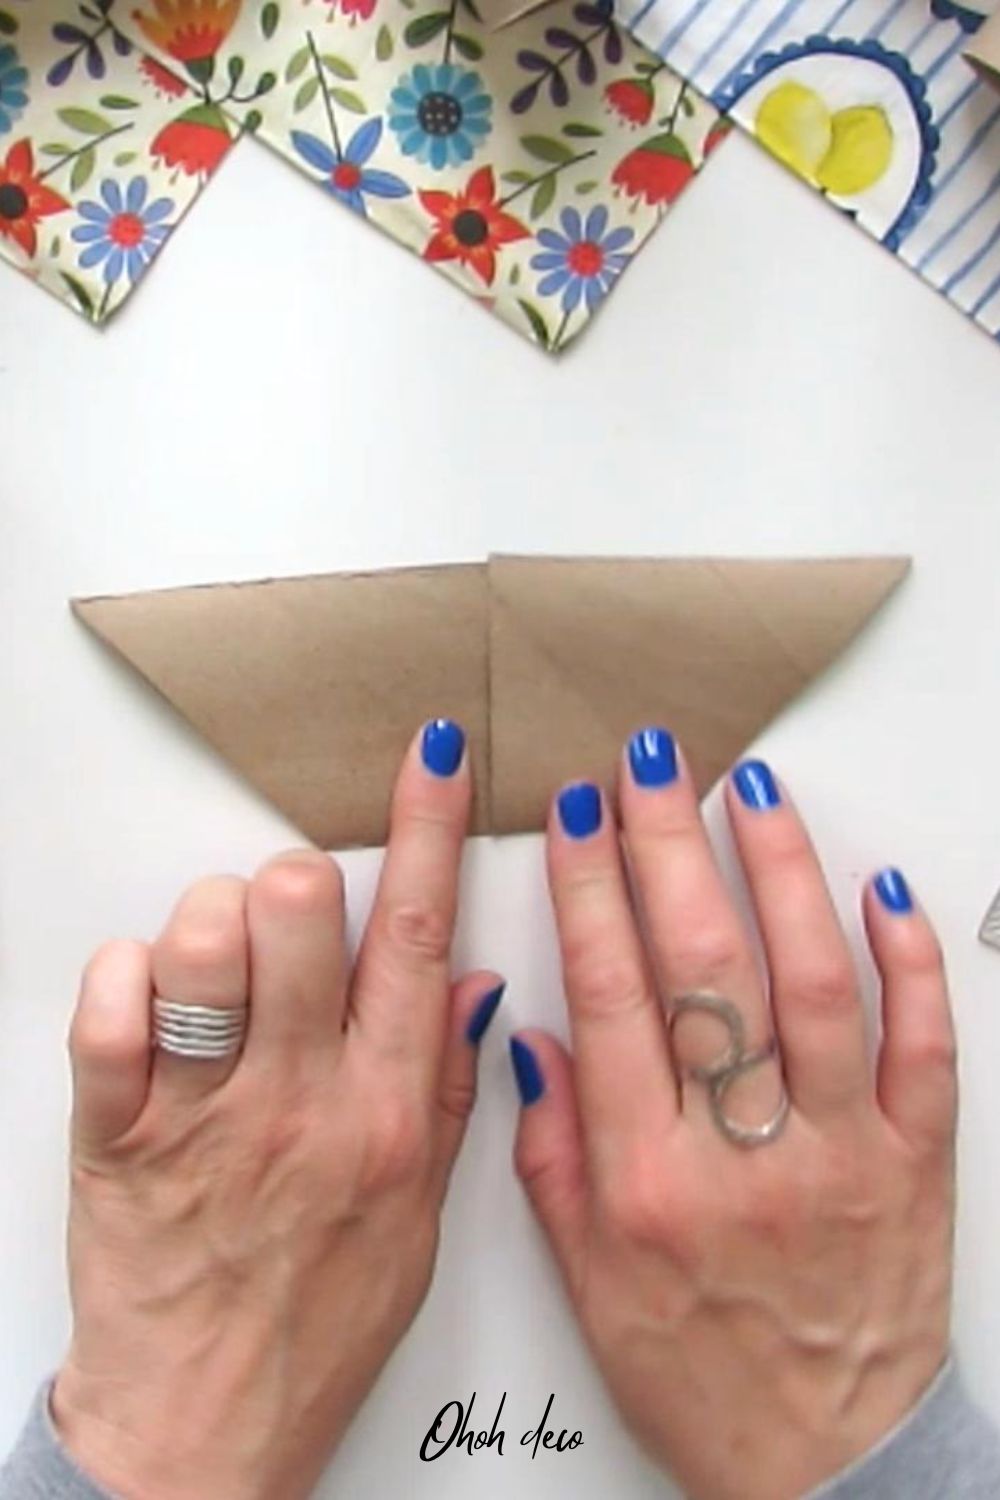
Step 4: Create the First Side
Place two parts of the opened roll next to each other and tape them together using masking tape or craft tape. Craft tape is especially nice because it’s easy to paint over and cover later. This creates one side of your frame.
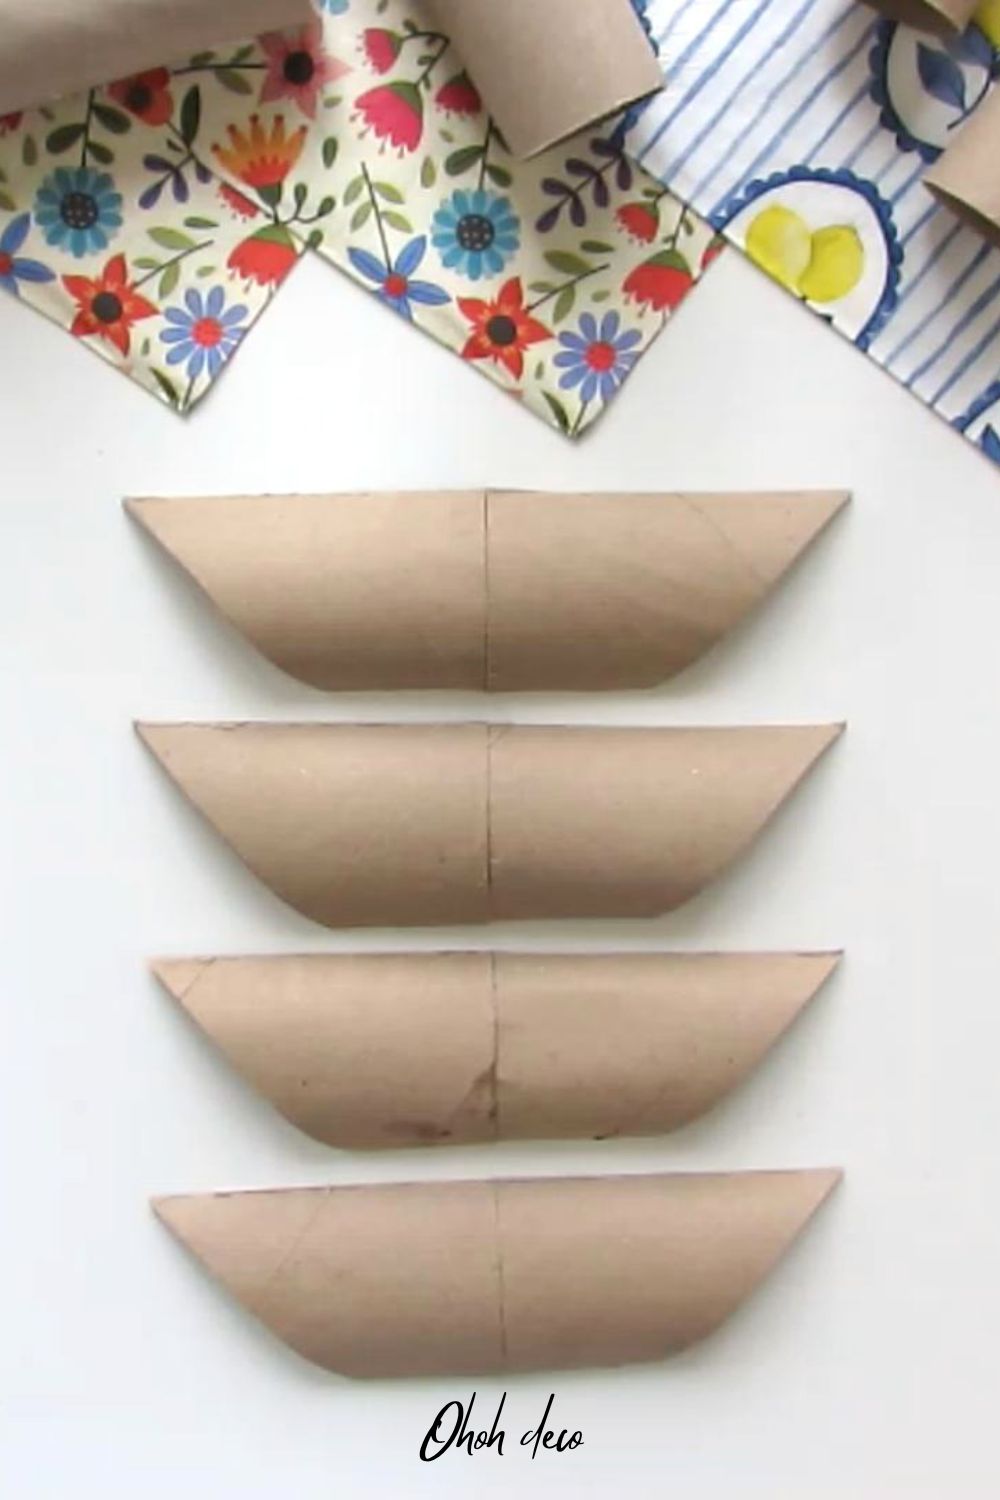
Step 5: Build All Four Sides
Repeat the previous steps to create all 4 sides of the frame. You’ll end up with four long, angled pieces ready to assemble.
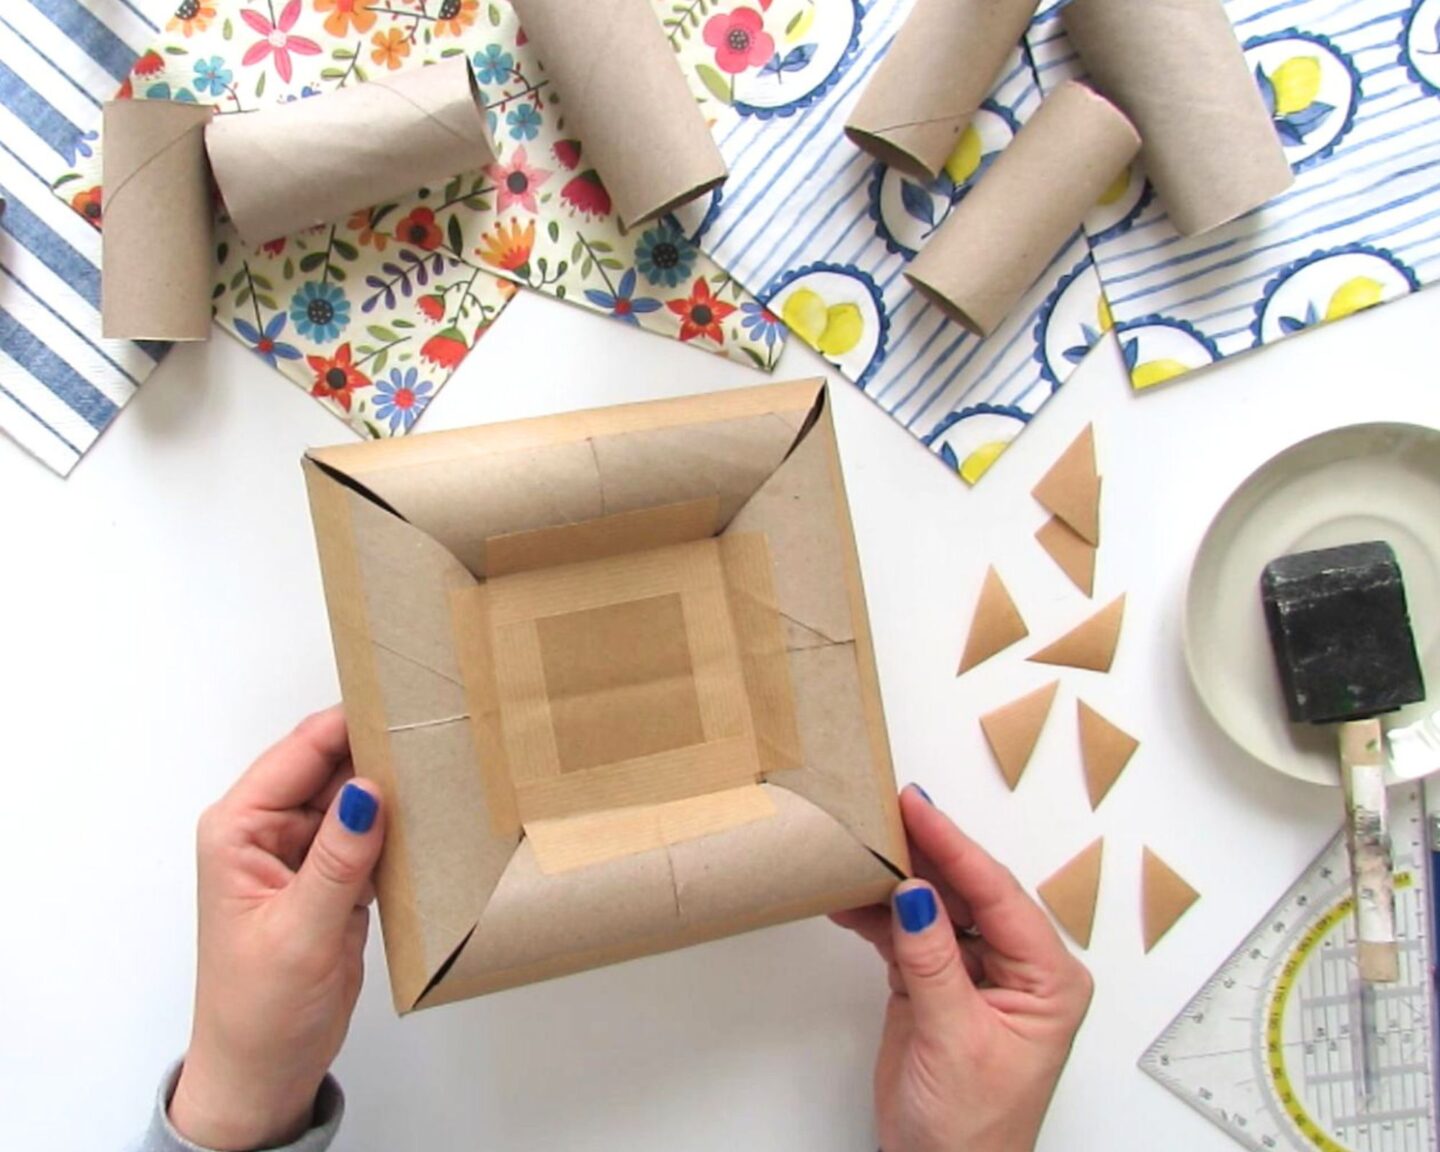
Step 6: Cut the Cardboard Back
Cut a square piece of cardboard measuring 19 cm x 19 cm. This will be the back of your frame. Measurements can slighty vary depending on the size of your paper rolls.
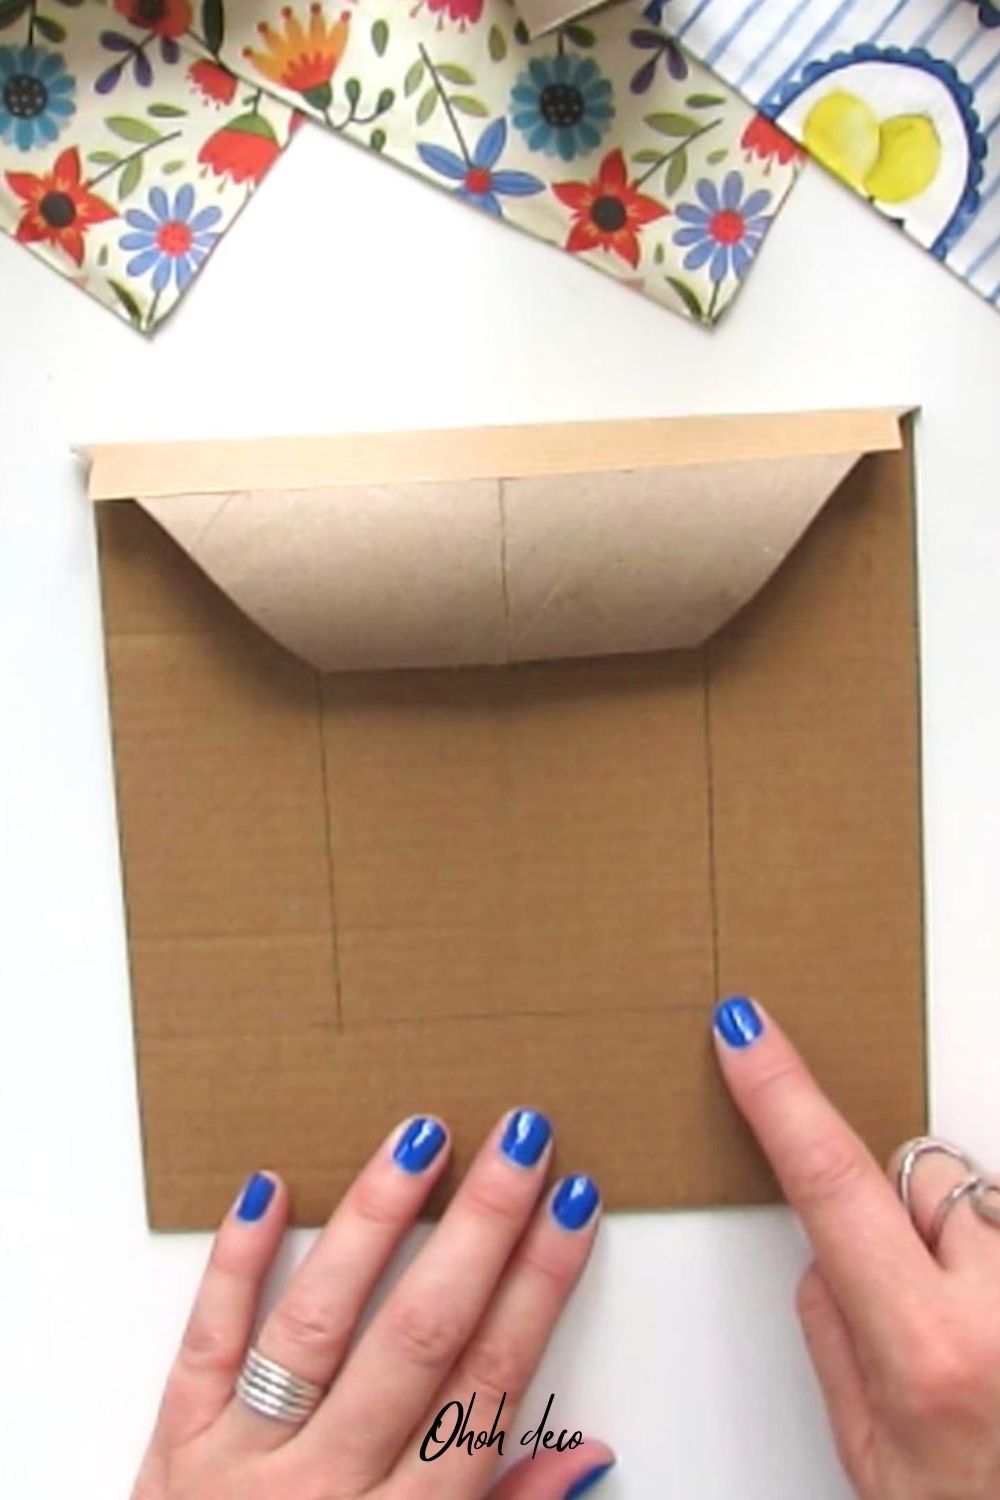
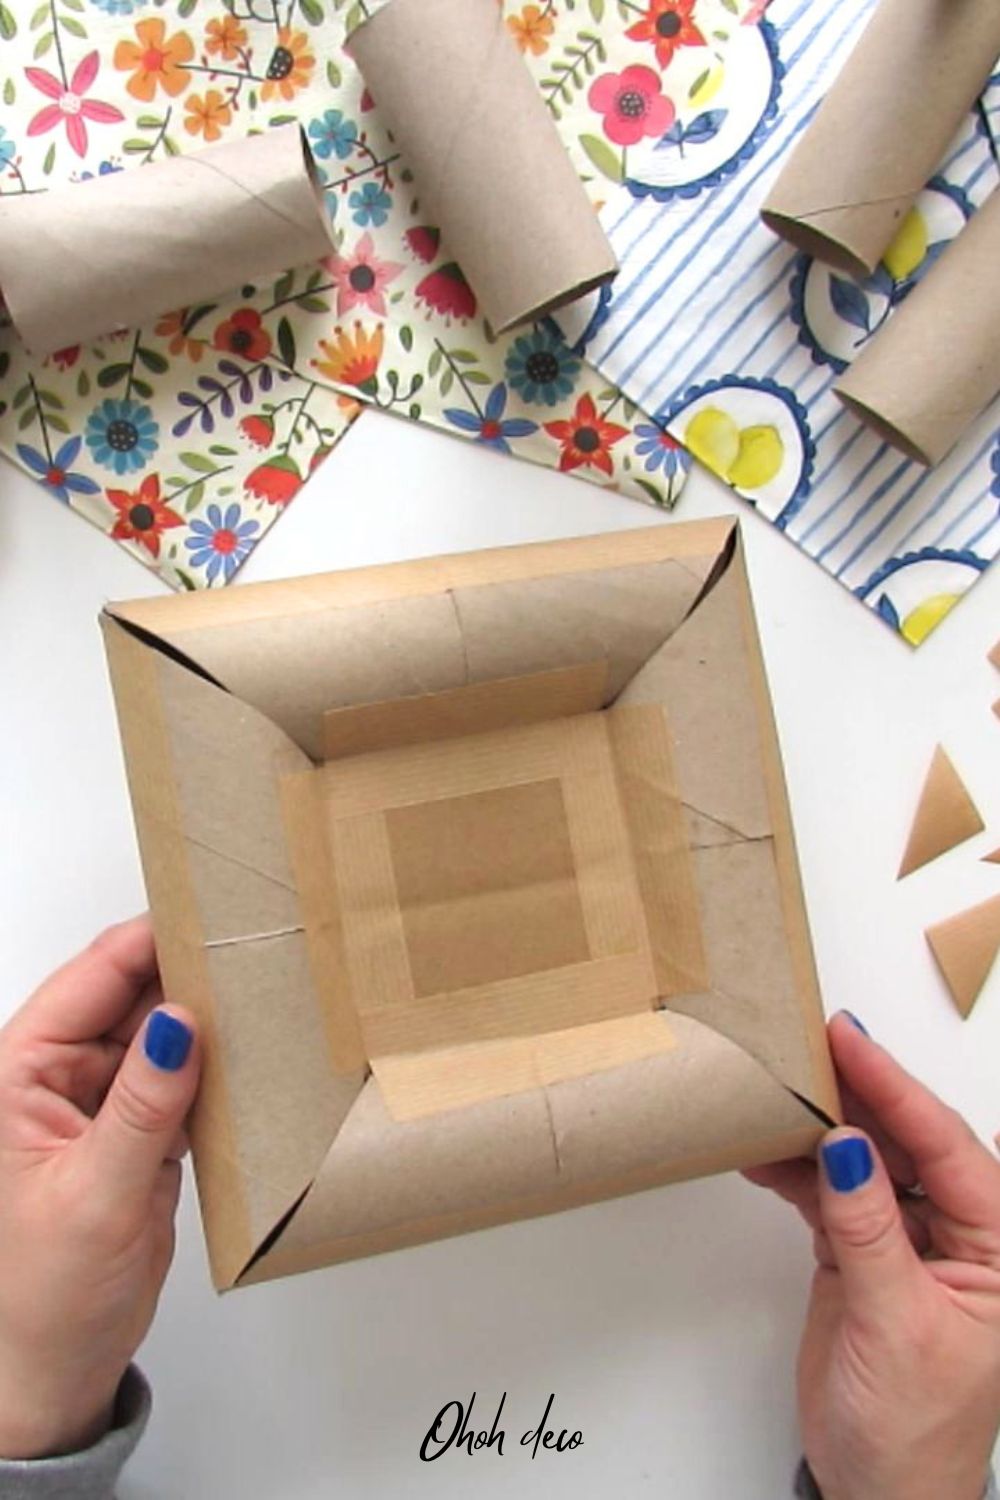
Step 7: Assemble the Frame
Tape the four toilet paper roll sides onto the cardboard square to form your DIY photo frame. Make sure to tape down the creases and folds securely.
You can use craft tape, or for extra strength, try the newspaper and glue technique (like papier-mâché). If using newspaper and glue, let the cardboard dry completely.
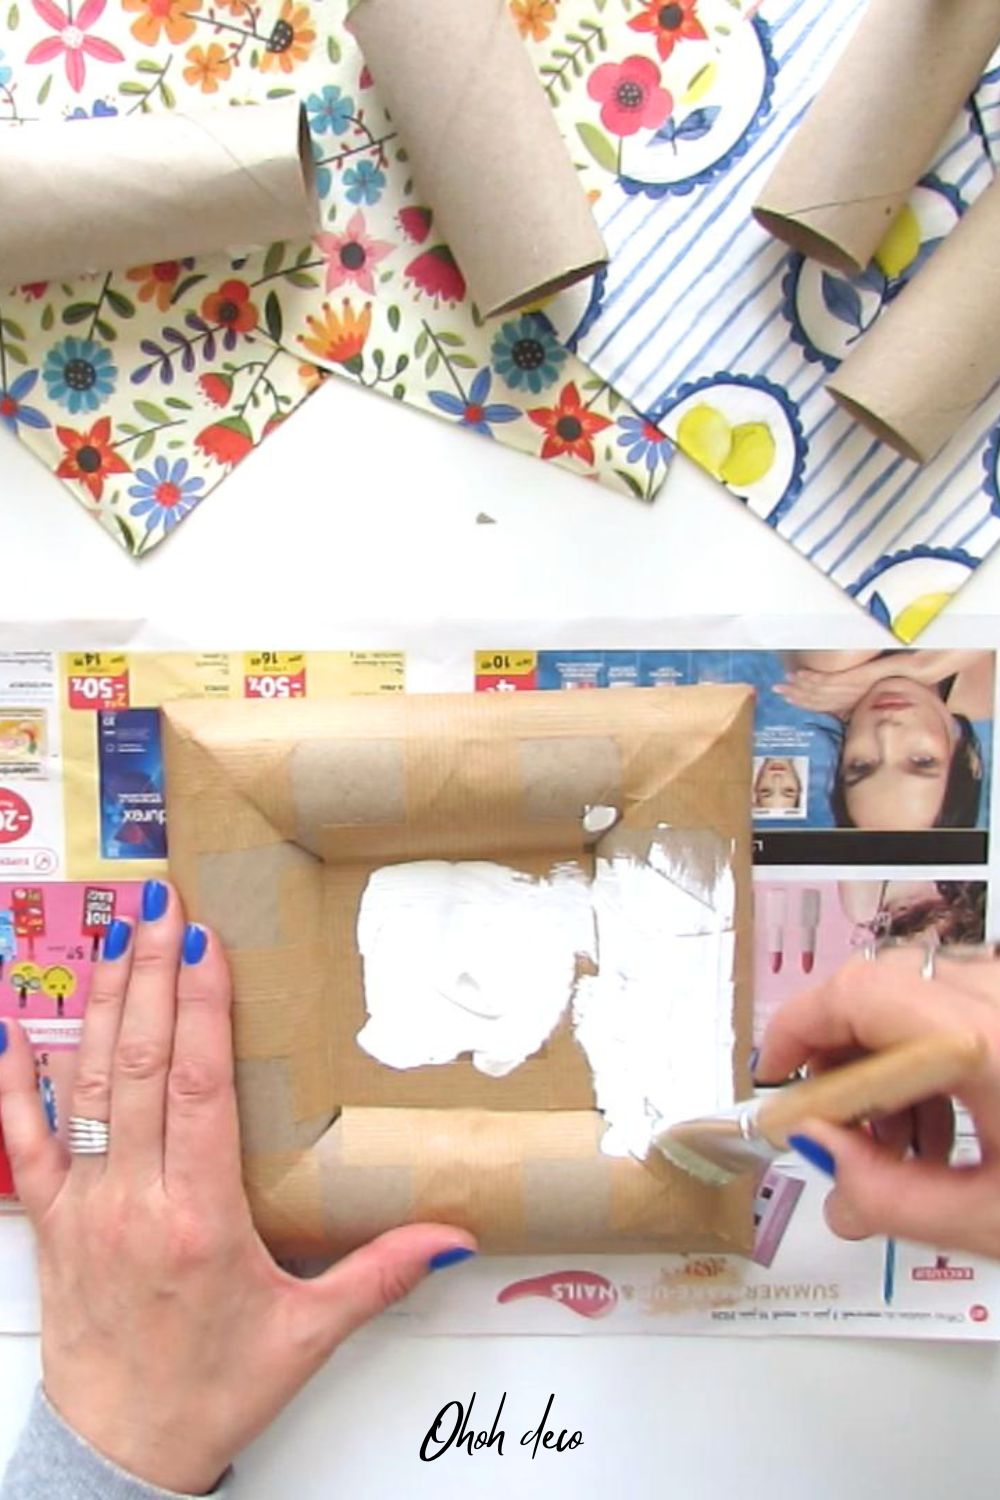
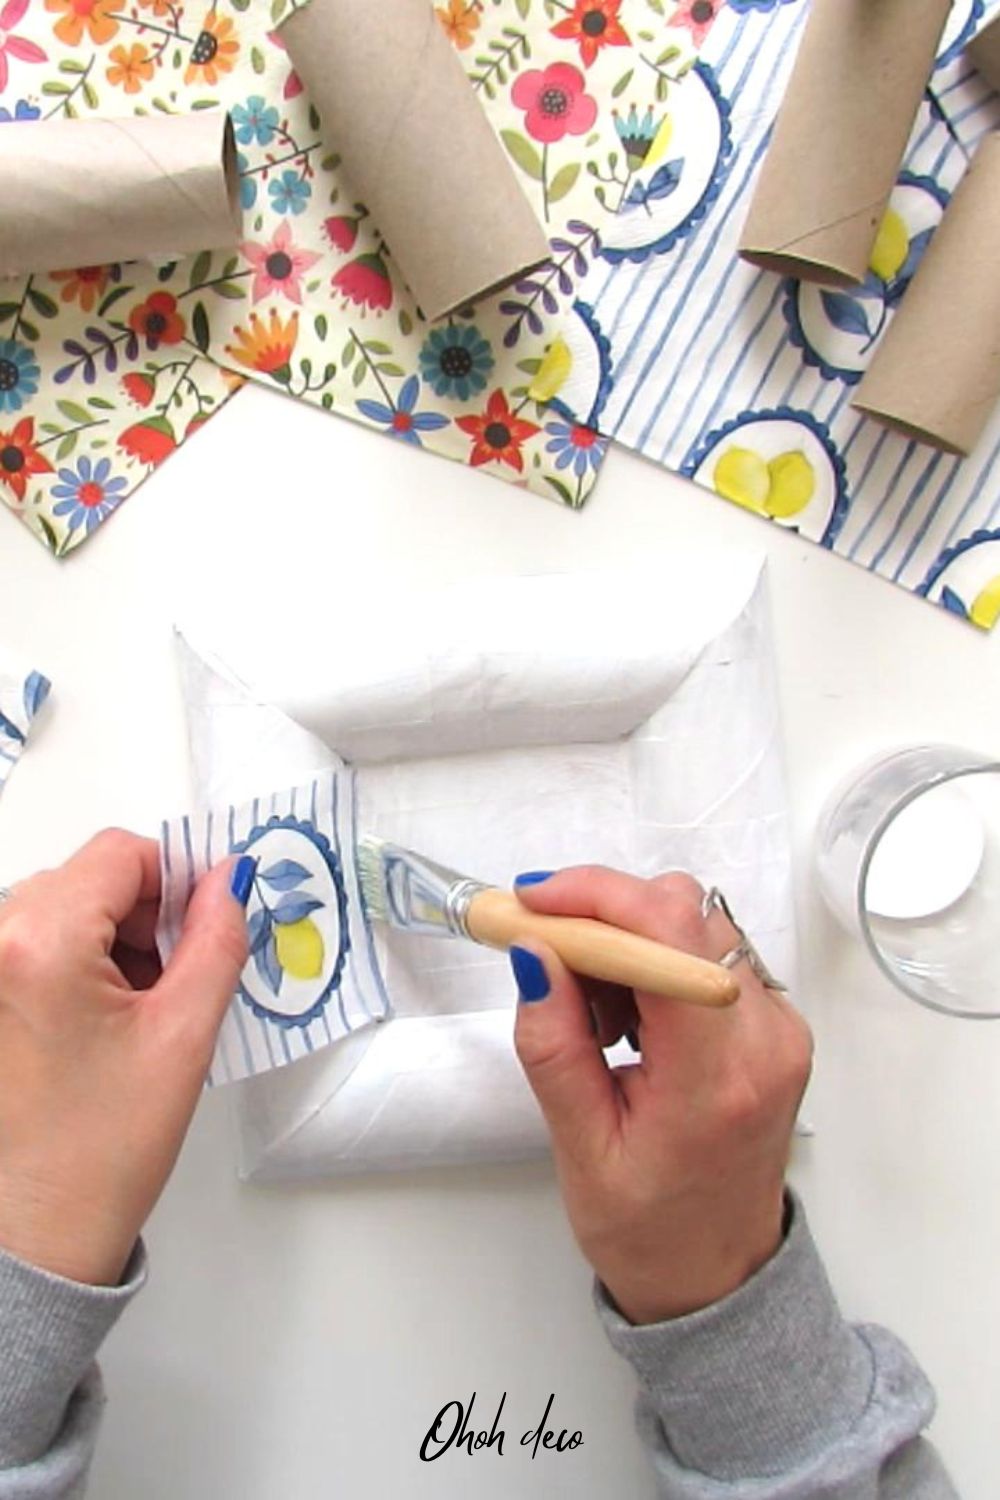
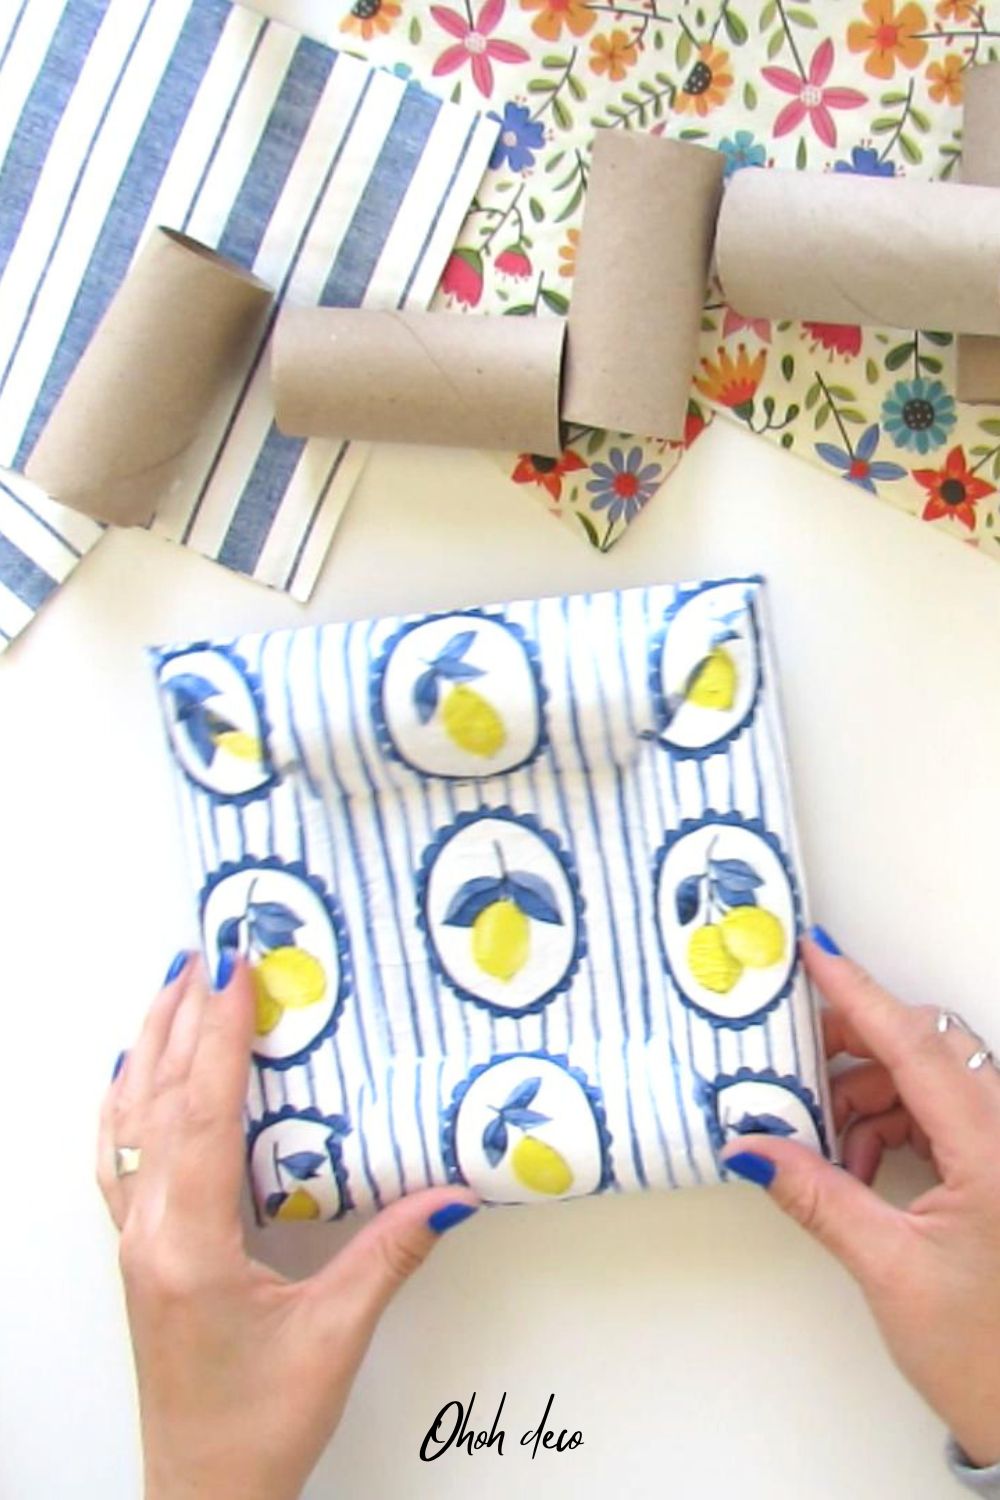
Step 8: Finish with Decoupage
Now comes the fun part! To finish your frame, you can paint it any color you like or apply decorative paper napkins using the decoupage technique. I chose decoupage for a beautiful, detailed finish:
- First, apply a coat of white paint as your base and let it dry completely
- Cut out your favorite designs from decorative paper napkins
- Apply the napkin cutouts to the frame using varnish glue, smoothing out any bubbles
- For a better, more polished finish, apply an extra coat of varnish over the entire frame and let it dry
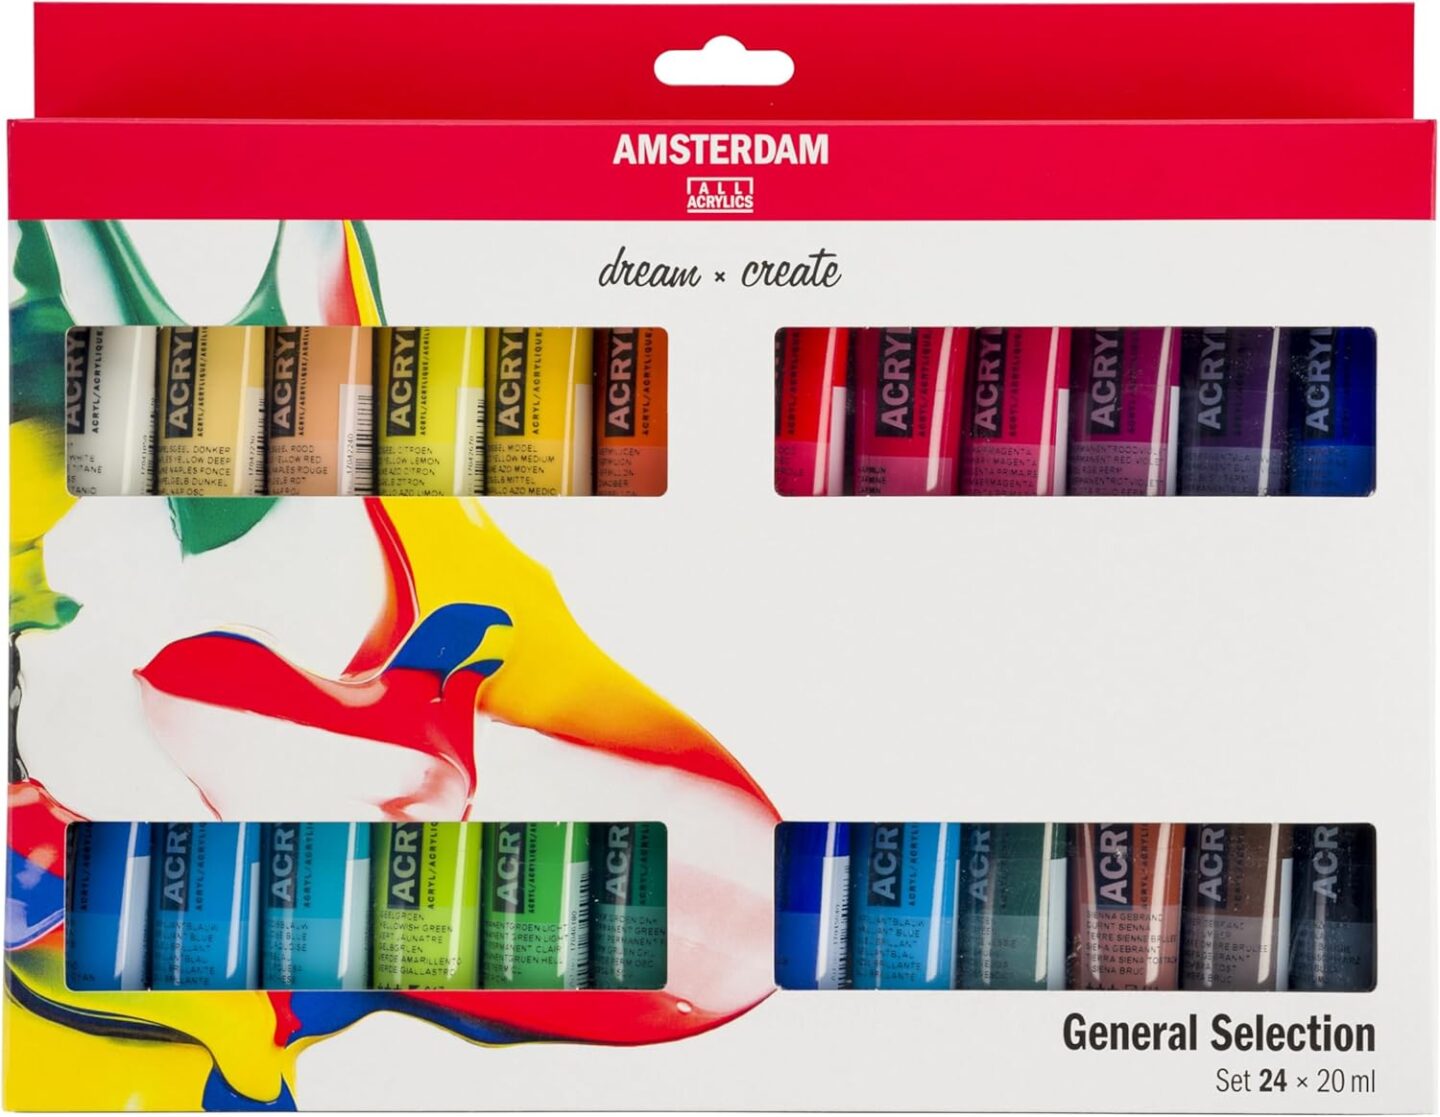
This Acrylic paint brand is the best, a lot of colors and excellent coverage
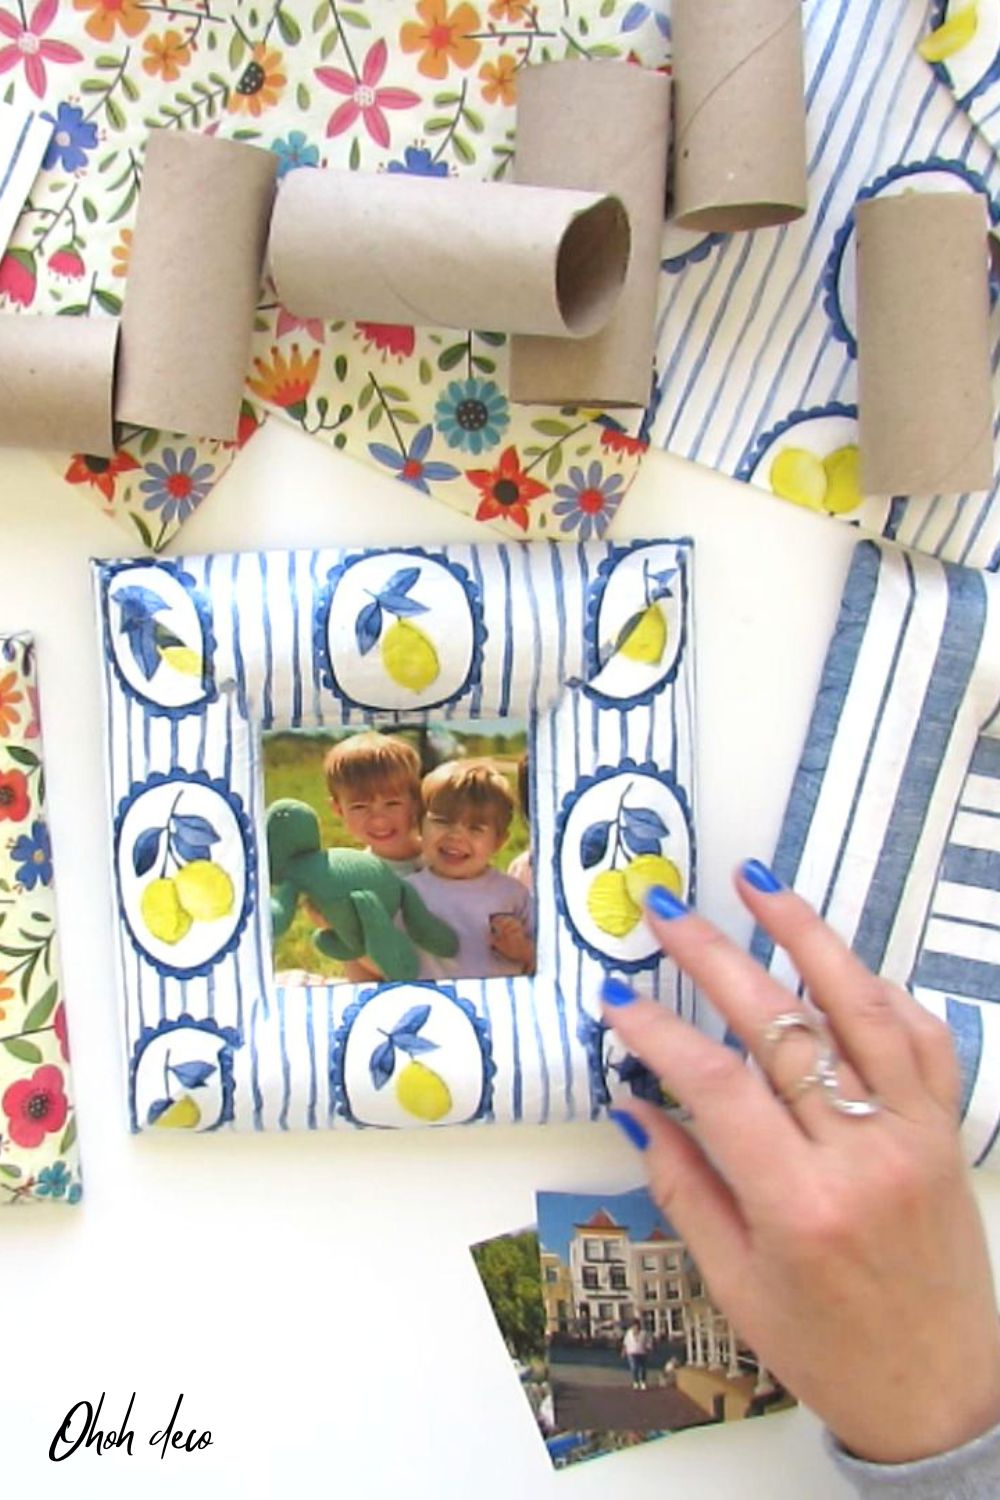
Step 9: Add Your Photo
Take your favorite photo and cut it to fit perfectly into the frame opening. Fix it in place with double-sided tape on the back.
Watch the Full Video Tutorial
Want to see every step in action? Head over to my YouTube channel to watch the complete video tutorial for this DIY photo frame project. Seeing the process makes it even easier to follow along and get those corners just right!
RELATED: Fall Pumpkins made with Toilet Paper rolls
Conclusion
Your DIY photo frame is complete and ready to display! You can hang it on the wall using double-sided tape or command hooks for a damage-free solution.
If you prefer to display your frame on a table, desk, or shelf, simply cut a small piece of cardboard and fix it on the back at an angle to create a stand. You can watch this final step in the video.
This way, your frame can stand by itself, and you can display your favorite photo wherever you like.
This project proves that beautiful home decor doesn’t have to be expensive – sometimes the best materials are already in your home, just waiting to be transformed.
It’s a wonderful way to upcycle, get creative, and make something truly personal.
RELATED: 30 Toilet Paper Rolls crafts ideas for adults
RELATED: DIY Flower Trinket Dish from Toilet Paper Roll
Love this project? Please pin it and share this DIY Photo Frame with your crafty friends!
Now I’d love to hear from you: What picture would you like to display in your DIY photo frame?
A family photo, a favorite vacation memory, or maybe some inspiring artwork?
Let me know in the comments below!