
I bought this piece of furniture on a garage sale a year ago and have left it all this time in the game room without knowing exactly what I wanted to do with it. Until, a few weeks ago, I realized it would be perfect in the dining room … it was about time!
[ This post probably contains affiliate links, our full disclosure policy is really boring, but you can read it HERE ]
Buying new furniture requires a certain budget. You can make serious savings by upgrading the furniture you already have or by modernizing furniture that you buy second-hand.
I show you what I did with a shelving unit that I bought for next to nothing in a garage sale.
How to choose the right furniture to modernize?
Before starting, there are a few things to consider when buying furniture you want to upcycle:
1.Take into consideration the dimensions of the furniture. Is it suitable for the space where you want to place it? Does it have the right proportions for your room?
2. Look at the general condition of the piece. Do all the drawers/doors open and close properly? Is the furniture structure strong? Check that there is no trace of moisture or mold.
3. Does the general shape of the furniture suit your decor? We can always adapt the style of the furniture when doing a makeover, but it’s easier to start on a basis that suits you. Example, if you like modern, favor furniture with a simple shape. If baroque is your style, do not hesitate to look for rounded furniture with carved wood details.
Back at my shelving unit. I liked the simple shape of it but as you can see in the pictures below, it needs some work to upgrade it to something modern.
I will explain what I did and give you the products I used.
I also give you a great tip to change the back of any piece of furniture, shelf unit, or cabinet without damaging it.
RELATED: How to make DIY cardboard table
RELATED: Shoe storage ideas: 21 easy DIY
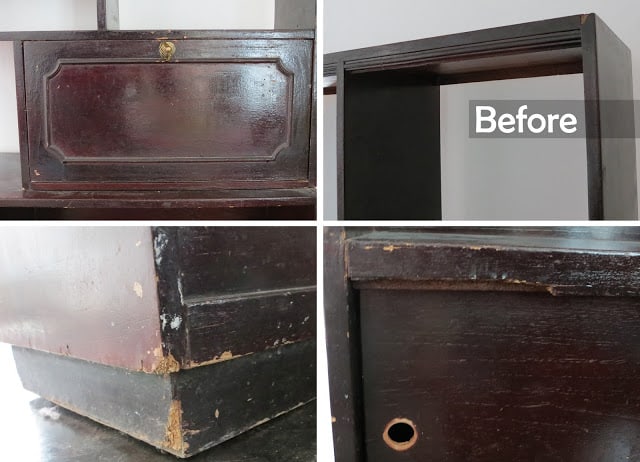
As I said, I like the general shape of the cabinet, the size, and the the sliding doors which gives it a nice touch.
What I do not like at all is that it’s veneer and not wood (I realized that after purchase it of course!).
I think the handles and the moldings are weird and do not match with the shape of this piece. There are many scratches and blows. So a lot of work to do to make it look nice!
How to modernize a piece of furniture
Here is what I did to refresh this shelving unit.
1. I removed all the moldings, those above and also those glued on the right door.
I simply used a carpenter hammer, the moldings went up very quickly.
2. I sanded with 120 grid paper to remove small imperfections. I insisted on where the moldings were to remove the glue.
3. Once the light sanding was finished, I clean with a damp cloth and then with this product mixed with water to remove all traces of grease.
4. I cut and placed a new door to hide part of the shelves on the left side. The door is made of plywood and is fixed with hinges on the side of the cabinet.
5. I removed the base and build new feets out of a plywood piece.
6. I stained the furniture with a dark wood stain. The starting color of the furniture was similar to the one I chose, so it was easy to do and I only needed two coats to have a nice result.
7. I added a nice paper to decorate the back of the shelves. I explain how you can do it below.
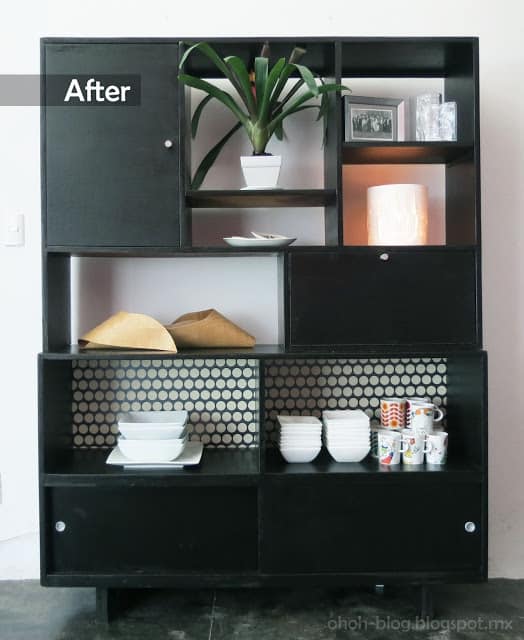
Here is the after! What do you think?
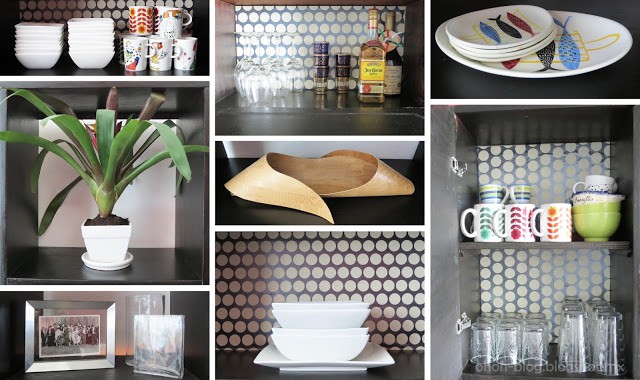
The new handles and the pretty background with the polka dots give a completely different aspect to the furniture.
RELATED: DIY round Coffee Table
RELATED: DIY Cardboard Wall Shelf
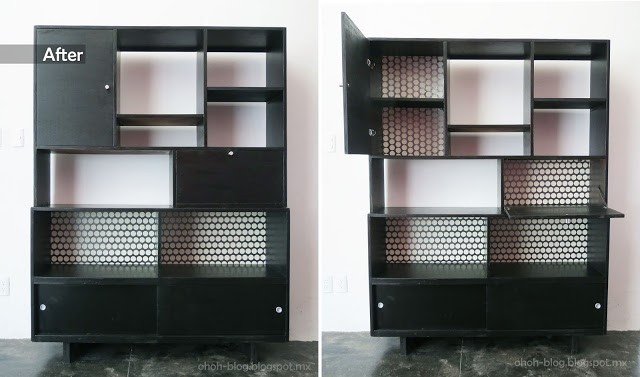
Old furniture look modern
Changing the back of a display cabinet or a shelving unit is a super simple and inexpensive way to refresh a piece of furniture.
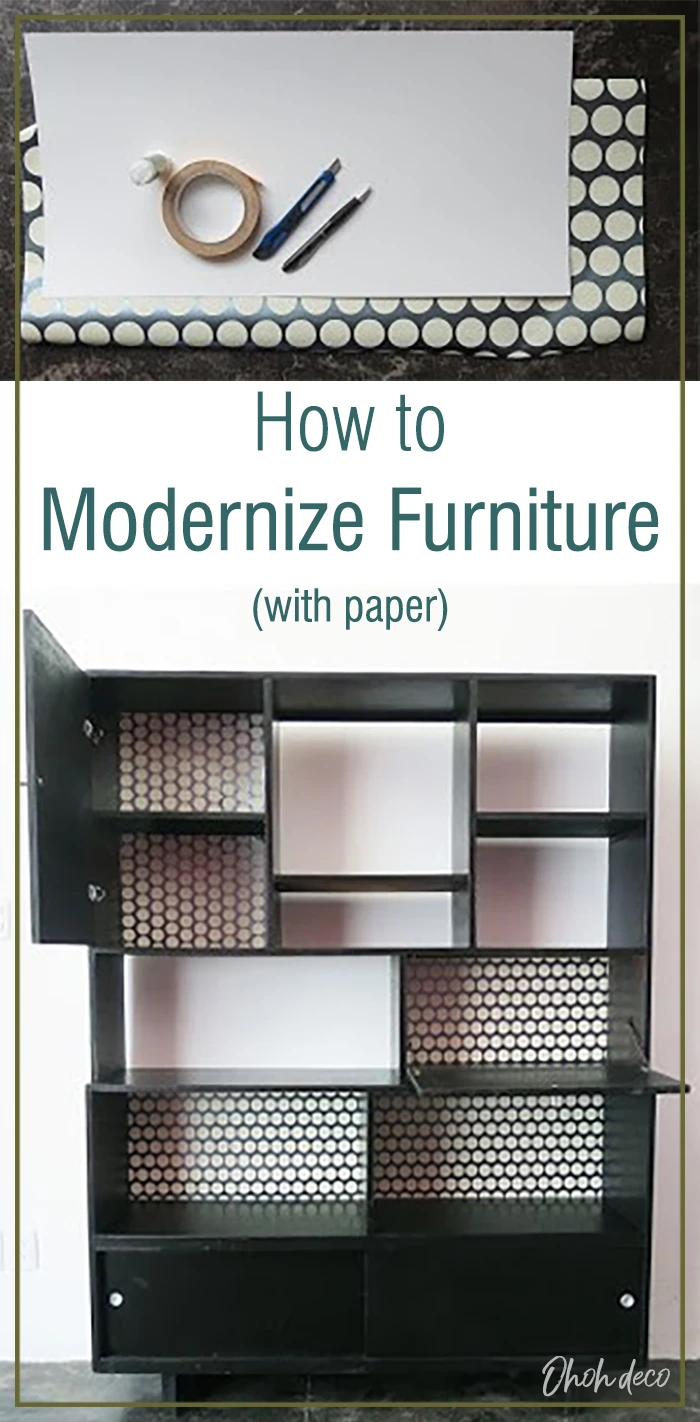
To give your furniture a facelift you will need:
- A nice patterned paper (wallpaper or even gift wrapping paper…it’s what I used for this makeover)
- Thin cardboard sheets
- Spray adhesive
- double sided tape
- A pair of scissors
- a cutter
- a ruler
- A slat
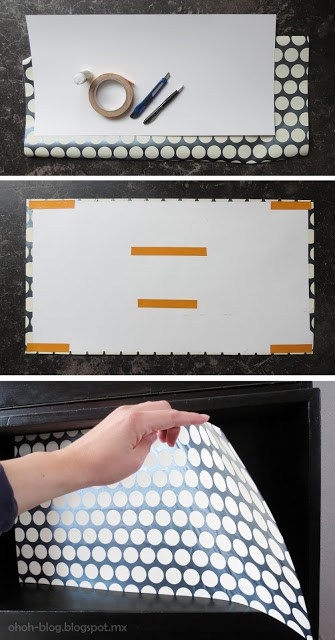
Measure the back area where you want to add the new paper. You can remove the shelves if it’s easy to do or leave them in place and work with differente pieces of paper.
Cut a thin cardboard piece to fill the back area you want to cover.
Glue the wallpaper on one side of the cardboard piece. Use spray adhesive so the bonding is uniform and without bubbles.
Cut or fold the extra paper length to fit the cardboard size.
Add some double sided tape on the back of the cardboard and stick it on the furniture back.
Repeat as many time as needed until the furniture is finished.
If you work with a large pattern paper, pay attention to the continuity of the design between the different pieces.
And done! Enjoy your new furniture.
Changing the back of a piece of furniture is one of my favorite makeovers because it’s super easy to do and requires very few tools and supplies.
In addition, it does not damage the furniture and is easy to remove when you want to change your decor again.
I love to see your creations, so don’t hesitate to let a comment or tag me on Instagram ohoh.deco and show me your flea market furniture flips.
RELATED: DIY Display Shelf
RELATED: Easy upcycled shelving unit
Want to remember it? Save how to modernize a piece of furniture in you favorite pinterest board.
You will find all the tutorials featured in the video on my “Best DIY” page.
Amaryllis
Anonymous
Wednesday 13th of April 2016
Thank you for another essential article. Where else could anyone get that kind of information in such a complete way of writing? I have a presentation incoming week, and I am on the lookout for such information. automated logic dealers
Hannah
Wednesday 30th of March 2016
Really love all of the new furniture too, and I think that lamp looks good against the grey wall after all that!
David Patterson
Wednesday 20th of January 2016
Thank you for sharing this information. Furniture Store
Robiul Rony
Thursday 15th of October 2015
Great post. I like this post. Informative and interesting which we share with you so i think so it is very useful and knowledgeable. I would like to thank you for the efforts. I am tiring the same best work from me in the future as well.
Anonymous
Thursday 17th of July 2014
Thanks a lot for sharing such a wonderful post, it is a very nice site i really enjoyed to visit this site. business for sale nj craigslist