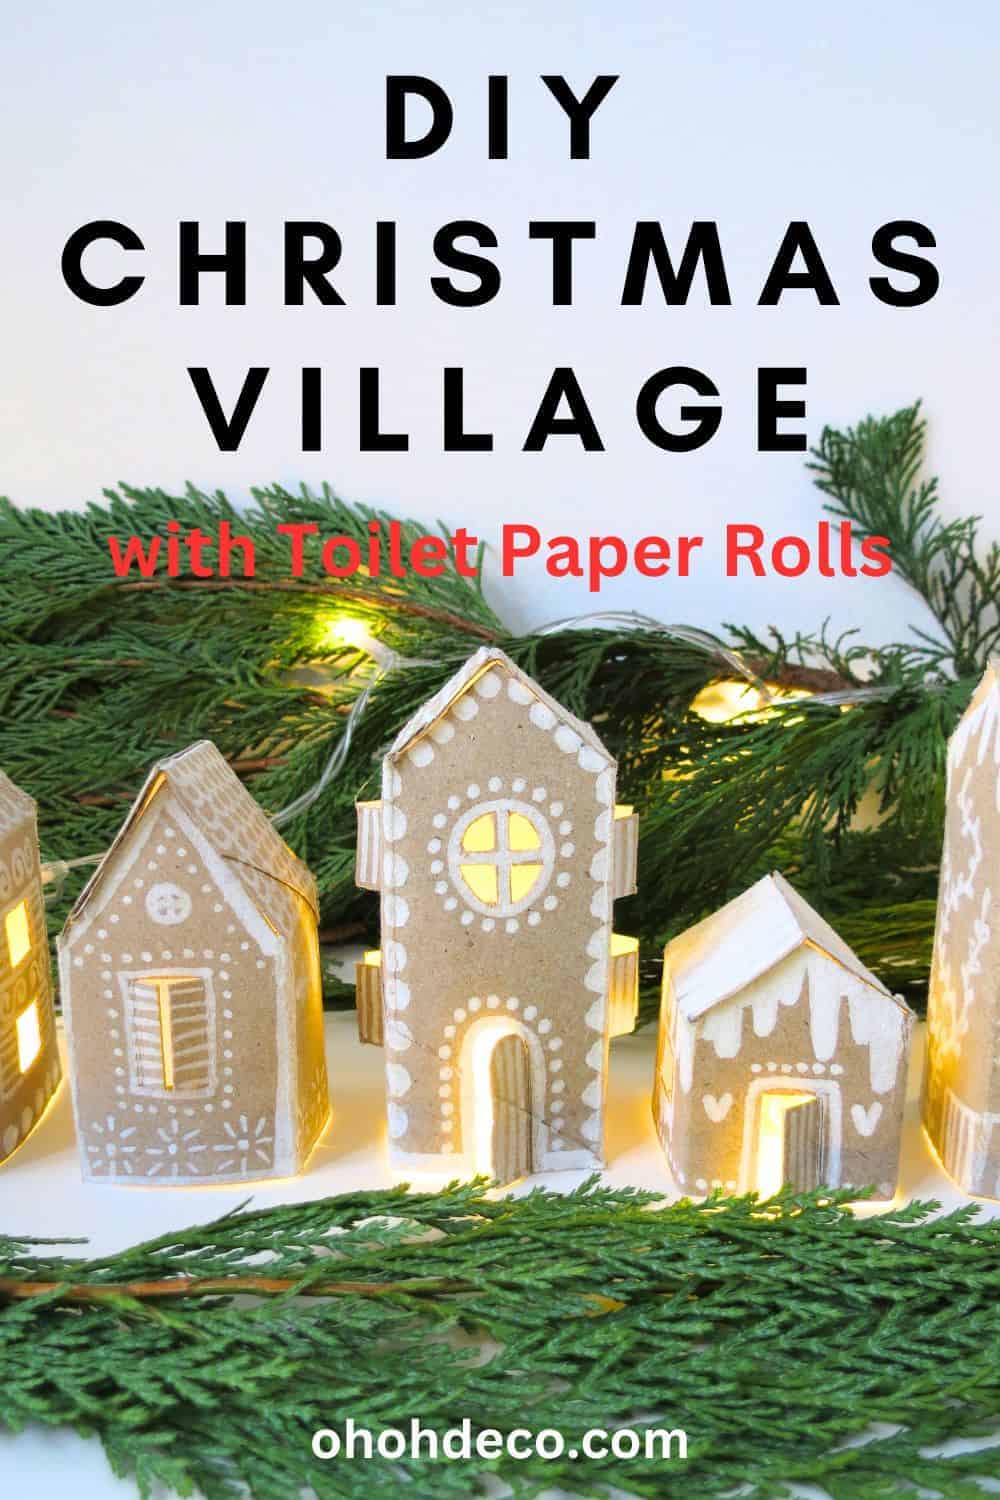
Are you ready to take your holiday decorations to the next level? Prepare to be amazed as we unveil the unbelievable secrets of transforming ordinary toilet paper rolls into a stunning DIY Christmas village.
In this article, we will guide you through step-by-step instructions and share creative ideas to make your holiday decorations truly unique and budget-friendly.
From gathering your materials to adding the finishing touches, lighting up your village, and displaying your creation, we’ve got you covered. Get ready to unleash your creativity and make this holiday season special.
[ This post probably contains affiliate links, our full disclosure policy is boring, but you can read it HERE ]
Gather Your Materials
To begin your journey in creating a stunning Christmas village using toilet paper rolls, it’s essential to gather the materials needed to bring your vision to life. Luckily, you won’t need much to get started, making this project both accessible and budget-friendly.
The primary material you’ll need, of course, is a collection of empty toilet paper rolls. These can be easily collected from your own bathroom or perhaps donated by friends and family who will be thrilled to see their everyday waste transformed into holiday magic. The number of rolls you gather will determine the size and scope of your Christmas village, so feel free to stock up accordingly.
In addition to the toilet paper rolls, you’ll want to gather a few other basic supplies like:
- Scissors
- Cutter
- Ruler
- Pencil
- Chalk sharpie
- Posca
- Hot glue or craft glue
- Tiny LED light
To give your Christmas village some festive color and texture, you can also use paint or markers in various shades. These will allow you to bring your houses, trees, and other structures to life, adding a touch of personalization and charm.
Don’t forget about the finishing touches that will make your DIY Christmas village sparkle. Glitter, sequins, fake snow are all fantastic options for adding an enchanting and magical touch to your creation. These small but mighty details can truly elevate your Christmas village from ordinary to extraordinary, capturing the hearts of all who behold it.
Now that you’ve gathered your materials, it’s time to dive into the exciting process of creating a house with toilet paper rolls. Let’s explore the step-by-step instructions for this delightful DIY project.
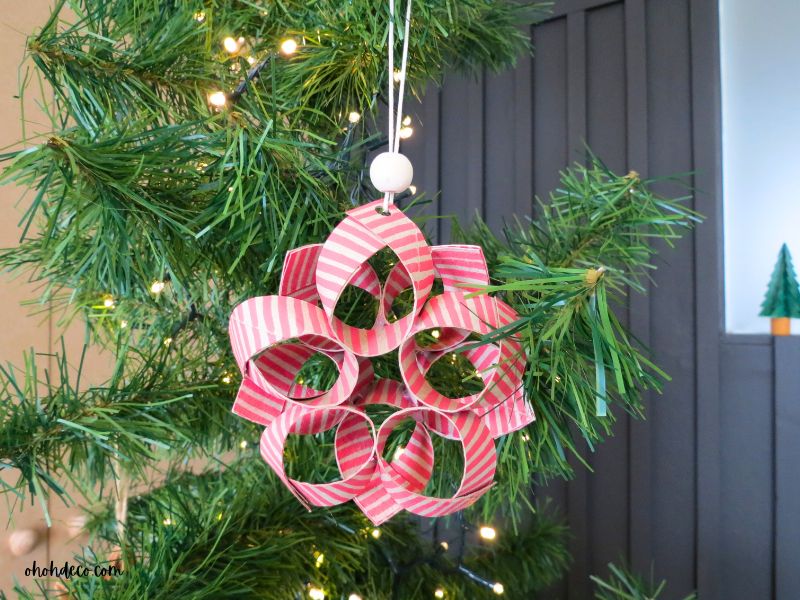
RELATED: From Trash to Treasure: How to Transform Toilet Paper Rolls into Delicate Snowflake Ornaments
RELATED: How to make a Christmas gingerbread village with cardboard
Creating a house with toilet paper roll
Now that you’ve gathered your materials, it’s time to dive into the exciting process of creating the little houses of the village with toilet paper rolls.
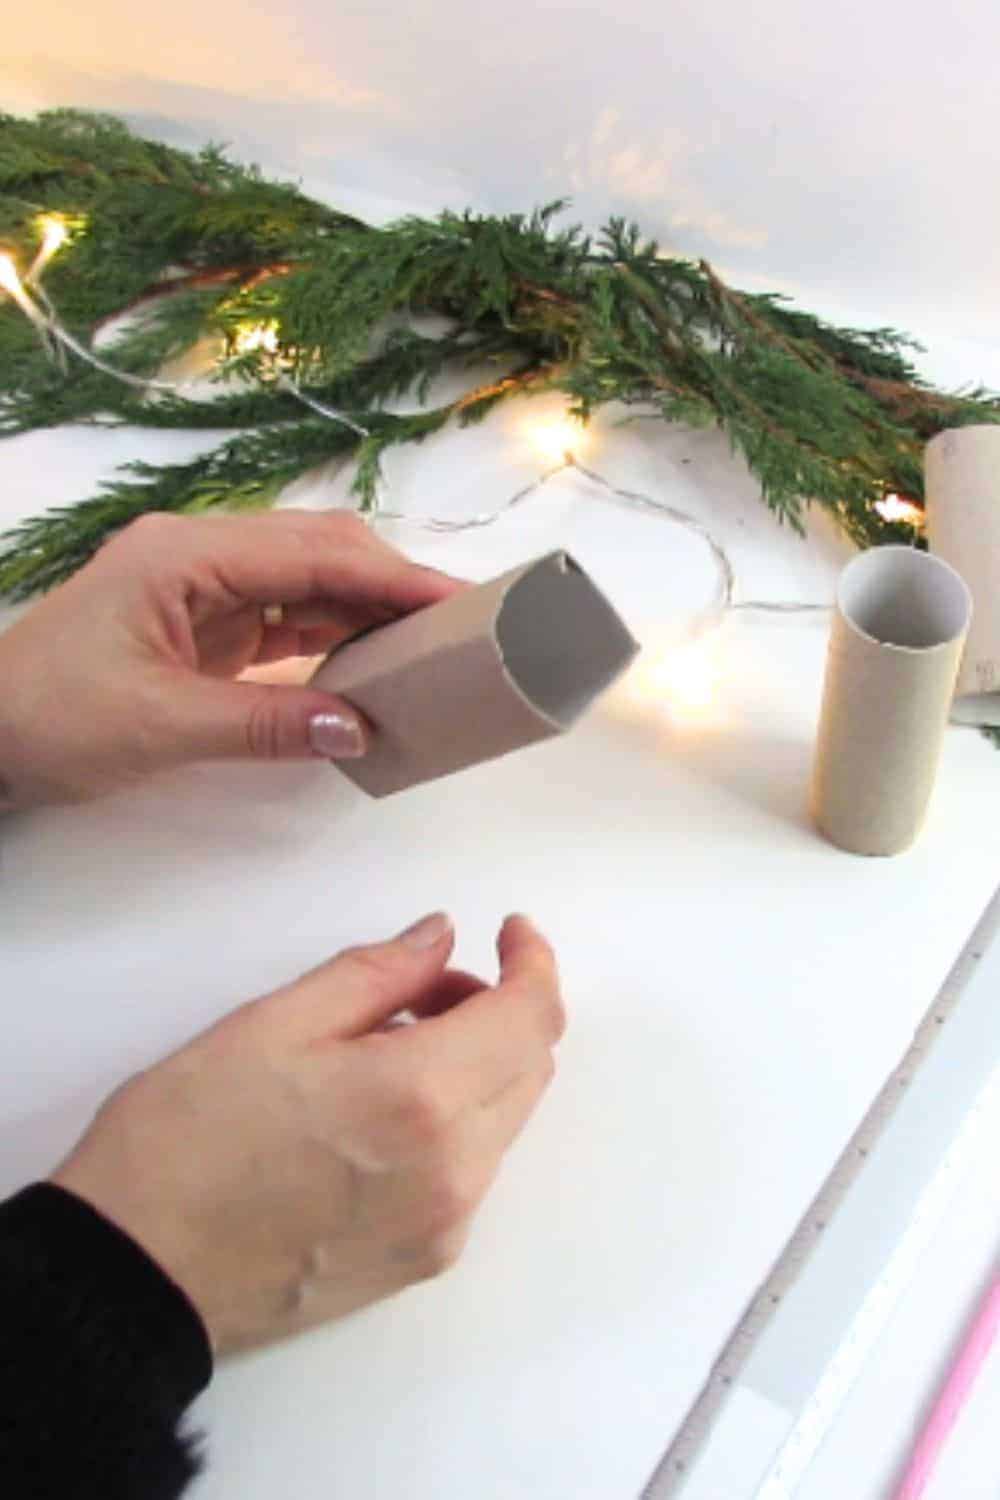
Start by flattening the rolls and create 4 folds along the tube, so the bases are square.
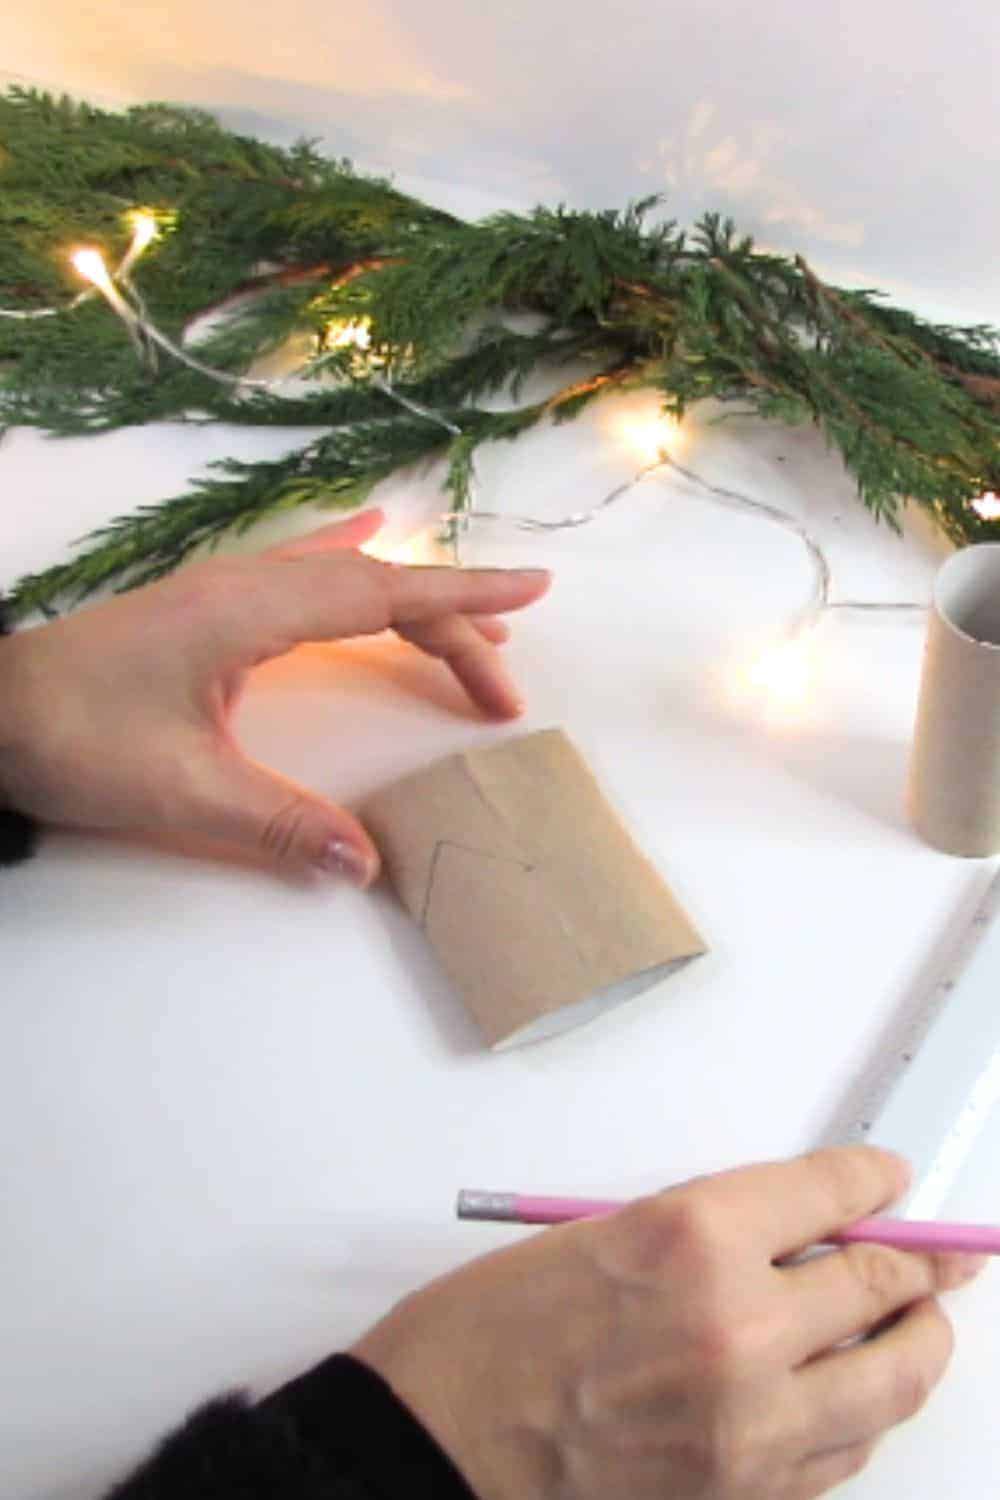
With a ruler measure the center and draw a triangle that fit between two folds.
Cut out the shape around the triangle to create one of wall of the house with a roof tip.
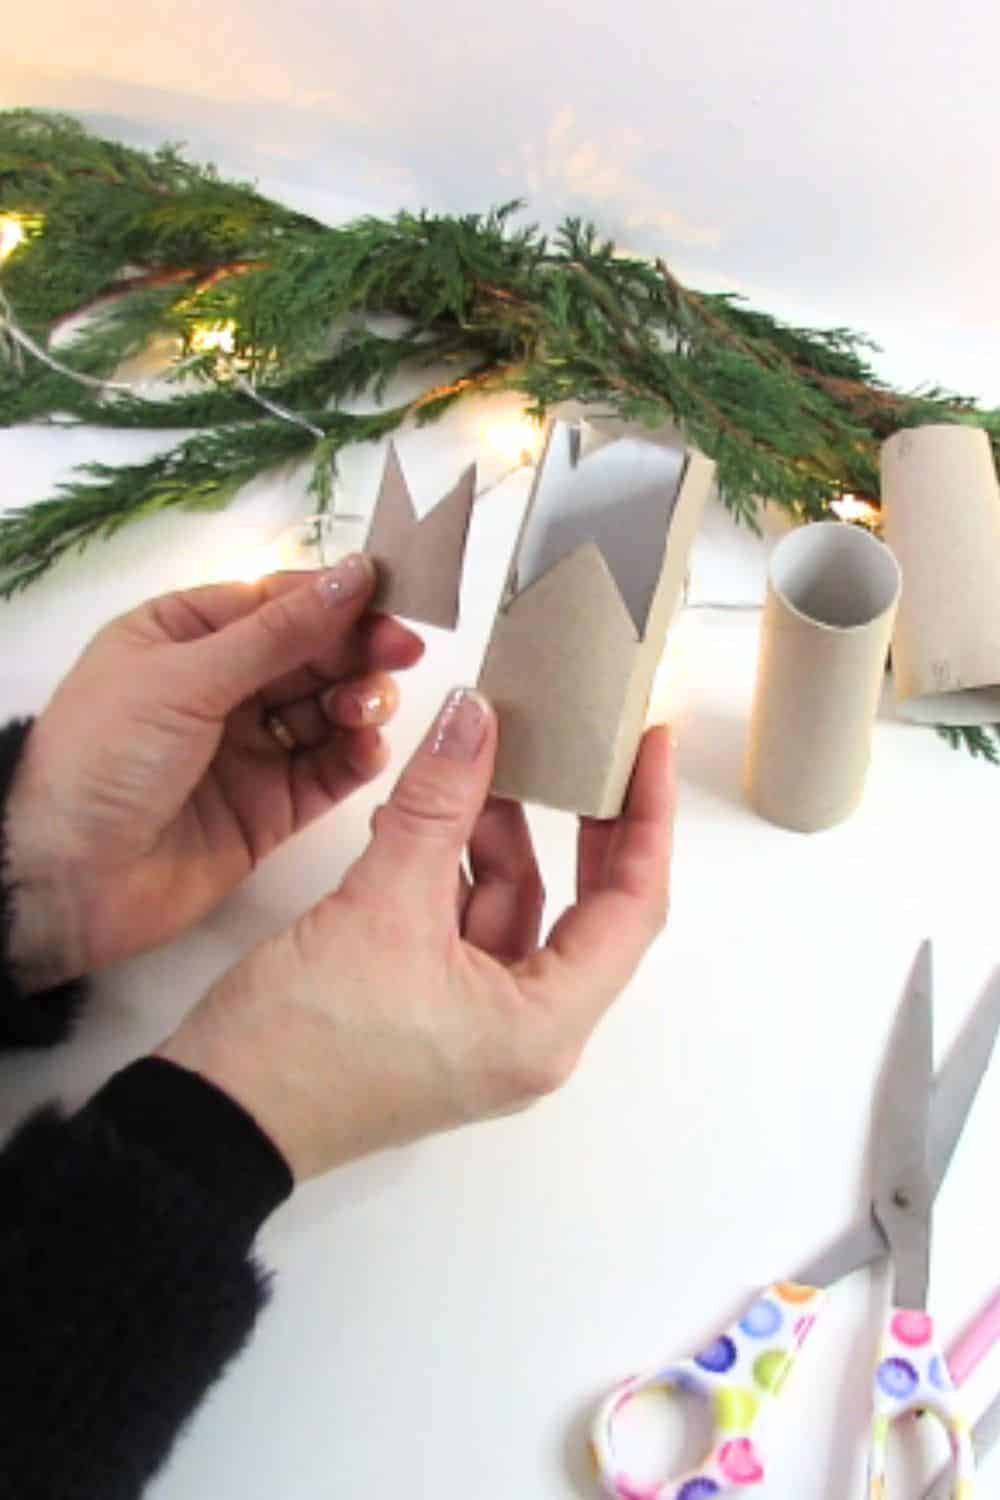
Report the same measurement on the opposite side of the roll and, again, cut the shape around the triangle. You must have the shape of the house well define.
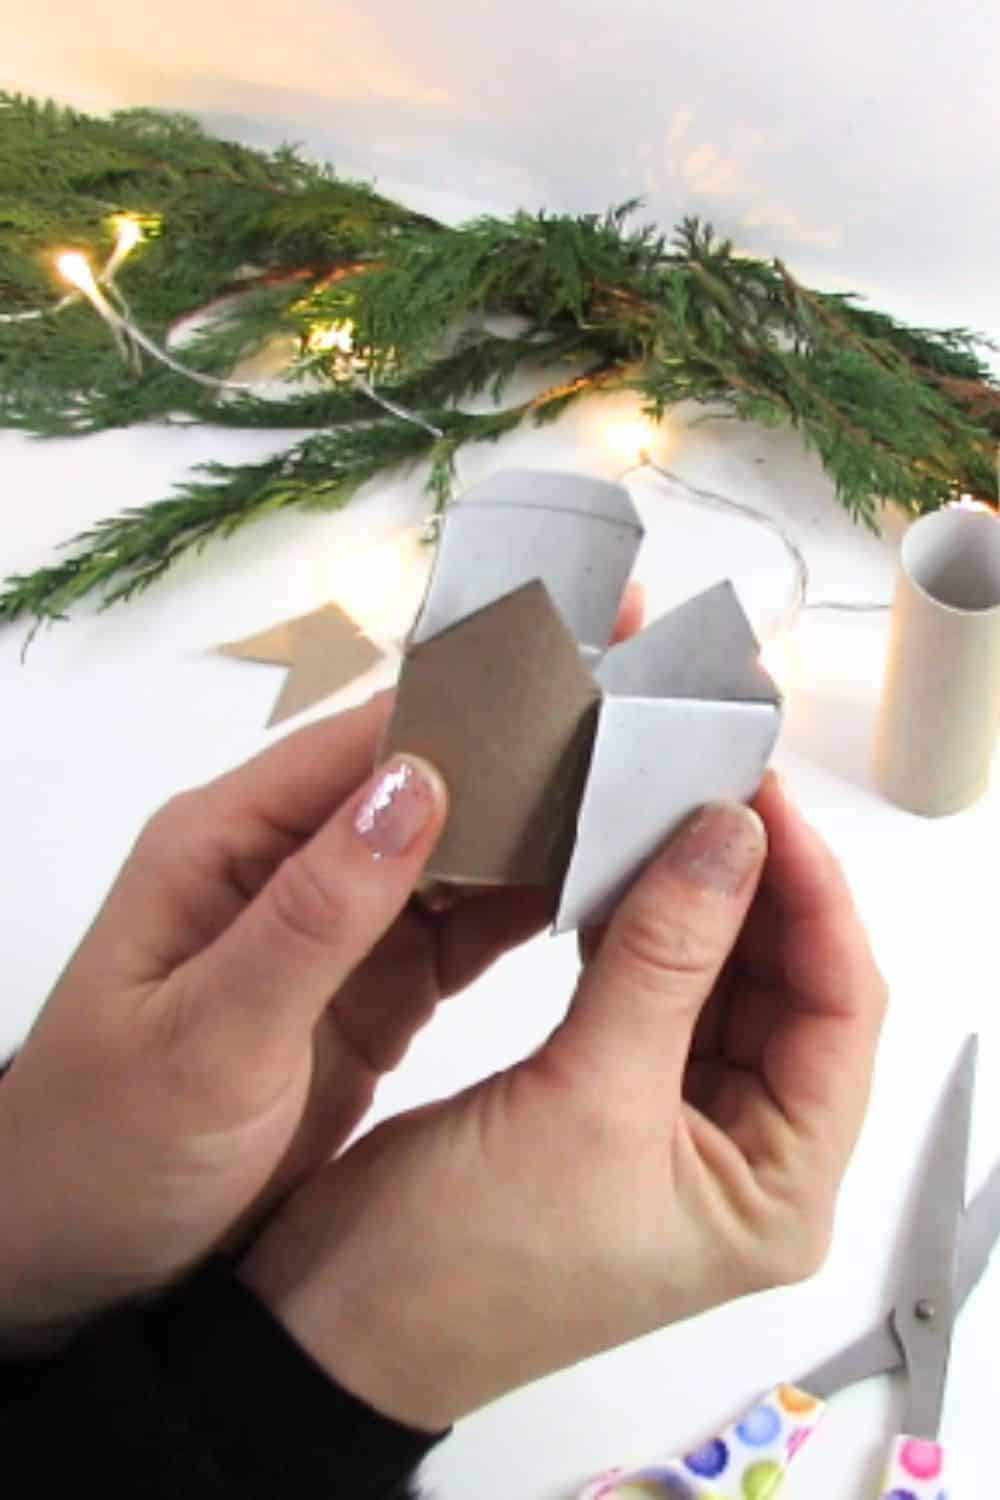
Fold the sides to make the roof. Cut the extra cardboard to adjust it on the roof length. It’s easier if you make a flap on one of the roof side.
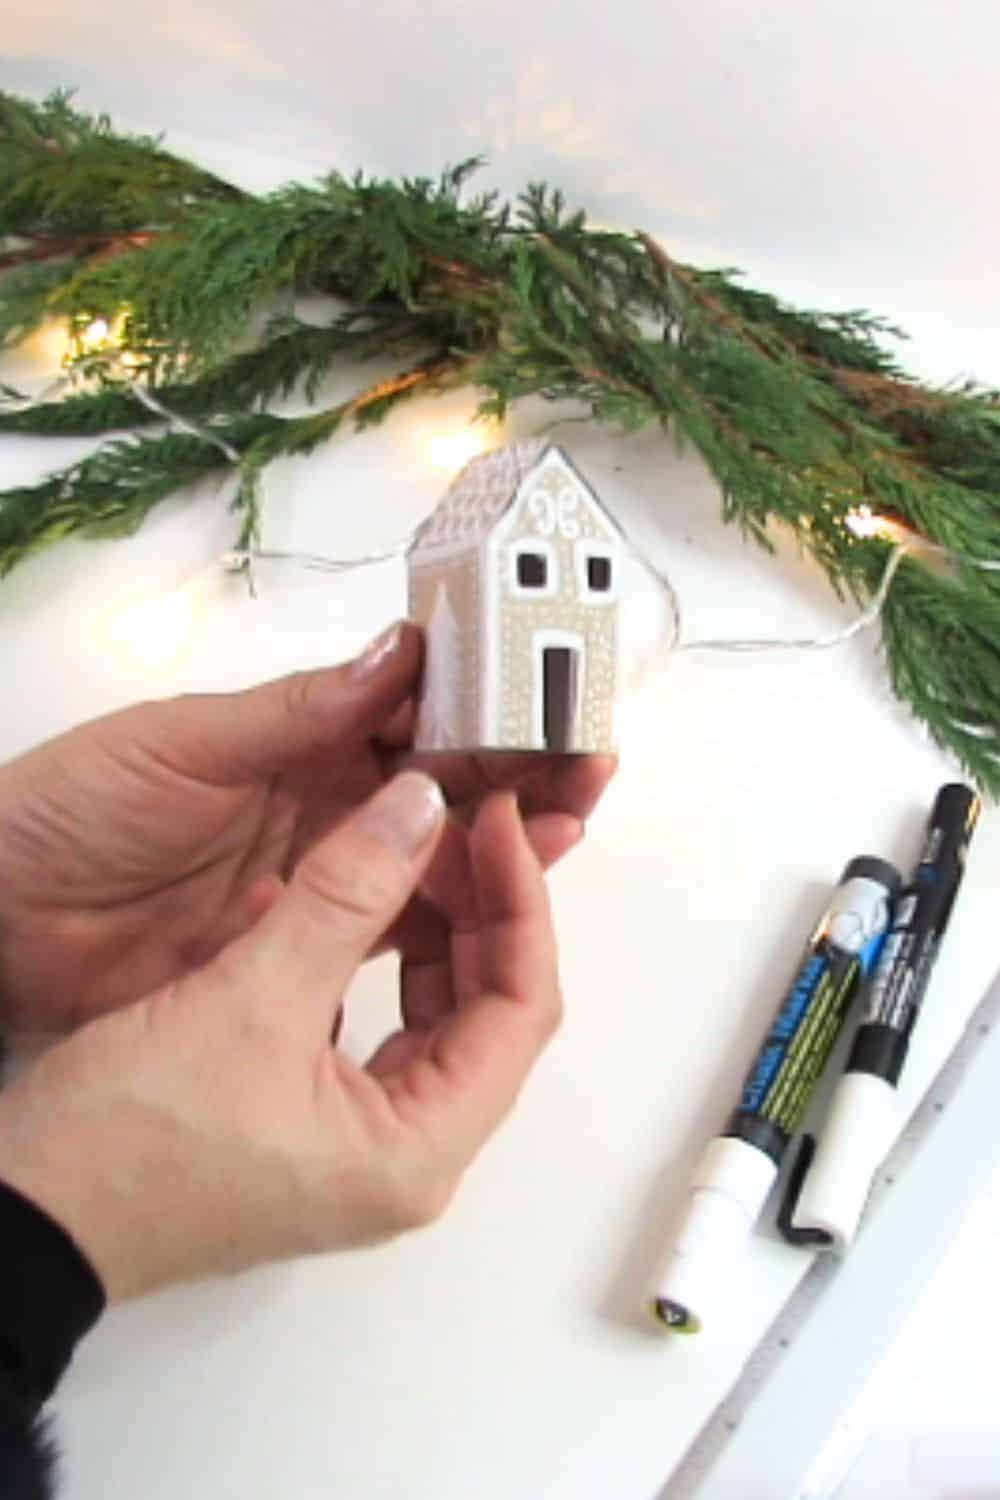
Check that the little house look nice and lay it flat again for the next step.
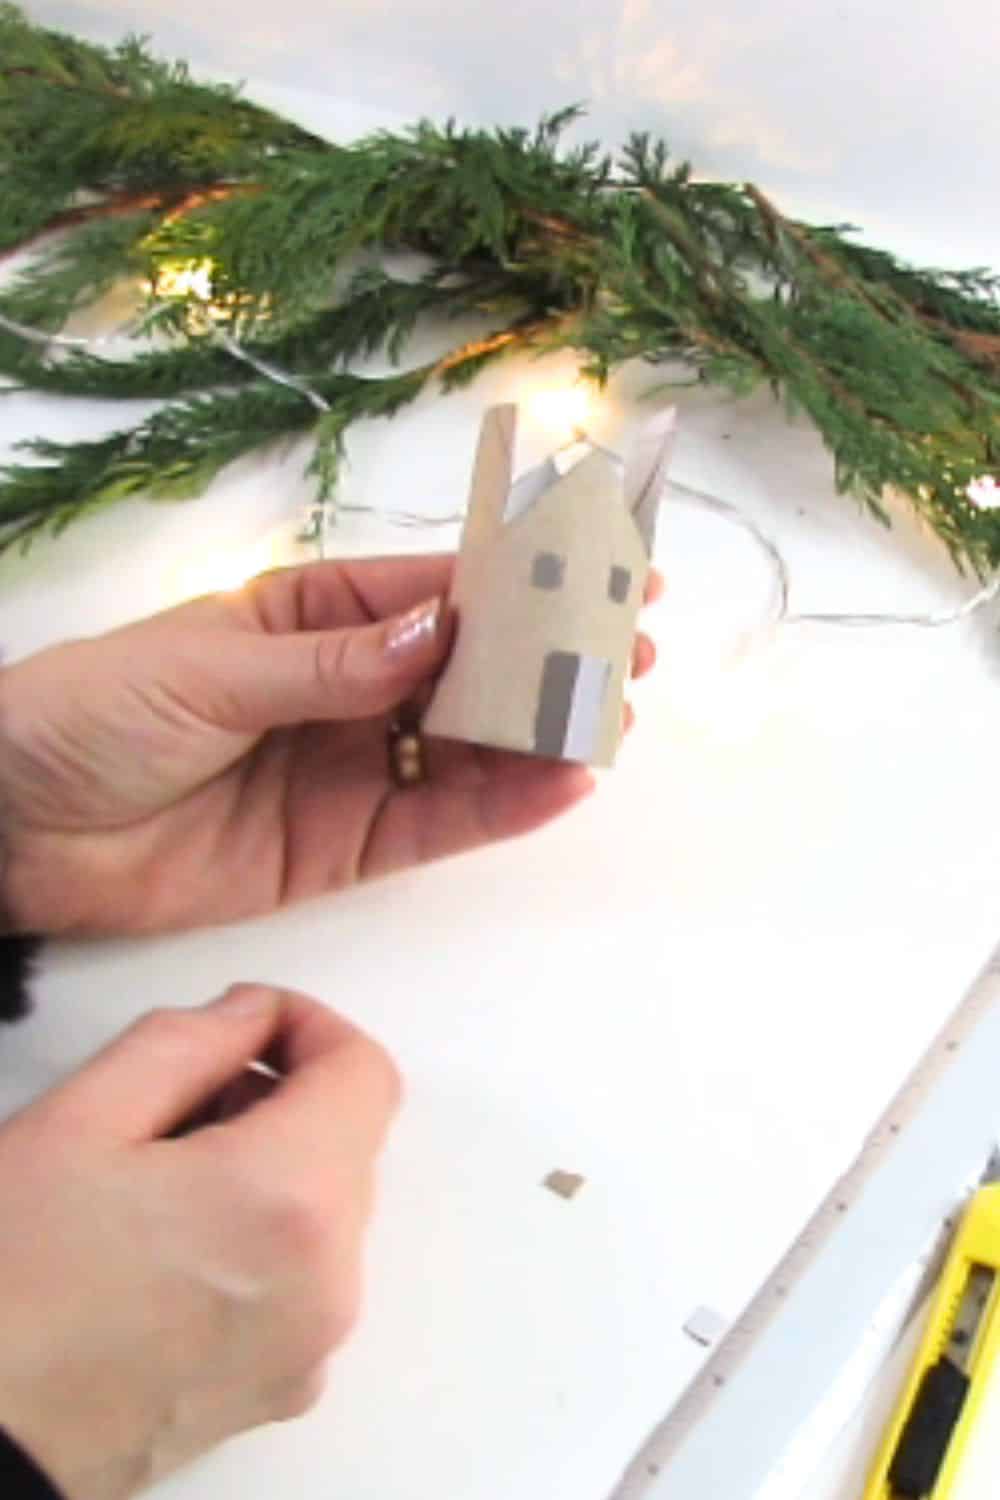
To add some character to your creation, consider adding windows and a door. You can use a craft knife to carefully cut out small openings in the walls of your house.
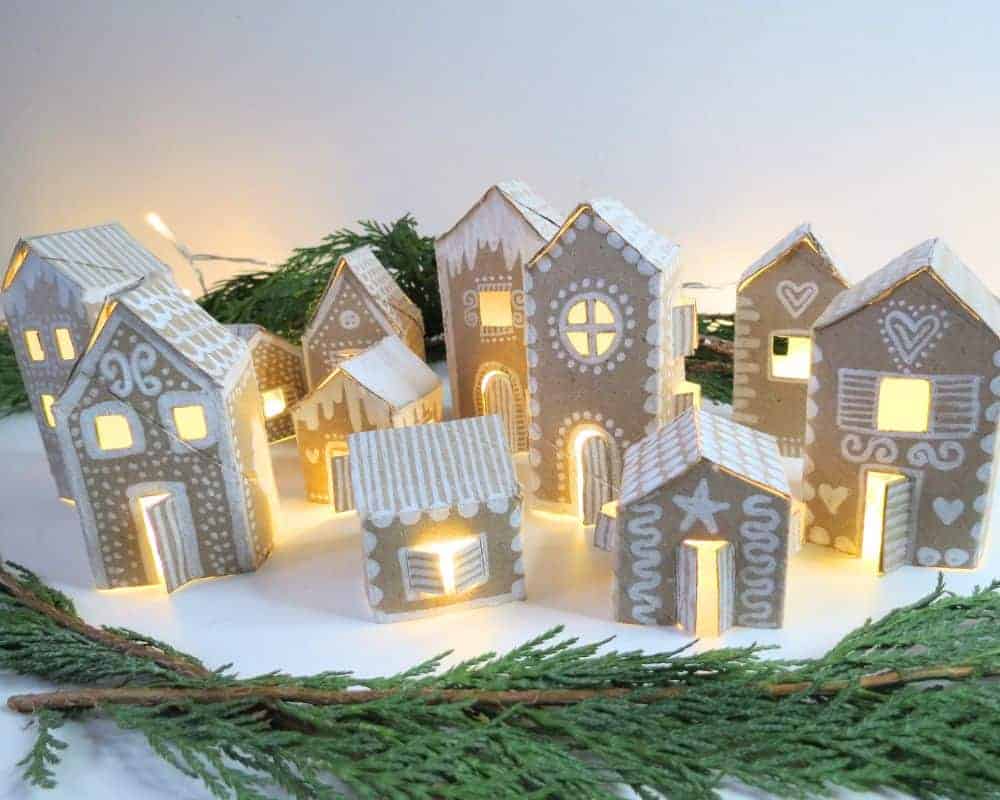
Make as many houses as you like to complete your Christmas village.
You can find the video tutorial of the DIY Christmas Village on my YouTube channel.
RELATED: How to make Christmas ornaments with toilet paper roll
RELATED: Toilet paper roll Christmas crafts: 33 Unexpected Ideas
Adding the Finishing Touches
With your houses complete, you can now move on to adding the finishing touches that will make your Christmas village sparkle.
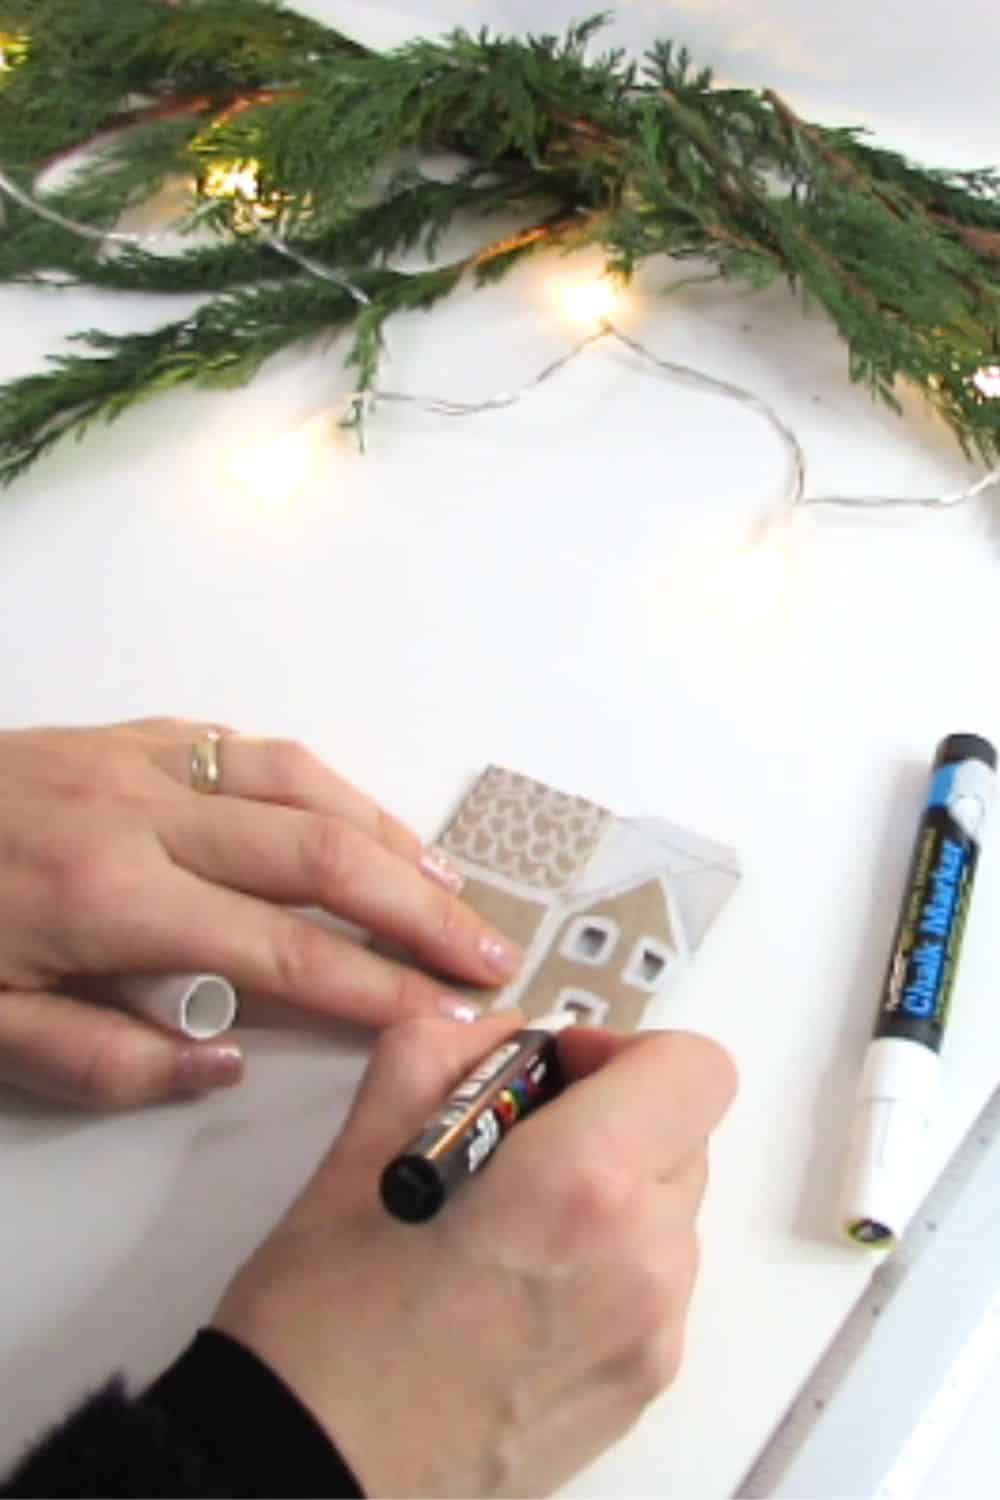
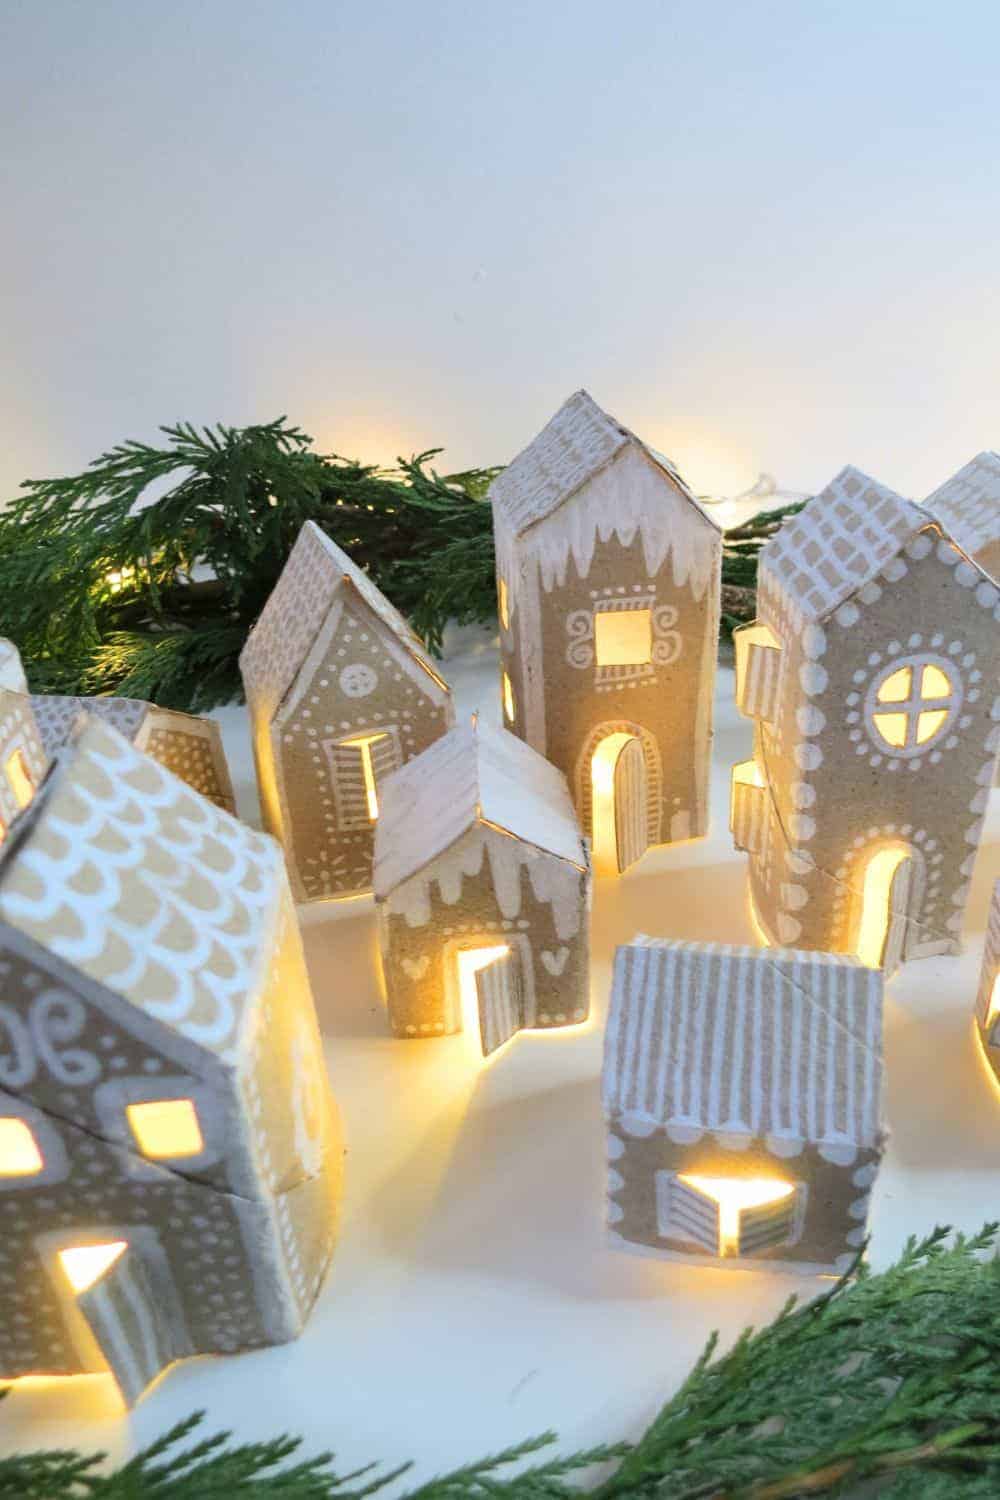
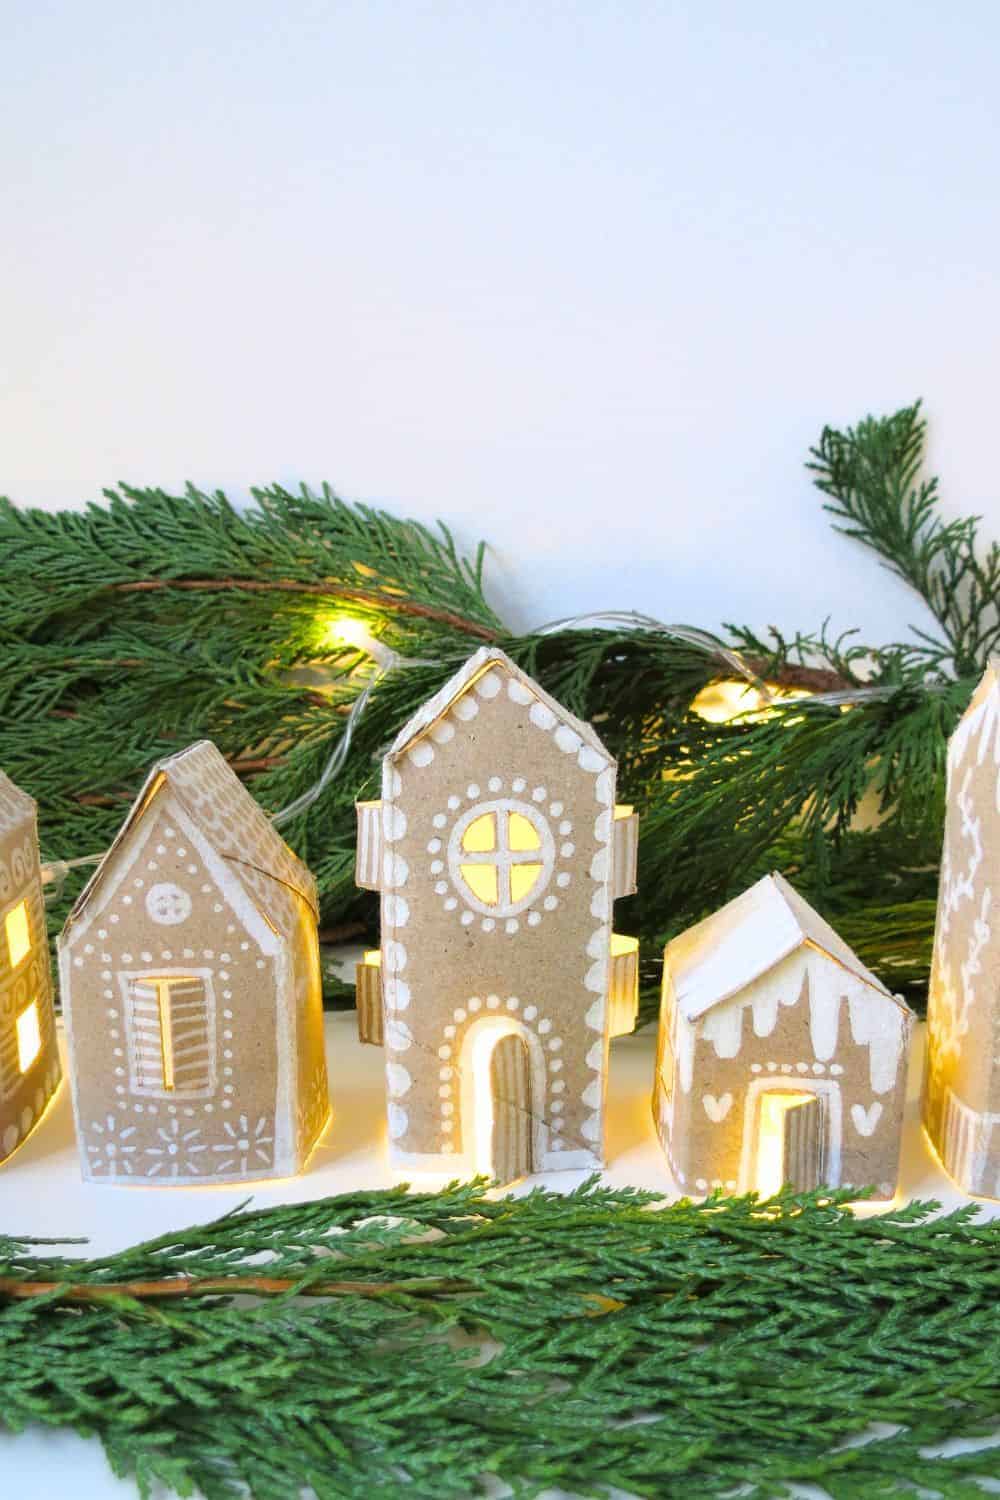
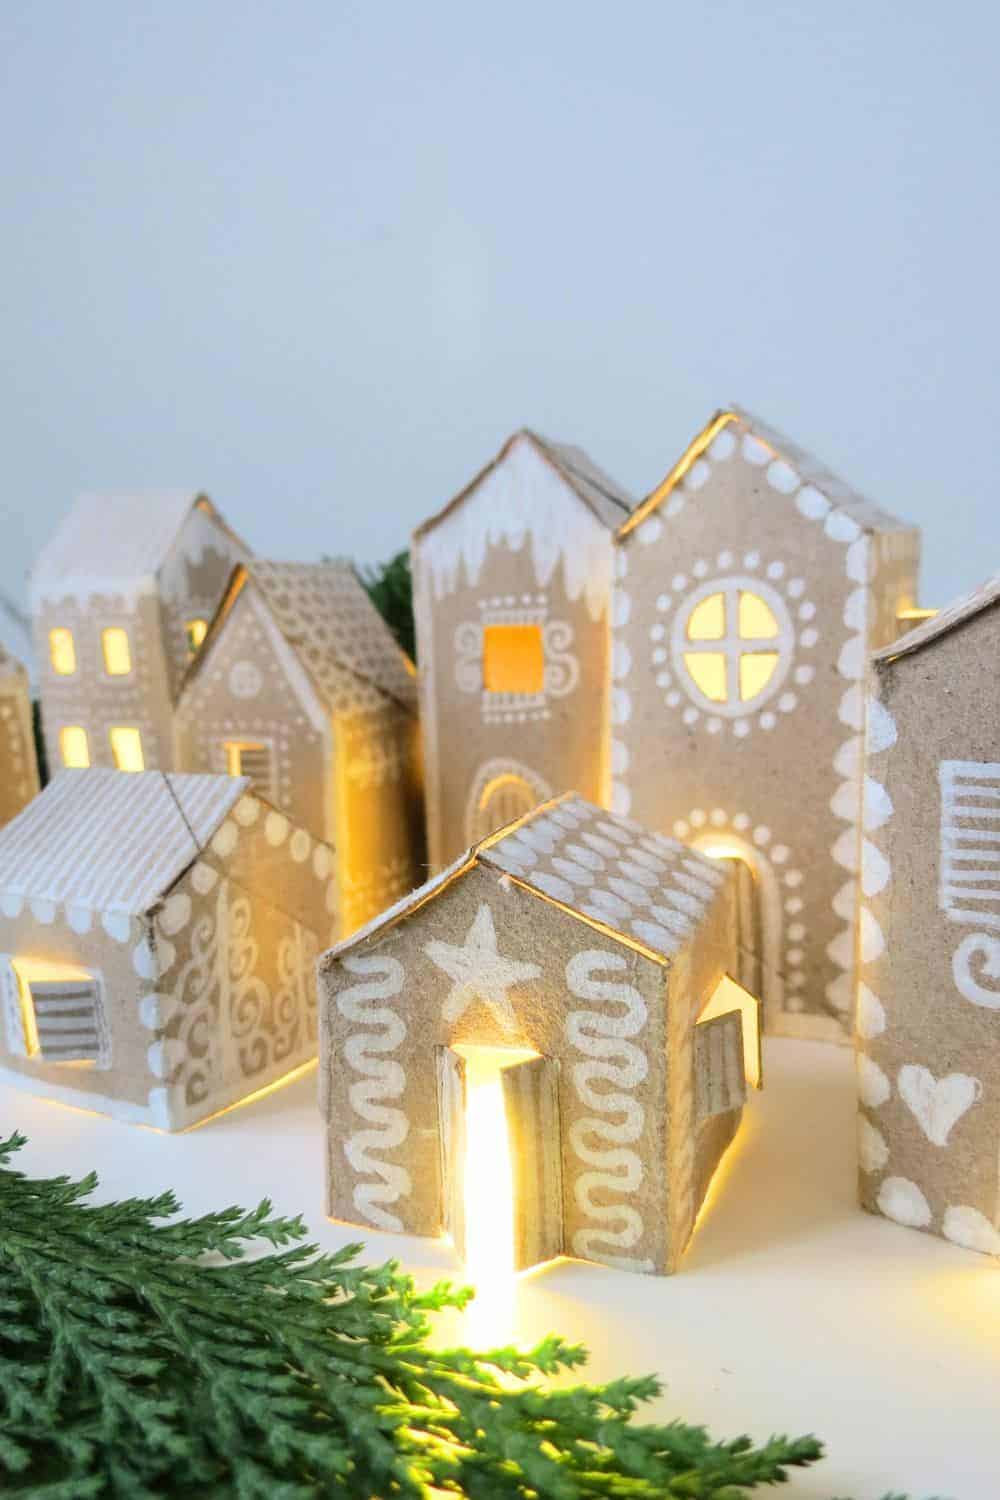
Use Chark sharpie, posca or white paint to decorate the tiny houses.
I keep it simple with only white decor for a gingerbread house look but feel free to add colors and textures.
One of the easiest ways to add a touch of sparkle is to use glitter. You can sprinkle glitter on the roofs and sides of your houses to mimic the glistening effect of freshly fallen snow. Gold or silver glitter can create a festive ambiance, while colorful glitter can add a whimsical touch. Just be sure to apply it evenly and with care, so it doesn’t overpower the entire scene.
Sequins are another fabulous option for enhancing your DIY Christmas village. These small, shiny discs can be glued onto the houses, creating a shimmery effect that catches the light and adds depth to your display. You can choose sequins in colors that complement your overall theme, or mix and match for a playful and eclectic vibe.
To bring the winter wonderland to life, fake snow is a must-have. You can purchase artificial snow spray or opt for a more DIY approach using a mixture of white glue and baking soda. Apply the snow generously on the roofs and around the base of the houses to mimic a freshly snow-covered landscape. The texture and visual impact will instantly transport your Christmas village to a magical realm.
Once you are done decorating the houses, you can assemble them.
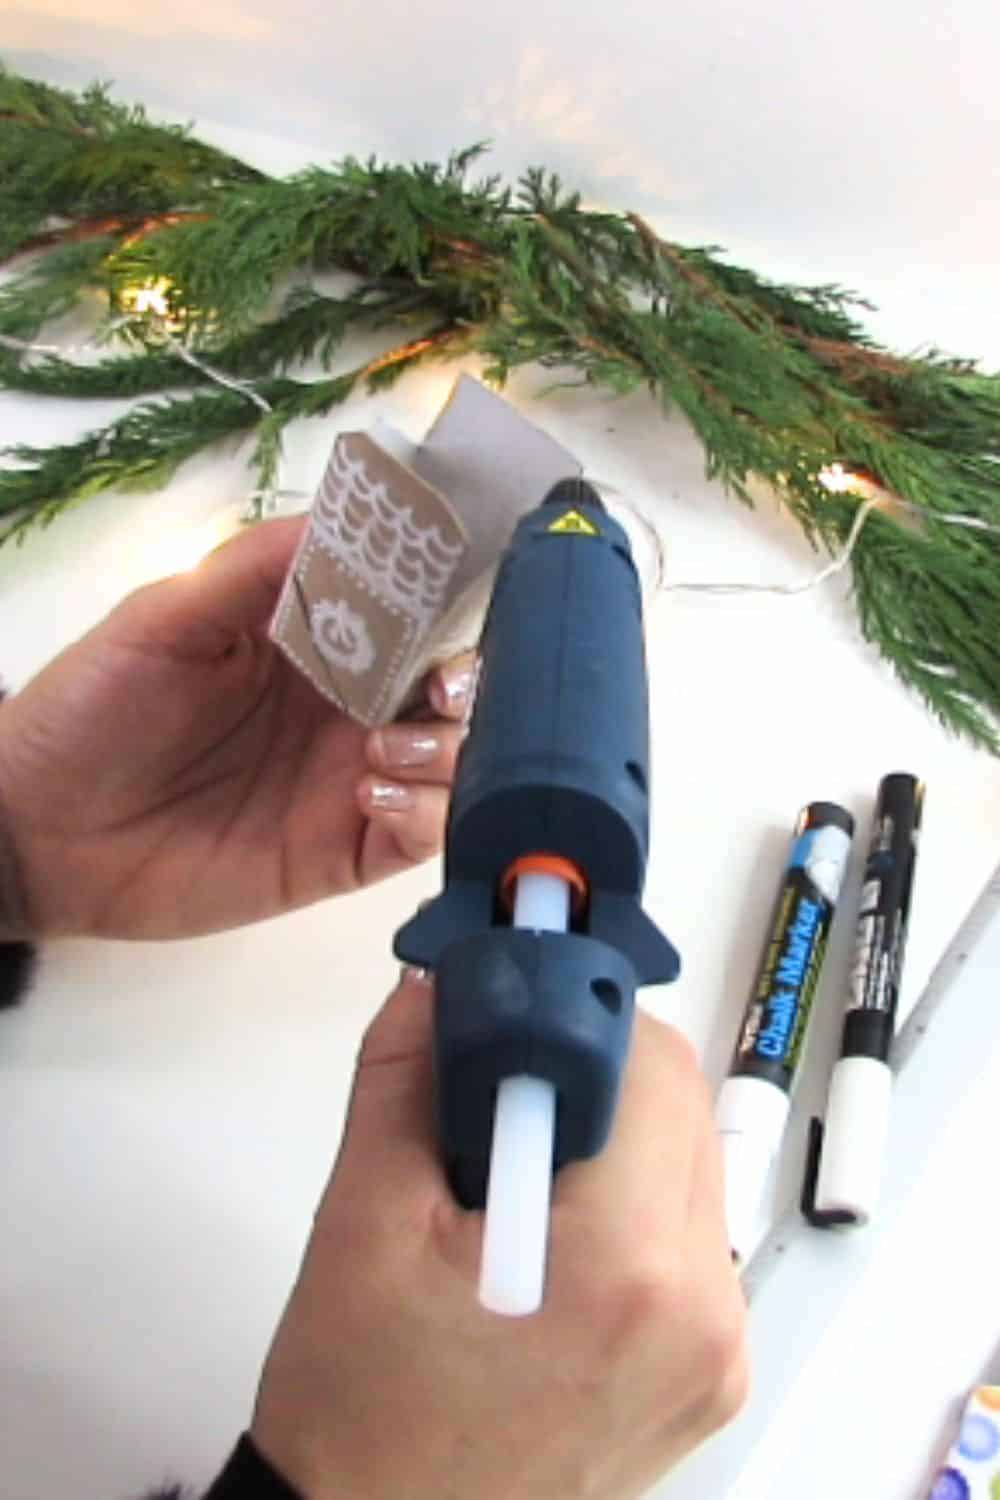
Add some glue inside the roof flaps and press them on the house walls. Hold a few second for the glue to dry and done, your Christmas house hold in shape.
Lighting Up Your DIY Christmas Village
In addition to the glitter, sequins, and fake snow, adding tiny LED lights to your Christmas village will elevate it to a whole new level.
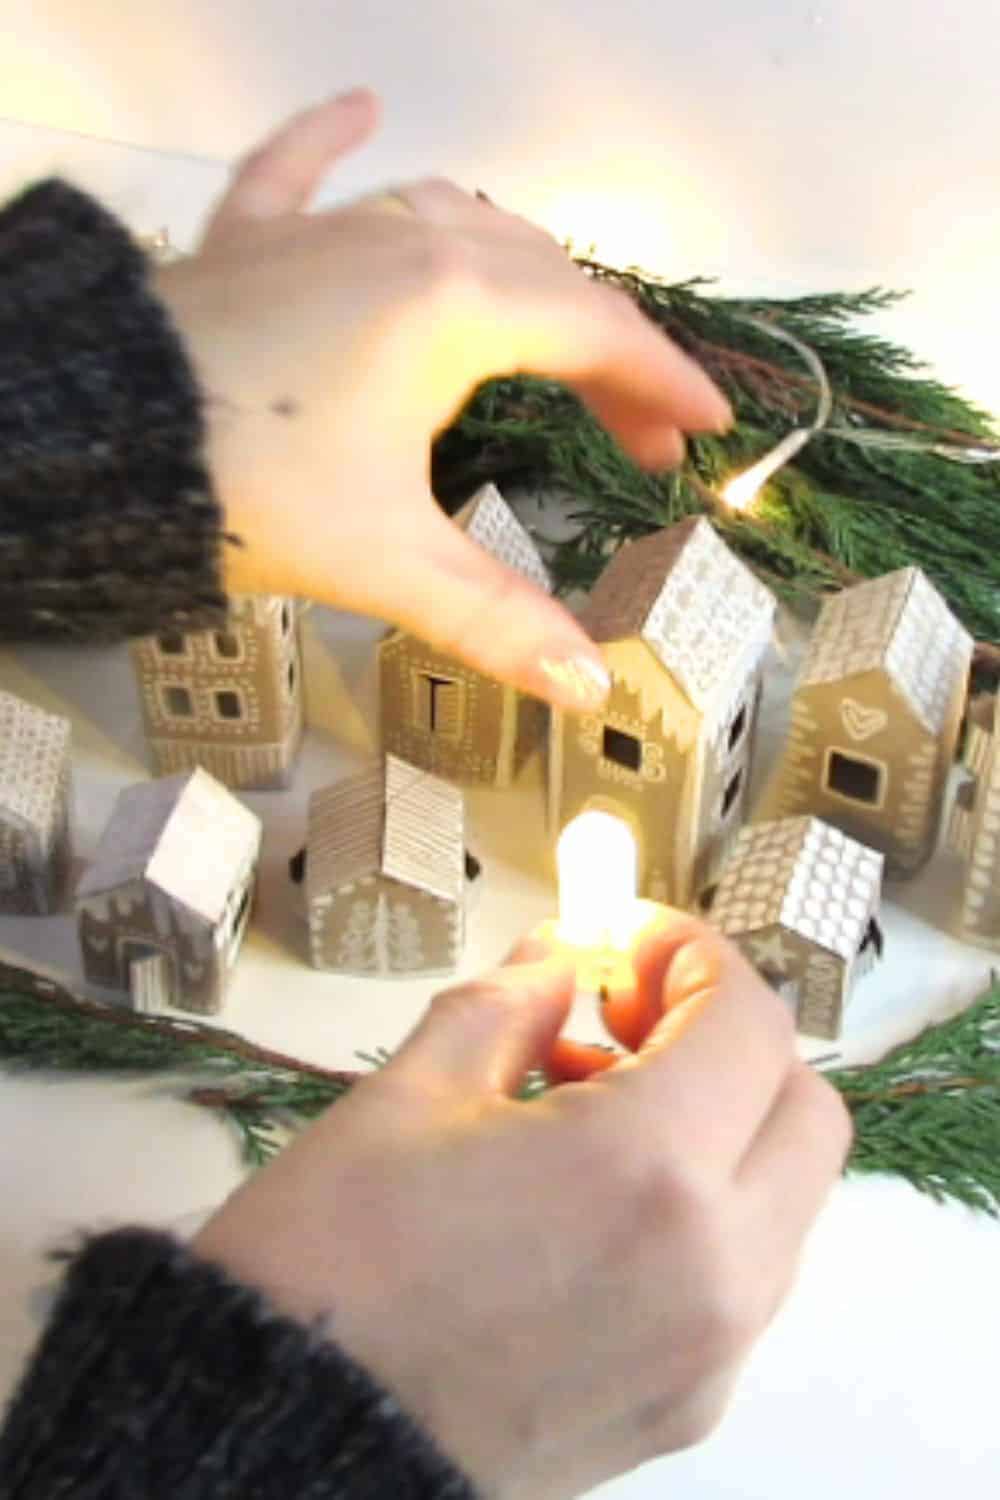
These small lights, powered by batteries, can be strategically placed inside and around the houses to create a warm and cozy glow.
The soft twinkle of these lights will infuse your Christmas village with a captivating ambiance, bringing it to life and enveloping it with an enchanting glow that perfectly captures the essence of the holiday season.
Displaying and Showcasing Your Creation
When it comes to displaying your stunning Christmas village, there are numerous creative options that can enhance its visual impact. One idea is to place your village on a sturdy table or shelf, allowing it to become the centerpiece of your holiday decorations.
Another way to showcase your creation is by incorporating a backdrop. Consider creating a backdrop using a large sheet of blue or white fabric to represent the sky or a snowy landscape.
Create multiple toilet paper roll houses, arranging them in various heights and formations to add depth and dimension to your display. Experiment with different configurations, such as clustering a group of houses together on one side and placing taller structures at the back to create a visually appealing village landscape.
To add even more charm, you can surround your Christmas village with natural elements. Incorporate pinecones, twigs, or even a small wreath to mimic the feel of an outdoor winter scene. These organic accents will bring a touch of authenticity and nature to your display, elevating its overall aesthetic.
Consider incorporating different levels and layers into your display. By using various risers, such as books or small boxes covered in festive wrapping paper, you can create multi-tiered displays that showcase your village in a visually dynamic way. This adds depth and visual interest, making your Christmas village an engaging focal point for your holiday decor.
Lastly, don’t forget about the power of lighting. Strategically placing spotlights or string lights around your display can emphasize key elements and create captivating shadows. This soft illumination will further enhance the magical ambiance of your Christmas village, captivating the hearts of all who behold it.
The possibilities for displaying and showcasing your Christmas village are endless, limited only by your imagination. Allow your creativity to guide you as you experiment with different arrangements.
.
In conclusion, transforming toilet paper rolls into a stunning Christmas village is easier than you think.
By following the step-by-step instructions and unleashing your creativity, you can create unique and budget-friendly holiday decorations that will leave your guests in awe.
So, let your imagination run wild and enjoy the journey of crafting your own extraordinary Christmas Village. Happy crafting!
RELATED: Paper Christmas Ornaments, 12 easy DIY ideas
Want to remember it? Save this DIY Christmas Village on you favorite Pinterest board.