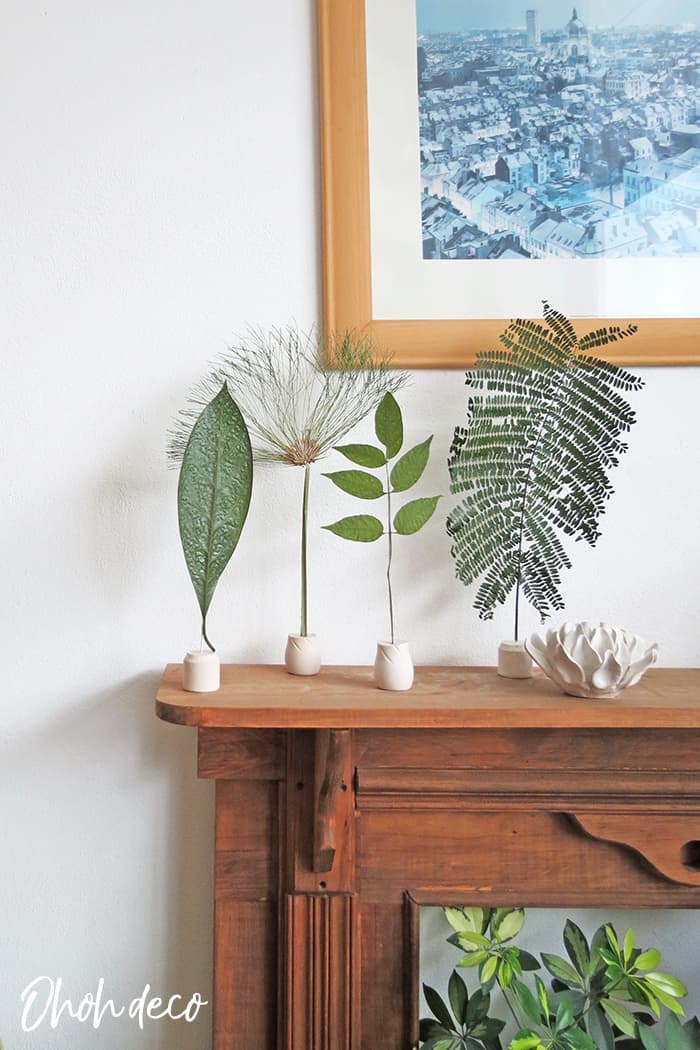
Nature is amazing and has wonderful things. Get inspired by this unique DIY decor idea: Use natural leaves as decoration.
Tree leaves have always impressed me with the variety of their shapes. Some sheets are so detailed that they are real works of art.
With this DIY, I want to propose a new way of bringing nature into your interior.
To make this project you can use autumn leaves and enhance their beautiful colors or you can cut fresh leaves that you will dry.
You can also spray paint the leaves if you like a different finish, like gold or silver for Holiday decor, as an example.
It’s a super simple DIY to create pretty and natural decorations.
[ This post probably contains affiliate links, our full disclosure policy is really boring, but you can read it HERE ]
RELATED: DIY paper Palm Leaf
RELATED: How to make a Fall Leaf Garland
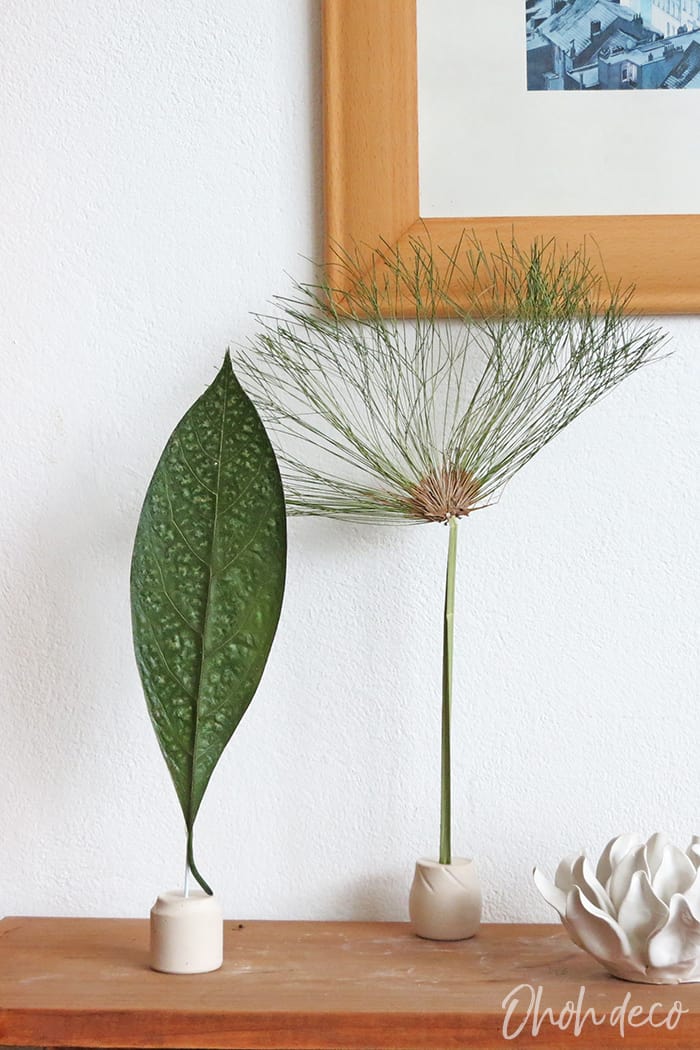
How to make decoration with leaves
Supplies you will need to make this craft:
- Natural leaves (or these)
- Plaster
- Wire
- Small plastic container (or this)
- Glue gun
- Masking tape
- Cutter
- Scissors
How to dry leaves
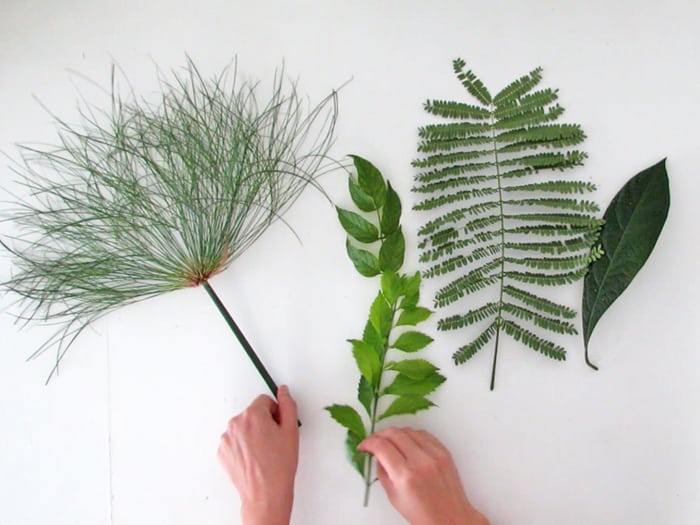
You can make these leaves decorations with fresh leaves or Fall leaves.
Collect the leaves you like and dry them.

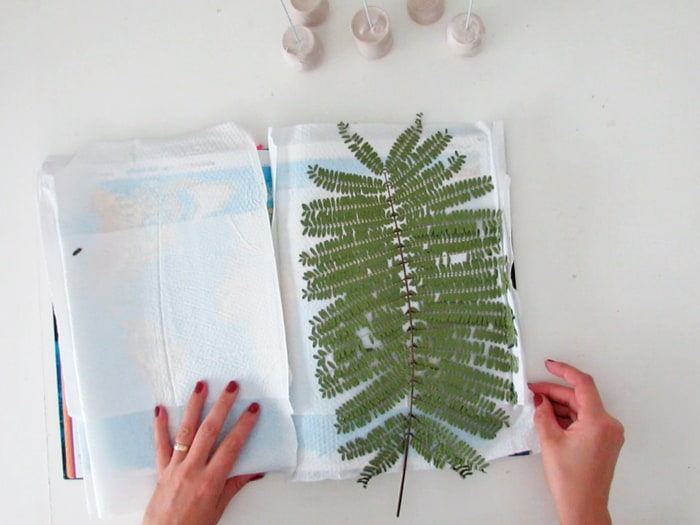
Place the leaves between paper napkins or paper towels, and place them in a heavy book.
Be careful to place the leaves’ flats and close the book. Add weight over the book and let dry for a week or a little more.
It’s a good idea to collect different kinds of leaves as they won’t all dry the same way and possibly some will not look nice after the drying process.
The best is to have several dried pressed leaves to choose from when putting together the decoration.
Make the support for the dried leaves
While the leaves dry, you can make the supports.
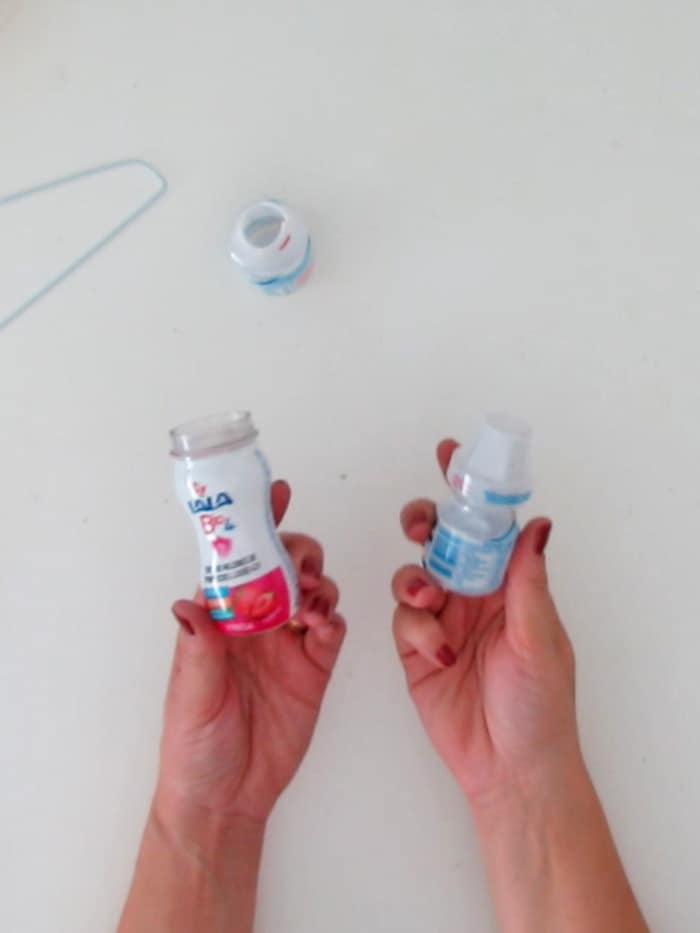
Use small plastic containers, like yogurt bottles, as molds for the plaster. Cut the top part of the bottle.
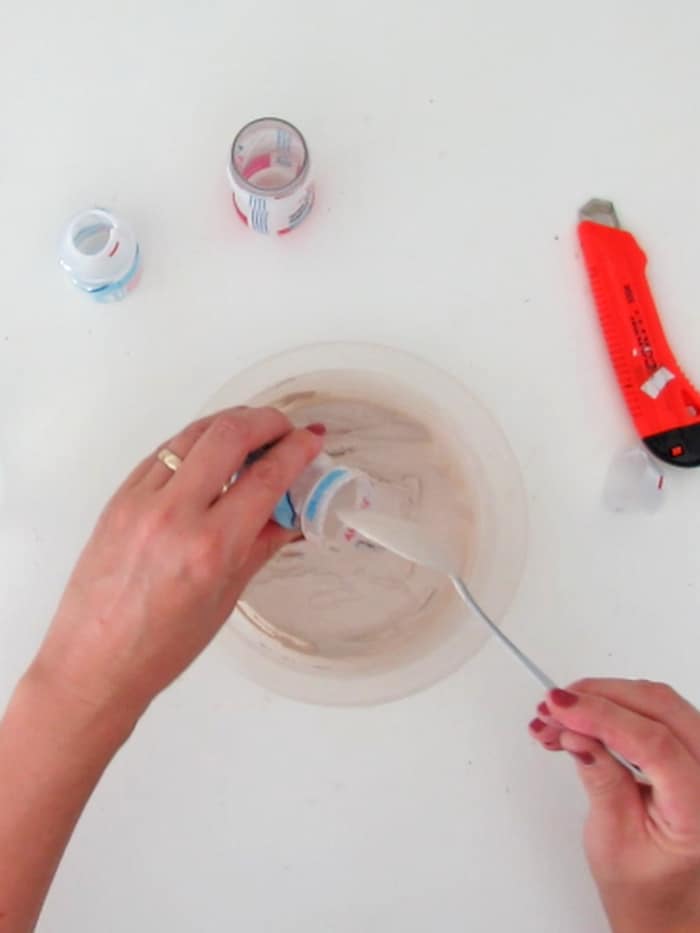
Mix the plaster with water following the package instruction. Once the mix is ready pour it into the bottle.
Give small taps on the bottle to take off the air bubbles and to level the plaster. You don’t need to fill completely the bottle, around 2 inches of plaster is fine.
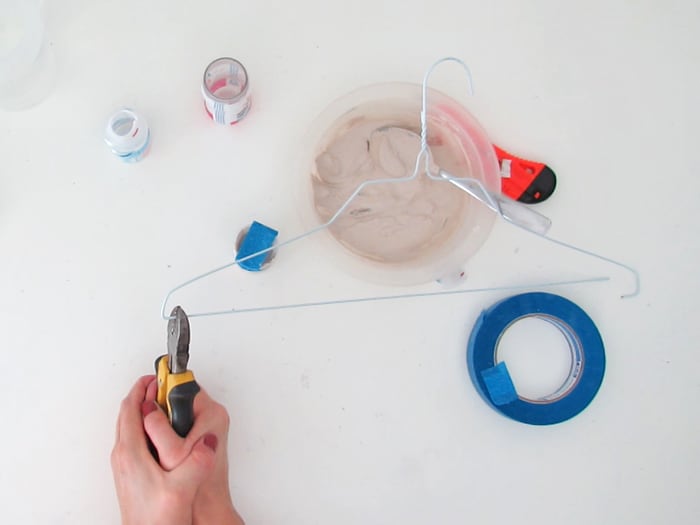
Take a piece of wire. I used a cloth hanger and cut out the central part. You can use any wire you have on hand (this will work great) or a skewer.
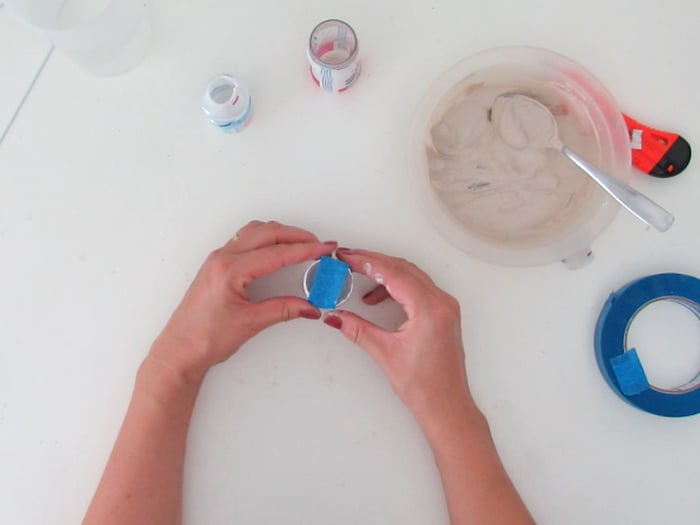
Take the container you filled with plaster and tape tho opening with masking tape.
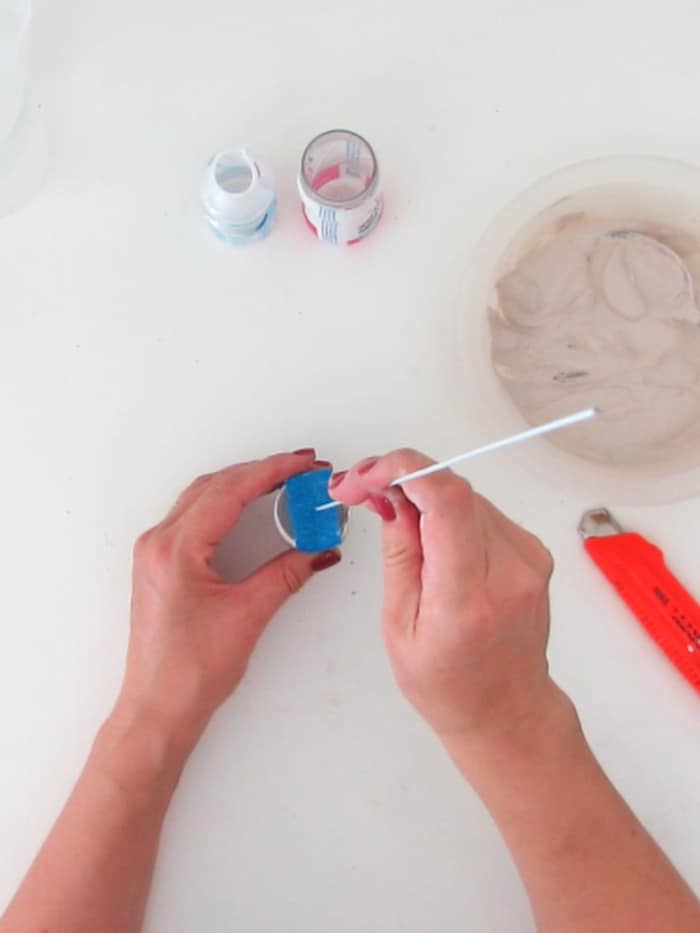
Poke a hole in the masking tape and stick the wire into the plaster. Be sure that the wire is vertical and let the plaster dry for 24-48 hours.
RELATED: Easy to make 3D Paper house
RELATED: DIY paper wall art
Last step to finish the leaves decoration
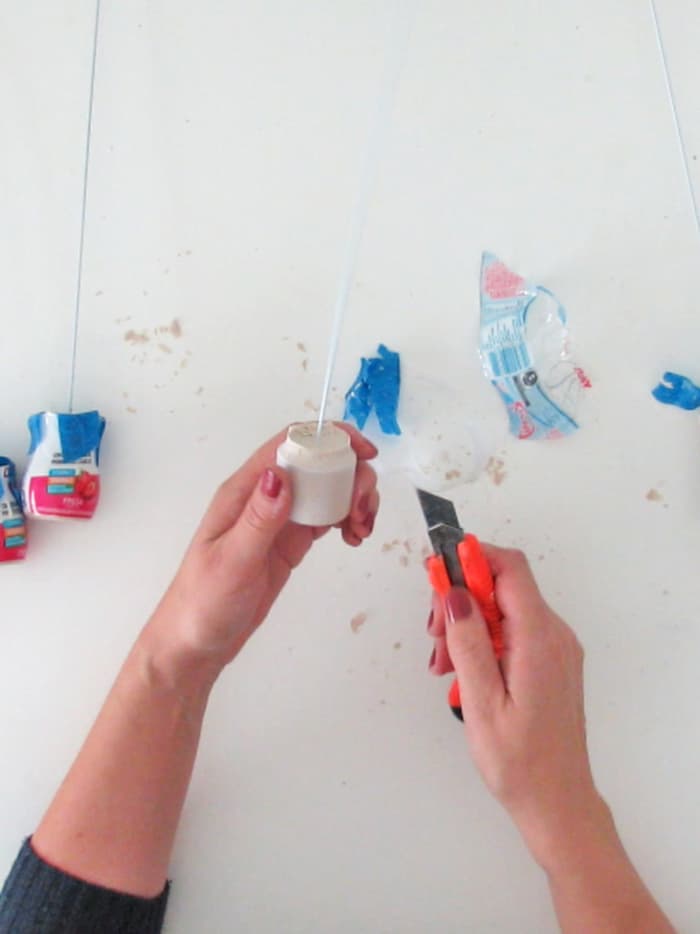
Once the plaster is dry, remove the container. You can help yourself with scissors or a cutter if it’s easier.
If needed you can sand the plaster to have a nice and smooth finish.
Take the leaves out of the book.
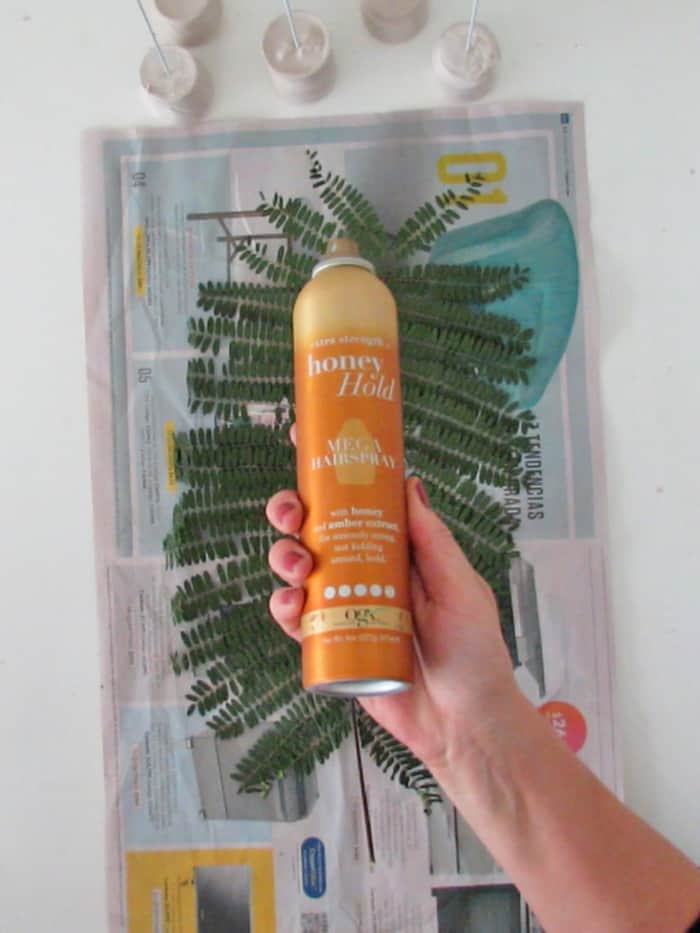
To preserve the leaves, you can spray them with hairspray. As you can imagine some leaves are more delicate than others.
In the case of the leaf you see in the picture above, the hairspray was very useful to keep all the small parts of the leaf together.
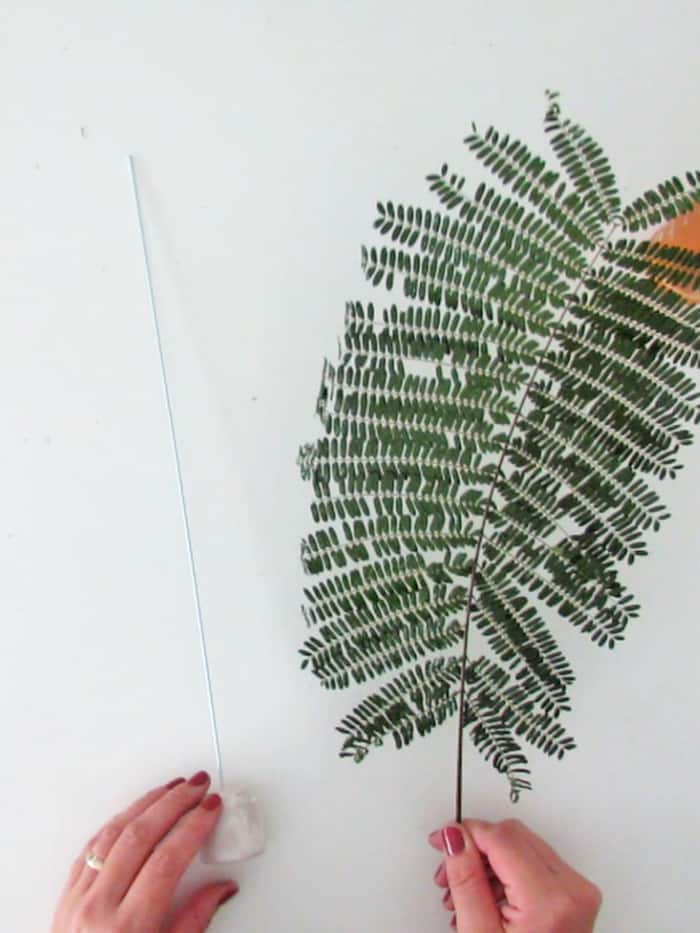
Take the plaster support you made and cut the wire a little shorter than the leaf high. You can also bend the wire a little to follow the leaf stem shape if needed.
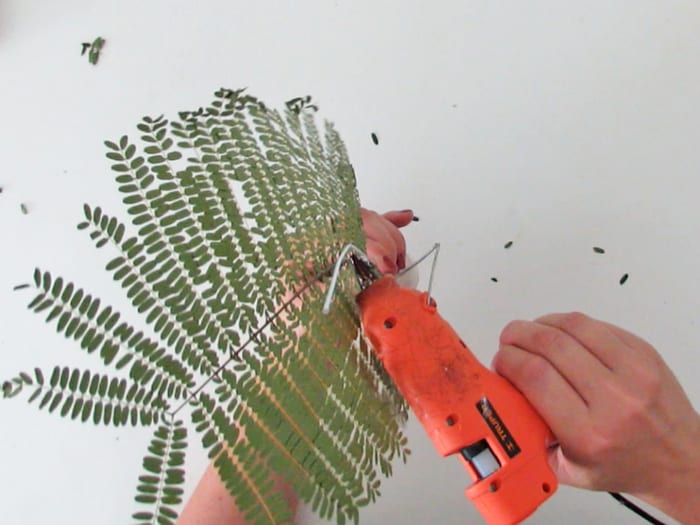
Put glue on the wire and attach the leaf to the support.
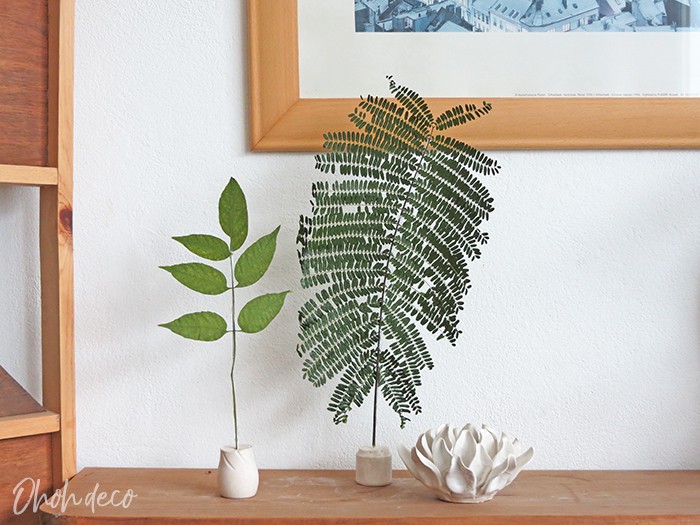
And done! You now have some cute leaves decorations.
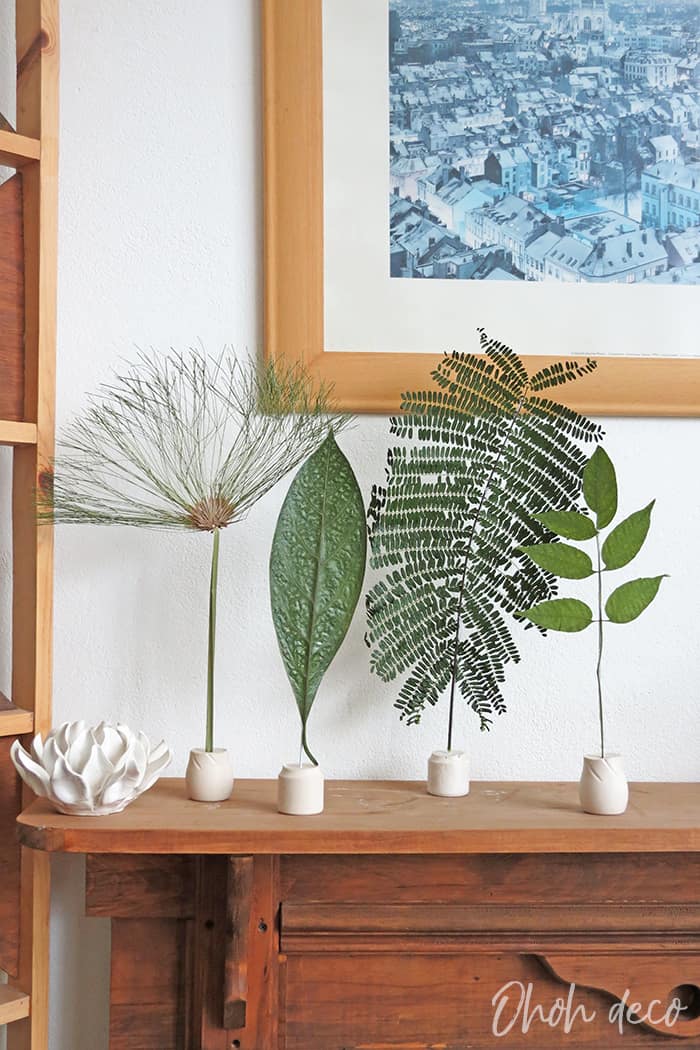
Have fun trying to make the decoration with different leaves. You can also spray paint the leaves before gluing them on the support if you want to try a different finish.
RELATED: 6 Creative Ways to Use Fall Leaf Garland Beyond Traditional Decor
RELATED: The Secret to Creating a Cozy Atmosphere with Indoor Fall Decorations
Watch the tutorial to make the leaves decorations